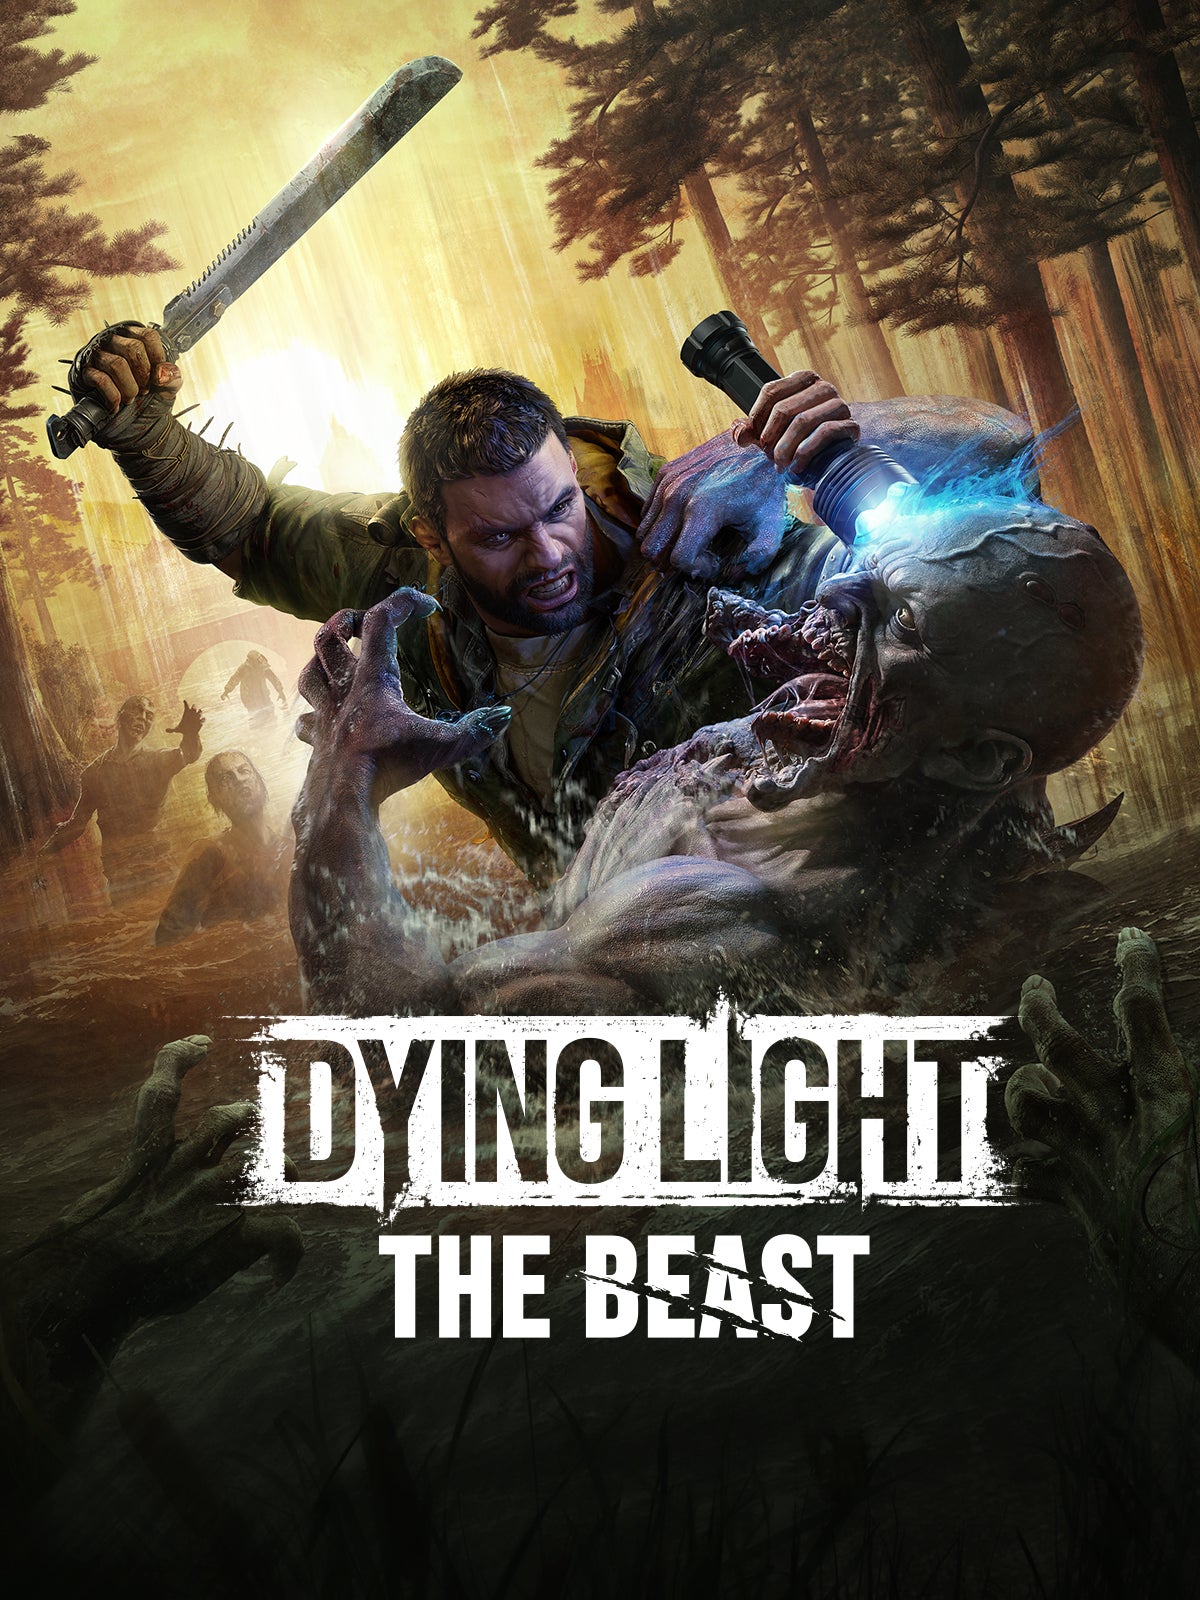
Dying Light: The Beast review
Cut down
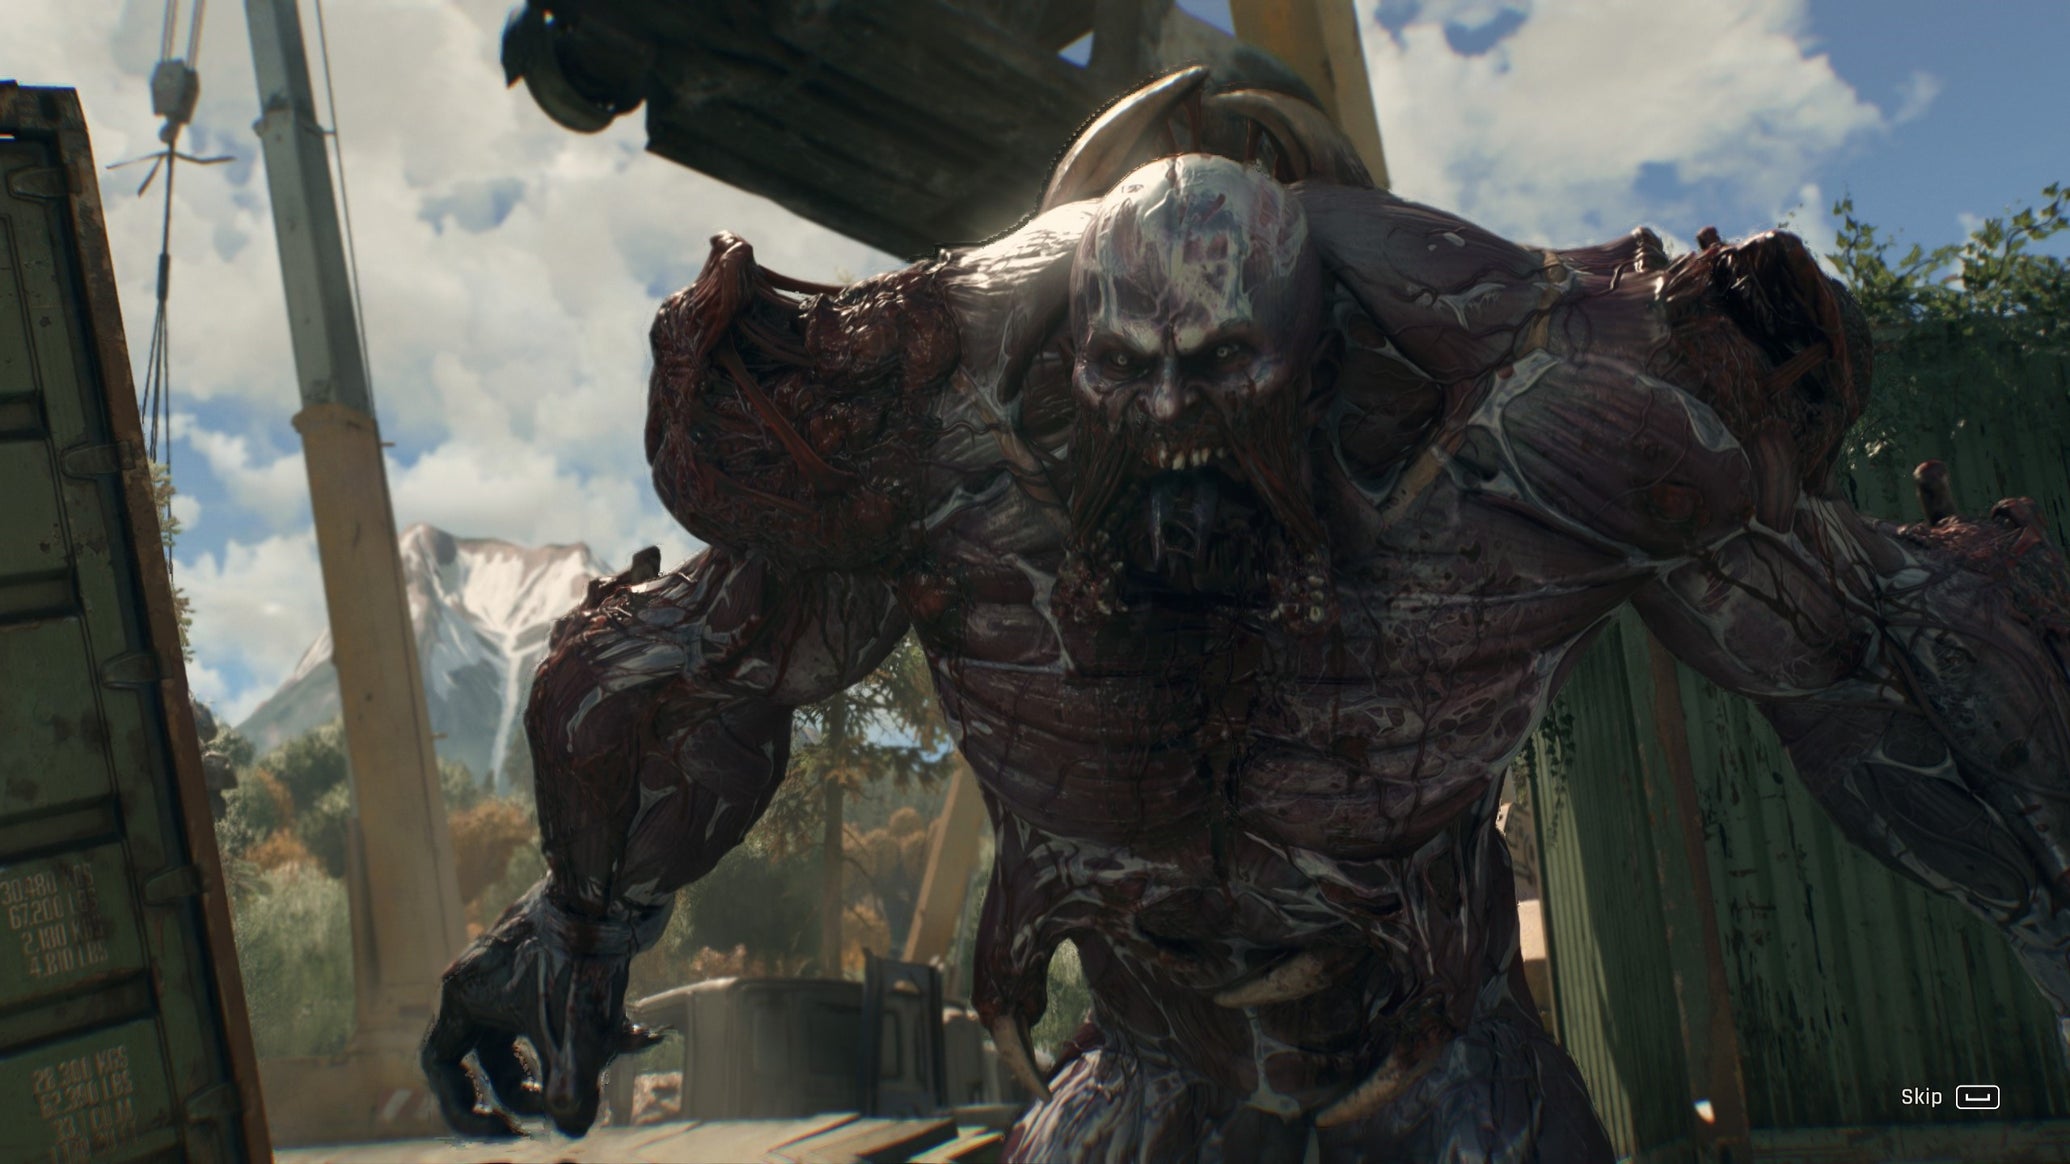
Image credit:Rock Paper Shotgun/Techland

Despite releasing as a standalone game, Dying Light: The Beast feels more like a distillation of Dying Light 2’s core loops, neither for better or worse.
- Developer: Techland
- Publisher: Techland
- Release: September 18th 2025
- On: Windows
- From: Steam , Epic Games Store
- Price: $60/£50/€60
- Reviewed on: Intel Core i9-13900K, 64GB RAM, Nvidia RTX 4090, Windows 11
It’s hard to talk about Dying Light: The Beast —the latest in Techland’s open-world zombie parkour action series—without talking about its origins. While now living life as a full-priced retail game with a respectable ~20 hour campaign (and one that I enjoyed for the most part), The Beast started out as a planned expansion for Dying Light 2 , itself a game that has grown, adapted and reshaped itself over the past few years, much like its genetically feisty mutant monsters.
Already a lengthy game (though nowhere near as massive as Techland claimed before release), Dying Light 2 has grown into something resembling a live-service sandbox, with daily quests, faction reputation grinds, microtransactions, endlessly escalating New Game Plus loops and even an optional roguelike mode. Dying Light 2’s gore has also grown grislier, its parkour more streamlined (no longer limited by your character’s stamina gauge), and there’s even a handful of firearms that you can unlock and collect, flying in the face of the game’s quirky pseudo-medieval post apocalyptic conceit.
Depending on who you ask and what direction the wind is blowing that day, these changes have either redeemed or forever ruined the game, but however you slice it, the Dying Light 2 of today is a different creature to the one Matthew Castle (RPS in peace) bounced off back in 2022. The Beast, therefore, represents a clean break: a chance to establish a new baseline, taking what Techland most wanted from DL2’s teetering jenga-tower of features and concepts, while chucking some of the original game’s weightier baggage overboard.


And so we’re off to the alps, and the scenic nature reserve of Castor Woods, with a dense, old touristy town flanked by small industrial and residential zones, and a mixture of forests and mountain trails surrounding those. Were it not for the hordes of undead, it’d be good place for a relaxing stroll.
Thanks to some impressive lighting, it’s a treat to look at from dawn til’ dusk, although since nighttimes tend to be nearly pitch black and patrolled by nigh-invulnerable ‘Volatile’ super-zombies, they’re best just slept through once you hoof it back to a sealed safe-room. For all the talk about making the night scary again in The Beast’s marketing, I generally just didn’t bother with it, outside a couple of mandatory stealth and chase sequences.
To help navigate the mountain trail are cars, not seen since Dying Light 1’s beefy expansion The Following. Easily found, easily refueled, and able to get you relatively safely from A to B when there aren’t rooftops to run across. But gone is DL2’s glider (great for moving between high rooftops), along with fast travel, which helped in navigating the sequel’s enormous cityscape.
Oddly, I don’t think it’s a particular success or failure (a refrain you’ll hear a lot from me today). Getting around on foot and always having to be aware of enemies is interesting, but the forests and fields outside of the central town here aren’t nearly as demanding to navigate as Villedor’s streets and skyscrapers. The cars let you bypass this less interesting travel, but in so doing, feel like a fix for a problem that needn’t exist.

Image credit:Rock Paper Shotgun/Techland
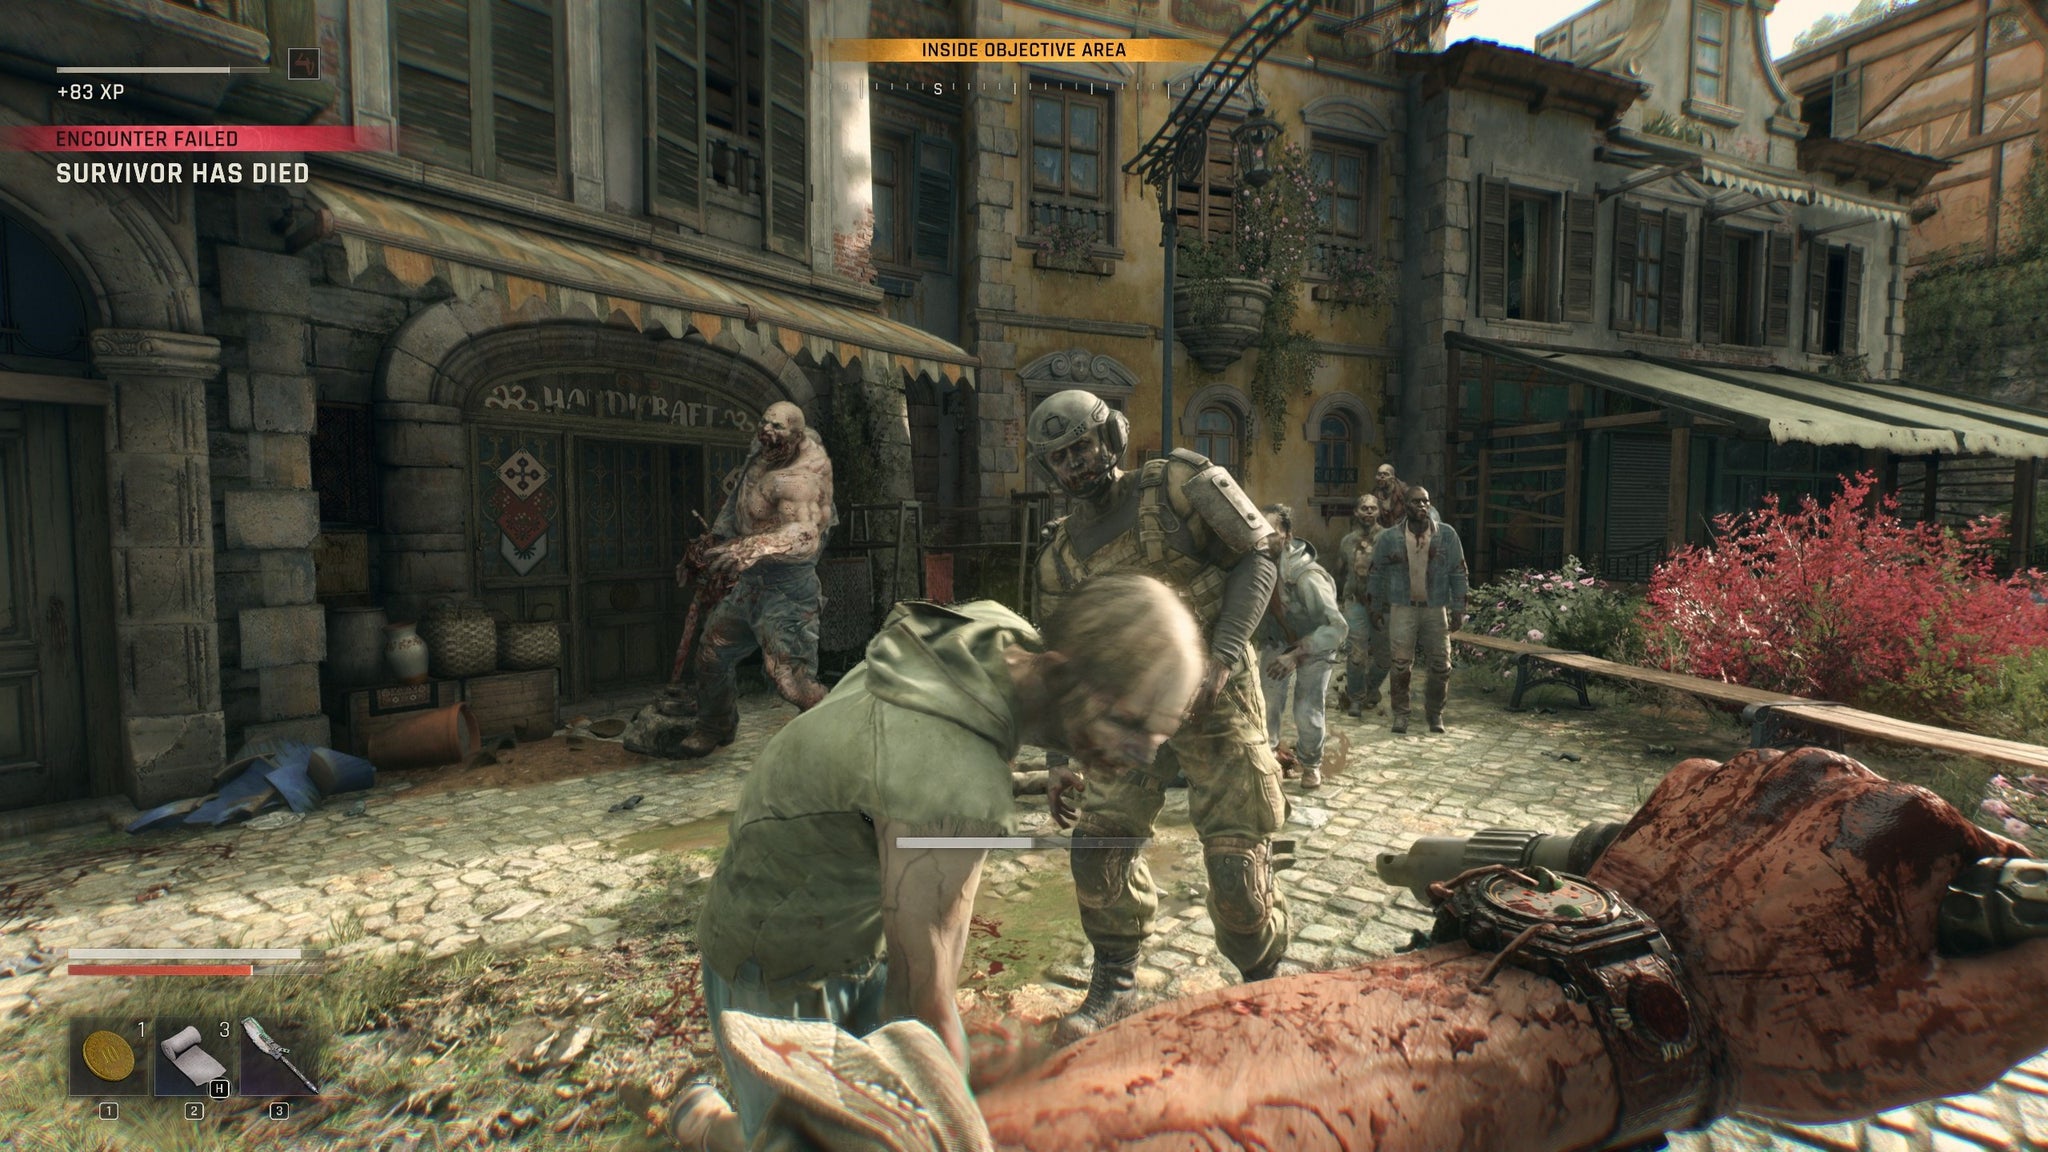
Another shift I remain largely ambivalent on is the move to more power-fantasy options in combat. The melee brawling is almost identical to where Dying Light 2 stands today, with your stamina gauge used solely for combat actions, where previously it was drained by any kind of rapid or high-exertion movement. I found it satisfying as ever, full of weighty impacts and squelchy audio feedback, and enhanced by some absolutely gruesome locational damage on the undead.
Constant combat is further encouraged by the new option to repair damaged melee weapons in the field, practically for free and nigh-instantaneously. While you can only repair any given melee weapon 4-5 times, it means that by the time you fully expend it, you’ll have found several replacements, effectively making it one more system that you don’t need to particularly care about.
The big gimmick introduced here is the option to go Beast Mode. By fighting in melee, you fill up an anger gauge on your HUD. When filled, you activate Hulk Hands (automatically at first, but manually later, once you’ve killed a few bosses) and gain a few seconds of nigh-invulnerability, tearing zombies in half with your bare, veiny mitts.
It’s gratifying and incredibly gory, but also basically just a room-clearing smart bomb, or a way to tear off a third of a boss’s health bar without reprisal. An ‘I don’t want to deal with zombies today’ button in a game where dealing with zombies IS the game. Fast travel may be gone, but fast combat is its replacement, and further upgraded by killing bosses.

Image credit:Rock Paper Shotgun/Techland
Still, as an enjoyer of Dying Light 2 in its current incarnation, I also enjoyed my time with The Beast, mainly because it’s more of DL2’s main loop - but leaner. Gone are the multiple factions, reputation grinds and daily quests, along with any other live-service fluff that its parent game picked up over the years. The only number to really care about is your level (determining your basic combat stats), and even then, there were only a couple of occasions when I was told I was probably too weak to continue the main plot, prompting me to go bulk up through a sidequest.
Even Dark Zones, the oft-extensive urban dungeons in Dying Light 2, have been trimmed down to slightly larger-than-average interiors that you can clear of zombies and scour for crafting resources. You don’t need to wait for nighttime to sweep through them here, either. This game just does not want you hanging around any location longer than necessary, and while I do miss the longer, more involved dungeon-delves through the city, I can’t deny that trimming the fat does allow the story, however cornball it is, to flow better.
Speaking of narrative, let’s start with our protagonist, Kyle Crane, returning from the original Dying Light. Originally a blandly cheerful can-do FPS man-voice, he’s spent thirteen years being tortured/experimented on by The Baron, a gleefully mad scientist. After escaping and accepting his new role as a gruffly-voiced pair of veiny forearms, Crane grimly swears revenge, and that he’ll stop at nothing - NOTHING - to achieve it.
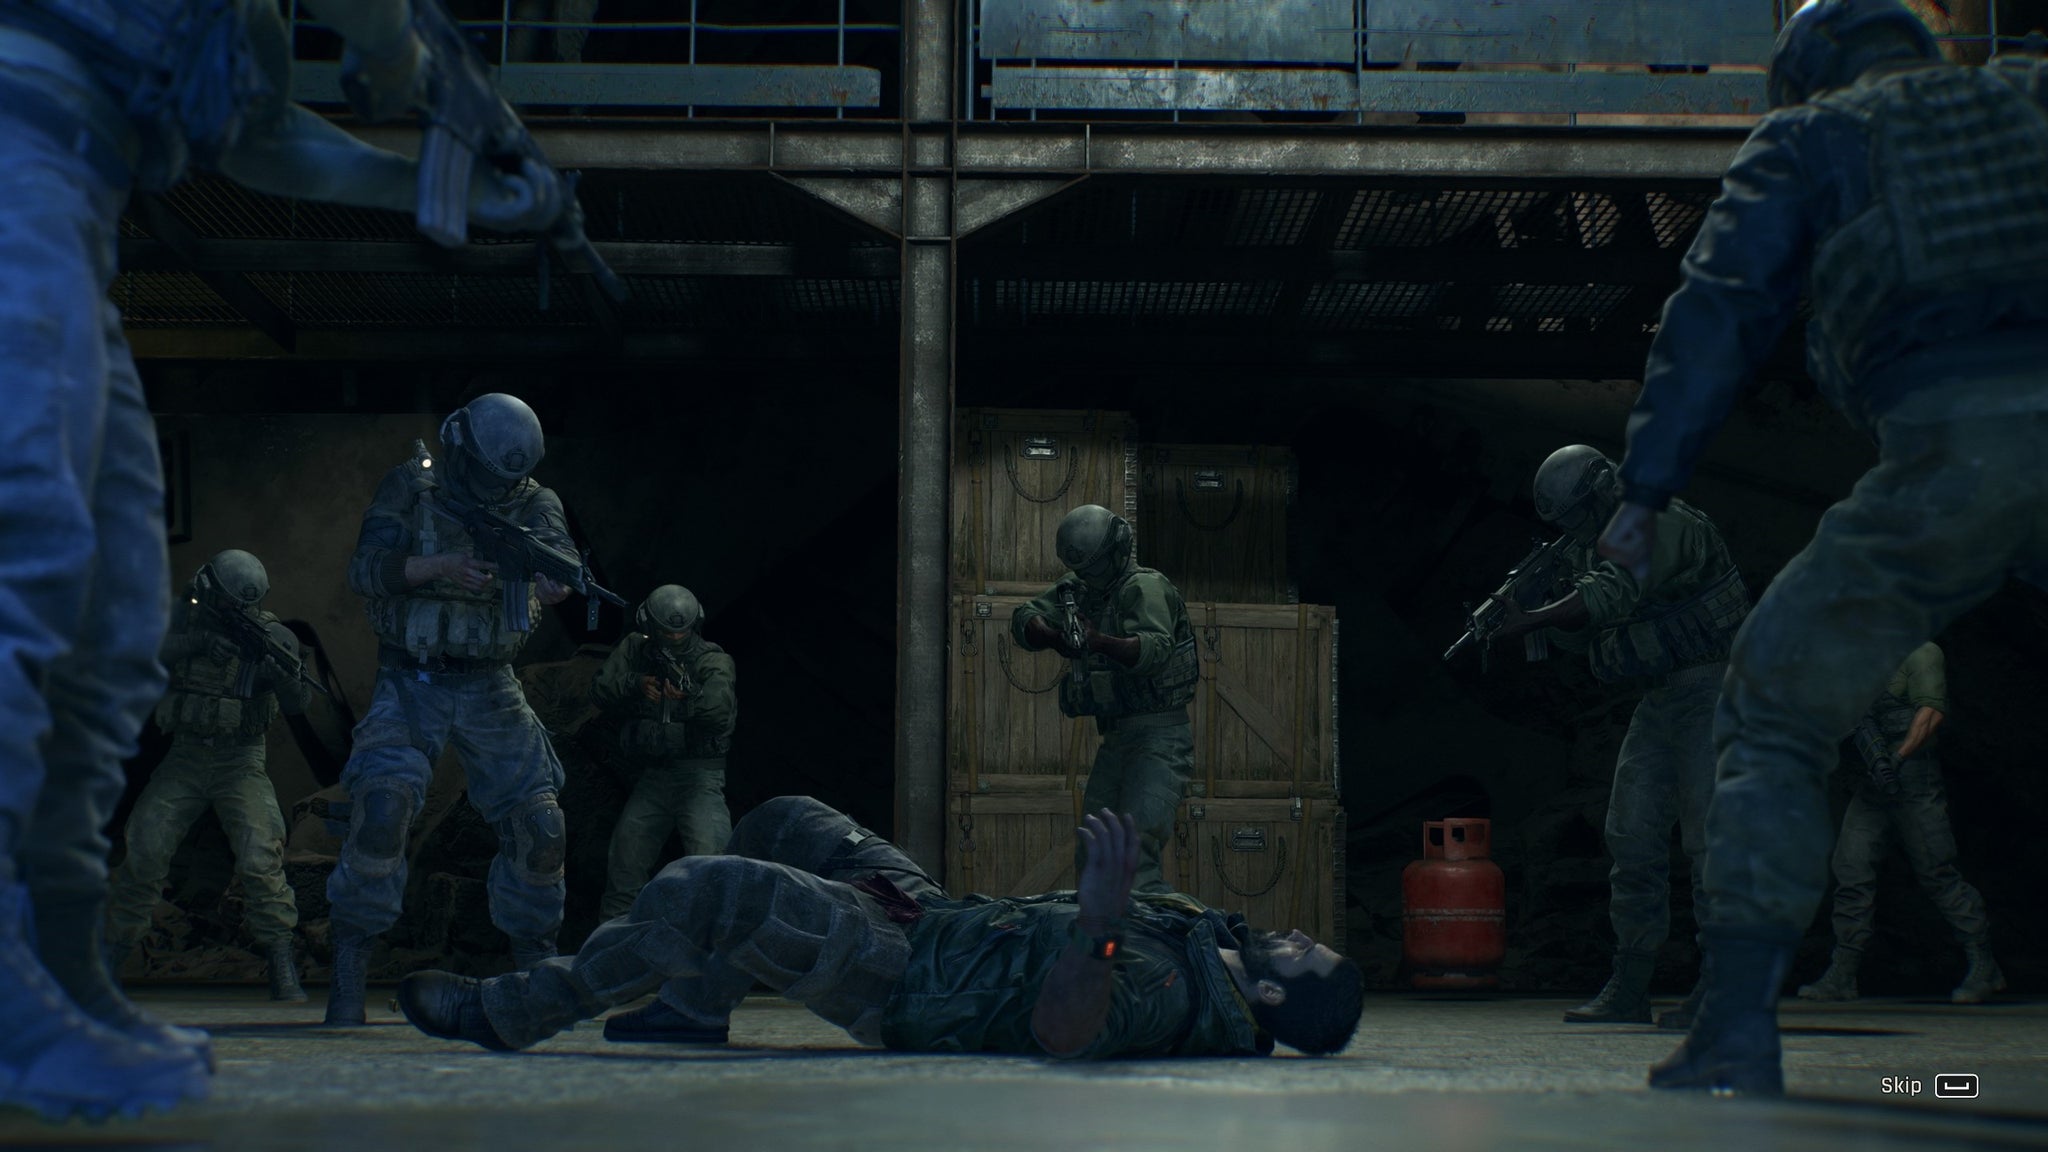
Image credit:Rock Paper Shotgun/Techland
And then he decides that the best way to get revenge is to make a lot of friends by helping out the locals, levelling up (to restore his lost strength, obviously), and extracting some mutagenic powerup-juice from any boss monsters he kills along the way, enhancing his Rage Bar powers.
He might look like a PS360-era generic grimdark Revengeanceman, but Kyle’s got the personality of a golden retriever. Other than plaintively calling some women ‘bossy’ and asking others to get to the point, there is little to no indication in dialogue that this man has spent about a third of his life in a super-science torture dungeon. It’s indicative of the kind of problems the series has always had, reaching for both gritty personal drama (usually in the quieter side-quests) and comic book excess at the same time, yet achieving neither. Thankfully, the villain here drags The Beast fully into the realm of camp action-horror schlock.
The Baron is gloriously over-the-top, and Techland knows it, regularly deploying him to liven up cutscenes. An aristocratic evil genius with access to seemingly endless resources, a mountaintop villa, and a vast complex of laboratories. Smugly chewing on the scenery in every scene he appears in, his sole goal in life appears to be creating new and increasingly deadly mutants, almost all of which seem to break containment at some point, slaughtering dozens of his (seemingly endless) horde of gun-toting soldiers, who in turn seemingly exist solely to die and deliver ammo to you.
He’s like Albert Wesker with the brakes cut. Unflappable in the face of all his self-made disasters. Even among zombie horror villains, he seems to harbor a special disdain for the concept of workplace safety. Taking each escaped creature in stride, always bragging that each failure is just a fresh opportunity to field-test a new monster. Even Umbrella Corp would be considering calling in OSHA inspectors after watching this man at work.
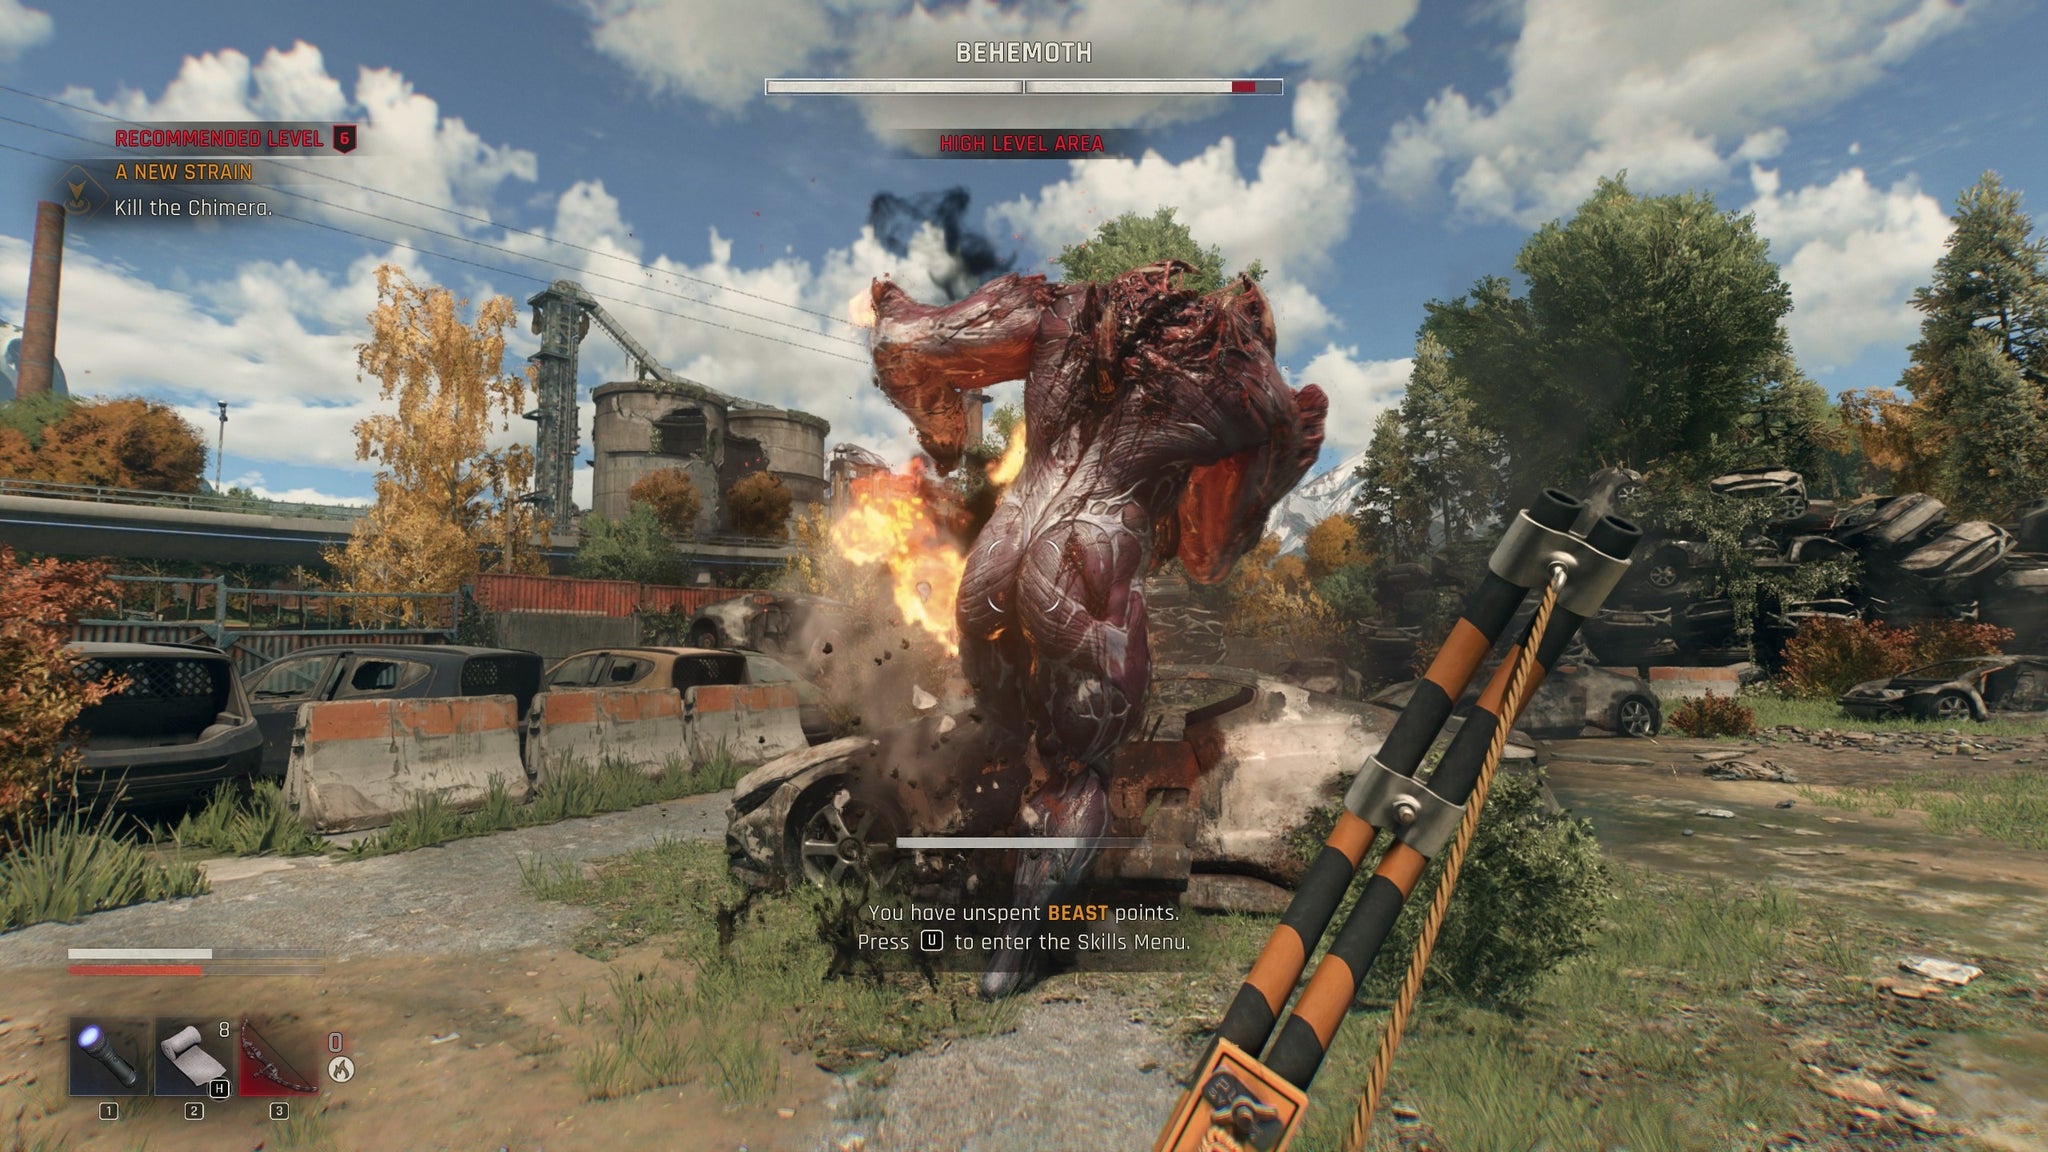
Image credit:Rock Paper Shotgun/Techland
It’s that kind of daft energy that carries The Beast. There are a few moments where it tries to deliver some resonant personal drama through side-quest dialogues, but it never quite lands. The Baron is always happy to ham it up, though, and deliver another monster-of-the-week encounter to punctuate the campaign.
Those boss fights tend to be against powered-up versions of the various ‘special’ zombies that you’ll encounter in the open world, and a were dramatic, enjoyable excuse to spend some of those consumable explosives and ammo packs I’d been hoarding. Sadly they’re also slightly let down by a lack of imagination, especially in the late-game, with the downright brolic Behemoth (a very large skinless muscle-monster with Hulk-style ground pounds) being brought back multiple times.
Combat against Behemoths boils down to dodging around a well-telegraphed rotation of attacks until you can hack, slash or punch at its surprisingly rounded, eye-level, musclebound arse cheeks. In the final stretch, you even have to fight several of them at once. A reasonable enough limitation for an expansion, but I’d have loved to see some really freaky, Resident Evil-inspired mutants with far too many limbs and maybe some weak points to shoot, but I guess that’d be getting away from Dying Light’s brawler foundations.

Image credit:Rock Paper Shotgun/Techland
The problem with The Beast is that while its fully ripped, protein-packed, and dehydrated new design is great on paper, I think that some of that fat and padding served a purpose. While not without its flaws (daily quests and weekly grinds were tiresome), Dying Light 2 was a weirdly cozy game, with a world that you could get into the mindset of living in. Were it not for the dozens of other titles demanding my attention, it could have become a go-to comfort game for me, whereas The Beast is all business.
Also, that lush lighting and dense greenery does come at a cost. Even my heavyweight PC (an RTX 4090 is still a brute of a GPU) needed a little help from DLSS and frame generation to hit a consistently smooth framerate at 3440x1440 ultrawide. While the launch-day patch improved the situation somewhat (bringing it closer in line with Dying Light 2), you’re still going to need a hefty machine to see this one at its absolute best, and unlike Kyle, extracting the thermal paste from other people’s PC’s probably isn’t an option if yours is underpowered.

Image credit:Rock Paper Shotgun/Techland
The Beast’s odd position as an escaped, heavily mutated expansion makes it a difficult value proposition, although a much simpler one if you happened to get the Ultimate version of Dying Light 2, in which case you’ve already paid for it at a steep discount. If you got the game this way, why are you even reading this review? Go and play it.
But for those looking at that £50/$60 price tag and hesitating, yes, this is a good Dying Light game, and a fine open-world zombie game in general, full of crunchy combat and simple but satisfying number-go-up loops. Is it the best in the series? Depends how much you disliked Dying Light 2’s slightly overstuffed design, and whether the same mechanics minus the padding sounds like your jam. As for newcomers, I’m not sure if I can really recommend that at full price when its larger and mechanically very similar parent often goes on sale for under £15.
While The Beast was fun to binge through in a few days (around 21 hours, with plenty more side-quests still left to do), I feel like I’ve had my fill of Techland’s specific brand of open-world design for now. But if the zombie parkour itch hits again, I think it says something that I’ll probably return to Dying Light 2’s sprawling cityscape over another scenic alpine excursion.
Find out how we conduct our reviews by reading our review policy .
Dying Light: The Beast
PS5 , Xbox Series X/S , PC
Rock Paper Shotgun is better when you sign in
Sign in and join us on our journey to discover strange and compelling PC games.

All 75 Arc Raiders Blueprints and where to get them
These areas have the highest chance of giving you Blueprints

Image credit:Rock Paper Shotgun/Embark Studios

Looking for more Arc Raiders Blueprints? It’s a special day when you find a Blueprint, as they’re among the most valuable items in Arc Raiders. If you find a Blueprint that you haven’t already found, then you must make sure you hold onto it at all costs, because Blueprints are the key to one of the most important and powerful systems of meta-progression in the game.
This guide aims to be the very best guide on Blueprints you can find, starting with a primer on what exactly they are and how they work in Arc Raiders, before delving into exactly where to get Blueprints and the very best farming spots for you to take in your search.
We’ll also go over how to get Blueprints from other unlikely activities, such as destroying Surveyors and completing specific quests. And you’ll also find the full list of all 75 Blueprints in Arc Raiders on this page (including the newest Blueprints added with the Cold Snap update , such as the Deadline Blueprint and Firework Box Blueprint), giving you all the information you need to expand your own crafting repertoire.
In this guide:
- What are Blueprints in Arc Raiders?
- Full Blueprint list: All crafting recipes
- Where to find Blueprints in Arc Raiders Blueprints obtained from quests Blueprints obtained from Trials Best Blueprint farming locations

What are Blueprints in Arc Raiders?
Blueprints in Arc Raiders are special items which, if you manage to extract with them, you can expend to permanently unlock a new crafting recipe in your Workshop. If you manage to extract from a raid with an Anvil Blueprint, for example, you can unlock the ability to craft your very own Anvil Pistol, as many times as you like (as long as you have the crafting materials).
To use a Blueprint, simply open your Inventory while in the lobby, then right-click on the Blueprint and click “Learn And Consume” . This will permanently unlock the recipe for that item in your Workshop. As of the Stella Montis update, there are allegedly 75 different Blueprints to unlock - although only 68 are confirmed to be in the game so far. You can see all the Blueprints you’ve found and unlocked by going to the Workshop menu, and hitting “R” to bring up the Blueprint screen.
It’s possible to find duplicates of past Blueprints you’ve already unlocked. If you find these, then you can either sell them, or - if you like to play with friends - you can take it into a match and gift it to your friend so they can unlock that recipe for themselves. Another option is to keep hold of them until the time comes to donate them to the Expedition.
Full Blueprint list: All crafting recipes
Below is the full list of all the Blueprints that are currently available to find in Arc Raiders, and the crafting recipe required for each item:
| Blueprint | Type | Recipe | Crafted At |
|---|---|---|---|
| Bettina | Weapon | 3x Advanced Mechanical Components 3x Heavy Gun Parts 3x Canister | Gunsmith 3 |
| Blue Light Stick | Quick Use | 3x Chemicals | Utility Station 1 |
| Aphelion | Weapon | 3x Magnetic Accelerator 3x Complex Gun Parts 1x Matriarch Reactor | Gunsmith 3 |
| Combat Mk. 3 (Flanking) | Augment | 2x Advanced Electrical Components 3x Processor | Gear Bench 3 |
| Combat Mk. 3 (Aggressive) | Augment | 2x Advanced Electrical Components 3x Processor | Gear Bench 3 |
| Complex Gun Parts | Material | 2x Light Gun Parts 2x Medium Gun Parts 2x Heavy Gun Parts | Refiner 3 |
| Fireworks Box | Quick Use | 1x Explosive Compound 3x Pop Trigger | Explosives Station 2 |
| Gas Mine | Mine | 4x Chemicals 2x Rubber Parts | Explosives Station 1 |
| Green Light Stick | Quick Use | 3x Chemicals | Utility Station 1 |
| Pulse Mine | Mine | 1x Crude Explosives 1x Wires | Explosives Station 1 |
| Seeker Grenade | Grenade | 1x Crude Explosives 2x ARC Alloy | Explosives Station 1 |
| Looting Mk. 3 (Survivor) | Augment | 2x Advanced Electrical Components 3x Processor | Gear Bench 3 |
| Angled Grip II | Mod | 2x Mechanical Components 3x Duct Tape | Gunsmith 2 |
| Angled Grip III | Mod | 2x Mod Components 5x Duct Tape | Gunsmith 3 |
| Hullcracker | Weapon | 1x Magnetic Accelerator 3x Heavy Gun Parts 1x Exodus Modules | Gunsmith 3 |
| Launcher Ammo | Ammo | 5x Metal Parts 1x Crude Explosives | Workbench 1 |
| Anvil | Weapon | 5x Mechanical Components 5x Simple Gun Parts | Gunsmith 2 |
| Anvil Splitter | Mod | 2x Mod Components 3x Processor | Gunsmith 3 |
| ??? | ??? | ??? | ??? |
| Barricade Kit | Quick Use | 1x Mechanical Components | Utility Station 2 |
| Blaze Grenade | Grenade | 1x Explosive Compound 2x Oil | Explosives Station 3 |
| Bobcat | Weapon | 3x Advanced Mechanical Components 3x Light Gun Parts | Gunsmith 3 |
| Osprey | Weapon | 2x Advanced Mechanical Components 3x Medium Gun Parts 7x Wires | Gunsmith 3 |
| Burletta | Weapon | 3x Mechanical Components 3x Simple Gun Parts | Gunsmith 1 |
| Compensator II | Mod | 2x Mechanical Components 4x Wires | Gunsmith 2 |
| Compensator III | Mod | 2x Mod Components 8x Wires | Gunsmith 3 |
| Defibrillator | Quick Use | 9x Plastic Parts 1x Moss | Medical Lab 2 |
| ??? | ??? | ??? | ??? |
| Equalizer | Weapon | 3x Magnetic Accelerator 3x Complex Gun Parts 1x Queen Reactor | Gunsmith 3 |
| Extended Barrel | Mod | 2x Mod Components 8x Wires | Gunsmith 3 |
| Extended Light Mag II | Mod | 2x Mechanical Components 3x Steel Spring | Gunsmith 2 |
| Extended Light Mag III | Mod | 2x Mod Components 5x Steel Spring | Gunsmith 3 |
| Extended Medium Mag II | Mod | 2x Mechanical Components 3x Steel Spring | Gunsmith 2 |
| Extended Medium Mag III | Mod | 2x Mod Components 5x Steel Spring | Gunsmith 3 |
| Extended Shotgun Mag II | Mod | 2x Mechanical Components 3x Steel Spring | Gunsmith 2 |
| Extended Shotgun Mag III | Mod | 2x Mod Components 5x Steel Spring | Gunsmith 3 |
| Remote Raider Flare | Quick Use | 2x Chemicals 4x Rubber Parts | Utility Station 1 |
| Heavy Gun Parts | Material | 4x Simple Gun Parts | Refiner 2 |
| Venator | Weapon | 2x Advanced Mechanical Components 3x Medium Gun Parts 5x Magnet | Gunsmith 3 |
| Il Toro | Weapon | 5x Mechanical Components 6x Simple Gun Parts | Gunsmith 1 |
| Jolt Mine | Mine | 1x Electrical Components 1x Battery | Explosives Station 2 |
| Explosive Mine | Mine | 1x Explosive Compound 1x Sensors | Explosives Station 3 |
| Jupiter | Weapon | 3x Magnetic Accelerator 3x Complex Gun Parts 1x Queen Reactor | Gunsmith 3 |
| Light Gun Parts | Material | 4x Simple Gun Parts | Refiner 2 |
| Lightweight Stock | Mod | 2x Mod Components 5x Duct Tape | Gunsmith 3 |
| Lure Grenade | Grenade | 1x Speaker Component 1x Electrical Components | Utility Station 2 |
| Medium Gun Parts | Material | 4x Simple Gun Parts | Refiner 2 |
| Torrente | Weapon | 2x Advanced Mechanical Components 3x Medium Gun Parts 6x Steel Spring | Gunsmith 3 |
| Muzzle Brake II | Mod | 2x Mechanical Components 4x Wires | Gunsmith 2 |
| Muzzle Brake III | Mod | 2x Mod Components 8x Wires | Gunsmith 3 |
| Padded Stock | Mod | 2x Mod Components 5x Duct Tape | Gunsmith 3 |
| Shotgun Choke II | Mod | 2x Mechanical Components 4x Wires | Gunsmith 2 |
| Shotgun Choke III | Mod | 2x Mod Components 8x Wires | Gunsmith 3 |
| Shotgun Silencer | Mod | 2x Mod Components 8x Wires | Gunsmith 3 |
| Showstopper | Grenade | 1x Advanced Electrical Components 1x Voltage Converter | Explosives Station 3 |
| Silencer I | Mod | 2x Mechanical Components 4x Wires | Gunsmith 2 |
| Silencer II | Mod | 2x Mod Components 8x Wires | Gunsmith 3 |
| Snap Hook | Quick Use | 2x Power Rod 3x Rope 1x Exodus Modules | Utility Station 3 |
| Stable Stock II | Mod | 2x Mechanical Components 3x Duct Tape | Gunsmith 2 |
| Stable Stock III | Mod | 2x Mod Components 5x Duct Tape | Gunsmith 3 |
| Tagging Grenade | Grenade | 1x Electrical Components 1x Sensors | Utility Station 3 |
| Tempest | Weapon | 3x Advanced Mechanical Components 3x Medium Gun Parts 3x Canister | Gunsmith 3 |
| Trigger Nade | Grenade | 2x Crude Explosives 1x Processor | Explosives Station 2 |
| Vertical Grip II | Mod | 2x Mechanical Components 3x Duct Tape | Gunsmith 2 |
| Vertical Grip III | Mod | 2x Mod Components 5x Duct Tape | Gunsmith 3 |
| Vita Shot | Quick Use | 2x Antiseptic 1x Syringe | Medical Lab 3 |
| Vita Spray | Quick Use | 3x Antiseptic 1x Canister | Medical Lab 3 |
| Vulcano | Weapon | 1x Magnetic Accelerator 3x Heavy Gun Parts 1x Exodus Modules | Gunsmith 3 |
| Wolfpack | Grenade | 2x Explosive Compound 2x Sensors | Explosives Station 3 |
| Red Light Stick | Quick Use | 3x Chemicals | Utility Station 1 |
| Smoke Grenade | Grenade | 14x Chemicals 1x Canister | Utility Station 2 |
| Deadline | Mine | 3x Explosive Compound 2x ARC Circuitry | Explosives Station 3 |
| Trailblazer | Grenade | 1x Explosive Compound 1x Synthesized Fuel | Explosives Station 3 |
| Tactical Mk. 3 (Defensive) | Augment | 2x Advanced Electrical Components 3x Processor | Gear Bench 3 |
| Tactical Mk. 3 (Healing) | Augment | 2x Advanced Electrical Components 3x Processor | Gear Bench 3 |
| Yellow Light Stick | Quick Use | 3x Chemicals | Utility Station 1 |
Note: The missing Blueprints in this list likely have not actually been added to the game at the time of writing, because none of the playerbase has managed to find any of them. As they are added to the game, I will update this page with the most relevant information so you know exactly how to get all 75 Arc Raiders Blueprints.
Where to find Blueprints in Arc Raiders
Below is a list of all containers, modifiers, and events which maximise your chances of finding Blueprints:
- Certain quests reward you with specific Blueprints .
- Completing Trials has a high chance of offering Blueprints as rewards.
- Surveyors have a decent chance of dropping Blueprints on death.
- High loot value areas tend to have a greater chance of spawning Blueprints.
- Night Raids and Storms may increase rare Blueprint spawn chances in containers.
- Containers with higher numbers of items may have a higher tendency to spawn Blueprints. As a result, Blue Gate (which has many “large” containers containing multiple items) may give you a higher chance of spawning Blueprints.
- Raider containers (Raider Caches, Weapon Boxes, Medical Bags, Grenade Tubes) have increased Blueprint drop rates. As a result, the Uncovered Caches event gives you a high chance of finding Blueprints.
- Security Lockers have a higher than average chance of containing Blueprints.
- Certain Blueprints only seem to spawn under specific circumstances: Tempest Blueprint only spawns during Night Raid events. Vulcano Blueprint only spawns during Hidden Bunker events. Jupiter and Equaliser Blueprints only spawn during Harvester events.

Raider Caches, Weapon Boxes, and other raider-oriented container types have a good chance of offering Blueprints. |Image credit:Rock Paper Shotgun/Embark Studios
Blueprints have a very low chance of spawning in any container in Arc Raiders, around 1-2% on average. However, there is a higher chance of finding Blueprints in particular container types. Specifically, you can find more Blueprints in Raider containers and security lockers.
Beyond this, if you’re looking for Blueprints you should focus on regions of the map which are marked as having particularly high-value loot. Areas such as the Control Tower in Dam Battlegrounds, the Arrival and Departure Buildings in Spaceport, and Pilgrim’s Peak in Blue Gate all have a better-than-average chance of spawning Blueprints somewhere amongst all their containers. Night Raids and Electromagnetic Storm events also increase the drop chances of certain Blueprints .
In addition to these containers, you can often loot Blueprints from destroyed Surveyors - the largest of the rolling ball ARC. Surveyors are more commonly found on the later maps - Spaceport and Blue Gate - and if one spawns in your match, you’ll likely see it by the blue laser beam that it casts into the sky while “surveying”.
Surveyors are quite well-armoured and will very speedily run away from you once it notices you, but if you can take one down then make sure you loot all its parts for a chance of obtaining certain unusual Blueprints.
Blueprints obtained from quests
One way in which you can get Blueprints is by completing certain quests for the vendors in Speranza. Some quests will reward you with a specific item Blueprint upon completion, so as long as you work through all the quests in Arc Raiders, you are guaranteed those Blueprints.
Here is the full list of all Blueprints you can get from quest rewards:
- Trigger Nade Blueprint: Rewarded after completing “Sparks Fly”.
- Lure Grenade Blueprint: Rewarded after completing “Greasing Her Palms”.
- Burletta Blueprint: Rewarded after completing “Industrial Espionage”.
- Hullcracker Blueprint (and Launcher Ammo Blueprint): Rewarded after completing “The Major’s Footlocker”.
Alas, that’s only 4 Blueprints out of a total of 75 to unlock, so for the vast majority you will need to find them yourself during a raid. If you’re intent on farming Blueprints, then it’s best to equip yourself with cheap gear in case you lose it, but don’t use a free loadout because then you won’t get a safe pocket to stash any new Blueprint you find. No pain in Arc Raiders is sharper than failing to extract with a new Blueprint you’ve been after for a dozen hours already.

One of the best ways to get Blueprints is by hitting three stars on all five Trials every week. |Image credit:Rock Paper Shotgun/Embark Studios
Blueprints obtained from Trials
One of the very best ways to get Blueprints is as rewards for completing Trials in Arc Raiders. Trials are unlocked from Level 15 onwards, and allow you to earn rewards by focusing on certain tasks over the course of several raids. For example, one Trial might task you with dealing damage to Hornets, while another might challenge you to loot Supply Drops.
Trials refresh on a weekly basis, with a new week bringing five new Trials. Each Trial can offer up to three rewards after passing certain score milestones, and it’s possible to receive very high level loot from these reward crates - including Blueprints. So if you want to unlock as many Blueprints as possible, you should make a point of completing as many Trials as possible each week.
Best Blueprint farming locations
The very best way to get Blueprints is to frequent specific areas of the maps which combine high-tier loot pools with the right types of containers to search. Here are my recommendations for where to find Blueprints on every map, so you can always keep the search going for new crafting recipes to unlock.

Image credit:Rock Paper Shotgun/Embark Studios
Dam Battlegrounds
The best places to farm Blueprints on Dam Battlegrounds are the Control Tower, Power Generation Complex, Ruby Residence, and Pale Apartments . The first two regions, despite only being marked on the map as mid-tier loot, contain a phenomenal number of containers to loot. The Control Tower can also contain a couple of high-tier Security Lockers - though of course, you’ll need to have unlocked the Security Breach skill at the end of the Survival tree.
There’s also a lot of reporting amongst the playerbase that the Residential areas in the top-left of the map - Pale Apartments and Ruby Residence - give you a comparatively strong chance of finding Blueprints. Considering their size, there’s a high density of containers to loot in both locations, and they also have the benefit of being fairly out of the way. So you’re more likely to have all the containers to yourself.
Buried City
The best Blueprint farming locations on Buried City are the Santa Maria Houses, Grandioso Apartments, Town Hall, and the various buildings of the New District . Grandioso Apartments has a lower number of containers than the rest, but a high chance of spawning weapon cases - which have good Blueprint drop rates. The others are high-tier loot areas, with plenty of lootable containers - including Security Lockers.
Spaceport
The best places to find Blueprints on Spaceport are the Arrival and Departure Buildings, as well as Control Tower A6 and the Launch Towers . All these areas are labelled as high-value loot regions, and many of them are also very handily connected to one another by the Spaceport wall, which you can use to quickly run from one area to the next. At the tops of most of these buildings you’ll find at least one Security Locker, so this is an excellent farming route for players looking to find Blueprints.
The downside to looting Blueprints on Spaceport is that all these areas are hotly contested, particularly in Duos and Squads. You’ll need to be very focused and fast in order to complete the full farming route.

Image credit:Rock Paper Shotgun/Embark Studios
Blue Gate
Blue Gate tends to have a good chance of dropping Blueprints, potentially because it generally has a high number of containers which can hold lots of items; so there’s a higher chance of a Blueprint spawning in each container. In my experience, the best Blueprint farming spots on Blue Gate are Pilgrim’s Peak, Raider’s Refuge, the Ancient Fort, and the Underground Complex beneath the Warehouse .
All of these areas contain a wealth of containers to loot. Raider’s Refuge has less to loot, but the majority of the containers in and around the Refuge are raider containers, which have a high chance of containing Blueprints - particularly during major events.
Stella Montis
On the whole, Stella Montis seems to have a very low drop rate for Blueprints (though a high chance of dropping other high-tier loot). If you do want to try farming Blueprints on this map, the best places to find Blueprints in Stella Montis are Medical Research, Assembly Workshop, and the Business Center . These areas have the highest density of containers to loot on the map.
In addition to this, the Western Tunnel has a few different Security Lockers to loot, so while there’s very little to loot elsewhere in this area of the map, it’s worth hitting those Security Lockers if you spawn there at the start of a match.
That wraps up this primer on how to get all the Blueprints in Arc Raiders as quickly as possible. With the Expedition system constantly resetting a large number of players’ Blueprints, it’s more important than ever to have the most up-to-date information on where to find all these Blueprints.
While you’re here, be sure to check out our Arc Raiders best guns tier list , as well as our primers on the best skills to unlock and all the different Field Depot locations on every map.

ARC Raiders
PS5 , Xbox Series X/S , PC
Rock Paper Shotgun is better when you sign in
Sign in and join us on our journey to discover strange and compelling PC games.
