Dragon Quest III HD-2D Remake review: a world in the palm of your hand
A model village the size of a medium-sized country
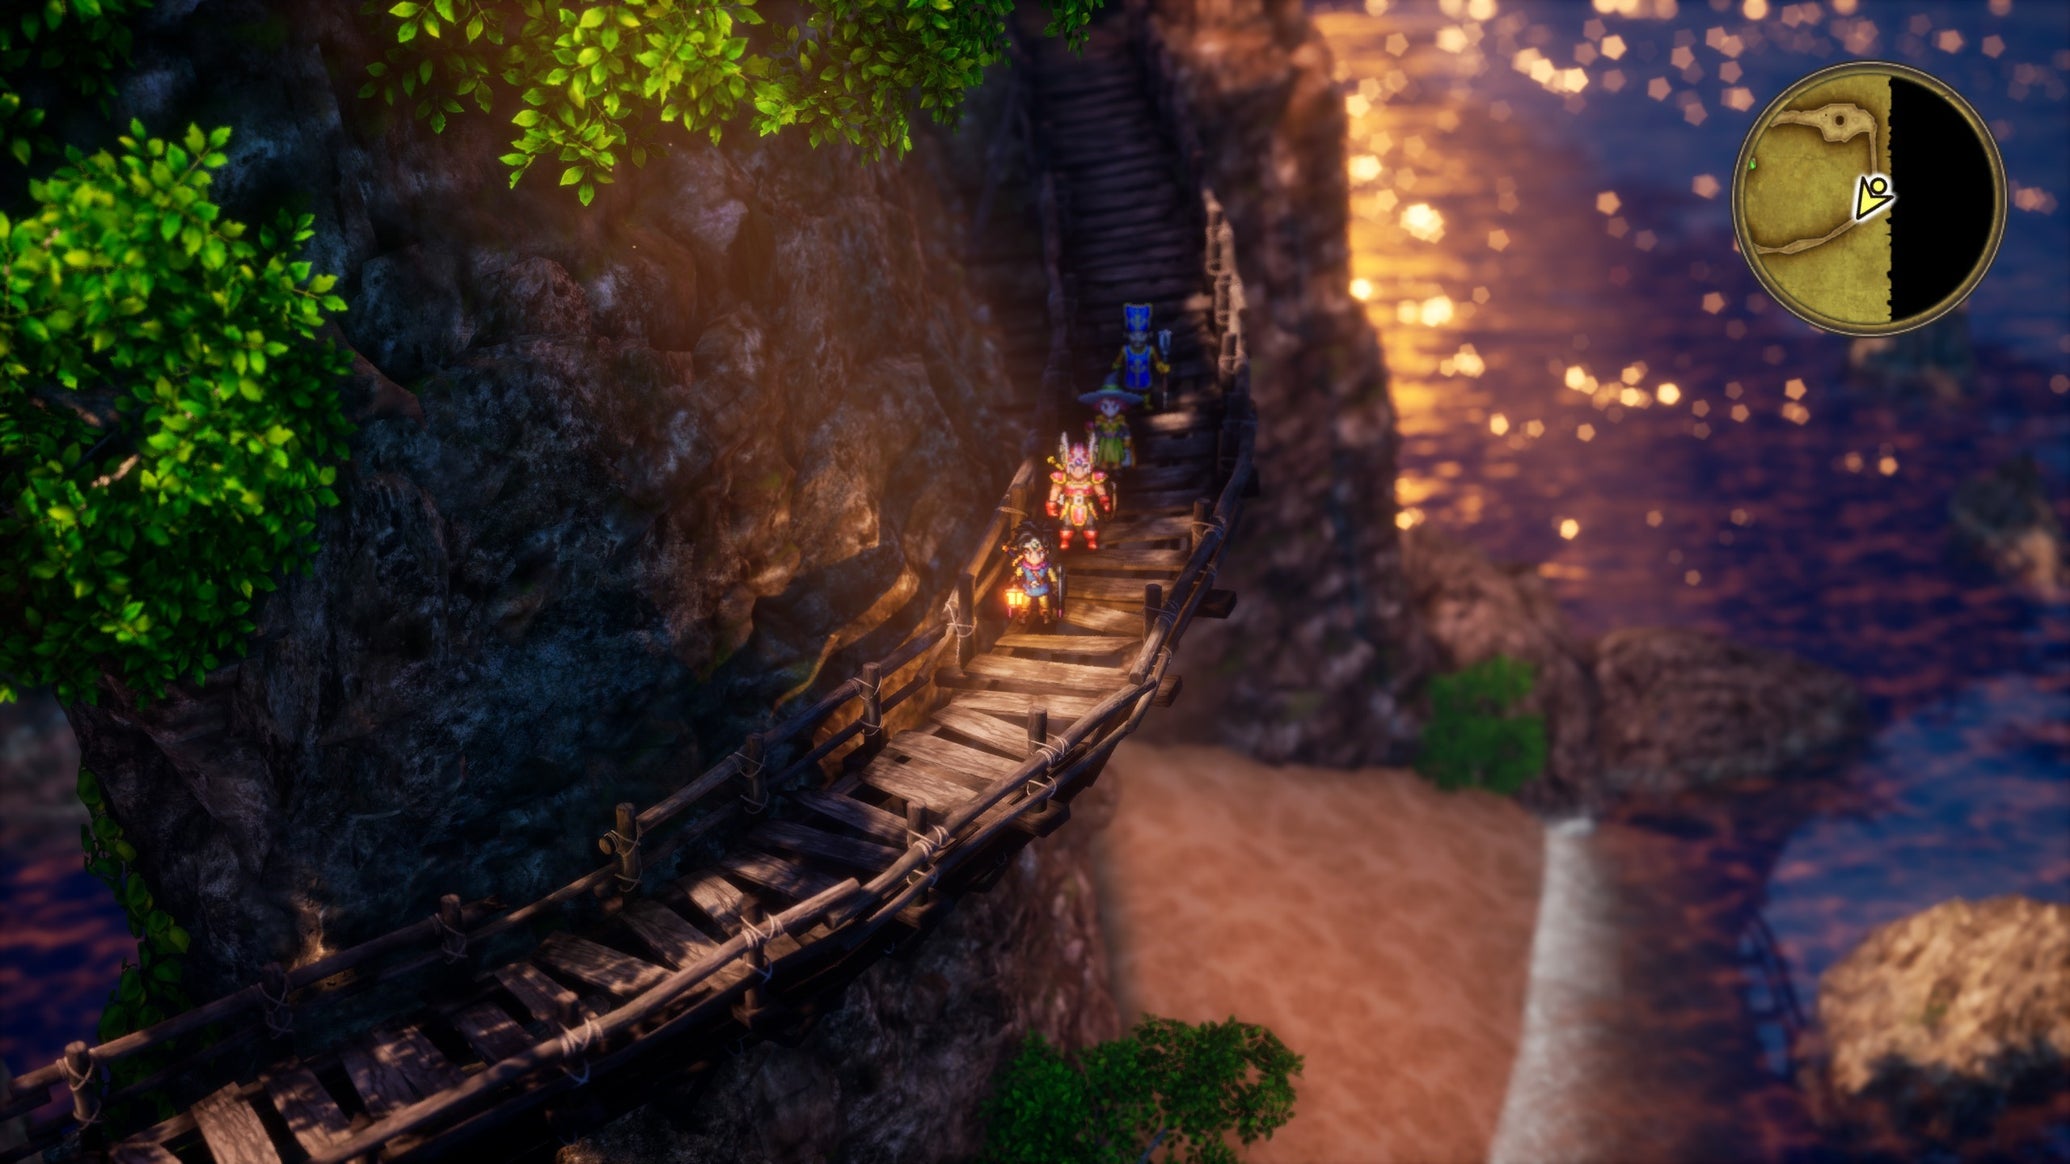
Image credit:Rock Paper Shotgun/Square Enix
- Developer: Square Enix, ARTDINK
- Publisher: Square Enix
- Release: November 14th, 2024
- On: Windows
- From: Steam
- Price: £50/$60/€60
- Reviewed on: Intel Core-i5-12600K, 16GB RAM, Nvidia GeForce RTX 3060, Windows 10; Steam Deck
Dragon Quest III HD-2D Remake ’s premise is bluntly, delightfully simple. The Archfiend Baramos, as evil as he is mysterious, is up and about. He’s got ill designs on the world. Your Dad tried to stop him, and he died. He fell into a volcano. We absolutely can’t be having that.
This is, more than anything else, a game about Going On An Adventure. Well walked ground, of course, but it’s rare to see it embarked upon with such barefaced delight, or such a wholehearted commitment to going the distance. It is a very big and a very simple RPG that is as wide as an ocean and as deep as a pond; a game to curl up with and play lazily and—with some sour caveats—enjoyably, for an entire winter.
After nearly three decades of remakes and re-releases since its 1988 debut, Dragon Quest III arrives, tilt-shifted and glimmering, in Square Enix’s HD-2D. This approach (first appearing in 2018’s Octopath Traveler ) combines 2D sprites with a detailed 3D world and—with a combination of camera tricks, simulated lenses and intricate lighting—renders out the world into a kind of toy-like diorama. The overall impression is that of looking down into a model village the size of a medium sized country.
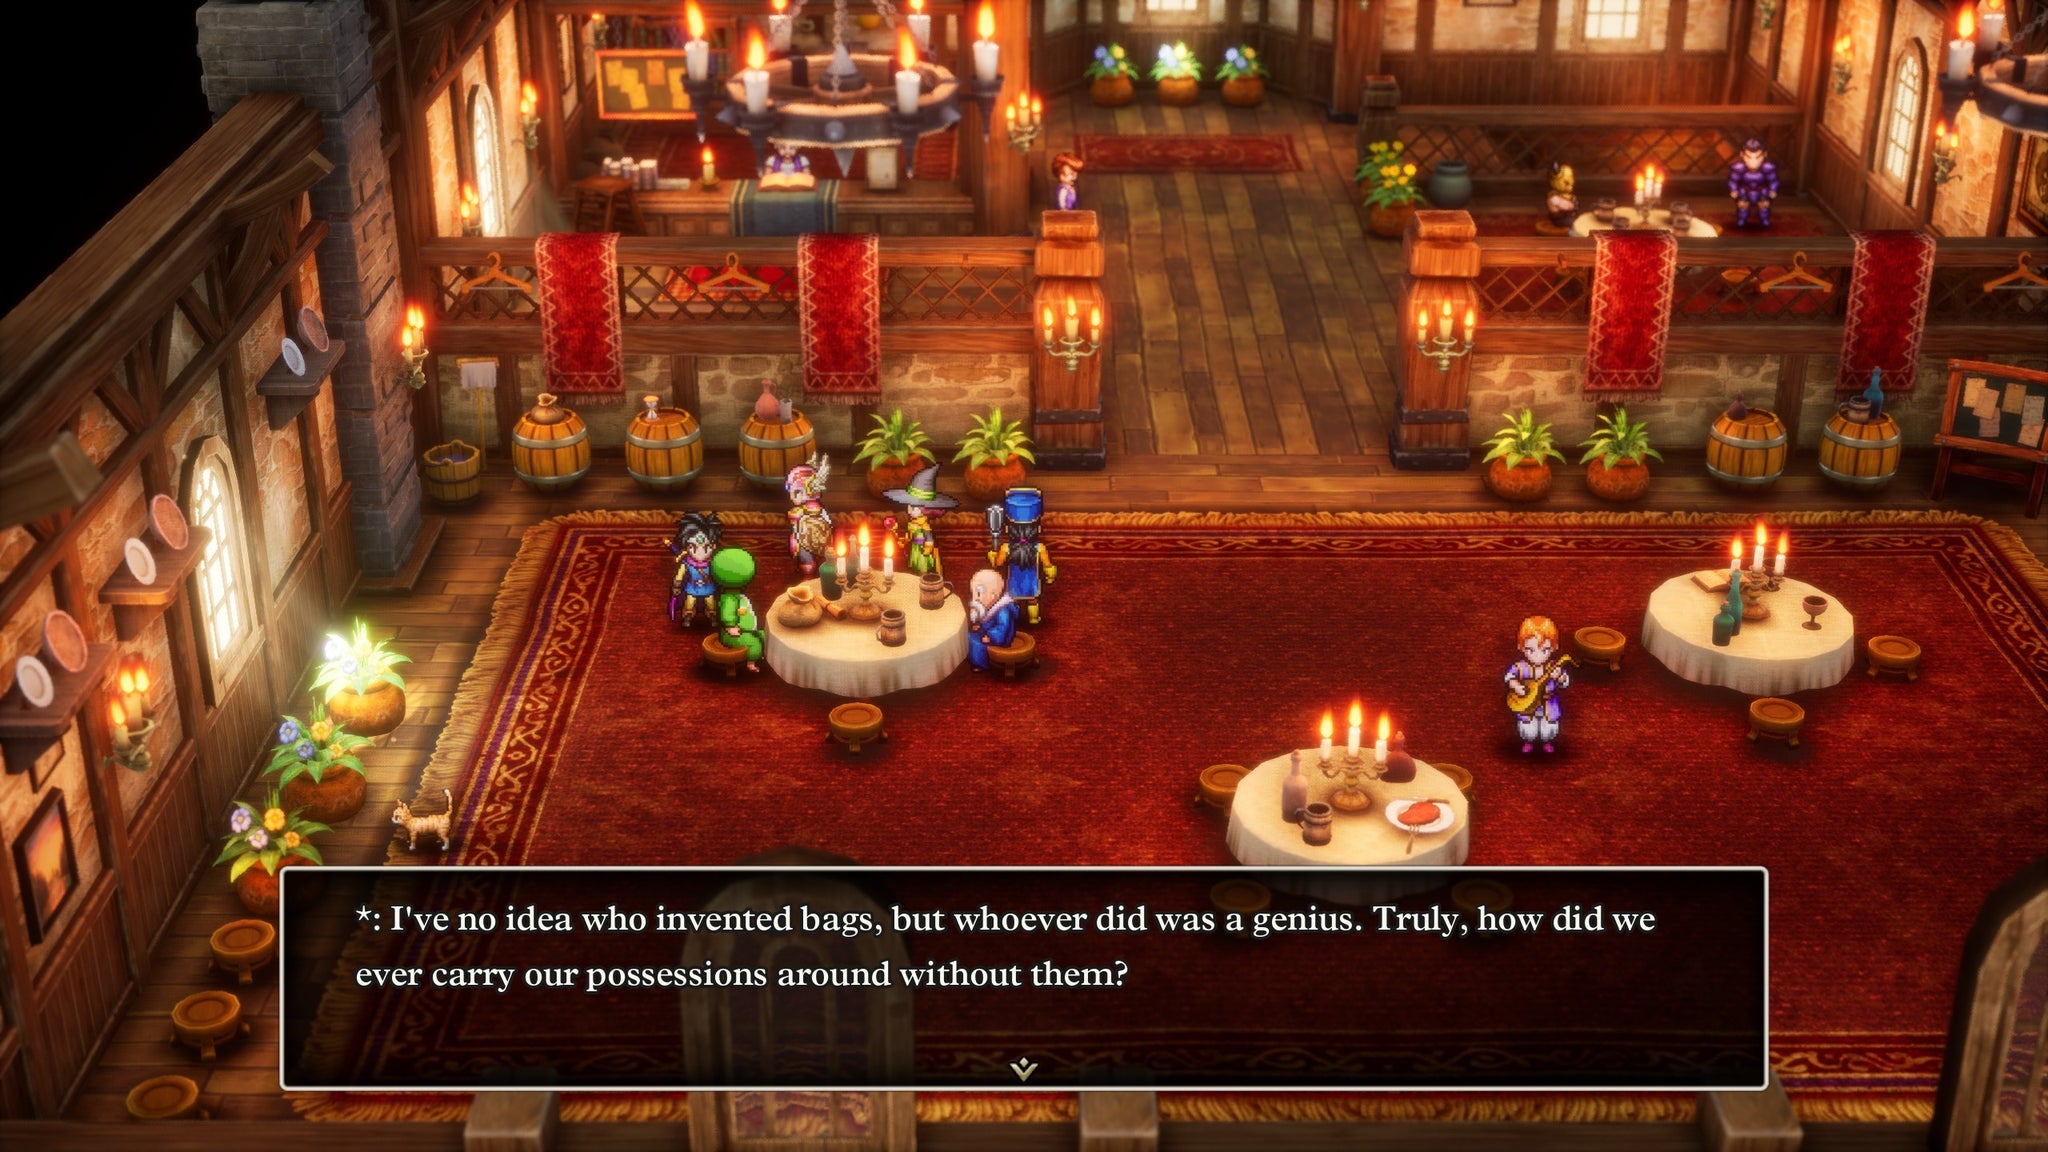
Image credit:Rock Paper Shotgun/Square Enix
Or, ”countries”. Dragon Quest III’s map is an enormous, squashed-play-doh recreation of Earth. You begin in the city of Aliahan, on an island which serves as the tutorial zone. Here, you are briefed by a king with such gusto and brevity that I replayed the entire opening for fear that I’d missed something. I hadn’t. “Go and get the Archfiend”. Where is he? “Unclear”. How can he be beaten? “Wouldn’t you like to know”. The king impresses upon you the importance of gaining power, but rather than pointing you in the direction of a Fabled Sword or Sealing Ring he suggests instead that you should begin by finding some keys. “Keys”, he says, breezily addressing the broad category rather than the specific.
This breezy approach to the mechanics, items, and MacGuffins of your quest to save the world runs like a breath of fresh air throughout the game. Much of the first few hours are taken up on a hunt for keys, graduating to stolen crowns, a bottomless pot, keys again , and a pinch of pepper to season a king’s dinner. Even when the items invariably trend towards the fantastical and the stakes get higher, this playful, almost dreamlike tone persists. There’s a kickabout feel to it all, like a playground game. One old man is every old man; the bruiser in the tavern is the bruiser in the square is the bruiser standing on the dockside. This could become formulaic or repetitive—and it is, a little—but what’s being asked of you isn’t being repeated: just the guises and tones of the people doing the asking. Find the waking powder to free the sleeping village. Defeat the serpent monster. One task splinters off into the next, another little king gives you a quest so straightforward as to be almost elliptical.
<img loading=“lazy” src=“https://assetsio.gnwcdn.com/dquest-3-2.jpg?width=2048&height=2048&fit=bounds&quality=85&format=jpg&auto=webp" onerror=“this.onerror=null;this.src=‘https://blogger.googleusercontent.com/img/a/AVvXsEhe7F7TRXHtjiKvHb5vS7DmnxvpHiDyoYyYvm1nHB3Qp2_w3BnM6A2eq4v7FYxCC9bfZt3a9vIMtAYEKUiaDQbHMg-ViyGmRIj39MLp0bGFfgfYw1Dc9q_H-T0wiTm3l0Uq42dETrN9eC8aGJ9_IORZsxST1AcLR7np1koOfcc7tnHa4S8Mwz_xD9d0=s16000';" alt=“A party is told that to open the jail beyond, they must obtain the “Ultimate Key”. - 3”>
The game lacks a quest log, instead offering a “recall” function that lets you store up to 30 previous conversations entirely. These are organised by location and speaker, though I often found myself tabbing through entries one by one to find what I was looking for in a kaleidoscopic whirl of rumours and legends. A little tedious, sure, but—Oh! I’d forgotten that song the Dockworker was singing about the hidden cave. |Image credit:Rock Paper Shotgun/Square Enix
The squashed Earthlike approach extends beyond the landmasses. As soon as you emerge into the vast main map you start running into direct analogues. Romaria is obviously, glaringly, Rome. Portoga stands in for Portugal. Ibis is very clearly ancient Egypt. Each of these towns is intended as a broad, smiling caricature, but the smile is just a little too wide to hide several rotten teeth. I find it hard to object to the city of Edina’s caricature of Britain as a manners-obsessed, stuffy aristocracy, but as the game moved into Asham (so taking its name from the Arabic greeting “as-salamu alaykum”) complete with bottom-of-the-barrel tropes of spices, belly dancers and night markets, my heart sank.
And, for the most part, the character sprites are all the same wherever you are. The shopkeeper in Romaria is the same as the shopkeeper in Asham, as is the old man (white hair, blue robe): White, smiling sprites speaking in a broad dialect of whatever caricatured city you find yourself in. This is racist, ugly stuff and isn’t the only instance where the game’s thoughtlessness bubbled up, sour and imposing. When I encountered an enemy type called “Heedoo Voodoo”, a racist-children’s-book cartoon of an African tribesman, I turned the game off for the rest of the night. It wasn’t the last time I did that. Things like this would have stood out in 1988 and it’s remarkable that they weren’t altered or addressed with a remake that is already clearly so invested in altering the game’s visuals and presentation.
Before the first little king will let you out of Aliahan, you have to construct your adventuring party. This is done at Patty’s Party Planning Place, somewhere between an inn and a job center where you collect the three other weirdos you’re going to spend most of your time with. The current trend among party based RPGs is to draw complex, involved character studies (your Shadowhearts, Kim Kitsuragis, Strohls, etc.) but here your compatriots are defined almost entirely by their class and have no dialogue. Along with a temperament, which governs how quickly certain stats of theirs will increase, you choose their name and their appearance and off you go, rattling out into the world with them trailing behind you like ducklings following their mother.
There are warriors, priests, mages - you know the drill - all lining up in classic turn-based combat against gangs of the Archfiend’s ne’er do wells. Man sized caterpillars. Odd little porcupines. Roving gangs of Draculas on stubby wings. Your comrades start with a limited selection of spells or abilities but, foreshadowed by tantalising “????” menu items, they soon develop varied tactical toolsets.
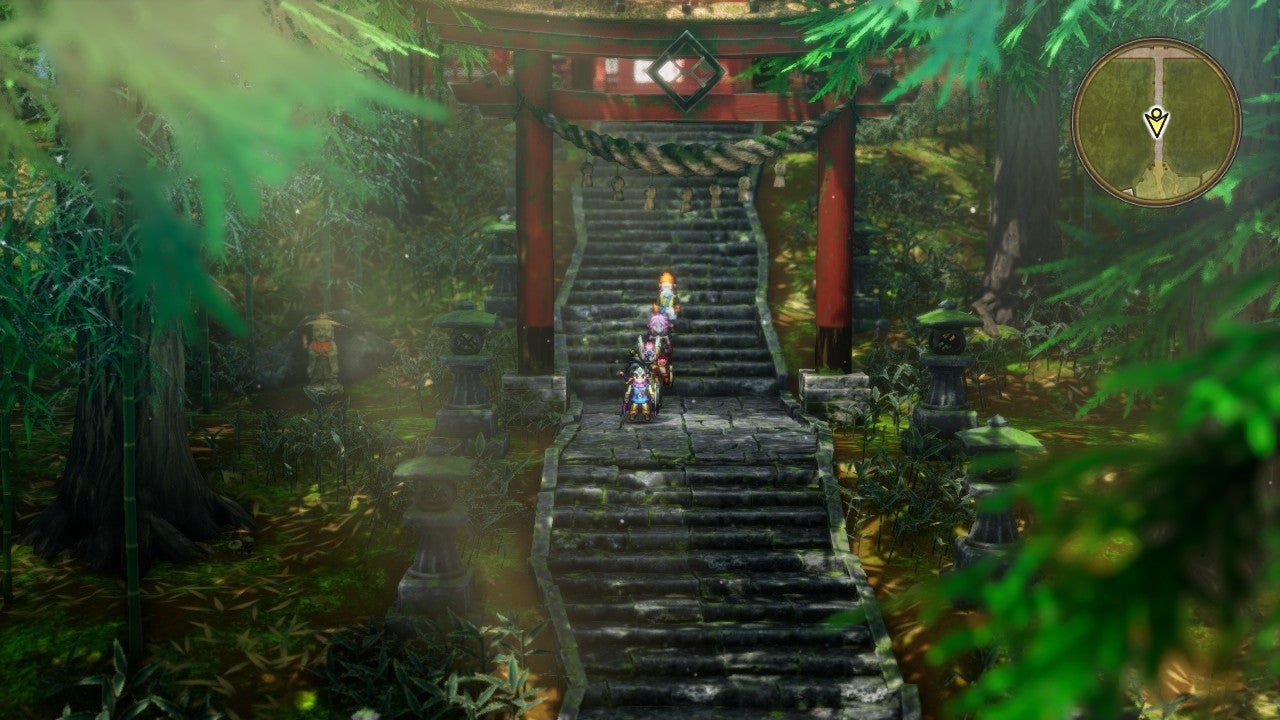
Image credit:Rock Paper Shotgun/Square Enix
Other classes get more interesting: the Merchant extracts extra gold from your foes, and the Gadabout is a bizarre clown, more interested in goofing around than pulling their weight. They might get tired and fall asleep, or sneeze loudly, startling everybody on the battlefield. Their luck stat is outlandishly high, sure, and they might have something genuinely useful up their sleeve, but are just as likely to go plunging off piste at exactly the wrong moment. The Monster Wrangler, new to this remake, is particularly attuned to the location of “friendly monsters” that you can scoop up and dispatch to fight in arenas. There’s good money in bloodsports, and the Wrangler acquires more monstrous abilities with each unfortunate critter you collect. On several occasions my party was saved by Aoife, a human woman, howling and biting her opponent four or five times.
Travelling from one town to the next, your party is gigantic in the overworld. Forests foam up around your ankles. Outside the safety of the towns, and in the game’s enemy filled dungeons, you’re constantly tumbling into random encounters. There is no indication as to where these enemies are—no “tall grass” or warning—and in the early game I found this almost intolerable. At that point battles took time, even with the granular auto-battle switched on, and while I could have fled I desperately needed the experience to help me fight other, more troublesome foes.
In the game’s dungeons I grew to resent the random encounters especially deeply. I wanted so badly to explore, to dive down a beautifully rendered side path, but each encounter felt like an interruption, a wagging finger, a patronising “Ah, wait—”. My frustration reached its nadir as I discovered (O, delight!) an item that purportedly prevented random encounters only to learn (O, horror!) that it had no effect at all within the dungeons.
Still, I gritted my teeth, and it is with a measure of relief that I can tell you that the feeling passed. The Thief class, ever reliable, quickly learned an ability that let me hide myself from enemies, allowing me more control over when and how I fought. As my abilities grew, the easier fights could be overcome almost instantly and I spent the trickier ones enjoying the tactics involved in identifying and exploiting enemy weaknesses. I became an active participant in how and when I fought, rather than feeling imposed upon by the game.

Image credit:Rock Paper Shotgun/Square Enix
Maybe you think that when I say “wide as an ocean, deep as a pond,” I’m damning this game with faint praise. I’m not. Listen to me—listen to me—the ocean is very, very wide. I could spend the whole review listing things that are in the game, context free, and I still wouldn’t make much of a dent. Little mechanical wrinkles ripple through the game. You start exploring the world in new ways. You’ll find villages tucked away in areas you thought you’d explored. On several occasions, the breezy, single-minded arrow of the game’s main quest goes splintering in a variety of directions simultaneously and you start to pick and choose what to approach next. There is a real joy in cutting about the world with wild abandon, neatly closing the loop on one fantasy peril after another.
You could start playing this today, an hour at a time before bed, and you’d still be playing when the snow melted in Spring. Some portions of that adventure are better than others. Some are downright ugly. With those caveats, in its latest (and possibly definitive) incarnation, Dragon Quest III is a colourful, adventurous romp of wild goose chases, indistinct but compelling rumours, and tactical positioning: a miniature fantasy made grand.
Find out how we conduct our reviews by reading our review policy .
Dragon Quest III HD-2D Remake
Video Game
Rock Paper Shotgun is better when you sign in
Sign in and join us on our journey to discover strange and compelling PC games.

All 75 Arc Raiders Blueprints and where to get them
These areas have the highest chance of giving you Blueprints

Image credit:Rock Paper Shotgun/Embark Studios

Looking for more Arc Raiders Blueprints? It’s a special day when you find a Blueprint, as they’re among the most valuable items in Arc Raiders. If you find a Blueprint that you haven’t already found, then you must make sure you hold onto it at all costs, because Blueprints are the key to one of the most important and powerful systems of meta-progression in the game.
This guide aims to be the very best guide on Blueprints you can find, starting with a primer on what exactly they are and how they work in Arc Raiders, before delving into exactly where to get Blueprints and the very best farming spots for you to take in your search.
We’ll also go over how to get Blueprints from other unlikely activities, such as destroying Surveyors and completing specific quests. And you’ll also find the full list of all 75 Blueprints in Arc Raiders on this page (including the newest Blueprints added with the Cold Snap update , such as the Deadline Blueprint and Firework Box Blueprint), giving you all the information you need to expand your own crafting repertoire.
In this guide:
- What are Blueprints in Arc Raiders?
- Full Blueprint list: All crafting recipes
- Where to find Blueprints in Arc Raiders Blueprints obtained from quests Blueprints obtained from Trials Best Blueprint farming locations

What are Blueprints in Arc Raiders?
Blueprints in Arc Raiders are special items which, if you manage to extract with them, you can expend to permanently unlock a new crafting recipe in your Workshop. If you manage to extract from a raid with an Anvil Blueprint, for example, you can unlock the ability to craft your very own Anvil Pistol, as many times as you like (as long as you have the crafting materials).
To use a Blueprint, simply open your Inventory while in the lobby, then right-click on the Blueprint and click “Learn And Consume” . This will permanently unlock the recipe for that item in your Workshop. As of the Stella Montis update, there are allegedly 75 different Blueprints to unlock - although only 68 are confirmed to be in the game so far. You can see all the Blueprints you’ve found and unlocked by going to the Workshop menu, and hitting “R” to bring up the Blueprint screen.
It’s possible to find duplicates of past Blueprints you’ve already unlocked. If you find these, then you can either sell them, or - if you like to play with friends - you can take it into a match and gift it to your friend so they can unlock that recipe for themselves. Another option is to keep hold of them until the time comes to donate them to the Expedition.
Full Blueprint list: All crafting recipes
Below is the full list of all the Blueprints that are currently available to find in Arc Raiders, and the crafting recipe required for each item:
| Blueprint | Type | Recipe | Crafted At |
|---|---|---|---|
| Bettina | Weapon | 3x Advanced Mechanical Components 3x Heavy Gun Parts 3x Canister | Gunsmith 3 |
| Blue Light Stick | Quick Use | 3x Chemicals | Utility Station 1 |
| Aphelion | Weapon | 3x Magnetic Accelerator 3x Complex Gun Parts 1x Matriarch Reactor | Gunsmith 3 |
| Combat Mk. 3 (Flanking) | Augment | 2x Advanced Electrical Components 3x Processor | Gear Bench 3 |
| Combat Mk. 3 (Aggressive) | Augment | 2x Advanced Electrical Components 3x Processor | Gear Bench 3 |
| Complex Gun Parts | Material | 2x Light Gun Parts 2x Medium Gun Parts 2x Heavy Gun Parts | Refiner 3 |
| Fireworks Box | Quick Use | 1x Explosive Compound 3x Pop Trigger | Explosives Station 2 |
| Gas Mine | Mine | 4x Chemicals 2x Rubber Parts | Explosives Station 1 |
| Green Light Stick | Quick Use | 3x Chemicals | Utility Station 1 |
| Pulse Mine | Mine | 1x Crude Explosives 1x Wires | Explosives Station 1 |
| Seeker Grenade | Grenade | 1x Crude Explosives 2x ARC Alloy | Explosives Station 1 |
| Looting Mk. 3 (Survivor) | Augment | 2x Advanced Electrical Components 3x Processor | Gear Bench 3 |
| Angled Grip II | Mod | 2x Mechanical Components 3x Duct Tape | Gunsmith 2 |
| Angled Grip III | Mod | 2x Mod Components 5x Duct Tape | Gunsmith 3 |
| Hullcracker | Weapon | 1x Magnetic Accelerator 3x Heavy Gun Parts 1x Exodus Modules | Gunsmith 3 |
| Launcher Ammo | Ammo | 5x Metal Parts 1x Crude Explosives | Workbench 1 |
| Anvil | Weapon | 5x Mechanical Components 5x Simple Gun Parts | Gunsmith 2 |
| Anvil Splitter | Mod | 2x Mod Components 3x Processor | Gunsmith 3 |
| ??? | ??? | ??? | ??? |
| Barricade Kit | Quick Use | 1x Mechanical Components | Utility Station 2 |
| Blaze Grenade | Grenade | 1x Explosive Compound 2x Oil | Explosives Station 3 |
| Bobcat | Weapon | 3x Advanced Mechanical Components 3x Light Gun Parts | Gunsmith 3 |
| Osprey | Weapon | 2x Advanced Mechanical Components 3x Medium Gun Parts 7x Wires | Gunsmith 3 |
| Burletta | Weapon | 3x Mechanical Components 3x Simple Gun Parts | Gunsmith 1 |
| Compensator II | Mod | 2x Mechanical Components 4x Wires | Gunsmith 2 |
| Compensator III | Mod | 2x Mod Components 8x Wires | Gunsmith 3 |
| Defibrillator | Quick Use | 9x Plastic Parts 1x Moss | Medical Lab 2 |
| ??? | ??? | ??? | ??? |
| Equalizer | Weapon | 3x Magnetic Accelerator 3x Complex Gun Parts 1x Queen Reactor | Gunsmith 3 |
| Extended Barrel | Mod | 2x Mod Components 8x Wires | Gunsmith 3 |
| Extended Light Mag II | Mod | 2x Mechanical Components 3x Steel Spring | Gunsmith 2 |
| Extended Light Mag III | Mod | 2x Mod Components 5x Steel Spring | Gunsmith 3 |
| Extended Medium Mag II | Mod | 2x Mechanical Components 3x Steel Spring | Gunsmith 2 |
| Extended Medium Mag III | Mod | 2x Mod Components 5x Steel Spring | Gunsmith 3 |
| Extended Shotgun Mag II | Mod | 2x Mechanical Components 3x Steel Spring | Gunsmith 2 |
| Extended Shotgun Mag III | Mod | 2x Mod Components 5x Steel Spring | Gunsmith 3 |
| Remote Raider Flare | Quick Use | 2x Chemicals 4x Rubber Parts | Utility Station 1 |
| Heavy Gun Parts | Material | 4x Simple Gun Parts | Refiner 2 |
| Venator | Weapon | 2x Advanced Mechanical Components 3x Medium Gun Parts 5x Magnet | Gunsmith 3 |
| Il Toro | Weapon | 5x Mechanical Components 6x Simple Gun Parts | Gunsmith 1 |
| Jolt Mine | Mine | 1x Electrical Components 1x Battery | Explosives Station 2 |
| Explosive Mine | Mine | 1x Explosive Compound 1x Sensors | Explosives Station 3 |
| Jupiter | Weapon | 3x Magnetic Accelerator 3x Complex Gun Parts 1x Queen Reactor | Gunsmith 3 |
| Light Gun Parts | Material | 4x Simple Gun Parts | Refiner 2 |
| Lightweight Stock | Mod | 2x Mod Components 5x Duct Tape | Gunsmith 3 |
| Lure Grenade | Grenade | 1x Speaker Component 1x Electrical Components | Utility Station 2 |
| Medium Gun Parts | Material | 4x Simple Gun Parts | Refiner 2 |
| Torrente | Weapon | 2x Advanced Mechanical Components 3x Medium Gun Parts 6x Steel Spring | Gunsmith 3 |
| Muzzle Brake II | Mod | 2x Mechanical Components 4x Wires | Gunsmith 2 |
| Muzzle Brake III | Mod | 2x Mod Components 8x Wires | Gunsmith 3 |
| Padded Stock | Mod | 2x Mod Components 5x Duct Tape | Gunsmith 3 |
| Shotgun Choke II | Mod | 2x Mechanical Components 4x Wires | Gunsmith 2 |
| Shotgun Choke III | Mod | 2x Mod Components 8x Wires | Gunsmith 3 |
| Shotgun Silencer | Mod | 2x Mod Components 8x Wires | Gunsmith 3 |
| Showstopper | Grenade | 1x Advanced Electrical Components 1x Voltage Converter | Explosives Station 3 |
| Silencer I | Mod | 2x Mechanical Components 4x Wires | Gunsmith 2 |
| Silencer II | Mod | 2x Mod Components 8x Wires | Gunsmith 3 |
| Snap Hook | Quick Use | 2x Power Rod 3x Rope 1x Exodus Modules | Utility Station 3 |
| Stable Stock II | Mod | 2x Mechanical Components 3x Duct Tape | Gunsmith 2 |
| Stable Stock III | Mod | 2x Mod Components 5x Duct Tape | Gunsmith 3 |
| Tagging Grenade | Grenade | 1x Electrical Components 1x Sensors | Utility Station 3 |
| Tempest | Weapon | 3x Advanced Mechanical Components 3x Medium Gun Parts 3x Canister | Gunsmith 3 |
| Trigger Nade | Grenade | 2x Crude Explosives 1x Processor | Explosives Station 2 |
| Vertical Grip II | Mod | 2x Mechanical Components 3x Duct Tape | Gunsmith 2 |
| Vertical Grip III | Mod | 2x Mod Components 5x Duct Tape | Gunsmith 3 |
| Vita Shot | Quick Use | 2x Antiseptic 1x Syringe | Medical Lab 3 |
| Vita Spray | Quick Use | 3x Antiseptic 1x Canister | Medical Lab 3 |
| Vulcano | Weapon | 1x Magnetic Accelerator 3x Heavy Gun Parts 1x Exodus Modules | Gunsmith 3 |
| Wolfpack | Grenade | 2x Explosive Compound 2x Sensors | Explosives Station 3 |
| Red Light Stick | Quick Use | 3x Chemicals | Utility Station 1 |
| Smoke Grenade | Grenade | 14x Chemicals 1x Canister | Utility Station 2 |
| Deadline | Mine | 3x Explosive Compound 2x ARC Circuitry | Explosives Station 3 |
| Trailblazer | Grenade | 1x Explosive Compound 1x Synthesized Fuel | Explosives Station 3 |
| Tactical Mk. 3 (Defensive) | Augment | 2x Advanced Electrical Components 3x Processor | Gear Bench 3 |
| Tactical Mk. 3 (Healing) | Augment | 2x Advanced Electrical Components 3x Processor | Gear Bench 3 |
| Yellow Light Stick | Quick Use | 3x Chemicals | Utility Station 1 |
Note: The missing Blueprints in this list likely have not actually been added to the game at the time of writing, because none of the playerbase has managed to find any of them. As they are added to the game, I will update this page with the most relevant information so you know exactly how to get all 75 Arc Raiders Blueprints.
Where to find Blueprints in Arc Raiders
Below is a list of all containers, modifiers, and events which maximise your chances of finding Blueprints:
- Certain quests reward you with specific Blueprints .
- Completing Trials has a high chance of offering Blueprints as rewards.
- Surveyors have a decent chance of dropping Blueprints on death.
- High loot value areas tend to have a greater chance of spawning Blueprints.
- Night Raids and Storms may increase rare Blueprint spawn chances in containers.
- Containers with higher numbers of items may have a higher tendency to spawn Blueprints. As a result, Blue Gate (which has many “large” containers containing multiple items) may give you a higher chance of spawning Blueprints.
- Raider containers (Raider Caches, Weapon Boxes, Medical Bags, Grenade Tubes) have increased Blueprint drop rates. As a result, the Uncovered Caches event gives you a high chance of finding Blueprints.
- Security Lockers have a higher than average chance of containing Blueprints.
- Certain Blueprints only seem to spawn under specific circumstances: Tempest Blueprint only spawns during Night Raid events. Vulcano Blueprint only spawns during Hidden Bunker events. Jupiter and Equaliser Blueprints only spawn during Harvester events.

Raider Caches, Weapon Boxes, and other raider-oriented container types have a good chance of offering Blueprints. |Image credit:Rock Paper Shotgun/Embark Studios
Blueprints have a very low chance of spawning in any container in Arc Raiders, around 1-2% on average. However, there is a higher chance of finding Blueprints in particular container types. Specifically, you can find more Blueprints in Raider containers and security lockers.
Beyond this, if you’re looking for Blueprints you should focus on regions of the map which are marked as having particularly high-value loot. Areas such as the Control Tower in Dam Battlegrounds, the Arrival and Departure Buildings in Spaceport, and Pilgrim’s Peak in Blue Gate all have a better-than-average chance of spawning Blueprints somewhere amongst all their containers. Night Raids and Electromagnetic Storm events also increase the drop chances of certain Blueprints .
In addition to these containers, you can often loot Blueprints from destroyed Surveyors - the largest of the rolling ball ARC. Surveyors are more commonly found on the later maps - Spaceport and Blue Gate - and if one spawns in your match, you’ll likely see it by the blue laser beam that it casts into the sky while “surveying”.
Surveyors are quite well-armoured and will very speedily run away from you once it notices you, but if you can take one down then make sure you loot all its parts for a chance of obtaining certain unusual Blueprints.
Blueprints obtained from quests
One way in which you can get Blueprints is by completing certain quests for the vendors in Speranza. Some quests will reward you with a specific item Blueprint upon completion, so as long as you work through all the quests in Arc Raiders, you are guaranteed those Blueprints.
Here is the full list of all Blueprints you can get from quest rewards:
- Trigger Nade Blueprint: Rewarded after completing “Sparks Fly”.
- Lure Grenade Blueprint: Rewarded after completing “Greasing Her Palms”.
- Burletta Blueprint: Rewarded after completing “Industrial Espionage”.
- Hullcracker Blueprint (and Launcher Ammo Blueprint): Rewarded after completing “The Major’s Footlocker”.
Alas, that’s only 4 Blueprints out of a total of 75 to unlock, so for the vast majority you will need to find them yourself during a raid. If you’re intent on farming Blueprints, then it’s best to equip yourself with cheap gear in case you lose it, but don’t use a free loadout because then you won’t get a safe pocket to stash any new Blueprint you find. No pain in Arc Raiders is sharper than failing to extract with a new Blueprint you’ve been after for a dozen hours already.

One of the best ways to get Blueprints is by hitting three stars on all five Trials every week. |Image credit:Rock Paper Shotgun/Embark Studios
Blueprints obtained from Trials
One of the very best ways to get Blueprints is as rewards for completing Trials in Arc Raiders. Trials are unlocked from Level 15 onwards, and allow you to earn rewards by focusing on certain tasks over the course of several raids. For example, one Trial might task you with dealing damage to Hornets, while another might challenge you to loot Supply Drops.
Trials refresh on a weekly basis, with a new week bringing five new Trials. Each Trial can offer up to three rewards after passing certain score milestones, and it’s possible to receive very high level loot from these reward crates - including Blueprints. So if you want to unlock as many Blueprints as possible, you should make a point of completing as many Trials as possible each week.
Best Blueprint farming locations
The very best way to get Blueprints is to frequent specific areas of the maps which combine high-tier loot pools with the right types of containers to search. Here are my recommendations for where to find Blueprints on every map, so you can always keep the search going for new crafting recipes to unlock.

Image credit:Rock Paper Shotgun/Embark Studios
Dam Battlegrounds
The best places to farm Blueprints on Dam Battlegrounds are the Control Tower, Power Generation Complex, Ruby Residence, and Pale Apartments . The first two regions, despite only being marked on the map as mid-tier loot, contain a phenomenal number of containers to loot. The Control Tower can also contain a couple of high-tier Security Lockers - though of course, you’ll need to have unlocked the Security Breach skill at the end of the Survival tree.
There’s also a lot of reporting amongst the playerbase that the Residential areas in the top-left of the map - Pale Apartments and Ruby Residence - give you a comparatively strong chance of finding Blueprints. Considering their size, there’s a high density of containers to loot in both locations, and they also have the benefit of being fairly out of the way. So you’re more likely to have all the containers to yourself.
Buried City
The best Blueprint farming locations on Buried City are the Santa Maria Houses, Grandioso Apartments, Town Hall, and the various buildings of the New District . Grandioso Apartments has a lower number of containers than the rest, but a high chance of spawning weapon cases - which have good Blueprint drop rates. The others are high-tier loot areas, with plenty of lootable containers - including Security Lockers.
Spaceport
The best places to find Blueprints on Spaceport are the Arrival and Departure Buildings, as well as Control Tower A6 and the Launch Towers . All these areas are labelled as high-value loot regions, and many of them are also very handily connected to one another by the Spaceport wall, which you can use to quickly run from one area to the next. At the tops of most of these buildings you’ll find at least one Security Locker, so this is an excellent farming route for players looking to find Blueprints.
The downside to looting Blueprints on Spaceport is that all these areas are hotly contested, particularly in Duos and Squads. You’ll need to be very focused and fast in order to complete the full farming route.

Image credit:Rock Paper Shotgun/Embark Studios
Blue Gate
Blue Gate tends to have a good chance of dropping Blueprints, potentially because it generally has a high number of containers which can hold lots of items; so there’s a higher chance of a Blueprint spawning in each container. In my experience, the best Blueprint farming spots on Blue Gate are Pilgrim’s Peak, Raider’s Refuge, the Ancient Fort, and the Underground Complex beneath the Warehouse .
All of these areas contain a wealth of containers to loot. Raider’s Refuge has less to loot, but the majority of the containers in and around the Refuge are raider containers, which have a high chance of containing Blueprints - particularly during major events.
Stella Montis
On the whole, Stella Montis seems to have a very low drop rate for Blueprints (though a high chance of dropping other high-tier loot). If you do want to try farming Blueprints on this map, the best places to find Blueprints in Stella Montis are Medical Research, Assembly Workshop, and the Business Center . These areas have the highest density of containers to loot on the map.
In addition to this, the Western Tunnel has a few different Security Lockers to loot, so while there’s very little to loot elsewhere in this area of the map, it’s worth hitting those Security Lockers if you spawn there at the start of a match.
That wraps up this primer on how to get all the Blueprints in Arc Raiders as quickly as possible. With the Expedition system constantly resetting a large number of players’ Blueprints, it’s more important than ever to have the most up-to-date information on where to find all these Blueprints.
While you’re here, be sure to check out our Arc Raiders best guns tier list , as well as our primers on the best skills to unlock and all the different Field Depot locations on every map.

ARC Raiders
PS5 , Xbox Series X/S , PC
Rock Paper Shotgun is better when you sign in
Sign in and join us on our journey to discover strange and compelling PC games.
