Call of Duty: Black Ops 6 performs well on PC – shame about the launcher
Running in the 90s
Image credit:Rock Paper Shotgun/Activision

It’s always nice to say that a big, look-how-much-we-spent-on-pore-rendering AAA game actually runs quite well on PC, as Call of Duty: Black Ops 6 does. Unfortunately for Bl6ps, and for us, that technical success is balanced on the knife tip of some seriously overwrought infrastructure. Mainly in the form the UX nightmare that is the Call of Duty HQ launcher, as well as a meddlesome always-online requirement , itself serving a feature that doesn’t even work that well.
If you can elbow your way past those, than Black Ops 6 will at least make nice with premium rigs and dusty old desktops alike. I’ve put together a settings guide below, but you’re unlikely to end up begging for framerate scraps even on relatively weak graphics cards, especially if you take advantage of its DLSS and FSR upscaling support.

Here, though, we’ll focus on native Windows running: first, how Black Ops 6 performs on different GPUs, and second, how you can get the most out of its many, many graphics options.
Image credit:Rock Paper Shotgun/Activision
Call of Duty: Black Ops 6 system requirements and PC performance
As far the holy trinity of CPU, GPU, and RAM are concerned, Black Ops 6 probably won’t trouble most rigs. It’s still a gigantic SSD hog, mind, despite the newfound reliance on an over-the-Internet texture streaming technique that intends to cut down on install size by ad-hoc yoinking textures from the cloud instead.
This is where that always-online requirement comes from, as even the singleplayer campaign makes heavy use of streamed-in textures. You can tell because, sadly, they often take their sweet time arriving, leading to a lot of cutscenes and transitions where various textures will look like they just spilled out the back of an N64. Like this bloke’s sleeves:
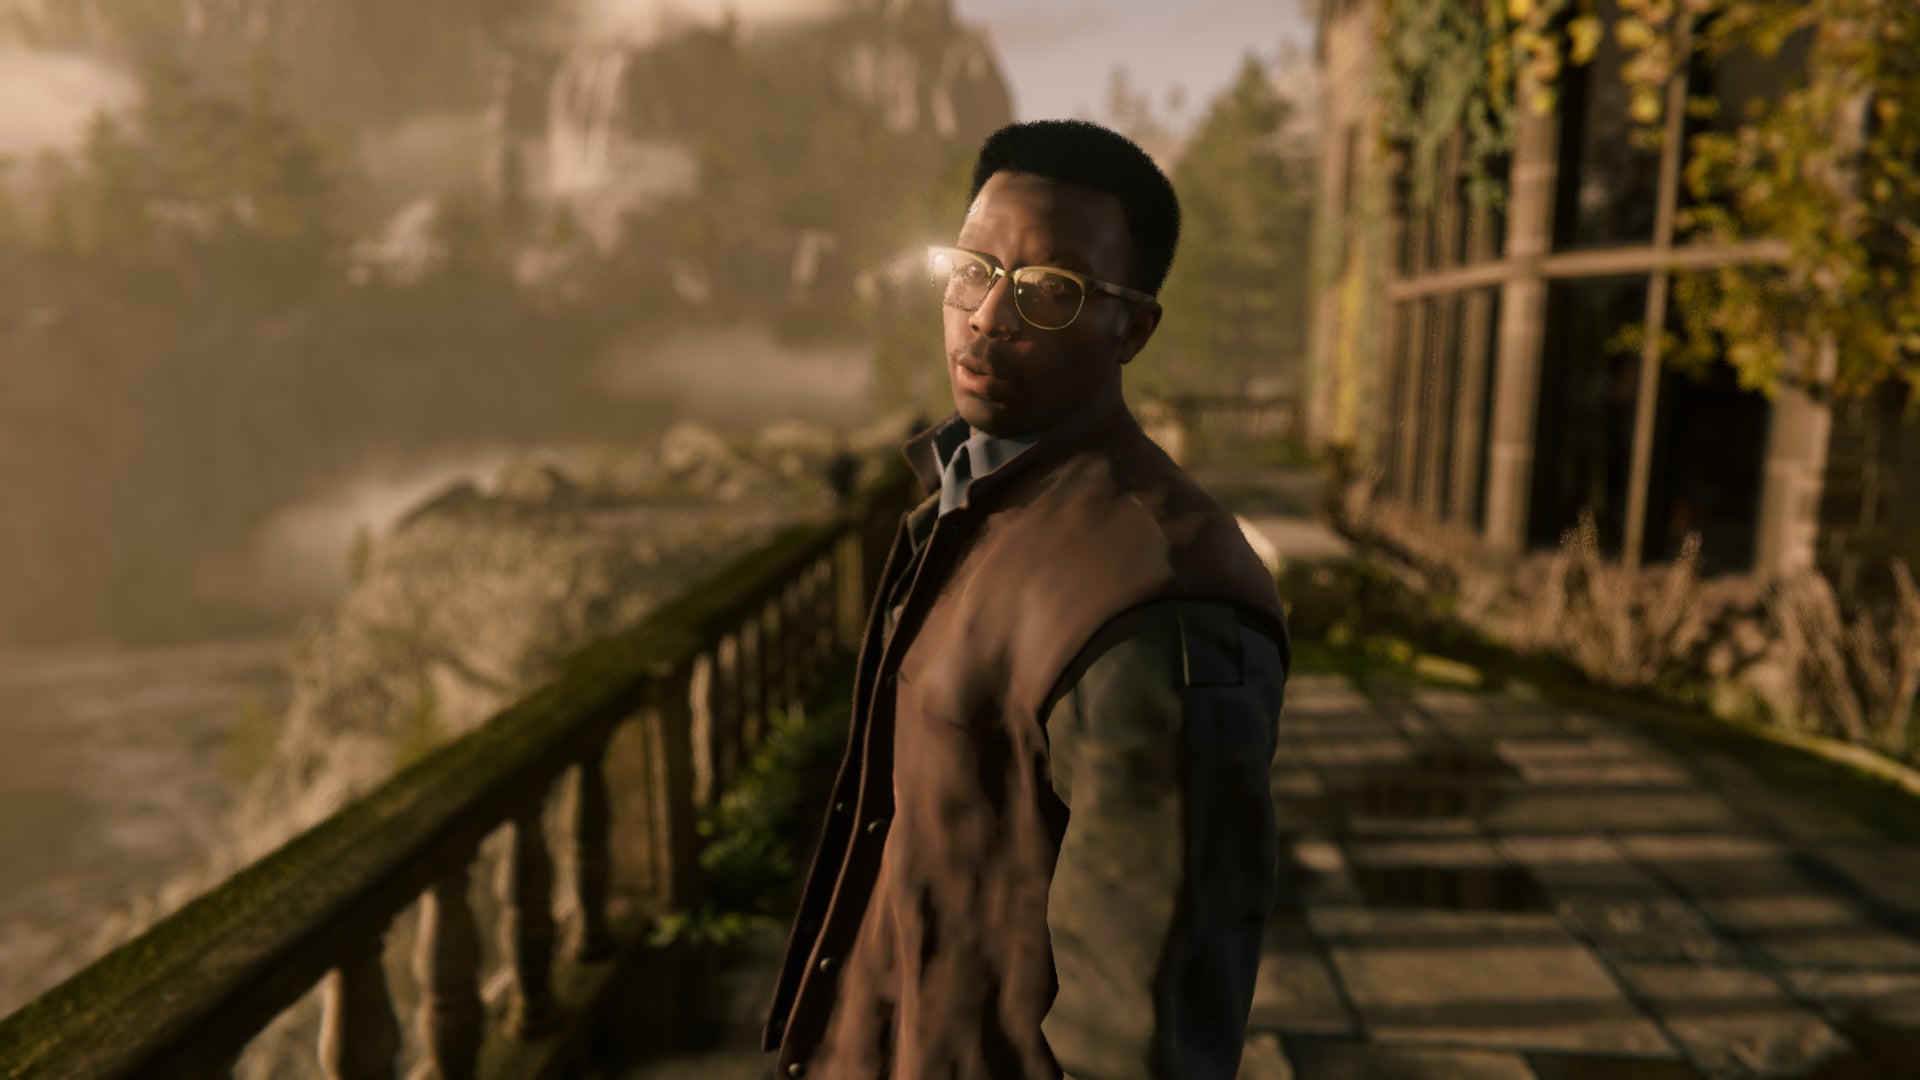
Image credit:Rock Paper Shotgun/Activision
This would make the online demand look silly by itself, but it’s not like it’s slimmed Black Ops 6 down to a sliver either. The COD HQ launcher, campaign and multiplayer components still add up to over 100GB.
Call of Duty: Black Ops 6 minimum PC specs
- OS: Windows 10 64-bit
- GPU: Nvidia GeForce GTX 960 / GTX 1650 / AMD Radeon RX 470
- Storage: 149GB SSD (78GB if COD HQ and Warzone are already installed)
- CPU: Intel Core i5-6600 / AMD Ryzen 5 1400
- RAM: 8GB
- Internet: Broadband Internet connection
Call of Duty: Black Ops 6 recommended PC specs
- OS: Windows 10 64-bit
- GPU: Nvidia GeForce GTX 1080 Ti / RTX 3060 / AMD Radeon RX 6600 XT / Intel Arc A770
- Storage: 149GB SSD (78GB if COD HQ and Warzone are already installed)
- CPU: Intel Core i7-6700K / AMD Ryzen 5 1600X
- RAM: 16GB
- Internet: Broadband Internet connection
Once you’ve made room, you can also look forward to one of the most miserable startup experiences in all of FPSdom. First, there’s COD HQ, which seemingly exists as a marketing device for skin packs first and a launcher second. Assuming it even fancies doing the launching bit at all – I didn’t have this problem on desktop but on my main testing laptop, CDO HQ refused to acknowledge that I had access to Black Ops 6 via Game Pass, and merely redirected me to the Microsoft Store instead. Awful. If you can launch, then you’ll need to restart immediately to install updates, and then if you want to play the campaign rather than multiplayer, you’ll need to restart again , which is not only tedious but repeatedly interrupts the interminable shader caching process. Expect at least a 20 minute delay between firing up Black Ops 6 for the first time and it actually becoming playable.
The saving grace for all this nonsense is that once you’re finally playing, Black Ops 6 does roll along nicely, being capable of adapting to low-end PCs while scaling up to hit triple digit framerates on luxury hardware. Using my test rig – with its decent, if ageing Core i5-11600K and 16GB of RAM – in the multiplayer performance benchmark, I found the humble GTX 1050 Ti was enough to average 40fps at 1080p with a combination of the Minimum preset and FSR 3 on Balanced mode. I’m not convinced you need to go as far as the recommended specs’ GTX 1080 Ti or RTX 3060, either: a GTX 1070, on Balanced mode with FSR 3 on Quality, pumped out a very smooth 76fps.
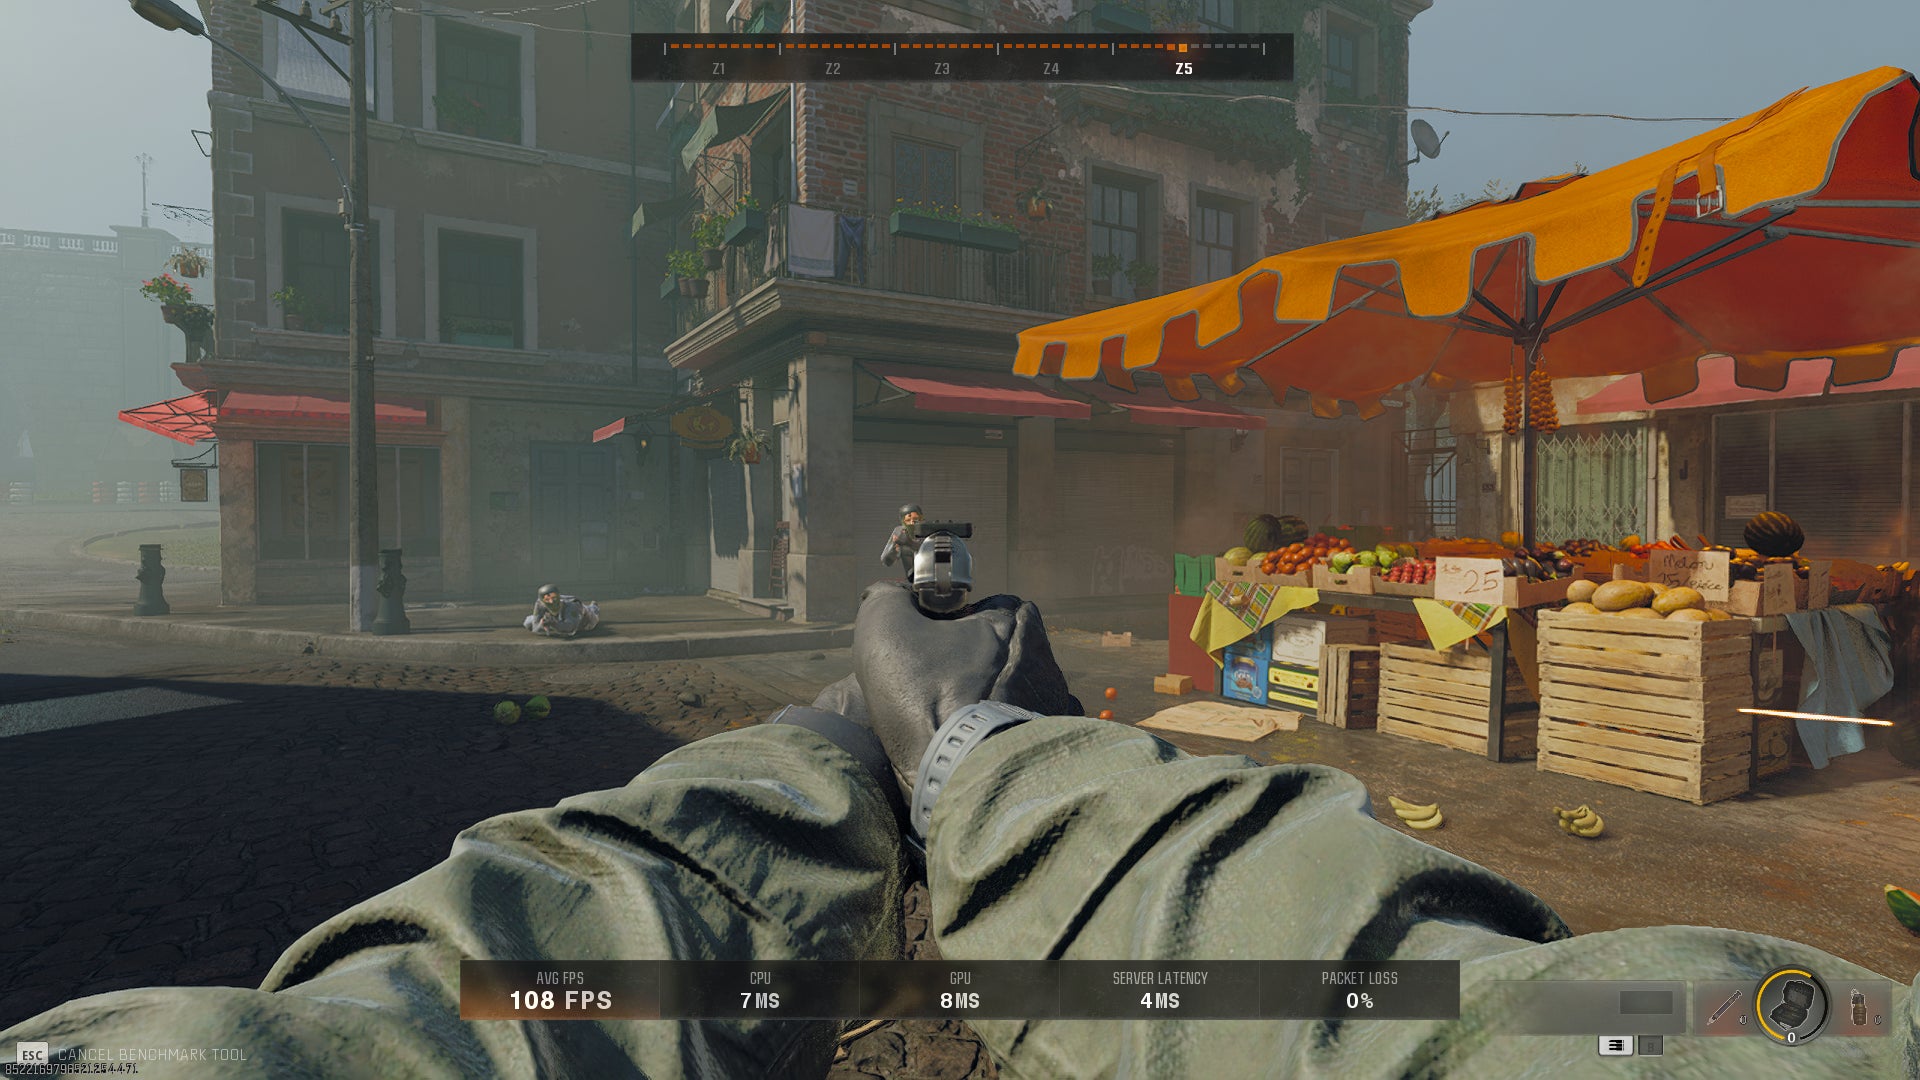
Image credit:Rock Paper Shotgun/Activision
As for newer gear, the RTX 4060 – which recently shot to 2nd on Steam’s most-used GPUs survey – could pull 57fps on the Extreme preset at 1080p with no upscaling at all, instead relying on DLAA for native-rez antialiasing. 1440p is possible on this card too, with Quality-level DLSS and the Ultra preset producing a 65fps average.
An RTX 4070 Ti , meanwhile, got me 119fps at 1440p with the Extreme preset and DLSS on Quality. Upping to 4K only dropped that to 80fps, proving that you don’t need the absolute top-shelf stuff to play Black Ops 6 at UHD. Though for the record, Nvidia’s RTX 4090 did score 113fps with the same settings.
It could still use some post-launch polish; I’ve seen a few flickering textures in both multiplayer and the campaign. But in strict performance terms, of keeping framerates high and seeing off stutter, Black Ops 6 does well. If only it wasn’t hitched to that rubbish launcher and wholly reliant on having a faultless net connection, yeah? I’ve even been booted out of the benchmark tool for a momentary Wi-Fi wobble. The benchmark tool!

Image credit:Rock Paper Shotgun/Activision
Call of Duty: Black Ops 6 best settings guide
I’ll say this: an offline mode toggle is probably the only setting that Black Ops 6 is missing. Its options menus are encyclopaedic in detail, including those for the display and graphics settings, which together offer several dozen individual choices to make about how the game looks and runs.
For this settings guide, I’ve focused my testing on the main graphics options, using an RTX 4060 running at 1080p to see how each one can improve (or hurt) average performance. Here’s one tip right off the bat, too: don’t just slap on a preset as it comes. These lean towards applying either AMD’s FidelityFX CAS or Nvidia Image Scaling in the upscaling field, when the better-looking FSR and DLSS are available instead. This makes the lower presets in particular look worse than they strictly need to.
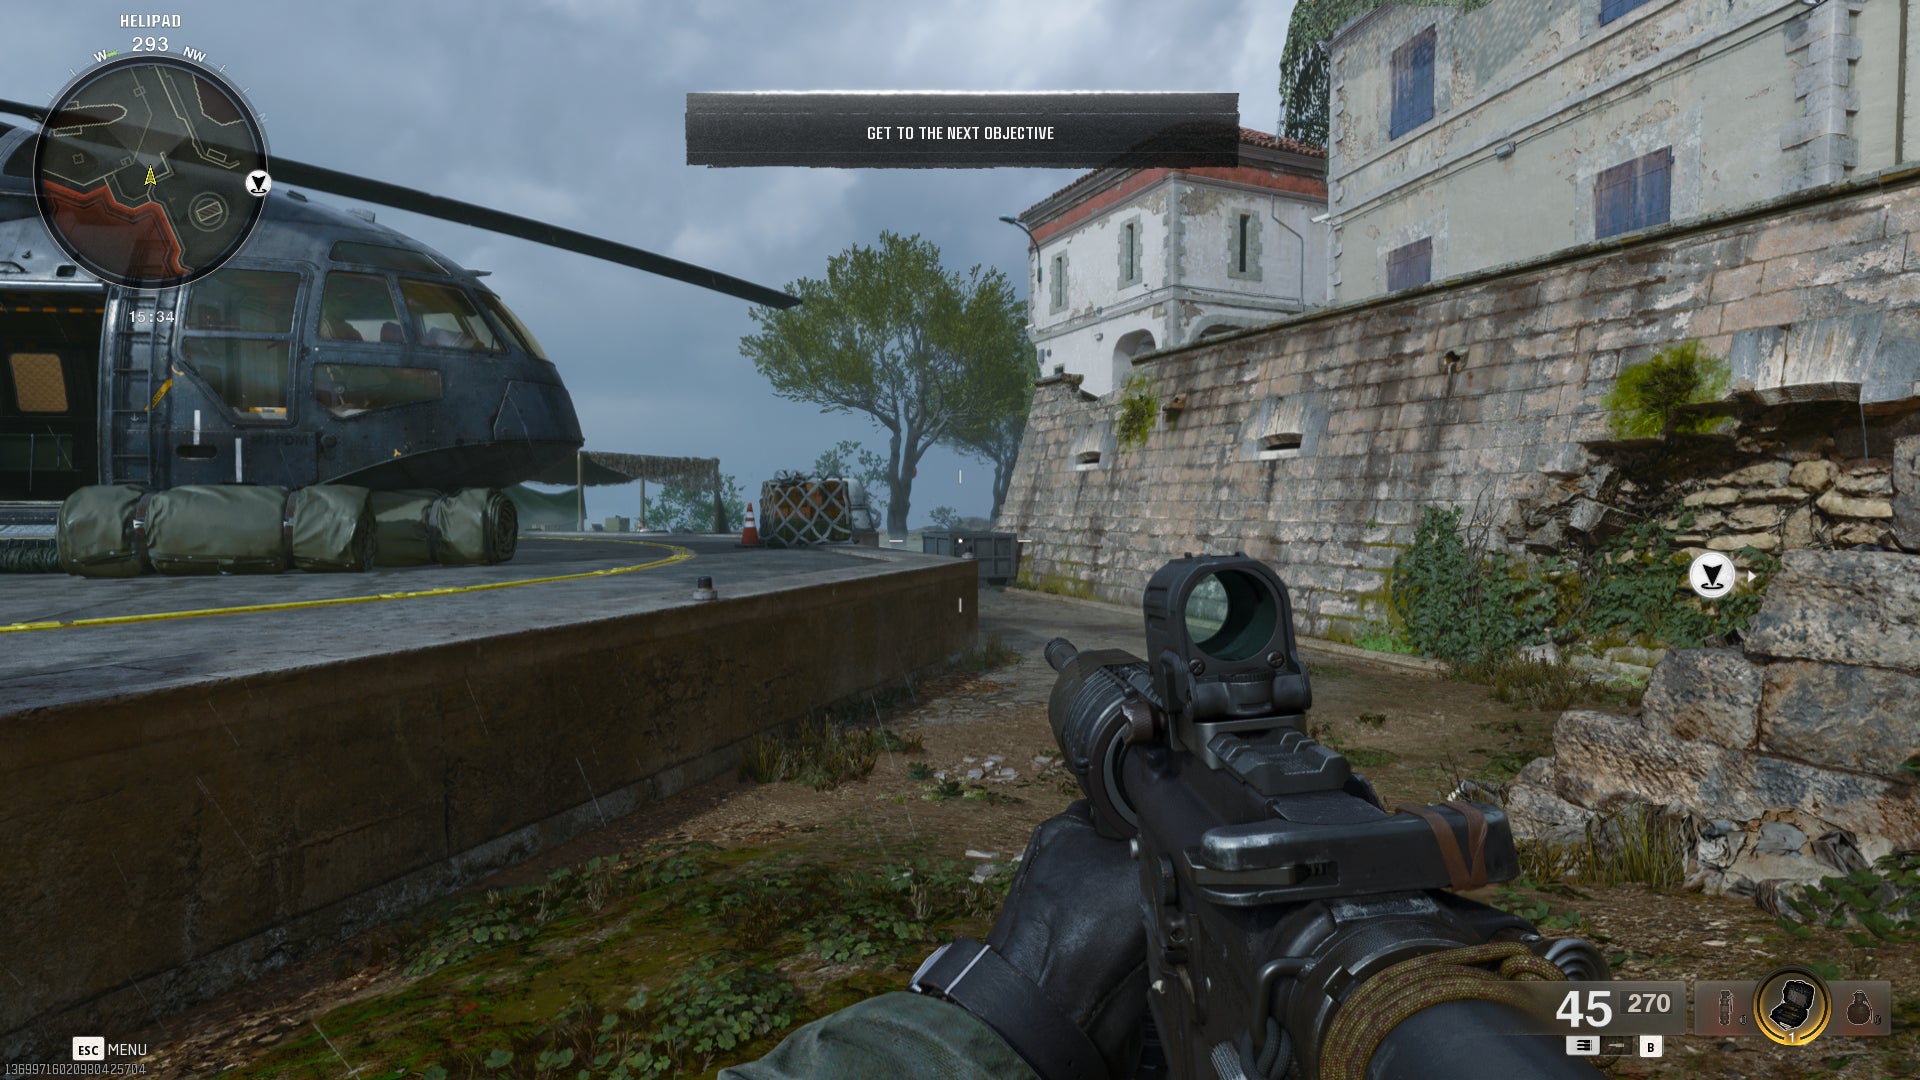
If you’re read one of these performance thingies before, you’ll know how it works. Using the RTX 4060’s Extreme preset average of 57fps as a starting point, I tried lowering each individual setting one by one to record how much of an impact they have on framerate output. By focusing your tweaks on the most speed-hungry settings, you should – in theory – get much faster performance without needing to drop others. Behold, results:
Upscaling/Sharpening: There are loads of options here, but DLSS and FSR 3 are both fast and sharper-looking, so they’re the only ones you need concern yourself with. As usual, DLSS is the best pick for GeForce RTX GPUs, landing a huge jump up to 84fps on Quality mode. FSR 3 was just behind, with 82fps, so that’s a fine alternative for AMD, Intel, and non-RTX Nvidia cards.
If you want to stick with native-rez rendering, you can still uses FSR 3 – just select Native as the mode instead of Quality. For RTX GPUs, you can select DLAA instead of DLSS, though honestly the performance benefit of upscaling is hard to pass up even at 1080p.
Texture resolution: Assuming they load in, eh? Eh? Eh. Low quality only nudged the RTX 4060 from 57fps to 59fps, so doesn’t make enough of a difference to seem worth it.
Texture filter anisotropic: Dropping this from Ultra to Normal only got the RTX 4060 up to 58fps, so again, you may as well leave it up.
Depth of field: You can turn this off if you simply don’t like the effect, which Blopsix does lay on rather heavily. It won’t noticeably aid performance, though, as I recorded 58fps with it disabled.
Detail quality: Another 58fps from the Low setting. Skip it.
Particle resolution: Hmm. Maaaaaaybe? 60fps from the Low setting suggests this might be worth cutting on lower-end PCs, though it’s unlikely to be a difference-maker on more capable hardware,
Bullet impacts: Just 58fps (again) from Low means you can keep those bullet holes in place.
Persistent effects: An odd one, this, for two reasons. One, it’s disabled on the Extreme preset, meaning Extreme does not in fact produce the highest image quality possible. Two, enabling it didn’t reduce performance at all – the RTX 4060 actually crept upwards, to 59fps. Does it make sense? No. Should you turn it on anyway? Also yes.
Shader quality: Easily one of the more impactful settings, with Low shaders shooting average performance up to 75fps. However, I’d suggest trying Medium first. This still got me a nudge up to 63fps, around a 10% improvement, and Medium looks far better than Low.
On-demand texture streaming: Swapping from Optimized to Minimal only shifted performance up to 59fps, which ain’t much. Considering the main problem with this texture streaming lark is the speed at which they load in, not the volume, it’s better to keep this on Optimized.
Local texture streaming quality: Likewise, there’s little to be gained from the Low setting, which only produced 59fps.
Shadow quality: This is one of the few where you can afford to slice the quality right down. Low-level shadows still look alright, and got my RTX 4060 up to 63fps by themselves.
Screen space shadows: These offer less of a framerate bounty than standard shadows. Turning them off completely only resulted in a 60fps average, in exchange for a relatively stark quality loss, and the Low setting wasn’t much better with 59fps. I’d stick to High.
Occlusion and screen space lighting: You may want to consider lowering this if you’re on an older PC, as dropping from Ultra to Off netted me 61fps. At the same time, you get a bigger improvement from lowering shadow quality, and keeping this setting up high helps keep things looking good.
Screen space reflections: I ummed and ahhed about this, as disabling SSR did get me up to 63fps. It’s a steep quality drop, though, so ultimately I’d recommend keeping these on if you can afford to.
Static reflection quality: Another slice of meh, with Low only producing 59fps to the High’s 57fps. Go with the latter.
Tessellation: Curiously, this doesn’t really affect performance regardless of which you choose, including disabling it entirely. Just leave it on.
Volumetric quality: You can tone this down with any serious drawback. All the way down to Low, which produced 63fps.
Deferred physics quality: Turn this off, I say. The effects are barely noticeable, and the jump to 62fps is an enticing one.
Weather grid volumes: Leave this on Ultra; the Low setting amounted to a mere 2fps boost, up to 59fps.
Water quality: Most PCs can leave this on max. There is a smidge of performance to be gained by disabling it, 60fps in the RTX 4060’s case, but it’s not a priority.
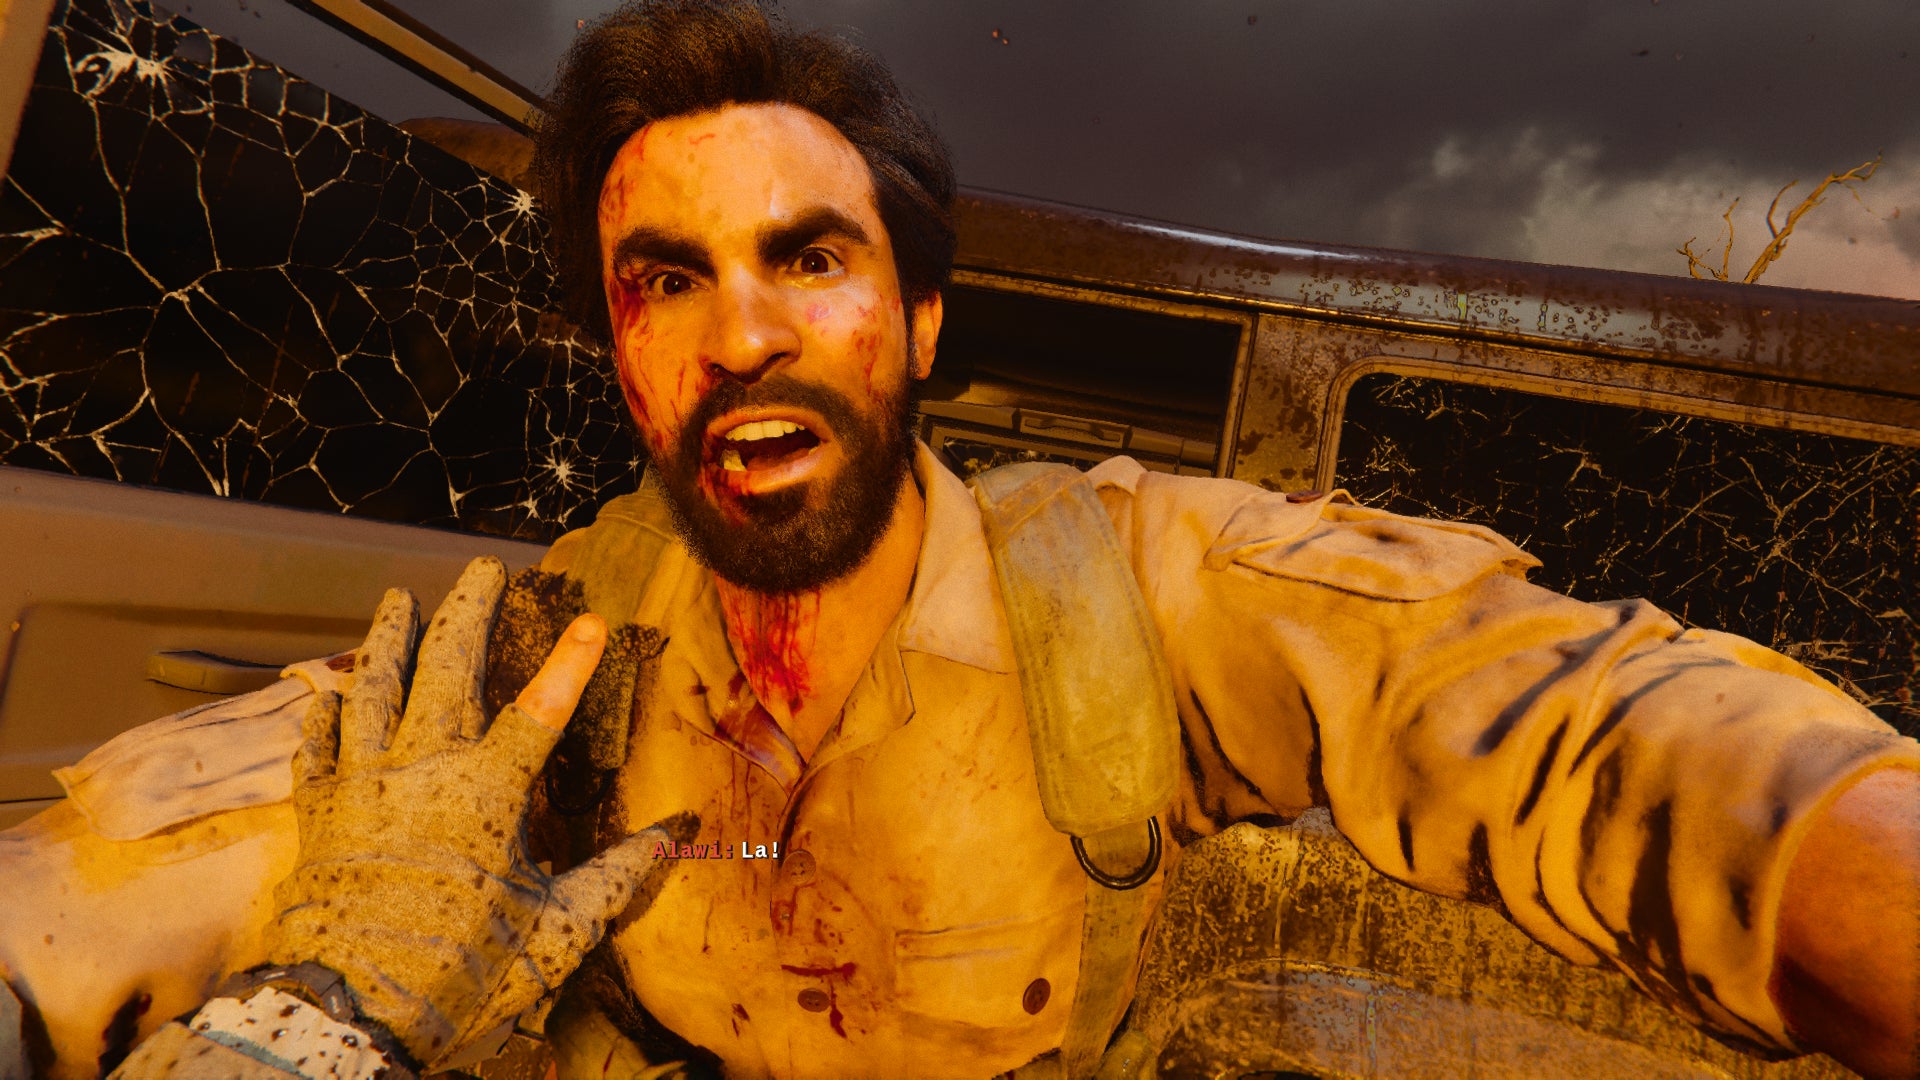
Image credit:Rock Paper Shotgun/Activision
Sticking with the juiciest settings gives us this combination, which honestly doesn’t look much worse than Extreme – but does run significantly faster.
- Upscaling/Sharpening: DLSS or FSR 3 on Quality
- Persistent effects: On
- Shader quality: Medium
- Shadow quality: Low
- Volumetric quality: Low
- Deferred physics quality: Off
- Everything else: Extreme preset equivalent
112fps, to be exact, or very nearly double what the Extreme preset delivered out of the box. Much of that improvement does come from upscaling, but DLSS and FSR have both improved to the point where you can deploy them at 1080p without too much loss the overall sharpness.


Call of Duty: Black Ops 6
PS4 , PS5 , Xbox One , Xbox Series X/S , PC
Rock Paper Shotgun is better when you sign in
Sign in and join us on our journey to discover strange and compelling PC games.

All 75 Arc Raiders Blueprints and where to get them
These areas have the highest chance of giving you Blueprints

Image credit:Rock Paper Shotgun/Embark Studios

Looking for more Arc Raiders Blueprints? It’s a special day when you find a Blueprint, as they’re among the most valuable items in Arc Raiders. If you find a Blueprint that you haven’t already found, then you must make sure you hold onto it at all costs, because Blueprints are the key to one of the most important and powerful systems of meta-progression in the game.
This guide aims to be the very best guide on Blueprints you can find, starting with a primer on what exactly they are and how they work in Arc Raiders, before delving into exactly where to get Blueprints and the very best farming spots for you to take in your search.
We’ll also go over how to get Blueprints from other unlikely activities, such as destroying Surveyors and completing specific quests. And you’ll also find the full list of all 75 Blueprints in Arc Raiders on this page (including the newest Blueprints added with the Cold Snap update , such as the Deadline Blueprint and Firework Box Blueprint), giving you all the information you need to expand your own crafting repertoire.
In this guide:
- What are Blueprints in Arc Raiders?
- Full Blueprint list: All crafting recipes
- Where to find Blueprints in Arc Raiders Blueprints obtained from quests Blueprints obtained from Trials Best Blueprint farming locations

What are Blueprints in Arc Raiders?
Blueprints in Arc Raiders are special items which, if you manage to extract with them, you can expend to permanently unlock a new crafting recipe in your Workshop. If you manage to extract from a raid with an Anvil Blueprint, for example, you can unlock the ability to craft your very own Anvil Pistol, as many times as you like (as long as you have the crafting materials).
To use a Blueprint, simply open your Inventory while in the lobby, then right-click on the Blueprint and click “Learn And Consume” . This will permanently unlock the recipe for that item in your Workshop. As of the Stella Montis update, there are allegedly 75 different Blueprints to unlock - although only 68 are confirmed to be in the game so far. You can see all the Blueprints you’ve found and unlocked by going to the Workshop menu, and hitting “R” to bring up the Blueprint screen.
It’s possible to find duplicates of past Blueprints you’ve already unlocked. If you find these, then you can either sell them, or - if you like to play with friends - you can take it into a match and gift it to your friend so they can unlock that recipe for themselves. Another option is to keep hold of them until the time comes to donate them to the Expedition.
Full Blueprint list: All crafting recipes
Below is the full list of all the Blueprints that are currently available to find in Arc Raiders, and the crafting recipe required for each item:
| Blueprint | Type | Recipe | Crafted At |
|---|---|---|---|
| Bettina | Weapon | 3x Advanced Mechanical Components 3x Heavy Gun Parts 3x Canister | Gunsmith 3 |
| Blue Light Stick | Quick Use | 3x Chemicals | Utility Station 1 |
| Aphelion | Weapon | 3x Magnetic Accelerator 3x Complex Gun Parts 1x Matriarch Reactor | Gunsmith 3 |
| Combat Mk. 3 (Flanking) | Augment | 2x Advanced Electrical Components 3x Processor | Gear Bench 3 |
| Combat Mk. 3 (Aggressive) | Augment | 2x Advanced Electrical Components 3x Processor | Gear Bench 3 |
| Complex Gun Parts | Material | 2x Light Gun Parts 2x Medium Gun Parts 2x Heavy Gun Parts | Refiner 3 |
| Fireworks Box | Quick Use | 1x Explosive Compound 3x Pop Trigger | Explosives Station 2 |
| Gas Mine | Mine | 4x Chemicals 2x Rubber Parts | Explosives Station 1 |
| Green Light Stick | Quick Use | 3x Chemicals | Utility Station 1 |
| Pulse Mine | Mine | 1x Crude Explosives 1x Wires | Explosives Station 1 |
| Seeker Grenade | Grenade | 1x Crude Explosives 2x ARC Alloy | Explosives Station 1 |
| Looting Mk. 3 (Survivor) | Augment | 2x Advanced Electrical Components 3x Processor | Gear Bench 3 |
| Angled Grip II | Mod | 2x Mechanical Components 3x Duct Tape | Gunsmith 2 |
| Angled Grip III | Mod | 2x Mod Components 5x Duct Tape | Gunsmith 3 |
| Hullcracker | Weapon | 1x Magnetic Accelerator 3x Heavy Gun Parts 1x Exodus Modules | Gunsmith 3 |
| Launcher Ammo | Ammo | 5x Metal Parts 1x Crude Explosives | Workbench 1 |
| Anvil | Weapon | 5x Mechanical Components 5x Simple Gun Parts | Gunsmith 2 |
| Anvil Splitter | Mod | 2x Mod Components 3x Processor | Gunsmith 3 |
| ??? | ??? | ??? | ??? |
| Barricade Kit | Quick Use | 1x Mechanical Components | Utility Station 2 |
| Blaze Grenade | Grenade | 1x Explosive Compound 2x Oil | Explosives Station 3 |
| Bobcat | Weapon | 3x Advanced Mechanical Components 3x Light Gun Parts | Gunsmith 3 |
| Osprey | Weapon | 2x Advanced Mechanical Components 3x Medium Gun Parts 7x Wires | Gunsmith 3 |
| Burletta | Weapon | 3x Mechanical Components 3x Simple Gun Parts | Gunsmith 1 |
| Compensator II | Mod | 2x Mechanical Components 4x Wires | Gunsmith 2 |
| Compensator III | Mod | 2x Mod Components 8x Wires | Gunsmith 3 |
| Defibrillator | Quick Use | 9x Plastic Parts 1x Moss | Medical Lab 2 |
| ??? | ??? | ??? | ??? |
| Equalizer | Weapon | 3x Magnetic Accelerator 3x Complex Gun Parts 1x Queen Reactor | Gunsmith 3 |
| Extended Barrel | Mod | 2x Mod Components 8x Wires | Gunsmith 3 |
| Extended Light Mag II | Mod | 2x Mechanical Components 3x Steel Spring | Gunsmith 2 |
| Extended Light Mag III | Mod | 2x Mod Components 5x Steel Spring | Gunsmith 3 |
| Extended Medium Mag II | Mod | 2x Mechanical Components 3x Steel Spring | Gunsmith 2 |
| Extended Medium Mag III | Mod | 2x Mod Components 5x Steel Spring | Gunsmith 3 |
| Extended Shotgun Mag II | Mod | 2x Mechanical Components 3x Steel Spring | Gunsmith 2 |
| Extended Shotgun Mag III | Mod | 2x Mod Components 5x Steel Spring | Gunsmith 3 |
| Remote Raider Flare | Quick Use | 2x Chemicals 4x Rubber Parts | Utility Station 1 |
| Heavy Gun Parts | Material | 4x Simple Gun Parts | Refiner 2 |
| Venator | Weapon | 2x Advanced Mechanical Components 3x Medium Gun Parts 5x Magnet | Gunsmith 3 |
| Il Toro | Weapon | 5x Mechanical Components 6x Simple Gun Parts | Gunsmith 1 |
| Jolt Mine | Mine | 1x Electrical Components 1x Battery | Explosives Station 2 |
| Explosive Mine | Mine | 1x Explosive Compound 1x Sensors | Explosives Station 3 |
| Jupiter | Weapon | 3x Magnetic Accelerator 3x Complex Gun Parts 1x Queen Reactor | Gunsmith 3 |
| Light Gun Parts | Material | 4x Simple Gun Parts | Refiner 2 |
| Lightweight Stock | Mod | 2x Mod Components 5x Duct Tape | Gunsmith 3 |
| Lure Grenade | Grenade | 1x Speaker Component 1x Electrical Components | Utility Station 2 |
| Medium Gun Parts | Material | 4x Simple Gun Parts | Refiner 2 |
| Torrente | Weapon | 2x Advanced Mechanical Components 3x Medium Gun Parts 6x Steel Spring | Gunsmith 3 |
| Muzzle Brake II | Mod | 2x Mechanical Components 4x Wires | Gunsmith 2 |
| Muzzle Brake III | Mod | 2x Mod Components 8x Wires | Gunsmith 3 |
| Padded Stock | Mod | 2x Mod Components 5x Duct Tape | Gunsmith 3 |
| Shotgun Choke II | Mod | 2x Mechanical Components 4x Wires | Gunsmith 2 |
| Shotgun Choke III | Mod | 2x Mod Components 8x Wires | Gunsmith 3 |
| Shotgun Silencer | Mod | 2x Mod Components 8x Wires | Gunsmith 3 |
| Showstopper | Grenade | 1x Advanced Electrical Components 1x Voltage Converter | Explosives Station 3 |
| Silencer I | Mod | 2x Mechanical Components 4x Wires | Gunsmith 2 |
| Silencer II | Mod | 2x Mod Components 8x Wires | Gunsmith 3 |
| Snap Hook | Quick Use | 2x Power Rod 3x Rope 1x Exodus Modules | Utility Station 3 |
| Stable Stock II | Mod | 2x Mechanical Components 3x Duct Tape | Gunsmith 2 |
| Stable Stock III | Mod | 2x Mod Components 5x Duct Tape | Gunsmith 3 |
| Tagging Grenade | Grenade | 1x Electrical Components 1x Sensors | Utility Station 3 |
| Tempest | Weapon | 3x Advanced Mechanical Components 3x Medium Gun Parts 3x Canister | Gunsmith 3 |
| Trigger Nade | Grenade | 2x Crude Explosives 1x Processor | Explosives Station 2 |
| Vertical Grip II | Mod | 2x Mechanical Components 3x Duct Tape | Gunsmith 2 |
| Vertical Grip III | Mod | 2x Mod Components 5x Duct Tape | Gunsmith 3 |
| Vita Shot | Quick Use | 2x Antiseptic 1x Syringe | Medical Lab 3 |
| Vita Spray | Quick Use | 3x Antiseptic 1x Canister | Medical Lab 3 |
| Vulcano | Weapon | 1x Magnetic Accelerator 3x Heavy Gun Parts 1x Exodus Modules | Gunsmith 3 |
| Wolfpack | Grenade | 2x Explosive Compound 2x Sensors | Explosives Station 3 |
| Red Light Stick | Quick Use | 3x Chemicals | Utility Station 1 |
| Smoke Grenade | Grenade | 14x Chemicals 1x Canister | Utility Station 2 |
| Deadline | Mine | 3x Explosive Compound 2x ARC Circuitry | Explosives Station 3 |
| Trailblazer | Grenade | 1x Explosive Compound 1x Synthesized Fuel | Explosives Station 3 |
| Tactical Mk. 3 (Defensive) | Augment | 2x Advanced Electrical Components 3x Processor | Gear Bench 3 |
| Tactical Mk. 3 (Healing) | Augment | 2x Advanced Electrical Components 3x Processor | Gear Bench 3 |
| Yellow Light Stick | Quick Use | 3x Chemicals | Utility Station 1 |
Note: The missing Blueprints in this list likely have not actually been added to the game at the time of writing, because none of the playerbase has managed to find any of them. As they are added to the game, I will update this page with the most relevant information so you know exactly how to get all 75 Arc Raiders Blueprints.
Where to find Blueprints in Arc Raiders
Below is a list of all containers, modifiers, and events which maximise your chances of finding Blueprints:
- Certain quests reward you with specific Blueprints .
- Completing Trials has a high chance of offering Blueprints as rewards.
- Surveyors have a decent chance of dropping Blueprints on death.
- High loot value areas tend to have a greater chance of spawning Blueprints.
- Night Raids and Storms may increase rare Blueprint spawn chances in containers.
- Containers with higher numbers of items may have a higher tendency to spawn Blueprints. As a result, Blue Gate (which has many “large” containers containing multiple items) may give you a higher chance of spawning Blueprints.
- Raider containers (Raider Caches, Weapon Boxes, Medical Bags, Grenade Tubes) have increased Blueprint drop rates. As a result, the Uncovered Caches event gives you a high chance of finding Blueprints.
- Security Lockers have a higher than average chance of containing Blueprints.
- Certain Blueprints only seem to spawn under specific circumstances: Tempest Blueprint only spawns during Night Raid events. Vulcano Blueprint only spawns during Hidden Bunker events. Jupiter and Equaliser Blueprints only spawn during Harvester events.

Raider Caches, Weapon Boxes, and other raider-oriented container types have a good chance of offering Blueprints. |Image credit:Rock Paper Shotgun/Embark Studios
Blueprints have a very low chance of spawning in any container in Arc Raiders, around 1-2% on average. However, there is a higher chance of finding Blueprints in particular container types. Specifically, you can find more Blueprints in Raider containers and security lockers.
Beyond this, if you’re looking for Blueprints you should focus on regions of the map which are marked as having particularly high-value loot. Areas such as the Control Tower in Dam Battlegrounds, the Arrival and Departure Buildings in Spaceport, and Pilgrim’s Peak in Blue Gate all have a better-than-average chance of spawning Blueprints somewhere amongst all their containers. Night Raids and Electromagnetic Storm events also increase the drop chances of certain Blueprints .
In addition to these containers, you can often loot Blueprints from destroyed Surveyors - the largest of the rolling ball ARC. Surveyors are more commonly found on the later maps - Spaceport and Blue Gate - and if one spawns in your match, you’ll likely see it by the blue laser beam that it casts into the sky while “surveying”.
Surveyors are quite well-armoured and will very speedily run away from you once it notices you, but if you can take one down then make sure you loot all its parts for a chance of obtaining certain unusual Blueprints.
Blueprints obtained from quests
One way in which you can get Blueprints is by completing certain quests for the vendors in Speranza. Some quests will reward you with a specific item Blueprint upon completion, so as long as you work through all the quests in Arc Raiders, you are guaranteed those Blueprints.
Here is the full list of all Blueprints you can get from quest rewards:
- Trigger Nade Blueprint: Rewarded after completing “Sparks Fly”.
- Lure Grenade Blueprint: Rewarded after completing “Greasing Her Palms”.
- Burletta Blueprint: Rewarded after completing “Industrial Espionage”.
- Hullcracker Blueprint (and Launcher Ammo Blueprint): Rewarded after completing “The Major’s Footlocker”.
Alas, that’s only 4 Blueprints out of a total of 75 to unlock, so for the vast majority you will need to find them yourself during a raid. If you’re intent on farming Blueprints, then it’s best to equip yourself with cheap gear in case you lose it, but don’t use a free loadout because then you won’t get a safe pocket to stash any new Blueprint you find. No pain in Arc Raiders is sharper than failing to extract with a new Blueprint you’ve been after for a dozen hours already.

One of the best ways to get Blueprints is by hitting three stars on all five Trials every week. |Image credit:Rock Paper Shotgun/Embark Studios
Blueprints obtained from Trials
One of the very best ways to get Blueprints is as rewards for completing Trials in Arc Raiders. Trials are unlocked from Level 15 onwards, and allow you to earn rewards by focusing on certain tasks over the course of several raids. For example, one Trial might task you with dealing damage to Hornets, while another might challenge you to loot Supply Drops.
Trials refresh on a weekly basis, with a new week bringing five new Trials. Each Trial can offer up to three rewards after passing certain score milestones, and it’s possible to receive very high level loot from these reward crates - including Blueprints. So if you want to unlock as many Blueprints as possible, you should make a point of completing as many Trials as possible each week.
Best Blueprint farming locations
The very best way to get Blueprints is to frequent specific areas of the maps which combine high-tier loot pools with the right types of containers to search. Here are my recommendations for where to find Blueprints on every map, so you can always keep the search going for new crafting recipes to unlock.

Image credit:Rock Paper Shotgun/Embark Studios
Dam Battlegrounds
The best places to farm Blueprints on Dam Battlegrounds are the Control Tower, Power Generation Complex, Ruby Residence, and Pale Apartments . The first two regions, despite only being marked on the map as mid-tier loot, contain a phenomenal number of containers to loot. The Control Tower can also contain a couple of high-tier Security Lockers - though of course, you’ll need to have unlocked the Security Breach skill at the end of the Survival tree.
There’s also a lot of reporting amongst the playerbase that the Residential areas in the top-left of the map - Pale Apartments and Ruby Residence - give you a comparatively strong chance of finding Blueprints. Considering their size, there’s a high density of containers to loot in both locations, and they also have the benefit of being fairly out of the way. So you’re more likely to have all the containers to yourself.
Buried City
The best Blueprint farming locations on Buried City are the Santa Maria Houses, Grandioso Apartments, Town Hall, and the various buildings of the New District . Grandioso Apartments has a lower number of containers than the rest, but a high chance of spawning weapon cases - which have good Blueprint drop rates. The others are high-tier loot areas, with plenty of lootable containers - including Security Lockers.
Spaceport
The best places to find Blueprints on Spaceport are the Arrival and Departure Buildings, as well as Control Tower A6 and the Launch Towers . All these areas are labelled as high-value loot regions, and many of them are also very handily connected to one another by the Spaceport wall, which you can use to quickly run from one area to the next. At the tops of most of these buildings you’ll find at least one Security Locker, so this is an excellent farming route for players looking to find Blueprints.
The downside to looting Blueprints on Spaceport is that all these areas are hotly contested, particularly in Duos and Squads. You’ll need to be very focused and fast in order to complete the full farming route.

Image credit:Rock Paper Shotgun/Embark Studios
Blue Gate
Blue Gate tends to have a good chance of dropping Blueprints, potentially because it generally has a high number of containers which can hold lots of items; so there’s a higher chance of a Blueprint spawning in each container. In my experience, the best Blueprint farming spots on Blue Gate are Pilgrim’s Peak, Raider’s Refuge, the Ancient Fort, and the Underground Complex beneath the Warehouse .
All of these areas contain a wealth of containers to loot. Raider’s Refuge has less to loot, but the majority of the containers in and around the Refuge are raider containers, which have a high chance of containing Blueprints - particularly during major events.
Stella Montis
On the whole, Stella Montis seems to have a very low drop rate for Blueprints (though a high chance of dropping other high-tier loot). If you do want to try farming Blueprints on this map, the best places to find Blueprints in Stella Montis are Medical Research, Assembly Workshop, and the Business Center . These areas have the highest density of containers to loot on the map.
In addition to this, the Western Tunnel has a few different Security Lockers to loot, so while there’s very little to loot elsewhere in this area of the map, it’s worth hitting those Security Lockers if you spawn there at the start of a match.
That wraps up this primer on how to get all the Blueprints in Arc Raiders as quickly as possible. With the Expedition system constantly resetting a large number of players’ Blueprints, it’s more important than ever to have the most up-to-date information on where to find all these Blueprints.
While you’re here, be sure to check out our Arc Raiders best guns tier list , as well as our primers on the best skills to unlock and all the different Field Depot locations on every map.


ARC Raiders
PS5 , Xbox Series X/S , PC
Rock Paper Shotgun is better when you sign in
Sign in and join us on our journey to discover strange and compelling PC games.
