Call Of Duty Black Ops 6: Best guns and tier list
These are the best guns in Black Ops 6
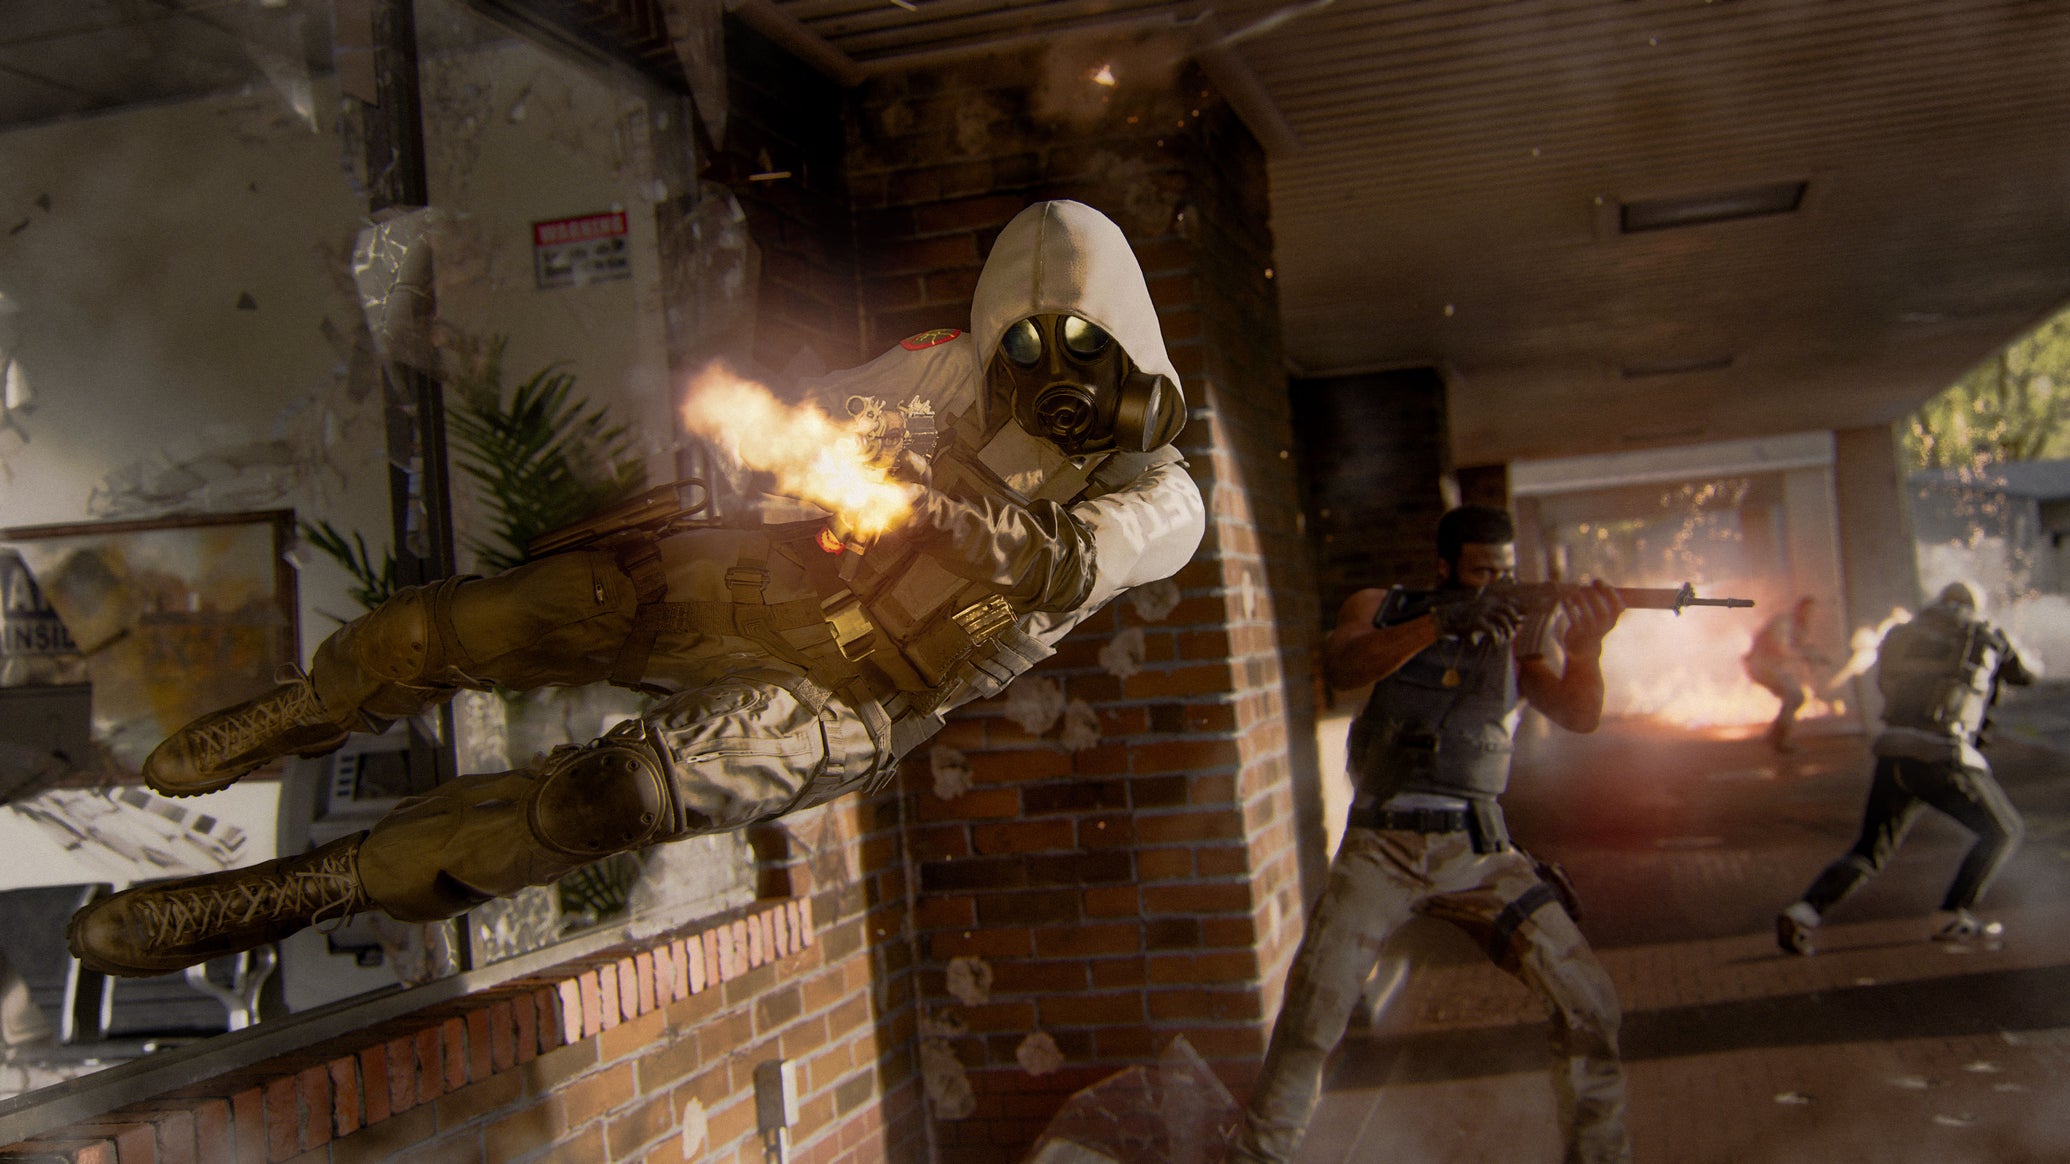
Image credit:Activison

What are the best guns in Black Ops 6? Call Of Duty: Black Ops 6 presents players with 30+ firearms to use in epic firefights, and 12 of these guns are newcomers to the franchise. From Assault Rifles to Shotguns, there’s a weapon for everyone, and multiplayer matches are going to be fast and furious as the meta expands and these guns receive buffs and nerfs over the next several weeks.
In this guide, we’ve divided all of Black Ops 6’s guns up into a tier list based on their performance during the beta and the launch of the game. We’ve also highlighted the top ten guns that we believe are worthy of your time. Read on for our tier list and rundown of the best guns in Call Of Duty: Black Ops 6 .
Black Ops 6 best guns tier list
Here’s our Black Ops 6 tier list ranking all firearms in the game:
| Best | AK-74, AMES 85, C9, Jackal PDW, KSV, LR 7.62, SVD, Tanto .22, XMG, XM4 |
|---|---|
| S Tier | AEK-973, AS VAL, Kompakt 92, LW3A1 Frostline, Marine SP, Model L, SVD, SWAT 5.56 |
| A Tier | DM-10, GPMG-7, GPR 91, PP-919, PU-21 |
| B Tier | ASG-89, Goblin Mk2, HE-1, Tsarkov 7.62 |
| C Tier | 9mm PM, CIGMA 2B, Grekhova, GS45, Stryder .22 |
Let’s now rank those ten guns in the Best category, and explain what makes them so strong in the current meta of Black Ops 6.
10. LR 7.62
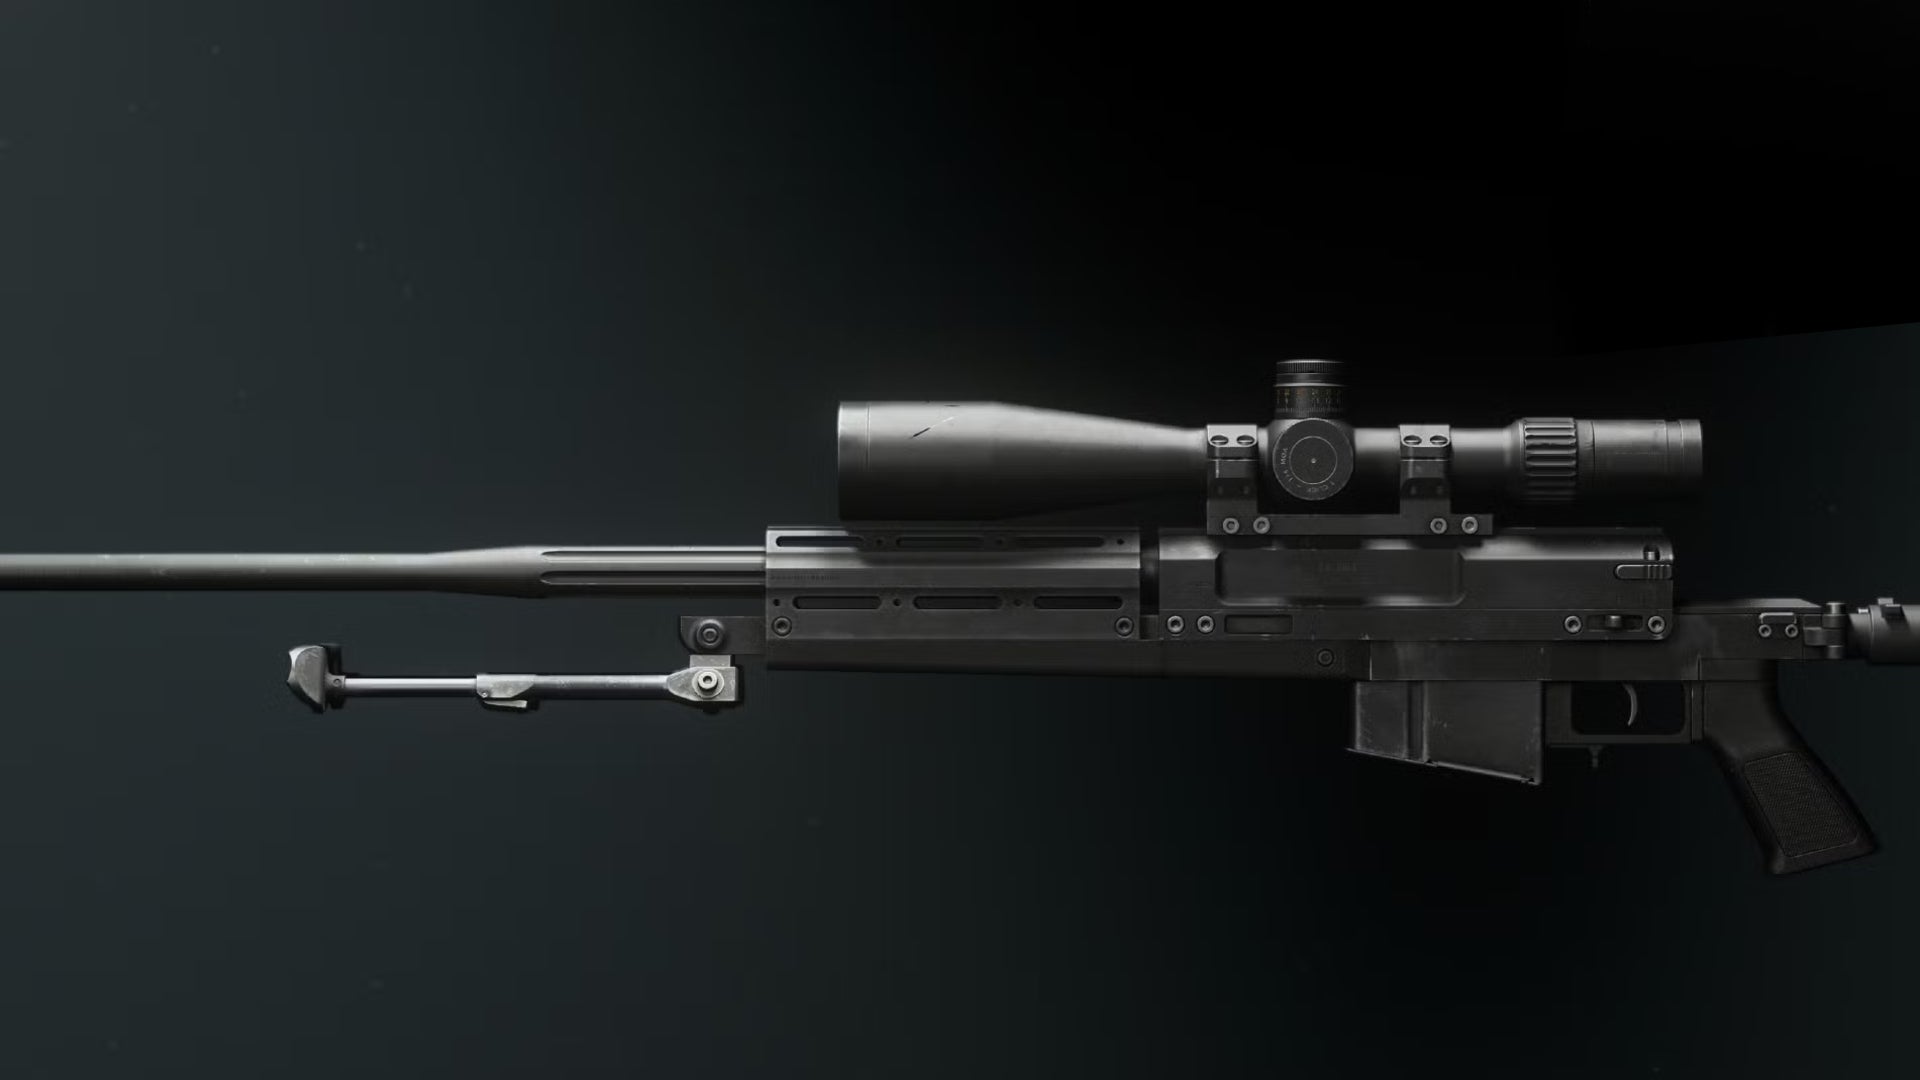
A great headshot weapon, but its slowness might let you down. |Image credit:Rock Paper Shotgun/Activision
Make no mistake, the LR 7.82 is a fine weapon, especially for bolt-action Sniper Rifle fans. If you’ve got great headshot aim and are on a big map, you can absolutely dominate and watch enemy operator heads explode. The main issue is the slow-as-molasses handling, which is a pain on smaller maps. Slowness is par the course with Sniper Rifles, but the SVD doesn’t seem to suffer this flaw as much as the LR 7.62, hence this tenth place ranking for now.
9. SVD

The top Sniper Rifle in the game, for now. |Image credit:Rock Paper Shotgun/Activision
The SVD wins our pick for the one shot, one kill weapon of choice in Black Ops 6. Sniping is arguably harder in Black Ops 6 than its been in previous Call of Duty titles thanks to hefty vertical recoil on all three guns along with very bothersome flinch and wobbly scoping, but the SVD shines as a forgiving semi-auto gun that delivers catastrophic damage at long range. Thanks to the higher Mag size compared to the game’s other Sniper Rifles, this one ends up on top.
8. XMG
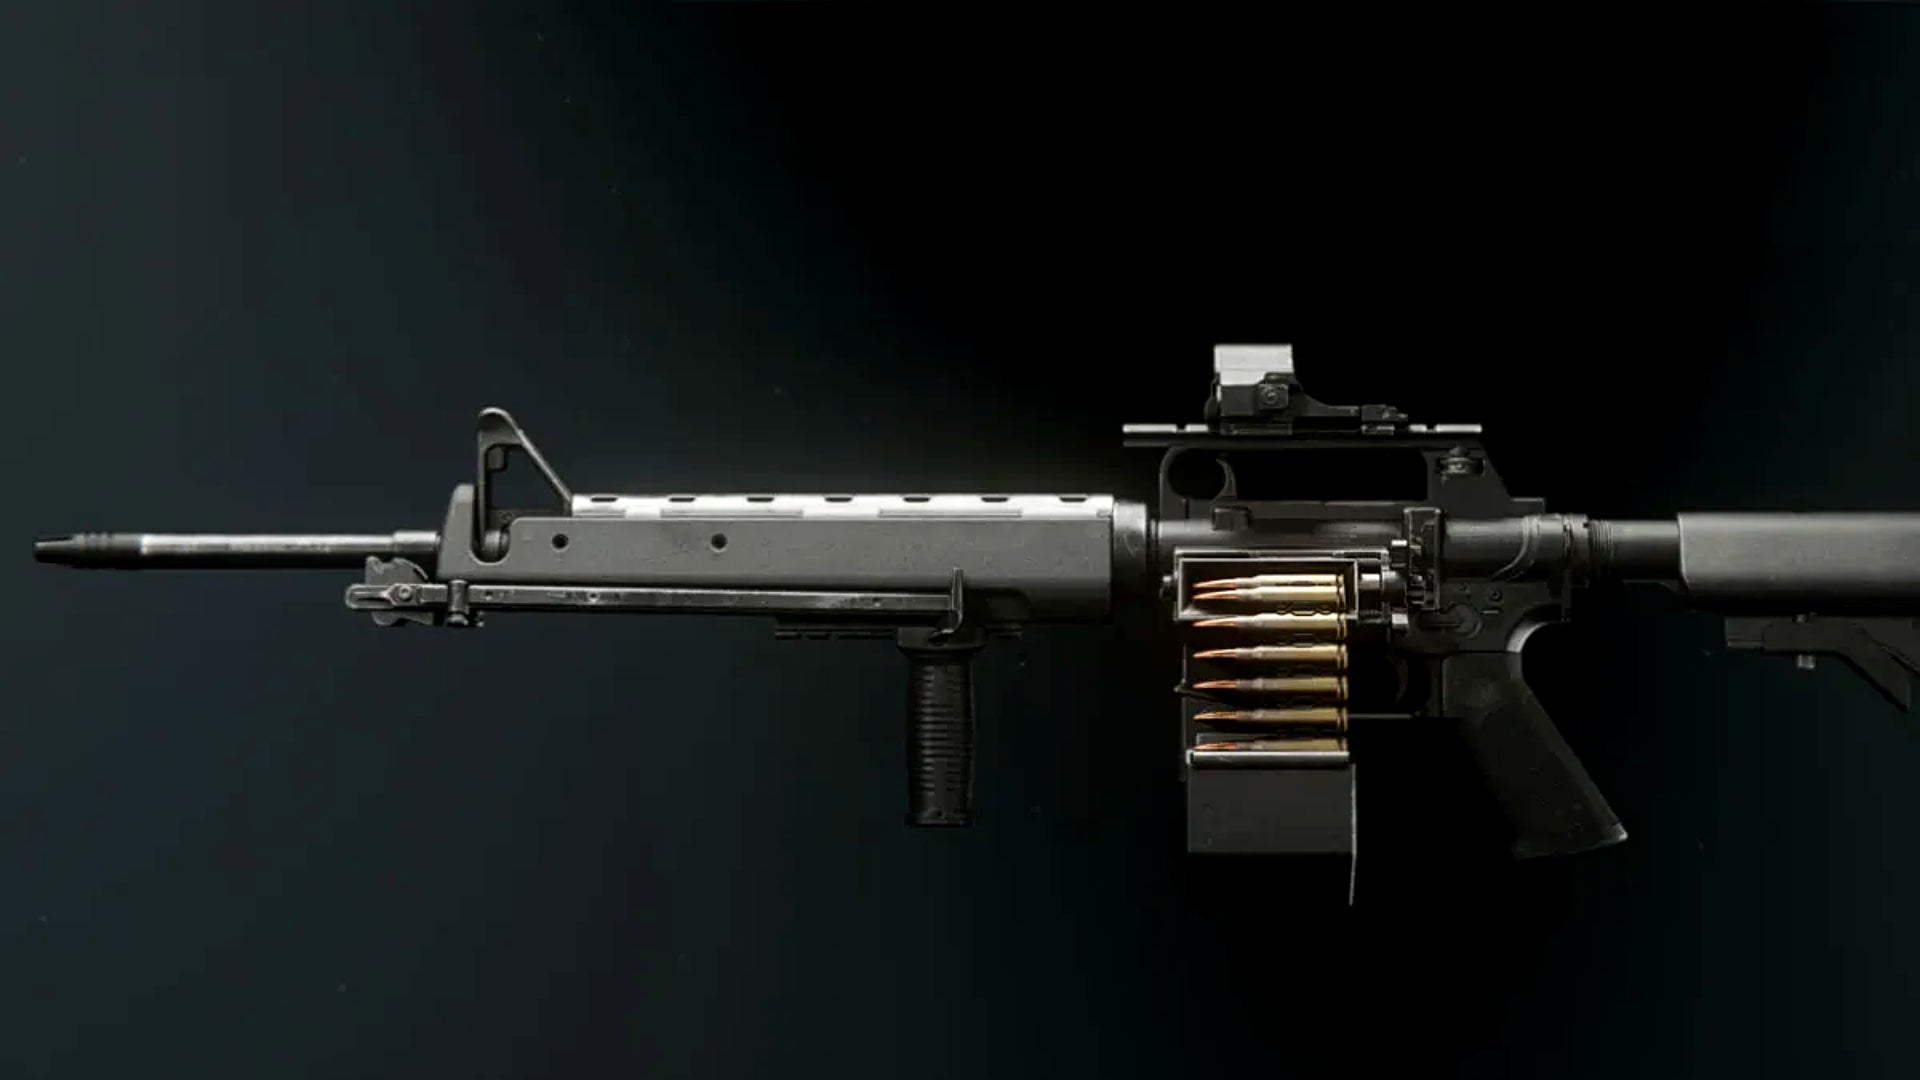
Look at all that ammo! You’ll make good use of it with the XMG. |Image credit:Rock Paper Shotgun/Activision
The XMG is a Light Machine Gun that has a pretty slow firing rate, but overcompensates for this with an absolutely fat Mag size of 100 that really makes a difference when you need to sustain fire for an extended period of time. Damage is solid and recoil is fairly low, though the handling stinks. That said, if you like LMGs, it’s well worth giving the XMG a whirl, as it’s certainly the best in the game at this moment.
7. AK-74
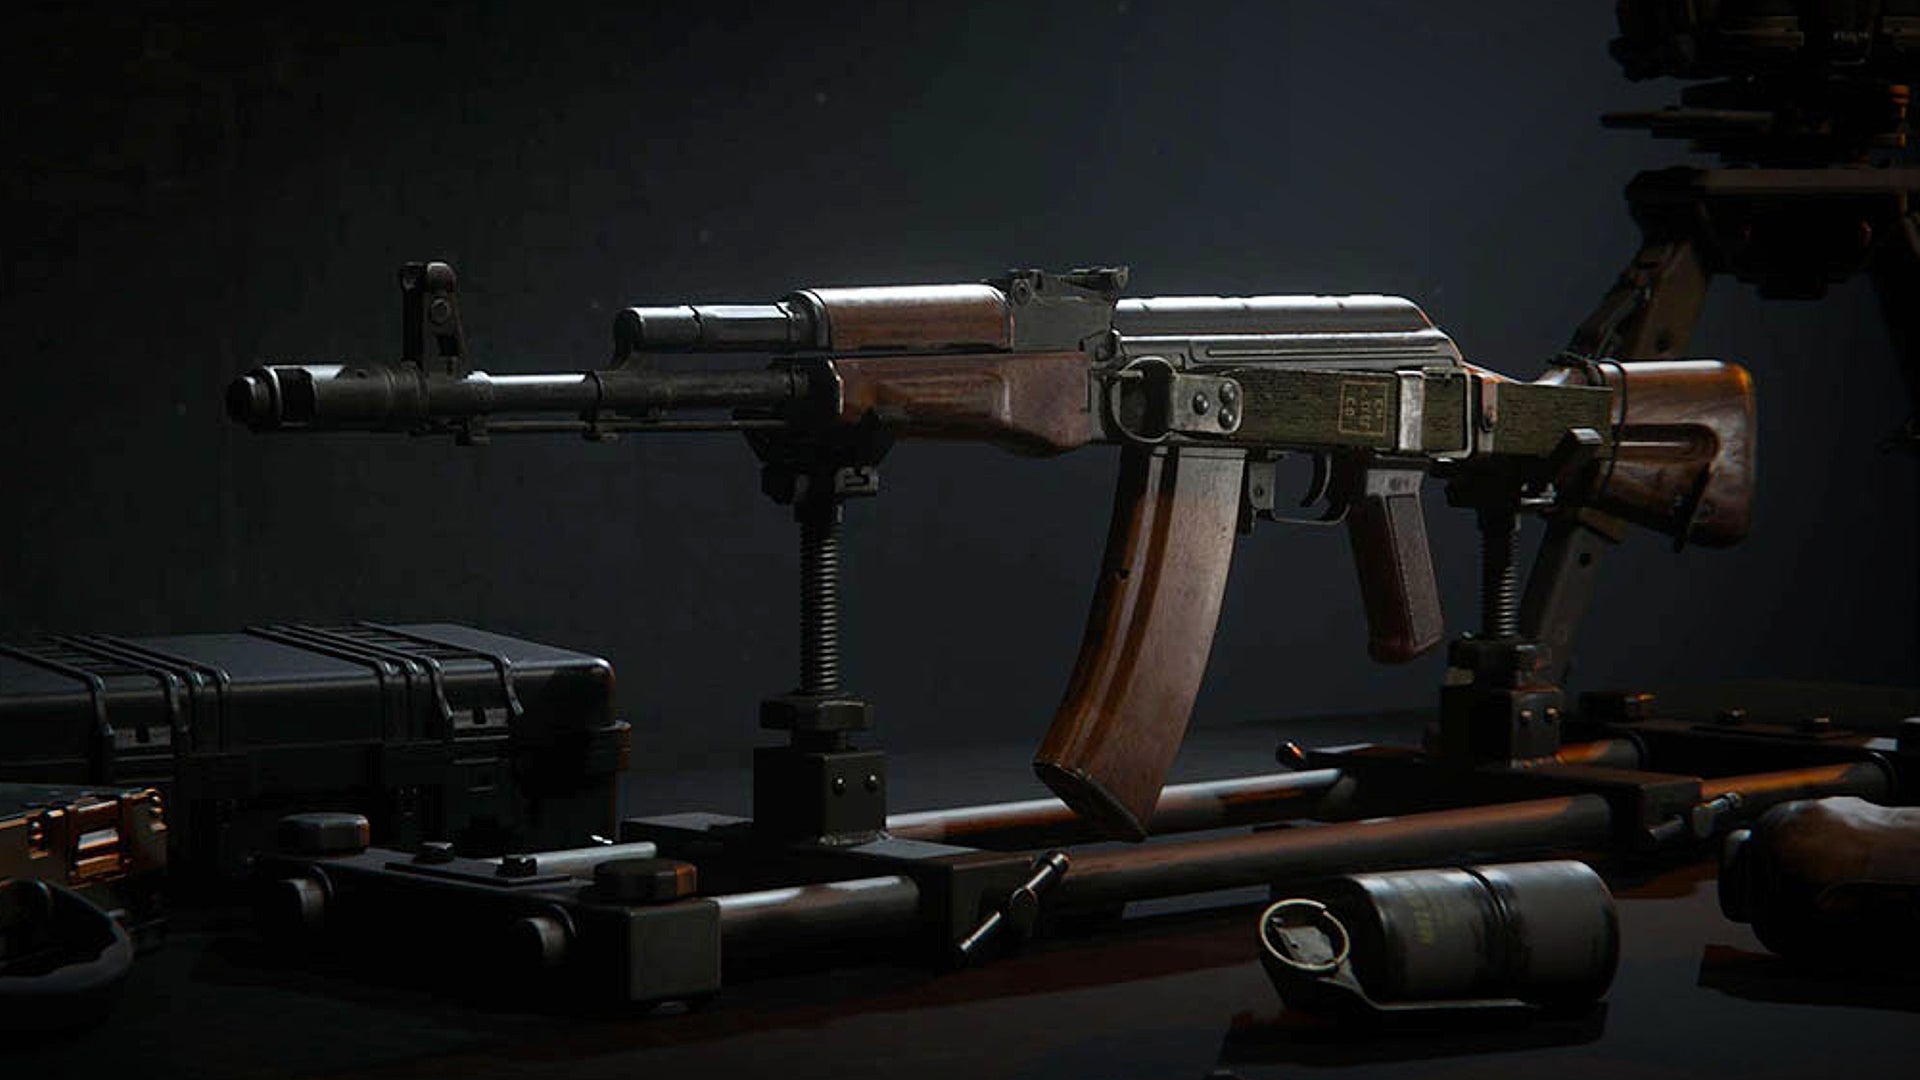
The AK-74’s got some hefty recoil, but if that’s no bother to you, it’s a great weapon. |Image credit:Rock Paper Shotgun/Activision
Unlike its cousin the AMES 85, which has average damage but low recoil, the AK-74 is very capable of shredding enemies, but bounces all over the place when it does so. The slow fire rate is also troublesome. But if you’re experienced with tricky guns and don’t mind a little bit of blowback, then the AK-74 may very well shine in your hands. And it’s really hard to say no to that awesome stopping power. Check out our AK-74 loadout guide for some tips on tweaking firing and speed.
6. KSV
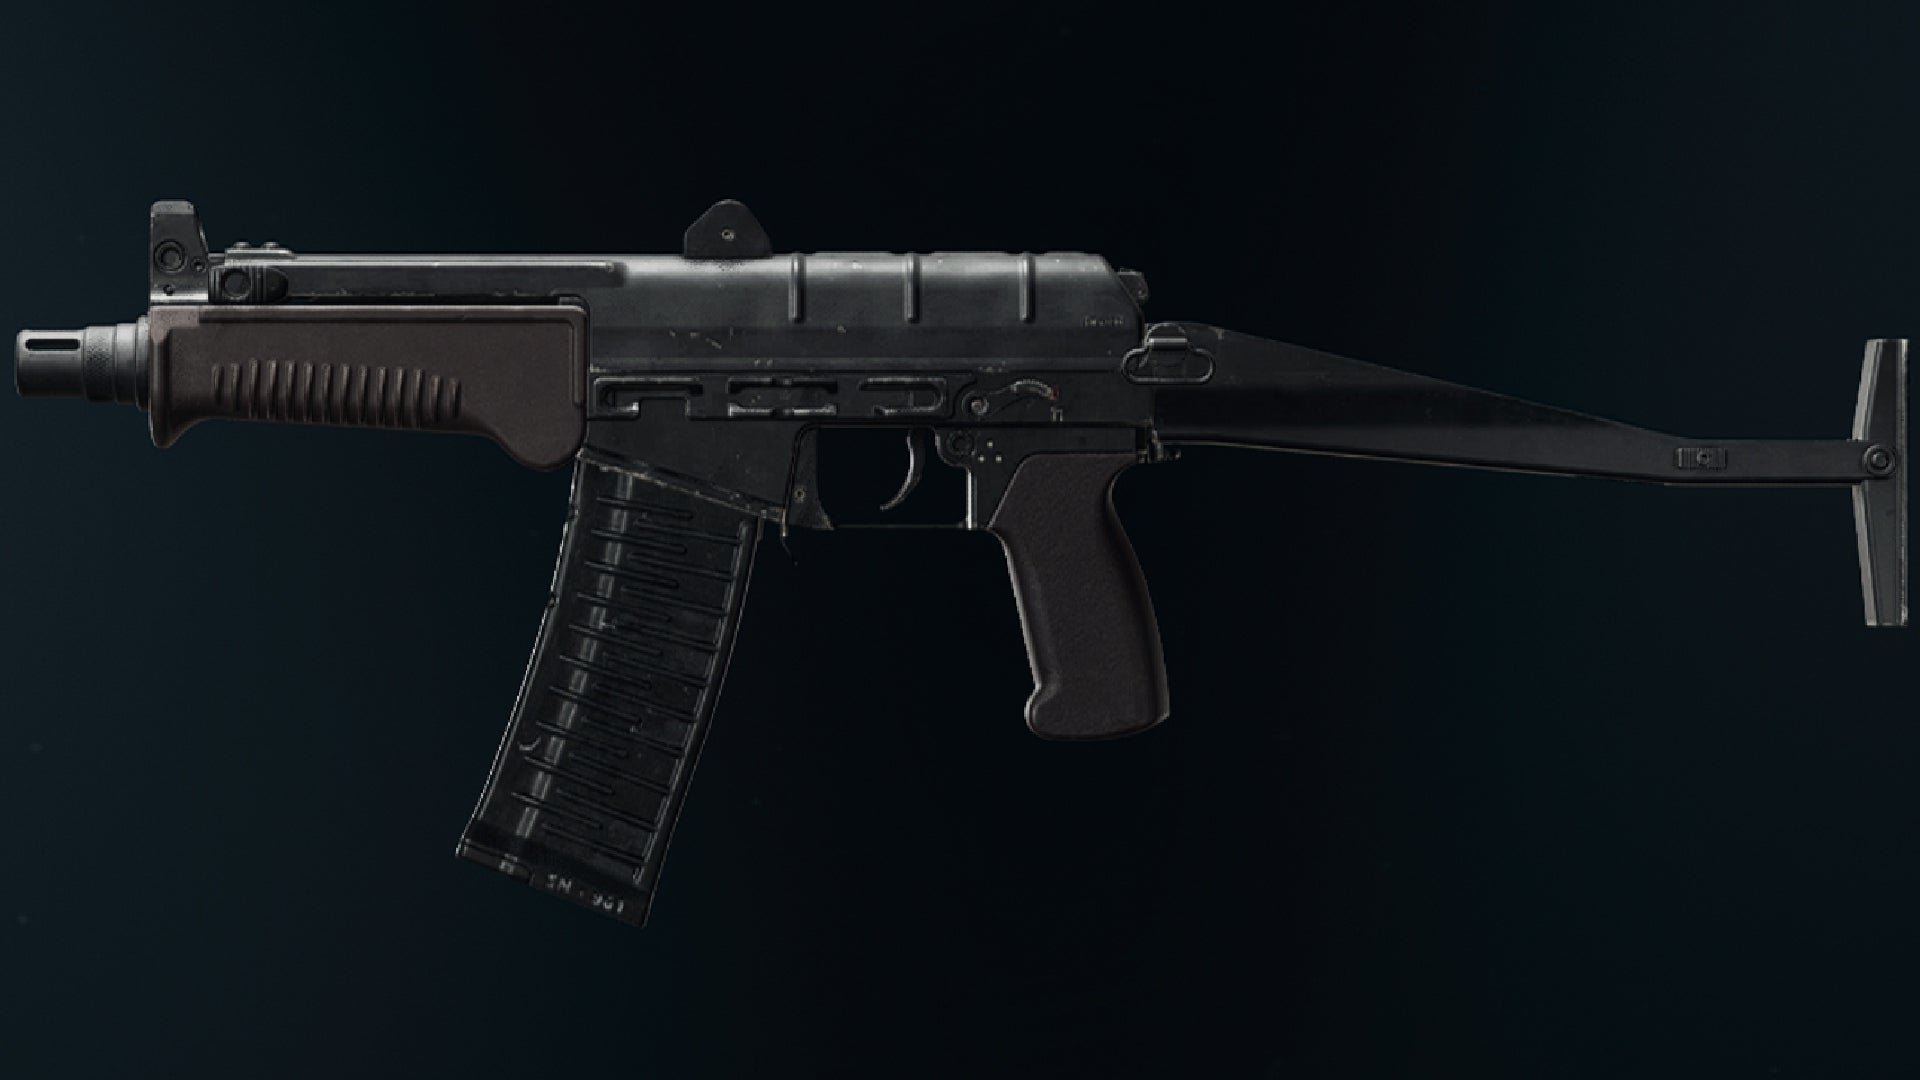
It’s either this or the C9 when it comes to deciding the best SMG for running and gunning. |Image credit:Rock Paper Shotgun/Activision
The KSV’s another fast and deadly submachine that rewards a speedy, aggressive playstyle, and is very much a top-tier option for run and gun class setups along with the C9. For highly mobile players who are looking for a gun with extremely speedy time-to-kill stats, this is an excellent choice, as it feels quicker to aim than the C9 and handles recoil well. I rate the C9 higher on a versatility level, but this is still an excellent SMG. Stick some accessories on this thing like a Long Barrel, Vertical Foregrip, or Recoil Springs, and you’ll be taking down opponents in no time.
5. C9

Good for running and gunning, and for anyone who mained the MP5 back in the day. |Image credit:Rock Paper Shotgun/Activision
For all of you nostalgic for the classic MP5 of yesteryear’s Call of Duty games, then look no further, for the C9 is that gun under another name. The accuracy here is nice, and the C9’s time-to-kill rate is among the highest of all of the weapons on this list. If you utilise a run-and-gun style and are still figuring out which SMG fits you best, the C9 is a great option, and our C9 loadout guide will be a valuable assist. The only reason it isn’t higher in our rankings is because the Jackal PDW and Tanto .22 are too good at the moment. Oh well - nerfs will come, and the C9 may benefit from them.
4. AMES 85
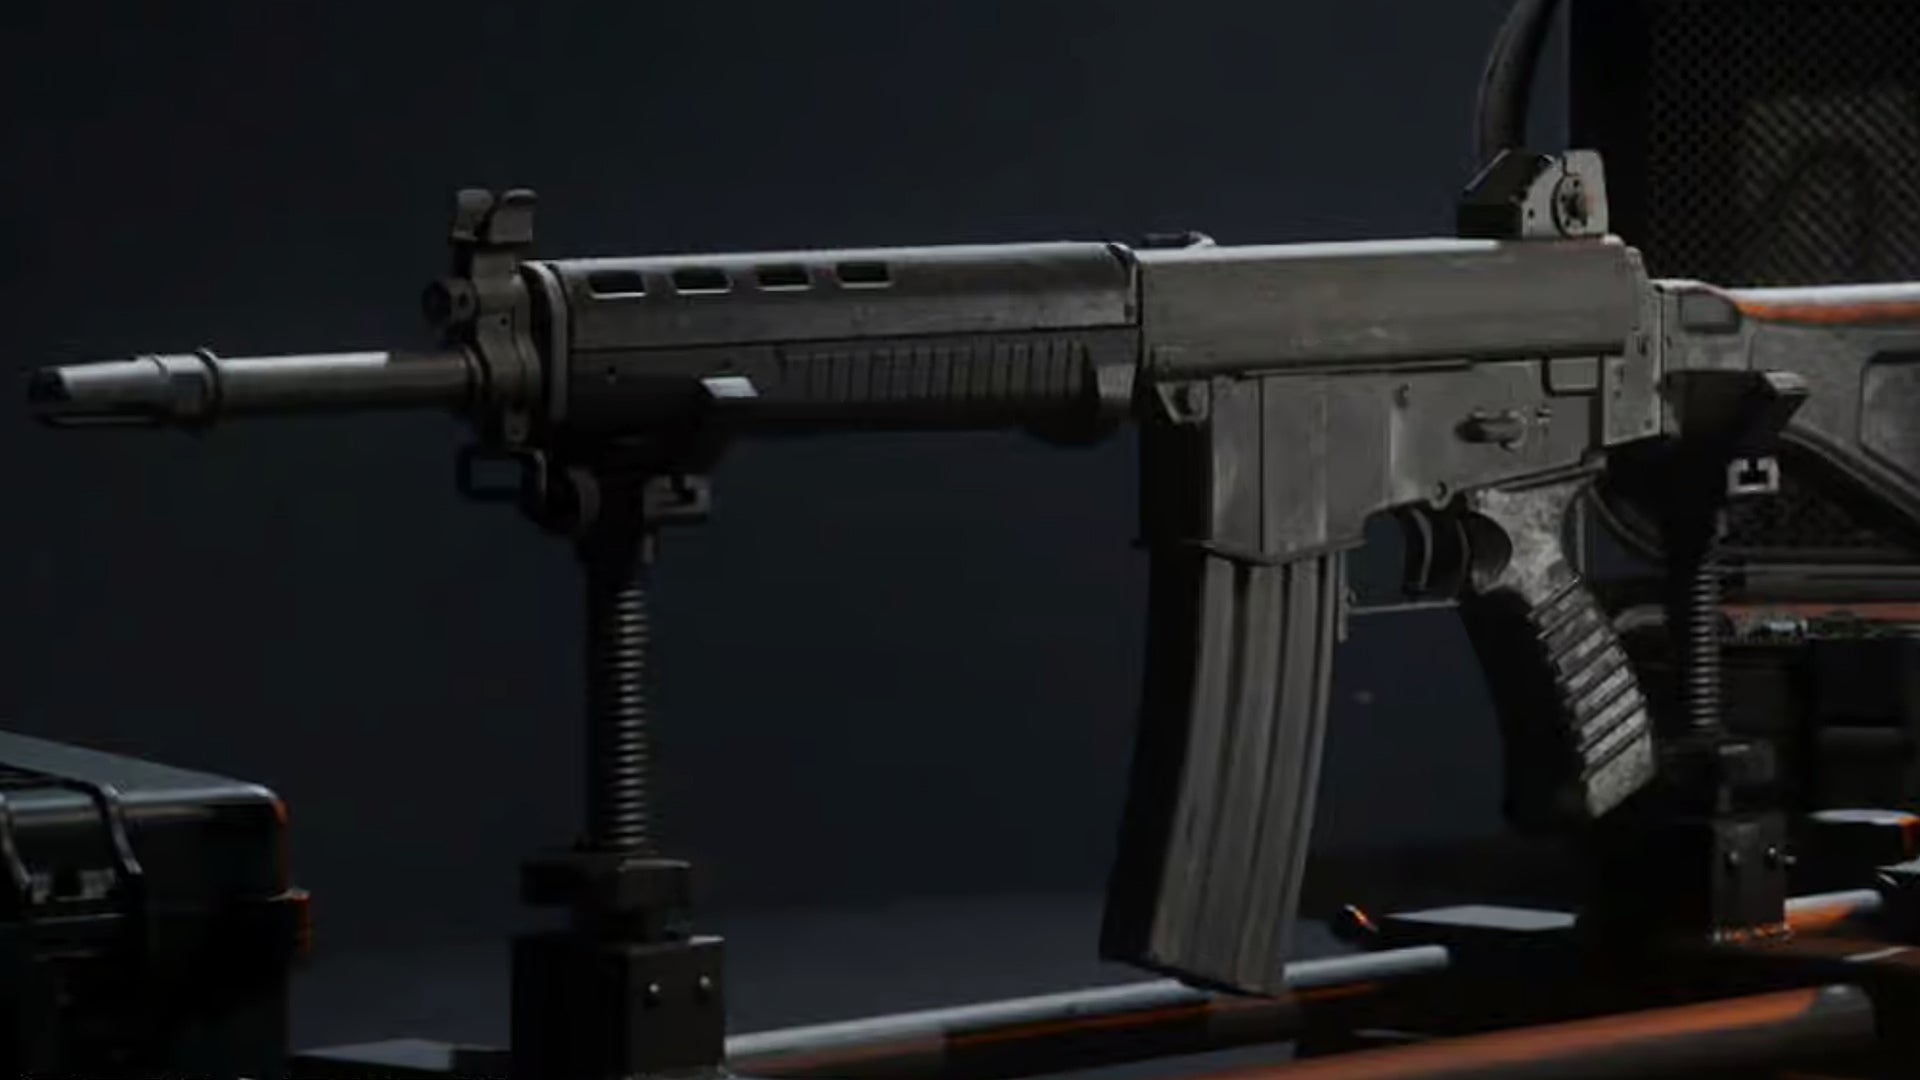
If you liked the MCW, you’ll probably dig the AMES 85. |Image credit:Rock Paper Shotgun/Activision
The AMES 85 took a long while to unlock in Black Ops 6’s beta, but now that the full game is upon us, there’s a good chance that this Assault Rifle will quickly shoot up in the rankings and possibly even take the top spot. We’re putting the XM4 ahead of this one for now but it’s a matter of preference, honestly.
The AMES 85’s main benefits are an excellent fire rate and low recoil. Damage could be better, but all-in-all, the AMES 85 vaguely reminds me of the MCW in Modern Warfare 3, and if you’re reading this list, then you know how popular that gun turned out to be. At any rate, leveling up the AMES 85 is a very good strategy if you’re aiming for multiplayer domination, and if you equip the Overkill Wildcard Perk, you can pair this gun with one of our top-ranking SMG to really blow holes in the opposition.
3. XM4
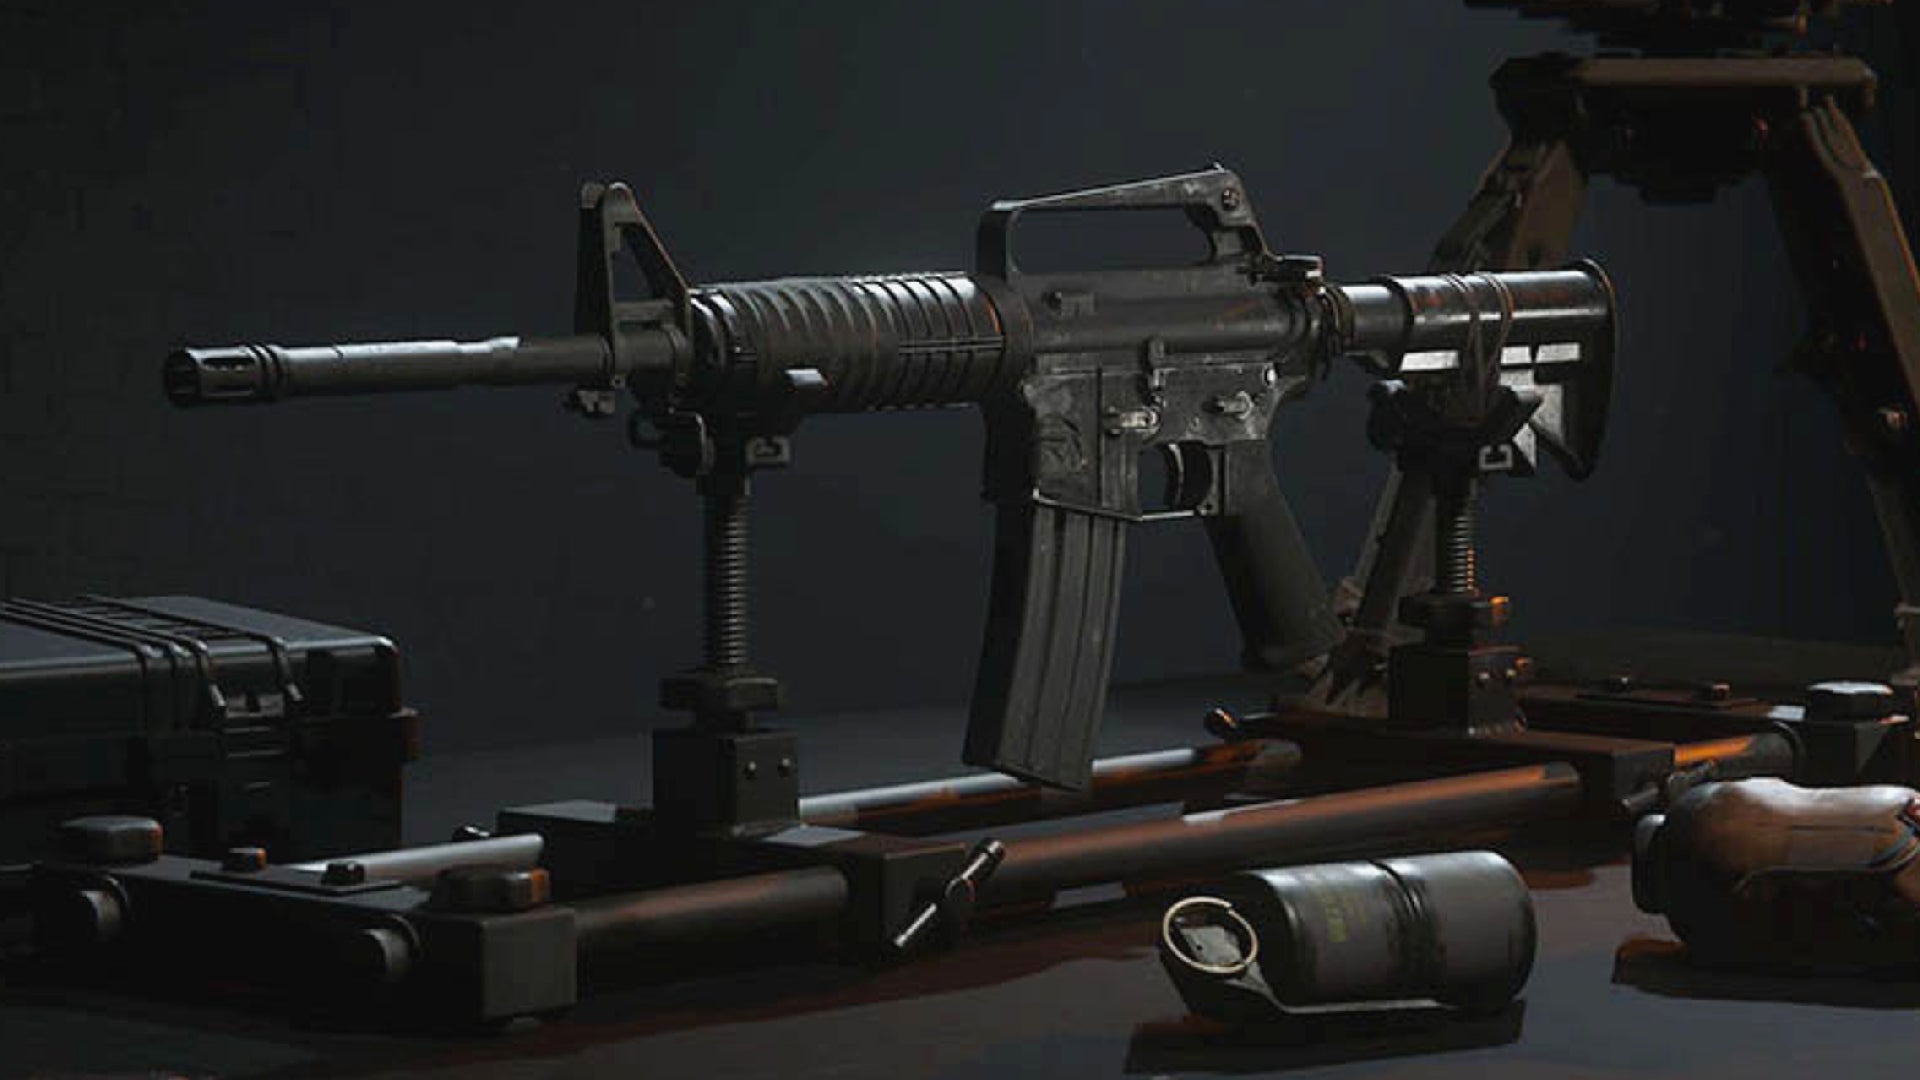
An excellent choice for AR newbies and experienced vets, the XM4 is a great addition to your arsenal. |Image credit:Rock Paper Shotgun/Activision
When it comes to the most impressive Black Ops 6 Assault Rifle, it’s a current toss-up between the XM4 and the AMES 85. We’re putting the XM4 ahead for being slightly more reliable. This is just a darn solid AR that does what it’s told to do as soon as you pick it up, and since many new players gravitate towards Assault Rifles, it’s nice to have one that serves as a useful recommendation for all.
Don’t be fooled into thinking that the XM4 is just for newbies, as experienced operators can get a lot out of this firearm with a good selection of accessories. Our XM4 loadout guide will tell you what you need to do to boost this weapon in the range department. We recommend a handy optic or something like the Long Barrel for starters.
2. Tanto .22

Depending on your playstyle, the Tanto .22 might be number one. |Image credit:Activision
The Tanto .22 is a mighty fine weapon, and I suspect it’ll pull the rug out from under the Jackal PDW in popularity as time goes on. You can expect extremely potent firepower with this gun, and its only tradeoff is a relatively sluggish fire rate, which means that it’s not the best idea to get close with the Tanto .22.
That said, at mid-range or when paired with a decent secondary weapon or an attachment to boost its headshot multiplier (try the CHF Barrel) then this SMG truly shines. We’ll be keeping a close eye on the Tanto .22, as it’s a really powerful tool in the hands of the right player. For now, it gets second place.
1. Jackal PDW
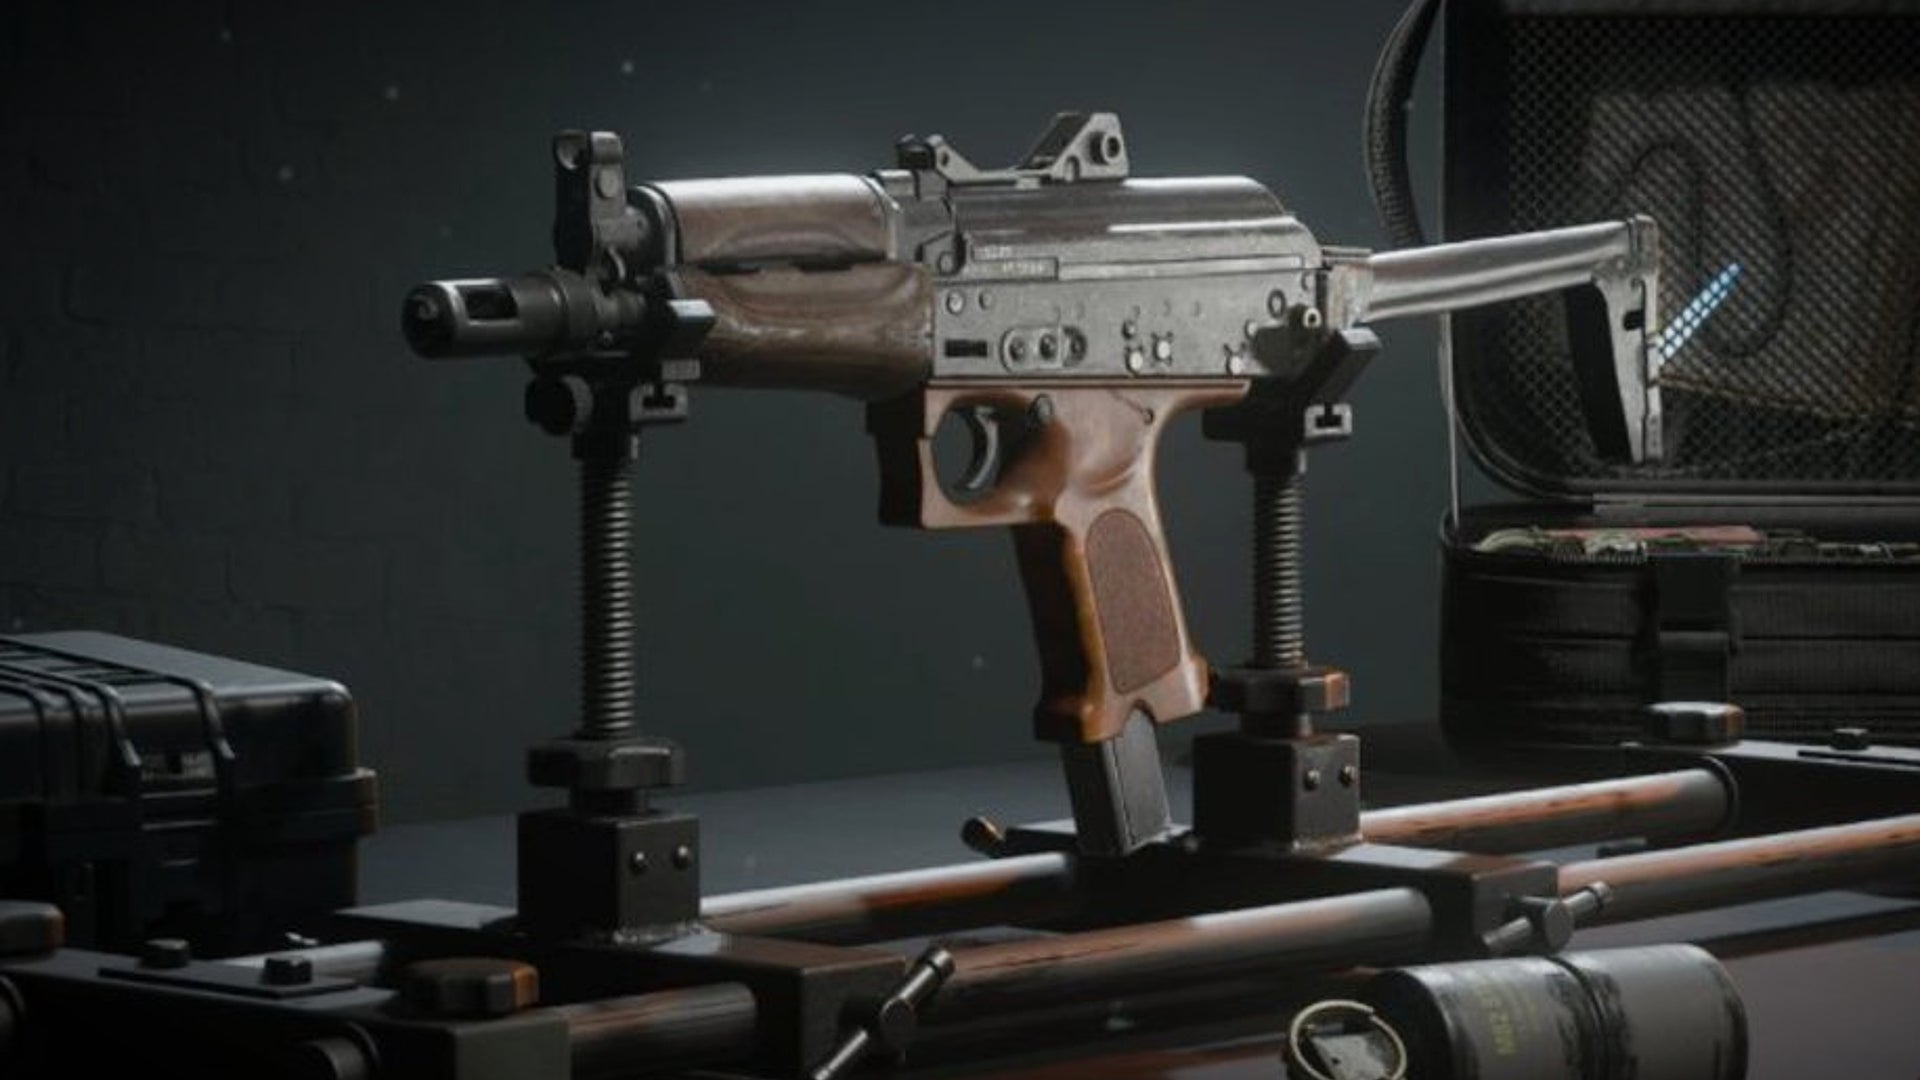
Possibly overpowered and a damn good SMG. |Image credit:Rock Paper Shotgun/Activision
The Jackal PDW takes the top spot as the gun that dominated Black Ops 6’s beta to the point that everyone was using it. While not quite as potent in the full game, the Jackal PDW remains ahead of the pack thanks to all-around quality stats that can beat ARs and Sniper Rifles on most maps. Expect an excellent fire rate, explosive time-to-kill stats, and top-of-the-line mobility and handling when you equip this weapon.
Chances are, the Jackal PDW may get knocked down a few spots once Black Ops 6 evolves. But this SMG is king of the hill for now, and its sick purple Scourge variant remains a very popular choice for everyone who’s preordered Black Ops 6’s Vault Edition. All of you currently running across multiplayer maps with your glowing Jackal PDW and blasting me at close range - enjoy it while it lasts. For more information on outfitting this impressive SMG to be all it can be, take a gander at out Jackal PDW loadout guide .
And that concludes our rundown of the very best guns in Black Ops 6! For more on some of the guns presented here, take a trip over to our guides to the best ARs and best SMGs in Black Ops 6. Happy shooting, and may you have many happy killstreaks.


Call of Duty: Black Ops 6
PS4 , PS5 , Xbox One , Xbox Series X/S , PC
Rock Paper Shotgun is better when you sign in
Sign in and join us on our journey to discover strange and compelling PC games.

All 75 Arc Raiders Blueprints and where to get them
These areas have the highest chance of giving you Blueprints

Image credit:Rock Paper Shotgun/Embark Studios

Looking for more Arc Raiders Blueprints? It’s a special day when you find a Blueprint, as they’re among the most valuable items in Arc Raiders. If you find a Blueprint that you haven’t already found, then you must make sure you hold onto it at all costs, because Blueprints are the key to one of the most important and powerful systems of meta-progression in the game.
This guide aims to be the very best guide on Blueprints you can find, starting with a primer on what exactly they are and how they work in Arc Raiders, before delving into exactly where to get Blueprints and the very best farming spots for you to take in your search.
We’ll also go over how to get Blueprints from other unlikely activities, such as destroying Surveyors and completing specific quests. And you’ll also find the full list of all 75 Blueprints in Arc Raiders on this page (including the newest Blueprints added with the Cold Snap update , such as the Deadline Blueprint and Firework Box Blueprint), giving you all the information you need to expand your own crafting repertoire.
In this guide:
- What are Blueprints in Arc Raiders?
- Full Blueprint list: All crafting recipes
- Where to find Blueprints in Arc Raiders Blueprints obtained from quests Blueprints obtained from Trials Best Blueprint farming locations

What are Blueprints in Arc Raiders?
Blueprints in Arc Raiders are special items which, if you manage to extract with them, you can expend to permanently unlock a new crafting recipe in your Workshop. If you manage to extract from a raid with an Anvil Blueprint, for example, you can unlock the ability to craft your very own Anvil Pistol, as many times as you like (as long as you have the crafting materials).
To use a Blueprint, simply open your Inventory while in the lobby, then right-click on the Blueprint and click “Learn And Consume” . This will permanently unlock the recipe for that item in your Workshop. As of the Stella Montis update, there are allegedly 75 different Blueprints to unlock - although only 68 are confirmed to be in the game so far. You can see all the Blueprints you’ve found and unlocked by going to the Workshop menu, and hitting “R” to bring up the Blueprint screen.
It’s possible to find duplicates of past Blueprints you’ve already unlocked. If you find these, then you can either sell them, or - if you like to play with friends - you can take it into a match and gift it to your friend so they can unlock that recipe for themselves. Another option is to keep hold of them until the time comes to donate them to the Expedition.
Full Blueprint list: All crafting recipes
Below is the full list of all the Blueprints that are currently available to find in Arc Raiders, and the crafting recipe required for each item:
| Blueprint | Type | Recipe | Crafted At |
|---|---|---|---|
| Bettina | Weapon | 3x Advanced Mechanical Components 3x Heavy Gun Parts 3x Canister | Gunsmith 3 |
| Blue Light Stick | Quick Use | 3x Chemicals | Utility Station 1 |
| Aphelion | Weapon | 3x Magnetic Accelerator 3x Complex Gun Parts 1x Matriarch Reactor | Gunsmith 3 |
| Combat Mk. 3 (Flanking) | Augment | 2x Advanced Electrical Components 3x Processor | Gear Bench 3 |
| Combat Mk. 3 (Aggressive) | Augment | 2x Advanced Electrical Components 3x Processor | Gear Bench 3 |
| Complex Gun Parts | Material | 2x Light Gun Parts 2x Medium Gun Parts 2x Heavy Gun Parts | Refiner 3 |
| Fireworks Box | Quick Use | 1x Explosive Compound 3x Pop Trigger | Explosives Station 2 |
| Gas Mine | Mine | 4x Chemicals 2x Rubber Parts | Explosives Station 1 |
| Green Light Stick | Quick Use | 3x Chemicals | Utility Station 1 |
| Pulse Mine | Mine | 1x Crude Explosives 1x Wires | Explosives Station 1 |
| Seeker Grenade | Grenade | 1x Crude Explosives 2x ARC Alloy | Explosives Station 1 |
| Looting Mk. 3 (Survivor) | Augment | 2x Advanced Electrical Components 3x Processor | Gear Bench 3 |
| Angled Grip II | Mod | 2x Mechanical Components 3x Duct Tape | Gunsmith 2 |
| Angled Grip III | Mod | 2x Mod Components 5x Duct Tape | Gunsmith 3 |
| Hullcracker | Weapon | 1x Magnetic Accelerator 3x Heavy Gun Parts 1x Exodus Modules | Gunsmith 3 |
| Launcher Ammo | Ammo | 5x Metal Parts 1x Crude Explosives | Workbench 1 |
| Anvil | Weapon | 5x Mechanical Components 5x Simple Gun Parts | Gunsmith 2 |
| Anvil Splitter | Mod | 2x Mod Components 3x Processor | Gunsmith 3 |
| ??? | ??? | ??? | ??? |
| Barricade Kit | Quick Use | 1x Mechanical Components | Utility Station 2 |
| Blaze Grenade | Grenade | 1x Explosive Compound 2x Oil | Explosives Station 3 |
| Bobcat | Weapon | 3x Advanced Mechanical Components 3x Light Gun Parts | Gunsmith 3 |
| Osprey | Weapon | 2x Advanced Mechanical Components 3x Medium Gun Parts 7x Wires | Gunsmith 3 |
| Burletta | Weapon | 3x Mechanical Components 3x Simple Gun Parts | Gunsmith 1 |
| Compensator II | Mod | 2x Mechanical Components 4x Wires | Gunsmith 2 |
| Compensator III | Mod | 2x Mod Components 8x Wires | Gunsmith 3 |
| Defibrillator | Quick Use | 9x Plastic Parts 1x Moss | Medical Lab 2 |
| ??? | ??? | ??? | ??? |
| Equalizer | Weapon | 3x Magnetic Accelerator 3x Complex Gun Parts 1x Queen Reactor | Gunsmith 3 |
| Extended Barrel | Mod | 2x Mod Components 8x Wires | Gunsmith 3 |
| Extended Light Mag II | Mod | 2x Mechanical Components 3x Steel Spring | Gunsmith 2 |
| Extended Light Mag III | Mod | 2x Mod Components 5x Steel Spring | Gunsmith 3 |
| Extended Medium Mag II | Mod | 2x Mechanical Components 3x Steel Spring | Gunsmith 2 |
| Extended Medium Mag III | Mod | 2x Mod Components 5x Steel Spring | Gunsmith 3 |
| Extended Shotgun Mag II | Mod | 2x Mechanical Components 3x Steel Spring | Gunsmith 2 |
| Extended Shotgun Mag III | Mod | 2x Mod Components 5x Steel Spring | Gunsmith 3 |
| Remote Raider Flare | Quick Use | 2x Chemicals 4x Rubber Parts | Utility Station 1 |
| Heavy Gun Parts | Material | 4x Simple Gun Parts | Refiner 2 |
| Venator | Weapon | 2x Advanced Mechanical Components 3x Medium Gun Parts 5x Magnet | Gunsmith 3 |
| Il Toro | Weapon | 5x Mechanical Components 6x Simple Gun Parts | Gunsmith 1 |
| Jolt Mine | Mine | 1x Electrical Components 1x Battery | Explosives Station 2 |
| Explosive Mine | Mine | 1x Explosive Compound 1x Sensors | Explosives Station 3 |
| Jupiter | Weapon | 3x Magnetic Accelerator 3x Complex Gun Parts 1x Queen Reactor | Gunsmith 3 |
| Light Gun Parts | Material | 4x Simple Gun Parts | Refiner 2 |
| Lightweight Stock | Mod | 2x Mod Components 5x Duct Tape | Gunsmith 3 |
| Lure Grenade | Grenade | 1x Speaker Component 1x Electrical Components | Utility Station 2 |
| Medium Gun Parts | Material | 4x Simple Gun Parts | Refiner 2 |
| Torrente | Weapon | 2x Advanced Mechanical Components 3x Medium Gun Parts 6x Steel Spring | Gunsmith 3 |
| Muzzle Brake II | Mod | 2x Mechanical Components 4x Wires | Gunsmith 2 |
| Muzzle Brake III | Mod | 2x Mod Components 8x Wires | Gunsmith 3 |
| Padded Stock | Mod | 2x Mod Components 5x Duct Tape | Gunsmith 3 |
| Shotgun Choke II | Mod | 2x Mechanical Components 4x Wires | Gunsmith 2 |
| Shotgun Choke III | Mod | 2x Mod Components 8x Wires | Gunsmith 3 |
| Shotgun Silencer | Mod | 2x Mod Components 8x Wires | Gunsmith 3 |
| Showstopper | Grenade | 1x Advanced Electrical Components 1x Voltage Converter | Explosives Station 3 |
| Silencer I | Mod | 2x Mechanical Components 4x Wires | Gunsmith 2 |
| Silencer II | Mod | 2x Mod Components 8x Wires | Gunsmith 3 |
| Snap Hook | Quick Use | 2x Power Rod 3x Rope 1x Exodus Modules | Utility Station 3 |
| Stable Stock II | Mod | 2x Mechanical Components 3x Duct Tape | Gunsmith 2 |
| Stable Stock III | Mod | 2x Mod Components 5x Duct Tape | Gunsmith 3 |
| Tagging Grenade | Grenade | 1x Electrical Components 1x Sensors | Utility Station 3 |
| Tempest | Weapon | 3x Advanced Mechanical Components 3x Medium Gun Parts 3x Canister | Gunsmith 3 |
| Trigger Nade | Grenade | 2x Crude Explosives 1x Processor | Explosives Station 2 |
| Vertical Grip II | Mod | 2x Mechanical Components 3x Duct Tape | Gunsmith 2 |
| Vertical Grip III | Mod | 2x Mod Components 5x Duct Tape | Gunsmith 3 |
| Vita Shot | Quick Use | 2x Antiseptic 1x Syringe | Medical Lab 3 |
| Vita Spray | Quick Use | 3x Antiseptic 1x Canister | Medical Lab 3 |
| Vulcano | Weapon | 1x Magnetic Accelerator 3x Heavy Gun Parts 1x Exodus Modules | Gunsmith 3 |
| Wolfpack | Grenade | 2x Explosive Compound 2x Sensors | Explosives Station 3 |
| Red Light Stick | Quick Use | 3x Chemicals | Utility Station 1 |
| Smoke Grenade | Grenade | 14x Chemicals 1x Canister | Utility Station 2 |
| Deadline | Mine | 3x Explosive Compound 2x ARC Circuitry | Explosives Station 3 |
| Trailblazer | Grenade | 1x Explosive Compound 1x Synthesized Fuel | Explosives Station 3 |
| Tactical Mk. 3 (Defensive) | Augment | 2x Advanced Electrical Components 3x Processor | Gear Bench 3 |
| Tactical Mk. 3 (Healing) | Augment | 2x Advanced Electrical Components 3x Processor | Gear Bench 3 |
| Yellow Light Stick | Quick Use | 3x Chemicals | Utility Station 1 |
Note: The missing Blueprints in this list likely have not actually been added to the game at the time of writing, because none of the playerbase has managed to find any of them. As they are added to the game, I will update this page with the most relevant information so you know exactly how to get all 75 Arc Raiders Blueprints.
Where to find Blueprints in Arc Raiders
Below is a list of all containers, modifiers, and events which maximise your chances of finding Blueprints:
- Certain quests reward you with specific Blueprints .
- Completing Trials has a high chance of offering Blueprints as rewards.
- Surveyors have a decent chance of dropping Blueprints on death.
- High loot value areas tend to have a greater chance of spawning Blueprints.
- Night Raids and Storms may increase rare Blueprint spawn chances in containers.
- Containers with higher numbers of items may have a higher tendency to spawn Blueprints. As a result, Blue Gate (which has many “large” containers containing multiple items) may give you a higher chance of spawning Blueprints.
- Raider containers (Raider Caches, Weapon Boxes, Medical Bags, Grenade Tubes) have increased Blueprint drop rates. As a result, the Uncovered Caches event gives you a high chance of finding Blueprints.
- Security Lockers have a higher than average chance of containing Blueprints.
- Certain Blueprints only seem to spawn under specific circumstances: Tempest Blueprint only spawns during Night Raid events. Vulcano Blueprint only spawns during Hidden Bunker events. Jupiter and Equaliser Blueprints only spawn during Harvester events.

Raider Caches, Weapon Boxes, and other raider-oriented container types have a good chance of offering Blueprints. |Image credit:Rock Paper Shotgun/Embark Studios
Blueprints have a very low chance of spawning in any container in Arc Raiders, around 1-2% on average. However, there is a higher chance of finding Blueprints in particular container types. Specifically, you can find more Blueprints in Raider containers and security lockers.
Beyond this, if you’re looking for Blueprints you should focus on regions of the map which are marked as having particularly high-value loot. Areas such as the Control Tower in Dam Battlegrounds, the Arrival and Departure Buildings in Spaceport, and Pilgrim’s Peak in Blue Gate all have a better-than-average chance of spawning Blueprints somewhere amongst all their containers. Night Raids and Electromagnetic Storm events also increase the drop chances of certain Blueprints .
In addition to these containers, you can often loot Blueprints from destroyed Surveyors - the largest of the rolling ball ARC. Surveyors are more commonly found on the later maps - Spaceport and Blue Gate - and if one spawns in your match, you’ll likely see it by the blue laser beam that it casts into the sky while “surveying”.
Surveyors are quite well-armoured and will very speedily run away from you once it notices you, but if you can take one down then make sure you loot all its parts for a chance of obtaining certain unusual Blueprints.
Blueprints obtained from quests
One way in which you can get Blueprints is by completing certain quests for the vendors in Speranza. Some quests will reward you with a specific item Blueprint upon completion, so as long as you work through all the quests in Arc Raiders, you are guaranteed those Blueprints.
Here is the full list of all Blueprints you can get from quest rewards:
- Trigger Nade Blueprint: Rewarded after completing “Sparks Fly”.
- Lure Grenade Blueprint: Rewarded after completing “Greasing Her Palms”.
- Burletta Blueprint: Rewarded after completing “Industrial Espionage”.
- Hullcracker Blueprint (and Launcher Ammo Blueprint): Rewarded after completing “The Major’s Footlocker”.
Alas, that’s only 4 Blueprints out of a total of 75 to unlock, so for the vast majority you will need to find them yourself during a raid. If you’re intent on farming Blueprints, then it’s best to equip yourself with cheap gear in case you lose it, but don’t use a free loadout because then you won’t get a safe pocket to stash any new Blueprint you find. No pain in Arc Raiders is sharper than failing to extract with a new Blueprint you’ve been after for a dozen hours already.

One of the best ways to get Blueprints is by hitting three stars on all five Trials every week. |Image credit:Rock Paper Shotgun/Embark Studios
Blueprints obtained from Trials
One of the very best ways to get Blueprints is as rewards for completing Trials in Arc Raiders. Trials are unlocked from Level 15 onwards, and allow you to earn rewards by focusing on certain tasks over the course of several raids. For example, one Trial might task you with dealing damage to Hornets, while another might challenge you to loot Supply Drops.
Trials refresh on a weekly basis, with a new week bringing five new Trials. Each Trial can offer up to three rewards after passing certain score milestones, and it’s possible to receive very high level loot from these reward crates - including Blueprints. So if you want to unlock as many Blueprints as possible, you should make a point of completing as many Trials as possible each week.
Best Blueprint farming locations
The very best way to get Blueprints is to frequent specific areas of the maps which combine high-tier loot pools with the right types of containers to search. Here are my recommendations for where to find Blueprints on every map, so you can always keep the search going for new crafting recipes to unlock.

Image credit:Rock Paper Shotgun/Embark Studios
Dam Battlegrounds
The best places to farm Blueprints on Dam Battlegrounds are the Control Tower, Power Generation Complex, Ruby Residence, and Pale Apartments . The first two regions, despite only being marked on the map as mid-tier loot, contain a phenomenal number of containers to loot. The Control Tower can also contain a couple of high-tier Security Lockers - though of course, you’ll need to have unlocked the Security Breach skill at the end of the Survival tree.
There’s also a lot of reporting amongst the playerbase that the Residential areas in the top-left of the map - Pale Apartments and Ruby Residence - give you a comparatively strong chance of finding Blueprints. Considering their size, there’s a high density of containers to loot in both locations, and they also have the benefit of being fairly out of the way. So you’re more likely to have all the containers to yourself.
Buried City
The best Blueprint farming locations on Buried City are the Santa Maria Houses, Grandioso Apartments, Town Hall, and the various buildings of the New District . Grandioso Apartments has a lower number of containers than the rest, but a high chance of spawning weapon cases - which have good Blueprint drop rates. The others are high-tier loot areas, with plenty of lootable containers - including Security Lockers.
Spaceport
The best places to find Blueprints on Spaceport are the Arrival and Departure Buildings, as well as Control Tower A6 and the Launch Towers . All these areas are labelled as high-value loot regions, and many of them are also very handily connected to one another by the Spaceport wall, which you can use to quickly run from one area to the next. At the tops of most of these buildings you’ll find at least one Security Locker, so this is an excellent farming route for players looking to find Blueprints.
The downside to looting Blueprints on Spaceport is that all these areas are hotly contested, particularly in Duos and Squads. You’ll need to be very focused and fast in order to complete the full farming route.

Image credit:Rock Paper Shotgun/Embark Studios
Blue Gate
Blue Gate tends to have a good chance of dropping Blueprints, potentially because it generally has a high number of containers which can hold lots of items; so there’s a higher chance of a Blueprint spawning in each container. In my experience, the best Blueprint farming spots on Blue Gate are Pilgrim’s Peak, Raider’s Refuge, the Ancient Fort, and the Underground Complex beneath the Warehouse .
All of these areas contain a wealth of containers to loot. Raider’s Refuge has less to loot, but the majority of the containers in and around the Refuge are raider containers, which have a high chance of containing Blueprints - particularly during major events.
Stella Montis
On the whole, Stella Montis seems to have a very low drop rate for Blueprints (though a high chance of dropping other high-tier loot). If you do want to try farming Blueprints on this map, the best places to find Blueprints in Stella Montis are Medical Research, Assembly Workshop, and the Business Center . These areas have the highest density of containers to loot on the map.
In addition to this, the Western Tunnel has a few different Security Lockers to loot, so while there’s very little to loot elsewhere in this area of the map, it’s worth hitting those Security Lockers if you spawn there at the start of a match.
That wraps up this primer on how to get all the Blueprints in Arc Raiders as quickly as possible. With the Expedition system constantly resetting a large number of players’ Blueprints, it’s more important than ever to have the most up-to-date information on where to find all these Blueprints.
While you’re here, be sure to check out our Arc Raiders best guns tier list , as well as our primers on the best skills to unlock and all the different Field Depot locations on every map.


ARC Raiders
PS5 , Xbox Series X/S , PC
Rock Paper Shotgun is better when you sign in
Sign in and join us on our journey to discover strange and compelling PC games.
