Bulwark: Falconeer Chronicles review: cliffside citybuilding that dries up sooner than you’d hope
Sinking feeling
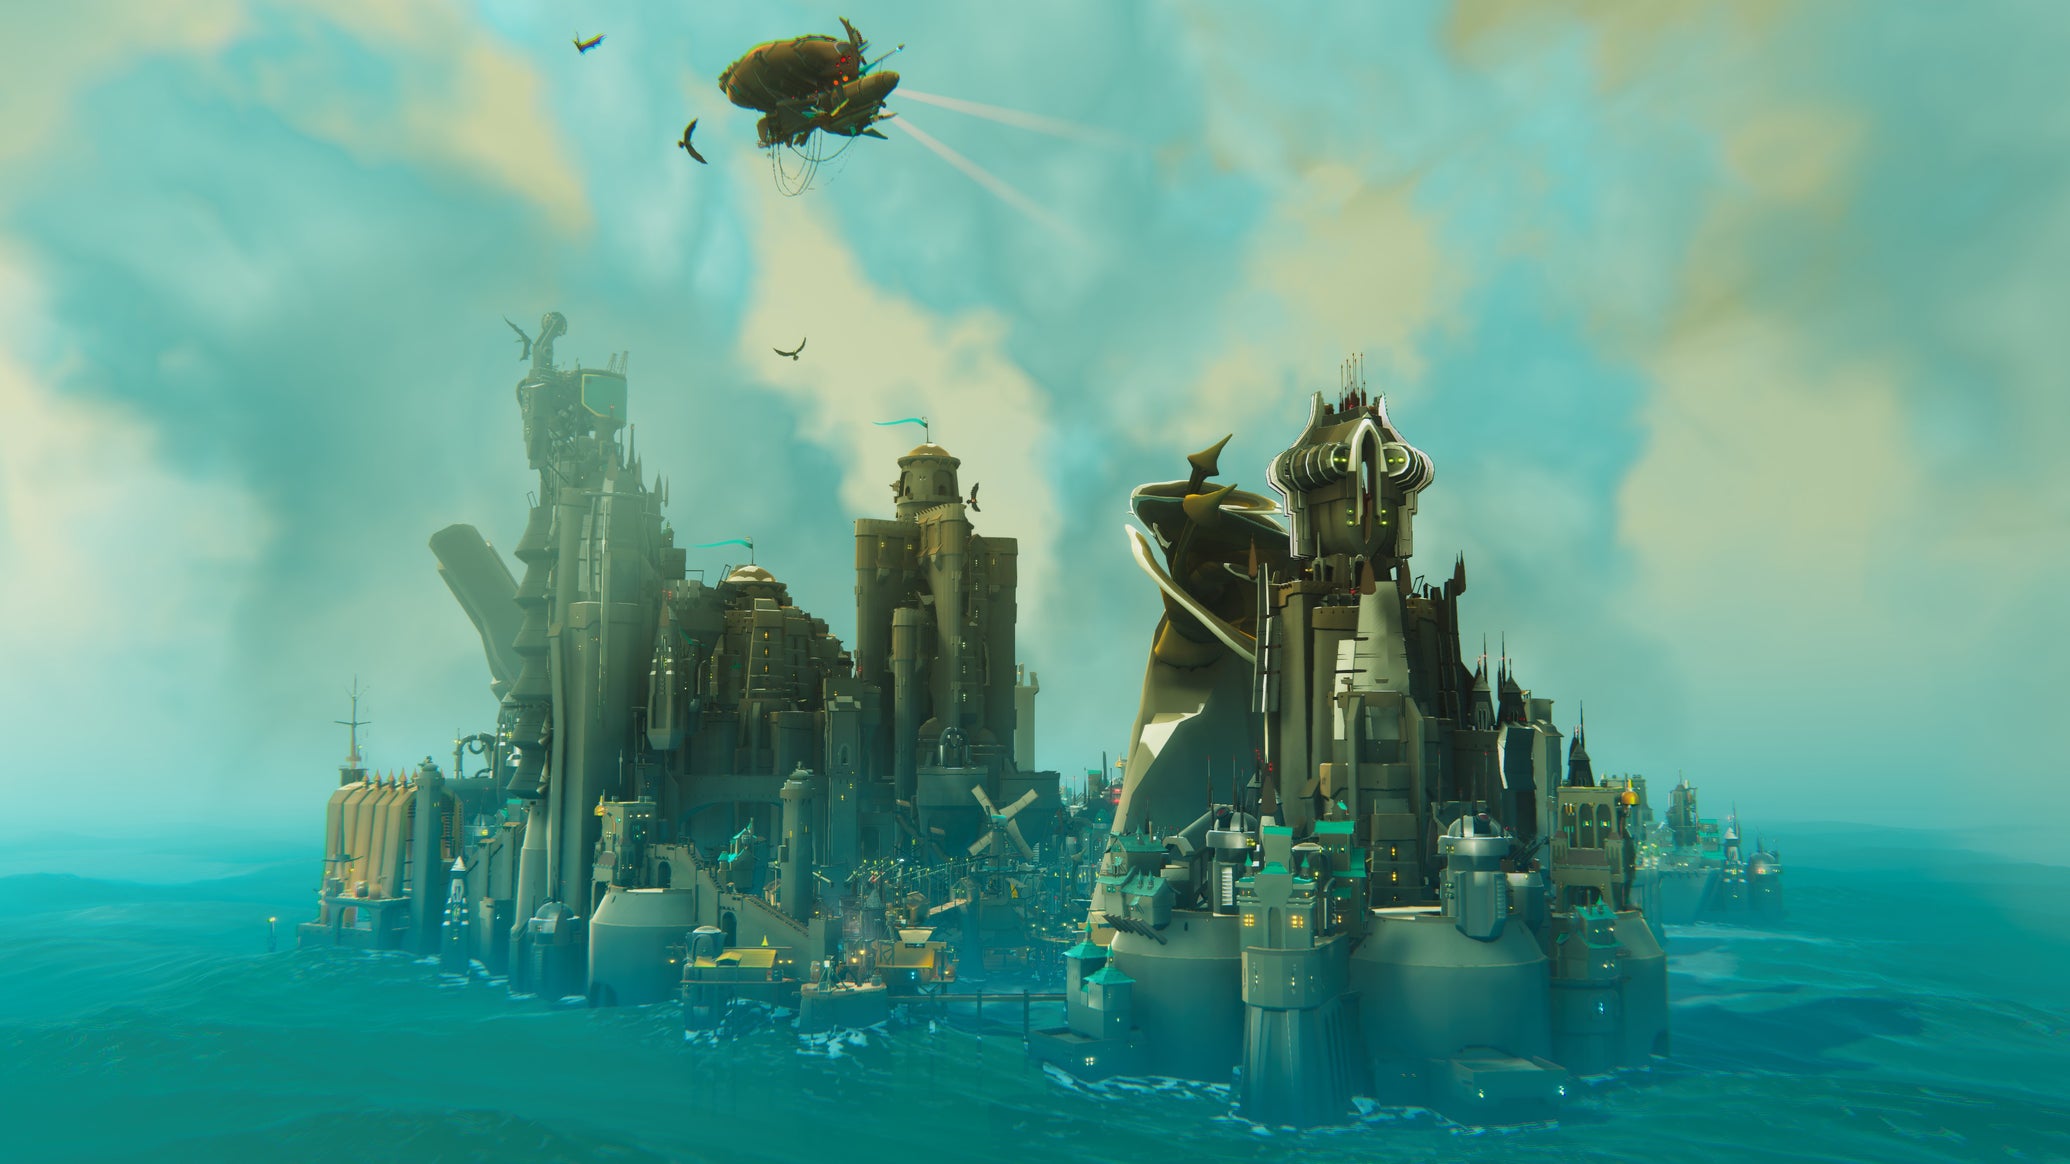
Image credit:Rock Paper Shotgun/Wired Productions

- Developer: Tomas Sala
- Publisher: Wired Productions
- Release: March 26th 2024
- On: Windows
- From: Steam , GOG , Epic Games Store
- Price: £15/€20/$20
- Reviewed on: Intel Core i9-11900K, 16GB RAM, Nvidia RTX 3080, Windows 10
Maintaining the thrum of a finely-tuned citybuilder has to be one of the most satisfying acts of video game plate-spinning around. Nursing that constant flow of foot traffic, produce and profits, all of them teetering on a carefully honed knife-edge, that’s the good stuff right there. Of course, it’s not always the threat of imminent and total collapse that fuels these mighty engines of urban planning. Sometimes it’s the simple pleasure of building itself, watching a scrub of dirt track rise up into an advanced superhighway of architectural wonder. The best of these more relaxed kinds of citybuilders - your Dorfromantik s and your SteamWorld Build s et al - still involve plenty of plate-spinning; it’s just that they won’t ever fall over if you take your eye off the ball for a moment.
Bulwark: Falconeer Chronicles sits at the citybuilding crossroads of ‘relaxed’ and ‘something more’. It wants to be an easy-going kind of builder, as nothing fundamentally bad happens when the wheels stop turning for a moment. For the most part, you’re free to build where and however you please, constructing imposing fortresses jutting out into the ocean from mere scraps of rock. But it also gets more bogged down in the minutiae of resource flow, worker management and conquest and expansion via muddy, ill-defined combat procedures than it probably should. It always feels on the precipice of becoming something bigger, bolder and more boisterous than it ever really achieves, dipping its toes into the murky waters of its lonely Ursee without truly ever getting its feet wet.
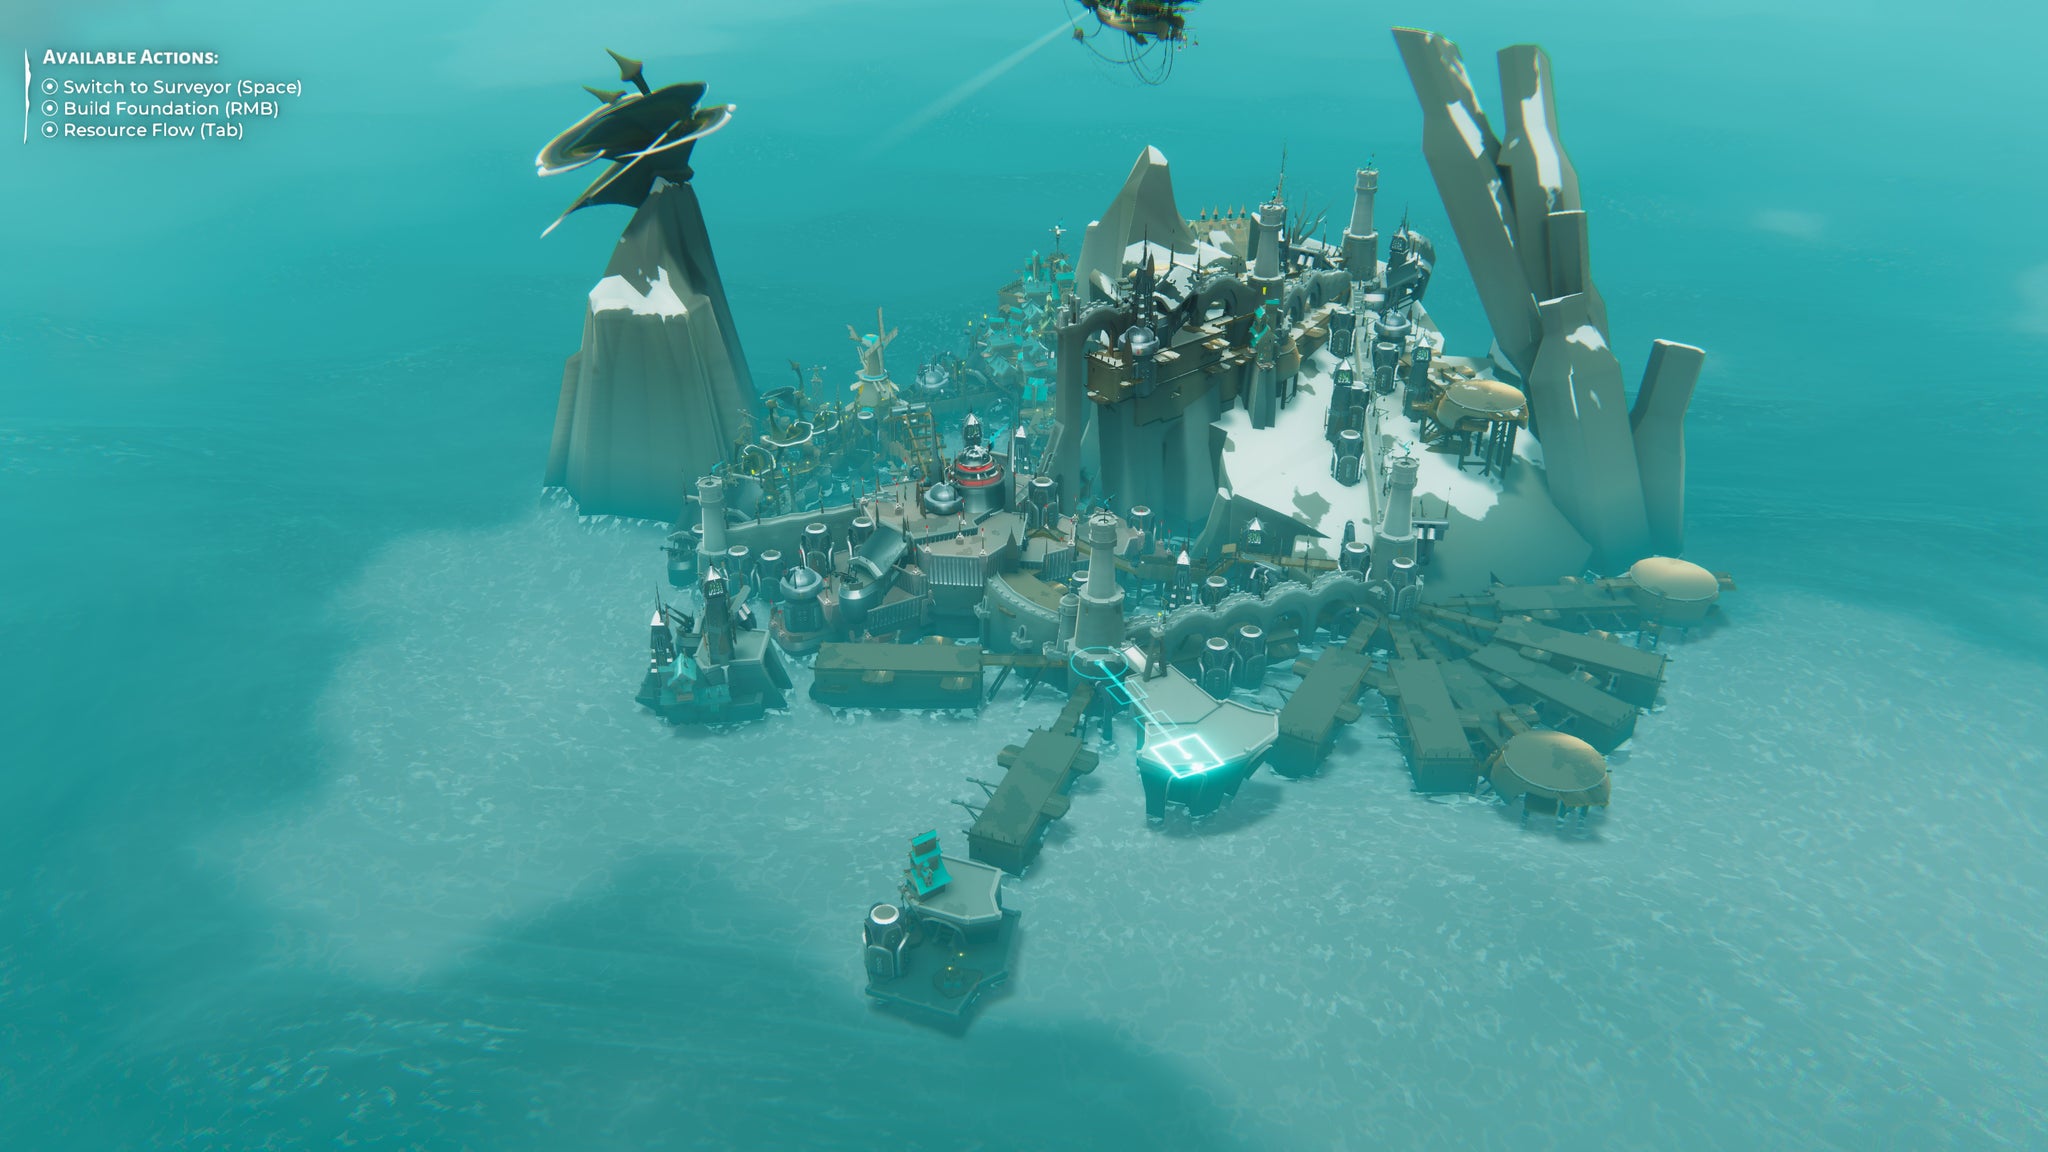
Buildling happens on a ‘spoke and wheel’ system, with circles denoting where you can build towers, and squares where you can expand with foundations. |Image credit:Rock Paper Shotgun/Wired Productions
As a solo developer project, Bulwark still feels impressive in its own right - even if it’s ultimately one that’s subject to a debilitating amount of feature-creep. When you fire it up, you’re presented with a sort-of campaign mode that consists of three starting scenarios, and a free build mode where you can really go to town with its seaside construction systems. I say ‘sort-of-campaign’, as there’s no real goal in Bulwark. You can just keep building and building until you’ve had your fill. Sure, you could probably conquer the oceans if you wished, but there are no objectives or victory conditions per se telling you to do so, or what you should aim for next. You make your own fun in Bulwark, which can feel quite freeing on the one hand, but directionless on the other.
The first scenario has a tutorial of sorts that teaches you the basics of how to build and get your settlement up and running, but most of its later-game queries, such as how combat works, are hidden away in its help menu. Other questions I had, though, are never answered at all, such as ‘why can’t I build another extractor on this nearby stone quarry?’ and ‘am I really making the best use of these outposts I seem to keep collecting?’ It can often feel like you’re clutching at straws as a result, making Bulwark the kind of citybuilder you probably need to try and fail at (or at least muddle along with) two or three times before you really feel like you’ve got the measure of it - because the game itself isn’t going to help you understand it in any great detail. Some folks will no doubt thrive on feeling your way around its borders like this. But the more I played, the more I found myself listing in the other direction, just wanting some straightforward answers for how certain parts of it actually worked.


The fundamental act of building, though, is quite satisfying, and watching your settlements edge further and further out into the sea really feels like you’re defying the odds as you try and make a life for yourself. The first thing you’ll need to do is connect your outpost to a wood mill, as without wood, nothing can be accomplished at all. It’s one of three main resources in Bulwark - the others being stone and iron - and once you’ve got walkways and towers connected to their respective extractor sites, resources will flow freely (for the most part), with houses cropping up automatically along your bridges and jetties.
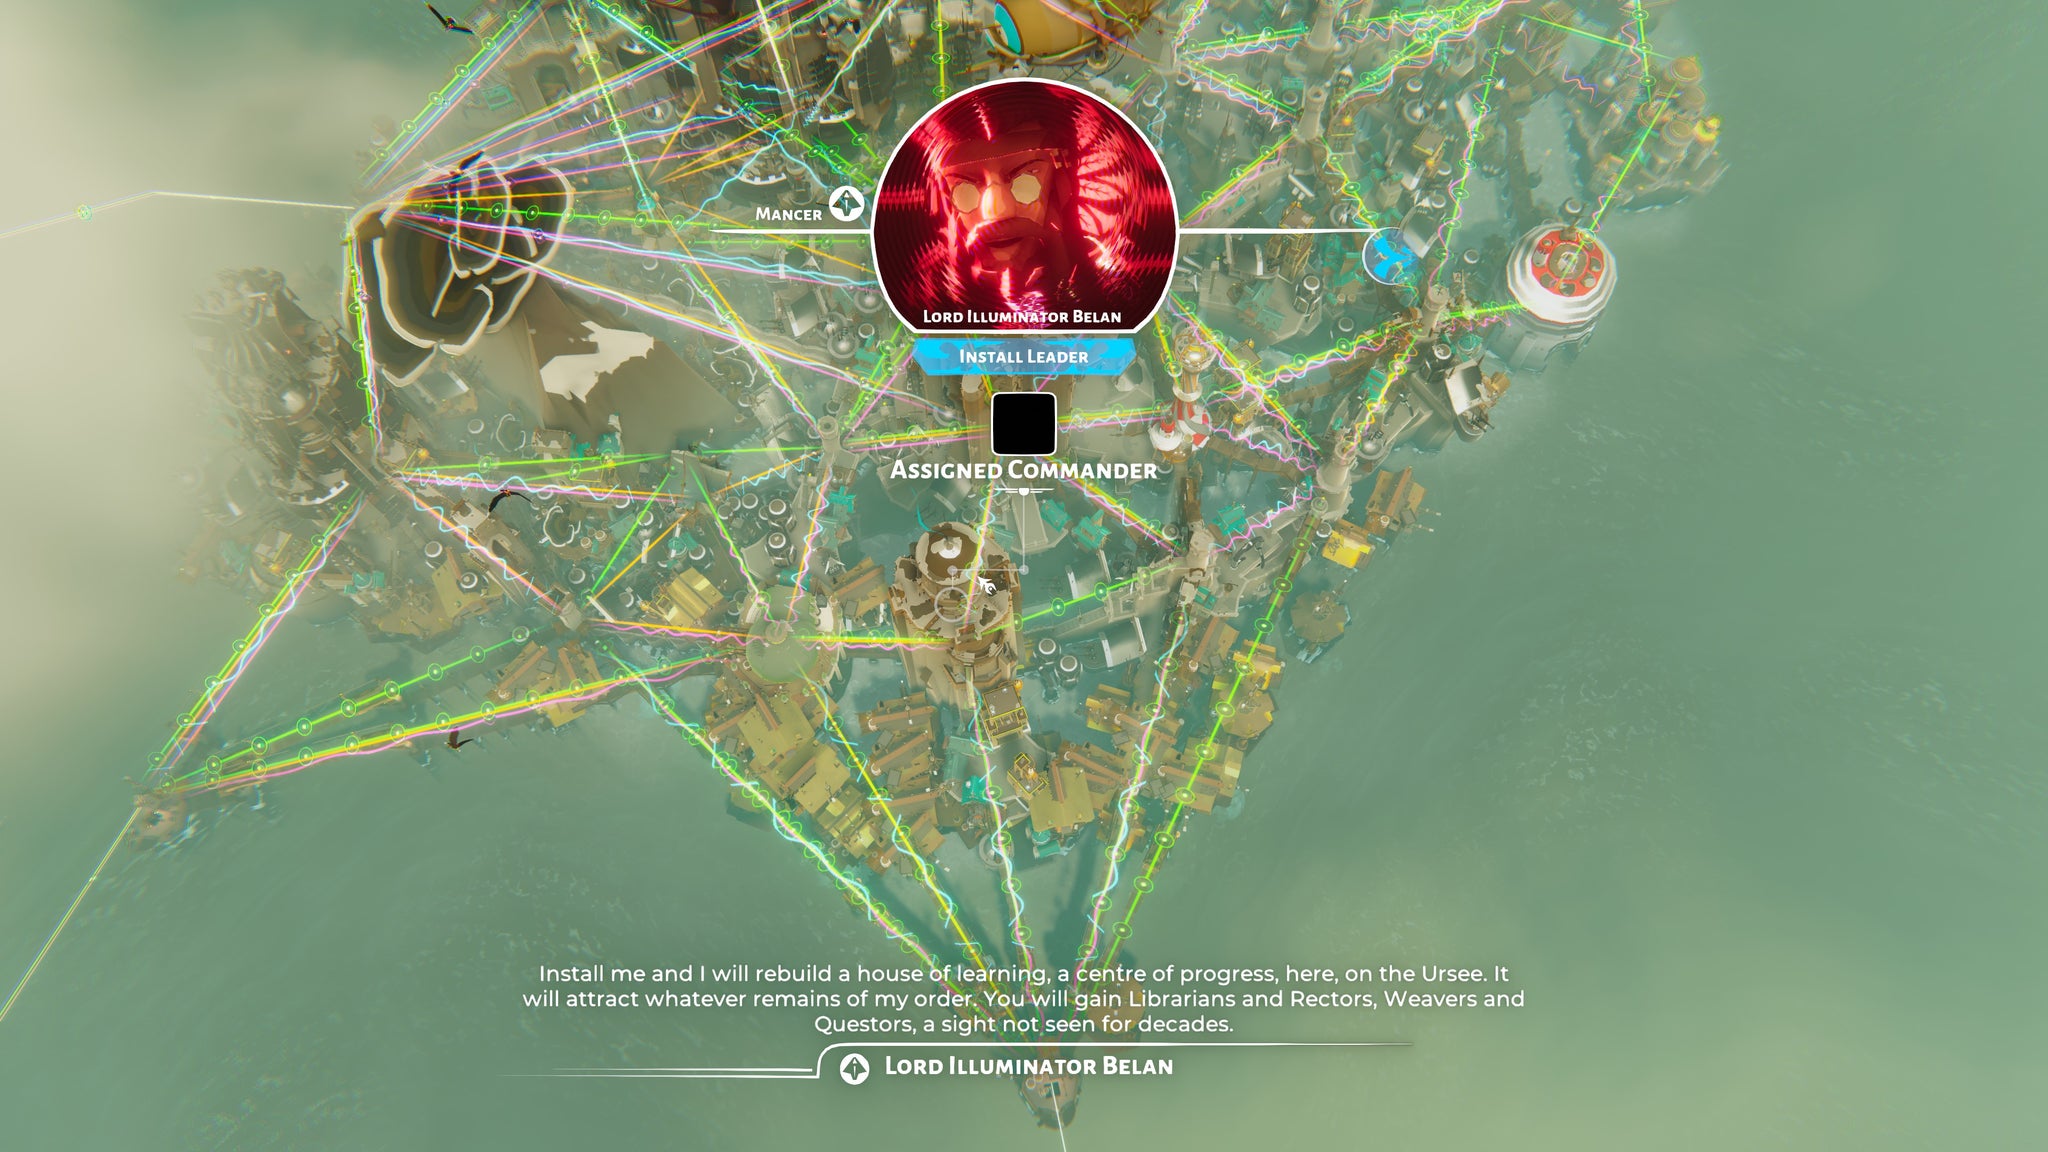
It’s a very easy kind of citybuilding. While resource sites can be depleted, they take a long time to do so, and they’re effectively infinite in quantity while they’re being mined. There are no real limits on how much you can build in the early parts of the game, and you’ll feel little need to hit Tab to toggle on the Resource Flow menu. Remember this menu exists, though, as I’ll be returning to this later. Instead, you’ll be too busy creating a spiderweb of walkways around your starting location, constructing towers and laying foundations to give you more solid ground to work with as you expand into the deeper and deeper water. Once you have stone and iron, you can also upgrade your buildings further, like ever higher towers that reach upwards into the foggy heavens, and balconies to support even more elaborate skyways. Eventually, you’ll also be able to assign captains and commanders to these towers to increase your military might and resource production, each one bringing their own unique trimmings to make them instantly stand out against your settlement’s skyline.
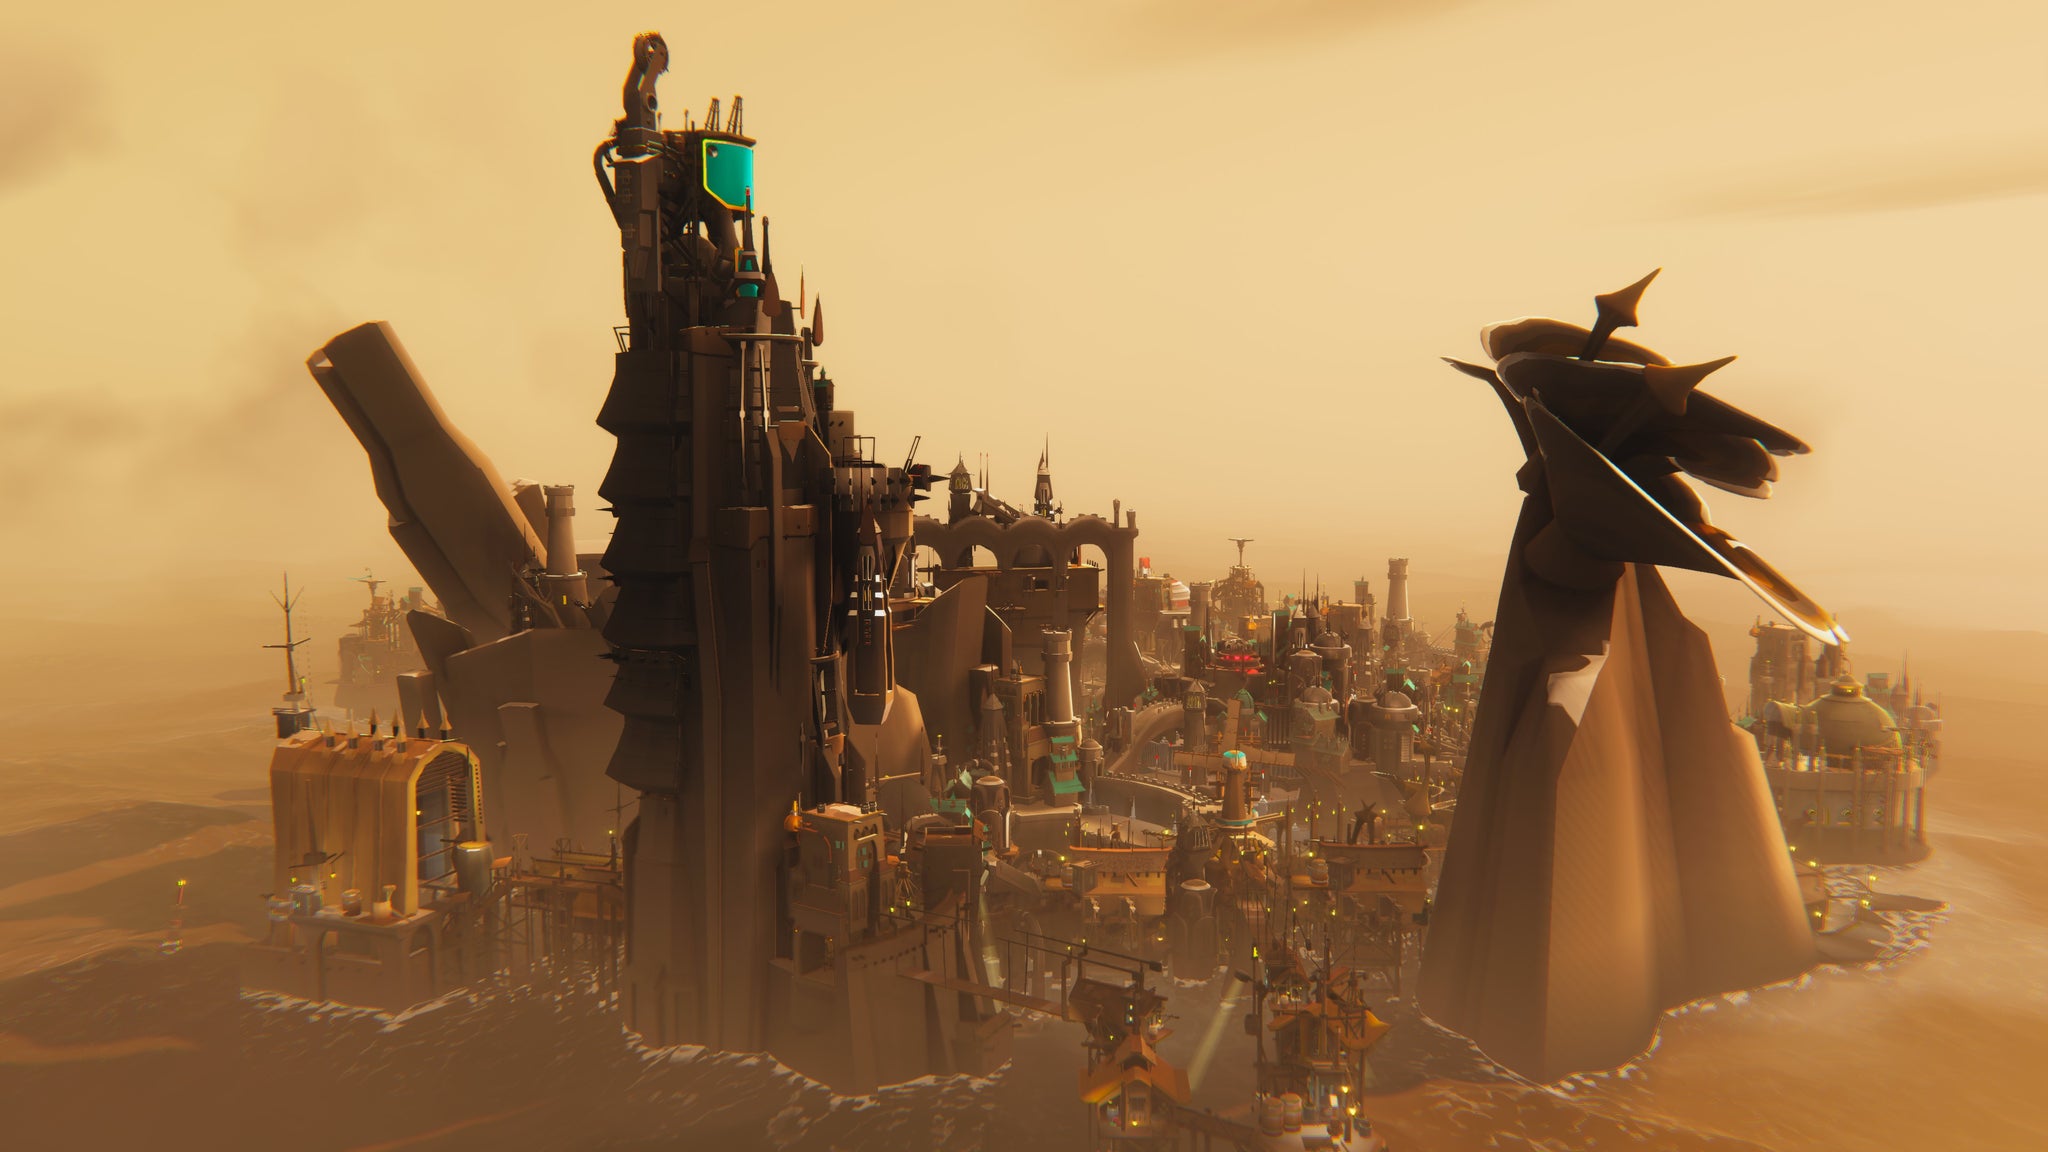
The camera struggles with depth a lot of the time, which can make clicking into the distance a bit finicky. |Image credit:Rock Paper Shotgun/Wired Productions
Like SteamWorld Build , you can comfortably leave your settlement to hum along in the background while you’re out in surveyor mode. I mean, there’s nothing you actually need to keep an eye on in Bulwark, as you don’t have to worry about resources running out, or keeping citizens happy, or anything , really, so you can pop off in your airship whenever you feel like it. In fact, this was where I ended up spending most of my time once I’d got my basic settlement going, as it’s only through exploration that you’ll find new faction outposts to hoover up, new trading ships to bring into your fold, and unique buildings to airlift back to your main home.
However, it’s this late-stage of Bulwark’s scenarios where its foundations start to feel increasingly wobbly. Unique buildings are all well and good, for example, but they have literally no purpose other than looking nice. Similarly for the vessels you’ll find that say they’ll bring ’new businesses’ to your settlement if you agree to take them in. What businesses? What goods? Businesses aren’t a concern or even a selectable building type in this game, so what good do these new recruits actually bring? Thankfully, other encounters are more profitable. Trading vessels are handy when your nearest source of iron, say, is three islands over, and fighter ships are great at keeping them safe as they ferry resources back and forth.
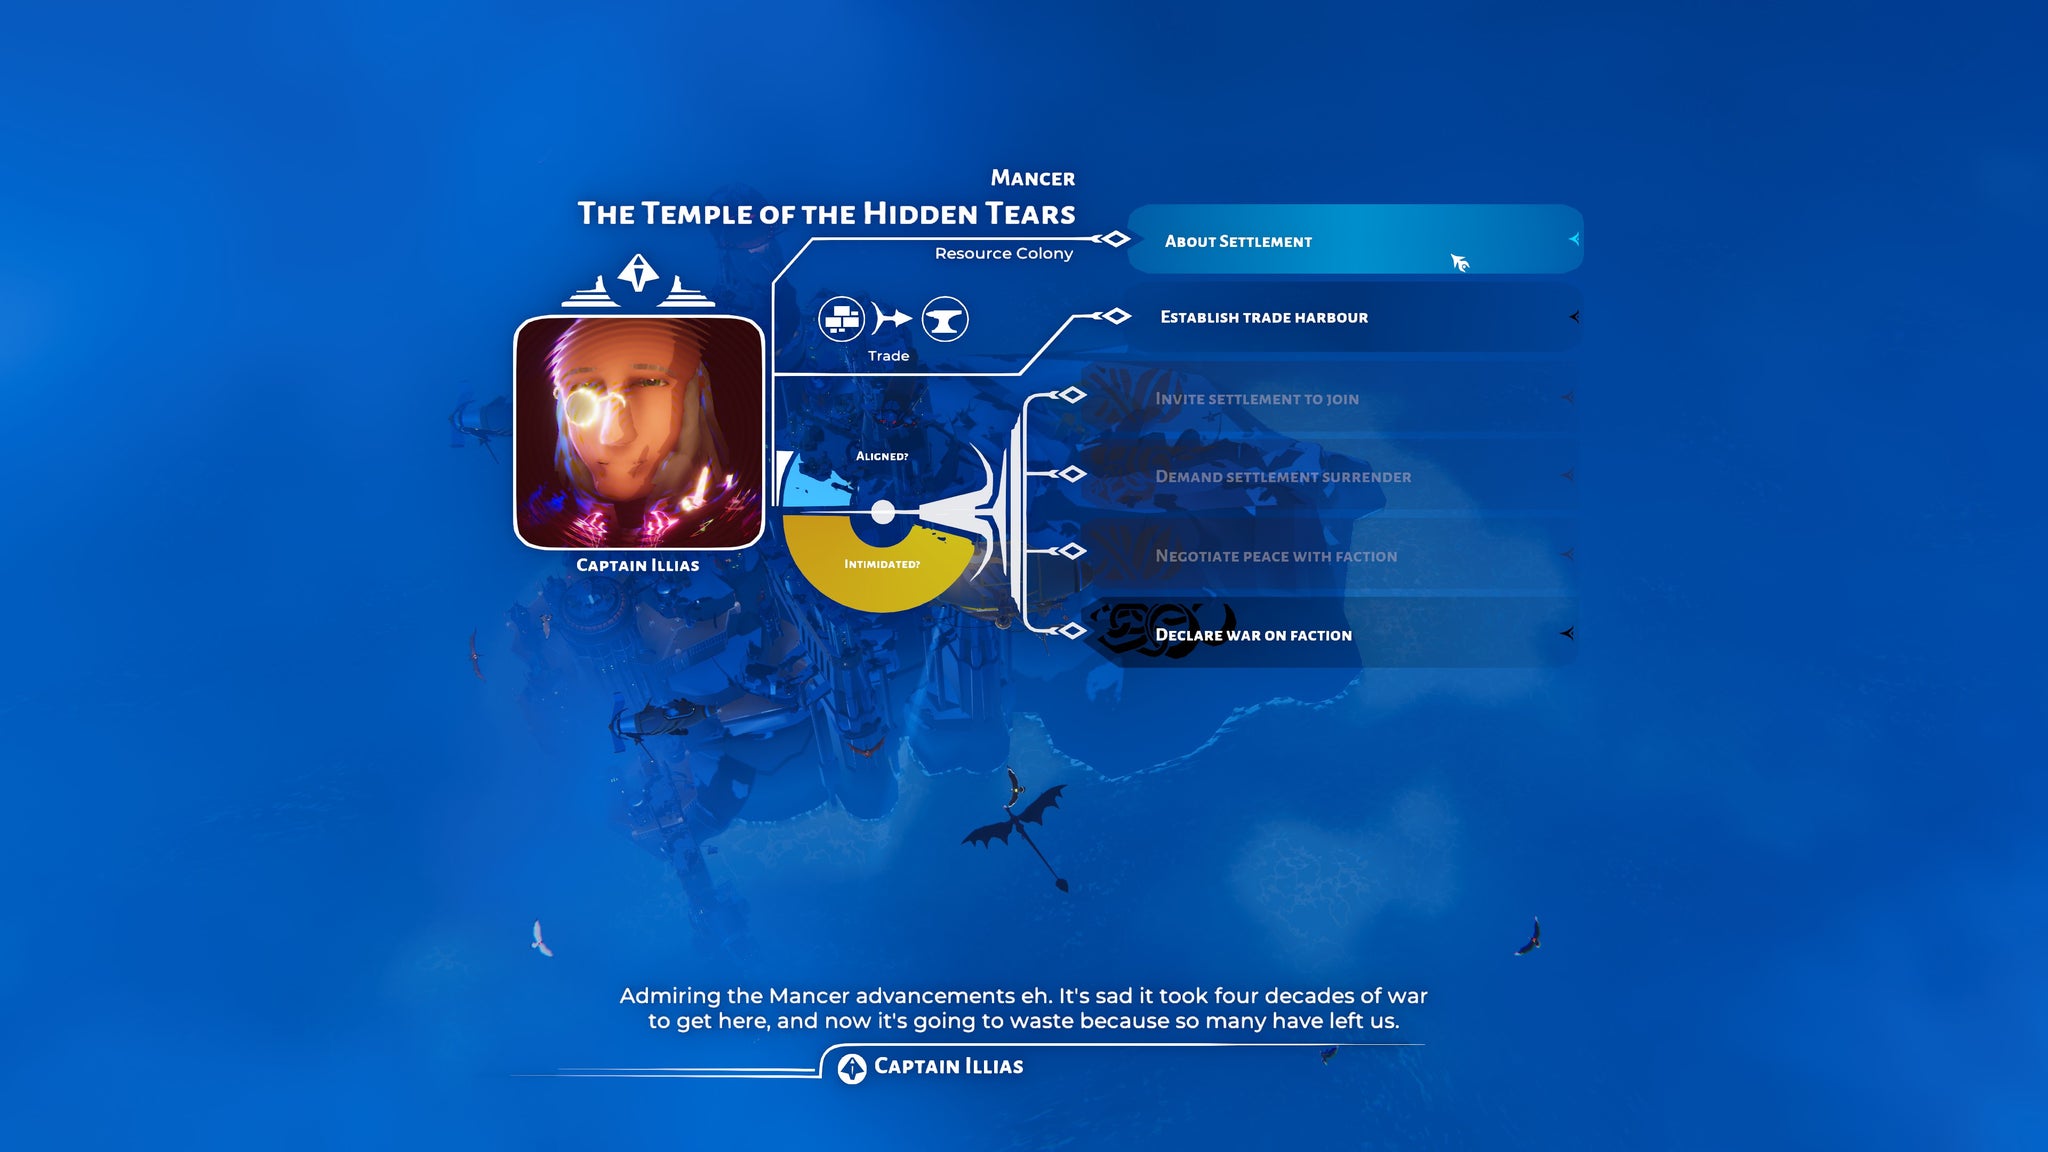
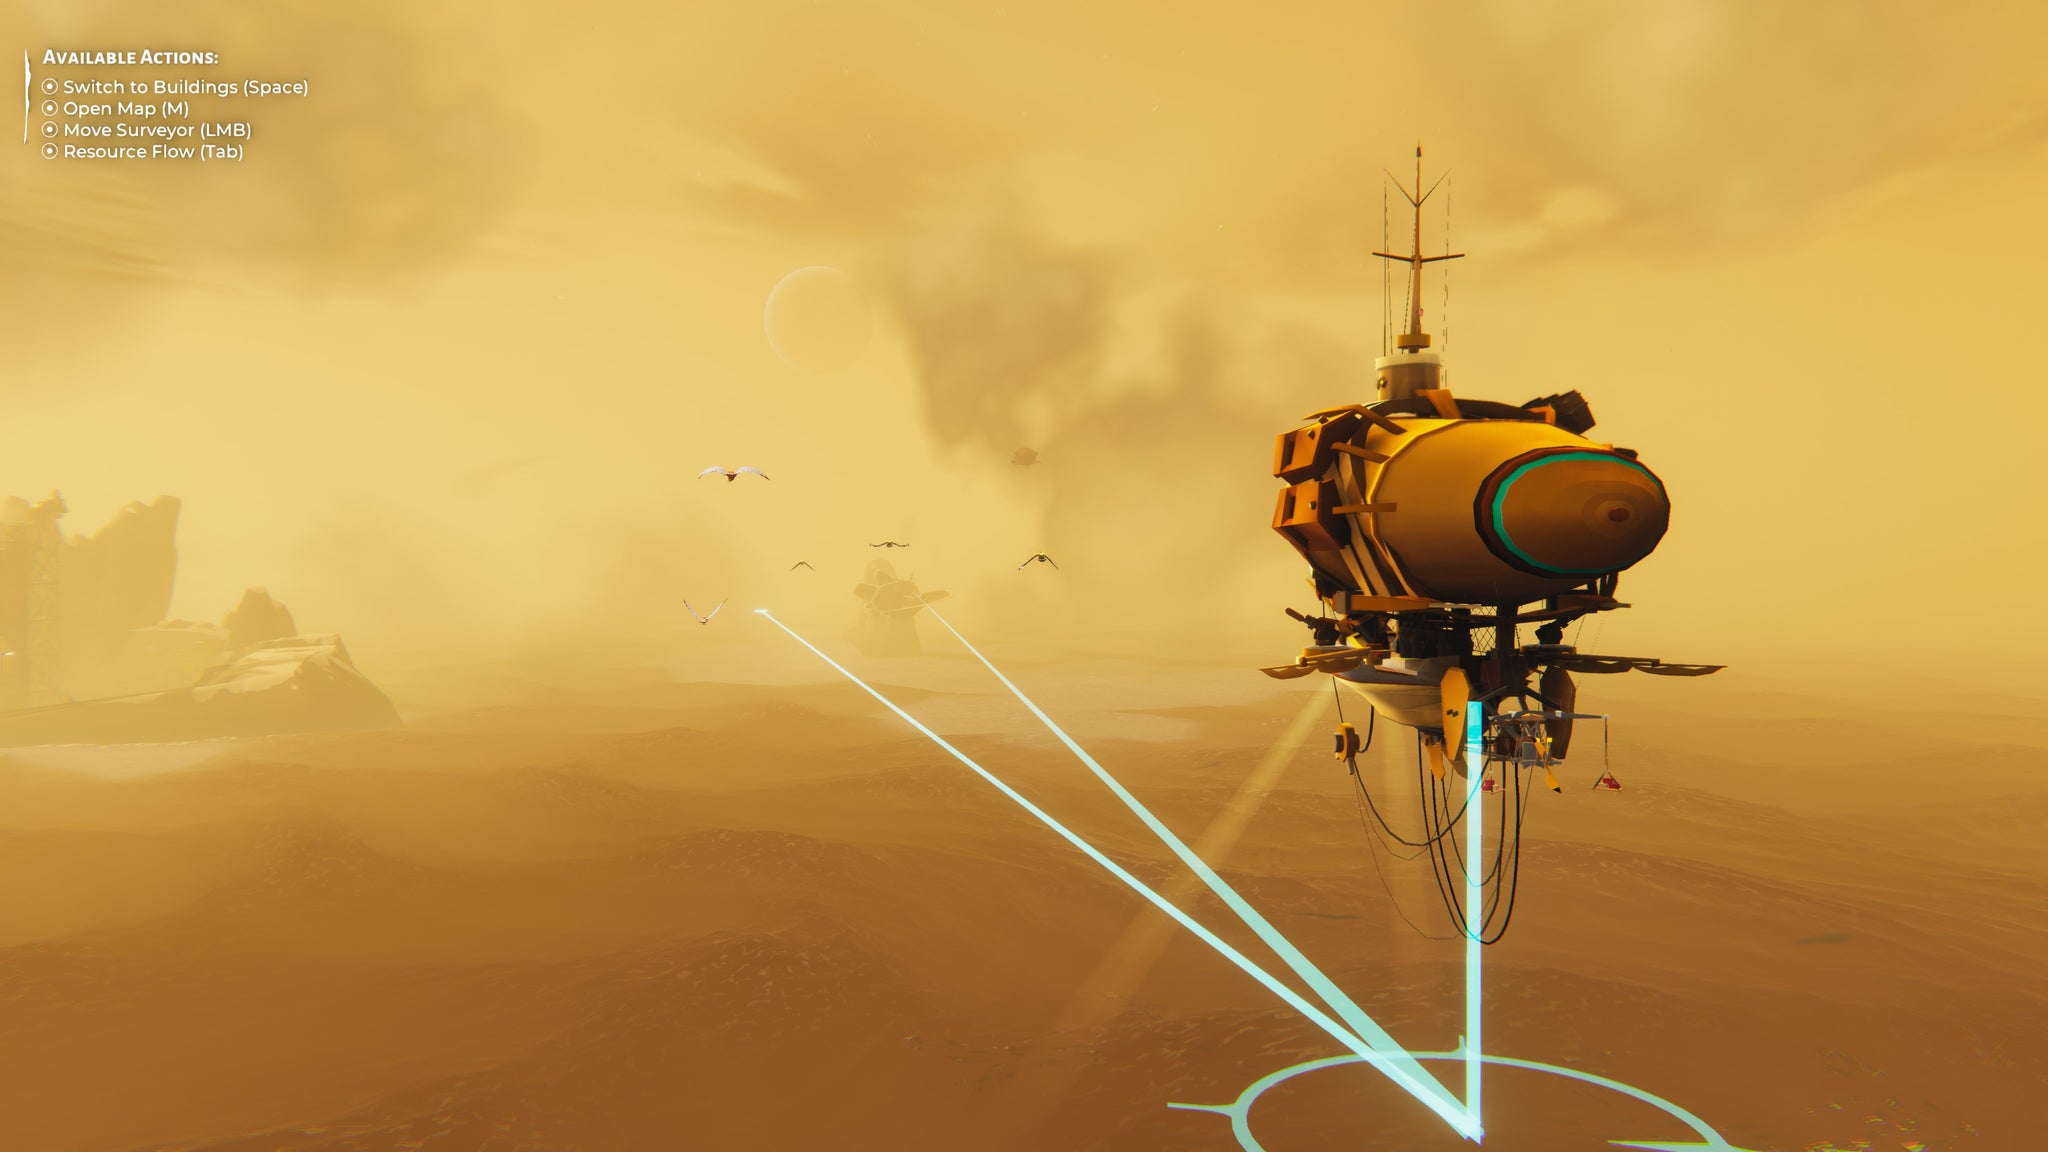
Eventually, you’ll seek new horizons with your surveyor, encountering new settlements (left), or finding anomaly events out at sea (right). The latter might give you new buildings, ship types, refugees or combat encounters, depending on how much you’ve pissed everyone off with your impressive cliff building. |Image credit:Rock Paper Shotgun/Wired Productions

The map gives you a good outline of how many ships you’ve got on each trade route, and whether they’re in danger of being attacked (as the green lines will turn orange if they’re being threatened). Fast travel is possible, but fiddly controls can make it tricky to select your intended destination when zoomed out. |Image credit:Rock Paper Shotgun/Wired Productions
Refugee outposts, on the other hand, can add more people to your settlement - though when their only purpose seems to be to man your towers, they too end up feeling quite superfluous as the game goes on. As actual outposts, however, they feel deeply underutilised. You can theoretically plonk them down anywhere on the map with shallow water, but as I mentioned earlier, you can’t build anything in Bulwark without access to wood - and to mine the world’s many, many resource spots, you need individual extractor tools for each resource in question. How many extractors does the game give you by default? One of each, for your main settlement. And how do you get more of them? The game doesn’t tell you.
As a result, you simply end up assimilating most of these outposts into your wider settlement, adding yet more functionless buildings to your ranks. This was one of my main sticking points in Bulwark, as it was only on my third playthrough, after several hours of bumbling around in the dark that I finally found my answer. I could either take over another settlement by force and dismantle their extractor that way (if they had one), or hope in vain to find a refugee camp event that came with one of its own. The latter only happened once during my review time, and it arguably came far too late for it to feel like a cause for celebration. I can understand not wanting to flood the place with readily available extractor tools, but when the game’s solo developer Tomas Sala proclaims in the start up screen tutorial that the game is about “chaotic creativity”, and the trick is to always “keep building”, it also begs the question: well, why not?
The resource flow menu is both useful for identifying upgrade bottlenecks, but also mildly pointless when there’s not really much of anything being transported anywhere important. |Image credit:Rock Paper Shotgun/Wired Productions
Resources having a set range of travel also feels at odds with Bulwark’s promise of easy, unhindered construction. Remember that Resource Flow menu? Toggle this on and you’ll be assaulted with a mass of coloured squiggly lines showing how workers and resources move through your growing city. But while the quantity of each resource may be technically infinite, they’ll only travel a certain distance from their respective extraction site (or harbour, if it’s coming from overseas). This isn’t brilliantly explained in the tutorial, and it wasn’t until I consulted the help menus that I realised why, despite a healthy supply of iron in my harbour, I couldn’t upgrade some of the towers further into my settlement. I had a great network of walkways going, but the towers I wanted to upgrade lay beyond its incredibly limited building range, stopping me from making progress. Once again, this is a somewhat arbitrary limit to place on construction, especially when extractors are so few and far between. It feels like you’re being imprisoned rather than encouraged, and while dismantling is free and comes without penalty, it’s a right old chore to rearrange everything.
Thing is, though, by the time I started finding more extractors, I wasn’t actually making much progress anymore. I was simply killing time, waiting to see if something else would happen. It’s like being stuck in a Fallout game that just endlessly feeds you with more of the same stuff to do - more captains to find, more trading boats to bring in, and yet more refugees to deposit somewhere. Really, the only thing that did seem to happen the longer I played was other enemy factions started to bristle with fear across the seas, my giant settlement sending the entire Ursee into a spiralling, never-ending war.
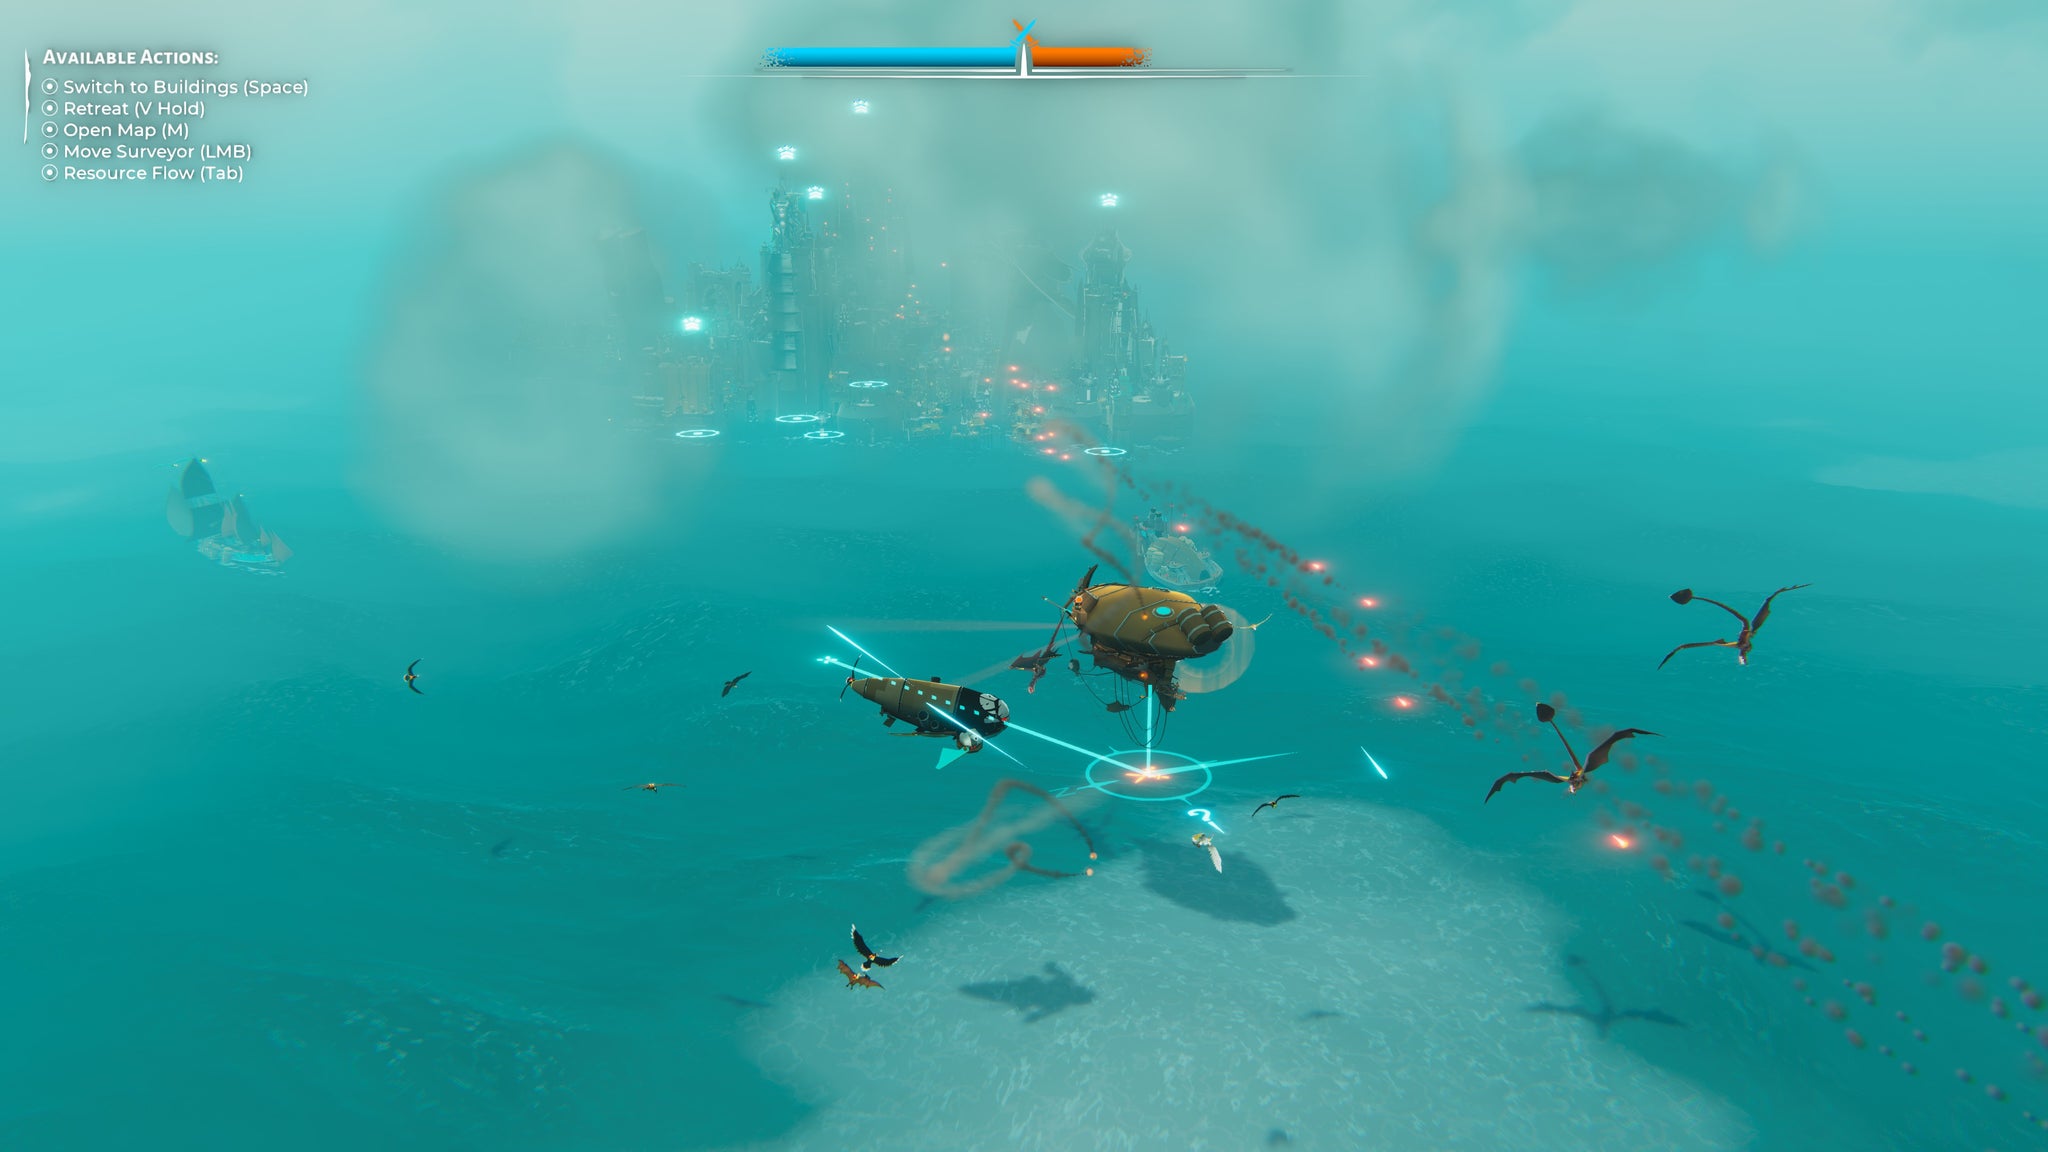
Combat is quite a frictionless affair, as you’ll usually whomp them in seconds without really ever knowing why. |Image credit:Rock Paper Shotgun/Wired Productions
And yes, combat does fill the void somewhat. Enemy settlements will frequently try and disrupt your trade routes, regardless of whether you have fighter ships protecting them or not, but you can also bring the fight to their door and conquer them with your retinue of accompanying fighter falcons. But this, too, grows stale after mincing your fifth large settlement with ease, if only because it’s never really clear how fights actually work. There’s little to no strategy involved - firing your guns all happens automatically, and I couldn’t tell you if clicking my ship around in the sky actually makes any difference versus standing still and letting the cannons rain down from above.
It all just starts to feel like you’re endlessly spinning plates without any real end in sight. Each campaign scenario is more of the same, too, offering little more than a change in starting position and faction type. For some, £15/$20 will be a more than adequate price of entry for that. But it also feels like Bulwark is on the cusp of something greater, like it’s aiming to be an Anno but never quite getting there in the process. It ultimately spreads itself too thin, doing lots of things well without being brilliant, and lacks the depth and momentum to make it feel satisfying on a strategic level. It’s a citybuilder that hums along quietly, but lethargically, sputtering occasionally as you change gears, and eventually petering out altogether as both you and the game become completely and utterly exhausted by it all.
This review is based on a retail build of the game provided by publishers Wired Productions.
Find out how we conduct our reviews by reading our review policy .
Bulwark: Falconeer Chronicles
PC
Rock Paper Shotgun is better when you sign in
Sign in and join us on our journey to discover strange and compelling PC games.

All 75 Arc Raiders Blueprints and where to get them
These areas have the highest chance of giving you Blueprints

Image credit:Rock Paper Shotgun/Embark Studios

Looking for more Arc Raiders Blueprints? It’s a special day when you find a Blueprint, as they’re among the most valuable items in Arc Raiders. If you find a Blueprint that you haven’t already found, then you must make sure you hold onto it at all costs, because Blueprints are the key to one of the most important and powerful systems of meta-progression in the game.
This guide aims to be the very best guide on Blueprints you can find, starting with a primer on what exactly they are and how they work in Arc Raiders, before delving into exactly where to get Blueprints and the very best farming spots for you to take in your search.
We’ll also go over how to get Blueprints from other unlikely activities, such as destroying Surveyors and completing specific quests. And you’ll also find the full list of all 75 Blueprints in Arc Raiders on this page (including the newest Blueprints added with the Cold Snap update , such as the Deadline Blueprint and Firework Box Blueprint), giving you all the information you need to expand your own crafting repertoire.
In this guide:
- What are Blueprints in Arc Raiders?
- Full Blueprint list: All crafting recipes
- Where to find Blueprints in Arc Raiders Blueprints obtained from quests Blueprints obtained from Trials Best Blueprint farming locations

What are Blueprints in Arc Raiders?
Blueprints in Arc Raiders are special items which, if you manage to extract with them, you can expend to permanently unlock a new crafting recipe in your Workshop. If you manage to extract from a raid with an Anvil Blueprint, for example, you can unlock the ability to craft your very own Anvil Pistol, as many times as you like (as long as you have the crafting materials).
To use a Blueprint, simply open your Inventory while in the lobby, then right-click on the Blueprint and click “Learn And Consume” . This will permanently unlock the recipe for that item in your Workshop. As of the Stella Montis update, there are allegedly 75 different Blueprints to unlock - although only 68 are confirmed to be in the game so far. You can see all the Blueprints you’ve found and unlocked by going to the Workshop menu, and hitting “R” to bring up the Blueprint screen.
It’s possible to find duplicates of past Blueprints you’ve already unlocked. If you find these, then you can either sell them, or - if you like to play with friends - you can take it into a match and gift it to your friend so they can unlock that recipe for themselves. Another option is to keep hold of them until the time comes to donate them to the Expedition.
Full Blueprint list: All crafting recipes
Below is the full list of all the Blueprints that are currently available to find in Arc Raiders, and the crafting recipe required for each item:
| Blueprint | Type | Recipe | Crafted At |
|---|---|---|---|
| Bettina | Weapon | 3x Advanced Mechanical Components 3x Heavy Gun Parts 3x Canister | Gunsmith 3 |
| Blue Light Stick | Quick Use | 3x Chemicals | Utility Station 1 |
| Aphelion | Weapon | 3x Magnetic Accelerator 3x Complex Gun Parts 1x Matriarch Reactor | Gunsmith 3 |
| Combat Mk. 3 (Flanking) | Augment | 2x Advanced Electrical Components 3x Processor | Gear Bench 3 |
| Combat Mk. 3 (Aggressive) | Augment | 2x Advanced Electrical Components 3x Processor | Gear Bench 3 |
| Complex Gun Parts | Material | 2x Light Gun Parts 2x Medium Gun Parts 2x Heavy Gun Parts | Refiner 3 |
| Fireworks Box | Quick Use | 1x Explosive Compound 3x Pop Trigger | Explosives Station 2 |
| Gas Mine | Mine | 4x Chemicals 2x Rubber Parts | Explosives Station 1 |
| Green Light Stick | Quick Use | 3x Chemicals | Utility Station 1 |
| Pulse Mine | Mine | 1x Crude Explosives 1x Wires | Explosives Station 1 |
| Seeker Grenade | Grenade | 1x Crude Explosives 2x ARC Alloy | Explosives Station 1 |
| Looting Mk. 3 (Survivor) | Augment | 2x Advanced Electrical Components 3x Processor | Gear Bench 3 |
| Angled Grip II | Mod | 2x Mechanical Components 3x Duct Tape | Gunsmith 2 |
| Angled Grip III | Mod | 2x Mod Components 5x Duct Tape | Gunsmith 3 |
| Hullcracker | Weapon | 1x Magnetic Accelerator 3x Heavy Gun Parts 1x Exodus Modules | Gunsmith 3 |
| Launcher Ammo | Ammo | 5x Metal Parts 1x Crude Explosives | Workbench 1 |
| Anvil | Weapon | 5x Mechanical Components 5x Simple Gun Parts | Gunsmith 2 |
| Anvil Splitter | Mod | 2x Mod Components 3x Processor | Gunsmith 3 |
| ??? | ??? | ??? | ??? |
| Barricade Kit | Quick Use | 1x Mechanical Components | Utility Station 2 |
| Blaze Grenade | Grenade | 1x Explosive Compound 2x Oil | Explosives Station 3 |
| Bobcat | Weapon | 3x Advanced Mechanical Components 3x Light Gun Parts | Gunsmith 3 |
| Osprey | Weapon | 2x Advanced Mechanical Components 3x Medium Gun Parts 7x Wires | Gunsmith 3 |
| Burletta | Weapon | 3x Mechanical Components 3x Simple Gun Parts | Gunsmith 1 |
| Compensator II | Mod | 2x Mechanical Components 4x Wires | Gunsmith 2 |
| Compensator III | Mod | 2x Mod Components 8x Wires | Gunsmith 3 |
| Defibrillator | Quick Use | 9x Plastic Parts 1x Moss | Medical Lab 2 |
| ??? | ??? | ??? | ??? |
| Equalizer | Weapon | 3x Magnetic Accelerator 3x Complex Gun Parts 1x Queen Reactor | Gunsmith 3 |
| Extended Barrel | Mod | 2x Mod Components 8x Wires | Gunsmith 3 |
| Extended Light Mag II | Mod | 2x Mechanical Components 3x Steel Spring | Gunsmith 2 |
| Extended Light Mag III | Mod | 2x Mod Components 5x Steel Spring | Gunsmith 3 |
| Extended Medium Mag II | Mod | 2x Mechanical Components 3x Steel Spring | Gunsmith 2 |
| Extended Medium Mag III | Mod | 2x Mod Components 5x Steel Spring | Gunsmith 3 |
| Extended Shotgun Mag II | Mod | 2x Mechanical Components 3x Steel Spring | Gunsmith 2 |
| Extended Shotgun Mag III | Mod | 2x Mod Components 5x Steel Spring | Gunsmith 3 |
| Remote Raider Flare | Quick Use | 2x Chemicals 4x Rubber Parts | Utility Station 1 |
| Heavy Gun Parts | Material | 4x Simple Gun Parts | Refiner 2 |
| Venator | Weapon | 2x Advanced Mechanical Components 3x Medium Gun Parts 5x Magnet | Gunsmith 3 |
| Il Toro | Weapon | 5x Mechanical Components 6x Simple Gun Parts | Gunsmith 1 |
| Jolt Mine | Mine | 1x Electrical Components 1x Battery | Explosives Station 2 |
| Explosive Mine | Mine | 1x Explosive Compound 1x Sensors | Explosives Station 3 |
| Jupiter | Weapon | 3x Magnetic Accelerator 3x Complex Gun Parts 1x Queen Reactor | Gunsmith 3 |
| Light Gun Parts | Material | 4x Simple Gun Parts | Refiner 2 |
| Lightweight Stock | Mod | 2x Mod Components 5x Duct Tape | Gunsmith 3 |
| Lure Grenade | Grenade | 1x Speaker Component 1x Electrical Components | Utility Station 2 |
| Medium Gun Parts | Material | 4x Simple Gun Parts | Refiner 2 |
| Torrente | Weapon | 2x Advanced Mechanical Components 3x Medium Gun Parts 6x Steel Spring | Gunsmith 3 |
| Muzzle Brake II | Mod | 2x Mechanical Components 4x Wires | Gunsmith 2 |
| Muzzle Brake III | Mod | 2x Mod Components 8x Wires | Gunsmith 3 |
| Padded Stock | Mod | 2x Mod Components 5x Duct Tape | Gunsmith 3 |
| Shotgun Choke II | Mod | 2x Mechanical Components 4x Wires | Gunsmith 2 |
| Shotgun Choke III | Mod | 2x Mod Components 8x Wires | Gunsmith 3 |
| Shotgun Silencer | Mod | 2x Mod Components 8x Wires | Gunsmith 3 |
| Showstopper | Grenade | 1x Advanced Electrical Components 1x Voltage Converter | Explosives Station 3 |
| Silencer I | Mod | 2x Mechanical Components 4x Wires | Gunsmith 2 |
| Silencer II | Mod | 2x Mod Components 8x Wires | Gunsmith 3 |
| Snap Hook | Quick Use | 2x Power Rod 3x Rope 1x Exodus Modules | Utility Station 3 |
| Stable Stock II | Mod | 2x Mechanical Components 3x Duct Tape | Gunsmith 2 |
| Stable Stock III | Mod | 2x Mod Components 5x Duct Tape | Gunsmith 3 |
| Tagging Grenade | Grenade | 1x Electrical Components 1x Sensors | Utility Station 3 |
| Tempest | Weapon | 3x Advanced Mechanical Components 3x Medium Gun Parts 3x Canister | Gunsmith 3 |
| Trigger Nade | Grenade | 2x Crude Explosives 1x Processor | Explosives Station 2 |
| Vertical Grip II | Mod | 2x Mechanical Components 3x Duct Tape | Gunsmith 2 |
| Vertical Grip III | Mod | 2x Mod Components 5x Duct Tape | Gunsmith 3 |
| Vita Shot | Quick Use | 2x Antiseptic 1x Syringe | Medical Lab 3 |
| Vita Spray | Quick Use | 3x Antiseptic 1x Canister | Medical Lab 3 |
| Vulcano | Weapon | 1x Magnetic Accelerator 3x Heavy Gun Parts 1x Exodus Modules | Gunsmith 3 |
| Wolfpack | Grenade | 2x Explosive Compound 2x Sensors | Explosives Station 3 |
| Red Light Stick | Quick Use | 3x Chemicals | Utility Station 1 |
| Smoke Grenade | Grenade | 14x Chemicals 1x Canister | Utility Station 2 |
| Deadline | Mine | 3x Explosive Compound 2x ARC Circuitry | Explosives Station 3 |
| Trailblazer | Grenade | 1x Explosive Compound 1x Synthesized Fuel | Explosives Station 3 |
| Tactical Mk. 3 (Defensive) | Augment | 2x Advanced Electrical Components 3x Processor | Gear Bench 3 |
| Tactical Mk. 3 (Healing) | Augment | 2x Advanced Electrical Components 3x Processor | Gear Bench 3 |
| Yellow Light Stick | Quick Use | 3x Chemicals | Utility Station 1 |
Note: The missing Blueprints in this list likely have not actually been added to the game at the time of writing, because none of the playerbase has managed to find any of them. As they are added to the game, I will update this page with the most relevant information so you know exactly how to get all 75 Arc Raiders Blueprints.
Where to find Blueprints in Arc Raiders
Below is a list of all containers, modifiers, and events which maximise your chances of finding Blueprints:
- Certain quests reward you with specific Blueprints .
- Completing Trials has a high chance of offering Blueprints as rewards.
- Surveyors have a decent chance of dropping Blueprints on death.
- High loot value areas tend to have a greater chance of spawning Blueprints.
- Night Raids and Storms may increase rare Blueprint spawn chances in containers.
- Containers with higher numbers of items may have a higher tendency to spawn Blueprints. As a result, Blue Gate (which has many “large” containers containing multiple items) may give you a higher chance of spawning Blueprints.
- Raider containers (Raider Caches, Weapon Boxes, Medical Bags, Grenade Tubes) have increased Blueprint drop rates. As a result, the Uncovered Caches event gives you a high chance of finding Blueprints.
- Security Lockers have a higher than average chance of containing Blueprints.
- Certain Blueprints only seem to spawn under specific circumstances: Tempest Blueprint only spawns during Night Raid events. Vulcano Blueprint only spawns during Hidden Bunker events. Jupiter and Equaliser Blueprints only spawn during Harvester events.

Raider Caches, Weapon Boxes, and other raider-oriented container types have a good chance of offering Blueprints. |Image credit:Rock Paper Shotgun/Embark Studios
Blueprints have a very low chance of spawning in any container in Arc Raiders, around 1-2% on average. However, there is a higher chance of finding Blueprints in particular container types. Specifically, you can find more Blueprints in Raider containers and security lockers.
Beyond this, if you’re looking for Blueprints you should focus on regions of the map which are marked as having particularly high-value loot. Areas such as the Control Tower in Dam Battlegrounds, the Arrival and Departure Buildings in Spaceport, and Pilgrim’s Peak in Blue Gate all have a better-than-average chance of spawning Blueprints somewhere amongst all their containers. Night Raids and Electromagnetic Storm events also increase the drop chances of certain Blueprints .
In addition to these containers, you can often loot Blueprints from destroyed Surveyors - the largest of the rolling ball ARC. Surveyors are more commonly found on the later maps - Spaceport and Blue Gate - and if one spawns in your match, you’ll likely see it by the blue laser beam that it casts into the sky while “surveying”.
Surveyors are quite well-armoured and will very speedily run away from you once it notices you, but if you can take one down then make sure you loot all its parts for a chance of obtaining certain unusual Blueprints.
Blueprints obtained from quests
One way in which you can get Blueprints is by completing certain quests for the vendors in Speranza. Some quests will reward you with a specific item Blueprint upon completion, so as long as you work through all the quests in Arc Raiders, you are guaranteed those Blueprints.
Here is the full list of all Blueprints you can get from quest rewards:
- Trigger Nade Blueprint: Rewarded after completing “Sparks Fly”.
- Lure Grenade Blueprint: Rewarded after completing “Greasing Her Palms”.
- Burletta Blueprint: Rewarded after completing “Industrial Espionage”.
- Hullcracker Blueprint (and Launcher Ammo Blueprint): Rewarded after completing “The Major’s Footlocker”.
Alas, that’s only 4 Blueprints out of a total of 75 to unlock, so for the vast majority you will need to find them yourself during a raid. If you’re intent on farming Blueprints, then it’s best to equip yourself with cheap gear in case you lose it, but don’t use a free loadout because then you won’t get a safe pocket to stash any new Blueprint you find. No pain in Arc Raiders is sharper than failing to extract with a new Blueprint you’ve been after for a dozen hours already.

One of the best ways to get Blueprints is by hitting three stars on all five Trials every week. |Image credit:Rock Paper Shotgun/Embark Studios
Blueprints obtained from Trials
One of the very best ways to get Blueprints is as rewards for completing Trials in Arc Raiders. Trials are unlocked from Level 15 onwards, and allow you to earn rewards by focusing on certain tasks over the course of several raids. For example, one Trial might task you with dealing damage to Hornets, while another might challenge you to loot Supply Drops.
Trials refresh on a weekly basis, with a new week bringing five new Trials. Each Trial can offer up to three rewards after passing certain score milestones, and it’s possible to receive very high level loot from these reward crates - including Blueprints. So if you want to unlock as many Blueprints as possible, you should make a point of completing as many Trials as possible each week.
Best Blueprint farming locations
The very best way to get Blueprints is to frequent specific areas of the maps which combine high-tier loot pools with the right types of containers to search. Here are my recommendations for where to find Blueprints on every map, so you can always keep the search going for new crafting recipes to unlock.

Image credit:Rock Paper Shotgun/Embark Studios
Dam Battlegrounds
The best places to farm Blueprints on Dam Battlegrounds are the Control Tower, Power Generation Complex, Ruby Residence, and Pale Apartments . The first two regions, despite only being marked on the map as mid-tier loot, contain a phenomenal number of containers to loot. The Control Tower can also contain a couple of high-tier Security Lockers - though of course, you’ll need to have unlocked the Security Breach skill at the end of the Survival tree.
There’s also a lot of reporting amongst the playerbase that the Residential areas in the top-left of the map - Pale Apartments and Ruby Residence - give you a comparatively strong chance of finding Blueprints. Considering their size, there’s a high density of containers to loot in both locations, and they also have the benefit of being fairly out of the way. So you’re more likely to have all the containers to yourself.
Buried City
The best Blueprint farming locations on Buried City are the Santa Maria Houses, Grandioso Apartments, Town Hall, and the various buildings of the New District . Grandioso Apartments has a lower number of containers than the rest, but a high chance of spawning weapon cases - which have good Blueprint drop rates. The others are high-tier loot areas, with plenty of lootable containers - including Security Lockers.
Spaceport
The best places to find Blueprints on Spaceport are the Arrival and Departure Buildings, as well as Control Tower A6 and the Launch Towers . All these areas are labelled as high-value loot regions, and many of them are also very handily connected to one another by the Spaceport wall, which you can use to quickly run from one area to the next. At the tops of most of these buildings you’ll find at least one Security Locker, so this is an excellent farming route for players looking to find Blueprints.
The downside to looting Blueprints on Spaceport is that all these areas are hotly contested, particularly in Duos and Squads. You’ll need to be very focused and fast in order to complete the full farming route.

Image credit:Rock Paper Shotgun/Embark Studios
Blue Gate
Blue Gate tends to have a good chance of dropping Blueprints, potentially because it generally has a high number of containers which can hold lots of items; so there’s a higher chance of a Blueprint spawning in each container. In my experience, the best Blueprint farming spots on Blue Gate are Pilgrim’s Peak, Raider’s Refuge, the Ancient Fort, and the Underground Complex beneath the Warehouse .
All of these areas contain a wealth of containers to loot. Raider’s Refuge has less to loot, but the majority of the containers in and around the Refuge are raider containers, which have a high chance of containing Blueprints - particularly during major events.
Stella Montis
On the whole, Stella Montis seems to have a very low drop rate for Blueprints (though a high chance of dropping other high-tier loot). If you do want to try farming Blueprints on this map, the best places to find Blueprints in Stella Montis are Medical Research, Assembly Workshop, and the Business Center . These areas have the highest density of containers to loot on the map.
In addition to this, the Western Tunnel has a few different Security Lockers to loot, so while there’s very little to loot elsewhere in this area of the map, it’s worth hitting those Security Lockers if you spawn there at the start of a match.
That wraps up this primer on how to get all the Blueprints in Arc Raiders as quickly as possible. With the Expedition system constantly resetting a large number of players’ Blueprints, it’s more important than ever to have the most up-to-date information on where to find all these Blueprints.
While you’re here, be sure to check out our Arc Raiders best guns tier list , as well as our primers on the best skills to unlock and all the different Field Depot locations on every map.

ARC Raiders
PS5 , Xbox Series X/S , PC
Rock Paper Shotgun is better when you sign in
Sign in and join us on our journey to discover strange and compelling PC games.
