Black Ops 6 Zombies Terminus easter egg walkthrough
Here’s how to complete the main quest easter egg on the Black Ops 6 Terminus map
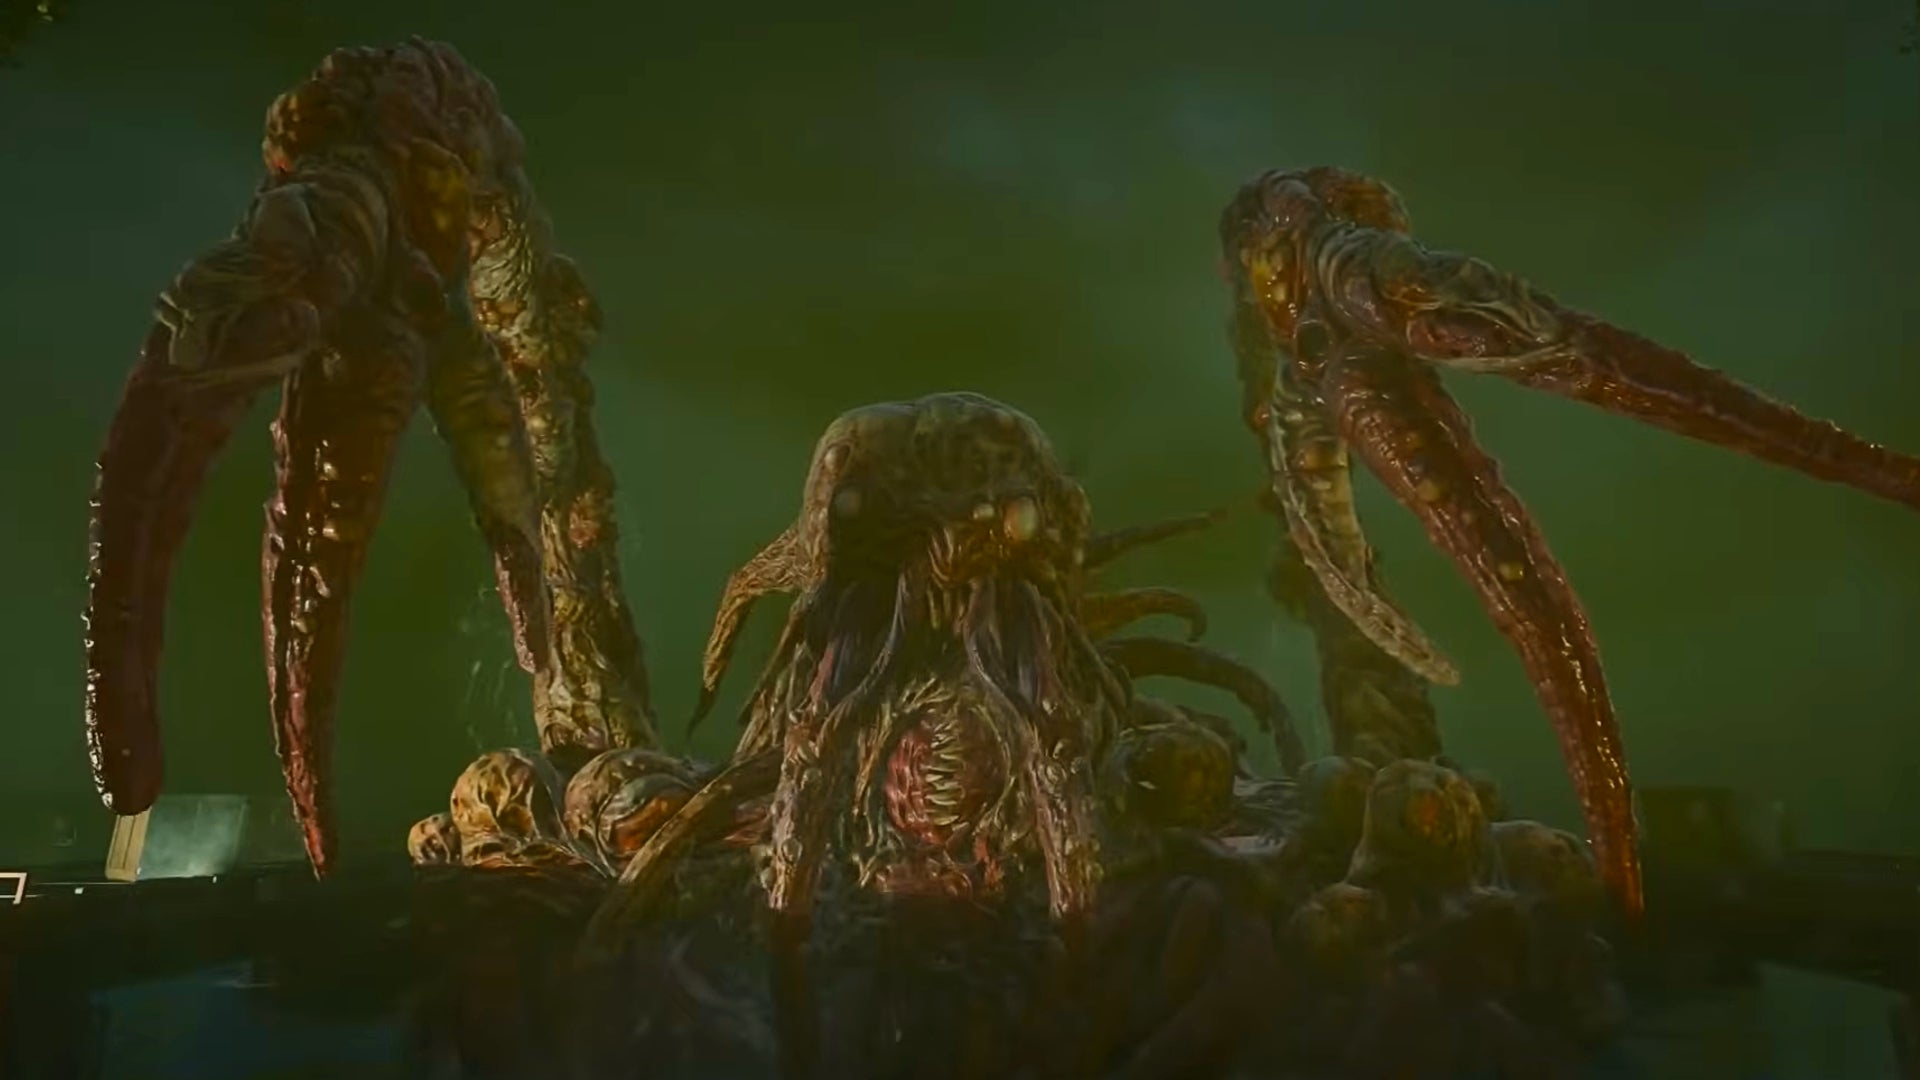
Image credit:Rock Paper Shotgun/Activision

Want to complete the Terminus easter egg in Call Of Duty: Black Ops 6 Zombies? Black Ops 6 features a wide array of secrets on both of its Zombies maps, and the sheer size and scale of Terminus means you’ve got quite a bit to do if you want to complete the main easter egg. Aside from building the Beamsmasher Wonder Weapon, you’ll need to boat around the map to find nodes, hack satellites, and face some truly horrific undead abominations, including Patient 13 - a real pain of a final boss.
For everyone struggling to complete these objectives during a match, we’ve outlined them below for your viewing convenience. In this guide, we’ll tell you exactly what you need to do to complete the main easter egg in Call Of Duty: Black Ops 6 Zombies’ Terminus map .
How to complete the Terminus easter egg in Black Ops 6
You’ll need to check off the following objectives in order to complete Terminus’ easter egg. Click on the objective to be taken to that section of the guide:
- Craft the Beamsmasher
- Rescue Nathan
- Find Node Connectors
- Hack Water Satellites
- Defeat Patient 13
Craft the Beamsmasher
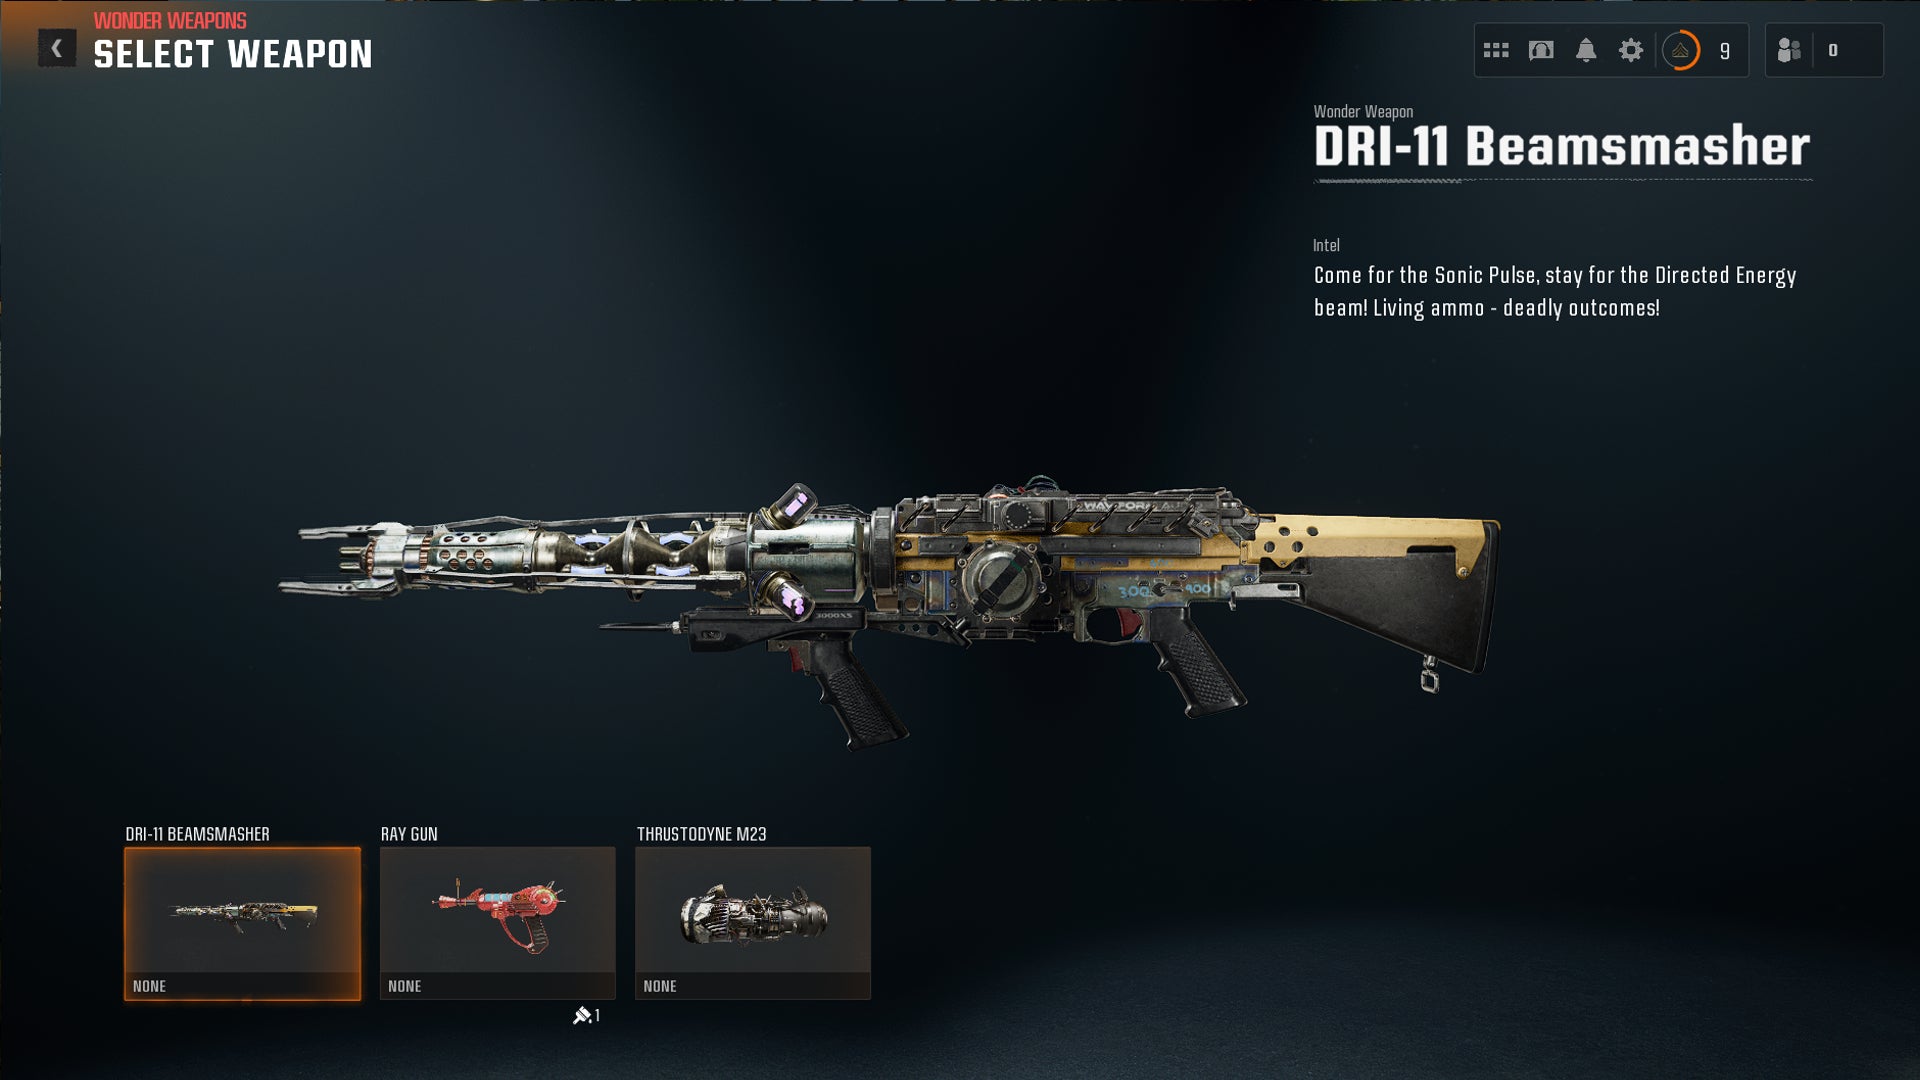
This bad boy roasts the undead with pure energy. You have to solve a maths problem to get it, believe it or not. |Image credit:Rock Paper Shotgun/Activision.
The DRI-11 Beamsmasher is the Wonder Weapon of Terminus, and a truly wondrous piece of work it is indeed. It fires a continuous beam that’ll obliterate anything in your way, but crafting it takes a darn long time. We’ve made a guide specifically devoted to finding this big gun for everyone who wants to prioritise it first and foremost, so head on over to our comprehensive look at how to craft the Beamsmasher .
Rescue Nathan
Once the Beamsmasher’s in your hands, it’s time to acquire a missing Hard Drive , which can be found at one of the Tentacle Traps scattered across the map. You may have come across these when searching for the Beamsmasher’s components - basically, they’re grates in the ceiling that contain nasty tendrils which will come down and attack you if you stand underneath. Keep an eye out for a tentacle trap that’s broken with a keycard and blood splattered on the floor below it. Once you find this trap and activate it, shoot the tentacled mass with the Beamsmasher for it to drop the Hard Drive. Refer to the following maps and location descriptions if you’re not sure where the Tentacle Traps are:
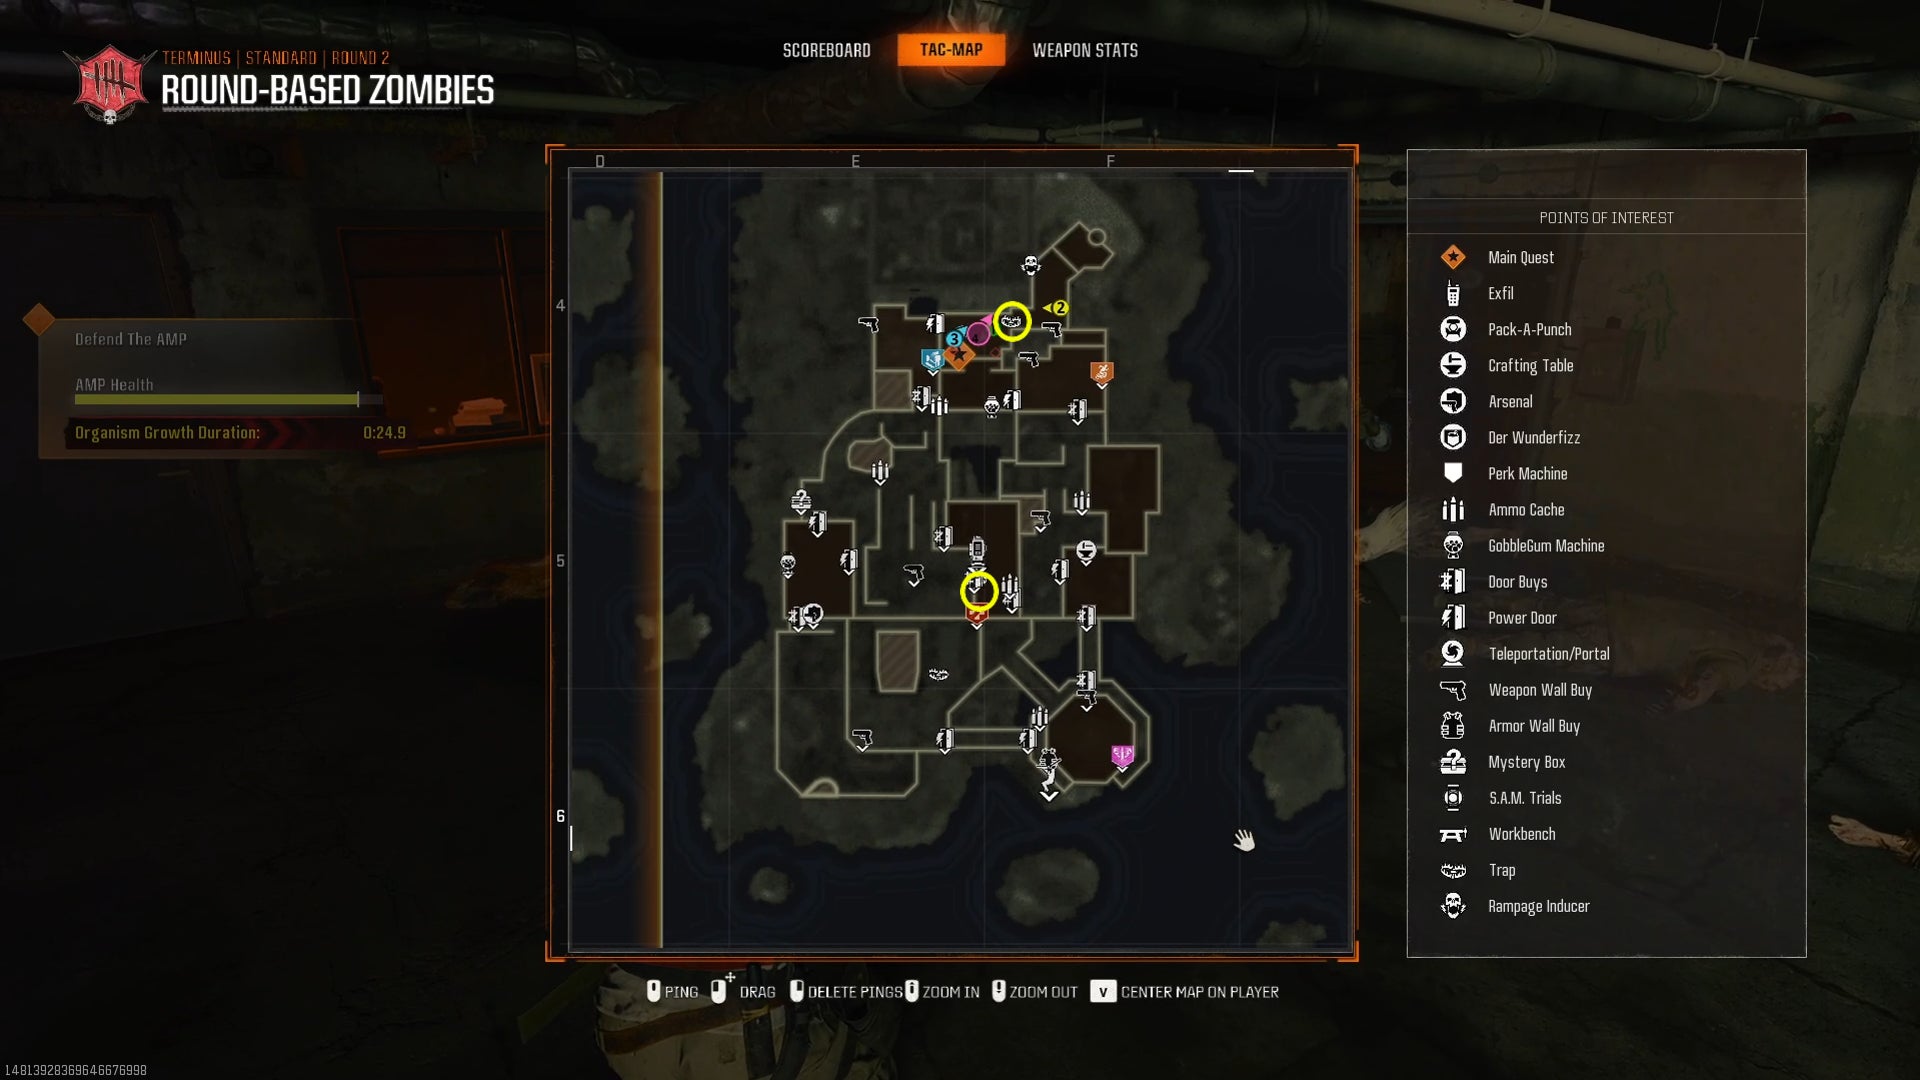
Image credit:Rock Paper Shotgun/Activision

Image credit:Rock Paper Shotgun/Activision
- Near your spawn point next to the first AMP Generator
- Near the Jugger-Nog machine
- In the Bio Lab to the southwest
- In the Bio Lab to the southeast
Take the Hard Drive back to the Guard Station where Peck is and put it in the deposit slot. Peck then gives you instructions to head to the Bio Lab and interact with the main central chamber. Doing so reveals Nathan Aguinaldo , a truly tragic character and the brother of my favourite Operator, Maya Aguinaldo. If you’re playing as Maya during this segment, you’ll get lots of cool extra dialogue that adds to the overall Zombies storyline.
Saving Nathan from his Bio Lab prison requires finding a three digit keypad code scattered throughout Terminus. The code is randomised per playthrough and hidden in some pretty obscure places. You’ll have to search in the following three locations:
- Check the clock behind the gate in the Interrogation Room in quadrant E4 . The hour hand is the first digit of the code.
- Go to the bulletin board by the door of the Mess Hall in quadrant E5 and look at the playing card. The number on the card is the second digit of the code. If it’s an Ace card, the number is 1.
- In the Engineering Room in quadrant F5 , check the sign that says " Days Since Last Injury ." The number there is the third digit of the code.
Return to the Bio Lab, input all three numbers into Nathan’s cell, and then turn the valves to release him. Alas, upon his release you’ll see that Nathan isn’t in the best of states. In fact, he’s morphed into a gruesome Amalgam undead, and a boss fight against him will begin. You’ll be stuck within the Bio Lab as this fight goes on, and the best way to take Nathan out is by strafing around the area and targeting your fire on the weak spots of his body. Plenty of zombies will spawn to distract you, but if you focus on Nathan he’ll soon meet his tragic end.
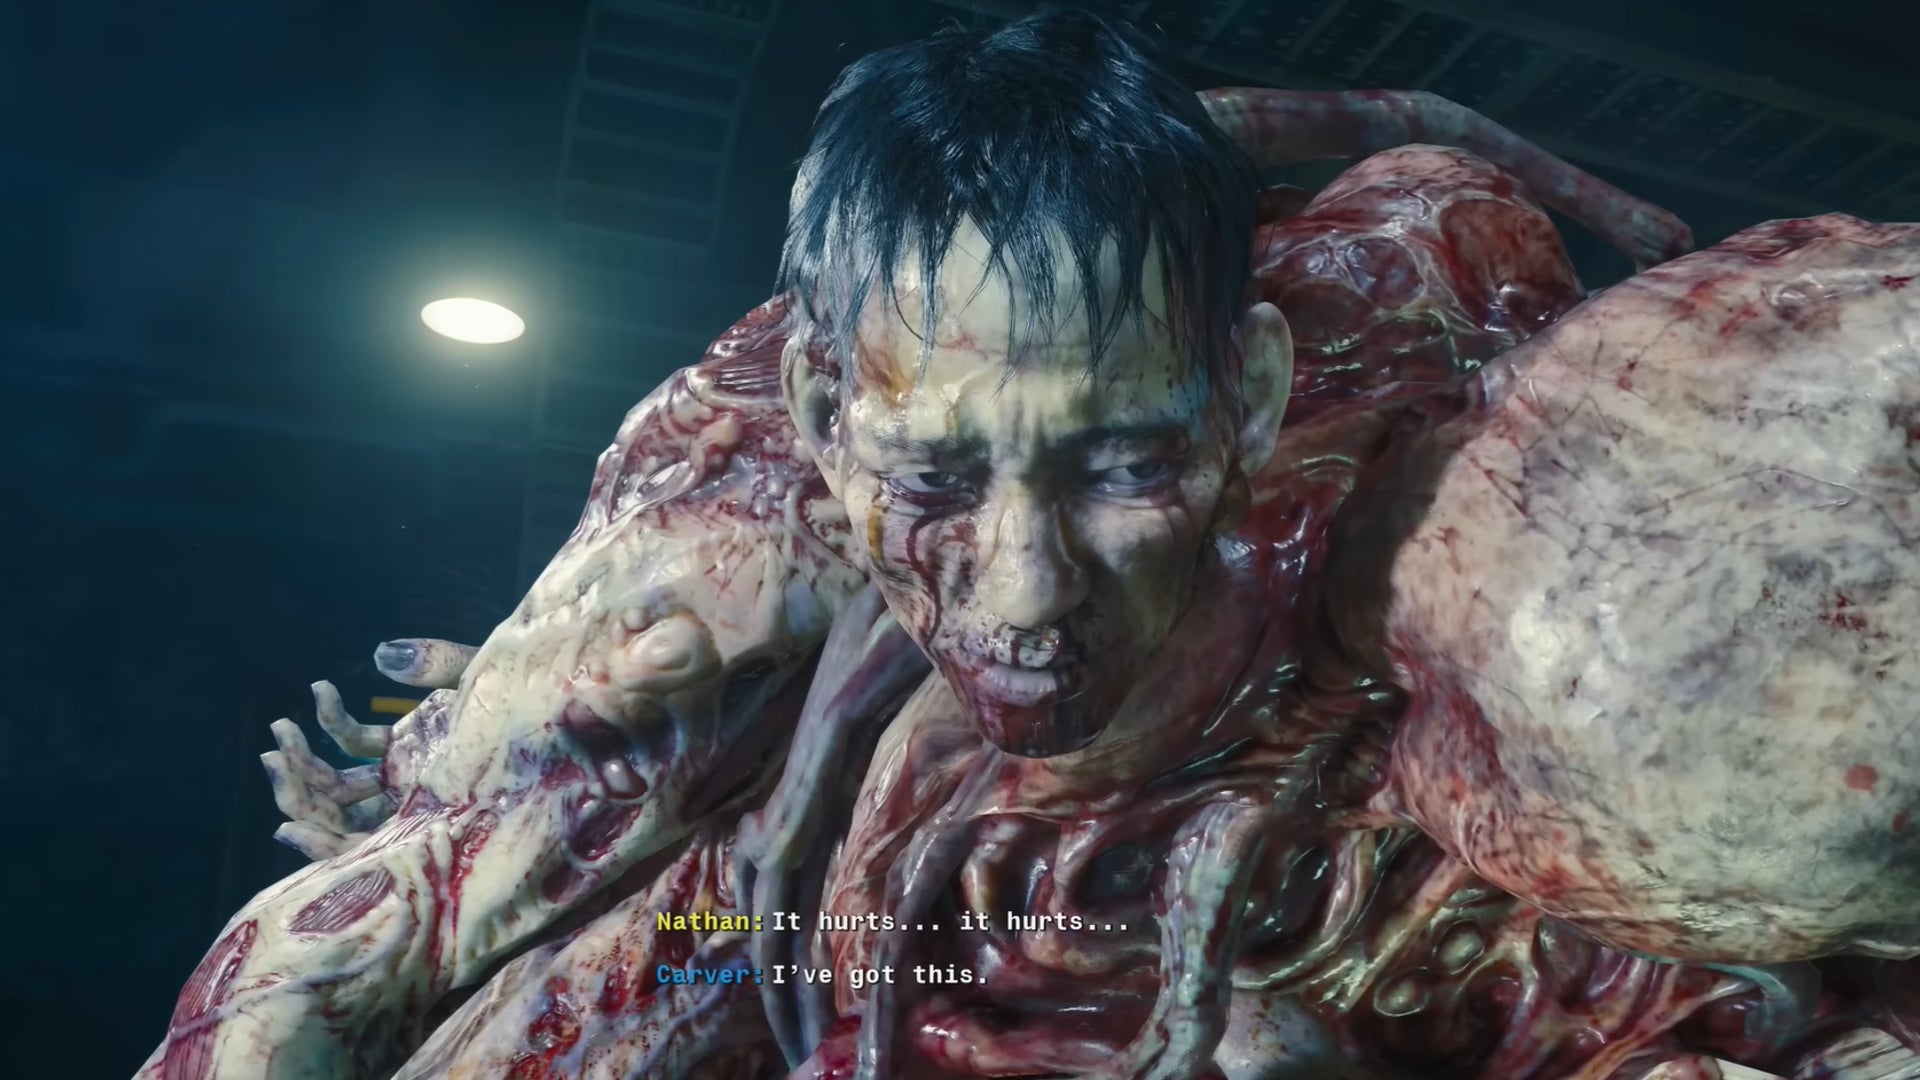
The culmination of this scene is all the more potent if you’re playing as Maya. |Image credit:Rock Paper Shotgun/Activision
Find Node Connectors
After the Nathan fight, dive into the Bio Lab’s water and swim down until you find a keycard. Take it to the Communications room (south of where you find the Stamin-Up) and use it on the computer on the top floor. You’ll get an error message, along with a missive from Peck to go to the map’s Shipwreck to find Node Connectors .
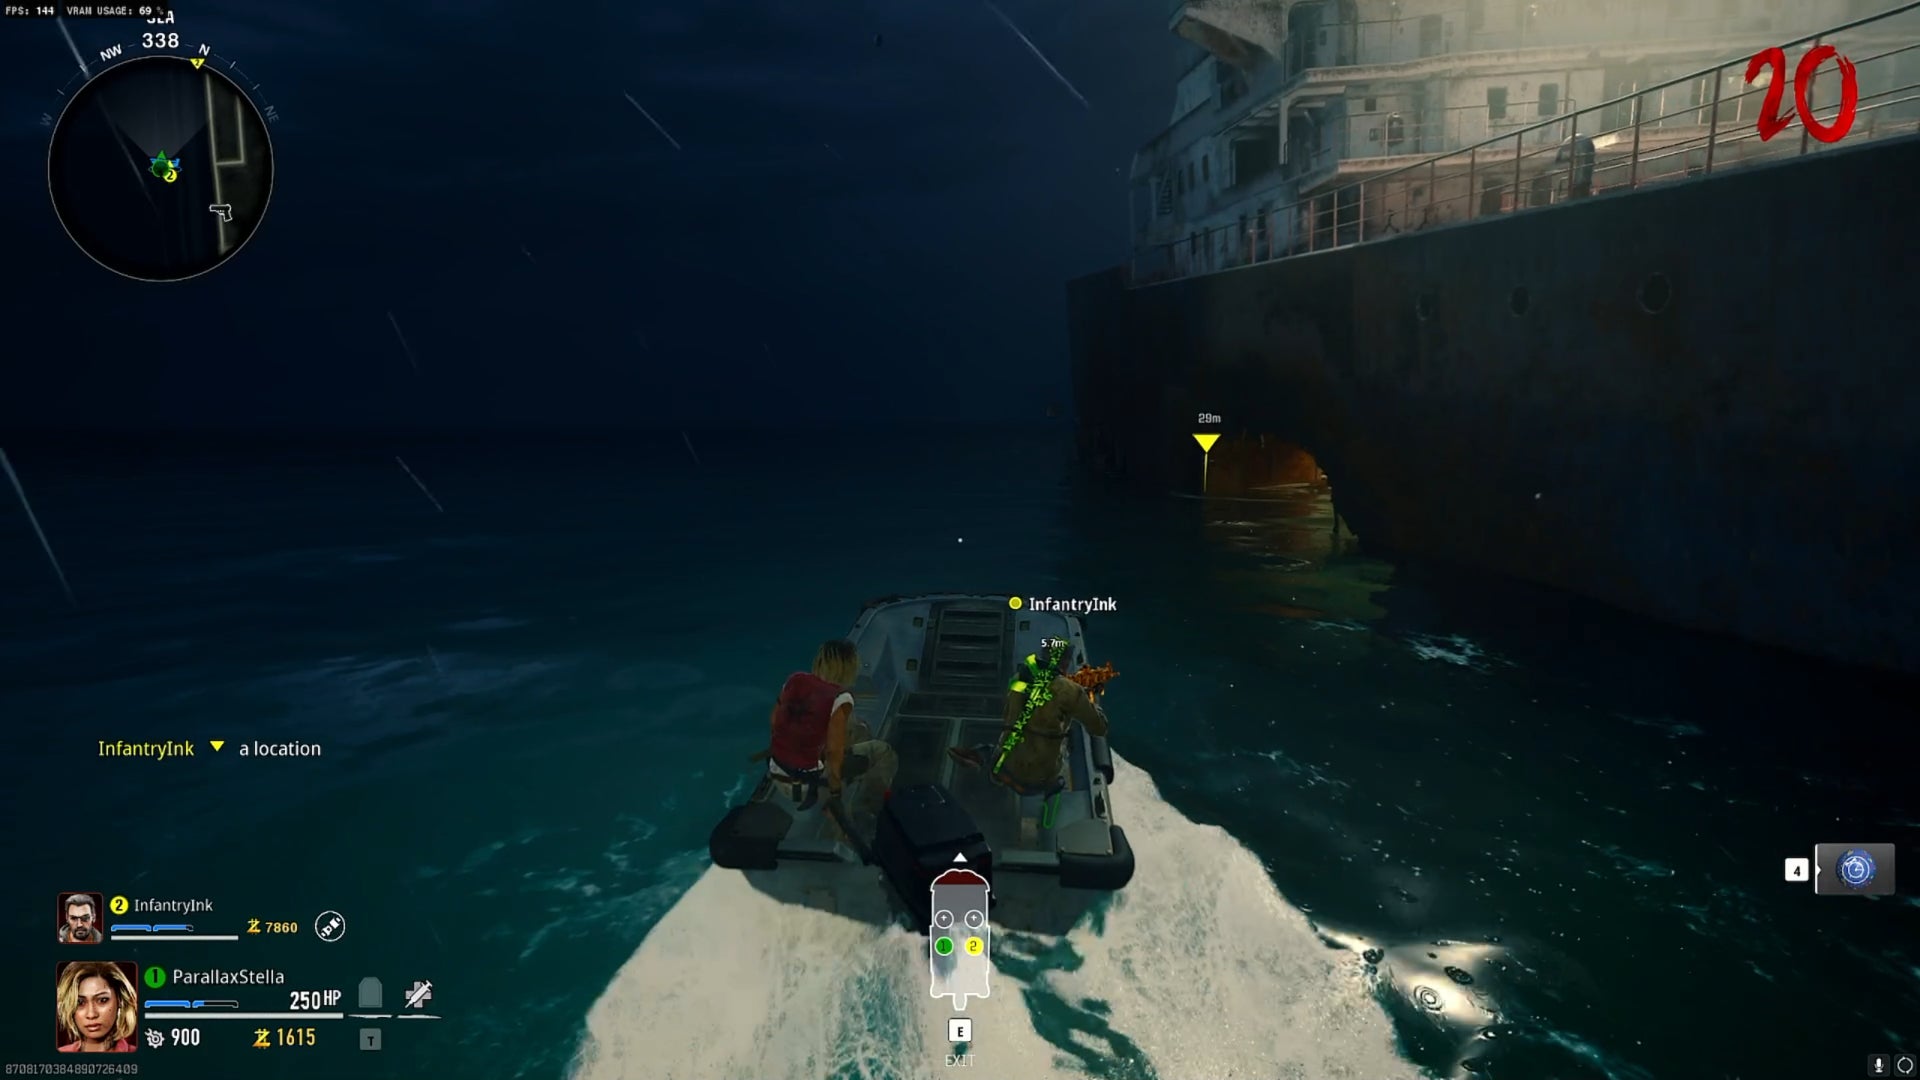
This is the makeshift entrance you’ll use to access the Shipwreck. |Image credit:IGN/Activision
You’ll need to hop in a boat to head to the Shipwreck. Circle around the middle of the boat until you see a hole that serves as an entrance; go on in and then climb up the ladder to enter a room with two Node Connectors. Once you pick them up, the room goes into lockdown and a zombie wave spawns. Once they’ve been blasted away, you’ll have to visit three different locations to slot in your Node Connectors. One of these locations will randomly have a Node Connector already; in which case move on to the next one. Refer to the following maps and descriptions to find the locations, which are as follows:
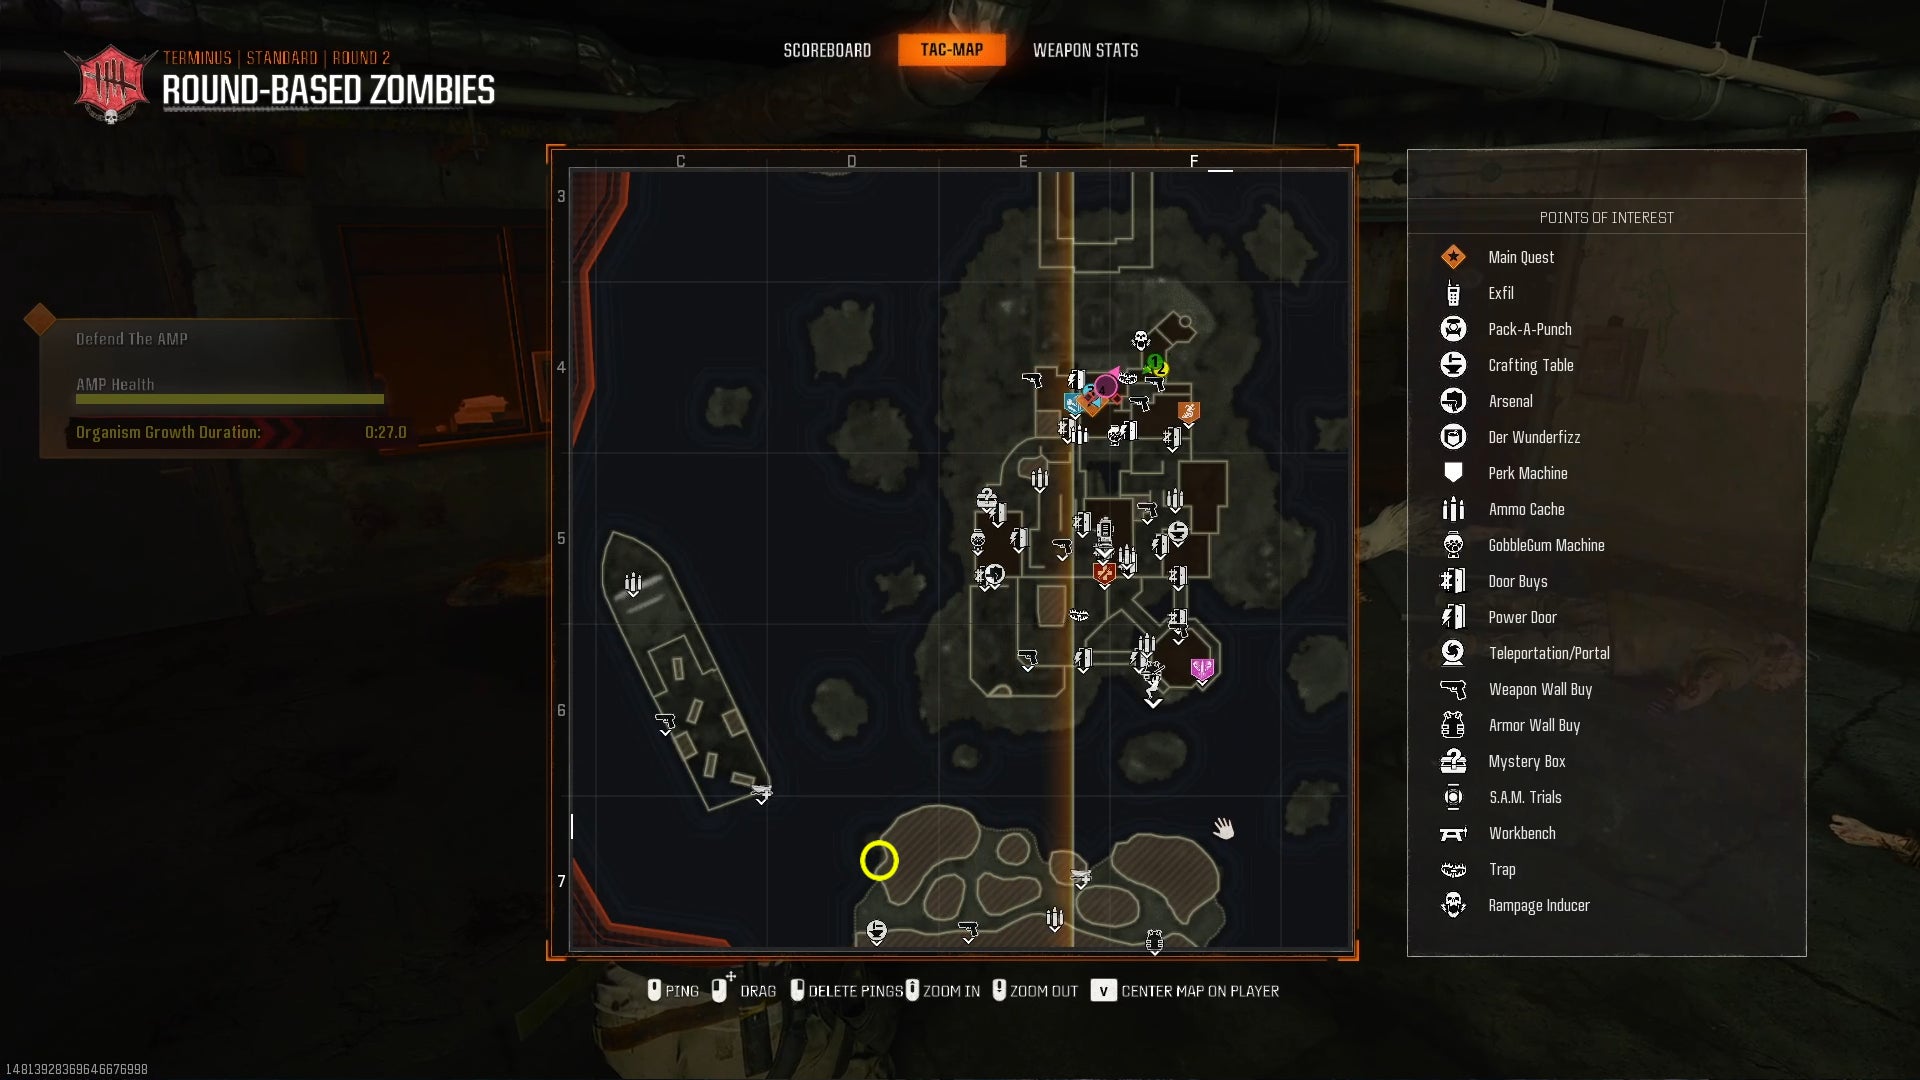
Image credit:Rock Paper Shotgun/Activision
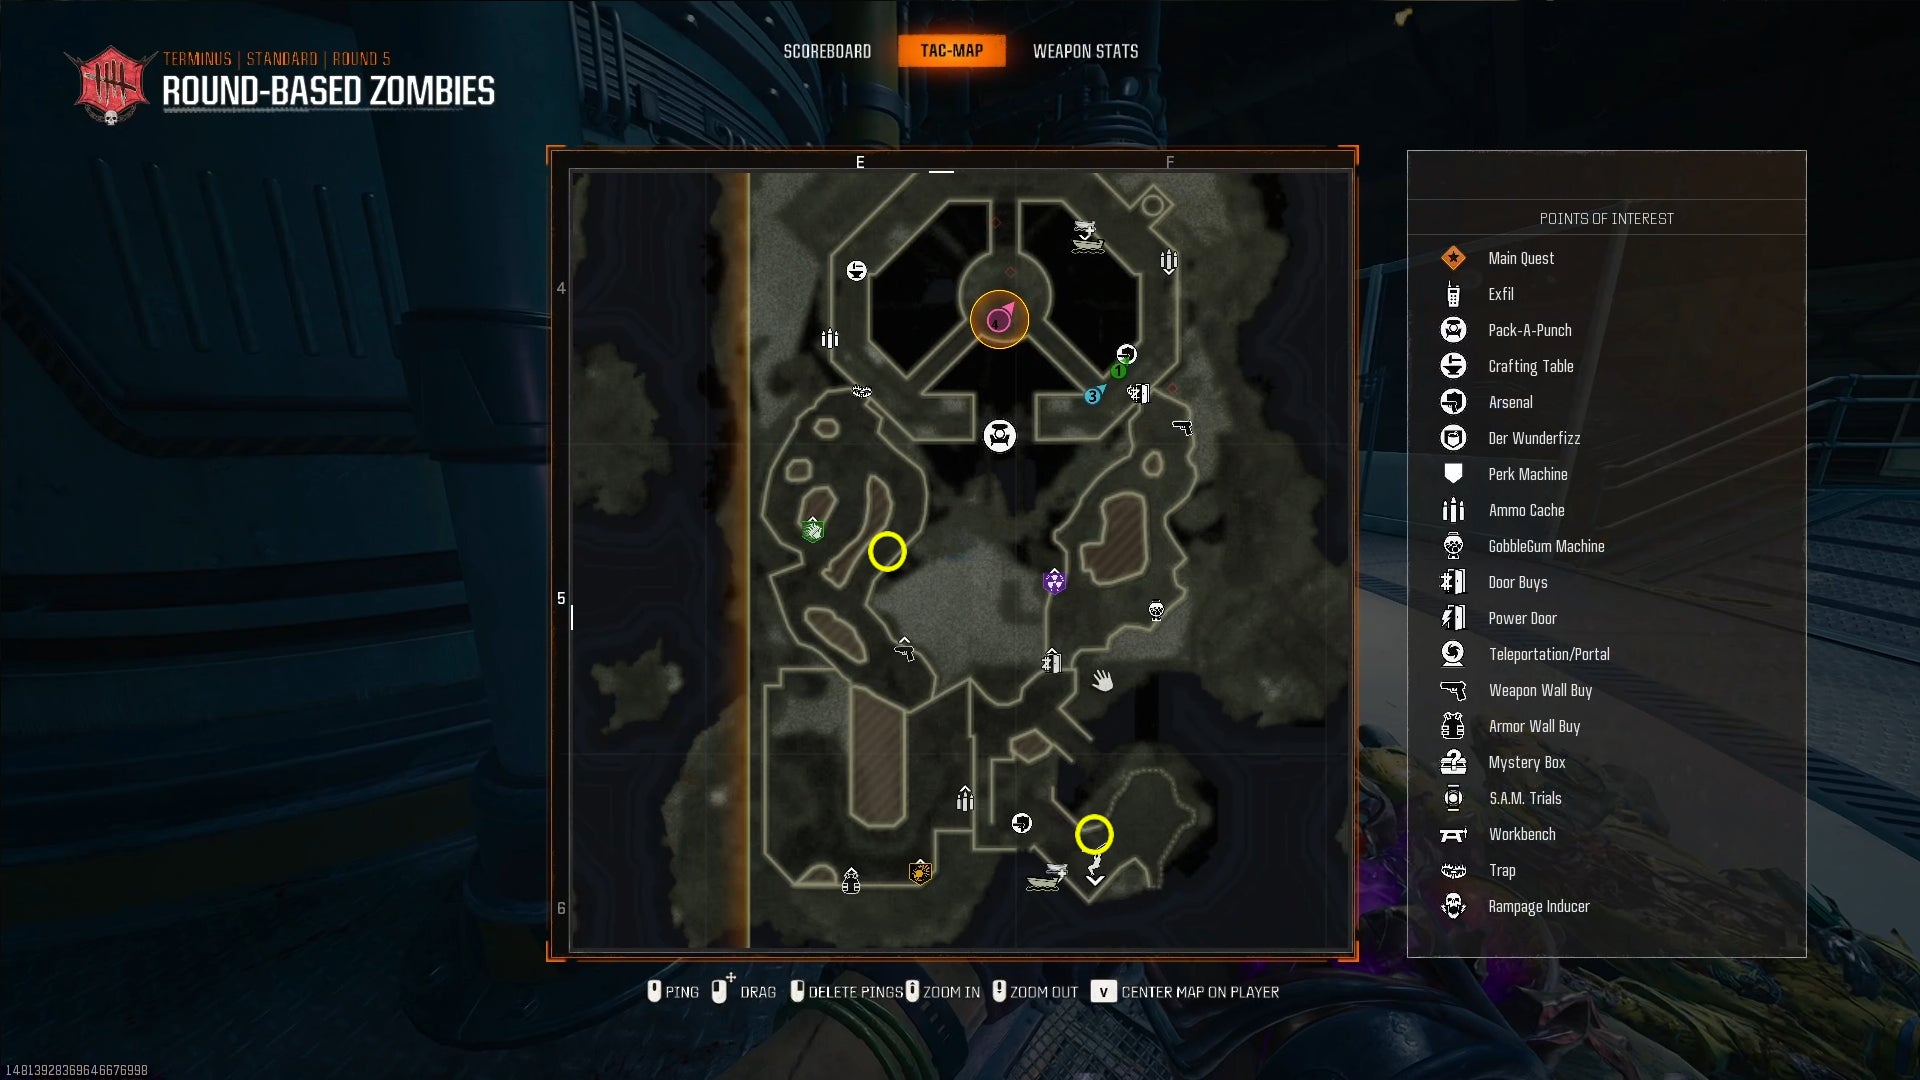
Image credit:Rock Paper Shotgun/Activision
- In quadrant D7 on the Southern Island, right across from the workbench.
- In quadrant E5 by the cave entrance where you can find Speed Cola; search the right wall.
- In quadrant F6 , directly beneath one of the legs of the Sea Tower.
Hack Water Satellites
With the Node Connectors in their places, go back to the Guard Station to get your next directive from Peck. You’ll get a Hacking Device , which you need to take to the Docks. Here you need to drive out in a boat and search for three Water Satellites . Each boat is swarming with Parasite enemies and you’ll need to defeat them to start hacking. You also need to hack all three satellites within two minutes of each other or risk having to do the whole thing all over again. A tentacled enemy will also attack if you dilly-dally in the water for too long, so be speedy. The Water Satellites should be hidden in quadrants D7 , E2 , and G6 - you can also just check your map to see where Parasites are gathering to get a good sense of where they are.
As soon as you hack the third satellite, hurry back to the Bio Lab. You’ve got to disable three warheads before they explode, and you’ve only got five minutes to do so before all of Terminus blows up. This is probably the most pain-in-the-butt part of the easter egg aside from the last boss battle. The explosive warheads resemble purple coils hidden in the wall, and you need to stand still to disable them while zombies spawn all over you. If you’ve got good teammates, this will hopefully be less of an anxious experience. If you don’t, try using Smoke Grenades to set up a smokescreen cloud near each bomb, giving you some breathing room free of interruptions.
Defeat Patient 13
Finally it’s time for the big, bad final boss battle - Patient 13 . The boss arena will open once all players opt in, and you’ll be faced with an absolutely monstrosity. Fighting Patient 13 is a tough affair with glowing weak spots that change throughout the fight. At first, its weak spots are on both shoulders, and it’s a good idea to duck behind the boxes for cover in the area as you fire away. Ideally, you can have allies distract Patient 13 as you do so, and it really helps to have someone with a Chopper Gunner at the ready.
When the shoulder weak spots are taken out, a zombie wave will emerge and poison will flood the arena. To reduce the poison, fire at the tentacles just outside the arena. Eventually, Patient 13 will appear once again, and its weak spot has now shifted to its tentacles. Once enough damage has been done, the weak spot will shift to Patient 13’s mouth. When you’ve blasted the mouth into oblivion, Patient 13 disappears once again and a new zombie wave replete with Amalgams and Manglers emerges.
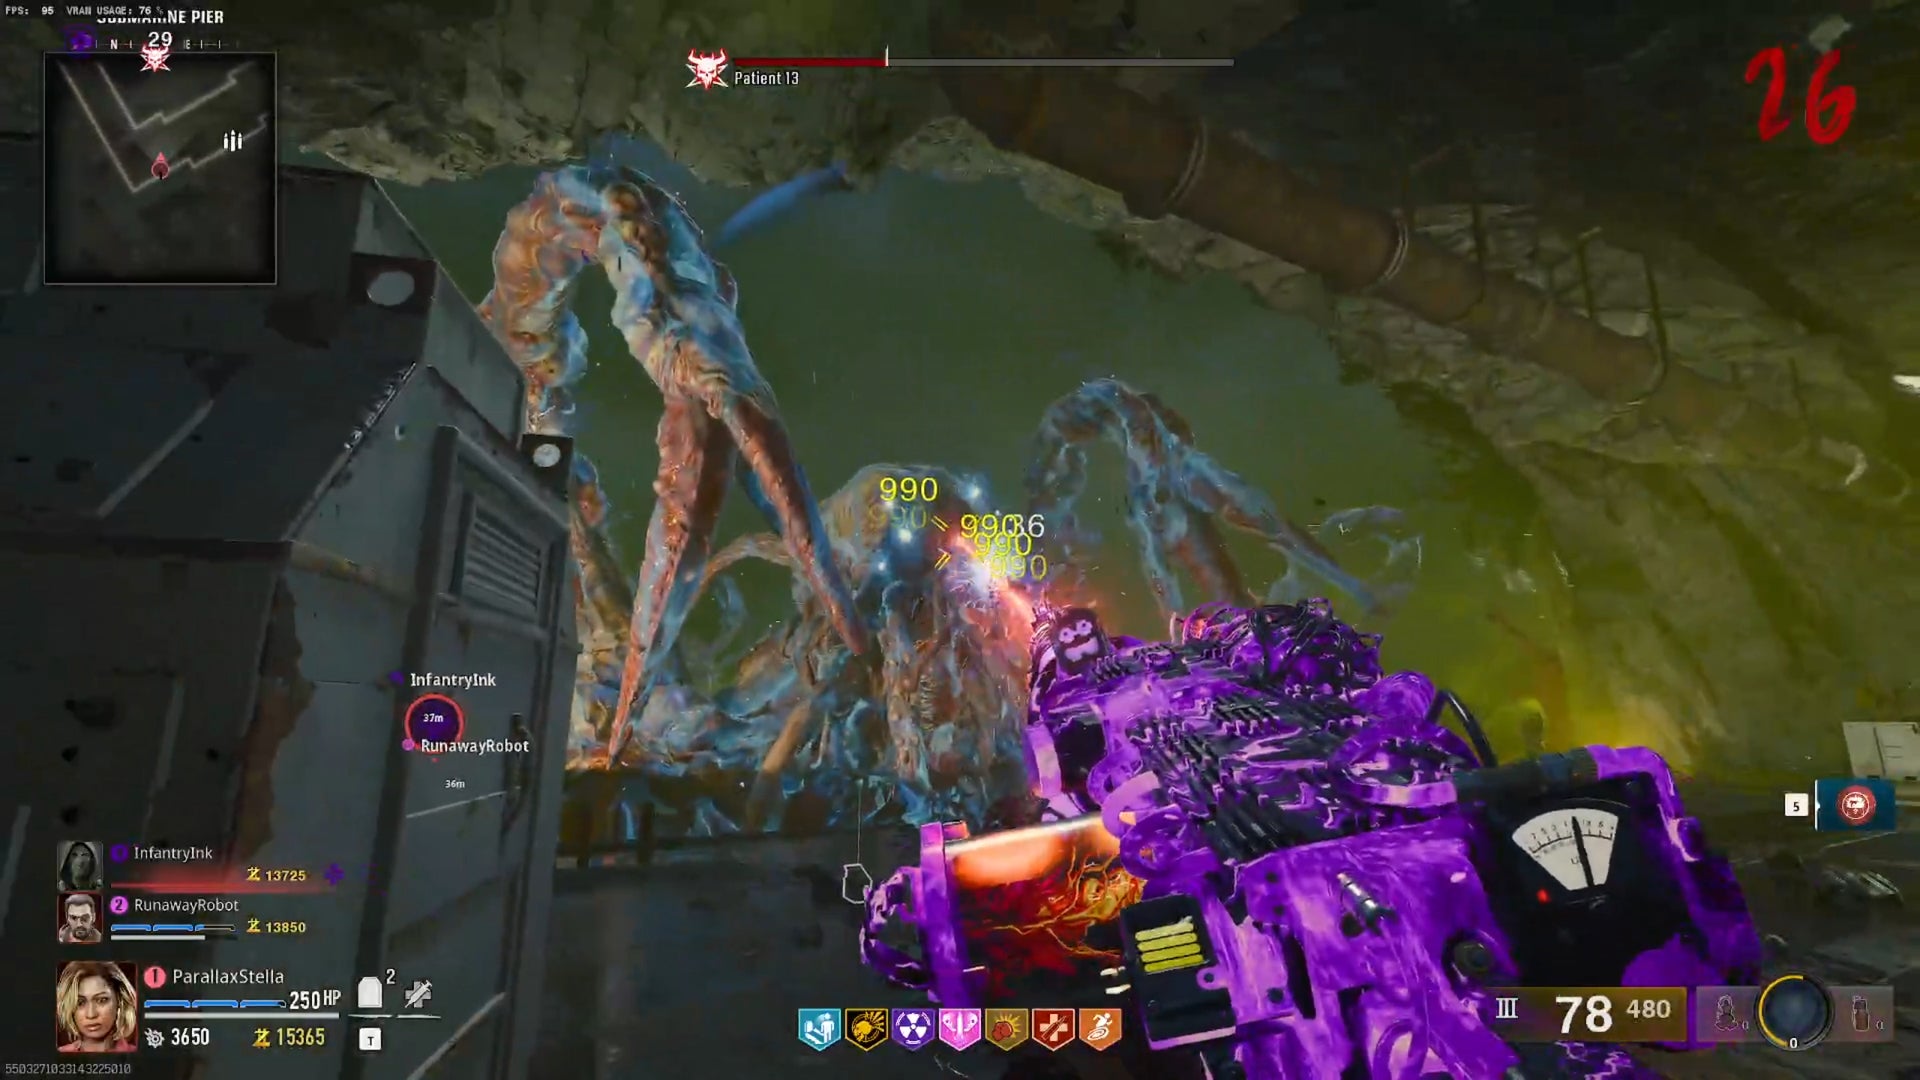
Defeating Patient 13 is a lengthy ordeal. Mutant Injection, Chopper Gunner, and anything else you’ve got that can help wreck this mucus monster are all ideal. |Image credit:IGN/Activision
When you’ve taken care of the wave, Patient 13 reappears one final time, and the arena is greatly reduced, leaving you highly susceptible to hordes with only two boxes to hide behind. It’s time to use the big guns and whatever Scorestreaks you have. Whenever Patient 13 turns bright blue and your screen lights up, go into the water or hide behind the boxes to avoid being fried. In the meantime, target Patient 13’s new weak spots, which will switch between its blue eyes and mouth.
The fight’s a lengthy one, to be sure, but once you’re victorious and leave the match, you’ll get a tonne of excellent rewards, including 5,000 XP and the Terminus Quest Complete Calling Card. Maya also gets the cool Trophy Collector Operator skin - not the best reward for having to shoot her brother in the face, but it sure looks cool.
Well done on completing the main quest of Terminus! For the other Zombies map in Black Ops 6, see our guide on completing the Liberty Falls easter egg . Lastly, for regular multiplayer matches, check our guides on the best guns in Black Ops 6. We’ve also got lists of how to unlock each weapon and every Operator . If you’re stuck choosing a weapon, feel free to refer to our guides on the best Assault Rifle , SMG , Sniper Rifle , and Shotgun in Black Ops 6.


Call of Duty: Black Ops 6
PS4 , PS5 , Xbox One , Xbox Series X/S , PC
Rock Paper Shotgun is better when you sign in
Sign in and join us on our journey to discover strange and compelling PC games.

All 75 Arc Raiders Blueprints and where to get them
These areas have the highest chance of giving you Blueprints

Image credit:Rock Paper Shotgun/Embark Studios

Looking for more Arc Raiders Blueprints? It’s a special day when you find a Blueprint, as they’re among the most valuable items in Arc Raiders. If you find a Blueprint that you haven’t already found, then you must make sure you hold onto it at all costs, because Blueprints are the key to one of the most important and powerful systems of meta-progression in the game.
This guide aims to be the very best guide on Blueprints you can find, starting with a primer on what exactly they are and how they work in Arc Raiders, before delving into exactly where to get Blueprints and the very best farming spots for you to take in your search.
We’ll also go over how to get Blueprints from other unlikely activities, such as destroying Surveyors and completing specific quests. And you’ll also find the full list of all 75 Blueprints in Arc Raiders on this page (including the newest Blueprints added with the Cold Snap update , such as the Deadline Blueprint and Firework Box Blueprint), giving you all the information you need to expand your own crafting repertoire.
In this guide:
- What are Blueprints in Arc Raiders?
- Full Blueprint list: All crafting recipes
- Where to find Blueprints in Arc Raiders Blueprints obtained from quests Blueprints obtained from Trials Best Blueprint farming locations

What are Blueprints in Arc Raiders?
Blueprints in Arc Raiders are special items which, if you manage to extract with them, you can expend to permanently unlock a new crafting recipe in your Workshop. If you manage to extract from a raid with an Anvil Blueprint, for example, you can unlock the ability to craft your very own Anvil Pistol, as many times as you like (as long as you have the crafting materials).
To use a Blueprint, simply open your Inventory while in the lobby, then right-click on the Blueprint and click “Learn And Consume” . This will permanently unlock the recipe for that item in your Workshop. As of the Stella Montis update, there are allegedly 75 different Blueprints to unlock - although only 68 are confirmed to be in the game so far. You can see all the Blueprints you’ve found and unlocked by going to the Workshop menu, and hitting “R” to bring up the Blueprint screen.
It’s possible to find duplicates of past Blueprints you’ve already unlocked. If you find these, then you can either sell them, or - if you like to play with friends - you can take it into a match and gift it to your friend so they can unlock that recipe for themselves. Another option is to keep hold of them until the time comes to donate them to the Expedition.
Full Blueprint list: All crafting recipes
Below is the full list of all the Blueprints that are currently available to find in Arc Raiders, and the crafting recipe required for each item:
| Blueprint | Type | Recipe | Crafted At |
|---|---|---|---|
| Bettina | Weapon | 3x Advanced Mechanical Components 3x Heavy Gun Parts 3x Canister | Gunsmith 3 |
| Blue Light Stick | Quick Use | 3x Chemicals | Utility Station 1 |
| Aphelion | Weapon | 3x Magnetic Accelerator 3x Complex Gun Parts 1x Matriarch Reactor | Gunsmith 3 |
| Combat Mk. 3 (Flanking) | Augment | 2x Advanced Electrical Components 3x Processor | Gear Bench 3 |
| Combat Mk. 3 (Aggressive) | Augment | 2x Advanced Electrical Components 3x Processor | Gear Bench 3 |
| Complex Gun Parts | Material | 2x Light Gun Parts 2x Medium Gun Parts 2x Heavy Gun Parts | Refiner 3 |
| Fireworks Box | Quick Use | 1x Explosive Compound 3x Pop Trigger | Explosives Station 2 |
| Gas Mine | Mine | 4x Chemicals 2x Rubber Parts | Explosives Station 1 |
| Green Light Stick | Quick Use | 3x Chemicals | Utility Station 1 |
| Pulse Mine | Mine | 1x Crude Explosives 1x Wires | Explosives Station 1 |
| Seeker Grenade | Grenade | 1x Crude Explosives 2x ARC Alloy | Explosives Station 1 |
| Looting Mk. 3 (Survivor) | Augment | 2x Advanced Electrical Components 3x Processor | Gear Bench 3 |
| Angled Grip II | Mod | 2x Mechanical Components 3x Duct Tape | Gunsmith 2 |
| Angled Grip III | Mod | 2x Mod Components 5x Duct Tape | Gunsmith 3 |
| Hullcracker | Weapon | 1x Magnetic Accelerator 3x Heavy Gun Parts 1x Exodus Modules | Gunsmith 3 |
| Launcher Ammo | Ammo | 5x Metal Parts 1x Crude Explosives | Workbench 1 |
| Anvil | Weapon | 5x Mechanical Components 5x Simple Gun Parts | Gunsmith 2 |
| Anvil Splitter | Mod | 2x Mod Components 3x Processor | Gunsmith 3 |
| ??? | ??? | ??? | ??? |
| Barricade Kit | Quick Use | 1x Mechanical Components | Utility Station 2 |
| Blaze Grenade | Grenade | 1x Explosive Compound 2x Oil | Explosives Station 3 |
| Bobcat | Weapon | 3x Advanced Mechanical Components 3x Light Gun Parts | Gunsmith 3 |
| Osprey | Weapon | 2x Advanced Mechanical Components 3x Medium Gun Parts 7x Wires | Gunsmith 3 |
| Burletta | Weapon | 3x Mechanical Components 3x Simple Gun Parts | Gunsmith 1 |
| Compensator II | Mod | 2x Mechanical Components 4x Wires | Gunsmith 2 |
| Compensator III | Mod | 2x Mod Components 8x Wires | Gunsmith 3 |
| Defibrillator | Quick Use | 9x Plastic Parts 1x Moss | Medical Lab 2 |
| ??? | ??? | ??? | ??? |
| Equalizer | Weapon | 3x Magnetic Accelerator 3x Complex Gun Parts 1x Queen Reactor | Gunsmith 3 |
| Extended Barrel | Mod | 2x Mod Components 8x Wires | Gunsmith 3 |
| Extended Light Mag II | Mod | 2x Mechanical Components 3x Steel Spring | Gunsmith 2 |
| Extended Light Mag III | Mod | 2x Mod Components 5x Steel Spring | Gunsmith 3 |
| Extended Medium Mag II | Mod | 2x Mechanical Components 3x Steel Spring | Gunsmith 2 |
| Extended Medium Mag III | Mod | 2x Mod Components 5x Steel Spring | Gunsmith 3 |
| Extended Shotgun Mag II | Mod | 2x Mechanical Components 3x Steel Spring | Gunsmith 2 |
| Extended Shotgun Mag III | Mod | 2x Mod Components 5x Steel Spring | Gunsmith 3 |
| Remote Raider Flare | Quick Use | 2x Chemicals 4x Rubber Parts | Utility Station 1 |
| Heavy Gun Parts | Material | 4x Simple Gun Parts | Refiner 2 |
| Venator | Weapon | 2x Advanced Mechanical Components 3x Medium Gun Parts 5x Magnet | Gunsmith 3 |
| Il Toro | Weapon | 5x Mechanical Components 6x Simple Gun Parts | Gunsmith 1 |
| Jolt Mine | Mine | 1x Electrical Components 1x Battery | Explosives Station 2 |
| Explosive Mine | Mine | 1x Explosive Compound 1x Sensors | Explosives Station 3 |
| Jupiter | Weapon | 3x Magnetic Accelerator 3x Complex Gun Parts 1x Queen Reactor | Gunsmith 3 |
| Light Gun Parts | Material | 4x Simple Gun Parts | Refiner 2 |
| Lightweight Stock | Mod | 2x Mod Components 5x Duct Tape | Gunsmith 3 |
| Lure Grenade | Grenade | 1x Speaker Component 1x Electrical Components | Utility Station 2 |
| Medium Gun Parts | Material | 4x Simple Gun Parts | Refiner 2 |
| Torrente | Weapon | 2x Advanced Mechanical Components 3x Medium Gun Parts 6x Steel Spring | Gunsmith 3 |
| Muzzle Brake II | Mod | 2x Mechanical Components 4x Wires | Gunsmith 2 |
| Muzzle Brake III | Mod | 2x Mod Components 8x Wires | Gunsmith 3 |
| Padded Stock | Mod | 2x Mod Components 5x Duct Tape | Gunsmith 3 |
| Shotgun Choke II | Mod | 2x Mechanical Components 4x Wires | Gunsmith 2 |
| Shotgun Choke III | Mod | 2x Mod Components 8x Wires | Gunsmith 3 |
| Shotgun Silencer | Mod | 2x Mod Components 8x Wires | Gunsmith 3 |
| Showstopper | Grenade | 1x Advanced Electrical Components 1x Voltage Converter | Explosives Station 3 |
| Silencer I | Mod | 2x Mechanical Components 4x Wires | Gunsmith 2 |
| Silencer II | Mod | 2x Mod Components 8x Wires | Gunsmith 3 |
| Snap Hook | Quick Use | 2x Power Rod 3x Rope 1x Exodus Modules | Utility Station 3 |
| Stable Stock II | Mod | 2x Mechanical Components 3x Duct Tape | Gunsmith 2 |
| Stable Stock III | Mod | 2x Mod Components 5x Duct Tape | Gunsmith 3 |
| Tagging Grenade | Grenade | 1x Electrical Components 1x Sensors | Utility Station 3 |
| Tempest | Weapon | 3x Advanced Mechanical Components 3x Medium Gun Parts 3x Canister | Gunsmith 3 |
| Trigger Nade | Grenade | 2x Crude Explosives 1x Processor | Explosives Station 2 |
| Vertical Grip II | Mod | 2x Mechanical Components 3x Duct Tape | Gunsmith 2 |
| Vertical Grip III | Mod | 2x Mod Components 5x Duct Tape | Gunsmith 3 |
| Vita Shot | Quick Use | 2x Antiseptic 1x Syringe | Medical Lab 3 |
| Vita Spray | Quick Use | 3x Antiseptic 1x Canister | Medical Lab 3 |
| Vulcano | Weapon | 1x Magnetic Accelerator 3x Heavy Gun Parts 1x Exodus Modules | Gunsmith 3 |
| Wolfpack | Grenade | 2x Explosive Compound 2x Sensors | Explosives Station 3 |
| Red Light Stick | Quick Use | 3x Chemicals | Utility Station 1 |
| Smoke Grenade | Grenade | 14x Chemicals 1x Canister | Utility Station 2 |
| Deadline | Mine | 3x Explosive Compound 2x ARC Circuitry | Explosives Station 3 |
| Trailblazer | Grenade | 1x Explosive Compound 1x Synthesized Fuel | Explosives Station 3 |
| Tactical Mk. 3 (Defensive) | Augment | 2x Advanced Electrical Components 3x Processor | Gear Bench 3 |
| Tactical Mk. 3 (Healing) | Augment | 2x Advanced Electrical Components 3x Processor | Gear Bench 3 |
| Yellow Light Stick | Quick Use | 3x Chemicals | Utility Station 1 |
Note: The missing Blueprints in this list likely have not actually been added to the game at the time of writing, because none of the playerbase has managed to find any of them. As they are added to the game, I will update this page with the most relevant information so you know exactly how to get all 75 Arc Raiders Blueprints.
Where to find Blueprints in Arc Raiders
Below is a list of all containers, modifiers, and events which maximise your chances of finding Blueprints:
- Certain quests reward you with specific Blueprints .
- Completing Trials has a high chance of offering Blueprints as rewards.
- Surveyors have a decent chance of dropping Blueprints on death.
- High loot value areas tend to have a greater chance of spawning Blueprints.
- Night Raids and Storms may increase rare Blueprint spawn chances in containers.
- Containers with higher numbers of items may have a higher tendency to spawn Blueprints. As a result, Blue Gate (which has many “large” containers containing multiple items) may give you a higher chance of spawning Blueprints.
- Raider containers (Raider Caches, Weapon Boxes, Medical Bags, Grenade Tubes) have increased Blueprint drop rates. As a result, the Uncovered Caches event gives you a high chance of finding Blueprints.
- Security Lockers have a higher than average chance of containing Blueprints.
- Certain Blueprints only seem to spawn under specific circumstances: Tempest Blueprint only spawns during Night Raid events. Vulcano Blueprint only spawns during Hidden Bunker events. Jupiter and Equaliser Blueprints only spawn during Harvester events.

Raider Caches, Weapon Boxes, and other raider-oriented container types have a good chance of offering Blueprints. |Image credit:Rock Paper Shotgun/Embark Studios
Blueprints have a very low chance of spawning in any container in Arc Raiders, around 1-2% on average. However, there is a higher chance of finding Blueprints in particular container types. Specifically, you can find more Blueprints in Raider containers and security lockers.
Beyond this, if you’re looking for Blueprints you should focus on regions of the map which are marked as having particularly high-value loot. Areas such as the Control Tower in Dam Battlegrounds, the Arrival and Departure Buildings in Spaceport, and Pilgrim’s Peak in Blue Gate all have a better-than-average chance of spawning Blueprints somewhere amongst all their containers. Night Raids and Electromagnetic Storm events also increase the drop chances of certain Blueprints .
In addition to these containers, you can often loot Blueprints from destroyed Surveyors - the largest of the rolling ball ARC. Surveyors are more commonly found on the later maps - Spaceport and Blue Gate - and if one spawns in your match, you’ll likely see it by the blue laser beam that it casts into the sky while “surveying”.
Surveyors are quite well-armoured and will very speedily run away from you once it notices you, but if you can take one down then make sure you loot all its parts for a chance of obtaining certain unusual Blueprints.
Blueprints obtained from quests
One way in which you can get Blueprints is by completing certain quests for the vendors in Speranza. Some quests will reward you with a specific item Blueprint upon completion, so as long as you work through all the quests in Arc Raiders, you are guaranteed those Blueprints.
Here is the full list of all Blueprints you can get from quest rewards:
- Trigger Nade Blueprint: Rewarded after completing “Sparks Fly”.
- Lure Grenade Blueprint: Rewarded after completing “Greasing Her Palms”.
- Burletta Blueprint: Rewarded after completing “Industrial Espionage”.
- Hullcracker Blueprint (and Launcher Ammo Blueprint): Rewarded after completing “The Major’s Footlocker”.
Alas, that’s only 4 Blueprints out of a total of 75 to unlock, so for the vast majority you will need to find them yourself during a raid. If you’re intent on farming Blueprints, then it’s best to equip yourself with cheap gear in case you lose it, but don’t use a free loadout because then you won’t get a safe pocket to stash any new Blueprint you find. No pain in Arc Raiders is sharper than failing to extract with a new Blueprint you’ve been after for a dozen hours already.

One of the best ways to get Blueprints is by hitting three stars on all five Trials every week. |Image credit:Rock Paper Shotgun/Embark Studios
Blueprints obtained from Trials
One of the very best ways to get Blueprints is as rewards for completing Trials in Arc Raiders. Trials are unlocked from Level 15 onwards, and allow you to earn rewards by focusing on certain tasks over the course of several raids. For example, one Trial might task you with dealing damage to Hornets, while another might challenge you to loot Supply Drops.
Trials refresh on a weekly basis, with a new week bringing five new Trials. Each Trial can offer up to three rewards after passing certain score milestones, and it’s possible to receive very high level loot from these reward crates - including Blueprints. So if you want to unlock as many Blueprints as possible, you should make a point of completing as many Trials as possible each week.
Best Blueprint farming locations
The very best way to get Blueprints is to frequent specific areas of the maps which combine high-tier loot pools with the right types of containers to search. Here are my recommendations for where to find Blueprints on every map, so you can always keep the search going for new crafting recipes to unlock.

Image credit:Rock Paper Shotgun/Embark Studios
Dam Battlegrounds
The best places to farm Blueprints on Dam Battlegrounds are the Control Tower, Power Generation Complex, Ruby Residence, and Pale Apartments . The first two regions, despite only being marked on the map as mid-tier loot, contain a phenomenal number of containers to loot. The Control Tower can also contain a couple of high-tier Security Lockers - though of course, you’ll need to have unlocked the Security Breach skill at the end of the Survival tree.
There’s also a lot of reporting amongst the playerbase that the Residential areas in the top-left of the map - Pale Apartments and Ruby Residence - give you a comparatively strong chance of finding Blueprints. Considering their size, there’s a high density of containers to loot in both locations, and they also have the benefit of being fairly out of the way. So you’re more likely to have all the containers to yourself.
Buried City
The best Blueprint farming locations on Buried City are the Santa Maria Houses, Grandioso Apartments, Town Hall, and the various buildings of the New District . Grandioso Apartments has a lower number of containers than the rest, but a high chance of spawning weapon cases - which have good Blueprint drop rates. The others are high-tier loot areas, with plenty of lootable containers - including Security Lockers.
Spaceport
The best places to find Blueprints on Spaceport are the Arrival and Departure Buildings, as well as Control Tower A6 and the Launch Towers . All these areas are labelled as high-value loot regions, and many of them are also very handily connected to one another by the Spaceport wall, which you can use to quickly run from one area to the next. At the tops of most of these buildings you’ll find at least one Security Locker, so this is an excellent farming route for players looking to find Blueprints.
The downside to looting Blueprints on Spaceport is that all these areas are hotly contested, particularly in Duos and Squads. You’ll need to be very focused and fast in order to complete the full farming route.

Image credit:Rock Paper Shotgun/Embark Studios
Blue Gate
Blue Gate tends to have a good chance of dropping Blueprints, potentially because it generally has a high number of containers which can hold lots of items; so there’s a higher chance of a Blueprint spawning in each container. In my experience, the best Blueprint farming spots on Blue Gate are Pilgrim’s Peak, Raider’s Refuge, the Ancient Fort, and the Underground Complex beneath the Warehouse .
All of these areas contain a wealth of containers to loot. Raider’s Refuge has less to loot, but the majority of the containers in and around the Refuge are raider containers, which have a high chance of containing Blueprints - particularly during major events.
Stella Montis
On the whole, Stella Montis seems to have a very low drop rate for Blueprints (though a high chance of dropping other high-tier loot). If you do want to try farming Blueprints on this map, the best places to find Blueprints in Stella Montis are Medical Research, Assembly Workshop, and the Business Center . These areas have the highest density of containers to loot on the map.
In addition to this, the Western Tunnel has a few different Security Lockers to loot, so while there’s very little to loot elsewhere in this area of the map, it’s worth hitting those Security Lockers if you spawn there at the start of a match.
That wraps up this primer on how to get all the Blueprints in Arc Raiders as quickly as possible. With the Expedition system constantly resetting a large number of players’ Blueprints, it’s more important than ever to have the most up-to-date information on where to find all these Blueprints.
While you’re here, be sure to check out our Arc Raiders best guns tier list , as well as our primers on the best skills to unlock and all the different Field Depot locations on every map.


ARC Raiders
PS5 , Xbox Series X/S , PC
Rock Paper Shotgun is better when you sign in
Sign in and join us on our journey to discover strange and compelling PC games.
