Black Ops 6 Zombies Liberty Falls easter egg walkthrough
Here’s how to complete the main quest easter egg on the Black Ops 6 Liberty Falls map

Image credit:Rock Paper Shotgun/Activision

Want to complete the Liberty Falls easter egg in Call Of Duty: Black Ops 6 Zombies? Black Ops 6 continues the exciting tradition of featuring a tonne of easter eggs within its Zombies maps, both of which have a main quest that requires a number of steps to complete. Liberty Falls’ main easter egg will require you to build the Jet Gun Wonder Weapon, set up an LTG Device, run around locating Aether Canisters, and survive dozens of zombie waves all the while.
For everyone struggling to complete these objectives during a match, we’ve outlined them below for your viewing convenience. In this guide, we’ll tell you exactly what you need to do to complete the main easter egg in Call Of Duty: Black Ops 6 Zombies’ Liberty Falls map .
How to complete the Liberty Falls easter egg in Black Ops 6
You’ll need to check off the following objectives in order to complete Liberty Falls’ easter egg. Click on the objective to be taken to that section of the guide:
- Craft the Jet Gun
- Craft the LTG
- Charge the first Aether Canister
- Use the Strauss Counter to find Projectors
- Charge the second Aether Canister
- Survive the final encounter
Craft the Jet Gun
The Jet Gun, more formally known as the Thrustodyne M23 , is the Wonder Weapon of Liberty Falls. It’s an awesome weapon that sucks zombies into its gears and grinds them up. Locating the three special parts needed to craft this undead slicer should be your first priority when you touch down on the Liberty Falls map, and you’ll need to visit several locations to do so. We’ve split this one out into a separate guide to account for all players who want to grab the gun first and foremost - see our guide on how to craft the Jet Gun for more info.

The Jet Gun in all its glory. You’ll need this big bastard to take on the later challenges of this map. |Image credit:Rock Paper Shotgun/Activision
Once you’ve got the Jet Gun, you can use it to suck up all of the Aetherella statues lying around the map. It’s best to do this as an ongoing project while tackling the remainder of Liberty Falls, because once you get all of the statues, you’ll turn into a temporarily invincible version of Aetherella herself, which is perfect for the final encounter.
One last thing of importance - you’ll probably do it naturally over the course of crafting the Jet Gun, but be sure to unlock the Pack-a-Punch machine located within the Church while you’re running around the map. This is a necessity for upping the strength of your weapons.
Craft the LTG
Once you’ve got the Jet Gun, go back into the Church and check out the SDG Generator . A cutscene ensues; when it’s over you’ll need to run around town and use the Jet Gun to suck up three components needed to craft the LTG.
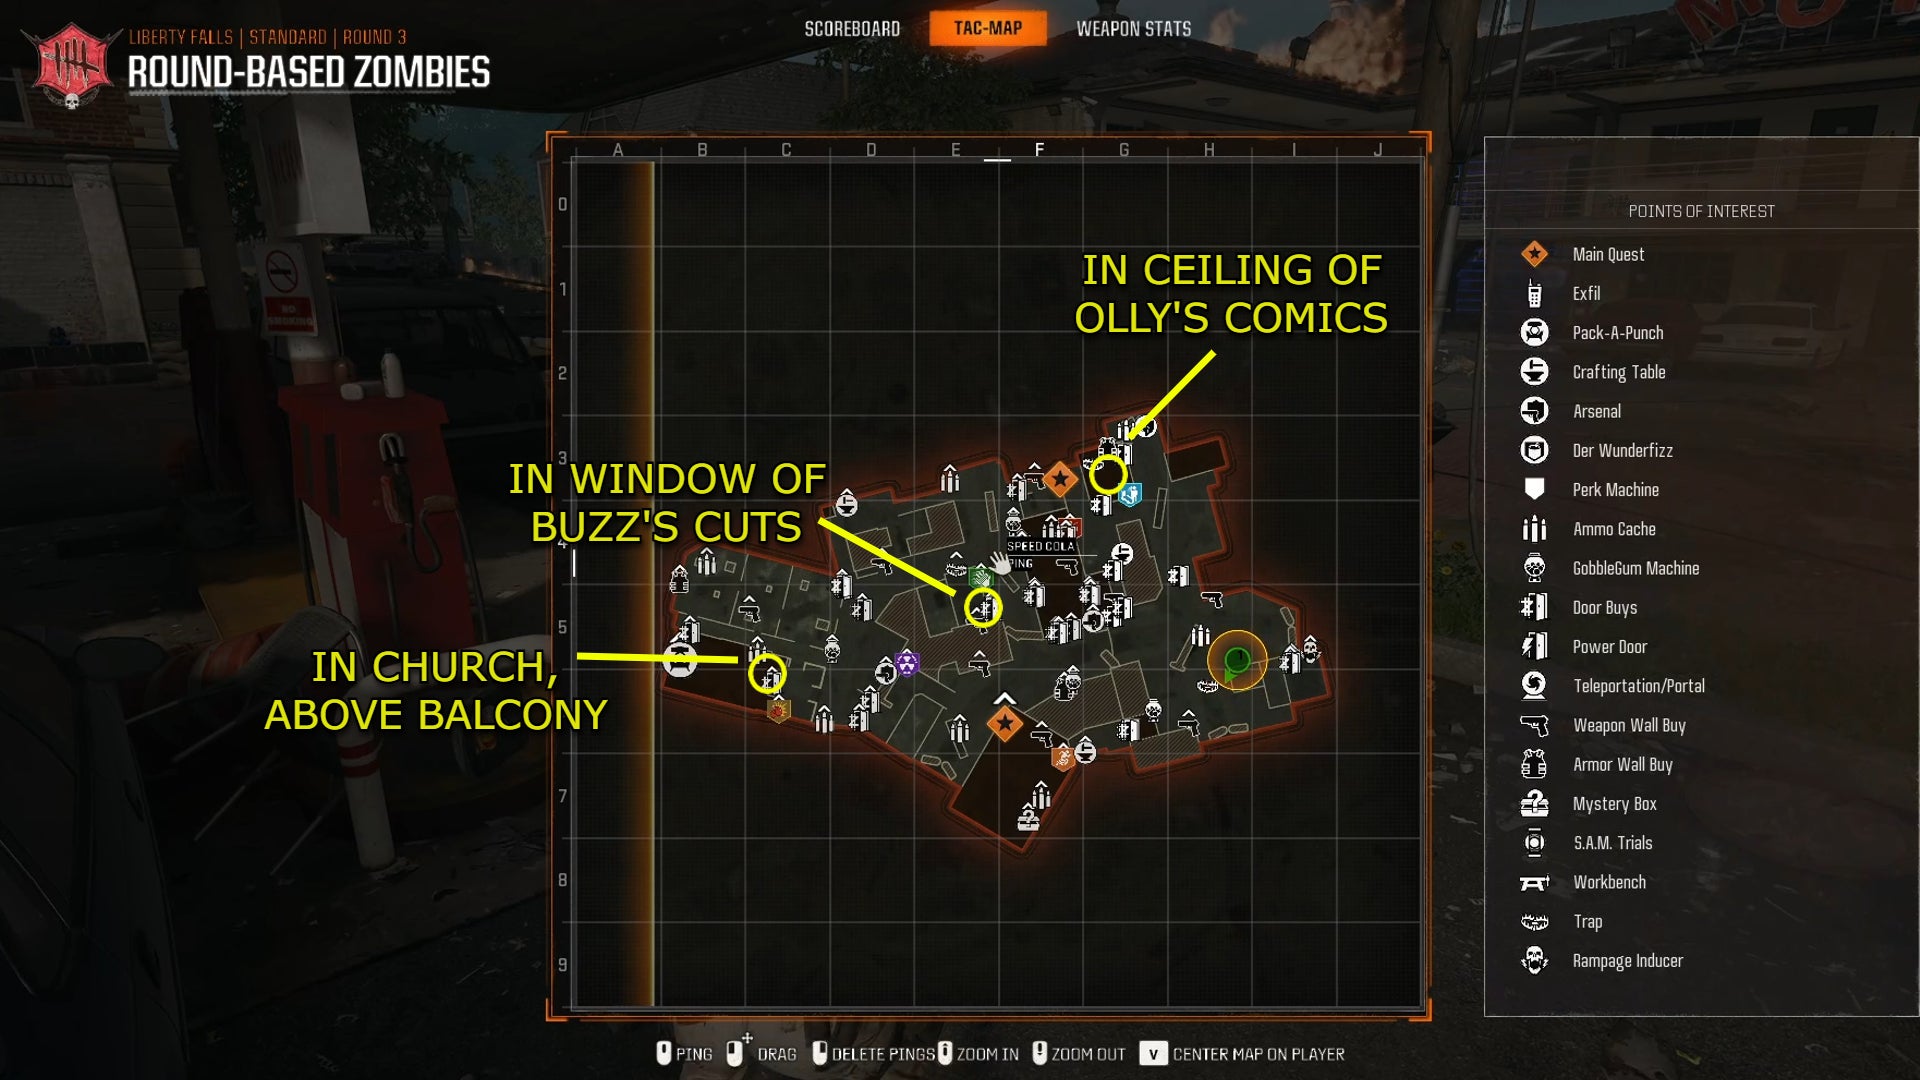
Refer to this map to track down the three pieces of the LTG. |Image credit:Rock Paper Shotgun/Activision
- First component : Getting the first component is thankfully really easy. Just look up at the balcony in the church, right above the big portal. You’ll see the component floating there. Use the Jet Gun on it!
- Second component : The second component is in the centre of the map and can be reached from the roof of the barber shop Buzz’s Cuts. The easiest way to get the component is to take the path that leads to the barber shop’s roof and then jump off the roof onto the white truck. You’ll be able to suck up the component, which is within the open window on Buzz’s Cuts second floor, once you’re atop the truck.
- Third component : The third component is within Olly’s Comics. Go to the middle of the room and look up at the hole in the ceiling. The component is floating there.
Once you’ve got all the components, go back to the Buzz’s Cuts roof you jumped from to reach the second component. Unlock the zipline and take it across to the roof of the Savings and Loans building. You’ll find a workbench on the roof’s far end; interact with it to craft the LTG, also known as the Limited Transdimensional Gateway .
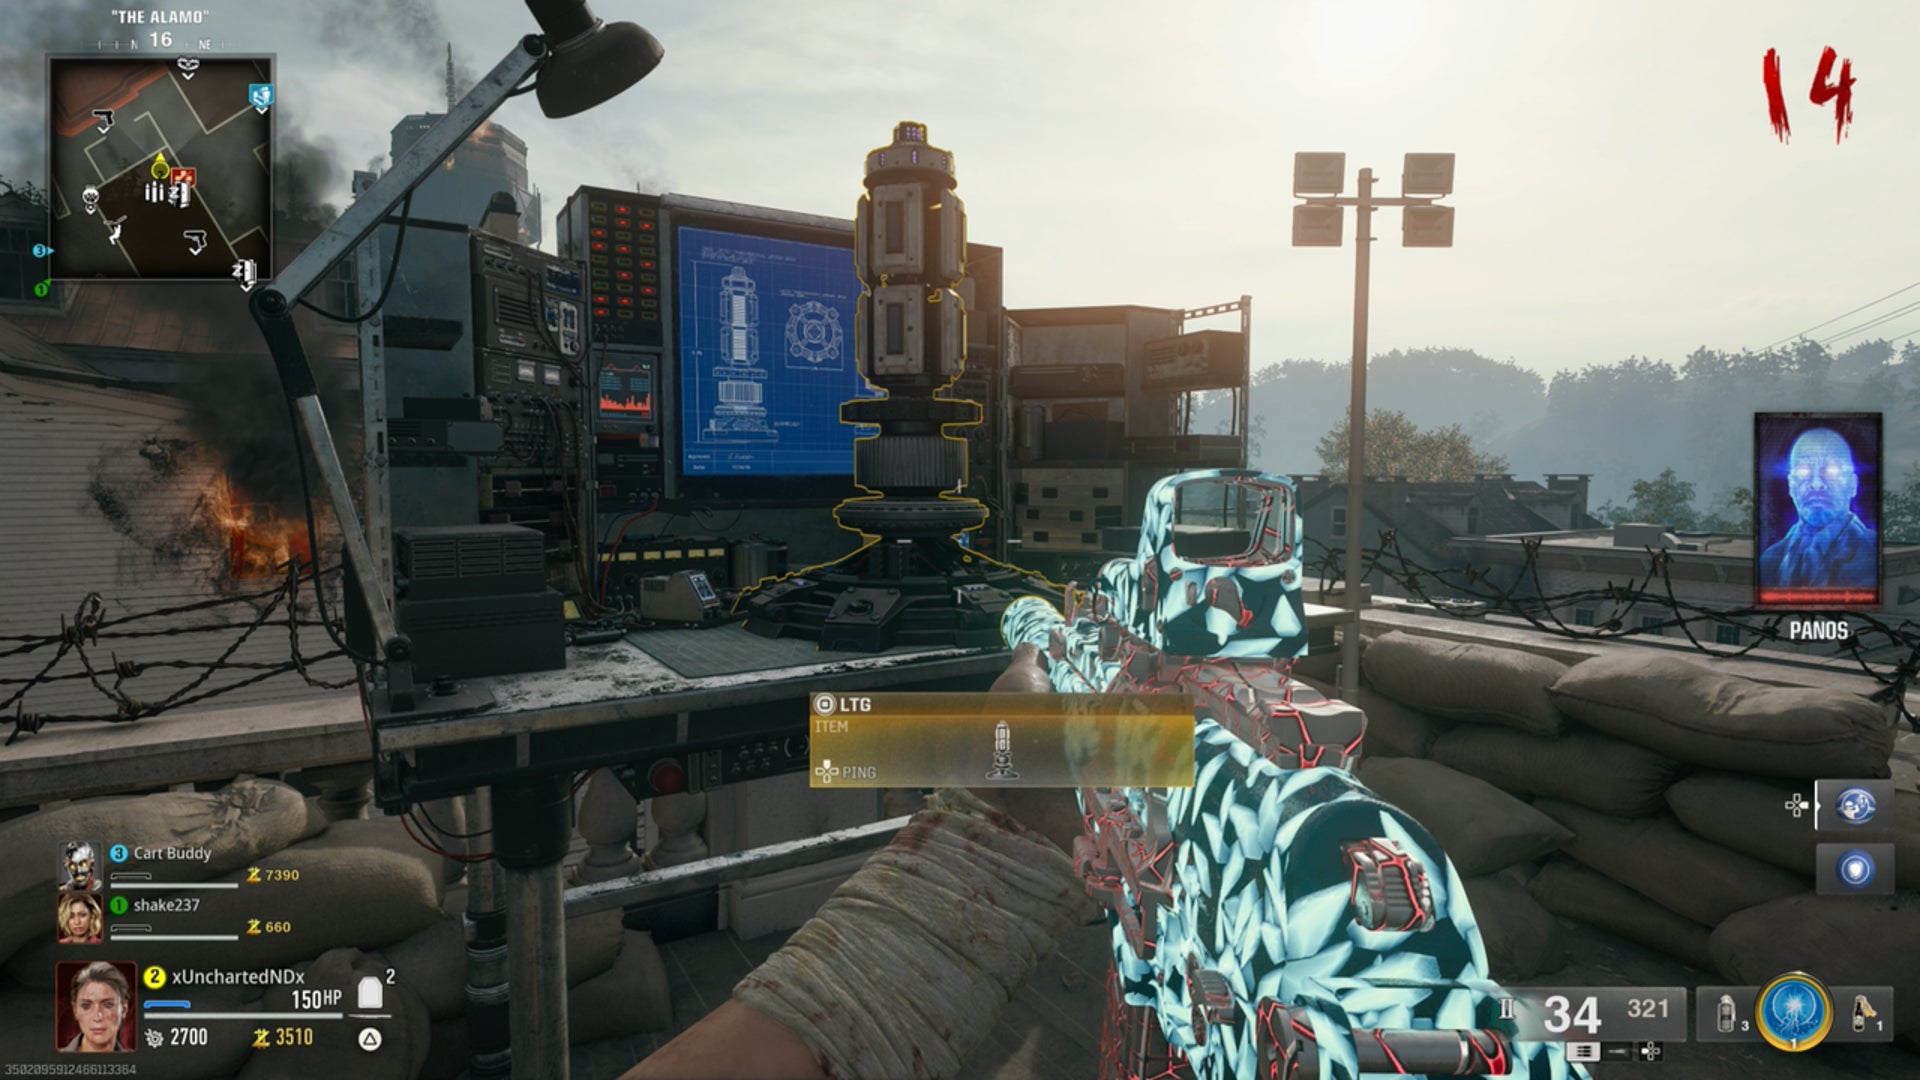
As is always the case when crafting something on a Zombies map, you’ll be highly vulnerable while at the workbench. Get teammates to cover you or simply watch your back. |Image credit:IGN/Activision
Charge the first Aether Canister
With the Jet Gun and LTG in tow, return to the Church and interact once again with the SDG Generator to pick up your first Aether Canister . You now need to charge this thing by taking it to a Dark Aether Field Generator . These are those electrical traps scattered on the map - there’s one on Hill Street close to the Cemetery and the other is on Riverside, near the Pump & Pay Gas Station. Be aware that you can’t sprint while carrying the Aether Canister, so you’re something of a sitting duck.
When the canister’s dropped in the trap, an Aether storm cloud will appear nearby on the map. You now have to put the LTG under the storm clouds and protect the resulting portal from waves of enemies until a countdown of about one minute ends. If zombies approach the LTG, they’ll damage the portal’s integrity, which is something you do not want, since if the portal goes bust, you’ll need to wait for the round to end before reactivating it.
Eventually, a High Value Target will emerge; this is typically an elite undead like an Abomination or Mangler. Blast it until it starts turning purple and then kite it towards the Aether canister and activate the Dark Aether Field Generator. Be sure that the target stays within the purple area as you continue to whittle down its health; the trap will absorb the essence of the target and charge the Aether Canister if you succeed.
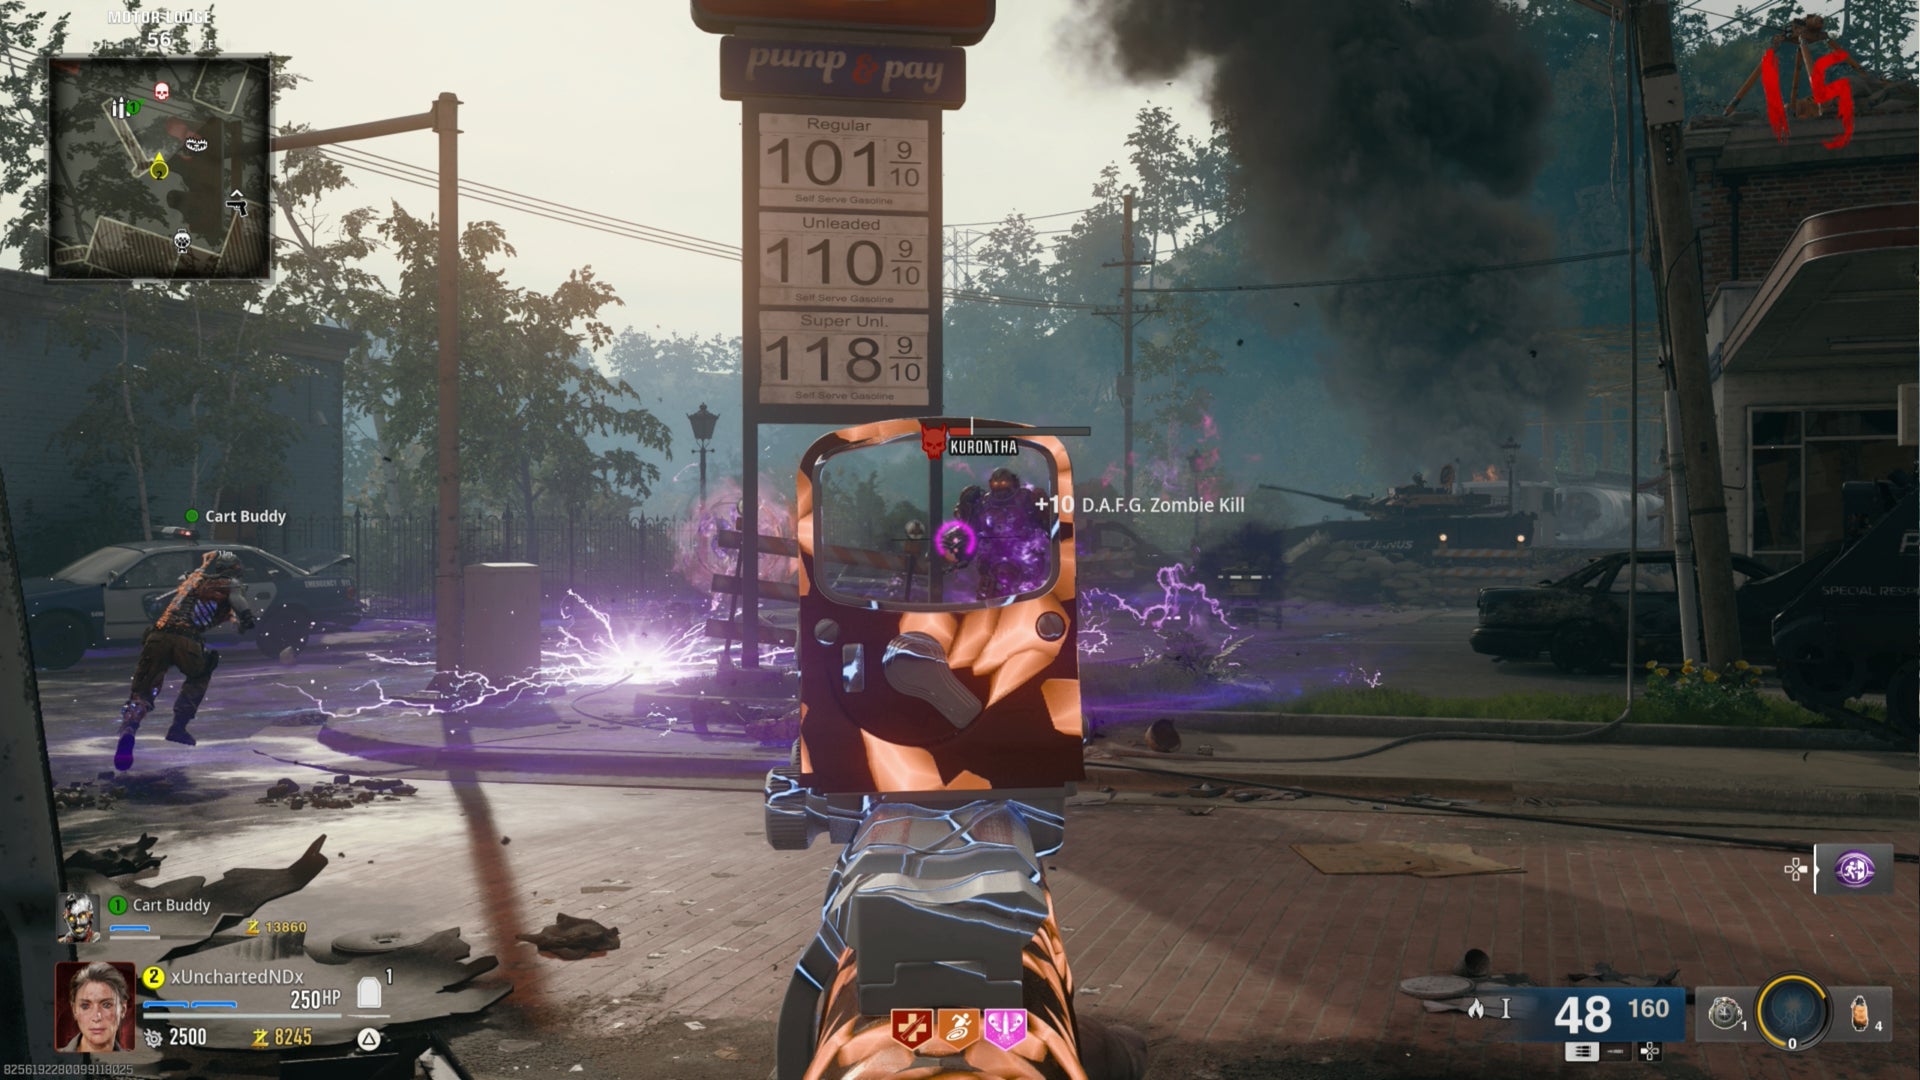
The High Value Targets who spawn have unique names, like this feller “Kurontha” here. |Image credit:IGN/Activision
You now have to transport the Aether Canister back to the SDG Generator in the Church. Get a move on, as you’ve only got a minute and a half , and you don’t want to repeat the whole charging process if you’re too slow. Once you reach the SDG Generator, stick the canister into it and you’ll be tasked with your next objective.
Use the Strauss Counter to find Projectors
Now you’ve got to find another Aether Canister via a Strauss Counter , which tells you where three Projectors are located throughout the map. When you come upon a Projector, you need to use the Strauss Counter to change its light to a particular colour. There’s some randomisation involved here for each playthrough, so use the following guidelines to help you:
- If the Strauss Counter is red , the Projector light must be green .
- If the Strauss Counter is green , the Projector light must be red .
- If the Strauss Counter is yellow , the Projector light must be yellow .
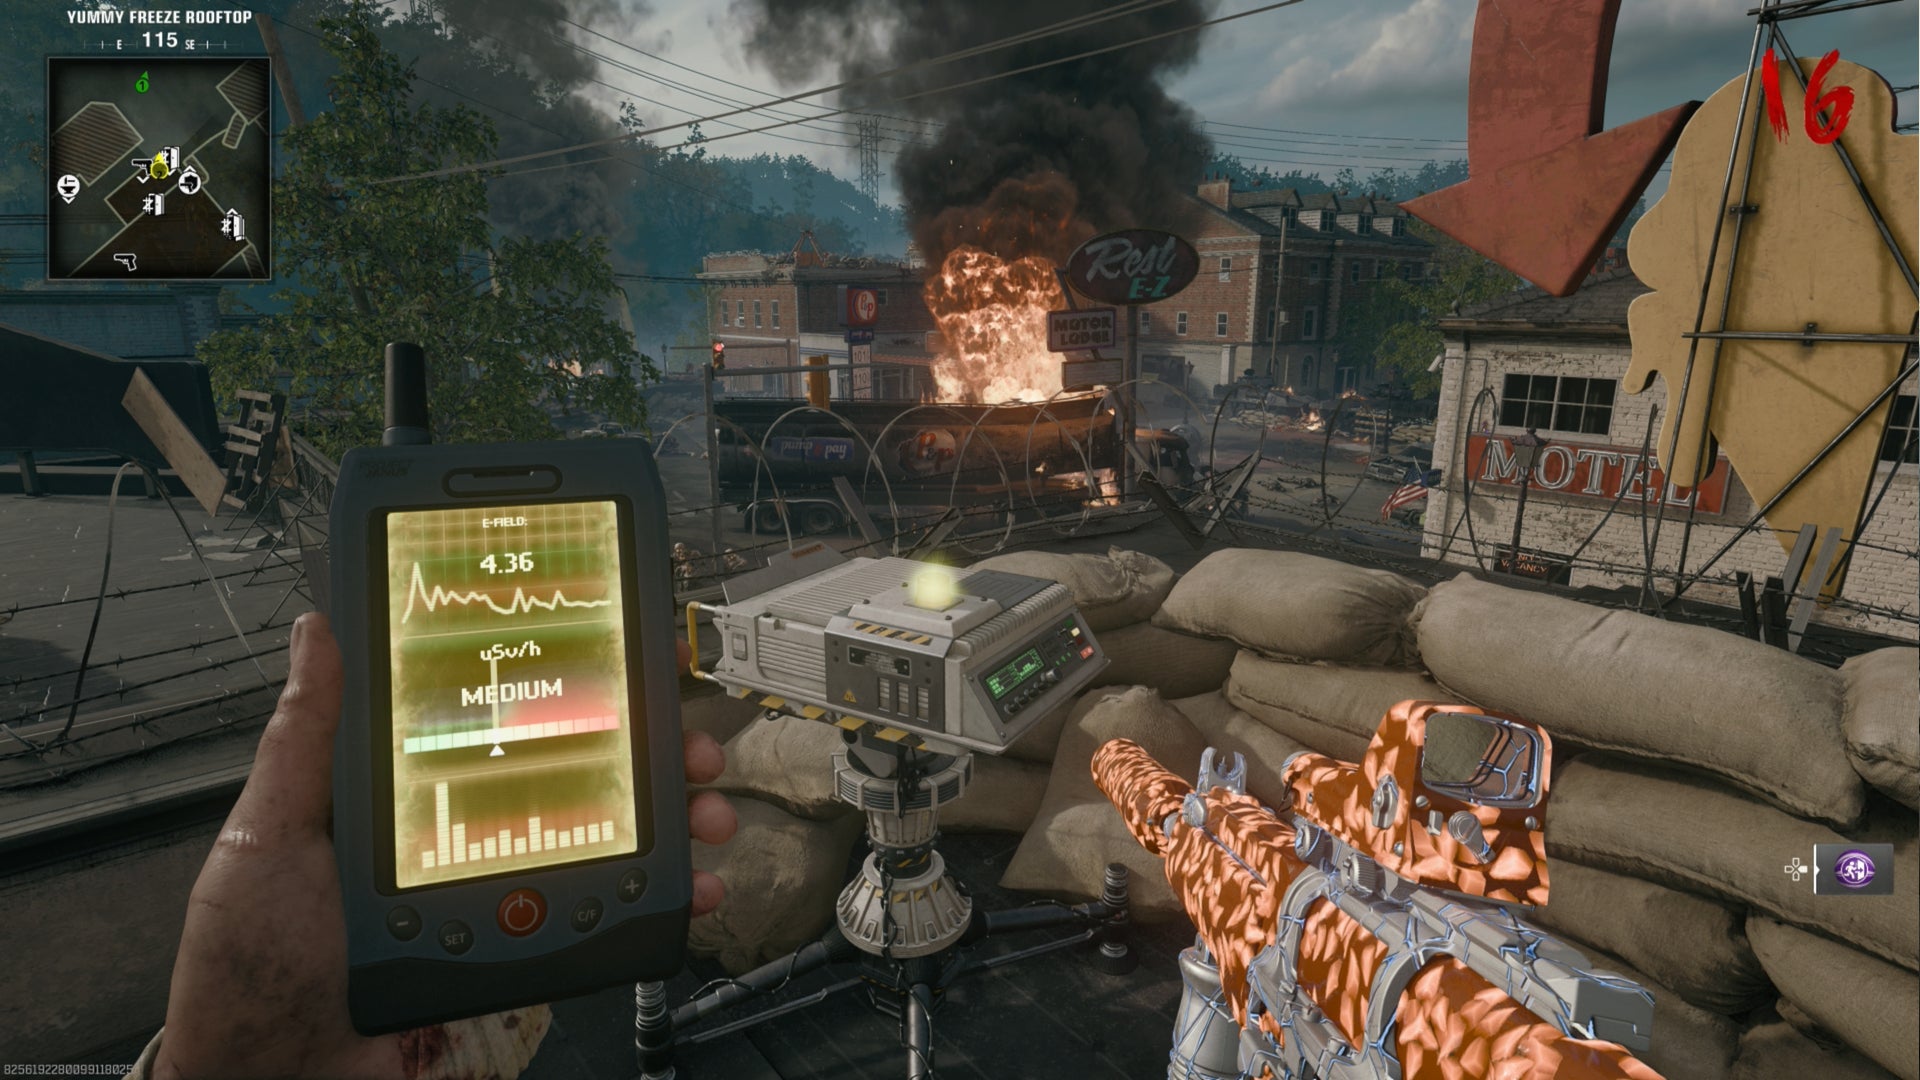
Red, green, and yellow. Gotta get those colours right! |Image credit:IGN/Activision
The Projectors can be found in the following places:
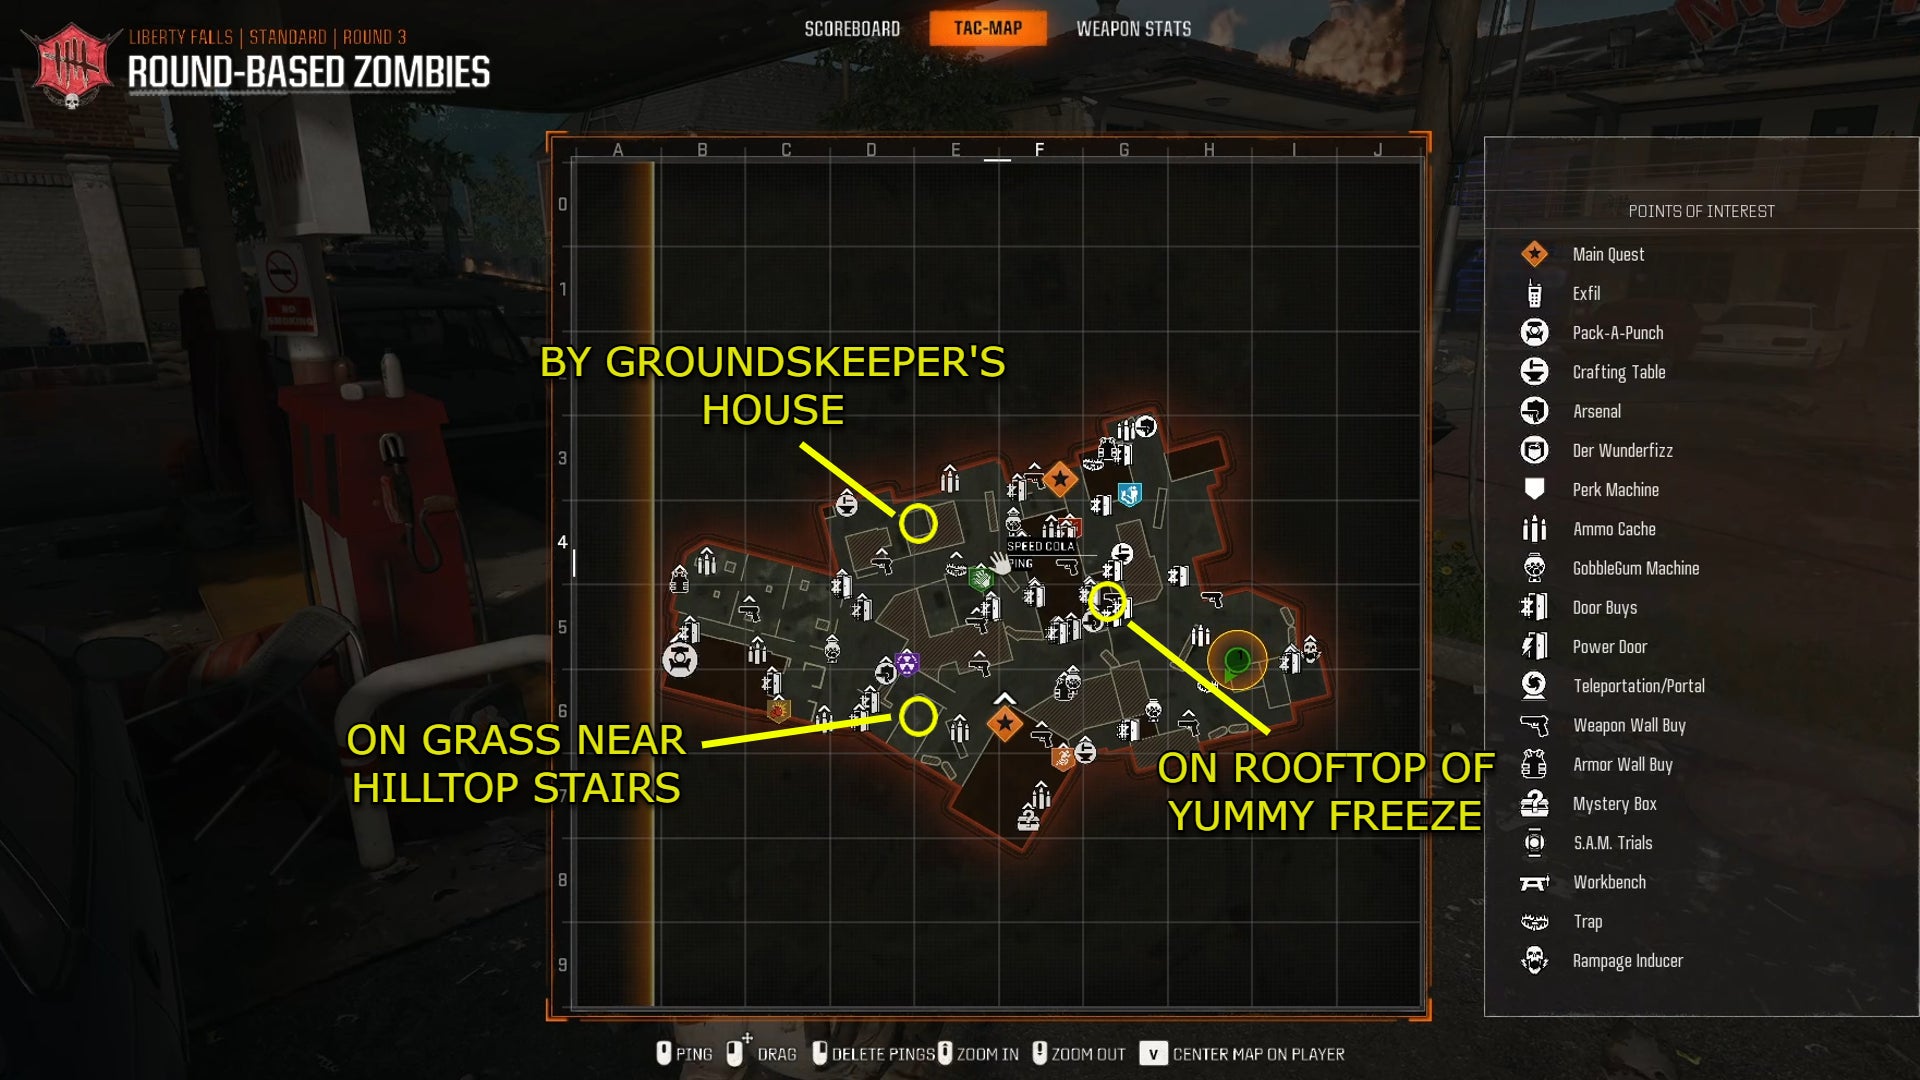
Refer to this map to track down the three Projectors. |Image credit:Rock Paper Shotgun/Activision
- In the yard near the Cemetery Groundskeeper’s house and toolshed , where you found one of the pieces of the Jet Gun.
- On the grassy area next to the stairs that lead up to the Church , within view of the Liberty Lanes logo.
- On the roof of Yummy Freeze . You can get here by ziplining to the roof of the Savings and Loans building, where you built the LTG. Jump down to a ledge overlooking the Motel to find the projector.
Charge the second Aether Canister
After activating the Projectors you’ll need to go to the Gas Station. Another Aether Canister has appeared here; take it and carry it to the Dark Aether Field Generator that you didn’t previously use. Now you’ve got to repeat the process of charging the Aether Canister. Put the LTG under the storm cloud, protect the portal from the waves of enemies until the counter ends, and then blast the High Value Target that pops up until it turns purple. Activate the Dark Aether Field Generator and then lure your target into the trap radius before killing it. This will charge the Aether Canister.
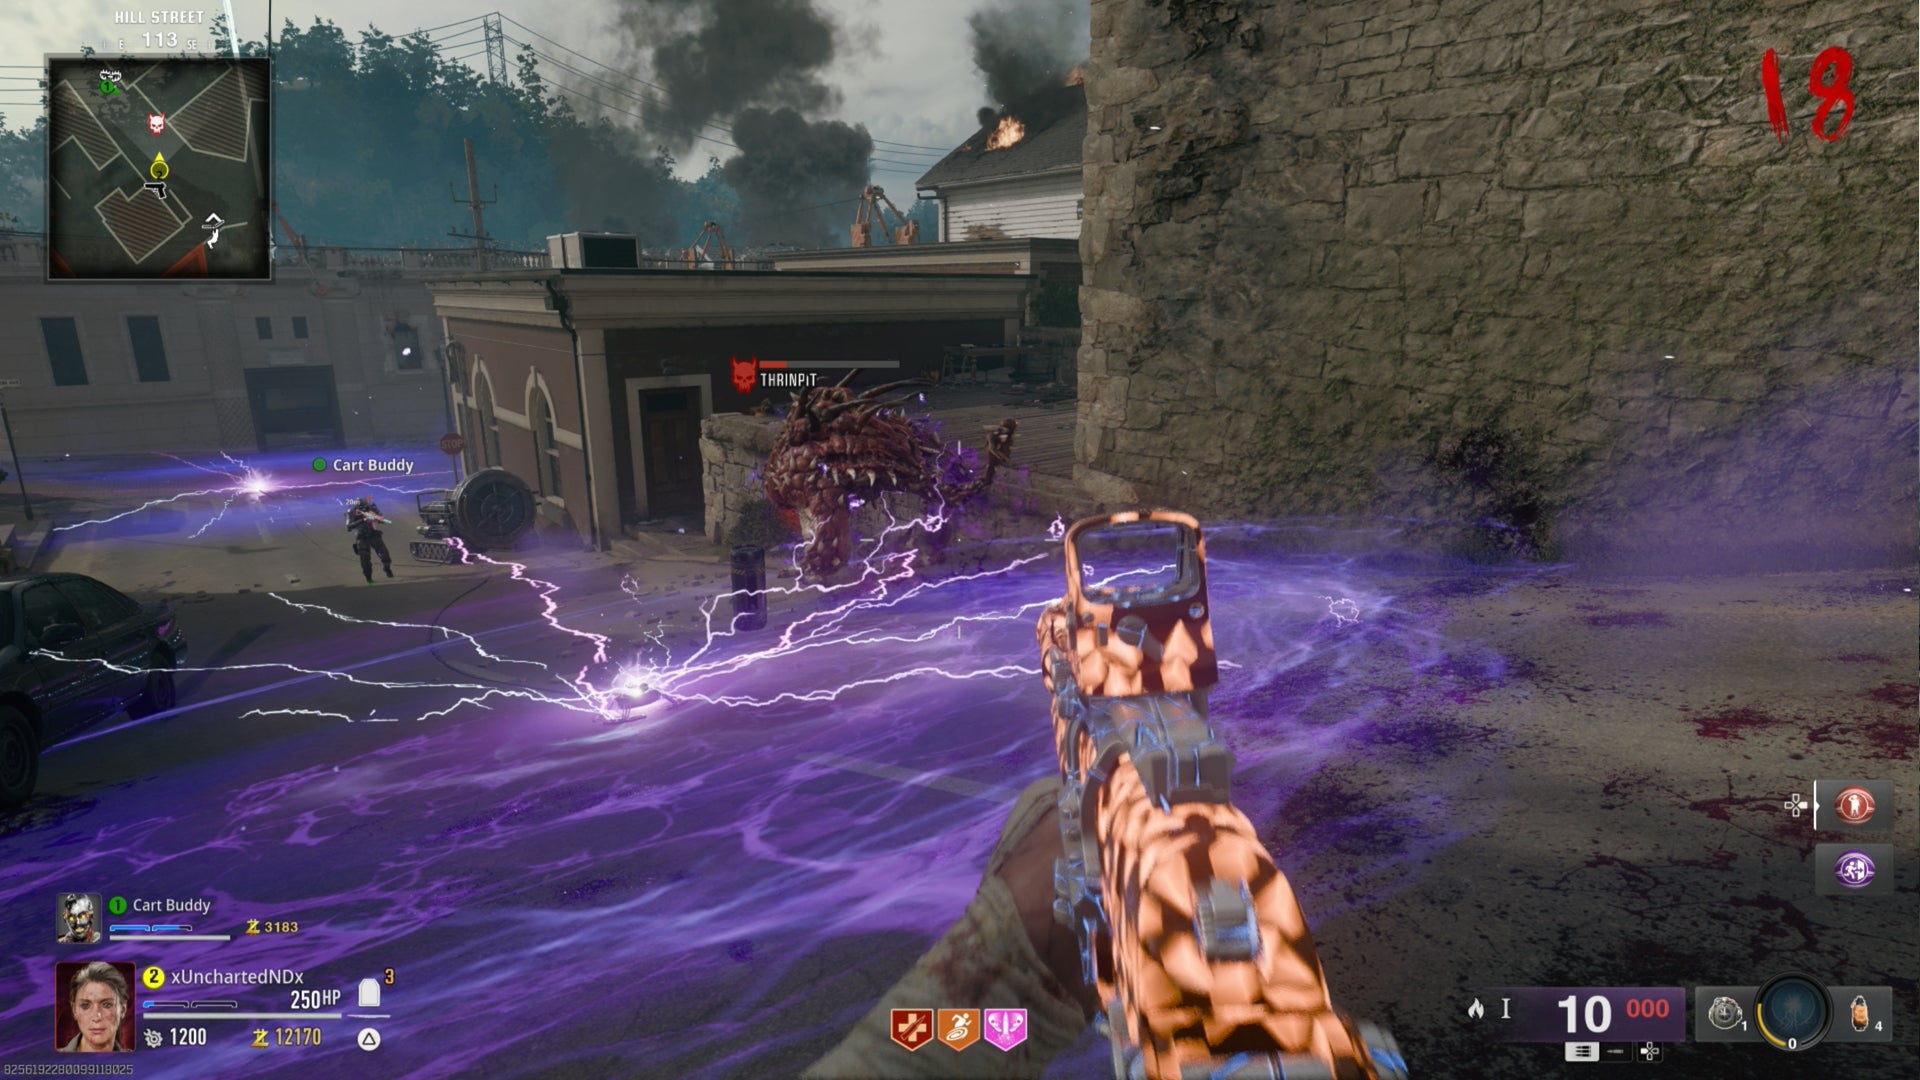
More Aether Canister shenanigans. This time, we’ve gotta trap an Abomination named Thrinpit. |Image credit:IGN/Activision
Pick up the charged Aether Canister and bring it back to the SDG Generator in the church. As before, hurry - you’ve only got a minute and a half to do this.
Survive the final encounter
Make sure your weapons are powered up via the Pack-a-Punch and the rest of your gear is ready, as we’ve got one last zombie onslaught to endure, and it’s bigger than all the others. Interact with the SDG Generator one final time to kick off the final encounter of Liberty Falls. The small space within the Church will quickly become overwhelmed with all manner of zombies, and you’ll have to survive three waves before all’s said and done.
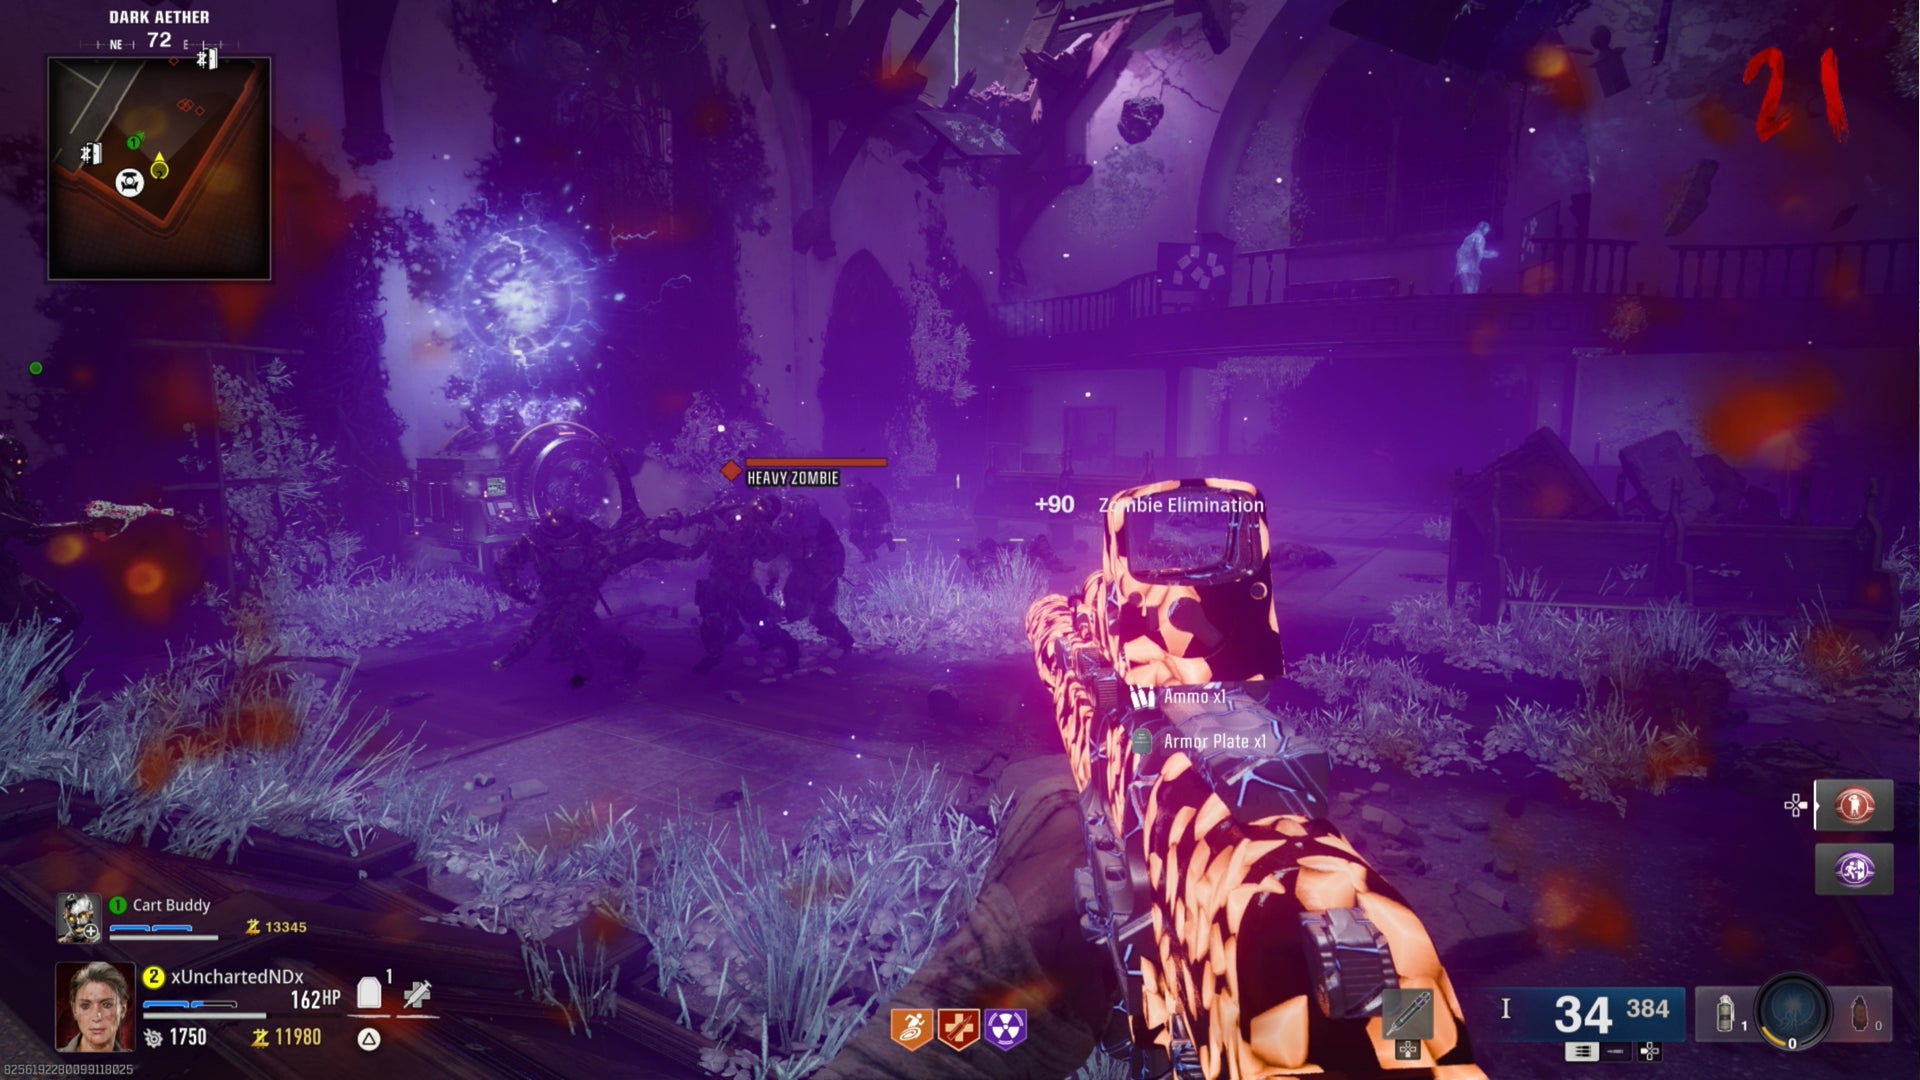
Once the third wave begins, keep in mind that you technically only need to kill the Abomination that spawns to complete the final encounter - the Manglers are optional. |Image credit:IGN/Activision
When you’ve survived this high intensity showdown, a cutscene involving Panos will play, and that’ll be the end of Liberty Falls! You’ll be given the choice to keep playing, and if you do so, you’ll respawn with a plethora of rewards, including lots of Salvage, a Raw Aetherium Crystal, and a random Wonder Weapon. Nice.
Well done on completing the main quest of Liberty Falls! For more on the secrets scattered around the map, take a peek at our guide to all the vault codes in Liberty Falls . If you’re interested in the Terminus map, head over to our guide on building the Beamsmasher. Lastly, for regular multiplayer matches, check our guides on the best guns in Black Ops 6. We’ve also got lists of how to unlock each weapon and every Operator . If you’re stuck choosing a weapon, feel free to refer to our guides on the best Assault Rifle , SMG , Sniper Rifle , and Shotgun in Black Ops 6.


Call of Duty: Black Ops 6
PS4 , PS5 , Xbox One , Xbox Series X/S , PC
Rock Paper Shotgun is better when you sign in
Sign in and join us on our journey to discover strange and compelling PC games.

All 75 Arc Raiders Blueprints and where to get them
These areas have the highest chance of giving you Blueprints

Image credit:Rock Paper Shotgun/Embark Studios

Looking for more Arc Raiders Blueprints? It’s a special day when you find a Blueprint, as they’re among the most valuable items in Arc Raiders. If you find a Blueprint that you haven’t already found, then you must make sure you hold onto it at all costs, because Blueprints are the key to one of the most important and powerful systems of meta-progression in the game.
This guide aims to be the very best guide on Blueprints you can find, starting with a primer on what exactly they are and how they work in Arc Raiders, before delving into exactly where to get Blueprints and the very best farming spots for you to take in your search.
We’ll also go over how to get Blueprints from other unlikely activities, such as destroying Surveyors and completing specific quests. And you’ll also find the full list of all 75 Blueprints in Arc Raiders on this page (including the newest Blueprints added with the Cold Snap update , such as the Deadline Blueprint and Firework Box Blueprint), giving you all the information you need to expand your own crafting repertoire.
In this guide:
- What are Blueprints in Arc Raiders?
- Full Blueprint list: All crafting recipes
- Where to find Blueprints in Arc Raiders Blueprints obtained from quests Blueprints obtained from Trials Best Blueprint farming locations

What are Blueprints in Arc Raiders?
Blueprints in Arc Raiders are special items which, if you manage to extract with them, you can expend to permanently unlock a new crafting recipe in your Workshop. If you manage to extract from a raid with an Anvil Blueprint, for example, you can unlock the ability to craft your very own Anvil Pistol, as many times as you like (as long as you have the crafting materials).
To use a Blueprint, simply open your Inventory while in the lobby, then right-click on the Blueprint and click “Learn And Consume” . This will permanently unlock the recipe for that item in your Workshop. As of the Stella Montis update, there are allegedly 75 different Blueprints to unlock - although only 68 are confirmed to be in the game so far. You can see all the Blueprints you’ve found and unlocked by going to the Workshop menu, and hitting “R” to bring up the Blueprint screen.
It’s possible to find duplicates of past Blueprints you’ve already unlocked. If you find these, then you can either sell them, or - if you like to play with friends - you can take it into a match and gift it to your friend so they can unlock that recipe for themselves. Another option is to keep hold of them until the time comes to donate them to the Expedition.
Full Blueprint list: All crafting recipes
Below is the full list of all the Blueprints that are currently available to find in Arc Raiders, and the crafting recipe required for each item:
| Blueprint | Type | Recipe | Crafted At |
|---|---|---|---|
| Bettina | Weapon | 3x Advanced Mechanical Components 3x Heavy Gun Parts 3x Canister | Gunsmith 3 |
| Blue Light Stick | Quick Use | 3x Chemicals | Utility Station 1 |
| Aphelion | Weapon | 3x Magnetic Accelerator 3x Complex Gun Parts 1x Matriarch Reactor | Gunsmith 3 |
| Combat Mk. 3 (Flanking) | Augment | 2x Advanced Electrical Components 3x Processor | Gear Bench 3 |
| Combat Mk. 3 (Aggressive) | Augment | 2x Advanced Electrical Components 3x Processor | Gear Bench 3 |
| Complex Gun Parts | Material | 2x Light Gun Parts 2x Medium Gun Parts 2x Heavy Gun Parts | Refiner 3 |
| Fireworks Box | Quick Use | 1x Explosive Compound 3x Pop Trigger | Explosives Station 2 |
| Gas Mine | Mine | 4x Chemicals 2x Rubber Parts | Explosives Station 1 |
| Green Light Stick | Quick Use | 3x Chemicals | Utility Station 1 |
| Pulse Mine | Mine | 1x Crude Explosives 1x Wires | Explosives Station 1 |
| Seeker Grenade | Grenade | 1x Crude Explosives 2x ARC Alloy | Explosives Station 1 |
| Looting Mk. 3 (Survivor) | Augment | 2x Advanced Electrical Components 3x Processor | Gear Bench 3 |
| Angled Grip II | Mod | 2x Mechanical Components 3x Duct Tape | Gunsmith 2 |
| Angled Grip III | Mod | 2x Mod Components 5x Duct Tape | Gunsmith 3 |
| Hullcracker | Weapon | 1x Magnetic Accelerator 3x Heavy Gun Parts 1x Exodus Modules | Gunsmith 3 |
| Launcher Ammo | Ammo | 5x Metal Parts 1x Crude Explosives | Workbench 1 |
| Anvil | Weapon | 5x Mechanical Components 5x Simple Gun Parts | Gunsmith 2 |
| Anvil Splitter | Mod | 2x Mod Components 3x Processor | Gunsmith 3 |
| ??? | ??? | ??? | ??? |
| Barricade Kit | Quick Use | 1x Mechanical Components | Utility Station 2 |
| Blaze Grenade | Grenade | 1x Explosive Compound 2x Oil | Explosives Station 3 |
| Bobcat | Weapon | 3x Advanced Mechanical Components 3x Light Gun Parts | Gunsmith 3 |
| Osprey | Weapon | 2x Advanced Mechanical Components 3x Medium Gun Parts 7x Wires | Gunsmith 3 |
| Burletta | Weapon | 3x Mechanical Components 3x Simple Gun Parts | Gunsmith 1 |
| Compensator II | Mod | 2x Mechanical Components 4x Wires | Gunsmith 2 |
| Compensator III | Mod | 2x Mod Components 8x Wires | Gunsmith 3 |
| Defibrillator | Quick Use | 9x Plastic Parts 1x Moss | Medical Lab 2 |
| ??? | ??? | ??? | ??? |
| Equalizer | Weapon | 3x Magnetic Accelerator 3x Complex Gun Parts 1x Queen Reactor | Gunsmith 3 |
| Extended Barrel | Mod | 2x Mod Components 8x Wires | Gunsmith 3 |
| Extended Light Mag II | Mod | 2x Mechanical Components 3x Steel Spring | Gunsmith 2 |
| Extended Light Mag III | Mod | 2x Mod Components 5x Steel Spring | Gunsmith 3 |
| Extended Medium Mag II | Mod | 2x Mechanical Components 3x Steel Spring | Gunsmith 2 |
| Extended Medium Mag III | Mod | 2x Mod Components 5x Steel Spring | Gunsmith 3 |
| Extended Shotgun Mag II | Mod | 2x Mechanical Components 3x Steel Spring | Gunsmith 2 |
| Extended Shotgun Mag III | Mod | 2x Mod Components 5x Steel Spring | Gunsmith 3 |
| Remote Raider Flare | Quick Use | 2x Chemicals 4x Rubber Parts | Utility Station 1 |
| Heavy Gun Parts | Material | 4x Simple Gun Parts | Refiner 2 |
| Venator | Weapon | 2x Advanced Mechanical Components 3x Medium Gun Parts 5x Magnet | Gunsmith 3 |
| Il Toro | Weapon | 5x Mechanical Components 6x Simple Gun Parts | Gunsmith 1 |
| Jolt Mine | Mine | 1x Electrical Components 1x Battery | Explosives Station 2 |
| Explosive Mine | Mine | 1x Explosive Compound 1x Sensors | Explosives Station 3 |
| Jupiter | Weapon | 3x Magnetic Accelerator 3x Complex Gun Parts 1x Queen Reactor | Gunsmith 3 |
| Light Gun Parts | Material | 4x Simple Gun Parts | Refiner 2 |
| Lightweight Stock | Mod | 2x Mod Components 5x Duct Tape | Gunsmith 3 |
| Lure Grenade | Grenade | 1x Speaker Component 1x Electrical Components | Utility Station 2 |
| Medium Gun Parts | Material | 4x Simple Gun Parts | Refiner 2 |
| Torrente | Weapon | 2x Advanced Mechanical Components 3x Medium Gun Parts 6x Steel Spring | Gunsmith 3 |
| Muzzle Brake II | Mod | 2x Mechanical Components 4x Wires | Gunsmith 2 |
| Muzzle Brake III | Mod | 2x Mod Components 8x Wires | Gunsmith 3 |
| Padded Stock | Mod | 2x Mod Components 5x Duct Tape | Gunsmith 3 |
| Shotgun Choke II | Mod | 2x Mechanical Components 4x Wires | Gunsmith 2 |
| Shotgun Choke III | Mod | 2x Mod Components 8x Wires | Gunsmith 3 |
| Shotgun Silencer | Mod | 2x Mod Components 8x Wires | Gunsmith 3 |
| Showstopper | Grenade | 1x Advanced Electrical Components 1x Voltage Converter | Explosives Station 3 |
| Silencer I | Mod | 2x Mechanical Components 4x Wires | Gunsmith 2 |
| Silencer II | Mod | 2x Mod Components 8x Wires | Gunsmith 3 |
| Snap Hook | Quick Use | 2x Power Rod 3x Rope 1x Exodus Modules | Utility Station 3 |
| Stable Stock II | Mod | 2x Mechanical Components 3x Duct Tape | Gunsmith 2 |
| Stable Stock III | Mod | 2x Mod Components 5x Duct Tape | Gunsmith 3 |
| Tagging Grenade | Grenade | 1x Electrical Components 1x Sensors | Utility Station 3 |
| Tempest | Weapon | 3x Advanced Mechanical Components 3x Medium Gun Parts 3x Canister | Gunsmith 3 |
| Trigger Nade | Grenade | 2x Crude Explosives 1x Processor | Explosives Station 2 |
| Vertical Grip II | Mod | 2x Mechanical Components 3x Duct Tape | Gunsmith 2 |
| Vertical Grip III | Mod | 2x Mod Components 5x Duct Tape | Gunsmith 3 |
| Vita Shot | Quick Use | 2x Antiseptic 1x Syringe | Medical Lab 3 |
| Vita Spray | Quick Use | 3x Antiseptic 1x Canister | Medical Lab 3 |
| Vulcano | Weapon | 1x Magnetic Accelerator 3x Heavy Gun Parts 1x Exodus Modules | Gunsmith 3 |
| Wolfpack | Grenade | 2x Explosive Compound 2x Sensors | Explosives Station 3 |
| Red Light Stick | Quick Use | 3x Chemicals | Utility Station 1 |
| Smoke Grenade | Grenade | 14x Chemicals 1x Canister | Utility Station 2 |
| Deadline | Mine | 3x Explosive Compound 2x ARC Circuitry | Explosives Station 3 |
| Trailblazer | Grenade | 1x Explosive Compound 1x Synthesized Fuel | Explosives Station 3 |
| Tactical Mk. 3 (Defensive) | Augment | 2x Advanced Electrical Components 3x Processor | Gear Bench 3 |
| Tactical Mk. 3 (Healing) | Augment | 2x Advanced Electrical Components 3x Processor | Gear Bench 3 |
| Yellow Light Stick | Quick Use | 3x Chemicals | Utility Station 1 |
Note: The missing Blueprints in this list likely have not actually been added to the game at the time of writing, because none of the playerbase has managed to find any of them. As they are added to the game, I will update this page with the most relevant information so you know exactly how to get all 75 Arc Raiders Blueprints.
Where to find Blueprints in Arc Raiders
Below is a list of all containers, modifiers, and events which maximise your chances of finding Blueprints:
- Certain quests reward you with specific Blueprints .
- Completing Trials has a high chance of offering Blueprints as rewards.
- Surveyors have a decent chance of dropping Blueprints on death.
- High loot value areas tend to have a greater chance of spawning Blueprints.
- Night Raids and Storms may increase rare Blueprint spawn chances in containers.
- Containers with higher numbers of items may have a higher tendency to spawn Blueprints. As a result, Blue Gate (which has many “large” containers containing multiple items) may give you a higher chance of spawning Blueprints.
- Raider containers (Raider Caches, Weapon Boxes, Medical Bags, Grenade Tubes) have increased Blueprint drop rates. As a result, the Uncovered Caches event gives you a high chance of finding Blueprints.
- Security Lockers have a higher than average chance of containing Blueprints.
- Certain Blueprints only seem to spawn under specific circumstances: Tempest Blueprint only spawns during Night Raid events. Vulcano Blueprint only spawns during Hidden Bunker events. Jupiter and Equaliser Blueprints only spawn during Harvester events.

Raider Caches, Weapon Boxes, and other raider-oriented container types have a good chance of offering Blueprints. |Image credit:Rock Paper Shotgun/Embark Studios
Blueprints have a very low chance of spawning in any container in Arc Raiders, around 1-2% on average. However, there is a higher chance of finding Blueprints in particular container types. Specifically, you can find more Blueprints in Raider containers and security lockers.
Beyond this, if you’re looking for Blueprints you should focus on regions of the map which are marked as having particularly high-value loot. Areas such as the Control Tower in Dam Battlegrounds, the Arrival and Departure Buildings in Spaceport, and Pilgrim’s Peak in Blue Gate all have a better-than-average chance of spawning Blueprints somewhere amongst all their containers. Night Raids and Electromagnetic Storm events also increase the drop chances of certain Blueprints .
In addition to these containers, you can often loot Blueprints from destroyed Surveyors - the largest of the rolling ball ARC. Surveyors are more commonly found on the later maps - Spaceport and Blue Gate - and if one spawns in your match, you’ll likely see it by the blue laser beam that it casts into the sky while “surveying”.
Surveyors are quite well-armoured and will very speedily run away from you once it notices you, but if you can take one down then make sure you loot all its parts for a chance of obtaining certain unusual Blueprints.
Blueprints obtained from quests
One way in which you can get Blueprints is by completing certain quests for the vendors in Speranza. Some quests will reward you with a specific item Blueprint upon completion, so as long as you work through all the quests in Arc Raiders, you are guaranteed those Blueprints.
Here is the full list of all Blueprints you can get from quest rewards:
- Trigger Nade Blueprint: Rewarded after completing “Sparks Fly”.
- Lure Grenade Blueprint: Rewarded after completing “Greasing Her Palms”.
- Burletta Blueprint: Rewarded after completing “Industrial Espionage”.
- Hullcracker Blueprint (and Launcher Ammo Blueprint): Rewarded after completing “The Major’s Footlocker”.
Alas, that’s only 4 Blueprints out of a total of 75 to unlock, so for the vast majority you will need to find them yourself during a raid. If you’re intent on farming Blueprints, then it’s best to equip yourself with cheap gear in case you lose it, but don’t use a free loadout because then you won’t get a safe pocket to stash any new Blueprint you find. No pain in Arc Raiders is sharper than failing to extract with a new Blueprint you’ve been after for a dozen hours already.

One of the best ways to get Blueprints is by hitting three stars on all five Trials every week. |Image credit:Rock Paper Shotgun/Embark Studios
Blueprints obtained from Trials
One of the very best ways to get Blueprints is as rewards for completing Trials in Arc Raiders. Trials are unlocked from Level 15 onwards, and allow you to earn rewards by focusing on certain tasks over the course of several raids. For example, one Trial might task you with dealing damage to Hornets, while another might challenge you to loot Supply Drops.
Trials refresh on a weekly basis, with a new week bringing five new Trials. Each Trial can offer up to three rewards after passing certain score milestones, and it’s possible to receive very high level loot from these reward crates - including Blueprints. So if you want to unlock as many Blueprints as possible, you should make a point of completing as many Trials as possible each week.
Best Blueprint farming locations
The very best way to get Blueprints is to frequent specific areas of the maps which combine high-tier loot pools with the right types of containers to search. Here are my recommendations for where to find Blueprints on every map, so you can always keep the search going for new crafting recipes to unlock.

Image credit:Rock Paper Shotgun/Embark Studios
Dam Battlegrounds
The best places to farm Blueprints on Dam Battlegrounds are the Control Tower, Power Generation Complex, Ruby Residence, and Pale Apartments . The first two regions, despite only being marked on the map as mid-tier loot, contain a phenomenal number of containers to loot. The Control Tower can also contain a couple of high-tier Security Lockers - though of course, you’ll need to have unlocked the Security Breach skill at the end of the Survival tree.
There’s also a lot of reporting amongst the playerbase that the Residential areas in the top-left of the map - Pale Apartments and Ruby Residence - give you a comparatively strong chance of finding Blueprints. Considering their size, there’s a high density of containers to loot in both locations, and they also have the benefit of being fairly out of the way. So you’re more likely to have all the containers to yourself.
Buried City
The best Blueprint farming locations on Buried City are the Santa Maria Houses, Grandioso Apartments, Town Hall, and the various buildings of the New District . Grandioso Apartments has a lower number of containers than the rest, but a high chance of spawning weapon cases - which have good Blueprint drop rates. The others are high-tier loot areas, with plenty of lootable containers - including Security Lockers.
Spaceport
The best places to find Blueprints on Spaceport are the Arrival and Departure Buildings, as well as Control Tower A6 and the Launch Towers . All these areas are labelled as high-value loot regions, and many of them are also very handily connected to one another by the Spaceport wall, which you can use to quickly run from one area to the next. At the tops of most of these buildings you’ll find at least one Security Locker, so this is an excellent farming route for players looking to find Blueprints.
The downside to looting Blueprints on Spaceport is that all these areas are hotly contested, particularly in Duos and Squads. You’ll need to be very focused and fast in order to complete the full farming route.

Image credit:Rock Paper Shotgun/Embark Studios
Blue Gate
Blue Gate tends to have a good chance of dropping Blueprints, potentially because it generally has a high number of containers which can hold lots of items; so there’s a higher chance of a Blueprint spawning in each container. In my experience, the best Blueprint farming spots on Blue Gate are Pilgrim’s Peak, Raider’s Refuge, the Ancient Fort, and the Underground Complex beneath the Warehouse .
All of these areas contain a wealth of containers to loot. Raider’s Refuge has less to loot, but the majority of the containers in and around the Refuge are raider containers, which have a high chance of containing Blueprints - particularly during major events.
Stella Montis
On the whole, Stella Montis seems to have a very low drop rate for Blueprints (though a high chance of dropping other high-tier loot). If you do want to try farming Blueprints on this map, the best places to find Blueprints in Stella Montis are Medical Research, Assembly Workshop, and the Business Center . These areas have the highest density of containers to loot on the map.
In addition to this, the Western Tunnel has a few different Security Lockers to loot, so while there’s very little to loot elsewhere in this area of the map, it’s worth hitting those Security Lockers if you spawn there at the start of a match.
That wraps up this primer on how to get all the Blueprints in Arc Raiders as quickly as possible. With the Expedition system constantly resetting a large number of players’ Blueprints, it’s more important than ever to have the most up-to-date information on where to find all these Blueprints.
While you’re here, be sure to check out our Arc Raiders best guns tier list , as well as our primers on the best skills to unlock and all the different Field Depot locations on every map.


ARC Raiders
PS5 , Xbox Series X/S , PC
Rock Paper Shotgun is better when you sign in
Sign in and join us on our journey to discover strange and compelling PC games.
