Black Myth: Wukong review: a refreshing adventure after Elden Ring’s knotty DLC
Aping the competition

Image credit:Rock Paper Shotgun/Game Science

- Developer: Game Science
- Publisher: Game Science
- Release: August 20th 2024
- On: Windows
- From: Steam , Epic Games
- Price: £50/€60/$60
- Reviewed on: Intel Core i7-12700F, Nvidia RTX 3080, 16GB RAM, Windows 11
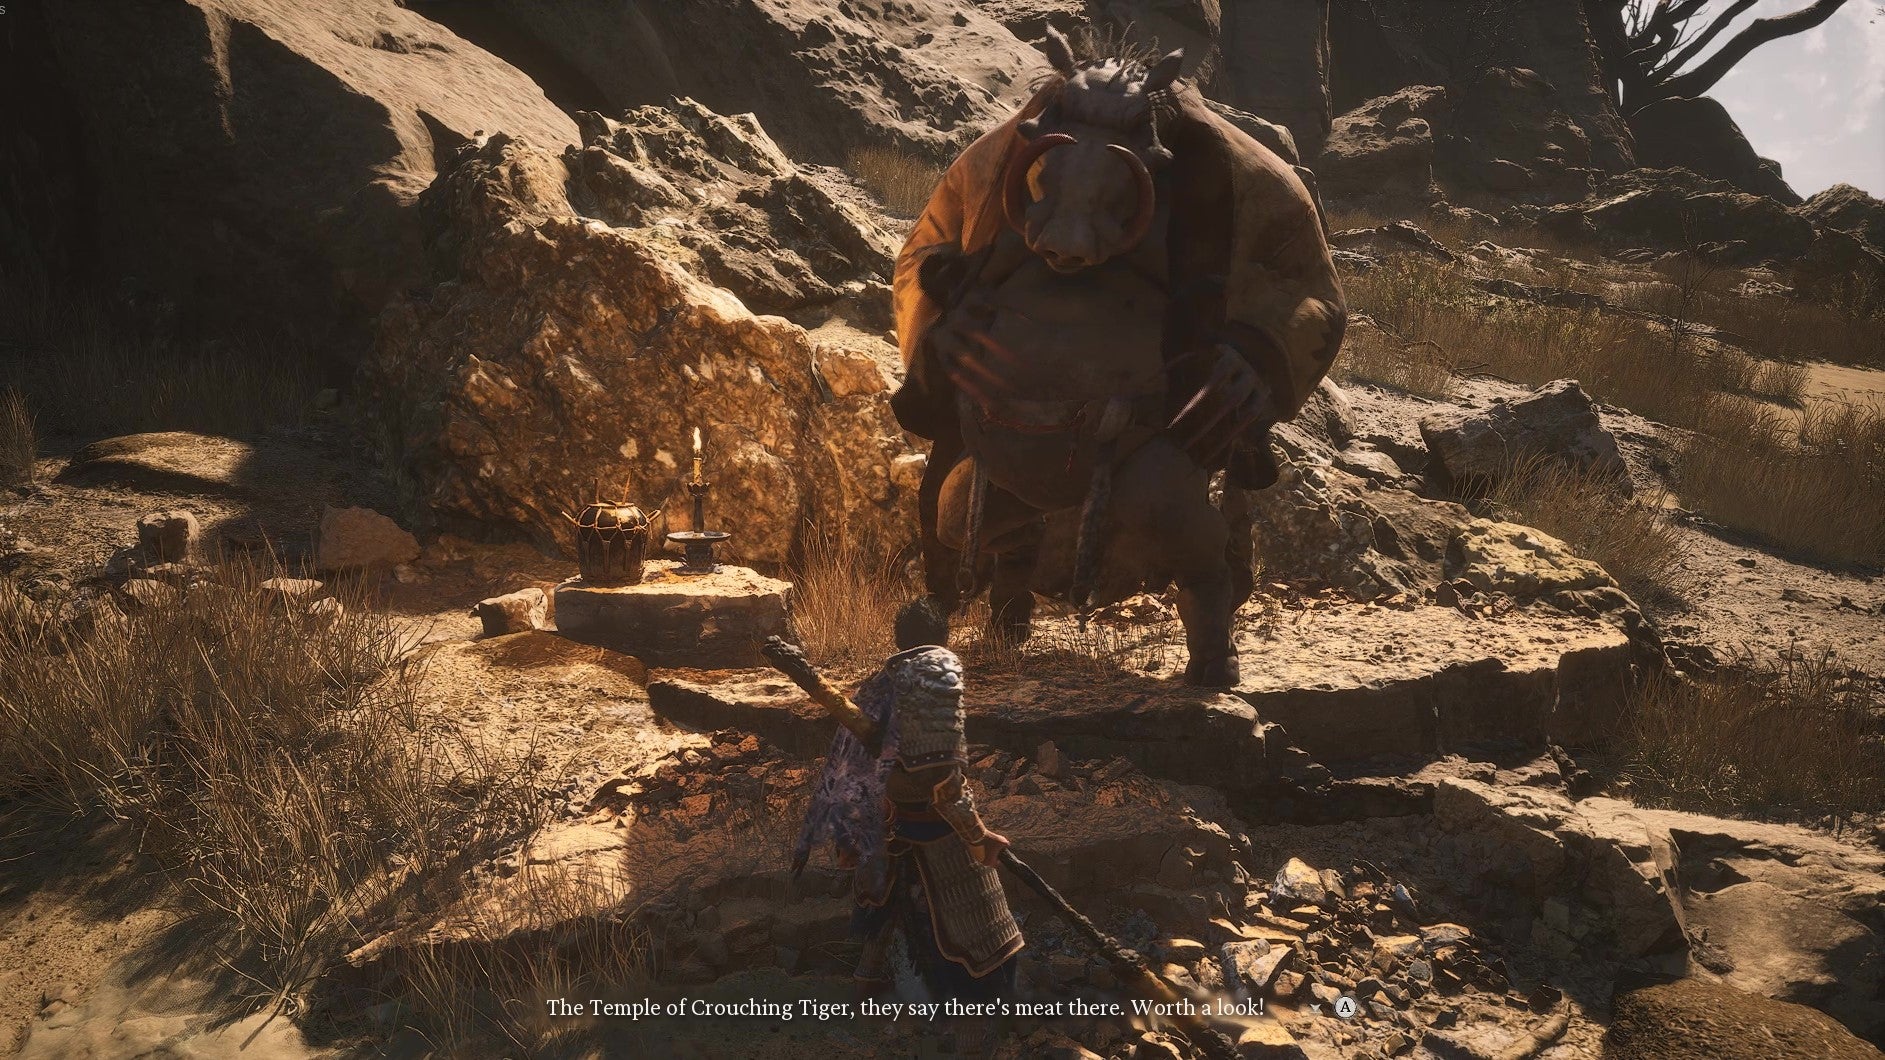
Black Myth: Wukong is an action RPG that leans a bit into the Souls camp and a bit into the adventure camp. And either way, it’s a spectacular journey that works for mostly everyone: those after challenging fights against Chinese mythological creatures, and those after the same thing, but with a little less challenge than your typical Soulslikes . What separates Black Myth from the crowd, though, is its slick presentation and a sense of generosity. You’re to witness the most lavish, cinematic worlds and its creatures. And you’re to enjoy battering everything with your staff as a highly athletic monkey with copious spells at his furry follicles and fingertips. It’s been a while since I’ve played anything quite as impressive as this.
The game’s based on one of the great classical Chinese novels Journey To The West, which I’ve not read. But, from the start of the game I gather that Wukong rebelled against Heaven and he got kicked into the nether. Many years pass and you, a person sitting behind a screen, take control of the Destined One: a monkey who’s essentially Wukong reincarnate. What is your mission? To thwack the shite out of various Yaoguai (mythical creatures) and remind them that you’re back in the game, baby. Back to reclaim… something.
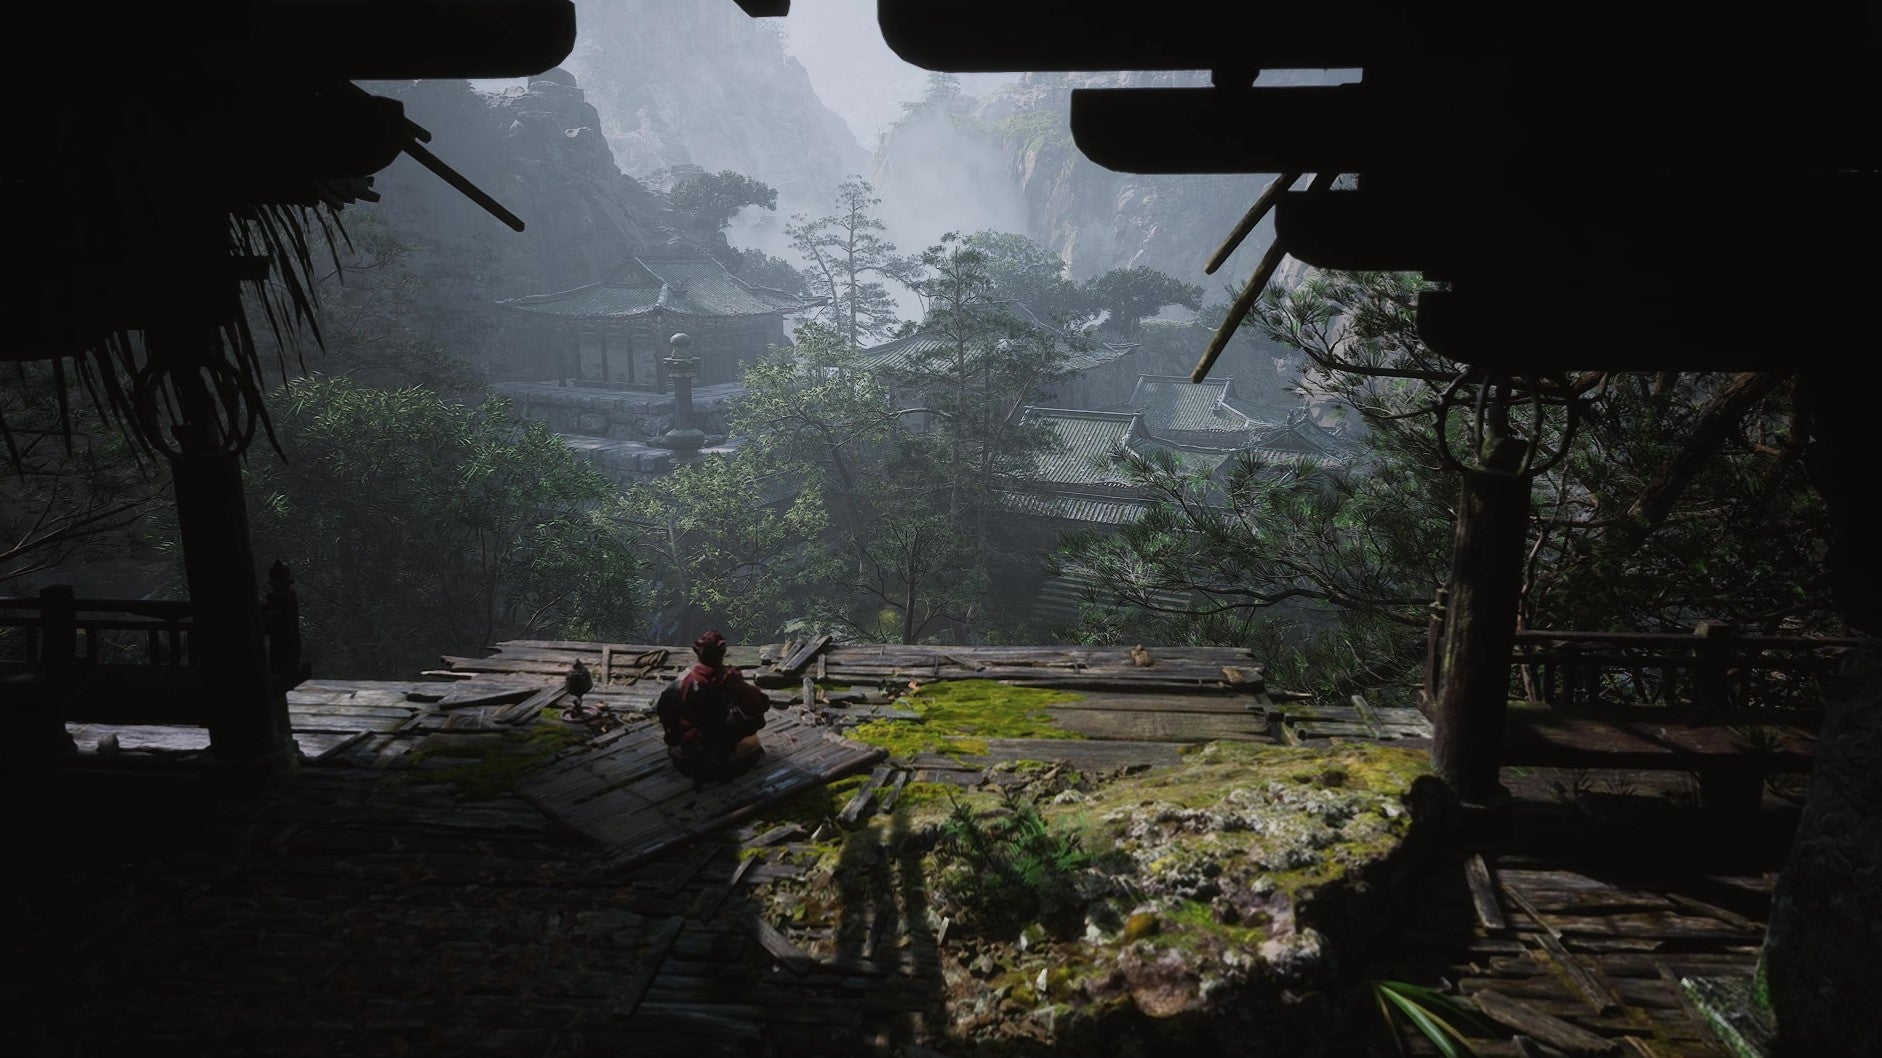
Complete a chapter and you’ll be met by interactable works of art, laying out a summation of where the story sits so far. Again, they’re not super simple to follow, but are wonderful ties back to the source material. I can’t show it for embargo reasons, so have another screen of a meditation point, instead. These are points where you can relax and view vignettes of the environment. |Image credit:Rock Paper Shotgun/Game Science
Forgive my ignorance, as I find Black Myth’s Soulsy story delivery quite difficult to follow. Those familiar with the source material or those with particularly discerning ear holes may find it a lot easier, but I struggle with rats the size of skyscrapers and headless monks speaking in riddles. Thing is, though, I don’t mind it one bit? With Souls it can frustrate, because their universes exist purely in-game and if I don’t understand something, I know the only answers lie in a 40-minute, interpretative YouTube video. With Black Myth, I’m just lapping up the spectacle, the drama, the boiling spittle ejected from the mouth of a blazing deity as it roars at me. Ignorance here only really means bliss, as no matter where you sit on the understanding scale, you’ll be adding Journey To The West to your cart immediately.
Before cosying up with the novel, though, comes the twiddling of your thumbs on a rotund piece of plastic (or the patter of your fingers, depending on whether you use the equally good mouse and keyboard). Black Myth is of the Souls school of action RPGs, for the most part: you dodge bruising enemy attacks, you wait for your stamina to recover, you drink from a Gourd to replenish health (an Estus), you rest at Shrines (Bonfires), you Get The Idea. Except it’s a generous Soulslike, to the point where it straddles - rather beautifully - the line between hard and “let’s crack on with the journey, shall we?”, making it a Souls-venture hybrid that pushes you and pushes you onwards.
Onwards through a series of slightly disjointed chapters (might make more sense in the novel), each whisking you off to realms of swaying groves and golden sands and curved roof tiles dusted with snow. Sure, some chapters have their tougher, more irritating sections, but the general rhythm of exploration is spot on. And that’s down to each realm’s linear structure, opting for more compact zones stitched together by Shrines, as opposed to, say, Elden Ring ’s vast open world.
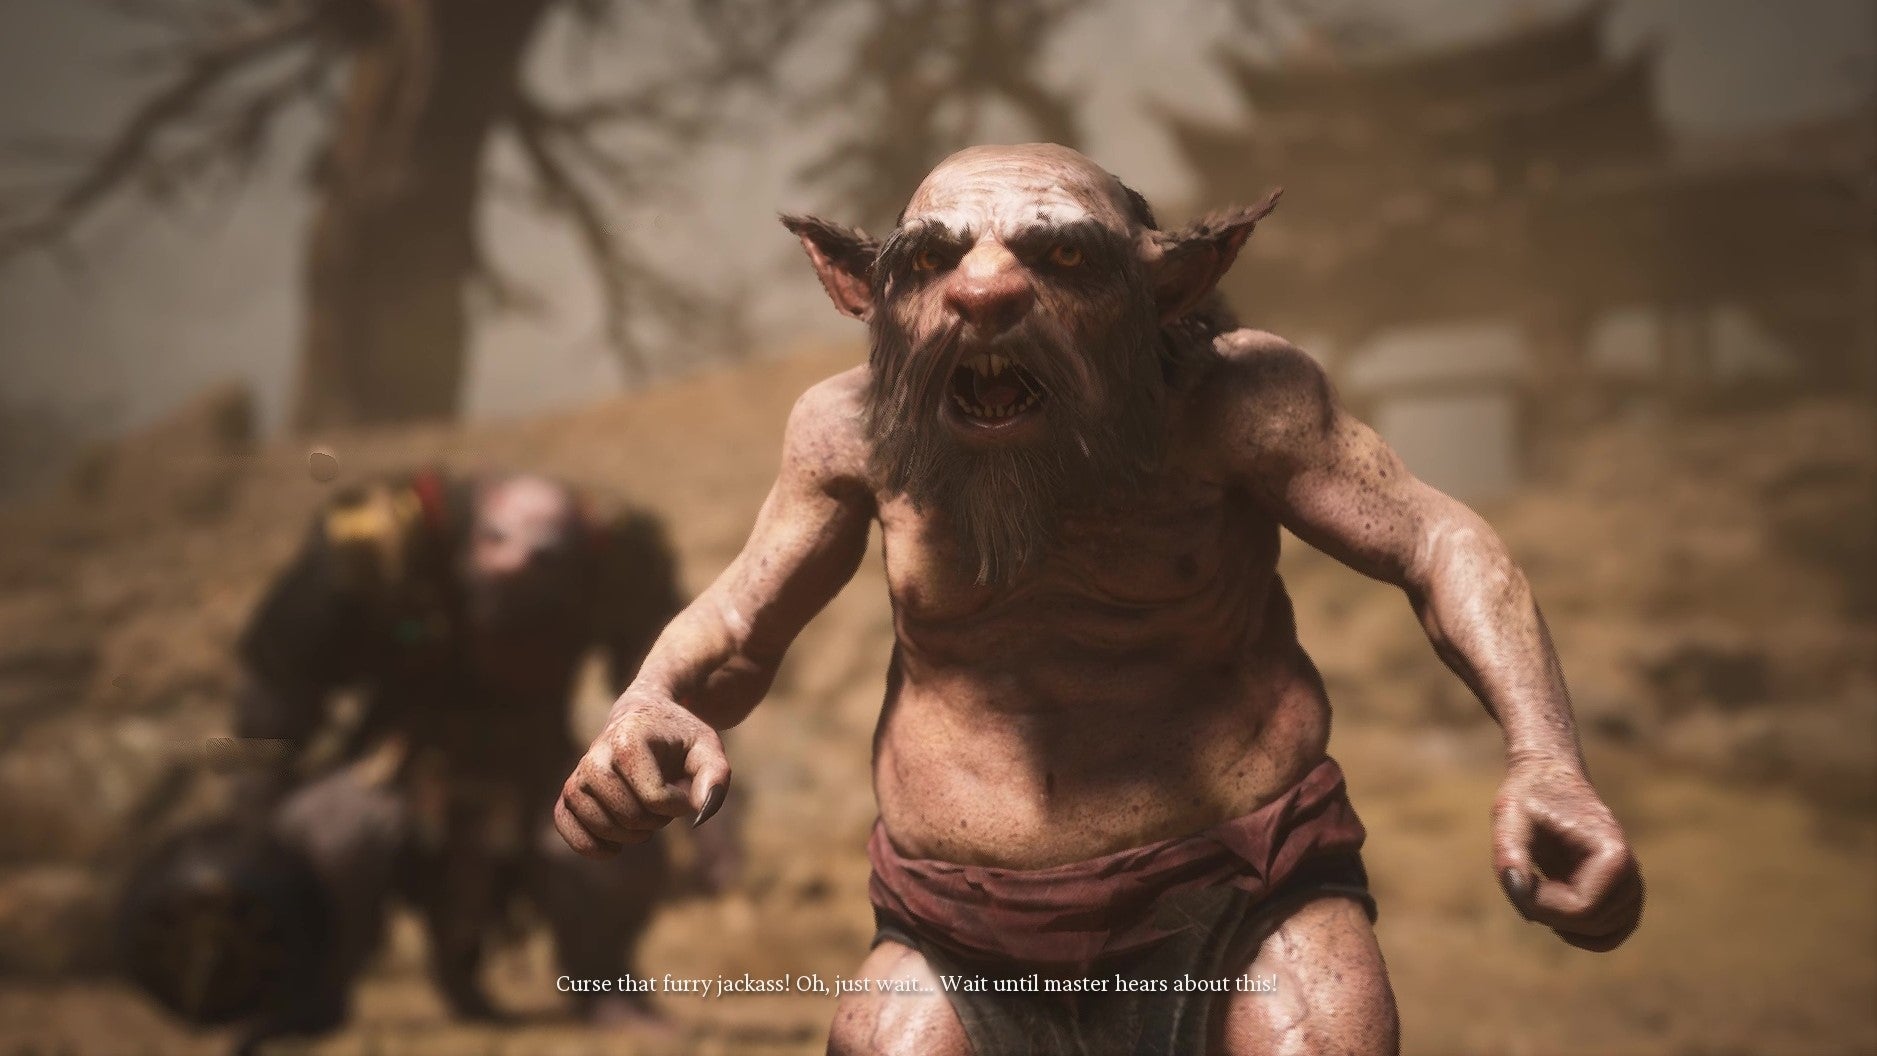
An FYI: bargo details meant that I couldn’t use my own screenshots from the final bit of Chapter 2 onwards. Anyway, here’s a nasty rat. |Image credit:Rock Paper Shotgun/Game Science
This doesn’t mean that Black Myth’s world is one big funnel, oh no. As I said in my preview, I think its use of space is remarkably authentic, with alternate pathways that don’t feel like they’ve been laid down by a level designer’s mouse. Okay yes, there are obvious arenas and routes; this is a video game, after all. But I do think they are all designed thoughtfully, as if everything in Game Science’s power has been poured into making this a mythical universe that’s not been created just for you and your power chase.
So no, the world doesn’t interlock and intertwine quite like a Souls game. But this doesn’t mean you aren’t challenged by careful enemy placement and hidden pathways and well-paced ‘breathers’ between boss battles. There are times, though, when things are laid out in such a way that you think you’re able to jump over to a ledge or up a log and you’ll bonk an invisible wall. Eh, it’s a restriction that’s quickly shrugged off given just how beautiful Black Myth is.
Like seriously, I am unsure whether I’ve ever been wowed quite like I have with Black Myth. I can’t recall the amount of times I’ve stopped dead in my tracks and panned the camera over frescoes on rock, or idols carved into wooden panels, or the intricacy of the Chinese mythological architecture. The little details, like snow trails left by your body and your staff and the way sakura blooms out of a Shrine you’ve visited for the first time? Stop it.
Still, you are an angry monkey and there’s only so much gawping at glistening turtle incense burners you can do before it’s time to slaughter. And slaughter is channelled through your hips and your staff, where lithe movements and stick-twirls make for fights that aren’t only stylish, but punchy too. There’s no blocking, besides spinning your staff to deflect arrows, so fights are a dance of dodges and well-timed strikes at the most basic level. Defeat an enemy and they’ll drop Will (Souls), except you don’t lose these on death! Instead, Will sticks with you no matter what, and not only does it act as a currency to purchase materials and craft things (more on this in a sec), it’s a means of levelling up. Ding up and you’ll earn Sparks, which you can pop into many a skill tree.
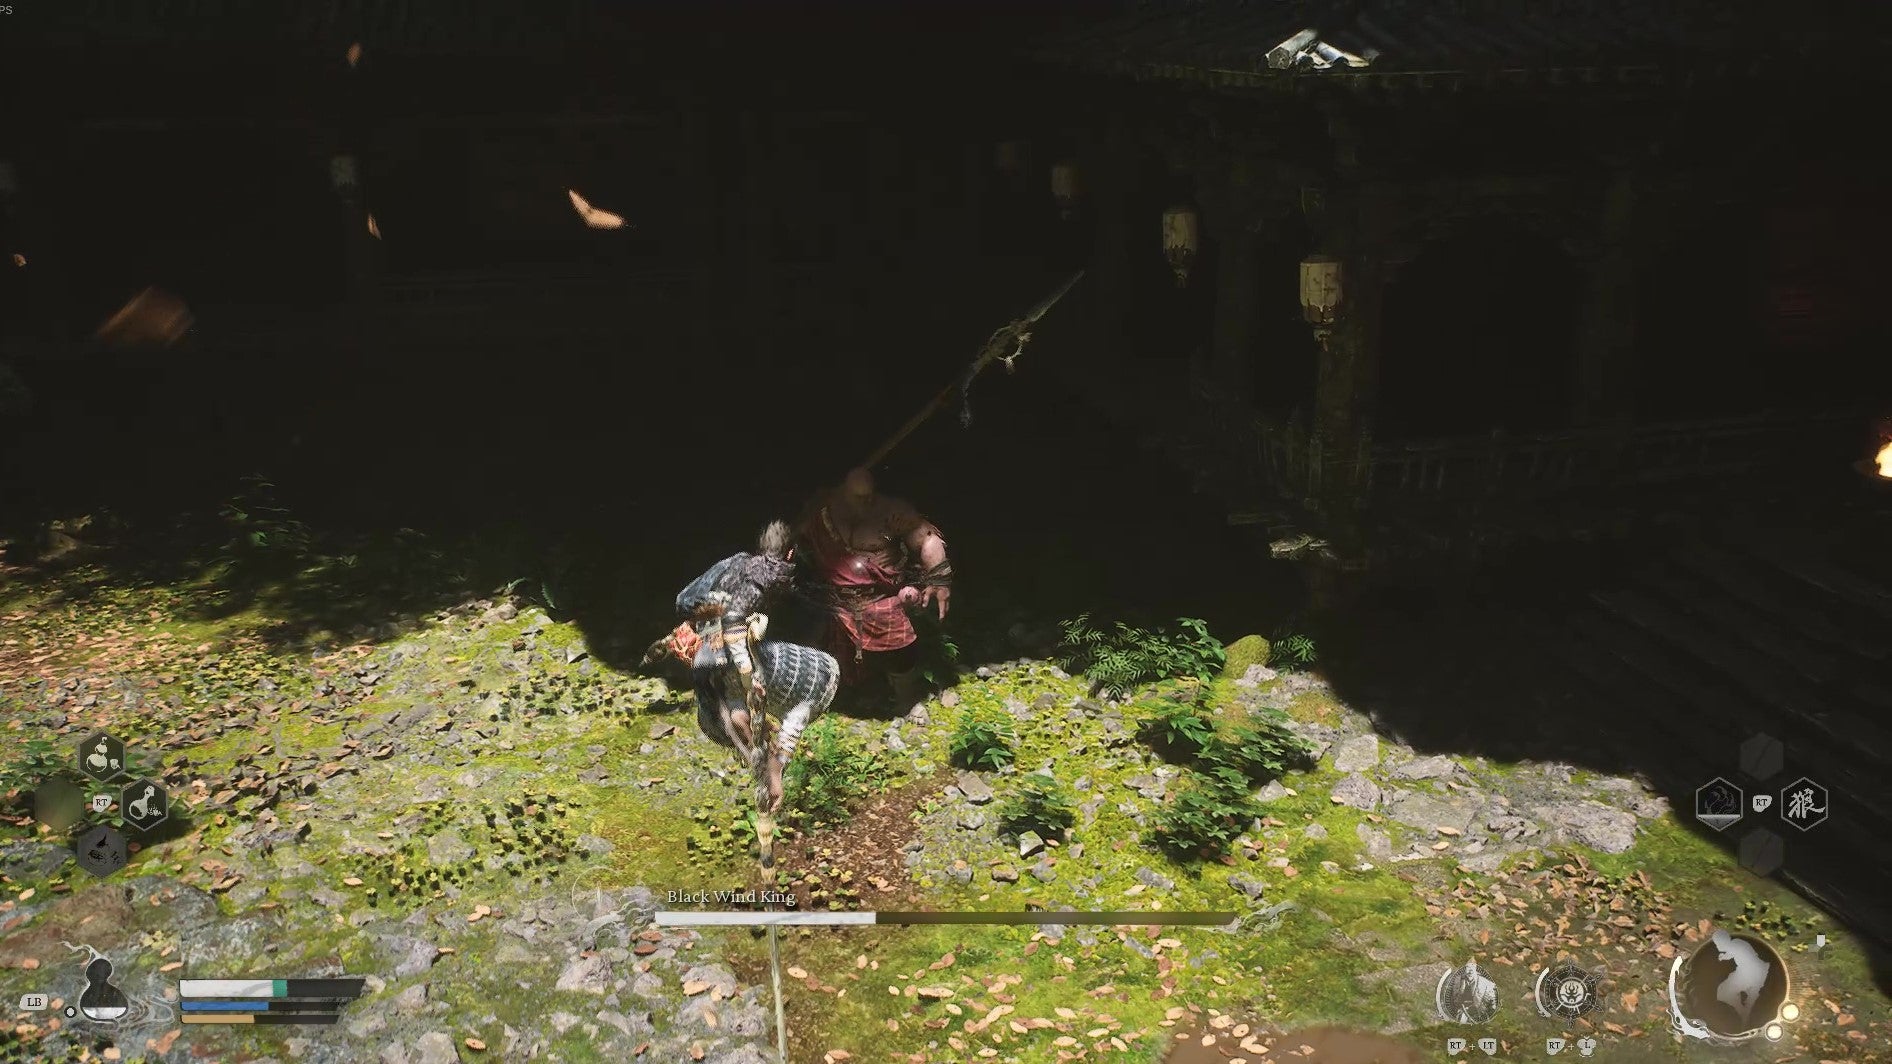
Land hits, time your dodges well, or hold strong attack, and you’ll build up Focus. It’s a resource you can unleash on its own as a powerful strike, or consume in the middle of a combo for extra spice. It is oh-so satisfying to string together a Focus-infused battery or keep it simple with a mega-donk. |Image credit:Rock Paper Shotgun/Game Science
And this is where more of Black Myth’s generosity lies. You can invest in three different staff stances: Smash, Pillar, and Thrust, each switchable on the fly and each with their own unlockable movesets. They’re all useful in certain situations, where Smash is great for one-on-one duels and general fights, Pillar lets you hop onto your staff to avoid sweeps and, later, even lets you sip from your Gourd atop it like you’ve gone for a quick old fashioned at the rooftop bar while the rabble nip at your impossibly long stool leg. Thrust is unlocked a little later, and acts almost like a spear, letting you jab from a distance, retreat, then close the gap. I love switching between them all, honestly. Alterations let you transform into even more powerful creatures for an extended time, too, like literally one of the first bosses you face.
There are yet more tools to navigate fights, which makes difficult scenarios a lot more manageable for a crowd who aren’t used to Soulslikes. The options are vast, like collectible Spirits that let you transform briefly into defeated enemies, or summon poisonous snakes from the earth. Maybe you’ll deliver a roar that knocks baddies onto their arses, or maybe you’ll slip into the body of an avian shinobi who slices with dual blades.
The Spells, though! It’s the Spells that really complement the fights, namely because they ooze style and there’s little in the way of constraint. Four slots (you’ll gradually unlock all four as you progress) are home to these abilities, each using varying slices of mana. Immobilize is one of the first spells you earn and it lets you freeze enemies in place for a short time, casting them in a golden glaze no matter where they are in their animation. It’s fantastic for catching a breather; a quick swig of the Gourd. But also for extending a combo or closing a gap. Once your foe is freed and goes for a swipe? Bam, simply turn to stone and parry it, then maybe hit ’em with the equivalent of Naruto’s shadow clone jutsu and let your doppelgangers do the work. God, it’s refreshing to be able to use these abilities so freely and seamlessly.
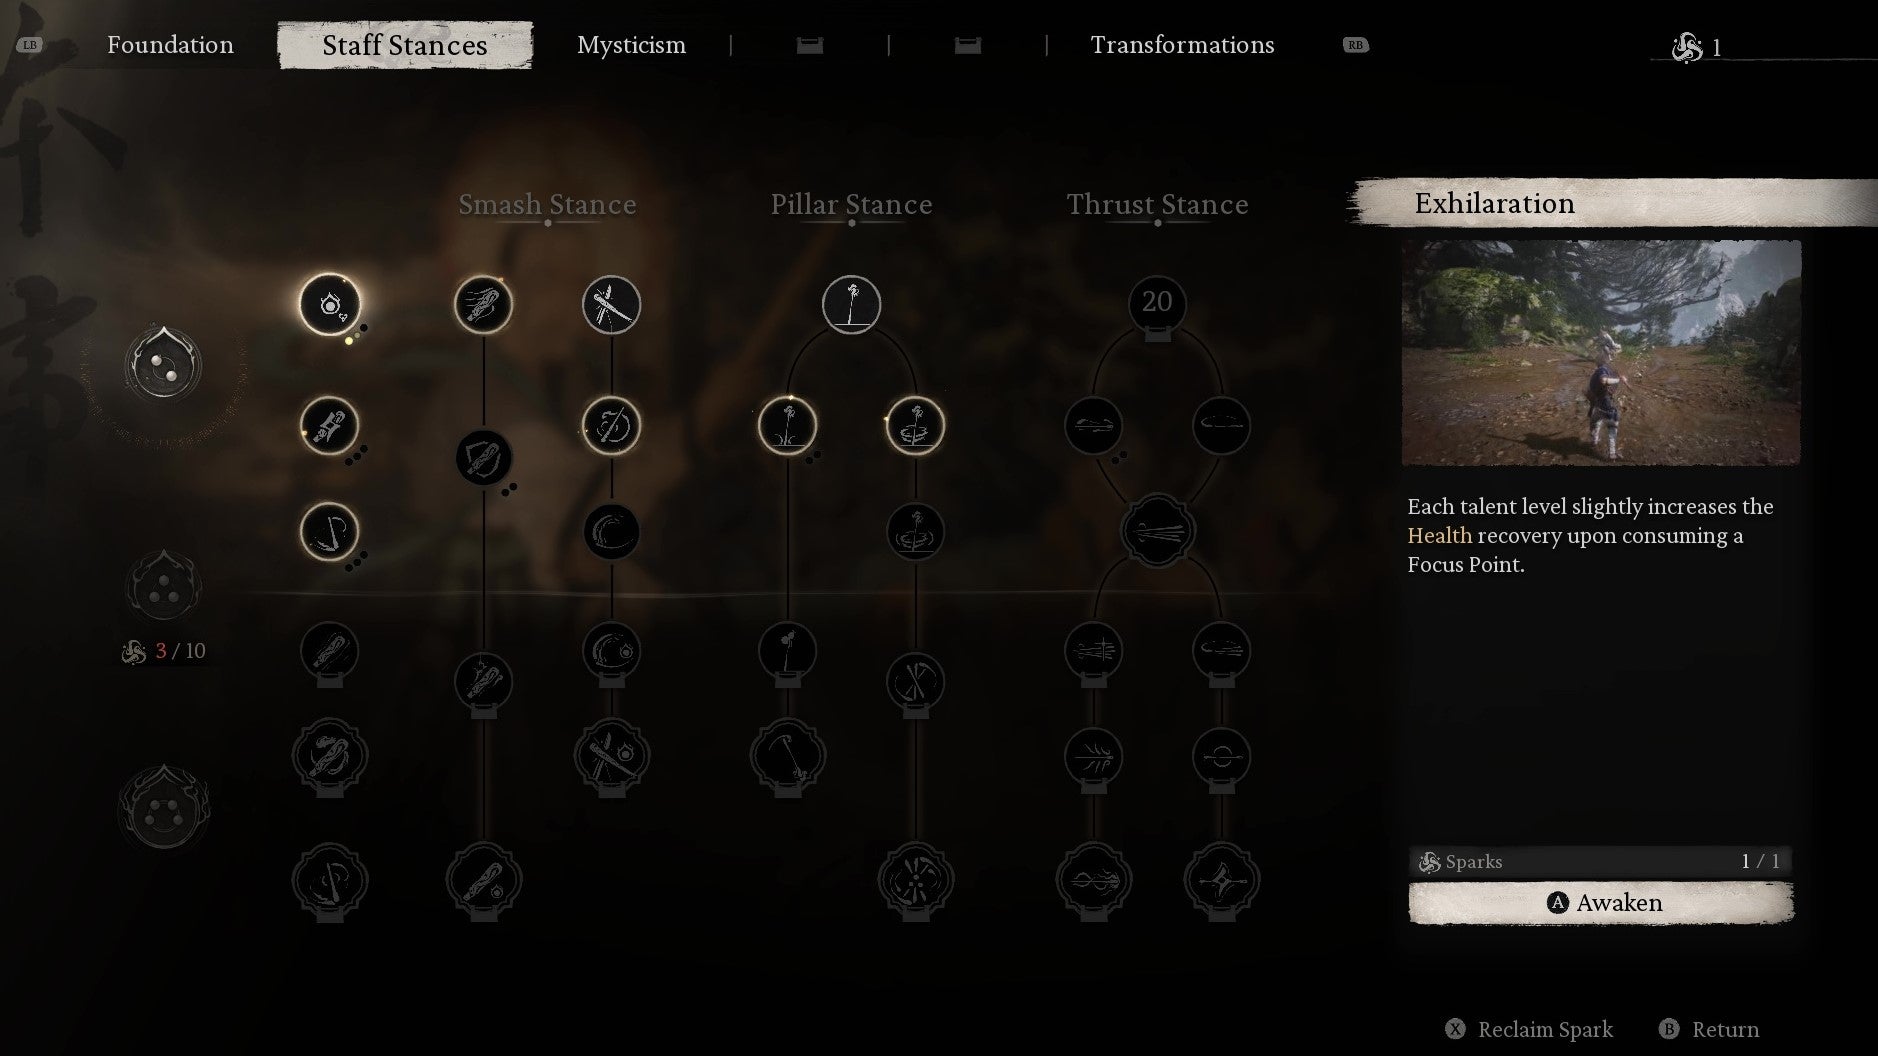
For all the merits of the skill tree, I do think it’s a bit cluttered. There’s a few too many foundational benefits, like upping health and mana and the like, which makes you question whether you should be popping points into those, or skipping them for the fun stances and spells. Thankfully, you can refund your sparks at any point and mess around with builds. |Image credit:Rock Paper Shotgun/Game Science
There’s less emphasis on equipment though. Say you’ve felled some hulking golem with your conniving spells, and they drop some crafting materials. You can combine these with Will and other materials you nab from chests, to whip up new staves and sexy armour sets. It’s a bit God Of War , in the sense that they have the rarity banners and will confer bonuses if you equip multiple pieces of the same set. There isn’t a great deal of depth here, as you’ll shift between the strongest sets as the game’s own intervals dictate. Then again, its relative simplicity doesn’t distract or overwhelm from the adventure at hand.
This means less time in menus analysing stats like you do in some other Soulslikes and more time basking in the cinema of the beasties you’ll face. All of the boss fights, whether they’re mini or not, are well-balanced, and so lavishly designed that you’ll often be floored by their presentation. The gyrating, sparkling dragons that spiral through the air. The mountains in the distance, ice crackling underfoot as you slow-mo dodge pillars of electricity. A corrupted buddha placing his palm on tiles and the earth splintering, pulsing, then erupting. And every boss backs up their spectacle with cleverly designed attack patterns and behaviours, some flaunting gimmicks like laser generators to tumble over, or reanimated monks to cleave through, all measures that keep your brain as lithe as your twiddling thumbs.
The game’s wonderful style is sadly underscored by allegations of sexist comments and behaviour within developers Game Science, as reported byIGNlast November. Game Science are yet to acknowledge IGN’s reporting and they refused to talk to me about it during apreview event.Image credit:Rock Paper Shotgun/Game Science
Black Myth is home to surprises, too, lots of them. A little detail I loved was one boss remarking on a spell I’d used, baffled by how I’d learned it. Then as if to spite me, he used the same technique on me two seconds later. And in a slightly less-convoluted-than-Souls style (still quite convoluted), you’ll bump into NPCs who’ll ask you for things, meaning you’ll need to revisit them as they whizz about. I can’t say much, but if you take the time to explore fully and heed their words, you’ll unlock some spectacular secret areas, with secret bosses that feel almost like you’re stumbling into some lost pages.
Black Myth: Wukong is a triumph. A surprising triumph in the sense that I can’t quite believe it’s as good as its drip feed of screens and trailers looked over the last few years. It’s a generous Soulsy adventure hybrid that works within its limitations and delivers a beautiful challenge to be unpicked with a magical toolbox. Arguably, I’d say Black Myth’s world sucked me in more than Elden Ring and Lies Of P , probably more so than anything I’ve played in ages! This is Game Science bursting onto the scene and saying: “You’ve got competition”. And hey, I’m listening. You should be, too.
Find out how we conduct our reviews by reading our review policy .
Black Myth: Wukong
PS5 , PC
Rock Paper Shotgun is better when you sign in
Sign in and join us on our journey to discover strange and compelling PC games.

All 75 Arc Raiders Blueprints and where to get them
These areas have the highest chance of giving you Blueprints

Image credit:Rock Paper Shotgun/Embark Studios

Looking for more Arc Raiders Blueprints? It’s a special day when you find a Blueprint, as they’re among the most valuable items in Arc Raiders. If you find a Blueprint that you haven’t already found, then you must make sure you hold onto it at all costs, because Blueprints are the key to one of the most important and powerful systems of meta-progression in the game.
This guide aims to be the very best guide on Blueprints you can find, starting with a primer on what exactly they are and how they work in Arc Raiders, before delving into exactly where to get Blueprints and the very best farming spots for you to take in your search.
We’ll also go over how to get Blueprints from other unlikely activities, such as destroying Surveyors and completing specific quests. And you’ll also find the full list of all 75 Blueprints in Arc Raiders on this page (including the newest Blueprints added with the Cold Snap update , such as the Deadline Blueprint and Firework Box Blueprint), giving you all the information you need to expand your own crafting repertoire.
In this guide:
- What are Blueprints in Arc Raiders?
- Full Blueprint list: All crafting recipes
- Where to find Blueprints in Arc Raiders Blueprints obtained from quests Blueprints obtained from Trials Best Blueprint farming locations

What are Blueprints in Arc Raiders?
Blueprints in Arc Raiders are special items which, if you manage to extract with them, you can expend to permanently unlock a new crafting recipe in your Workshop. If you manage to extract from a raid with an Anvil Blueprint, for example, you can unlock the ability to craft your very own Anvil Pistol, as many times as you like (as long as you have the crafting materials).
To use a Blueprint, simply open your Inventory while in the lobby, then right-click on the Blueprint and click “Learn And Consume” . This will permanently unlock the recipe for that item in your Workshop. As of the Stella Montis update, there are allegedly 75 different Blueprints to unlock - although only 68 are confirmed to be in the game so far. You can see all the Blueprints you’ve found and unlocked by going to the Workshop menu, and hitting “R” to bring up the Blueprint screen.
It’s possible to find duplicates of past Blueprints you’ve already unlocked. If you find these, then you can either sell them, or - if you like to play with friends - you can take it into a match and gift it to your friend so they can unlock that recipe for themselves. Another option is to keep hold of them until the time comes to donate them to the Expedition.
Full Blueprint list: All crafting recipes
Below is the full list of all the Blueprints that are currently available to find in Arc Raiders, and the crafting recipe required for each item:
| Blueprint | Type | Recipe | Crafted At |
|---|---|---|---|
| Bettina | Weapon | 3x Advanced Mechanical Components 3x Heavy Gun Parts 3x Canister | Gunsmith 3 |
| Blue Light Stick | Quick Use | 3x Chemicals | Utility Station 1 |
| Aphelion | Weapon | 3x Magnetic Accelerator 3x Complex Gun Parts 1x Matriarch Reactor | Gunsmith 3 |
| Combat Mk. 3 (Flanking) | Augment | 2x Advanced Electrical Components 3x Processor | Gear Bench 3 |
| Combat Mk. 3 (Aggressive) | Augment | 2x Advanced Electrical Components 3x Processor | Gear Bench 3 |
| Complex Gun Parts | Material | 2x Light Gun Parts 2x Medium Gun Parts 2x Heavy Gun Parts | Refiner 3 |
| Fireworks Box | Quick Use | 1x Explosive Compound 3x Pop Trigger | Explosives Station 2 |
| Gas Mine | Mine | 4x Chemicals 2x Rubber Parts | Explosives Station 1 |
| Green Light Stick | Quick Use | 3x Chemicals | Utility Station 1 |
| Pulse Mine | Mine | 1x Crude Explosives 1x Wires | Explosives Station 1 |
| Seeker Grenade | Grenade | 1x Crude Explosives 2x ARC Alloy | Explosives Station 1 |
| Looting Mk. 3 (Survivor) | Augment | 2x Advanced Electrical Components 3x Processor | Gear Bench 3 |
| Angled Grip II | Mod | 2x Mechanical Components 3x Duct Tape | Gunsmith 2 |
| Angled Grip III | Mod | 2x Mod Components 5x Duct Tape | Gunsmith 3 |
| Hullcracker | Weapon | 1x Magnetic Accelerator 3x Heavy Gun Parts 1x Exodus Modules | Gunsmith 3 |
| Launcher Ammo | Ammo | 5x Metal Parts 1x Crude Explosives | Workbench 1 |
| Anvil | Weapon | 5x Mechanical Components 5x Simple Gun Parts | Gunsmith 2 |
| Anvil Splitter | Mod | 2x Mod Components 3x Processor | Gunsmith 3 |
| ??? | ??? | ??? | ??? |
| Barricade Kit | Quick Use | 1x Mechanical Components | Utility Station 2 |
| Blaze Grenade | Grenade | 1x Explosive Compound 2x Oil | Explosives Station 3 |
| Bobcat | Weapon | 3x Advanced Mechanical Components 3x Light Gun Parts | Gunsmith 3 |
| Osprey | Weapon | 2x Advanced Mechanical Components 3x Medium Gun Parts 7x Wires | Gunsmith 3 |
| Burletta | Weapon | 3x Mechanical Components 3x Simple Gun Parts | Gunsmith 1 |
| Compensator II | Mod | 2x Mechanical Components 4x Wires | Gunsmith 2 |
| Compensator III | Mod | 2x Mod Components 8x Wires | Gunsmith 3 |
| Defibrillator | Quick Use | 9x Plastic Parts 1x Moss | Medical Lab 2 |
| ??? | ??? | ??? | ??? |
| Equalizer | Weapon | 3x Magnetic Accelerator 3x Complex Gun Parts 1x Queen Reactor | Gunsmith 3 |
| Extended Barrel | Mod | 2x Mod Components 8x Wires | Gunsmith 3 |
| Extended Light Mag II | Mod | 2x Mechanical Components 3x Steel Spring | Gunsmith 2 |
| Extended Light Mag III | Mod | 2x Mod Components 5x Steel Spring | Gunsmith 3 |
| Extended Medium Mag II | Mod | 2x Mechanical Components 3x Steel Spring | Gunsmith 2 |
| Extended Medium Mag III | Mod | 2x Mod Components 5x Steel Spring | Gunsmith 3 |
| Extended Shotgun Mag II | Mod | 2x Mechanical Components 3x Steel Spring | Gunsmith 2 |
| Extended Shotgun Mag III | Mod | 2x Mod Components 5x Steel Spring | Gunsmith 3 |
| Remote Raider Flare | Quick Use | 2x Chemicals 4x Rubber Parts | Utility Station 1 |
| Heavy Gun Parts | Material | 4x Simple Gun Parts | Refiner 2 |
| Venator | Weapon | 2x Advanced Mechanical Components 3x Medium Gun Parts 5x Magnet | Gunsmith 3 |
| Il Toro | Weapon | 5x Mechanical Components 6x Simple Gun Parts | Gunsmith 1 |
| Jolt Mine | Mine | 1x Electrical Components 1x Battery | Explosives Station 2 |
| Explosive Mine | Mine | 1x Explosive Compound 1x Sensors | Explosives Station 3 |
| Jupiter | Weapon | 3x Magnetic Accelerator 3x Complex Gun Parts 1x Queen Reactor | Gunsmith 3 |
| Light Gun Parts | Material | 4x Simple Gun Parts | Refiner 2 |
| Lightweight Stock | Mod | 2x Mod Components 5x Duct Tape | Gunsmith 3 |
| Lure Grenade | Grenade | 1x Speaker Component 1x Electrical Components | Utility Station 2 |
| Medium Gun Parts | Material | 4x Simple Gun Parts | Refiner 2 |
| Torrente | Weapon | 2x Advanced Mechanical Components 3x Medium Gun Parts 6x Steel Spring | Gunsmith 3 |
| Muzzle Brake II | Mod | 2x Mechanical Components 4x Wires | Gunsmith 2 |
| Muzzle Brake III | Mod | 2x Mod Components 8x Wires | Gunsmith 3 |
| Padded Stock | Mod | 2x Mod Components 5x Duct Tape | Gunsmith 3 |
| Shotgun Choke II | Mod | 2x Mechanical Components 4x Wires | Gunsmith 2 |
| Shotgun Choke III | Mod | 2x Mod Components 8x Wires | Gunsmith 3 |
| Shotgun Silencer | Mod | 2x Mod Components 8x Wires | Gunsmith 3 |
| Showstopper | Grenade | 1x Advanced Electrical Components 1x Voltage Converter | Explosives Station 3 |
| Silencer I | Mod | 2x Mechanical Components 4x Wires | Gunsmith 2 |
| Silencer II | Mod | 2x Mod Components 8x Wires | Gunsmith 3 |
| Snap Hook | Quick Use | 2x Power Rod 3x Rope 1x Exodus Modules | Utility Station 3 |
| Stable Stock II | Mod | 2x Mechanical Components 3x Duct Tape | Gunsmith 2 |
| Stable Stock III | Mod | 2x Mod Components 5x Duct Tape | Gunsmith 3 |
| Tagging Grenade | Grenade | 1x Electrical Components 1x Sensors | Utility Station 3 |
| Tempest | Weapon | 3x Advanced Mechanical Components 3x Medium Gun Parts 3x Canister | Gunsmith 3 |
| Trigger Nade | Grenade | 2x Crude Explosives 1x Processor | Explosives Station 2 |
| Vertical Grip II | Mod | 2x Mechanical Components 3x Duct Tape | Gunsmith 2 |
| Vertical Grip III | Mod | 2x Mod Components 5x Duct Tape | Gunsmith 3 |
| Vita Shot | Quick Use | 2x Antiseptic 1x Syringe | Medical Lab 3 |
| Vita Spray | Quick Use | 3x Antiseptic 1x Canister | Medical Lab 3 |
| Vulcano | Weapon | 1x Magnetic Accelerator 3x Heavy Gun Parts 1x Exodus Modules | Gunsmith 3 |
| Wolfpack | Grenade | 2x Explosive Compound 2x Sensors | Explosives Station 3 |
| Red Light Stick | Quick Use | 3x Chemicals | Utility Station 1 |
| Smoke Grenade | Grenade | 14x Chemicals 1x Canister | Utility Station 2 |
| Deadline | Mine | 3x Explosive Compound 2x ARC Circuitry | Explosives Station 3 |
| Trailblazer | Grenade | 1x Explosive Compound 1x Synthesized Fuel | Explosives Station 3 |
| Tactical Mk. 3 (Defensive) | Augment | 2x Advanced Electrical Components 3x Processor | Gear Bench 3 |
| Tactical Mk. 3 (Healing) | Augment | 2x Advanced Electrical Components 3x Processor | Gear Bench 3 |
| Yellow Light Stick | Quick Use | 3x Chemicals | Utility Station 1 |
Note: The missing Blueprints in this list likely have not actually been added to the game at the time of writing, because none of the playerbase has managed to find any of them. As they are added to the game, I will update this page with the most relevant information so you know exactly how to get all 75 Arc Raiders Blueprints.
Where to find Blueprints in Arc Raiders
Below is a list of all containers, modifiers, and events which maximise your chances of finding Blueprints:
- Certain quests reward you with specific Blueprints .
- Completing Trials has a high chance of offering Blueprints as rewards.
- Surveyors have a decent chance of dropping Blueprints on death.
- High loot value areas tend to have a greater chance of spawning Blueprints.
- Night Raids and Storms may increase rare Blueprint spawn chances in containers.
- Containers with higher numbers of items may have a higher tendency to spawn Blueprints. As a result, Blue Gate (which has many “large” containers containing multiple items) may give you a higher chance of spawning Blueprints.
- Raider containers (Raider Caches, Weapon Boxes, Medical Bags, Grenade Tubes) have increased Blueprint drop rates. As a result, the Uncovered Caches event gives you a high chance of finding Blueprints.
- Security Lockers have a higher than average chance of containing Blueprints.
- Certain Blueprints only seem to spawn under specific circumstances: Tempest Blueprint only spawns during Night Raid events. Vulcano Blueprint only spawns during Hidden Bunker events. Jupiter and Equaliser Blueprints only spawn during Harvester events.

Raider Caches, Weapon Boxes, and other raider-oriented container types have a good chance of offering Blueprints. |Image credit:Rock Paper Shotgun/Embark Studios
Blueprints have a very low chance of spawning in any container in Arc Raiders, around 1-2% on average. However, there is a higher chance of finding Blueprints in particular container types. Specifically, you can find more Blueprints in Raider containers and security lockers.
Beyond this, if you’re looking for Blueprints you should focus on regions of the map which are marked as having particularly high-value loot. Areas such as the Control Tower in Dam Battlegrounds, the Arrival and Departure Buildings in Spaceport, and Pilgrim’s Peak in Blue Gate all have a better-than-average chance of spawning Blueprints somewhere amongst all their containers. Night Raids and Electromagnetic Storm events also increase the drop chances of certain Blueprints .
In addition to these containers, you can often loot Blueprints from destroyed Surveyors - the largest of the rolling ball ARC. Surveyors are more commonly found on the later maps - Spaceport and Blue Gate - and if one spawns in your match, you’ll likely see it by the blue laser beam that it casts into the sky while “surveying”.
Surveyors are quite well-armoured and will very speedily run away from you once it notices you, but if you can take one down then make sure you loot all its parts for a chance of obtaining certain unusual Blueprints.
Blueprints obtained from quests
One way in which you can get Blueprints is by completing certain quests for the vendors in Speranza. Some quests will reward you with a specific item Blueprint upon completion, so as long as you work through all the quests in Arc Raiders, you are guaranteed those Blueprints.
Here is the full list of all Blueprints you can get from quest rewards:
- Trigger Nade Blueprint: Rewarded after completing “Sparks Fly”.
- Lure Grenade Blueprint: Rewarded after completing “Greasing Her Palms”.
- Burletta Blueprint: Rewarded after completing “Industrial Espionage”.
- Hullcracker Blueprint (and Launcher Ammo Blueprint): Rewarded after completing “The Major’s Footlocker”.
Alas, that’s only 4 Blueprints out of a total of 75 to unlock, so for the vast majority you will need to find them yourself during a raid. If you’re intent on farming Blueprints, then it’s best to equip yourself with cheap gear in case you lose it, but don’t use a free loadout because then you won’t get a safe pocket to stash any new Blueprint you find. No pain in Arc Raiders is sharper than failing to extract with a new Blueprint you’ve been after for a dozen hours already.

One of the best ways to get Blueprints is by hitting three stars on all five Trials every week. |Image credit:Rock Paper Shotgun/Embark Studios
Blueprints obtained from Trials
One of the very best ways to get Blueprints is as rewards for completing Trials in Arc Raiders. Trials are unlocked from Level 15 onwards, and allow you to earn rewards by focusing on certain tasks over the course of several raids. For example, one Trial might task you with dealing damage to Hornets, while another might challenge you to loot Supply Drops.
Trials refresh on a weekly basis, with a new week bringing five new Trials. Each Trial can offer up to three rewards after passing certain score milestones, and it’s possible to receive very high level loot from these reward crates - including Blueprints. So if you want to unlock as many Blueprints as possible, you should make a point of completing as many Trials as possible each week.
Best Blueprint farming locations
The very best way to get Blueprints is to frequent specific areas of the maps which combine high-tier loot pools with the right types of containers to search. Here are my recommendations for where to find Blueprints on every map, so you can always keep the search going for new crafting recipes to unlock.

Image credit:Rock Paper Shotgun/Embark Studios
Dam Battlegrounds
The best places to farm Blueprints on Dam Battlegrounds are the Control Tower, Power Generation Complex, Ruby Residence, and Pale Apartments . The first two regions, despite only being marked on the map as mid-tier loot, contain a phenomenal number of containers to loot. The Control Tower can also contain a couple of high-tier Security Lockers - though of course, you’ll need to have unlocked the Security Breach skill at the end of the Survival tree.
There’s also a lot of reporting amongst the playerbase that the Residential areas in the top-left of the map - Pale Apartments and Ruby Residence - give you a comparatively strong chance of finding Blueprints. Considering their size, there’s a high density of containers to loot in both locations, and they also have the benefit of being fairly out of the way. So you’re more likely to have all the containers to yourself.
Buried City
The best Blueprint farming locations on Buried City are the Santa Maria Houses, Grandioso Apartments, Town Hall, and the various buildings of the New District . Grandioso Apartments has a lower number of containers than the rest, but a high chance of spawning weapon cases - which have good Blueprint drop rates. The others are high-tier loot areas, with plenty of lootable containers - including Security Lockers.
Spaceport
The best places to find Blueprints on Spaceport are the Arrival and Departure Buildings, as well as Control Tower A6 and the Launch Towers . All these areas are labelled as high-value loot regions, and many of them are also very handily connected to one another by the Spaceport wall, which you can use to quickly run from one area to the next. At the tops of most of these buildings you’ll find at least one Security Locker, so this is an excellent farming route for players looking to find Blueprints.
The downside to looting Blueprints on Spaceport is that all these areas are hotly contested, particularly in Duos and Squads. You’ll need to be very focused and fast in order to complete the full farming route.

Image credit:Rock Paper Shotgun/Embark Studios
Blue Gate
Blue Gate tends to have a good chance of dropping Blueprints, potentially because it generally has a high number of containers which can hold lots of items; so there’s a higher chance of a Blueprint spawning in each container. In my experience, the best Blueprint farming spots on Blue Gate are Pilgrim’s Peak, Raider’s Refuge, the Ancient Fort, and the Underground Complex beneath the Warehouse .
All of these areas contain a wealth of containers to loot. Raider’s Refuge has less to loot, but the majority of the containers in and around the Refuge are raider containers, which have a high chance of containing Blueprints - particularly during major events.
Stella Montis
On the whole, Stella Montis seems to have a very low drop rate for Blueprints (though a high chance of dropping other high-tier loot). If you do want to try farming Blueprints on this map, the best places to find Blueprints in Stella Montis are Medical Research, Assembly Workshop, and the Business Center . These areas have the highest density of containers to loot on the map.
In addition to this, the Western Tunnel has a few different Security Lockers to loot, so while there’s very little to loot elsewhere in this area of the map, it’s worth hitting those Security Lockers if you spawn there at the start of a match.
That wraps up this primer on how to get all the Blueprints in Arc Raiders as quickly as possible. With the Expedition system constantly resetting a large number of players’ Blueprints, it’s more important than ever to have the most up-to-date information on where to find all these Blueprints.
While you’re here, be sure to check out our Arc Raiders best guns tier list , as well as our primers on the best skills to unlock and all the different Field Depot locations on every map.

ARC Raiders
PS5 , Xbox Series X/S , PC
Rock Paper Shotgun is better when you sign in
Sign in and join us on our journey to discover strange and compelling PC games.
