Black Myth Wukong: Chapter 3 walkthrough
Here’s a complete guide to Chapter 3, including a Pagoda Realm walkthrough

Image credit:Rock Paper Shotgun/Game Science

Looking for a Black Myth: Wukong Chapter 3 walkthrough? Chapter 3 of Black Myth: Wukong is the most expansive in the game, sometimes feeling like it’s two or three chapters bundled together into one. It features the longest array of bosses and amps up the difficulty from the first two chapters, particularly with the Pagoda Realm, a prison defined by constant debuffs. Exploring the snow-covered fields outside of the Pagoda Realm is no walk in the park either.
Luckily, we’ve charted the secrets of this chapter to make survival a little easier. In this guide, we’ll present a full rundown of everything you need to do to complete Chapter 3 of Black Myth: Wukong , including a full Pagoda Realm walkthrough and how to uncover all of the secret bosses in the New West.
Our walkthrough hub has links to all of our Black Myth: Wukong guides. You can also navigate between our Chapter walkthroughs below: Chapter 1 walkthrough Chapter 2 walkthrough Chapter 3 walkthrough (you’re here!) Chapter 4 walkthrough Chapter 5 walkthrough Chapter 6 walkthrough

Black Myth: Wukong Chapter 3 walkthrough
Chapter 3 of Black Myth: Wukong is entitled White Snow, Ice Cold . It is divided into the following six areas - click on each name to be taken to the section of the walkthrough where that area begins. You should also check out our guide to all bosses in Chapter 3 for greater details on fighting the foes in your path.
- Snowhill Path
- Pagoda Realm
- Bitter Lake
- Zodiac Village (optional)
- Valley of Ecstasy
- New Thunderclap Temple
Chapter 3 really is quite a maze in places, but you can keep your bearings with the help of our Chapter 3 map below. Be sure to refer back to it if you ever feel lost while following our walkthrough!
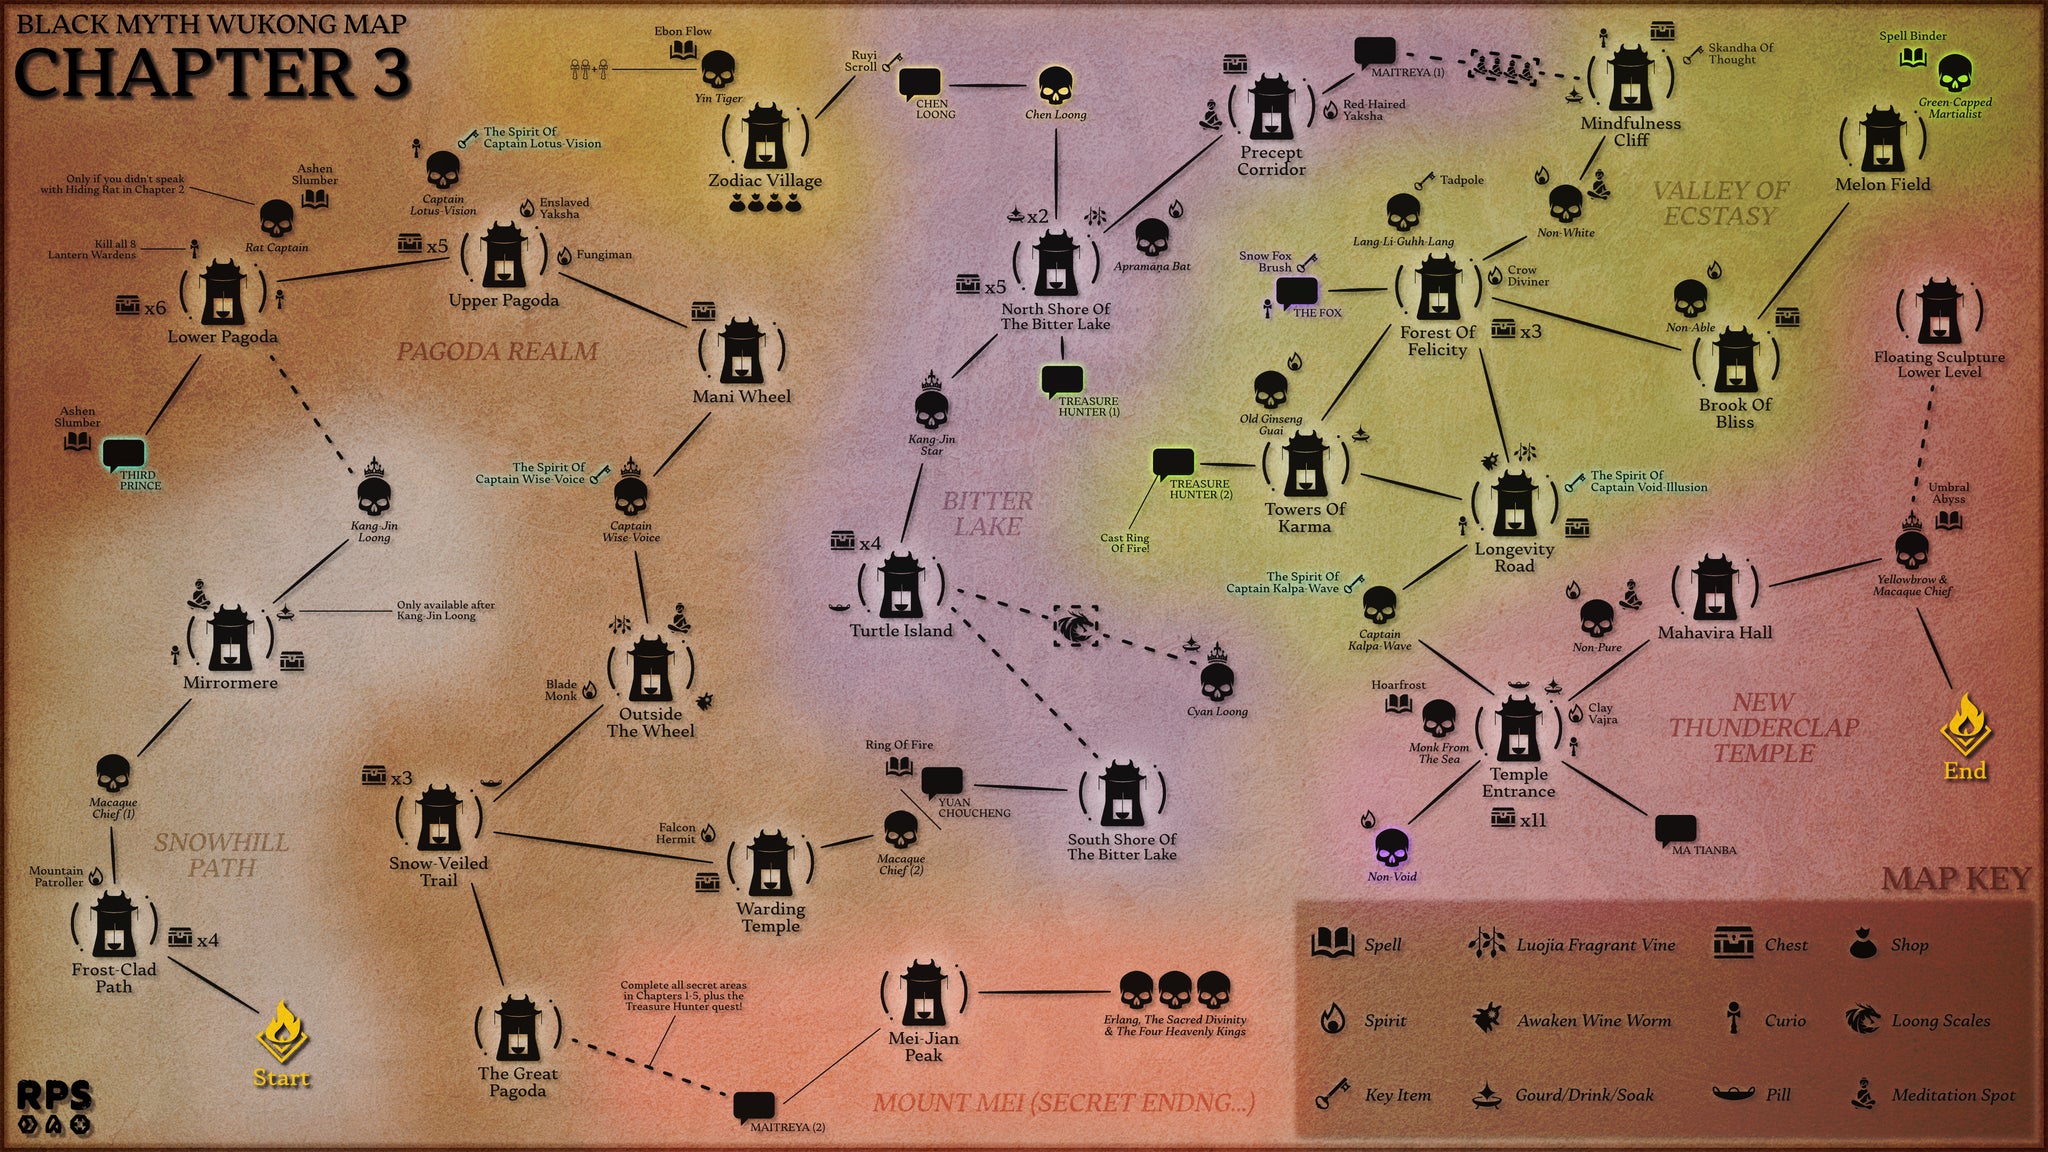
Make use of thisChapter 3 mapto keep track of your position within Chapter 3, and any bosses, Shrines, or collectibles you may have missed! |Image credit:Rock Paper Shotgun
1. Snowhill Path walkthrough
Snowhill Path: Frost-Clad Path
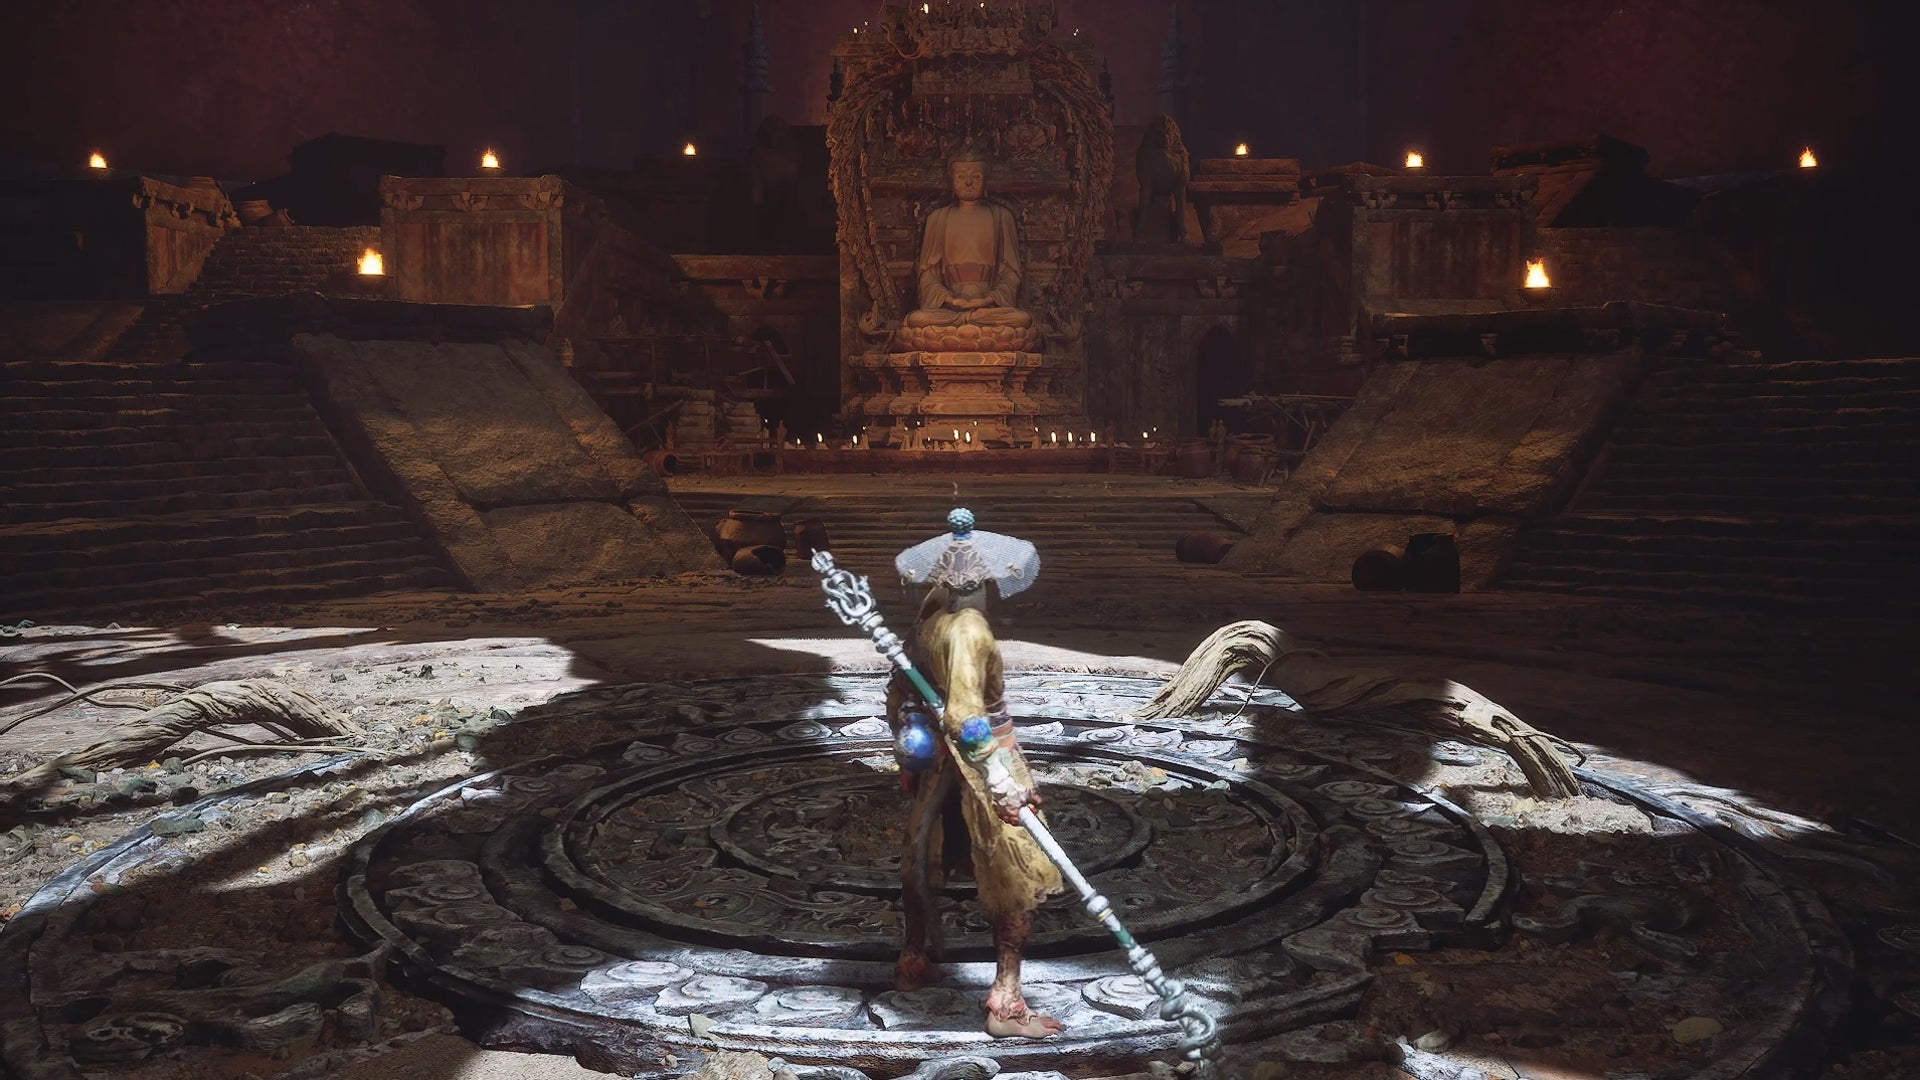
Chapter 3 begins in a cave on the outskirts of Snowhill Path. Exit to reach the “Frost-Clad Path” Keeper’s Shrine. Continue up the mountain, fighting frozen enemies along the way. You’ll soon come to an open area where Macaque Chief challenges you.
Round 1 against Macaque Chief is a breezy intro to Chapter 3’s boss battles. Once he’s out of the way, keep climbing up the mountain path until you reach a temple complex full of Frozen Corpses. Clear the complex out and approach the tree in the centre of the lake. The Keeper of the New West will greet you, transform you into a cute bat, and lead you to the next area.
Snowhill Path: Mirrormere
After some enjoyable scenery, your Destined One will be standing before a frozen lake. Save at the “Mirrormere” Shrine and give the surrounding area a once-over. The first Meditation Spot of Chapter 3, The Shade , can be found next to a large tree by the lake. When you’re ready to take on a dragon, walk onto the lake and the fight against Kang-Jin Loong commences.

Take advantage of the moments when Kang-Jin Loong swoops close to the ground, and always be prepared to dodge her tail and lightning strikes. |Image credit:Rock Paper Shotgun/Game Science
Battling Kang-Jin Loong requires patience more than anything else, as she’ll regularly avoid your blows by weaving into the sky, all the while summoning lightning bolts down upon your head. Getting in hits is tricky, and your best bet is to deal damage whenever she hits the icy lake with her tail. Using Immobilize and walloping her head with Charged Pillar and Thrust Stance attacks also work well.
2. Pagoda Realm walkthrough
Pagoda Realm: Lower Pagoda
Welcome to the Pagoda Realm. In order to make this area less aggravating, familiarise yourself with its curse mechanic, which we’ve described below. |Image credit:Rock Paper Shotgun/Game Science
After beating Kang-Jin Loong, you’ll awaken in the Pagoda Realm, a multi-leveled prison that’s possibly the most irritating area in the entire game. The Pagoda Realm features the following debuff gimmick:
- Every three minutes, the chants coming from the prison’s central pagoda intensify and create a curse effect, halving your maximum health. You’ll know this is occurring when a grey haze surrounds your screen.
- When the curse is active, creepy Lantern Wardens will appear on the ledges around the central pagoda, and everyone receives a damage boost. All enemies besides the Lantern Wardens will also glow red, as will the eyes of your Destined One. Technically, foes are a lot easier to target thanks to this red glow, but since they hit harder, dying is much easier.
- The debuff lasts for exactly one and a half minutes. Once it’s finished, the three minute timer until the next curse starts anew.
Be especially careful of the Lantern Wardens, as they have an attack that instantly knocks you off the platform. Black Myth: Wukong’s notorious invisible walls conveniently don’t exist here! |Image credit:Rock Paper Shotgun/Game Science
You’ll probably die a lot in this area due to the curse, tight confines, and enemies knocking you off platforms. (Watch out for Cyan Bats swooping down on you from above; they’re the worst.) You’ll also notice purple seals blocking certain doors. Take note of them so you can return later - in order to open these doors , you need to defeat Captain Lotus-Vision .
When you’re ready for some irritation, turn left from your cell and begin running down the ledge until you get to the “Lower Pagoda” Keeper’s Shrine. From here, enter the nearby cell and follow the tunnel pathway until you can go outside again. Continue following the ledge until you get to an alcove on your left marked by a lantern . Lanterns mark key passageways in the Pagoda Realm that contain stairs to upper levels.
Go up the stairs, exit the cell, and turn right. Keep going across a wooden beam (watch out for the Yaksha Archer on the other side) and enter the alcove on your right. Keep moving forward until you see a stair that takes you up another level and leads you to the “Upper Pagoda” Shrine.
Pagoda Realm: Upper Pagoda
The “Upper Pagoda” Shrine is located near a pit that leads down into a purple room littered with stone figures. Captain Lotus-Vision lurks here, and if you want to break the purple sealed doors, carefully jump onto the rooftops that lead into the pit to start the fight.
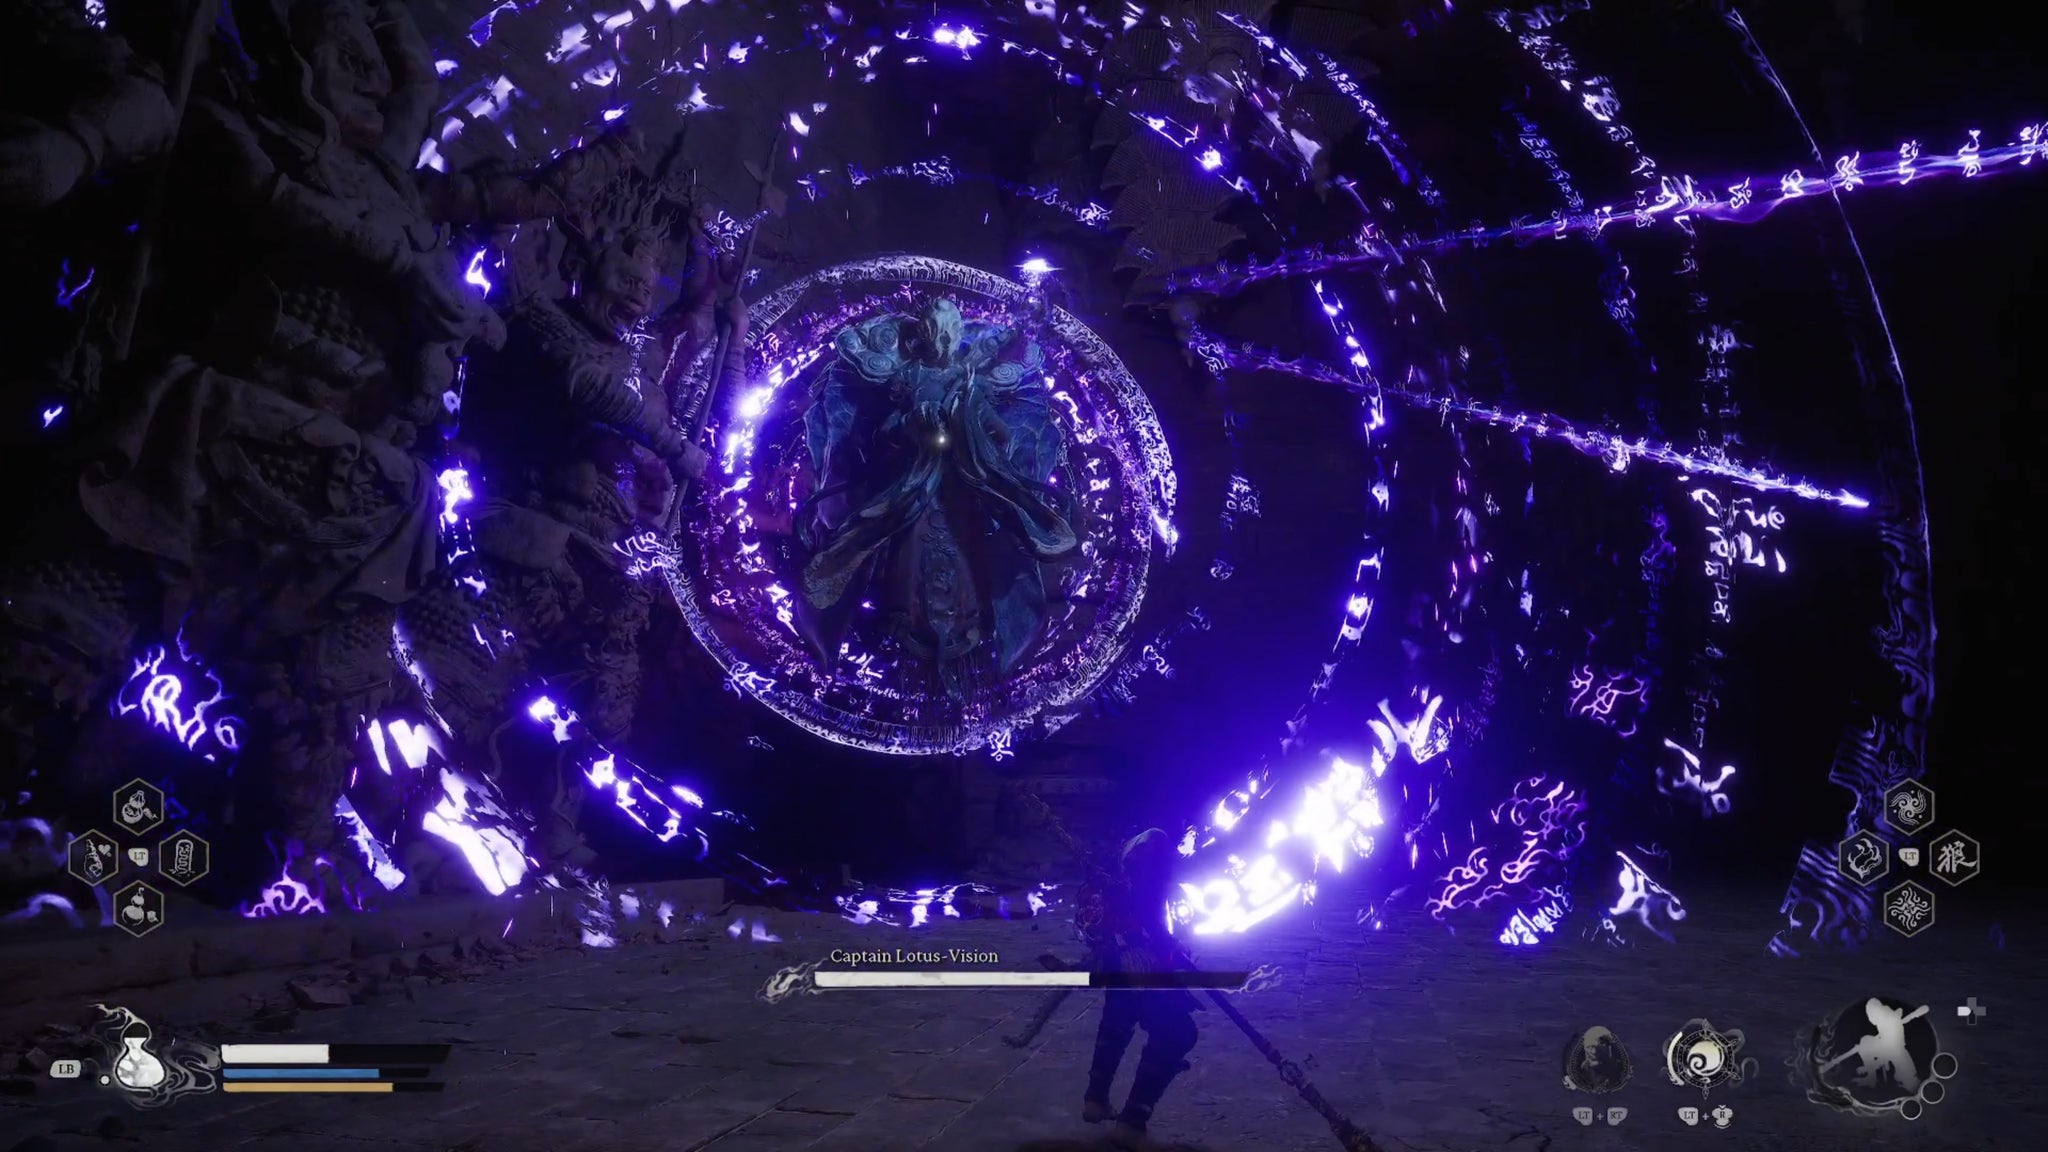
Captain Lotus-Vision shoots purple lasers all over the screen, making this battle a tricky one if you aren’t great at dodging. |Image credit:Rock Paper Shotgun/Game Science
Captain Lotus-Vision specialises in firing small projectiles and larger energy beams at you. Use your staff’s spinning move against the small ones and be ready to roll against the large blasts. When his health goes down, he’ll send an array of beams across the arena, and you can avoid some of these by ducking behind the room’s pillars.
When he’s dead, retrace your footsteps (or teleport back to the “Lower Pagoda” Shrine) to check out all of those newly opened locked doors. You’ll get a lot of Will and crafting materials, but the most interesting loot is the Ashen Slumber Transformation, which lets you turn into a giant two-headed rat and blow yourself up with the excessive spell Fiery Burst. Finding this loot depends on your actions in Chapter 2:
- If you fought the two-headed Rat Captains in Sandgate Village and listened to the dialogue of the two NPCs hiding in one of the village’s huts, you’ll find a dead rat’s corpse with a blade pierced through its body. Take it to get the transformation.
- If you didn’t fight the Rat Captains and skipped out on the dialogue, you’ll find a Rat Captain boss in one of the cells. Defeat him and you’ll receive his blade and the transformation.

If you explored every inch of Sandgate Village, chances are this is how you’ll discover Ashen Slumber. |Image credit:Rock Paper Shotgun/Game Science
Once you’re done retracing your steps, go back to the “Upper Pagoda” Shrine and continue along the platforms until you get to more wooden beams and a lantern-marked alcove. Go up the stairs to the uppermost level of the Pagoda Realm. Turn left at the top and move forward until you reach several broken wooden platforms that take you to the peak of the prison. Once there, turn left to find the next save point.
Pagoda Realm: Mani Wheel
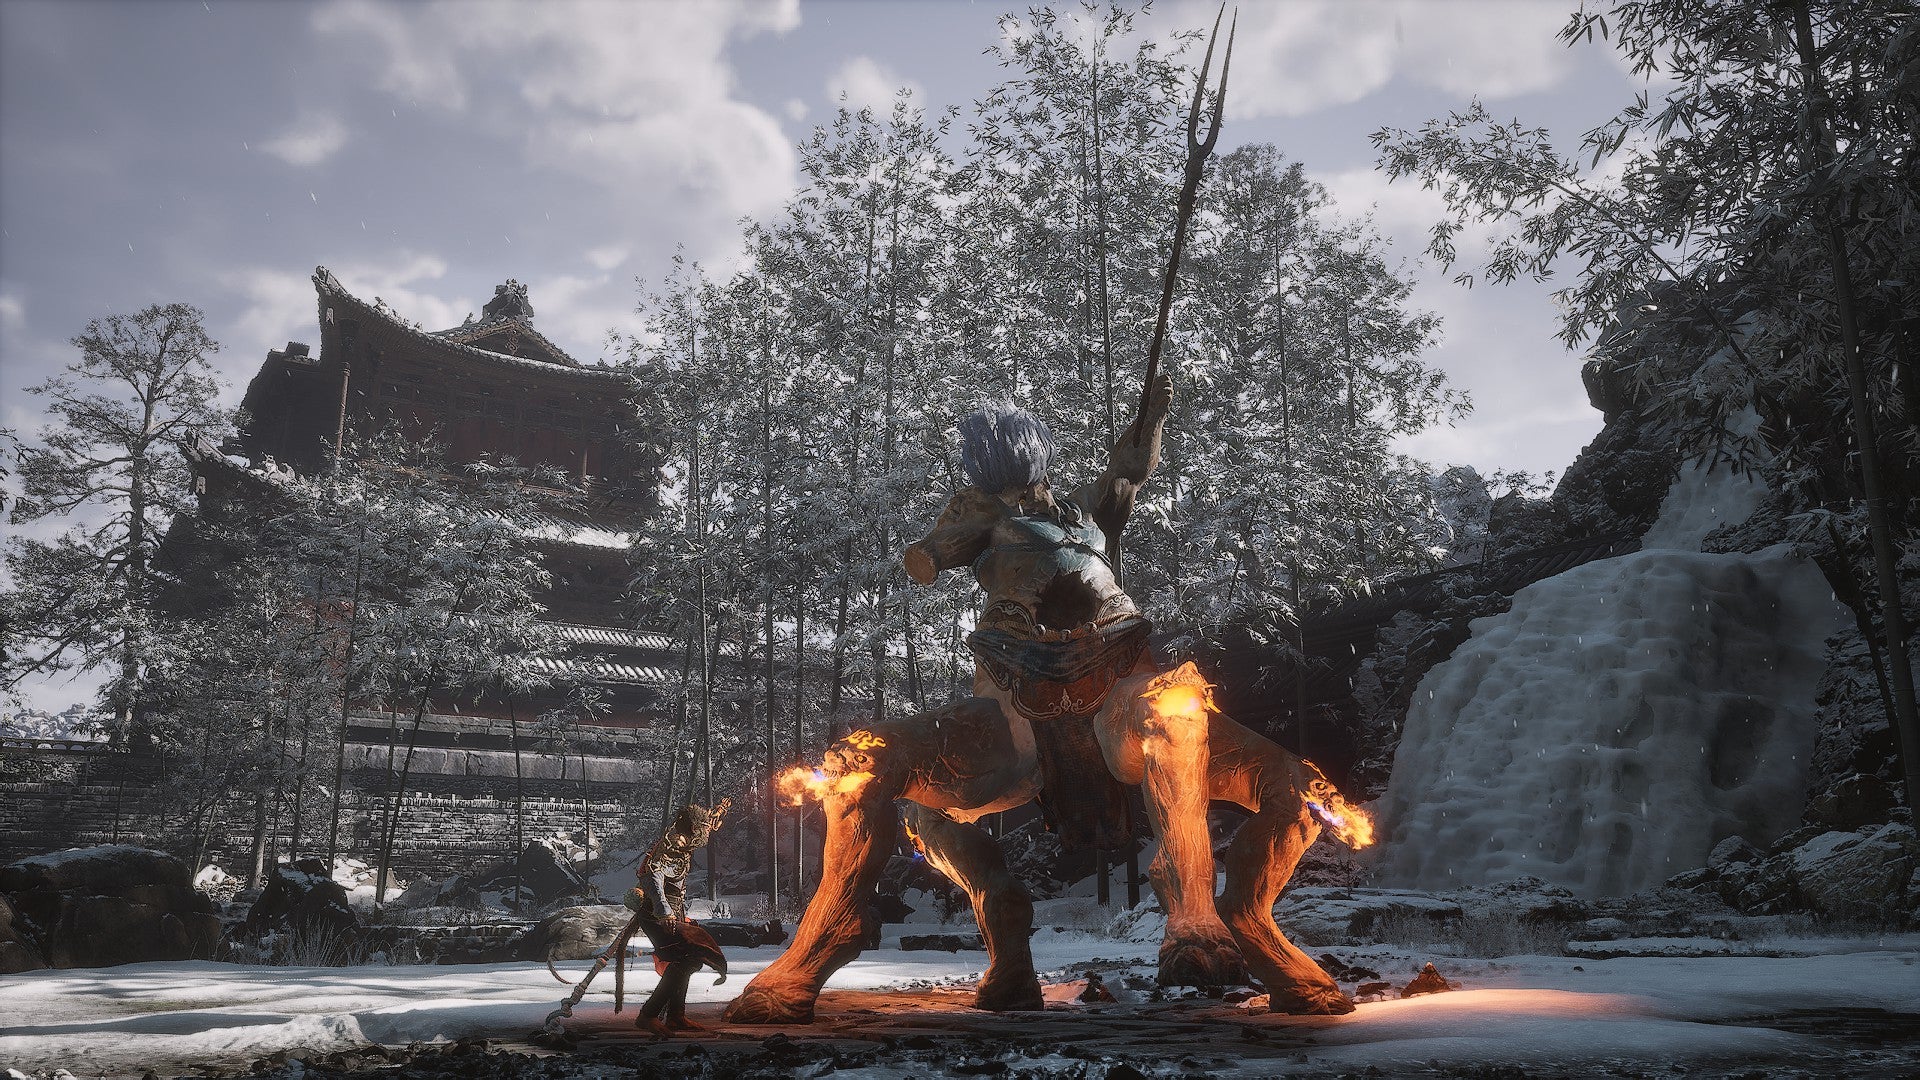
Rest up at the “Mani Wheel” Shrine. When you’re ready for a fight, clamber over the rocks that lead to the apex of the Pagoda Realm’s panopticon. This is the lair of Captain Wise-Voice , a Yaoguai King who’s so large that his bulk exceeds the screen. Target his leg and attack him until he falls, and then Immobilize him and smack the yellow core in his head repeatedly. Captain Wise-Voice’s attacks are lightning-based, and halfway through the fight he’ll start shooting long-range beams and targeting various spots on the floor with crackling bursts. You’ll need to study the patterns on the floor and roll to stay unscathed.

Completely different genre of game, but dodging Captain Wise-Voice’s electric patterns on the ground oddly reminded me of fighting bosses in Final Fantasy XIV. |Image credit:Rock Paper Shotgun/Game Science
When he falls, breathe a sigh of relief that the hardest parts of the Pagoda Realm are over, and exit via the other side of the boss arena.
Pagoda Realm: Outside the Wheel
From the “Outside the Wheel” Shrine, you have a nice, linear path ahead. Pick up all items and open all chests you find, and be sure to take the stairs near the Luojia Fragrant Vine to come across a snowy path that leads to an offering table on your right and a bamboo fence. Smash the fence and follow the path it reveals until you come upon a secluded snow field with several Frozen Corpses. The Bottom Meditation Spot is just beyond them.
Pagoda Realm: Snow-Veiled Trail
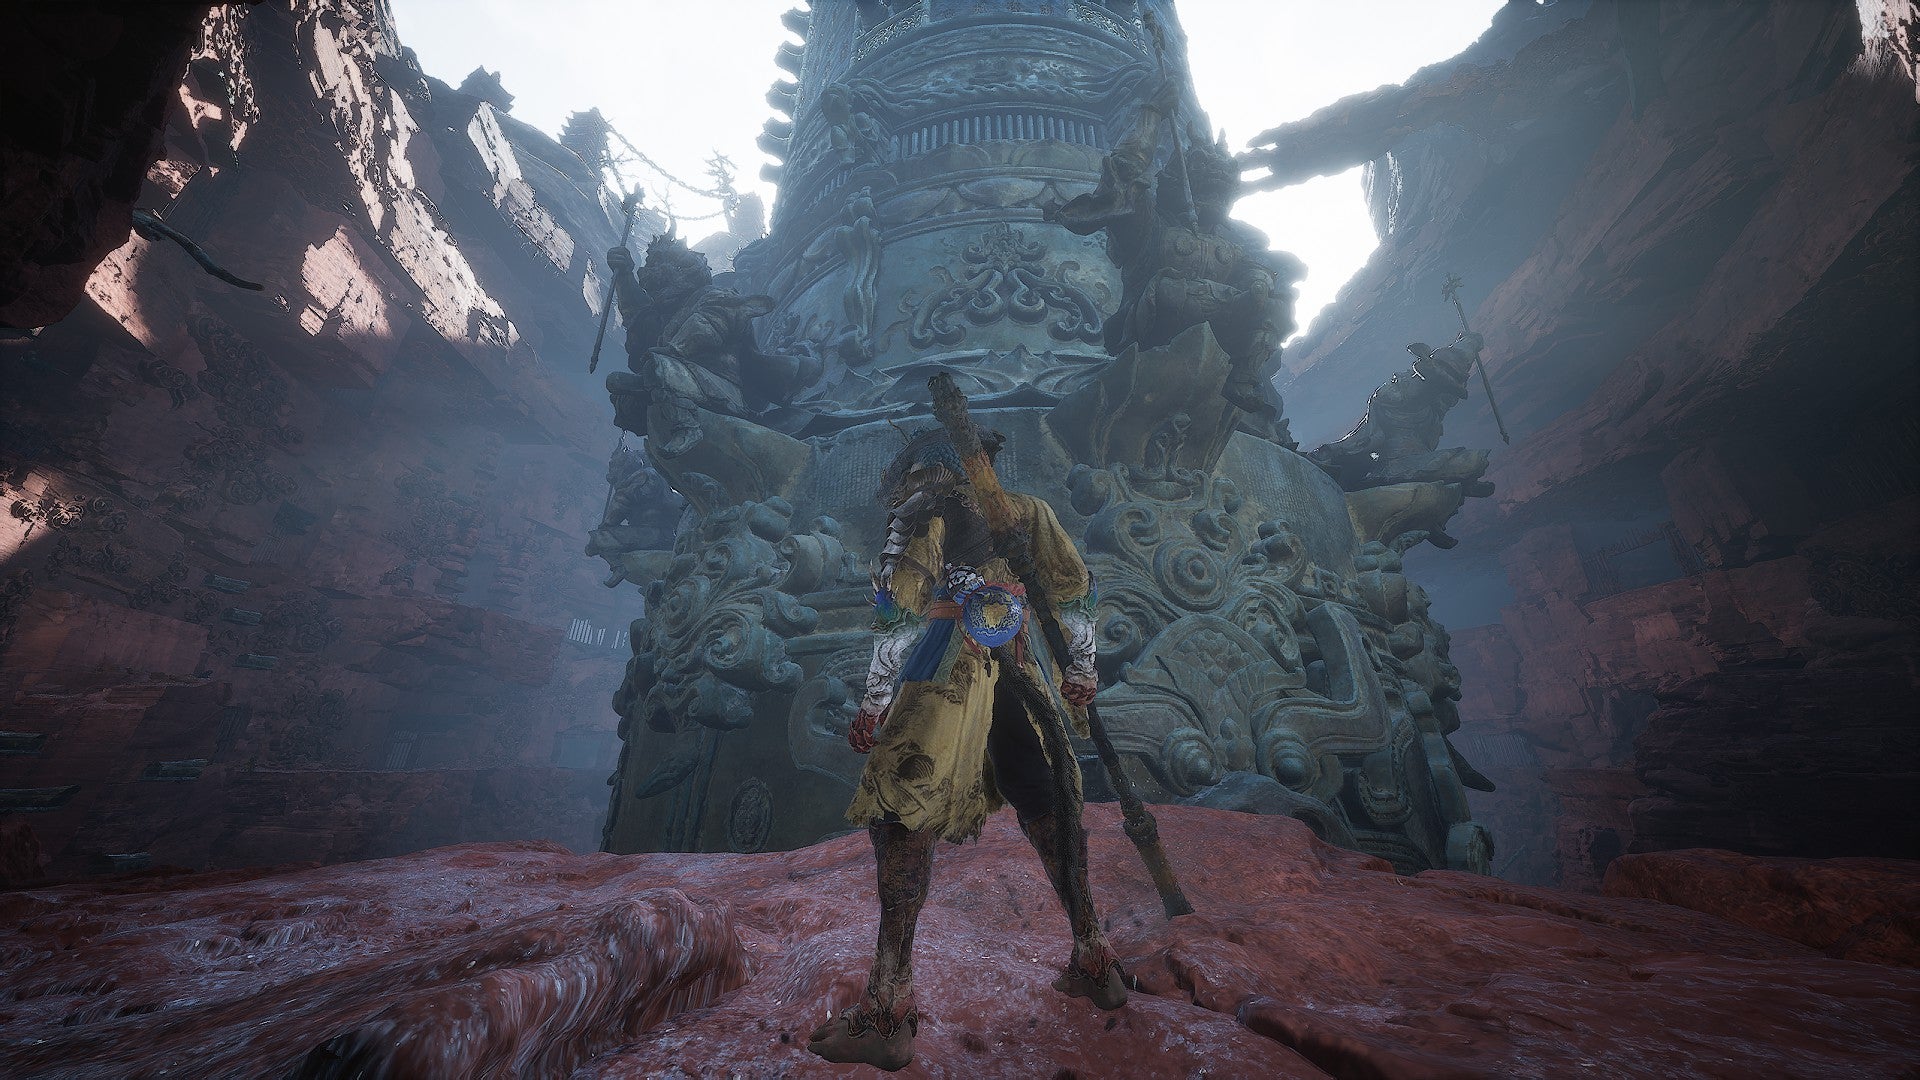
If you keep following the linear path, you’ll reach the “Snow-Veiled Trail” Shrine, and a fork in the road follows. The left path leads to the “Warding Temple” Shrine. If you go right, you’ll end up at a monumental pagoda built into the side of the mountain where you can unlock “The Great Pagoda” Shrine, but there’s not much else you can do there at the moment.
Come back here in the final Chapter to see a true finale to the Destined One’s tale. |Image credit:Rock Paper Shotgun/Game Science
The Great Pagoda is the entrance to Black Myth: Wukong’s secret ending . Look around at the walls in the pagoda and you’ll see the murals that appear at the end of each chapter painted on the wall. You can come back here in Chapter 6, or after you’ve beaten the main story, to find the pathway to the secret ending. (Skip ahead to our Chapter 6 walkthrough for advice on doing this.) Do this before you attempt New Game + mode , or else you’ll have to complete the game’s six chapters all over again.
Pagoda Realm: Warding Temple
After using the Shrine, go up the stairs and into the temple to face Macaque Chief for a second time. He’s trying to break the sealing spell of Yuan Shoucheng, the old man who taught you how to absorb spirits in Chapter 1. Knock some sense into him and the wizened master will teach you the Ring of Fire spell - which I personally never use, but it does come in handy for a sidequest later down the line.
When you’re finished, exit the temple complex via the left and slide down into the next area. You’ll overlook a mountain (which is actually on the back of a giant turtle) and overhear some dialogue between Kang-Jin Star and an unknown figure trapped in two giant cymbals. At the end of the cutscene, combat with Kang-Jin Star begins.

Kang-Jin Star was once a noble ally of Sun Wukong. Alas, allegiance to Yellowbrow has addled her mind. |Image credit:Rock Paper Shotgun/Game Science
I found the fight against Kang-Jin Star more straightforward than the fight against her dragon form. She’ll weave around the arena and shoot lightning, but she’s simpler to target and stagger than she was as Kang-Jin Loong, and when she does take on a wispy version of her draconic form, her attacks are easier to dodge. Don’t worry if you die during this fight - you’ll resurrect not far from “Turtle Island,” a new Keeper’s Shrine.
3. Bitter Lake walkthrough
Bitter Lake: Turtle Island
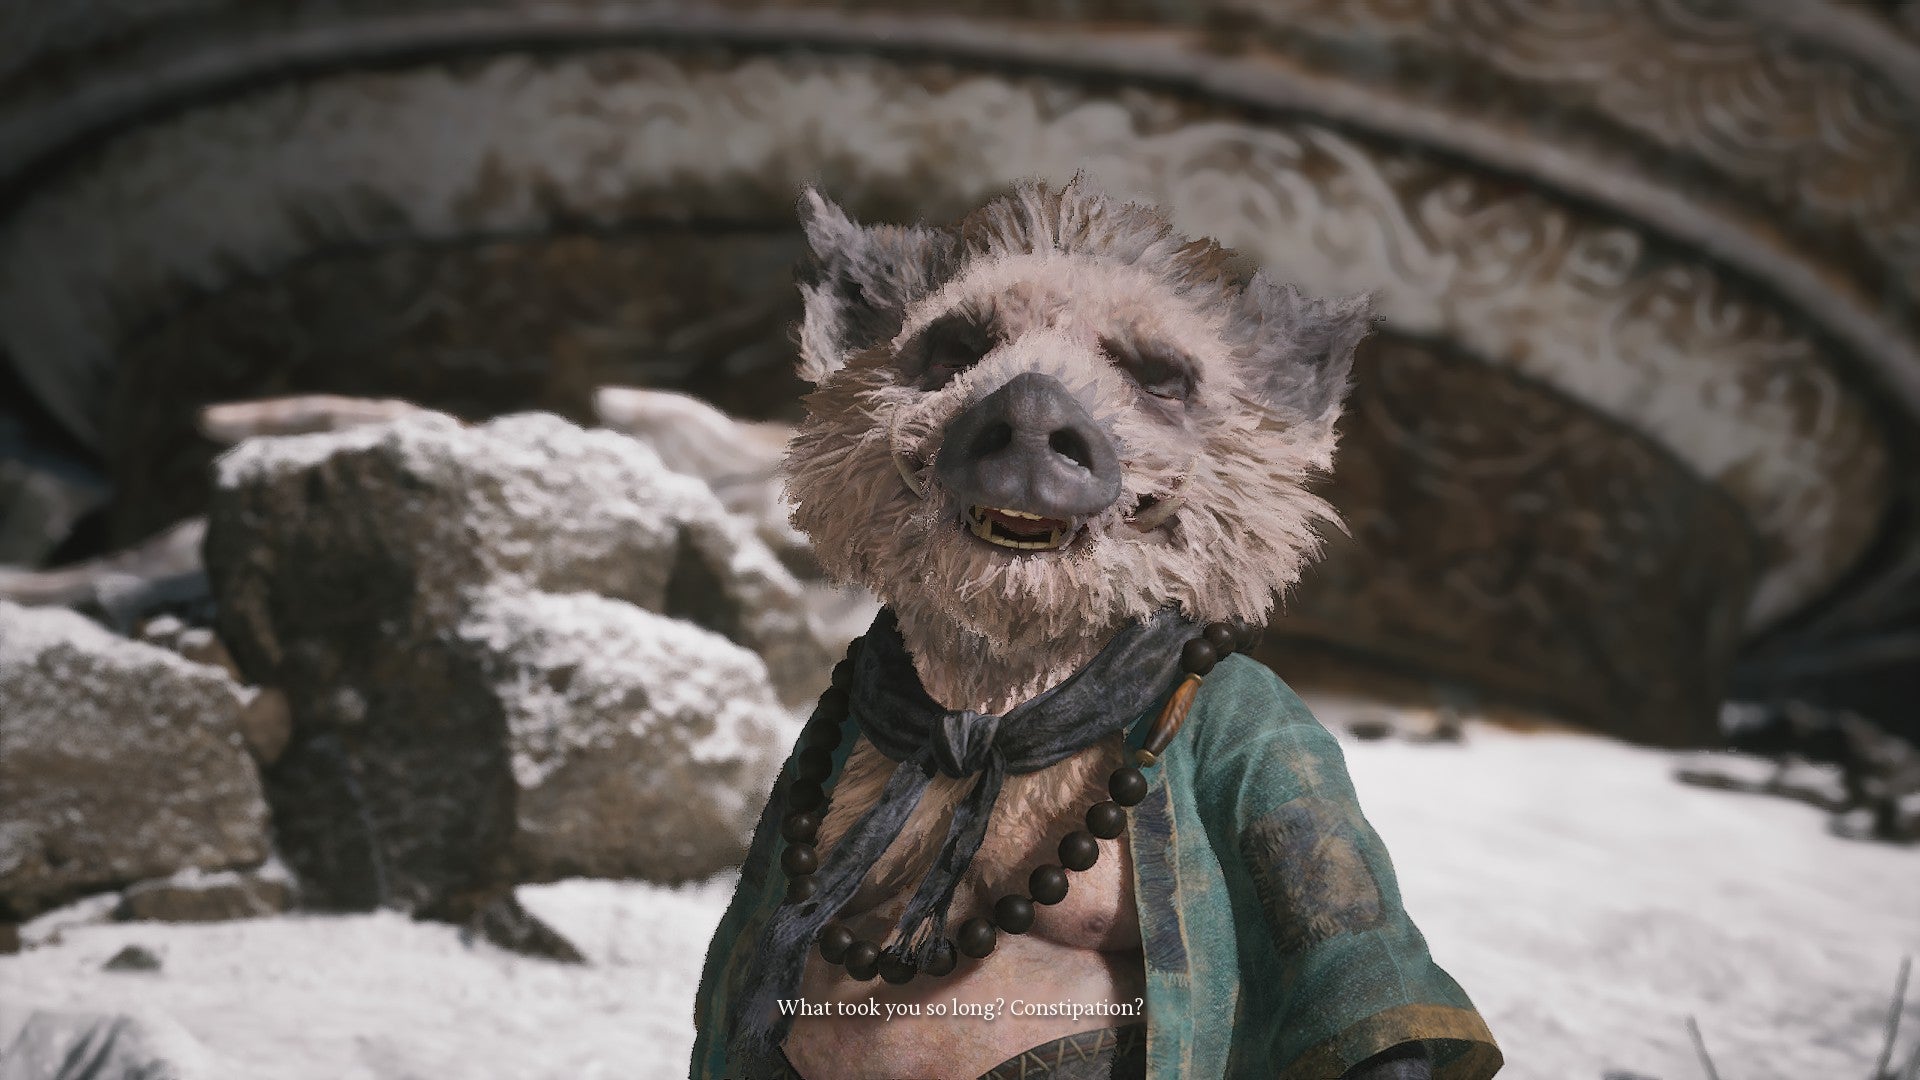
Zhu Baijie’s definitely one of the funniest NPCs in the game. |Image credit:Rock Paper Shotgun/Game Science
Once Kang-Jin Star is out of the picture, you’ll be joined by Zhu Baijie, one of Wukong’s original companions from the Journey to the West novel. He’ll tell you to join him at the head of Turtle Island, but before doing that, take some time to explore this huge shell you’re riding on. More specifically, head to the right of the Kang-Jin Star battlefield to find Cyan Loong .
Like the other hidden loong bosses, you can only battle Cyan Loong if you’ve found the Loong Scale - if you haven’t, you’ll just see his statue staring out at sea. (See our Chapter 1 boss guide for info on how to get the scale and start unlocking these secret opponents.)
Out of all the hidden loongs in Black Myth: Wukong, Cyan Loong boasts my fave design. He offers up a great boss fight too. |Image credit:Rock Paper Shotgun/Game Science
Cyan Loong’s a challenging opponent who heaves off chunks of your health bar with each successful hit and unleashes a lightning attack that has a wide radius. Dodging his moves is an exercise in timing, but like many bosses in this chapter, you can overwhelm him with Immobilize, A Flock of Many, and Red Tide combos. Wind Tamer also temporarily stuns him.
After beating Cyan Loong, go find Zhu Baijie at the head of the turtle, which carries you to the next area.
Bitter Lake: North Shore of the Bitter Lake
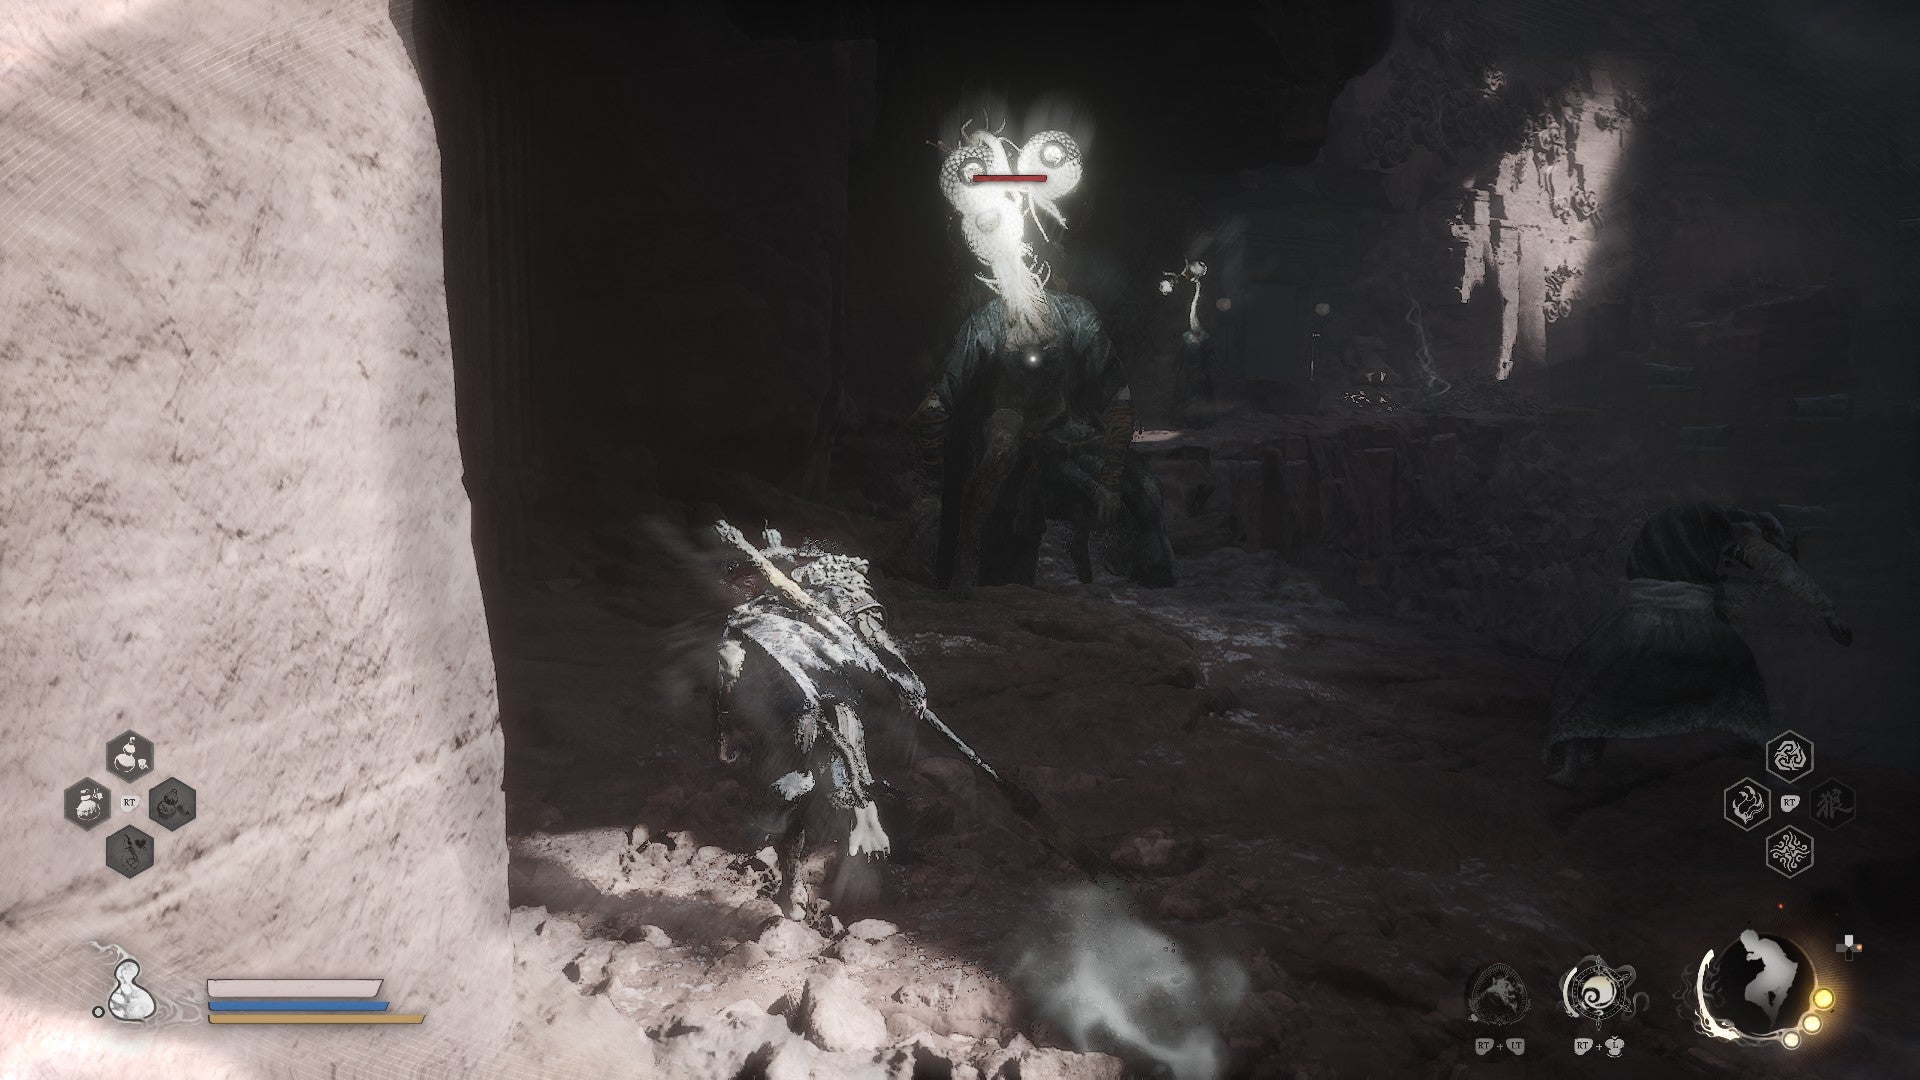
This is a nice, open area with a good view of the ocean. There are a few random tasks to complete here, and Zhu Baijie is by your side to help you out. (Try standing still for a while and listen to him ramble to get more insight into the game’s lore.) First off, from the “North Shore of the Bitter Lake” Shrine, proceed as far as you can along the coast (to your left if you’re facing the sea) to encounter the skeleton of a huge serpent. The Apramāṇa Bat will descend upon you here. Parry Apramāṇa Bat ’s attacks via Rock Solid and counter with extreme prejudice.

The first of several bat foes you’ll soon encounter, Apramāṇa Bat looks cool but is not strong enough to be dallying about by Snake General’s corpse. |Image credit:Rock Paper Shotgun/Game Science
Following this fight, go back to the Shrine and go up the sloping path to find a Treasure Hunter in a temple courtyard. He’s being attacked by two bat Guai, so save him and then exhaust all of his dialogue. This NPC will become important later if you want to fight the optional Green-Capped Martialist boss.
Lastly, head north along the shore from the “North Shore of the Bitter Lake” Shrine until you see a hut. Wandering the waters nearby is Chen Loong , a grumpy dragon who will challenge you to a fight as you draw near. Chen Loong has a few deadly lightning attacks, but overall he’s a snap to defeat especially with Zhu Baijie by your side.

Beating Chen Loong’s scaley butt (and then helping him) is pivotal if you want to unlock Black Myth: Wukong’s hub. |Image credit:Rock Paper Shotgun/Game Science
Following his defeat, Chen Loong asks you to deliver him some medicine. Our Chen Loong questline guide has the full details, but in short, teleport back to the “Cellar” Shrine in Chapter 2, talk with Xu Dog, and then deliver the Special-made Bone Strengthening Pellet to Chen Loong. You’ll get the Ruyi Scroll as a reward. Using the scroll transports you to the Painted Realm, a hub world that’s home to Zodiac Village.
Bitter Lake: Precept Corridor
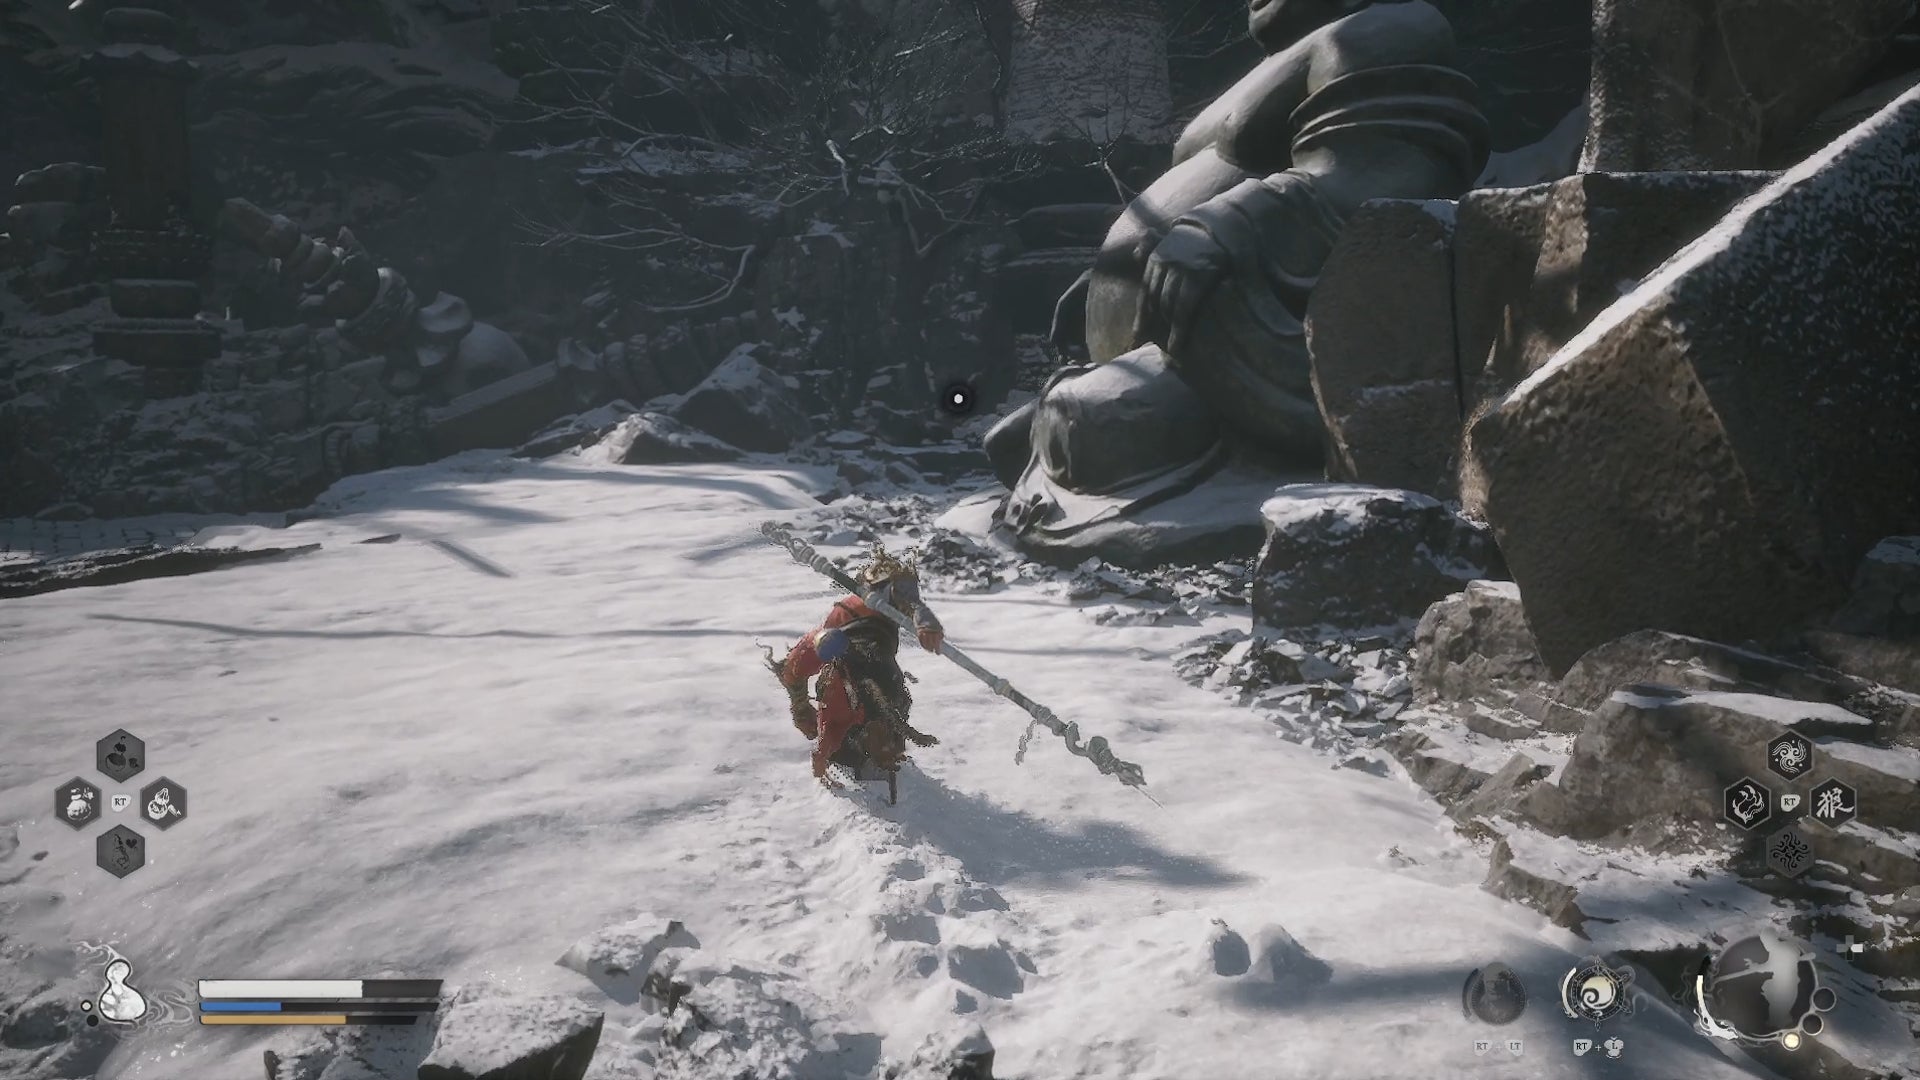
We’ll fully explain the Zodiac Village in the next section, but for now let’s wrap up the Bitter Lake by returning to the “North Shore of the Bitter Lake” Shrine. Follow the trail of Frozen Corpses into a cave and go across the bridge to unlock the “Precept Corridor” Shrine. You can find The Statue Meditation Spot next to the Shrine, in front of a big Buddha statue.
From there, go left and up the stairs. You’ll fight a Red-Haired Yaksha and then enter upon a temple courtyard complex. A cutscene will ensue; afterwards, you’ll need to find four Buddha statues. The first is in the courtyard to the left of the central pagoda. The second is down the left stairs and to your right, nestled against an alcove with a corpse praying in front of it. The third is in the opposite direction from the second, located outside under a few overhanging platforms and down a staircase. The fourth is located through the red gates near the third; follow the corridor all the way up the mountain (it’s a long climb) and you’ll eventually see it.


After locating all four statues, the pathway through the mountain will be unlocked. Head up the stairs, retracing the steps you took to find the fourth Buddha statue, and go through the small gap at the top of the mountain to walk a new path that leads to the “Mindfulness Cliff” Shrine.
4. Zodiac Village walkthrough
Zodiac Village: Village Entrance
Before detailing the next area, let’s talk about the Zodiac Village. You can visit this pocket realm from any point in the game after Chen Loong gives you the Ruyi Scroll, but we’re including the village and its denizens in this part of the guide for easy reference.
The “Village Entrance” Keeper’s Shrine is at the front of the village, which is home to all of the friendly merchants you’ve encountered so far. This includes Shen Monkey, Xu Dog, and Chen Loong, who helps you grow materials from any seeds that you’ve found on your travels.
There’s one new NPC here - Yin Tiger , the village’s blacksmith. Yin Tiger will not only upgrade your armor , but challenging him to a friendly fight lets you unlock an extra curio slot .
Yin Tiger is one of the toughest bosses you’ve encountered thus far, and it’s devilishly hard to avoid the range of his impressive blade. You can return to fight him at any time you wish, so it might be wise to wait until you’re stronger. Spells don’t work on him that well, and in our Chapter 3 boss guide , Ollie recommends that you wait until you unlock the Spell Binder spell, found after fighting the Green-Capped Martialist later this chapter, and use it against Yin Tiger. Personally, I was able to beat him through a combination of Red Tides, A Pluck of Many, and a fully upgraded smash from Wandering Wight’s head. He’s also susceptible to Cloud Step surprise attacks.

Some prefer to fight him one-on-one, but if you’re like me and could never get the dodging 100% right, spells do work against Yin Tiger at the right moments. |Image credit:Rock Paper Shotgun/Game Science
However you win, relish in your victory and enjoy the Ebon Flow Transformation, which lets you take on Yin Tiger’s form in battle. It’s undeniably one of the top Transformations in the game.
5. Valley of Ecstasy walkthrough
Valley of Ecstasy: Mindfulness Cliff
Keep going up until you reach an open area where you’ll fight Non-White for the first time. He’s got ice, poison attacks, and the ability to block your strikes, but this first fight against Non-White is a pushover compared to what you’ve been through to get here. He’ll flee when his health is halfway depleted.

If you read the Journal entries for Non-White, you’ll learn that he got his unique look - and name - from an old career in the circus. You’ll also learn that he’s wearing another dude’s face. |Image credit:Rock Paper Shotgun/Game Science
Following this fight, proceed onwards, and take note that you can drop down on the fallen pillar past the tree in Non-White’s arena to pick up a Fiery Gourd and the Skandha of Thought . Take a peek at our guide on the Skandha of Thought’s exact location if you’re having trouble.
Keep moving upwards until you encounter Non-White a second time ; he’s tougher now, but if you watch out for his poison-inflicting jump attacks, he shouldn’t make you break much of a sweat. After the fight, be sure to unlock The Track Meditation Spot, which is nearby, before going down the snowy mountain to the next area.
Valley of Ecstasy: Forest of Felicity

You may recall the music video at the end of Chapter 2 telling the tale of a man and his fox Guai. Now you can see how that story unfolded. |Image credit:Rock Paper Shotgun/Game Science
The Forest of Felicity is one big valley full of much to do. From the “Forest of Felicity” Shrine, you can get started by examining the corpse with a fox pelt draped around its neck. Our guide to the fox quest has all the details you need to know about this sidequest, which kicks off here and requires you to defeat the boss Non-Void to complete.
After the quest starts, you’ll be transformed into a fox immediately via the Snow Fox Brush and encouraged to head to the New Thunderclap Temple, which lies at the end of the Forest of Felicity. I recommend that you de-transform yourself and take some time to explore, as this area easily encompasses several hours of gameplay. You can always use the Snow Fox Brush to take the fox’s form again when the time is right.

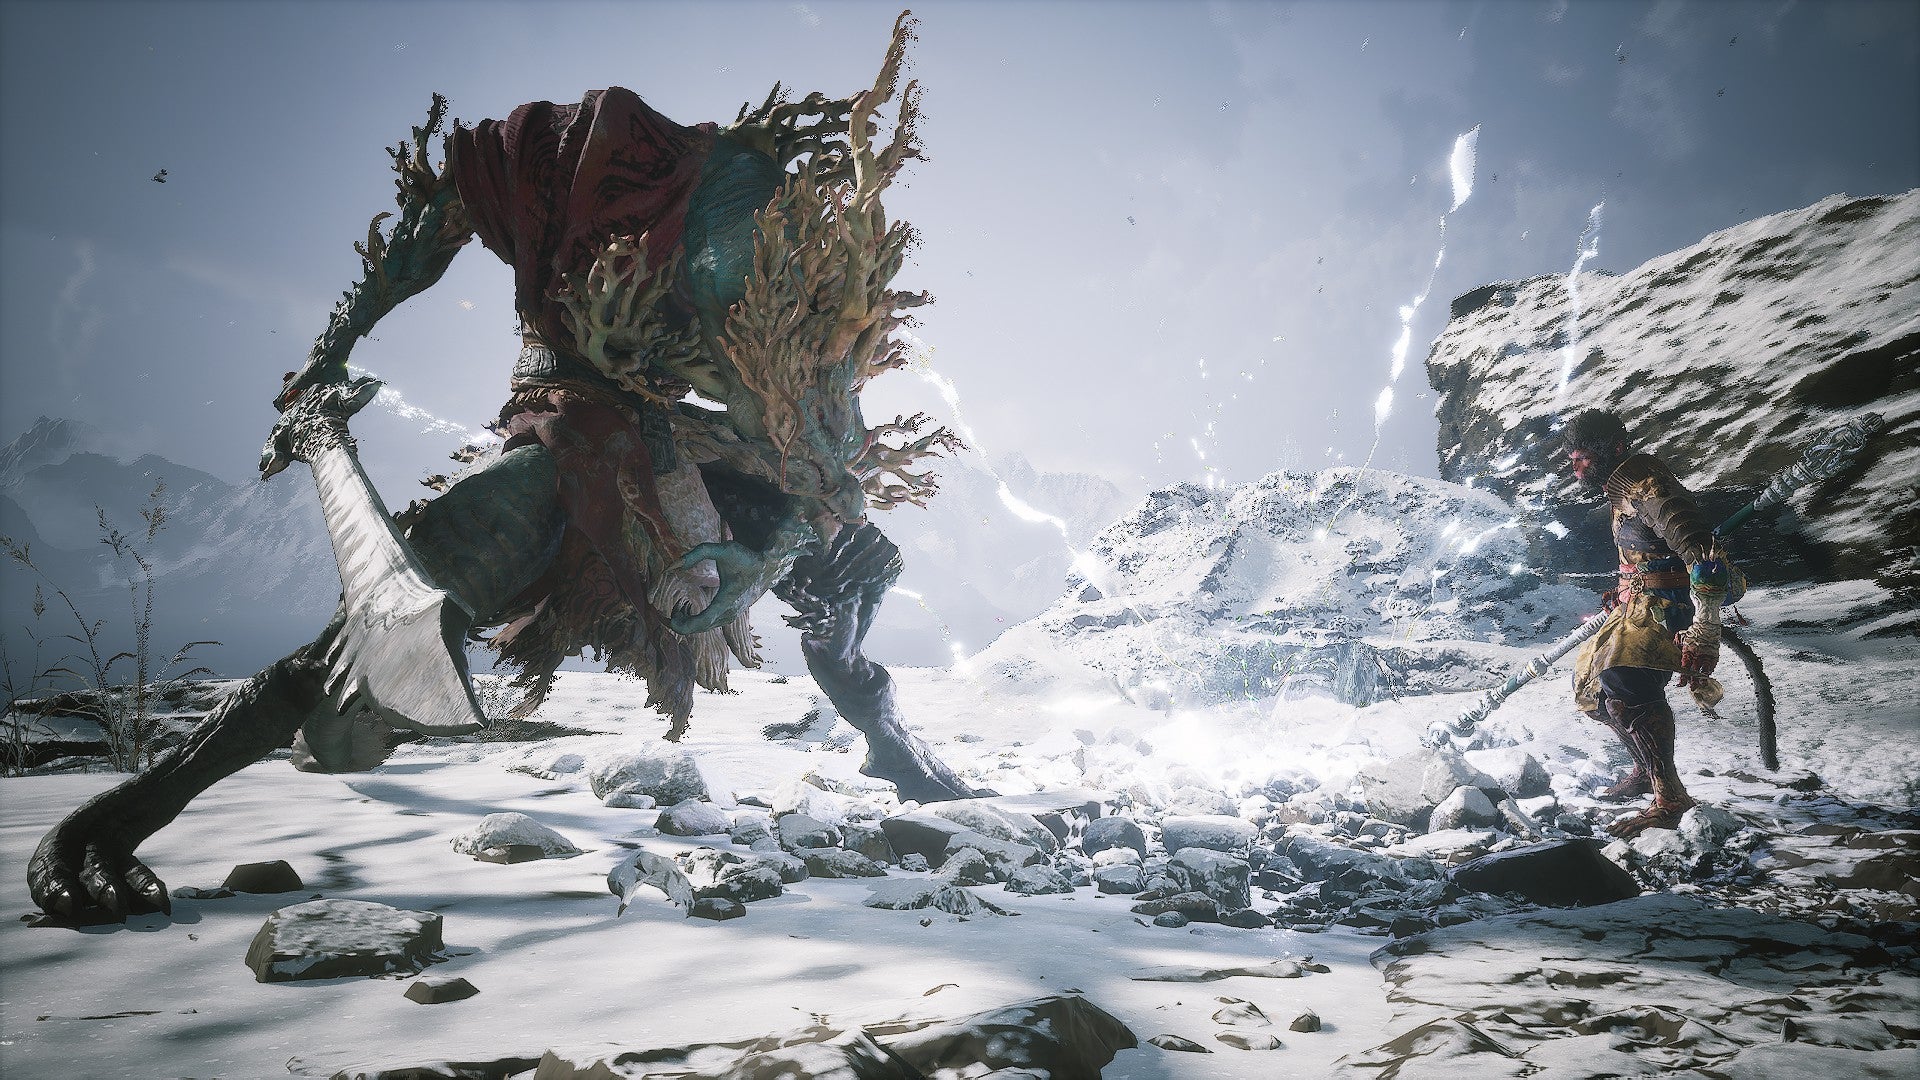
Here’s one of the secret foes of the Forest of Felicity - Old Ginseng Guai, king of the root Yaoguai. |Image credit:Rock Paper Shotgun/Game Science
There are two Yaoguai Chiefs that you can now tackle within walking distance - Lang-Li-Guhh-Lang and Old Ginseng Guai . Lang-Li-Guhh-Lang , Chapter 3’s frog boss, is the easier to find, as he’s located at the end of the shallow path through the cliff to your left of the “Forest of Felicity” Shrine. Refer to our boss guide on finding and fighting Old Ginseng Guai for a detailed set of instructions, as this root-covered foe is tricky to locate in the midst of the forest’s endless paths of snow.
Valley of Ecstasy: Brook of Bliss
To get to the “Brook of Bliss” Shrine, head down the path to your immediate right at the “Forest Of Felicity” Shrine, and go past the water. Turn left, keep going forward, and you’ll encounter the Shrine down a series of steps.
From there, you can find Non-Able by taking a righthand turn just before the Shrine. Go up the slope and keep walking until you find a clearing with several Frozen Corpses strewn about. Non-Able is kneeling amidst the corpses, and combat will ensue as soon as you reach him.

Non-Able provides my favourite boss fights out of all the monks in this chapter. If you read his Journal entry, he seems like a standup guy, too. |Image credit:Rock Paper Shotgun/Game Science
Non-Able has two forms - one with his hands tied behind his back and the other with his hands free - and he ranks on the harder scale when he comes to Chapter 3’s optional bosses. His first health bar can be overwhelmed by your clones and heavy attacks, but you’ll need to take some time to learn his moveset to empty his second health bar. You especially want to watch out for his big three-hit fist combos and Qi-infused palm strikes. Beating him is worthwhile, as the Non-Able Spirit you receive afterwards is an excellent addition to your light attack combos, and finally made me stop using Wandering Wight.
Valley of Ecstasy: Towers of Karma
To reach the “Towers of Karma” Shrine, follow our guide to finding Old Ginseng Guai , as the Shrine is located very close to the boss arena. If you saved the Treasure Hunter back at the North Shore of the Bitter Lake, you should hear his dialogue within the Shrine’s vicinity. Explore until you see him freezing in the snow nearby.
To warm him up, use the Ring of Fire spell - which marks the one time in my playthrough that I’ve actually chosen this spell over Immobilize. Then exhaust his dialogue.
Valley of Ecstasy: Melon Field
The “Melon Field” is a secret Keeper’s Shrine located within an area of the same name that’s only accessible if you’ve assisted the Treasure Hunter twice. To get there, return to the “Brook of Bliss” Shrine, cross the bridge, and turn right. Go to the far edge of the frozen lake and keep moving until you reach a cliff. You can jump down this cliff with some careful platforming, and at the very bottom you’ll reach Melon Field.

All this time I thought I was doing this guy favours - now he repays me with an exploding fiery chakram! |Image credit:Rock Paper Shotgun/Game Science
Green-Capped Martialist , the true identity of the Treasure Hunter, will attack you as you enter the cave in this field. Green-Capped Martialist’s fighting style is unorthodox, as he uses an ignitable chakram and specialises in spinning it around the battlefield. I recommend using Rock Solid against him, and being careful when you activate your clones - they’ll be useless when he’s disappeared and his chakram is spinning around.
When Green-Capped Martialist is dead, you’ll get the Spell Binder spell, which lets you do away with Mana for a temporary boost to attack.
Valley of Ecstasy: Longevity Road
The “Longevity Road” Shrine marks the far end of the Valley of Ecstasy, and is reachable if you follow the path leading from the “Forest of Felicity” Shrine and generally keep moving north. Take a quick detour here to examine the body of Captain Void-Illusion on the ground nearby - if your back is to the “Longevity Road” Shrine, its to your left. Interacting with the body gives you the Spirit of Captain Void-Illusion.
Once you’ve done checking out dead bosses that you didn’t have to fight, go past the Shrine and veer right. You’ll see the temple that marks the end of this long chapter, as well as the glowing visage of Captain Kalpa-Wave . Unlike his fellow Captains back in the Pagoda Realm, Captain Kalpa-Wave dies easily as long as you avoid his stomp attacks.

Captain Kalpa-Wave might guard the entrance to the New Thunderclap Temple, but he ain’t much compared to his comrades over in the Pagoda Realm. |Image credit:Rock Paper Shotgun/Game Science
6. New Thunderclap Temple walkthrough
New Thunderclap Temple: Temple Entrance
Finally, you’ve reached New Thunderclap Temple! Tired of Chapter 3 yet? Well, now there’s an entire temple complex for you to explore, and while it’s not quite as large as the forest you just endured, it’s still pretty big. This area is populated with vicious enemies, including blind monks who hit like a tonne of bricks and the Clay Vajra, a multi-legged monstrosity. It’s also a stellar place to level up, open some chests, and practice your fighting skills - just be warned that there are only two Keeper’s Shrines here, and you’ll have to do a lot of backtracking if you die.
Beware the Clay Vajra. First time I saw this impressive Guai, I thought it was a boss. |Image credit:Rock Paper Shotgun/Game Science
If you care about completing the fox sidequest, your first priority should be tracking down Non-Void . We’ve got detailed instructions on finding and defeating Non-Void in our boss guide. Once you reach the temple he stands in, be sure to use the Snow Fox Brush to turn into fox form and see his reaction. And then proceed to use A Flock of Many or the Red Tides charge attack to pulverise him for his sins.

Change into fox form before approaching him to make Non-Void feel especially guilty. |Image credit:Rock Paper Shotgun/Game Science
Non-Pure is another optional boss that can be found if you go straight from the “Temple Entrance” Shrine, and keep going in this direction until you reach a large courtyard area with two Dark-faced Overlords (the large blue giants). From here, enter the temple to your right to fight Non-Pure . He’s got a mean reach with his polearm, but I found Non-Void a little harder, all things considered. Once Non-Pure is dead, activate The Hall Meditation Spot.
Last on the list of extra bosses is Monk From The Sea , who’s hidden away in a far corner of the temple. From the entrance Shrine, head right, go up the ramp and steps, and keep going through the big doorway to the next area. Veer northeast until you reach a platform where several monks are training; you’ll know you’re in the right place if you see a turtle statue. On the far end of the platform is a plinth that manifests Monk From The Sea when you get near.
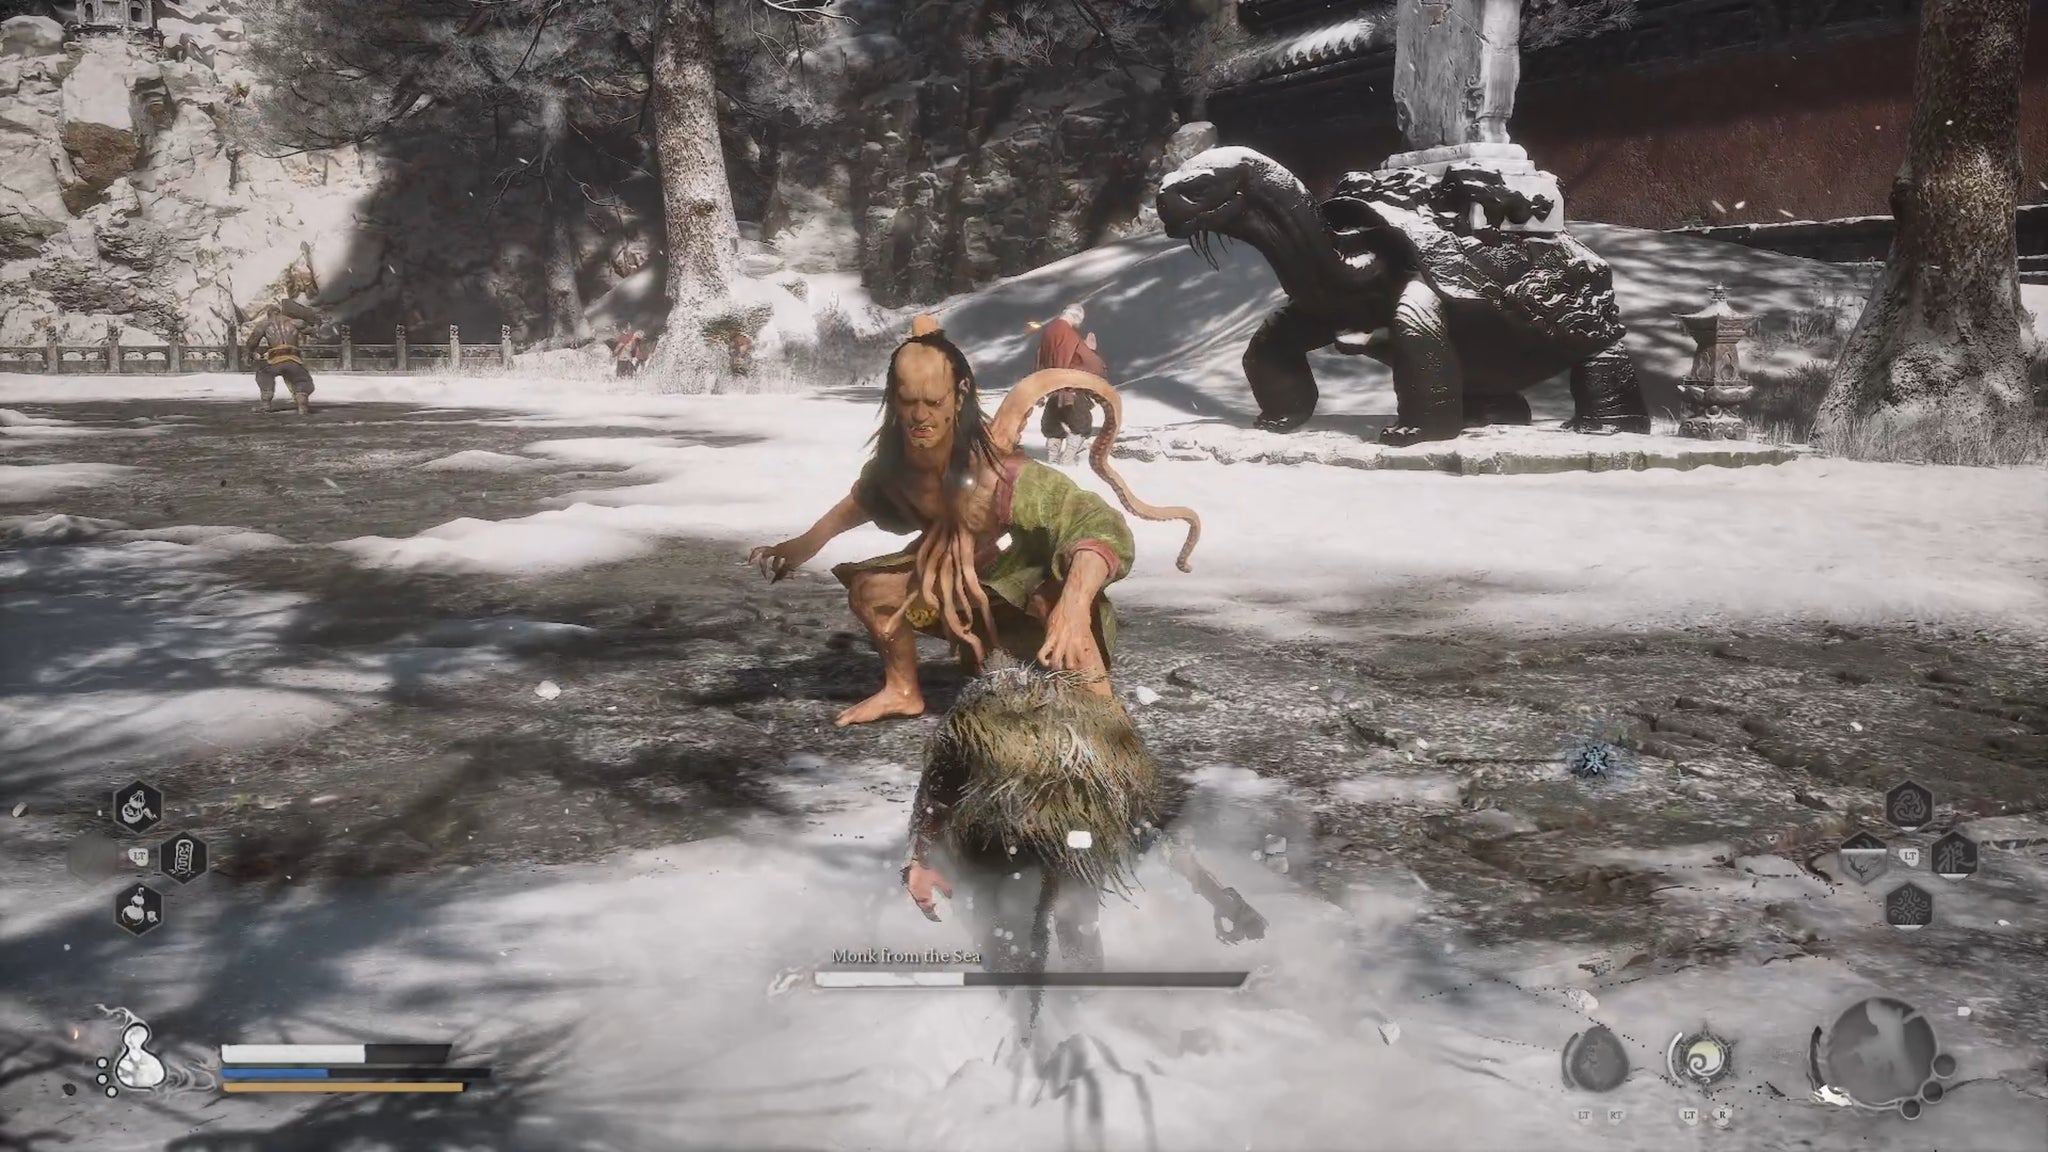
If you’ve been itching for a Transformation that involves tentacles, Monk From The Sea is your man. |Image credit:Rock Paper Shotgun/Game Science
Monk From The Sea’s tricky due to his tentacles, which give him immense reach, as well as the fact that nearby enemies can join in the fight (if you haven’t cleared out the surrounding area). After you beat him, you’ll get the Hoarfrost Transformation, which lets you assume his form.
Finally, the friendly horse Guai Ma Tianba can be found if you run past the “Temple Entrance” Shrine, go through the first temple, and up the lefthand stairs. At the top of the platform, take the next set of stairs on your left and then proceed into the next temple building in front of you, which is full of blind monks. Ascend the stairs on your right to reach the top floor, then head left to come across a wooden platform bordered by pillars. Ma Tianba will be standing by one of the pillars, waiting for you to talk with him. Finding him in each chapter of the game is necessary to eventually unlock his Transformation.
New Thunderclap Temple: Mahavira Hall
At last, let’s wrap up this quest in the New West. The “Mahavira Hall” Keeper’s Shrine is located up the stairs from the two Dark-faced Overlords that you previously passed. Enter the uppermost temple building when you’re ready and you’ll face the final boss battle - Yellowbrow and Macaque Chief .
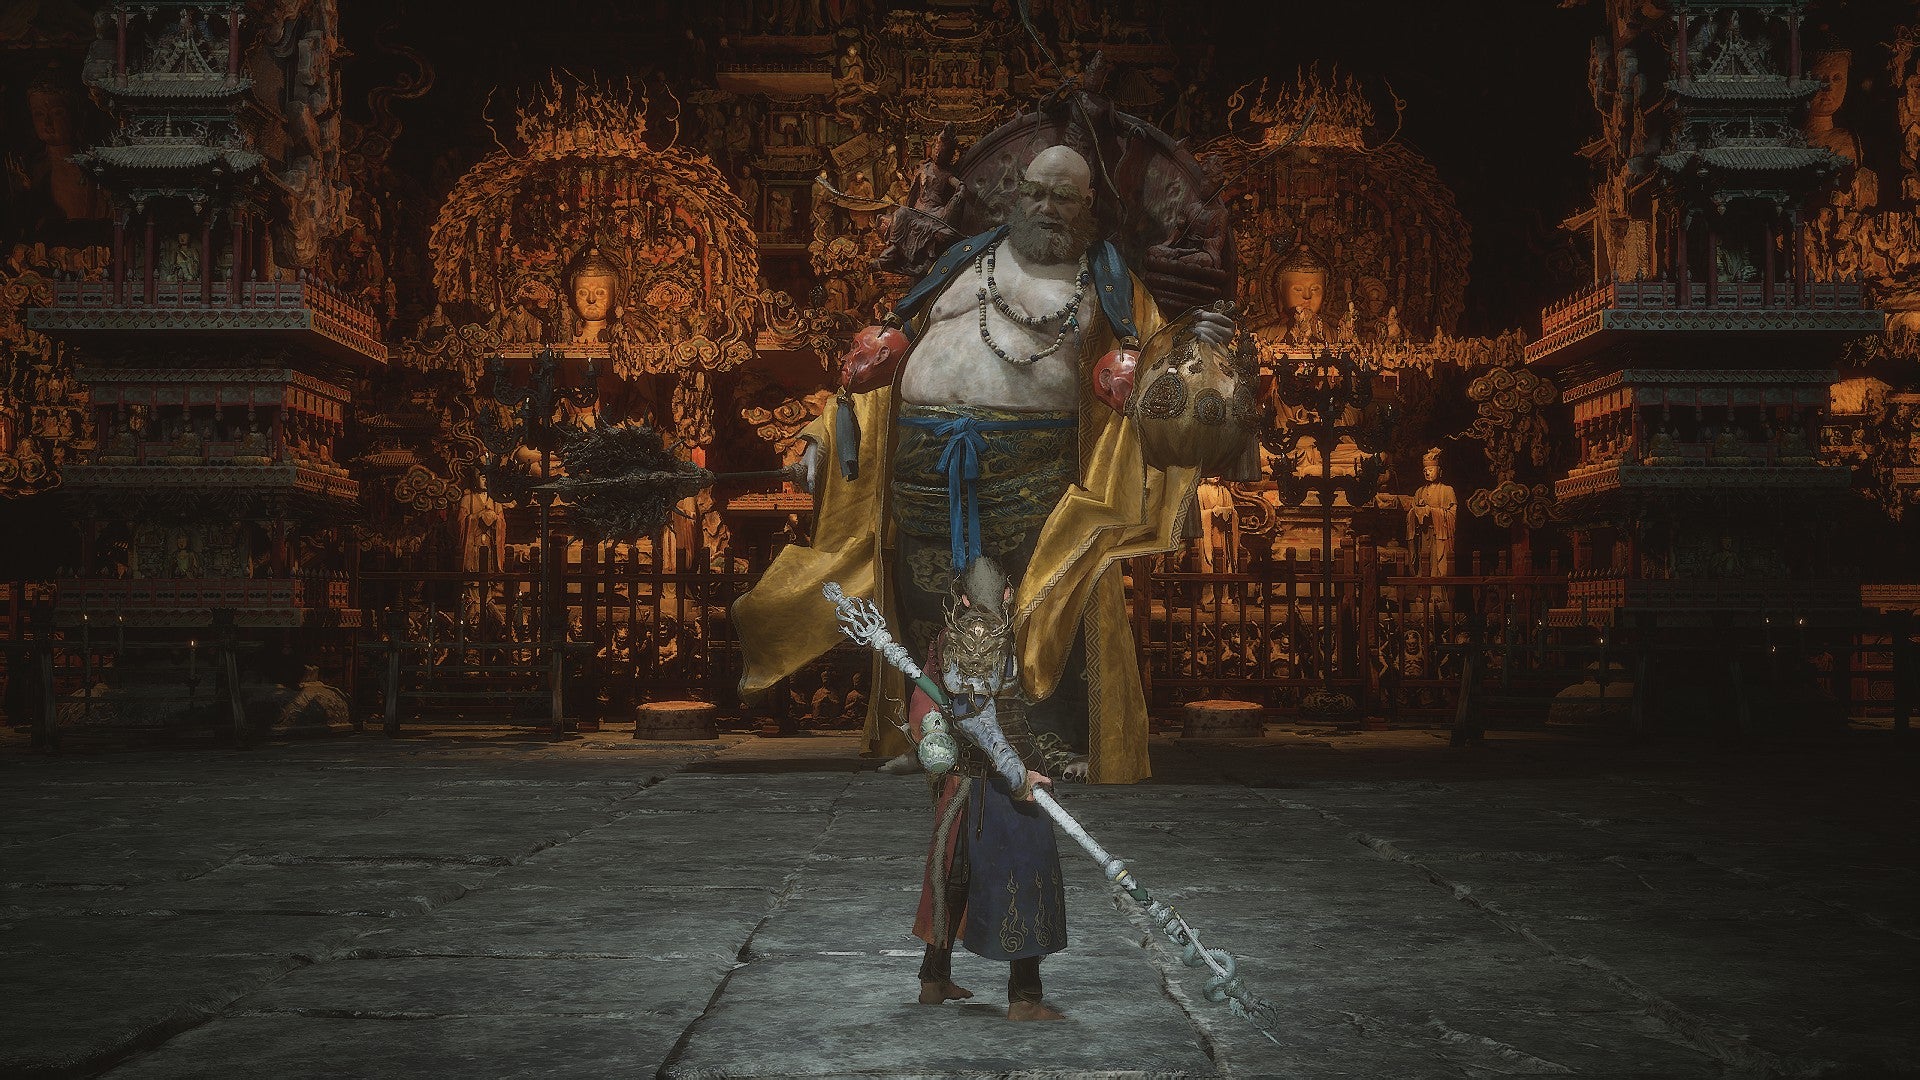
Finally we meet Yellowbrow, only to discover that he’s the dramatic sort who loves to extend a boss battle into multiple phases. |Image credit:Rock Paper Shotgun/Game Science
This is a lengthy, multi-phased affair. You’ll need to beat Yellowbrow in a straightforward one-on-one match first, and then he’ll trap you in his magic sack. Once there, you’ll fight the Macaque Chief for the final time with Zhu Baijie’s help. And then, you’ll be transformed into the Macaque Chief himself in a surreal moment that sees you running across the platforms of Yellowbrow’s Buddhist installation until you get to the very last boss arena.

I missed you, Zhu Baijie. Let’s kill the Macaque Chief together! |Image credit:Rock Paper Shotgun/Game Science
The last fight against Yellowbrow is much harder than the first, as he’ll turn his body into gold and absorb your attacks. Use multiple charged attacks or a well-timed smash from Wandering Wight to remove this golden shield. If you’ve gained the ability to transform into Yin Tiger or the Spell Binder spell, both will come in handy for unleashing maximum damage. It may take a few tries, but eventually Yellowbrow will go down…finally bringing an end to the longest chapter in the game.
Congratulations on completing Chapter 3 of Black Myth: Wukong - that’s a wrap on the snow fields of the New West! For a more detailed look at all of the Yaoguai in every chapter of this expansive game, take a deep dive into our guide to all bosses in Black Myth: Wukong. If you’d prefer a quick rundown of places to level up and rest, check out our guides to all Keeper’s Shrine locations and all Meditation Spots . And last but certainly not least is our guide to all Journal entries , which will help you make sense of Black Myth: Wukong’s awesome take on Chinese legend.
Black Myth: Wukong
PS5 , PC
Rock Paper Shotgun is better when you sign in
Sign in and join us on our journey to discover strange and compelling PC games.

All 75 Arc Raiders Blueprints and where to get them
These areas have the highest chance of giving you Blueprints

Image credit:Rock Paper Shotgun/Embark Studios

Looking for more Arc Raiders Blueprints? It’s a special day when you find a Blueprint, as they’re among the most valuable items in Arc Raiders. If you find a Blueprint that you haven’t already found, then you must make sure you hold onto it at all costs, because Blueprints are the key to one of the most important and powerful systems of meta-progression in the game.
This guide aims to be the very best guide on Blueprints you can find, starting with a primer on what exactly they are and how they work in Arc Raiders, before delving into exactly where to get Blueprints and the very best farming spots for you to take in your search.
We’ll also go over how to get Blueprints from other unlikely activities, such as destroying Surveyors and completing specific quests. And you’ll also find the full list of all 75 Blueprints in Arc Raiders on this page (including the newest Blueprints added with the Cold Snap update , such as the Deadline Blueprint and Firework Box Blueprint), giving you all the information you need to expand your own crafting repertoire.
In this guide:
- What are Blueprints in Arc Raiders?
- Full Blueprint list: All crafting recipes
- Where to find Blueprints in Arc Raiders Blueprints obtained from quests Blueprints obtained from Trials Best Blueprint farming locations

What are Blueprints in Arc Raiders?
Blueprints in Arc Raiders are special items which, if you manage to extract with them, you can expend to permanently unlock a new crafting recipe in your Workshop. If you manage to extract from a raid with an Anvil Blueprint, for example, you can unlock the ability to craft your very own Anvil Pistol, as many times as you like (as long as you have the crafting materials).
To use a Blueprint, simply open your Inventory while in the lobby, then right-click on the Blueprint and click “Learn And Consume” . This will permanently unlock the recipe for that item in your Workshop. As of the Stella Montis update, there are allegedly 75 different Blueprints to unlock - although only 68 are confirmed to be in the game so far. You can see all the Blueprints you’ve found and unlocked by going to the Workshop menu, and hitting “R” to bring up the Blueprint screen.
It’s possible to find duplicates of past Blueprints you’ve already unlocked. If you find these, then you can either sell them, or - if you like to play with friends - you can take it into a match and gift it to your friend so they can unlock that recipe for themselves. Another option is to keep hold of them until the time comes to donate them to the Expedition.
Full Blueprint list: All crafting recipes
Below is the full list of all the Blueprints that are currently available to find in Arc Raiders, and the crafting recipe required for each item:
| Blueprint | Type | Recipe | Crafted At |
|---|---|---|---|
| Bettina | Weapon | 3x Advanced Mechanical Components 3x Heavy Gun Parts 3x Canister | Gunsmith 3 |
| Blue Light Stick | Quick Use | 3x Chemicals | Utility Station 1 |
| Aphelion | Weapon | 3x Magnetic Accelerator 3x Complex Gun Parts 1x Matriarch Reactor | Gunsmith 3 |
| Combat Mk. 3 (Flanking) | Augment | 2x Advanced Electrical Components 3x Processor | Gear Bench 3 |
| Combat Mk. 3 (Aggressive) | Augment | 2x Advanced Electrical Components 3x Processor | Gear Bench 3 |
| Complex Gun Parts | Material | 2x Light Gun Parts 2x Medium Gun Parts 2x Heavy Gun Parts | Refiner 3 |
| Fireworks Box | Quick Use | 1x Explosive Compound 3x Pop Trigger | Explosives Station 2 |
| Gas Mine | Mine | 4x Chemicals 2x Rubber Parts | Explosives Station 1 |
| Green Light Stick | Quick Use | 3x Chemicals | Utility Station 1 |
| Pulse Mine | Mine | 1x Crude Explosives 1x Wires | Explosives Station 1 |
| Seeker Grenade | Grenade | 1x Crude Explosives 2x ARC Alloy | Explosives Station 1 |
| Looting Mk. 3 (Survivor) | Augment | 2x Advanced Electrical Components 3x Processor | Gear Bench 3 |
| Angled Grip II | Mod | 2x Mechanical Components 3x Duct Tape | Gunsmith 2 |
| Angled Grip III | Mod | 2x Mod Components 5x Duct Tape | Gunsmith 3 |
| Hullcracker | Weapon | 1x Magnetic Accelerator 3x Heavy Gun Parts 1x Exodus Modules | Gunsmith 3 |
| Launcher Ammo | Ammo | 5x Metal Parts 1x Crude Explosives | Workbench 1 |
| Anvil | Weapon | 5x Mechanical Components 5x Simple Gun Parts | Gunsmith 2 |
| Anvil Splitter | Mod | 2x Mod Components 3x Processor | Gunsmith 3 |
| ??? | ??? | ??? | ??? |
| Barricade Kit | Quick Use | 1x Mechanical Components | Utility Station 2 |
| Blaze Grenade | Grenade | 1x Explosive Compound 2x Oil | Explosives Station 3 |
| Bobcat | Weapon | 3x Advanced Mechanical Components 3x Light Gun Parts | Gunsmith 3 |
| Osprey | Weapon | 2x Advanced Mechanical Components 3x Medium Gun Parts 7x Wires | Gunsmith 3 |
| Burletta | Weapon | 3x Mechanical Components 3x Simple Gun Parts | Gunsmith 1 |
| Compensator II | Mod | 2x Mechanical Components 4x Wires | Gunsmith 2 |
| Compensator III | Mod | 2x Mod Components 8x Wires | Gunsmith 3 |
| Defibrillator | Quick Use | 9x Plastic Parts 1x Moss | Medical Lab 2 |
| ??? | ??? | ??? | ??? |
| Equalizer | Weapon | 3x Magnetic Accelerator 3x Complex Gun Parts 1x Queen Reactor | Gunsmith 3 |
| Extended Barrel | Mod | 2x Mod Components 8x Wires | Gunsmith 3 |
| Extended Light Mag II | Mod | 2x Mechanical Components 3x Steel Spring | Gunsmith 2 |
| Extended Light Mag III | Mod | 2x Mod Components 5x Steel Spring | Gunsmith 3 |
| Extended Medium Mag II | Mod | 2x Mechanical Components 3x Steel Spring | Gunsmith 2 |
| Extended Medium Mag III | Mod | 2x Mod Components 5x Steel Spring | Gunsmith 3 |
| Extended Shotgun Mag II | Mod | 2x Mechanical Components 3x Steel Spring | Gunsmith 2 |
| Extended Shotgun Mag III | Mod | 2x Mod Components 5x Steel Spring | Gunsmith 3 |
| Remote Raider Flare | Quick Use | 2x Chemicals 4x Rubber Parts | Utility Station 1 |
| Heavy Gun Parts | Material | 4x Simple Gun Parts | Refiner 2 |
| Venator | Weapon | 2x Advanced Mechanical Components 3x Medium Gun Parts 5x Magnet | Gunsmith 3 |
| Il Toro | Weapon | 5x Mechanical Components 6x Simple Gun Parts | Gunsmith 1 |
| Jolt Mine | Mine | 1x Electrical Components 1x Battery | Explosives Station 2 |
| Explosive Mine | Mine | 1x Explosive Compound 1x Sensors | Explosives Station 3 |
| Jupiter | Weapon | 3x Magnetic Accelerator 3x Complex Gun Parts 1x Queen Reactor | Gunsmith 3 |
| Light Gun Parts | Material | 4x Simple Gun Parts | Refiner 2 |
| Lightweight Stock | Mod | 2x Mod Components 5x Duct Tape | Gunsmith 3 |
| Lure Grenade | Grenade | 1x Speaker Component 1x Electrical Components | Utility Station 2 |
| Medium Gun Parts | Material | 4x Simple Gun Parts | Refiner 2 |
| Torrente | Weapon | 2x Advanced Mechanical Components 3x Medium Gun Parts 6x Steel Spring | Gunsmith 3 |
| Muzzle Brake II | Mod | 2x Mechanical Components 4x Wires | Gunsmith 2 |
| Muzzle Brake III | Mod | 2x Mod Components 8x Wires | Gunsmith 3 |
| Padded Stock | Mod | 2x Mod Components 5x Duct Tape | Gunsmith 3 |
| Shotgun Choke II | Mod | 2x Mechanical Components 4x Wires | Gunsmith 2 |
| Shotgun Choke III | Mod | 2x Mod Components 8x Wires | Gunsmith 3 |
| Shotgun Silencer | Mod | 2x Mod Components 8x Wires | Gunsmith 3 |
| Showstopper | Grenade | 1x Advanced Electrical Components 1x Voltage Converter | Explosives Station 3 |
| Silencer I | Mod | 2x Mechanical Components 4x Wires | Gunsmith 2 |
| Silencer II | Mod | 2x Mod Components 8x Wires | Gunsmith 3 |
| Snap Hook | Quick Use | 2x Power Rod 3x Rope 1x Exodus Modules | Utility Station 3 |
| Stable Stock II | Mod | 2x Mechanical Components 3x Duct Tape | Gunsmith 2 |
| Stable Stock III | Mod | 2x Mod Components 5x Duct Tape | Gunsmith 3 |
| Tagging Grenade | Grenade | 1x Electrical Components 1x Sensors | Utility Station 3 |
| Tempest | Weapon | 3x Advanced Mechanical Components 3x Medium Gun Parts 3x Canister | Gunsmith 3 |
| Trigger Nade | Grenade | 2x Crude Explosives 1x Processor | Explosives Station 2 |
| Vertical Grip II | Mod | 2x Mechanical Components 3x Duct Tape | Gunsmith 2 |
| Vertical Grip III | Mod | 2x Mod Components 5x Duct Tape | Gunsmith 3 |
| Vita Shot | Quick Use | 2x Antiseptic 1x Syringe | Medical Lab 3 |
| Vita Spray | Quick Use | 3x Antiseptic 1x Canister | Medical Lab 3 |
| Vulcano | Weapon | 1x Magnetic Accelerator 3x Heavy Gun Parts 1x Exodus Modules | Gunsmith 3 |
| Wolfpack | Grenade | 2x Explosive Compound 2x Sensors | Explosives Station 3 |
| Red Light Stick | Quick Use | 3x Chemicals | Utility Station 1 |
| Smoke Grenade | Grenade | 14x Chemicals 1x Canister | Utility Station 2 |
| Deadline | Mine | 3x Explosive Compound 2x ARC Circuitry | Explosives Station 3 |
| Trailblazer | Grenade | 1x Explosive Compound 1x Synthesized Fuel | Explosives Station 3 |
| Tactical Mk. 3 (Defensive) | Augment | 2x Advanced Electrical Components 3x Processor | Gear Bench 3 |
| Tactical Mk. 3 (Healing) | Augment | 2x Advanced Electrical Components 3x Processor | Gear Bench 3 |
| Yellow Light Stick | Quick Use | 3x Chemicals | Utility Station 1 |
Note: The missing Blueprints in this list likely have not actually been added to the game at the time of writing, because none of the playerbase has managed to find any of them. As they are added to the game, I will update this page with the most relevant information so you know exactly how to get all 75 Arc Raiders Blueprints.
Where to find Blueprints in Arc Raiders
Below is a list of all containers, modifiers, and events which maximise your chances of finding Blueprints:
- Certain quests reward you with specific Blueprints .
- Completing Trials has a high chance of offering Blueprints as rewards.
- Surveyors have a decent chance of dropping Blueprints on death.
- High loot value areas tend to have a greater chance of spawning Blueprints.
- Night Raids and Storms may increase rare Blueprint spawn chances in containers.
- Containers with higher numbers of items may have a higher tendency to spawn Blueprints. As a result, Blue Gate (which has many “large” containers containing multiple items) may give you a higher chance of spawning Blueprints.
- Raider containers (Raider Caches, Weapon Boxes, Medical Bags, Grenade Tubes) have increased Blueprint drop rates. As a result, the Uncovered Caches event gives you a high chance of finding Blueprints.
- Security Lockers have a higher than average chance of containing Blueprints.
- Certain Blueprints only seem to spawn under specific circumstances: Tempest Blueprint only spawns during Night Raid events. Vulcano Blueprint only spawns during Hidden Bunker events. Jupiter and Equaliser Blueprints only spawn during Harvester events.

Raider Caches, Weapon Boxes, and other raider-oriented container types have a good chance of offering Blueprints. |Image credit:Rock Paper Shotgun/Embark Studios
Blueprints have a very low chance of spawning in any container in Arc Raiders, around 1-2% on average. However, there is a higher chance of finding Blueprints in particular container types. Specifically, you can find more Blueprints in Raider containers and security lockers.
Beyond this, if you’re looking for Blueprints you should focus on regions of the map which are marked as having particularly high-value loot. Areas such as the Control Tower in Dam Battlegrounds, the Arrival and Departure Buildings in Spaceport, and Pilgrim’s Peak in Blue Gate all have a better-than-average chance of spawning Blueprints somewhere amongst all their containers. Night Raids and Electromagnetic Storm events also increase the drop chances of certain Blueprints .
In addition to these containers, you can often loot Blueprints from destroyed Surveyors - the largest of the rolling ball ARC. Surveyors are more commonly found on the later maps - Spaceport and Blue Gate - and if one spawns in your match, you’ll likely see it by the blue laser beam that it casts into the sky while “surveying”.
Surveyors are quite well-armoured and will very speedily run away from you once it notices you, but if you can take one down then make sure you loot all its parts for a chance of obtaining certain unusual Blueprints.
Blueprints obtained from quests
One way in which you can get Blueprints is by completing certain quests for the vendors in Speranza. Some quests will reward you with a specific item Blueprint upon completion, so as long as you work through all the quests in Arc Raiders, you are guaranteed those Blueprints.
Here is the full list of all Blueprints you can get from quest rewards:
- Trigger Nade Blueprint: Rewarded after completing “Sparks Fly”.
- Lure Grenade Blueprint: Rewarded after completing “Greasing Her Palms”.
- Burletta Blueprint: Rewarded after completing “Industrial Espionage”.
- Hullcracker Blueprint (and Launcher Ammo Blueprint): Rewarded after completing “The Major’s Footlocker”.
Alas, that’s only 4 Blueprints out of a total of 75 to unlock, so for the vast majority you will need to find them yourself during a raid. If you’re intent on farming Blueprints, then it’s best to equip yourself with cheap gear in case you lose it, but don’t use a free loadout because then you won’t get a safe pocket to stash any new Blueprint you find. No pain in Arc Raiders is sharper than failing to extract with a new Blueprint you’ve been after for a dozen hours already.

One of the best ways to get Blueprints is by hitting three stars on all five Trials every week. |Image credit:Rock Paper Shotgun/Embark Studios
Blueprints obtained from Trials
One of the very best ways to get Blueprints is as rewards for completing Trials in Arc Raiders. Trials are unlocked from Level 15 onwards, and allow you to earn rewards by focusing on certain tasks over the course of several raids. For example, one Trial might task you with dealing damage to Hornets, while another might challenge you to loot Supply Drops.
Trials refresh on a weekly basis, with a new week bringing five new Trials. Each Trial can offer up to three rewards after passing certain score milestones, and it’s possible to receive very high level loot from these reward crates - including Blueprints. So if you want to unlock as many Blueprints as possible, you should make a point of completing as many Trials as possible each week.
Best Blueprint farming locations
The very best way to get Blueprints is to frequent specific areas of the maps which combine high-tier loot pools with the right types of containers to search. Here are my recommendations for where to find Blueprints on every map, so you can always keep the search going for new crafting recipes to unlock.

Image credit:Rock Paper Shotgun/Embark Studios
Dam Battlegrounds
The best places to farm Blueprints on Dam Battlegrounds are the Control Tower, Power Generation Complex, Ruby Residence, and Pale Apartments . The first two regions, despite only being marked on the map as mid-tier loot, contain a phenomenal number of containers to loot. The Control Tower can also contain a couple of high-tier Security Lockers - though of course, you’ll need to have unlocked the Security Breach skill at the end of the Survival tree.
There’s also a lot of reporting amongst the playerbase that the Residential areas in the top-left of the map - Pale Apartments and Ruby Residence - give you a comparatively strong chance of finding Blueprints. Considering their size, there’s a high density of containers to loot in both locations, and they also have the benefit of being fairly out of the way. So you’re more likely to have all the containers to yourself.
Buried City
The best Blueprint farming locations on Buried City are the Santa Maria Houses, Grandioso Apartments, Town Hall, and the various buildings of the New District . Grandioso Apartments has a lower number of containers than the rest, but a high chance of spawning weapon cases - which have good Blueprint drop rates. The others are high-tier loot areas, with plenty of lootable containers - including Security Lockers.
Spaceport
The best places to find Blueprints on Spaceport are the Arrival and Departure Buildings, as well as Control Tower A6 and the Launch Towers . All these areas are labelled as high-value loot regions, and many of them are also very handily connected to one another by the Spaceport wall, which you can use to quickly run from one area to the next. At the tops of most of these buildings you’ll find at least one Security Locker, so this is an excellent farming route for players looking to find Blueprints.
The downside to looting Blueprints on Spaceport is that all these areas are hotly contested, particularly in Duos and Squads. You’ll need to be very focused and fast in order to complete the full farming route.

Image credit:Rock Paper Shotgun/Embark Studios
Blue Gate
Blue Gate tends to have a good chance of dropping Blueprints, potentially because it generally has a high number of containers which can hold lots of items; so there’s a higher chance of a Blueprint spawning in each container. In my experience, the best Blueprint farming spots on Blue Gate are Pilgrim’s Peak, Raider’s Refuge, the Ancient Fort, and the Underground Complex beneath the Warehouse .
All of these areas contain a wealth of containers to loot. Raider’s Refuge has less to loot, but the majority of the containers in and around the Refuge are raider containers, which have a high chance of containing Blueprints - particularly during major events.
Stella Montis
On the whole, Stella Montis seems to have a very low drop rate for Blueprints (though a high chance of dropping other high-tier loot). If you do want to try farming Blueprints on this map, the best places to find Blueprints in Stella Montis are Medical Research, Assembly Workshop, and the Business Center . These areas have the highest density of containers to loot on the map.
In addition to this, the Western Tunnel has a few different Security Lockers to loot, so while there’s very little to loot elsewhere in this area of the map, it’s worth hitting those Security Lockers if you spawn there at the start of a match.
That wraps up this primer on how to get all the Blueprints in Arc Raiders as quickly as possible. With the Expedition system constantly resetting a large number of players’ Blueprints, it’s more important than ever to have the most up-to-date information on where to find all these Blueprints.
While you’re here, be sure to check out our Arc Raiders best guns tier list , as well as our primers on the best skills to unlock and all the different Field Depot locations on every map.

ARC Raiders
PS5 , Xbox Series X/S , PC
Rock Paper Shotgun is better when you sign in
Sign in and join us on our journey to discover strange and compelling PC games.
