Black Myth Wukong: Chapter 1 walkthrough
Here’s a complete guide to Chapter 1, including how to unlock the Ancient Guanyin Temple

Image credit:Rock Paper Shotgun/Game Science

Looking for a Black Myth: Wukong Chapter 1 walkthrough? Chapter 1 of Black Myth: Wukong serves as an excellent introduction to the game’s mechanics, giving players the chance to master fundamental staff skills as they take the Destined One through the Forest of Wolves towards the lair of Black Bear Guai.
While it’s one of the smaller Chapters in the game, Chapter 1 is still chock full of twists and turns, including one location - the Ancient Guanyin Temple - that is only accessible after ringing three hidden Bells. In this guide, we’ll present a full rundown of everything you need to do to complete Chapter 1 of Black Myth: Wukong , including how to unlock the Ancient Guanyin Temple and unearth all of the secret bosses nearby.
Our walkthrough hub has links to all of our Black Myth: Wukong guides. You can also navigate between our Chapter walkthroughs below: Chapter 1 walkthrough (you’re here!) Chapter 2 walkthrough Chapter 3 walkthrough Chapter 4 walkthrough Chapter 5 walkthrough Chapter 6 walkthrough

Black Myth: Wukong Chapter 1 walkthrough
Chapter 1 of Black Myth: Wukong is entitled Black Cloud, Red Fire . It is preceded by a brief prologue, which we’ve included here for the sake of completion, and divided into the following areas - click on each name to be taken to the section of the walkthrough where that area begins. You should also check out our guide to all bosses in Chapter 1 for greater details on fighting the foes in your path.
- Prologue
- Forest of Wolves
- Bamboo Grove
- Ancient Guanyin Temple (optional)
- Black Wind Cave
You can also use this Chapter 1 map to keep track of your surroundings and any bosses or collectibles you may have missed while you follow along with the below walkthrough:

Use thisChapter 1 mapto keep track of where you are and what you’ve accomplished so far in the first phase of your Black Myth: Wukong journey. |Image credit:Rock Paper Shotgun
0. Prologue walkthrough
Black Myth: Wukong kicks off with a prologue that’s about fifteen minutes long and features an epic confrontation between Sun Wukong in his prime and the gods of the Celestial Court. You’ll be given control of Wukong as he fights Erlang Shan, and since you have no health bar, there’s no way you can fail this confrontation. As you get your grips on the game’s moveset, it’s worth taking note of Wukong’s special moves, like A Pluck of Many and Cloud Step, as these are the same techniques that your Destined One will use later in the game. And don’t worry, you’ll be able to confront Erlang for a round two eventually. (See our Chapter 6 walkthrough if you’re curious…)
1. Forest of Wolves walkthrough
Forest of Wolves: Front Hills
The proper start of Black Myth: Wukong begins as the Destined One appears from the form of a peach in the middle of the Forest of Wolves. Smack the Wolf Guais in front of you and go up the steps. At the fork in the road, go left to fight a Wolf Scout guarding a chest. To your right is a Wolf Stalwart; defeat him and you’ll be able to unlock the “Front Hills” Keeper’s Shrine.
From the Shrine, move forward and tackle the wolves in your path. Cross the bridge and keep moving to reach the Bullguard . If you’d rather explore the river, follow it for a brief ways to face a Crow Diviner, who’ll be slightly tougher than the wolves you’ve faced thus far.
Also of note near the top of a waterfall in this area is a round boulder guarded by a macaque - interact with it to get the Skandha of Form , the first of several Skandhas scattered throughout Black Myth: Wukong’s Chapters. You’ll need to collect all of these to unlock a final power-up, so get started now - our Skandha locations guide has more concrete info on the Skandha of Form’s exact location.

Black Myth: Wukong’s very first boss, Bullguard, is just an excuse to get the Immobilize spell. |Image credit:Rock Paper Shotgun/Game Science
Fighting the Bullguard is a tutorial on how to dodge and freeze enemies more than anything else. Once you’ve won and gotten the Immobilize spell, go past the gate and head left at the fork in the road to make it to the first Meditation Spot of the game, The Arbor . You can go through the nearby cave to reach the next Shrine.
Forest of Wolves: Outside the Forest
After interacting with the “Outside the Forest” Shrine, you’ll be temporarily turned into a cicada and encouraged to explore the nearby area, which is large and contains a fair number of secrets. You’ll probably notice Wandering Wight , the large-headed Yaoguai muddling about across the bridge not far from the Shrine. Wandering Wight is the first boss to serve up a sizable challenge, and you can return back to defeat him at any time prior to defeating Elder Jinchi , the secret boss of Chapter 1. However, if you’re itching to put everything you’ve learned about dodging thus far to the test, go ahead and take him on immediately - just be prepared to roll past his shockwaves!

Wandering Wight is here to give you your first dose of dying and trying again and again. It’s worth practising your skills on him, trust us. |Image credit:Rock Paper Shotgun/Game Science
After defeating Wandering Wight, you’ll free his Spirit, which is one of the best in the game. Examining it will give you the message " Cannot absorb Spirits without guidance ," but don’t worry - you’ll be able to get this awesome Spirit soon enough. In the meantime, explore the area across the bridge and opposite Wandering Wight to encounter Guangzhi , a wolf Guai with a flaming double-edged polearm.
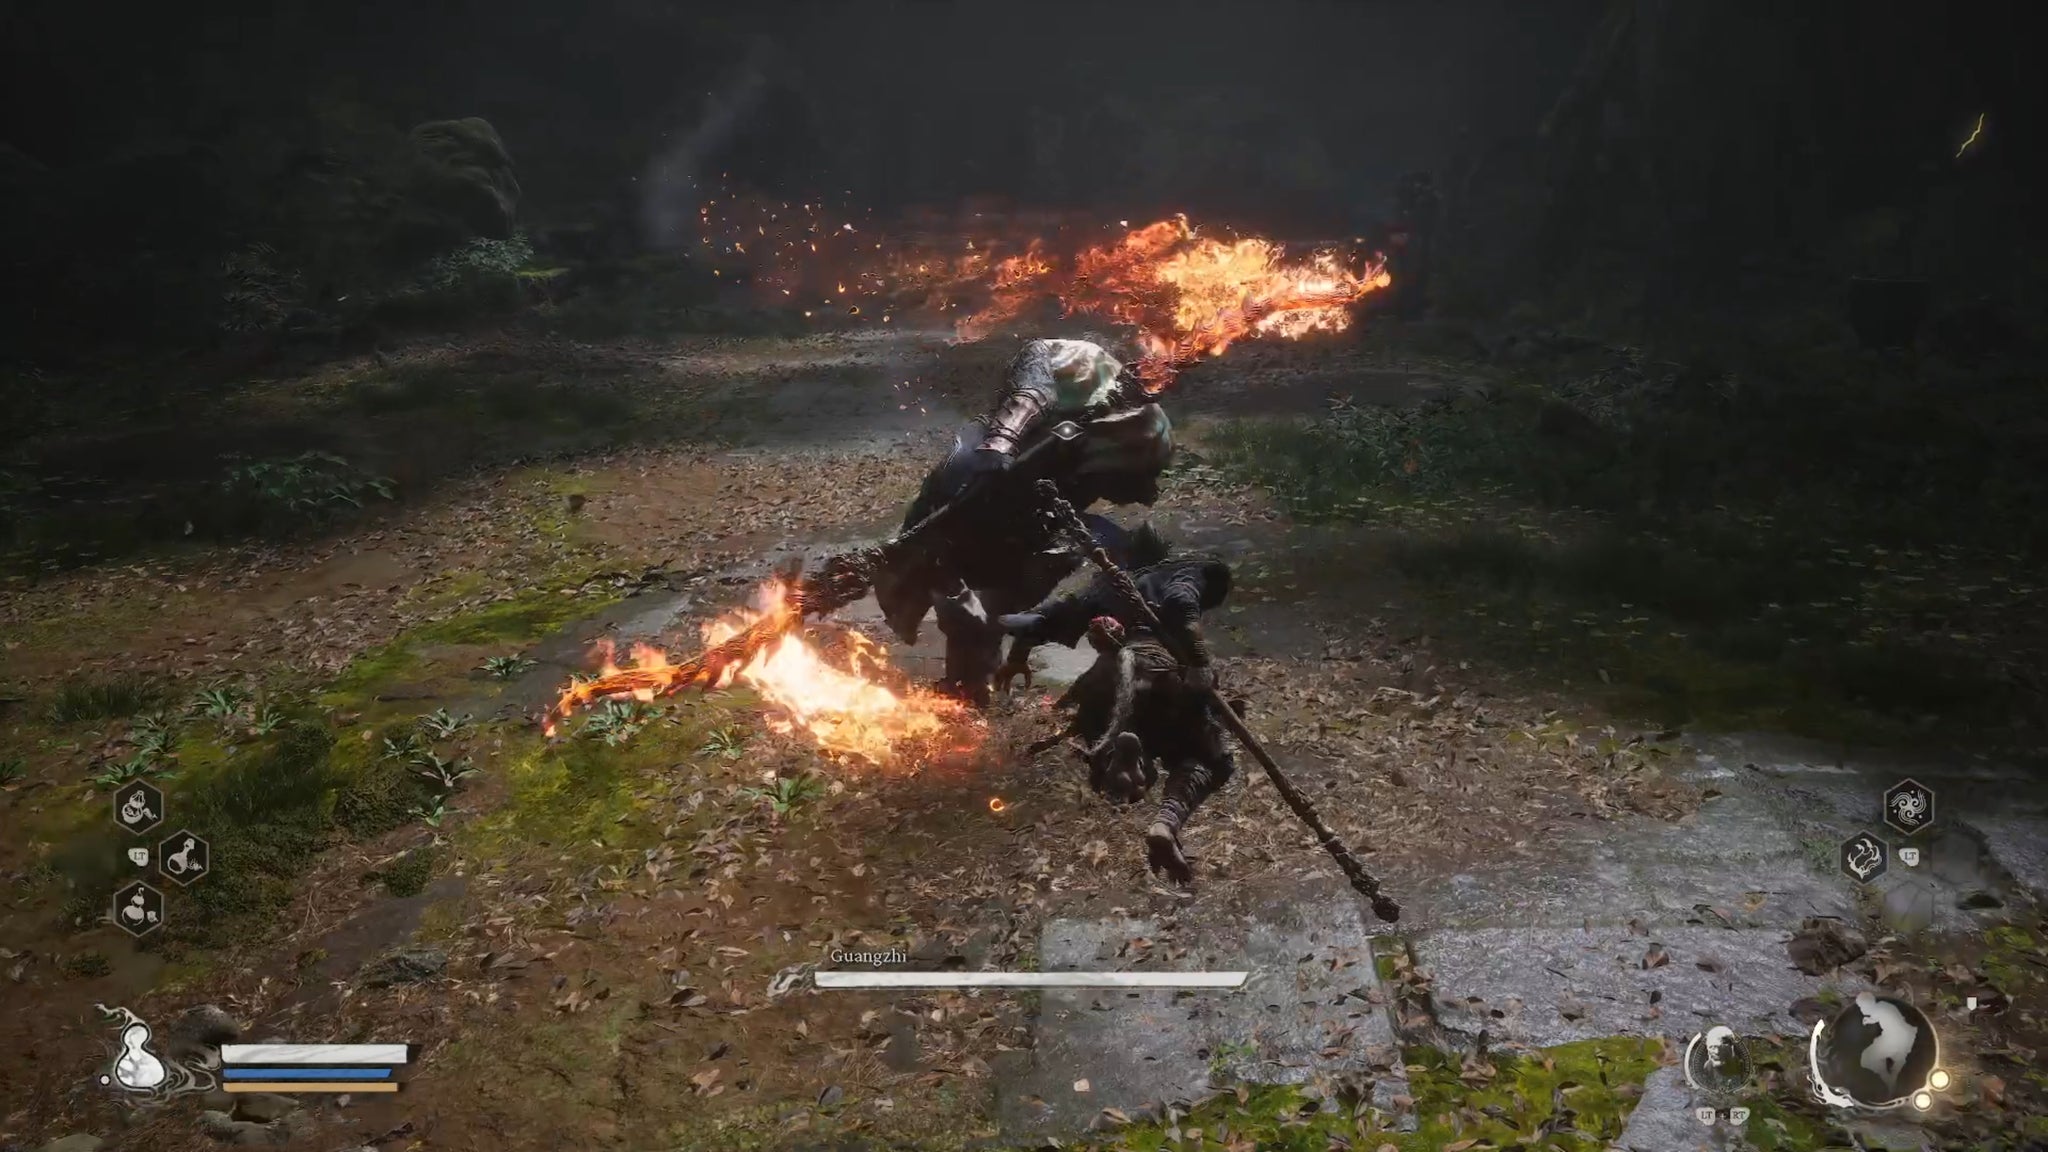
Like most of these early fights, Guangzhi is a great way to perfect your dodge skills before tougher bosses later down the line. |Image credit:Rock Paper Shotgun/Game Science
Guangzhi is very fast, so stay aggressive, dodge his charge, and stop him in his tracks with well-timed usages of Immobilize. When he’s down, you’ll unlock the Red Tides Transformation, which lets you transform into Guangzhi and unleash heavy damage. This is one of the most useful early skills in Black Myth: Wukong, so be sure to use it generously.
Before leaving Guangzhi’s arena, be sure to ring the Bell attached to a small shrine, which is necessary to unlock Chapter 1’s hidden area. Then retrace your steps. If you go back to where you found Wandering Wight and follow the path through a tunnel and across wooden platforms, you’ll end up at the “Guanyin Temple” Shrine.
As an aside, you may have noticed a giant waterfall in this area marked by a Buddha statue. This is a secret pathway to the boss Red Loong , first of the hidden dragon bosses scattered throughout the first four chapters of Black Myth: Wukong. In order to open up the waterfall, you need the Loong Scale, a secret item from Chapter 2. Our Chapter 1 boss guide on Red Loong has the details on acquiring the scale, but once you’ve got it later in the game, return here and interact with the waterfall to start the fight. Beware of Red Loong’s lightning strikes, and target the vessels on his back when he stumbles in order to deal big damage.
If this is your first run through Chapter 1, you won’t be able to fight this guy until you’re well into Chapter 2. His difficulty is on par with Chapter 2’s bosses, so it’s for the best. |Image credit:Rock Paper Shotgun/Game Science
Forest of Wolves: Guanyin Temple
After saving at the “Guanyin Temple” Shrine, enter the temple complex and loot it of all items. As you proceed deeper, a giant wolf will lunge from the rooftops and challenge you. This is Lingxuzi , the first Yaoguai King in the game. Fearsome he might appear, but Lingxuzi is a prime target for your new Red Tides transformation, and he isn’t as hard as he looks as long as you avoid his bite and two-part swipe combo.
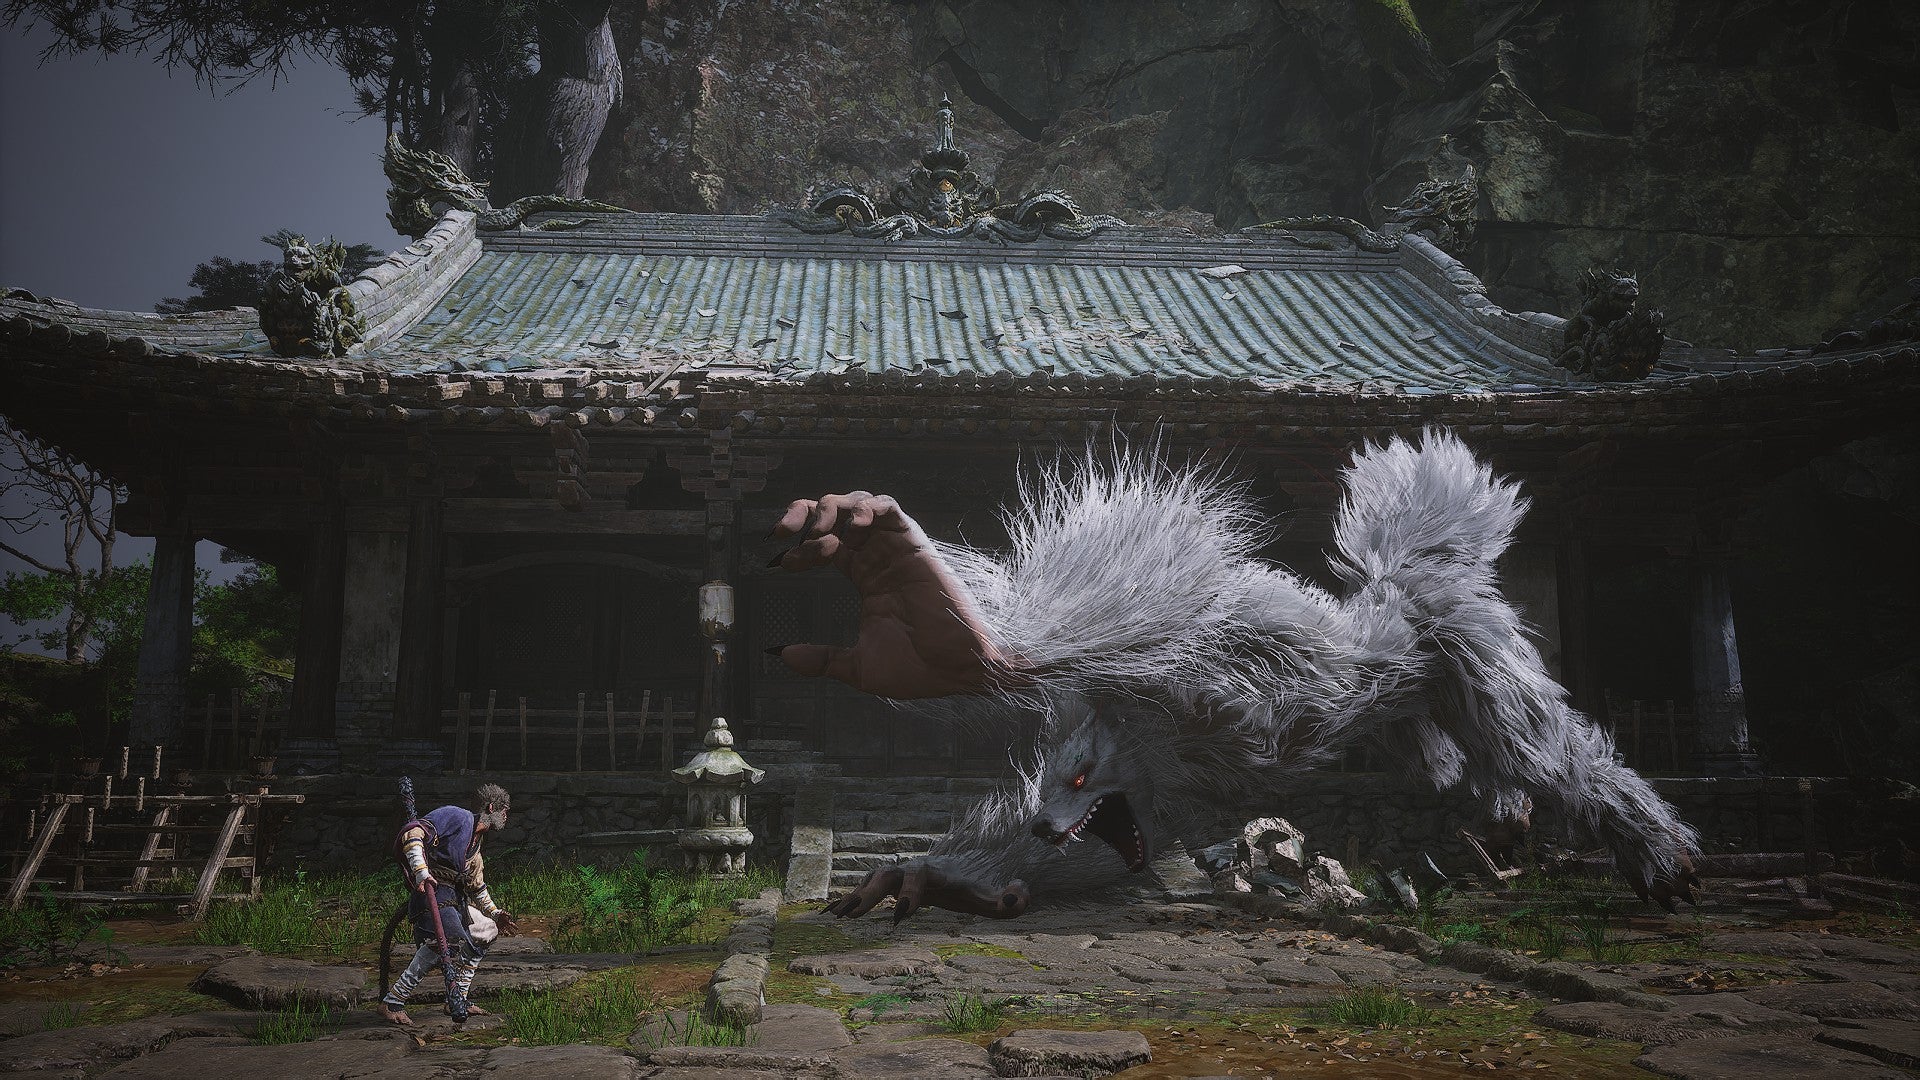
Lingxuzi featured in the first gameplay footage of Black Myth: Wukong back in 2020, and amazed viewers with his fluffy fur, which doesn’t appear to have been downgraded in the final game. |Image credit:Rock Paper Shotgun/Game Science
After roasting Lingxuzi, be sure to search the temple for a Celestial Jade Lotus Pill, and then leave via the rear exit to clear the Forest of Wolves and reach the “Back Hills” Shrine.
2. Bamboo Grove walkthrough
Bamboo Grove: Back Hills
From the “Back Hills” Shrine, veer left to find a cave with The Cavern Meditation Spot inside. The horse Guai Ma Tianba will also be here. You’ll need to find Ma in five of the game’s six chapters in order to unlock his Transformation, so talk with him and get to know the guy now.
Following this, exit the cave and follow the path. You can jump into the water below to grab some Will, but in order to advance you want to go up the stairs and cross the bridge to reach the proper start of the Bamboo Grove. Be sure to open the gazebo chest along the way to get yourself a whole bunch of medicines.
Bamboo Grove: Snake Trail
Right by the “Snake Trail” Shrine is a Crow Diviner who you’ll need to take out. After saving and resting, climb the stairs and you’ll see a small alcove with an old man reciting to himself. This is Yuan Shoucheng, a sage from the Journey to the West novel who will teach you how to cultivate spirits like Pokémon. After talking with him, go back to the “Snake Trail” Shrine and choose Retrieve Spirits to get access to the Wandering Wight Spirit, as long as you defeated the big-headed boss a ways back.
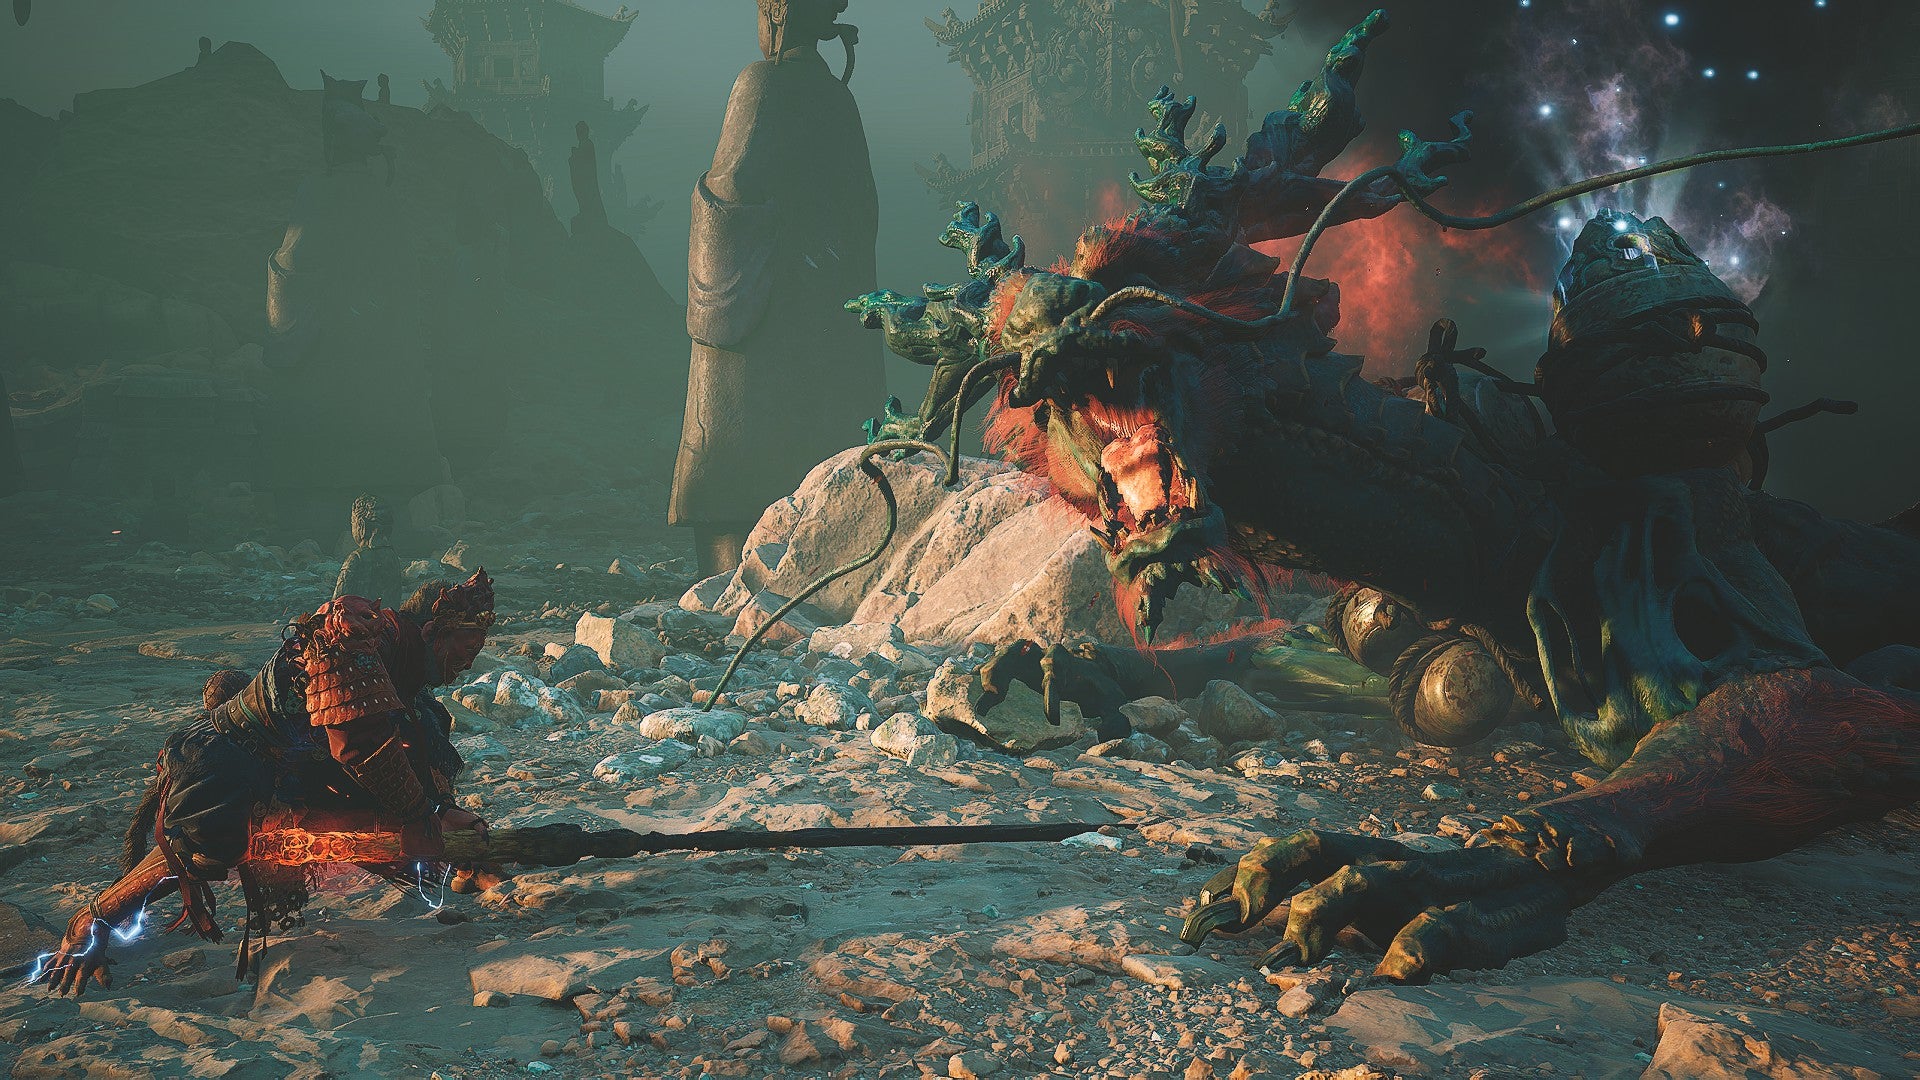
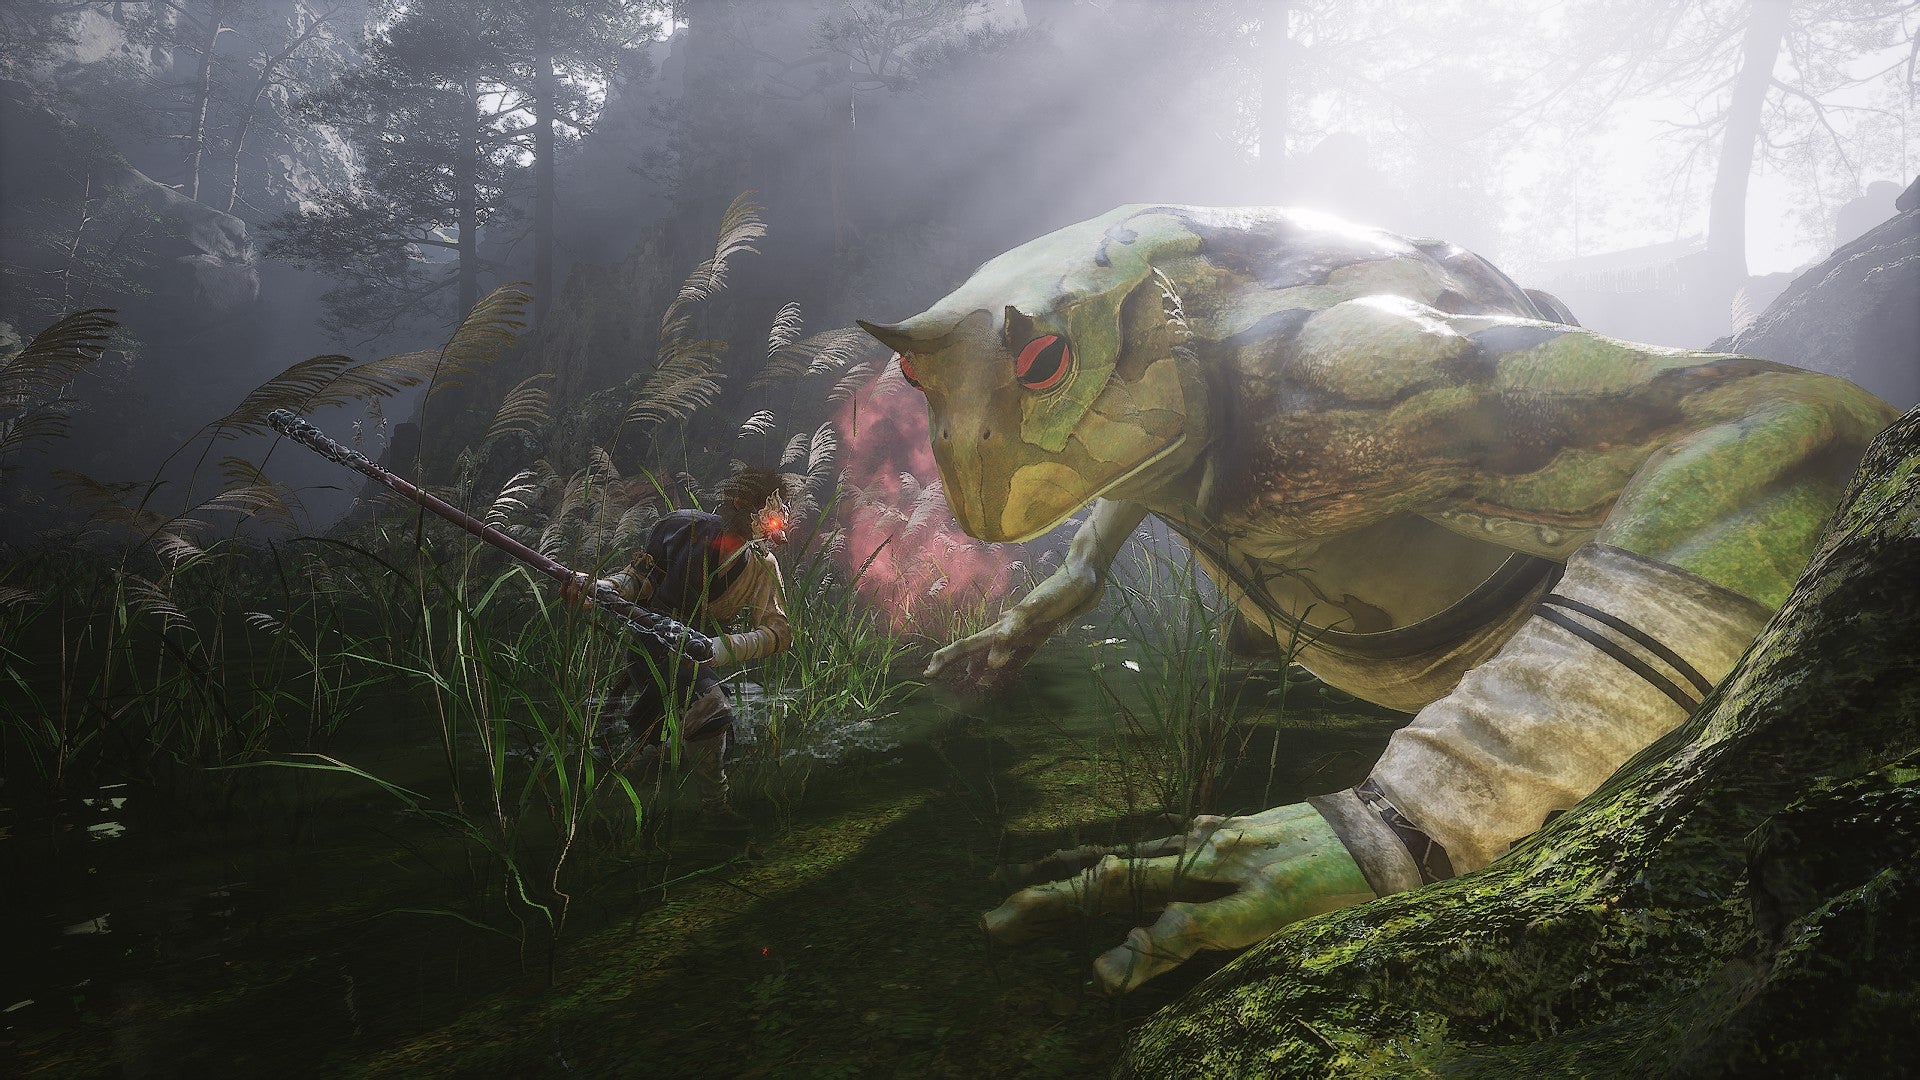
With your Spirits in tow, you’re ready for the tougher Yaoguai in this area. Cross the nearby bridge and follow the path until you get to a wooden sloped platform. Jump off this platform to the right and head into the large part of the river to find Baw-Li-Guhh-Lang , the first of Black Myth: Wukong’s optional frog bosses. Baw-Li-Guhh-Lang ’s not too hard, but his long tongue lashes have mighty range and there are a few other Croaky enemies in the area who may interrupt the fight.
You’ll face many frog Yaoguai Chiefs in your quest, and this big fella is the first. |Image credit:Rock Paper Shotgun/Game Science
Following this fight, retrace your steps to the main path and proceed forward until you enter a bamboo clearing. Beware, as this place is full of wandering Snake Patrollers and Skeletal Snakes who will rise up to ambush you if you get close. Go to the north of the clearing and enter the pathway marked by torches to start a fight with Guangmou , an old colleague of Guangzhi’s.

Dig into the Journal entries to learn of the shared history between Guangmou and Guangzhi, and their relationship with Elder Jinchi. |Image credit:Rock Paper Shotgun/Game Science
Guangmou uses ranged attacks and poison sprays to knock down your health, so be ready to dodge. For some fun dialogue, activate Red Tides during the fight. After he’s dead, be sure to ring the Bell located up the small set of stairs in Guangmou’s arena. Then exit via the other archway to make it to the “Marsh of the White Mist” Shrine.
Bamboo Grove: Marsh of the White Mist
You can grab a Luojia Fragrant Vine near the Shrine, and as you follow the platforms downwards, you’ll see a Snake Patroller attacking Shen Monkey, the first of the game’s NPC shopkeepers. Help him out and he’ll guide you into a cave and offer to upgrade your Gourds and Drinks. Once you’ve gotten a boost, leave and continue following the platforms to emerge upon a watery area. Whiteclad Noble awaits you at the end of this lake.

Whiteclad Noble will probably serve as a bit of a wall in your progress of Chapter 1, but don’t give up! |Image credit:Rock Paper Shotgun/Game Science
Whiteclad Noble tends to give new players quite a struggle, due to his serpentine moves, hard-hitting attacks, and vicious second form. Be wary of his reach and rely on fully charged Pillar Stance heavy attacks; you can also repeat the reliable combo of Immobilizing him, smashing him with Wandering Wight, and then following this up with Red Tides to pile on the damage before he can hurt you.
After the fight, you’ll get some ominous dialogue about all of the Bells in Chapter 1. Go to the left side of the lake to find a pathway that leads to the final Bell. Ring the Bell and you’ll be transported to the Ancient Guanyin Temple.
3. Ancient Guanyin Temple walkthrough
This eerie temple is home to Elder Jinchi , who shares an ominous connection with Wandering Wight and plays an important role in the chapter’s main story. Fighting Elder Jinchi is very much like the battle with Wandering Wight, though at certain points in the combat Jinchi will float into the air and start siphoning off the life force of nearby corpses. When this happens, attack the corpses as fast as you can to prevent them from restoring Jinchi’s health.

Elder Jinchi is the tragic hidden boss of Chapter 1. For the sake of poetic justice, use Wandering Wight against him. |Image credit:Rock Paper Shotgun/Game Science
Once Jinchi is gone, you’ll be transported back to the Bell by the Whiteclad Noble arena and you’ll have the Fireproof Mantle Vessel , which will help immeasurably in the upcoming fight against the final boss of Chapter 1.
3. Black Wind Cave walkthrough
Black Wind Cave: Cave Interior
Exit the Whiteclad Noble arena via the cave entrance that the noble was guarding. A fork in the road will greet you; the left path holds a Celestial Taiyi Pill and the last Meditation Spot of Chapter 1, The Cliff . The right path leads to the “Cave Interior” Shrine.

Black Wind King is a big dude, but don’t be fooled into thinking he’s slow - his invincible wind gust transformation is fast and will destroy you if you aren’t cautious. |Image credit:Rock Paper Shotgun/Game Science
Go forward from the Shine and you’ll meet Black Wind King , the humanoid form of Black Bear Guai. Probably the hardest foe you’ve faced thus far, Black Wind King has a tricky ability where he turns into an invincible wind gust and charges at you. The timing to dodge these wind blasts is tough to nail down, but you’d best become familiar with it now, as the upcoming final boss uses the same tactic. Once you’ve beaten Black Wind King, you’ll get Cloud Step , a very handy spell that lets you transform into mist, dodge enemy blows, and launch a surprise counterattack.
Black Wind Cave: Outside the Cave
The “Outside the Cave” Shrine lies beyond the Black Wind King boss area. From here, you’ve got to trek to the pinnacle of the mountain, fighting foes all along the way. This is a long climb, and the most annoying enemies in your path are bound to be the Wolf Archers who harass you from afar. Don’t be afraid to use your new Cloud Step spell when you need a breather from all the action.
The final Shrine of Chapter 1, “Bodhi Peak”, awaits you at the end of your ascent.
Black Wind Cave: Bodhi Peak
Fire’s everywhere, and Black Bear Guai is here to take you on. He’s a tough customer who delivers huge strikes from his big bear paws, though you should have some idea of what to expect after the last time you tangoed.
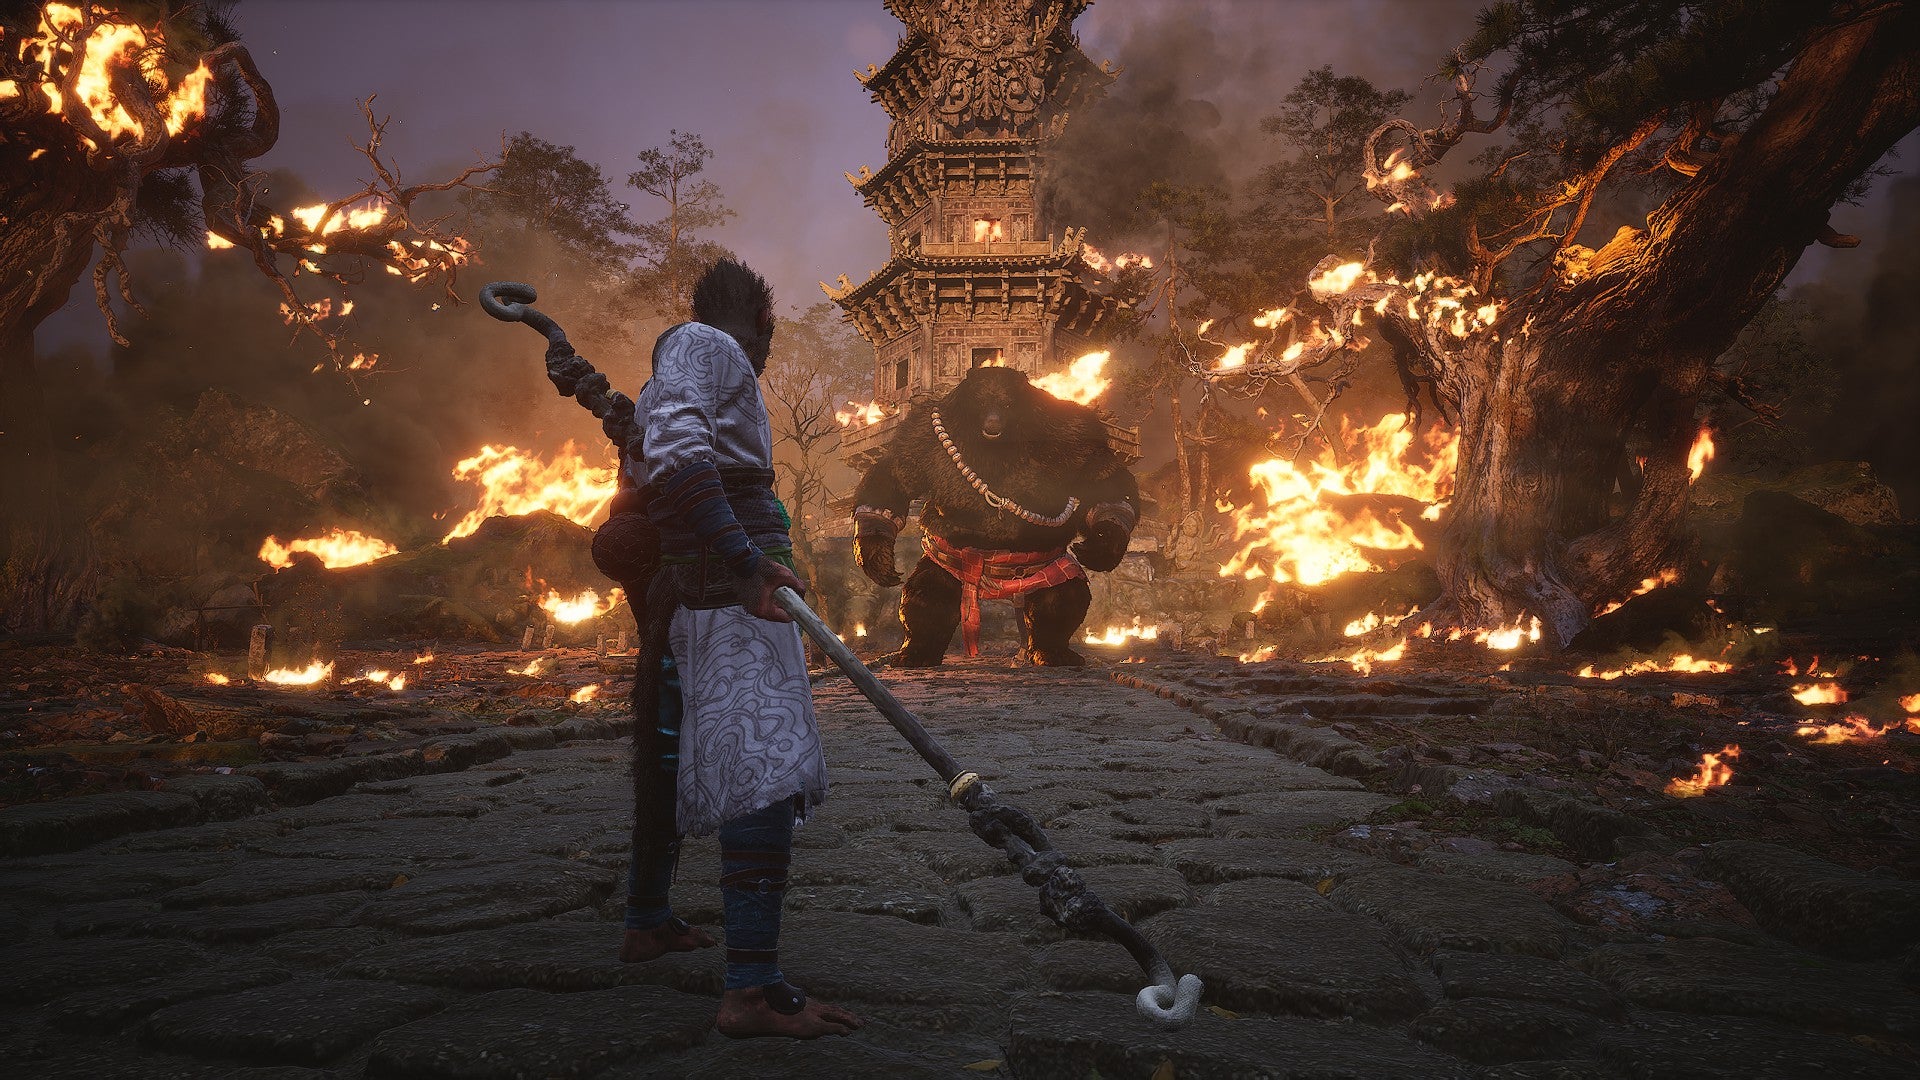
All your training in Chapter 1 has led to this fight! Use the Fireproof Mantle Vessel and beware the flames erupting from the ground. |Image credit:Rock Paper Shotgun/Game Science
Fighting Black Bear Guai is much easier if you have the Fireproof Mantle Vessel. Activate it right when he slams the ground and starts spamming flames all across the arena. He’ll then turn into a gust of fiery wind and throw himself at you; dodge like crazy once this happens and retaliate as soon as he goes back into bear form.
Congratulations on completing Chapter 1 of Black Myth: Wukong - the denizens of the Forest of Wolves will be speaking your name for a long time to come! For a more detailed look at all of the Yaoguai in every chapter of this expansive game, take a deep dive into our guide to all bosses in Black Myth: Wukong. If you’d prefer a quick rundown of places to level up and rest, check out our guides to all Keeper’s Shrine locations and all Meditation Spots . And last but certainly not least is our guide to all Journal entries , which will help you make sense of Black Myth: Wukong’s awesome take on Chinese legend.
Black Myth: Wukong
PS5 , PC
Rock Paper Shotgun is better when you sign in
Sign in and join us on our journey to discover strange and compelling PC games.

All 75 Arc Raiders Blueprints and where to get them
These areas have the highest chance of giving you Blueprints

Image credit:Rock Paper Shotgun/Embark Studios

Looking for more Arc Raiders Blueprints? It’s a special day when you find a Blueprint, as they’re among the most valuable items in Arc Raiders. If you find a Blueprint that you haven’t already found, then you must make sure you hold onto it at all costs, because Blueprints are the key to one of the most important and powerful systems of meta-progression in the game.
This guide aims to be the very best guide on Blueprints you can find, starting with a primer on what exactly they are and how they work in Arc Raiders, before delving into exactly where to get Blueprints and the very best farming spots for you to take in your search.
We’ll also go over how to get Blueprints from other unlikely activities, such as destroying Surveyors and completing specific quests. And you’ll also find the full list of all 75 Blueprints in Arc Raiders on this page (including the newest Blueprints added with the Cold Snap update , such as the Deadline Blueprint and Firework Box Blueprint), giving you all the information you need to expand your own crafting repertoire.
In this guide:
- What are Blueprints in Arc Raiders?
- Full Blueprint list: All crafting recipes
- Where to find Blueprints in Arc Raiders Blueprints obtained from quests Blueprints obtained from Trials Best Blueprint farming locations

What are Blueprints in Arc Raiders?
Blueprints in Arc Raiders are special items which, if you manage to extract with them, you can expend to permanently unlock a new crafting recipe in your Workshop. If you manage to extract from a raid with an Anvil Blueprint, for example, you can unlock the ability to craft your very own Anvil Pistol, as many times as you like (as long as you have the crafting materials).
To use a Blueprint, simply open your Inventory while in the lobby, then right-click on the Blueprint and click “Learn And Consume” . This will permanently unlock the recipe for that item in your Workshop. As of the Stella Montis update, there are allegedly 75 different Blueprints to unlock - although only 68 are confirmed to be in the game so far. You can see all the Blueprints you’ve found and unlocked by going to the Workshop menu, and hitting “R” to bring up the Blueprint screen.
It’s possible to find duplicates of past Blueprints you’ve already unlocked. If you find these, then you can either sell them, or - if you like to play with friends - you can take it into a match and gift it to your friend so they can unlock that recipe for themselves. Another option is to keep hold of them until the time comes to donate them to the Expedition.
Full Blueprint list: All crafting recipes
Below is the full list of all the Blueprints that are currently available to find in Arc Raiders, and the crafting recipe required for each item:
| Blueprint | Type | Recipe | Crafted At |
|---|---|---|---|
| Bettina | Weapon | 3x Advanced Mechanical Components 3x Heavy Gun Parts 3x Canister | Gunsmith 3 |
| Blue Light Stick | Quick Use | 3x Chemicals | Utility Station 1 |
| Aphelion | Weapon | 3x Magnetic Accelerator 3x Complex Gun Parts 1x Matriarch Reactor | Gunsmith 3 |
| Combat Mk. 3 (Flanking) | Augment | 2x Advanced Electrical Components 3x Processor | Gear Bench 3 |
| Combat Mk. 3 (Aggressive) | Augment | 2x Advanced Electrical Components 3x Processor | Gear Bench 3 |
| Complex Gun Parts | Material | 2x Light Gun Parts 2x Medium Gun Parts 2x Heavy Gun Parts | Refiner 3 |
| Fireworks Box | Quick Use | 1x Explosive Compound 3x Pop Trigger | Explosives Station 2 |
| Gas Mine | Mine | 4x Chemicals 2x Rubber Parts | Explosives Station 1 |
| Green Light Stick | Quick Use | 3x Chemicals | Utility Station 1 |
| Pulse Mine | Mine | 1x Crude Explosives 1x Wires | Explosives Station 1 |
| Seeker Grenade | Grenade | 1x Crude Explosives 2x ARC Alloy | Explosives Station 1 |
| Looting Mk. 3 (Survivor) | Augment | 2x Advanced Electrical Components 3x Processor | Gear Bench 3 |
| Angled Grip II | Mod | 2x Mechanical Components 3x Duct Tape | Gunsmith 2 |
| Angled Grip III | Mod | 2x Mod Components 5x Duct Tape | Gunsmith 3 |
| Hullcracker | Weapon | 1x Magnetic Accelerator 3x Heavy Gun Parts 1x Exodus Modules | Gunsmith 3 |
| Launcher Ammo | Ammo | 5x Metal Parts 1x Crude Explosives | Workbench 1 |
| Anvil | Weapon | 5x Mechanical Components 5x Simple Gun Parts | Gunsmith 2 |
| Anvil Splitter | Mod | 2x Mod Components 3x Processor | Gunsmith 3 |
| ??? | ??? | ??? | ??? |
| Barricade Kit | Quick Use | 1x Mechanical Components | Utility Station 2 |
| Blaze Grenade | Grenade | 1x Explosive Compound 2x Oil | Explosives Station 3 |
| Bobcat | Weapon | 3x Advanced Mechanical Components 3x Light Gun Parts | Gunsmith 3 |
| Osprey | Weapon | 2x Advanced Mechanical Components 3x Medium Gun Parts 7x Wires | Gunsmith 3 |
| Burletta | Weapon | 3x Mechanical Components 3x Simple Gun Parts | Gunsmith 1 |
| Compensator II | Mod | 2x Mechanical Components 4x Wires | Gunsmith 2 |
| Compensator III | Mod | 2x Mod Components 8x Wires | Gunsmith 3 |
| Defibrillator | Quick Use | 9x Plastic Parts 1x Moss | Medical Lab 2 |
| ??? | ??? | ??? | ??? |
| Equalizer | Weapon | 3x Magnetic Accelerator 3x Complex Gun Parts 1x Queen Reactor | Gunsmith 3 |
| Extended Barrel | Mod | 2x Mod Components 8x Wires | Gunsmith 3 |
| Extended Light Mag II | Mod | 2x Mechanical Components 3x Steel Spring | Gunsmith 2 |
| Extended Light Mag III | Mod | 2x Mod Components 5x Steel Spring | Gunsmith 3 |
| Extended Medium Mag II | Mod | 2x Mechanical Components 3x Steel Spring | Gunsmith 2 |
| Extended Medium Mag III | Mod | 2x Mod Components 5x Steel Spring | Gunsmith 3 |
| Extended Shotgun Mag II | Mod | 2x Mechanical Components 3x Steel Spring | Gunsmith 2 |
| Extended Shotgun Mag III | Mod | 2x Mod Components 5x Steel Spring | Gunsmith 3 |
| Remote Raider Flare | Quick Use | 2x Chemicals 4x Rubber Parts | Utility Station 1 |
| Heavy Gun Parts | Material | 4x Simple Gun Parts | Refiner 2 |
| Venator | Weapon | 2x Advanced Mechanical Components 3x Medium Gun Parts 5x Magnet | Gunsmith 3 |
| Il Toro | Weapon | 5x Mechanical Components 6x Simple Gun Parts | Gunsmith 1 |
| Jolt Mine | Mine | 1x Electrical Components 1x Battery | Explosives Station 2 |
| Explosive Mine | Mine | 1x Explosive Compound 1x Sensors | Explosives Station 3 |
| Jupiter | Weapon | 3x Magnetic Accelerator 3x Complex Gun Parts 1x Queen Reactor | Gunsmith 3 |
| Light Gun Parts | Material | 4x Simple Gun Parts | Refiner 2 |
| Lightweight Stock | Mod | 2x Mod Components 5x Duct Tape | Gunsmith 3 |
| Lure Grenade | Grenade | 1x Speaker Component 1x Electrical Components | Utility Station 2 |
| Medium Gun Parts | Material | 4x Simple Gun Parts | Refiner 2 |
| Torrente | Weapon | 2x Advanced Mechanical Components 3x Medium Gun Parts 6x Steel Spring | Gunsmith 3 |
| Muzzle Brake II | Mod | 2x Mechanical Components 4x Wires | Gunsmith 2 |
| Muzzle Brake III | Mod | 2x Mod Components 8x Wires | Gunsmith 3 |
| Padded Stock | Mod | 2x Mod Components 5x Duct Tape | Gunsmith 3 |
| Shotgun Choke II | Mod | 2x Mechanical Components 4x Wires | Gunsmith 2 |
| Shotgun Choke III | Mod | 2x Mod Components 8x Wires | Gunsmith 3 |
| Shotgun Silencer | Mod | 2x Mod Components 8x Wires | Gunsmith 3 |
| Showstopper | Grenade | 1x Advanced Electrical Components 1x Voltage Converter | Explosives Station 3 |
| Silencer I | Mod | 2x Mechanical Components 4x Wires | Gunsmith 2 |
| Silencer II | Mod | 2x Mod Components 8x Wires | Gunsmith 3 |
| Snap Hook | Quick Use | 2x Power Rod 3x Rope 1x Exodus Modules | Utility Station 3 |
| Stable Stock II | Mod | 2x Mechanical Components 3x Duct Tape | Gunsmith 2 |
| Stable Stock III | Mod | 2x Mod Components 5x Duct Tape | Gunsmith 3 |
| Tagging Grenade | Grenade | 1x Electrical Components 1x Sensors | Utility Station 3 |
| Tempest | Weapon | 3x Advanced Mechanical Components 3x Medium Gun Parts 3x Canister | Gunsmith 3 |
| Trigger Nade | Grenade | 2x Crude Explosives 1x Processor | Explosives Station 2 |
| Vertical Grip II | Mod | 2x Mechanical Components 3x Duct Tape | Gunsmith 2 |
| Vertical Grip III | Mod | 2x Mod Components 5x Duct Tape | Gunsmith 3 |
| Vita Shot | Quick Use | 2x Antiseptic 1x Syringe | Medical Lab 3 |
| Vita Spray | Quick Use | 3x Antiseptic 1x Canister | Medical Lab 3 |
| Vulcano | Weapon | 1x Magnetic Accelerator 3x Heavy Gun Parts 1x Exodus Modules | Gunsmith 3 |
| Wolfpack | Grenade | 2x Explosive Compound 2x Sensors | Explosives Station 3 |
| Red Light Stick | Quick Use | 3x Chemicals | Utility Station 1 |
| Smoke Grenade | Grenade | 14x Chemicals 1x Canister | Utility Station 2 |
| Deadline | Mine | 3x Explosive Compound 2x ARC Circuitry | Explosives Station 3 |
| Trailblazer | Grenade | 1x Explosive Compound 1x Synthesized Fuel | Explosives Station 3 |
| Tactical Mk. 3 (Defensive) | Augment | 2x Advanced Electrical Components 3x Processor | Gear Bench 3 |
| Tactical Mk. 3 (Healing) | Augment | 2x Advanced Electrical Components 3x Processor | Gear Bench 3 |
| Yellow Light Stick | Quick Use | 3x Chemicals | Utility Station 1 |
Note: The missing Blueprints in this list likely have not actually been added to the game at the time of writing, because none of the playerbase has managed to find any of them. As they are added to the game, I will update this page with the most relevant information so you know exactly how to get all 75 Arc Raiders Blueprints.
Where to find Blueprints in Arc Raiders
Below is a list of all containers, modifiers, and events which maximise your chances of finding Blueprints:
- Certain quests reward you with specific Blueprints .
- Completing Trials has a high chance of offering Blueprints as rewards.
- Surveyors have a decent chance of dropping Blueprints on death.
- High loot value areas tend to have a greater chance of spawning Blueprints.
- Night Raids and Storms may increase rare Blueprint spawn chances in containers.
- Containers with higher numbers of items may have a higher tendency to spawn Blueprints. As a result, Blue Gate (which has many “large” containers containing multiple items) may give you a higher chance of spawning Blueprints.
- Raider containers (Raider Caches, Weapon Boxes, Medical Bags, Grenade Tubes) have increased Blueprint drop rates. As a result, the Uncovered Caches event gives you a high chance of finding Blueprints.
- Security Lockers have a higher than average chance of containing Blueprints.
- Certain Blueprints only seem to spawn under specific circumstances: Tempest Blueprint only spawns during Night Raid events. Vulcano Blueprint only spawns during Hidden Bunker events. Jupiter and Equaliser Blueprints only spawn during Harvester events.

Raider Caches, Weapon Boxes, and other raider-oriented container types have a good chance of offering Blueprints. |Image credit:Rock Paper Shotgun/Embark Studios
Blueprints have a very low chance of spawning in any container in Arc Raiders, around 1-2% on average. However, there is a higher chance of finding Blueprints in particular container types. Specifically, you can find more Blueprints in Raider containers and security lockers.
Beyond this, if you’re looking for Blueprints you should focus on regions of the map which are marked as having particularly high-value loot. Areas such as the Control Tower in Dam Battlegrounds, the Arrival and Departure Buildings in Spaceport, and Pilgrim’s Peak in Blue Gate all have a better-than-average chance of spawning Blueprints somewhere amongst all their containers. Night Raids and Electromagnetic Storm events also increase the drop chances of certain Blueprints .
In addition to these containers, you can often loot Blueprints from destroyed Surveyors - the largest of the rolling ball ARC. Surveyors are more commonly found on the later maps - Spaceport and Blue Gate - and if one spawns in your match, you’ll likely see it by the blue laser beam that it casts into the sky while “surveying”.
Surveyors are quite well-armoured and will very speedily run away from you once it notices you, but if you can take one down then make sure you loot all its parts for a chance of obtaining certain unusual Blueprints.
Blueprints obtained from quests
One way in which you can get Blueprints is by completing certain quests for the vendors in Speranza. Some quests will reward you with a specific item Blueprint upon completion, so as long as you work through all the quests in Arc Raiders, you are guaranteed those Blueprints.
Here is the full list of all Blueprints you can get from quest rewards:
- Trigger Nade Blueprint: Rewarded after completing “Sparks Fly”.
- Lure Grenade Blueprint: Rewarded after completing “Greasing Her Palms”.
- Burletta Blueprint: Rewarded after completing “Industrial Espionage”.
- Hullcracker Blueprint (and Launcher Ammo Blueprint): Rewarded after completing “The Major’s Footlocker”.
Alas, that’s only 4 Blueprints out of a total of 75 to unlock, so for the vast majority you will need to find them yourself during a raid. If you’re intent on farming Blueprints, then it’s best to equip yourself with cheap gear in case you lose it, but don’t use a free loadout because then you won’t get a safe pocket to stash any new Blueprint you find. No pain in Arc Raiders is sharper than failing to extract with a new Blueprint you’ve been after for a dozen hours already.

One of the best ways to get Blueprints is by hitting three stars on all five Trials every week. |Image credit:Rock Paper Shotgun/Embark Studios
Blueprints obtained from Trials
One of the very best ways to get Blueprints is as rewards for completing Trials in Arc Raiders. Trials are unlocked from Level 15 onwards, and allow you to earn rewards by focusing on certain tasks over the course of several raids. For example, one Trial might task you with dealing damage to Hornets, while another might challenge you to loot Supply Drops.
Trials refresh on a weekly basis, with a new week bringing five new Trials. Each Trial can offer up to three rewards after passing certain score milestones, and it’s possible to receive very high level loot from these reward crates - including Blueprints. So if you want to unlock as many Blueprints as possible, you should make a point of completing as many Trials as possible each week.
Best Blueprint farming locations
The very best way to get Blueprints is to frequent specific areas of the maps which combine high-tier loot pools with the right types of containers to search. Here are my recommendations for where to find Blueprints on every map, so you can always keep the search going for new crafting recipes to unlock.

Image credit:Rock Paper Shotgun/Embark Studios
Dam Battlegrounds
The best places to farm Blueprints on Dam Battlegrounds are the Control Tower, Power Generation Complex, Ruby Residence, and Pale Apartments . The first two regions, despite only being marked on the map as mid-tier loot, contain a phenomenal number of containers to loot. The Control Tower can also contain a couple of high-tier Security Lockers - though of course, you’ll need to have unlocked the Security Breach skill at the end of the Survival tree.
There’s also a lot of reporting amongst the playerbase that the Residential areas in the top-left of the map - Pale Apartments and Ruby Residence - give you a comparatively strong chance of finding Blueprints. Considering their size, there’s a high density of containers to loot in both locations, and they also have the benefit of being fairly out of the way. So you’re more likely to have all the containers to yourself.
Buried City
The best Blueprint farming locations on Buried City are the Santa Maria Houses, Grandioso Apartments, Town Hall, and the various buildings of the New District . Grandioso Apartments has a lower number of containers than the rest, but a high chance of spawning weapon cases - which have good Blueprint drop rates. The others are high-tier loot areas, with plenty of lootable containers - including Security Lockers.
Spaceport
The best places to find Blueprints on Spaceport are the Arrival and Departure Buildings, as well as Control Tower A6 and the Launch Towers . All these areas are labelled as high-value loot regions, and many of them are also very handily connected to one another by the Spaceport wall, which you can use to quickly run from one area to the next. At the tops of most of these buildings you’ll find at least one Security Locker, so this is an excellent farming route for players looking to find Blueprints.
The downside to looting Blueprints on Spaceport is that all these areas are hotly contested, particularly in Duos and Squads. You’ll need to be very focused and fast in order to complete the full farming route.

Image credit:Rock Paper Shotgun/Embark Studios
Blue Gate
Blue Gate tends to have a good chance of dropping Blueprints, potentially because it generally has a high number of containers which can hold lots of items; so there’s a higher chance of a Blueprint spawning in each container. In my experience, the best Blueprint farming spots on Blue Gate are Pilgrim’s Peak, Raider’s Refuge, the Ancient Fort, and the Underground Complex beneath the Warehouse .
All of these areas contain a wealth of containers to loot. Raider’s Refuge has less to loot, but the majority of the containers in and around the Refuge are raider containers, which have a high chance of containing Blueprints - particularly during major events.
Stella Montis
On the whole, Stella Montis seems to have a very low drop rate for Blueprints (though a high chance of dropping other high-tier loot). If you do want to try farming Blueprints on this map, the best places to find Blueprints in Stella Montis are Medical Research, Assembly Workshop, and the Business Center . These areas have the highest density of containers to loot on the map.
In addition to this, the Western Tunnel has a few different Security Lockers to loot, so while there’s very little to loot elsewhere in this area of the map, it’s worth hitting those Security Lockers if you spawn there at the start of a match.
That wraps up this primer on how to get all the Blueprints in Arc Raiders as quickly as possible. With the Expedition system constantly resetting a large number of players’ Blueprints, it’s more important than ever to have the most up-to-date information on where to find all these Blueprints.
While you’re here, be sure to check out our Arc Raiders best guns tier list , as well as our primers on the best skills to unlock and all the different Field Depot locations on every map.

ARC Raiders
PS5 , Xbox Series X/S , PC
Rock Paper Shotgun is better when you sign in
Sign in and join us on our journey to discover strange and compelling PC games.
