Best Yasuke Mastery skills in Assassin’s Creed Shadows
Here are the best skills for Yasuke in AC Shadows
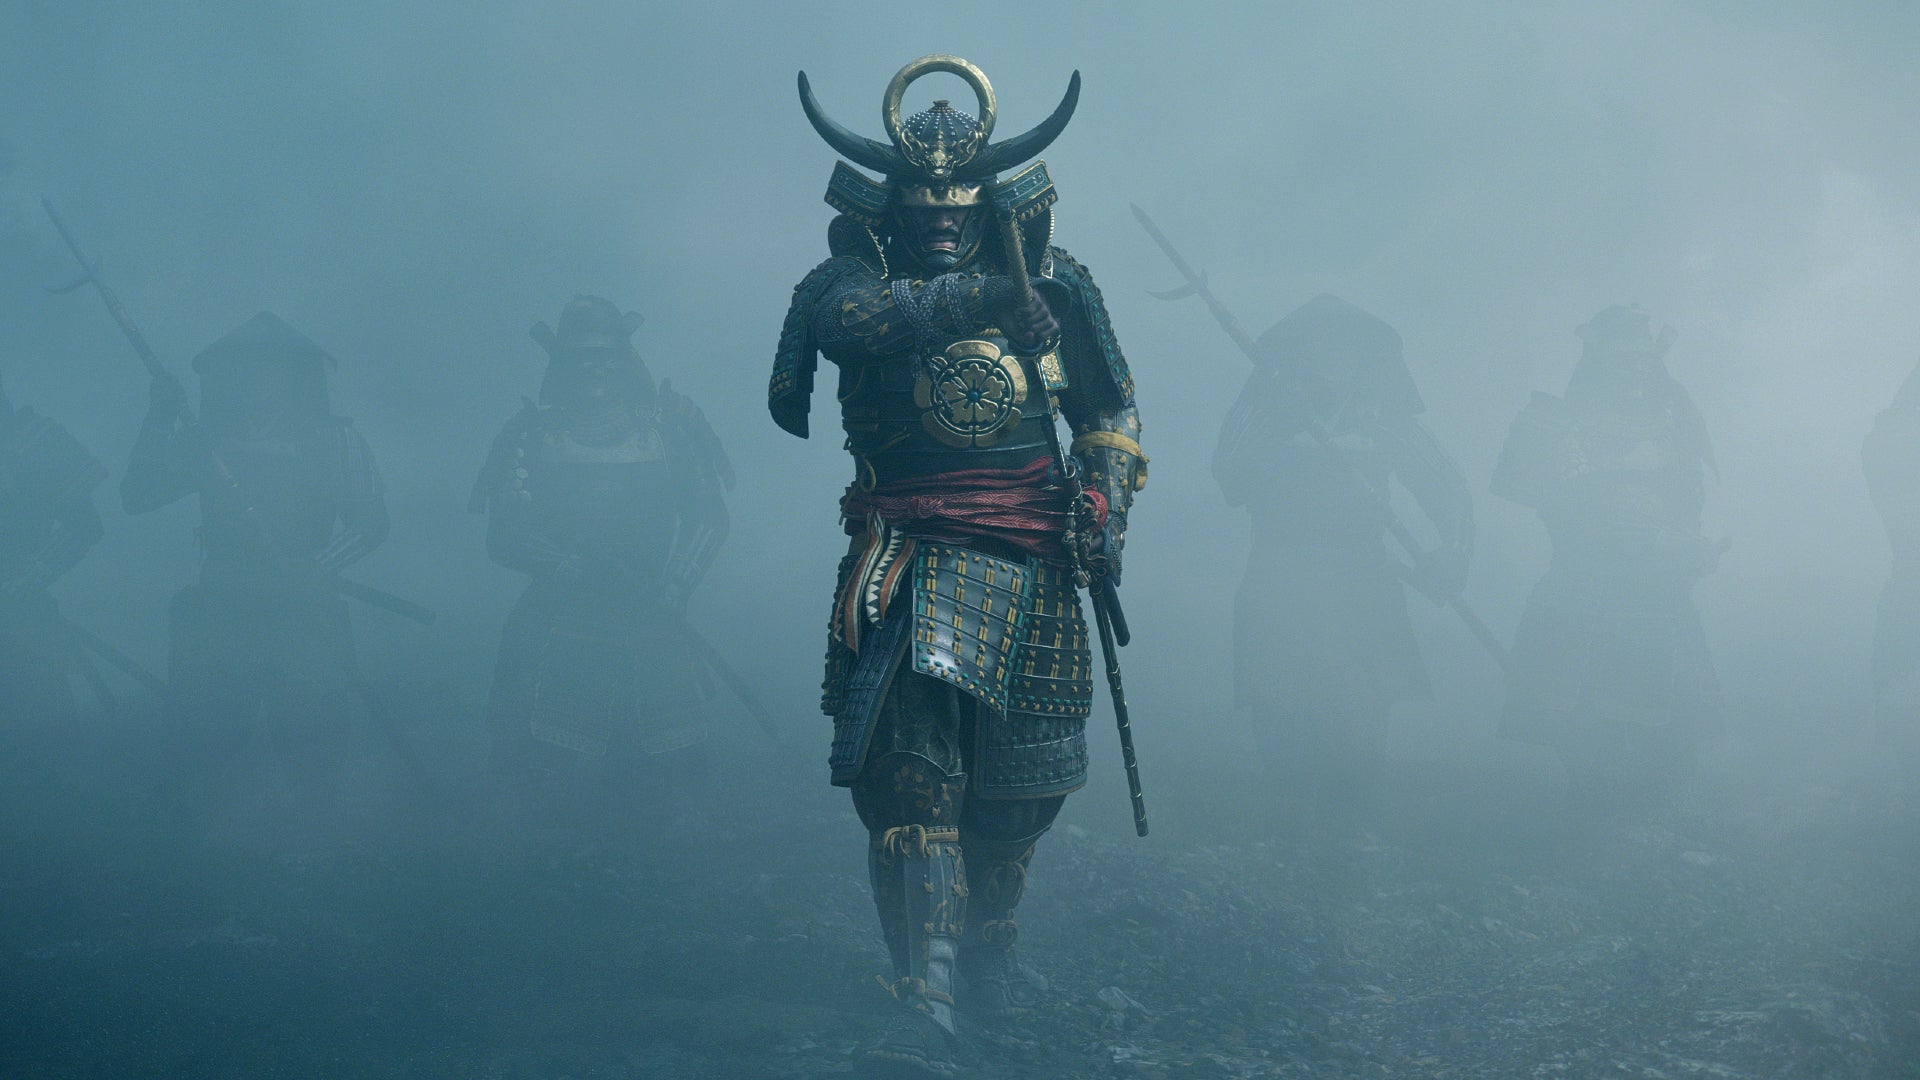
Image credit:Ubisoft

Wondering what the best skills are for Yasuke in Assassin’s Creed Shadows? Yasuke is the playable samurai character of Assassin’s Creed Shadows , and he is an absolute powerhouse when it comes to combat. Oda Nobunaga calls him a ‘one-man army’ near the beginning of the game, and this is an apt description. When it comes to plowing a blade through multiple contenders in a matter of seconds or kicking someone towards the moon, Yasuke has no equal. He’s not great at stealth, sure, but if you’re struggling to survive in a tough battle, his skills are fantastic.
In this guide, we’ll outline the best Yasuke Mastery skills you should be prioritising in Assassin’s Creed Shadows.

Assassin’s Creed Shadows: Best Yasuke skills
Yasuke has access to six Mastery trees, listed below. You can unlock skills within each tree by spending Mastery Points, which are gained by leveling up, as well as killing Targets and Samurai Daisho.
However, you can only access the upper rows of each Mastery tree by increasing your Knowledge Rank. Knowledge Ranks are gained by exploring the world and taking on side objectives.
Resetting Masteries can be done at any time from each Mastery tree menu, so don’t be afraid to experiment and see what works for you. Here are the six Mastery trees:
- Long Katana
- Naginata
- Kanabo
- Teppo
- Samurai
- Bow
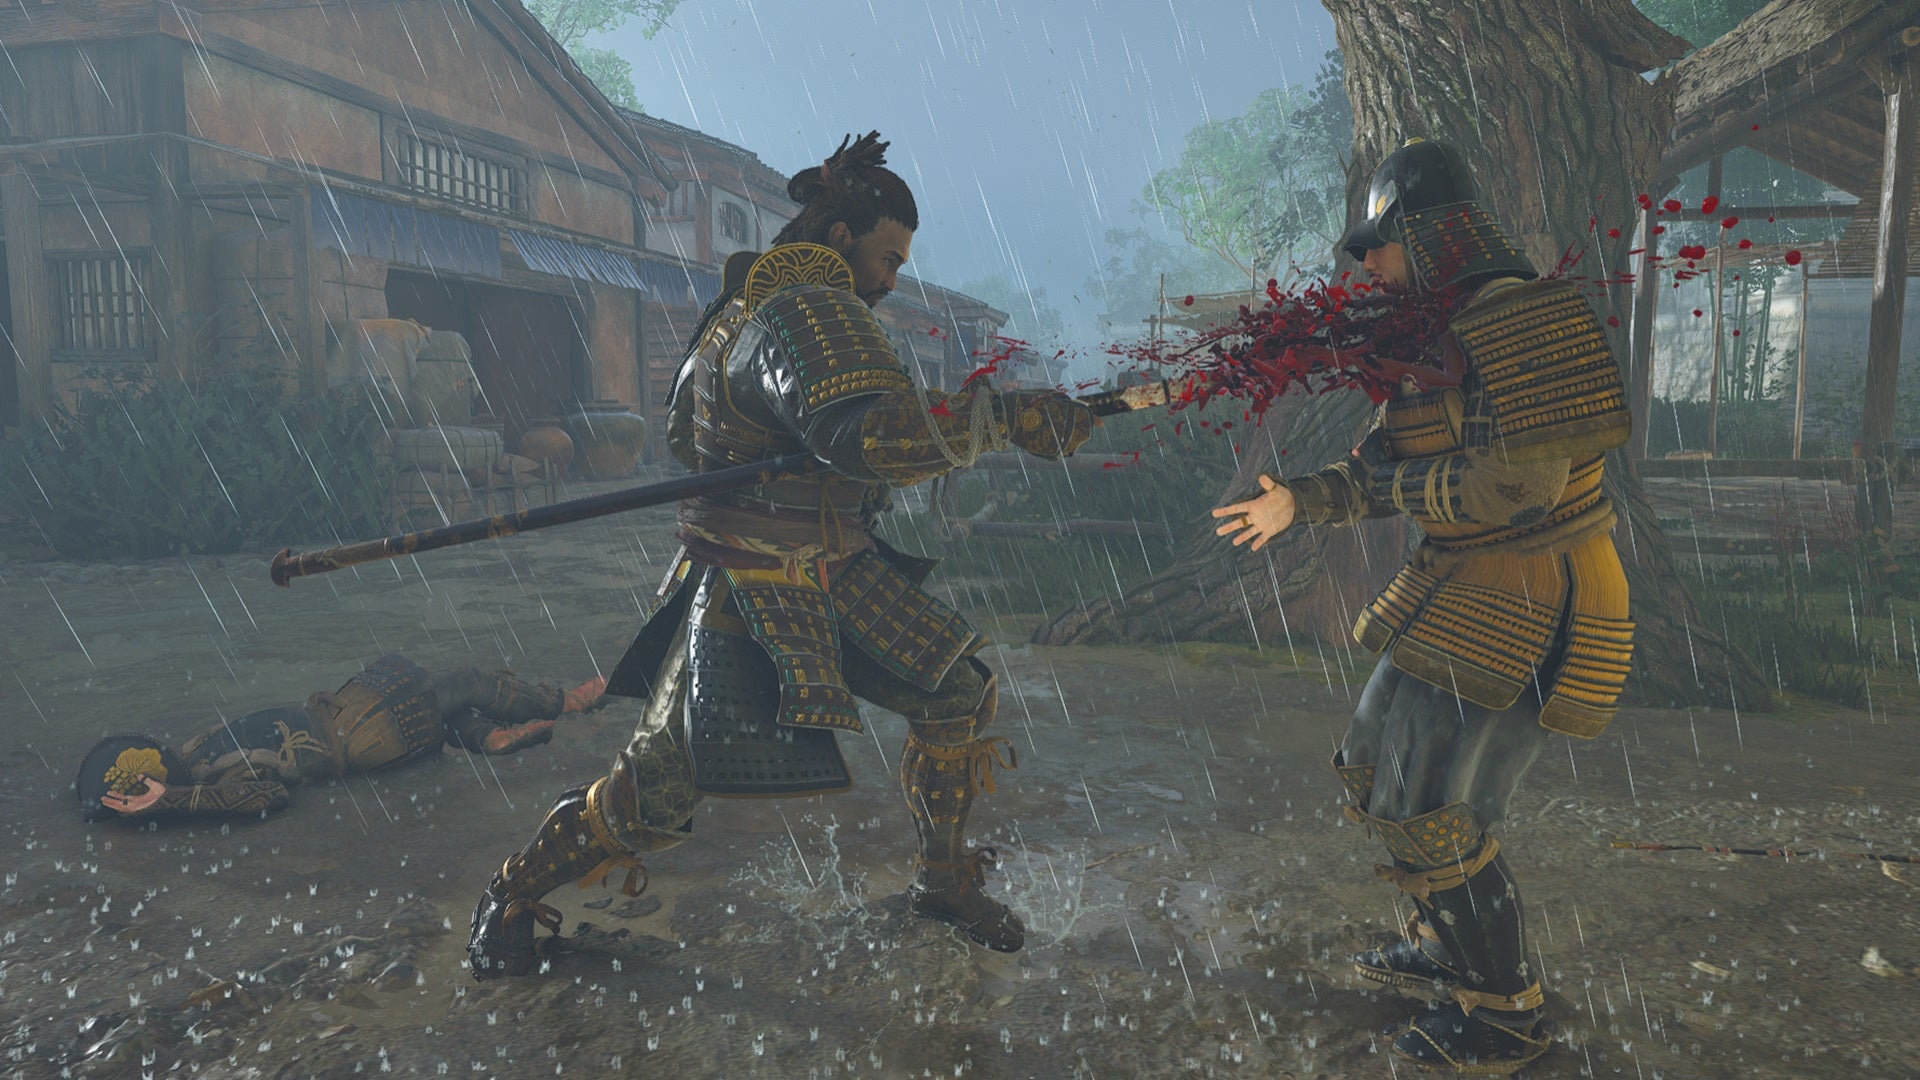
Long Katana

The long katana is a samurai’s dedicated weapon, and perfect for slicing through skulls. |Image credit:Rock Paper Shotgun/Ubisoft
Yasuke’s long katana is both lengthier than Naoe’s and more intimidating, as benefiting his status as Oda Nobunaga’s bodyguard. While I personally prefer the naginata, the long katana strikes a great balance between speed and power. While not listed here, if you want to have fun with your foes, take the skill Samurai Showdown to taunt enemies right before you skewer them. Nice reference to the classic fighting game series, there!
The best long katana skills are:
- Power Dash → Armor Avoidance → Chained Power Dash
- Sheathed Attack → Sheathed Posture → Adrenaline Boost
- Payback → Overrun → Unstoppable
Power Dash→Armor Avoidance→Chained Power Dash
Power Dash (available at the start of the game) is the first of Yasuke’s skills you’re introduced to in Assassin’s Creed Shadows, and it’s a good one. Use it to dash through an enemy, dealing 50% ability damage and leaving them Vulnerable to a follow-up strike.
Upgrading Power Dash is a no-brainer if you like the long katana. The subsequent Masteries are Armor Avoidance (Knowledge Rank 4 required), which grants Power Dash armor piercing capabilities, and Chained Power Dash (Knowledge Rank 6 required), which lets you dash a second time.
Sheathed Attack→Sheathed Posture→Adrenaline Boost
Enemies with a strong guard are one of your major impediments in combat. Yasuke can break guard stances easier than Naoe with the super effective slash that is Sheathed Attack (Knowledge Rank 1 required).
If you want to make a habit of slicing through all guarding foes, then it pays to take Sheathed Posture (Knowledge Rank 3 required), which turns Sheathed Attack into a Posture attack, which basically means that it’s more powerful. Finally, go with Adrenaline Boost (Knowledge Rank 5 required) to generate 50% of an Adrenaline chunk upon a successful hit, letting you stay in the fight.
Payback→Overrun→Unstoppable
Payback (Knowledge Rank 3 required) lets you deal three solid strikes, each of which restore 10% health. While Yasuke is much less in danger of losing health during a fight than Naoe, it’s still important to keep his HP out of the red while doing a flurry of quick attacks.
You can supplement this by taking Overrun (Knowledge Rank 4 required), which amps up Payback damage by 1% per 1% of your missing health. Unstoppable (Knowledge Rank 5 required) goes one step further, making Payback unblockable.
Naginata
This polearm offers excellent reach and the ability to tackle multiple targets at once. |Image credit:Rock Paper Shotgun/Ubisoft
The naginata is my preferred weapon for Yasuke thanks to its balance. While not as back-breakingly powerful as the kanabo or as self-explanatory as the long katana, the naginata delivers with a nice combination of damage and AoE attacks that can destabilise an oncoming mob.
The best naginata skills are:
- Crescent Strike → Deep Cut → Disabling Strike
- Impale → Lethal Charge → Stampeding Charge
- Whirlwind → Rising Storm → Persistent Storm
Crescent Strike→Deep Cut→Disabling Strike
The naginata is a polearm with extensive reach, and it pays to have a Mastery skill that takes advantage of this. Crescent Strike (Knowledge Rank 1 required) makes Yasuke jump towards an enemy and swing his naginata in an arc that deals 25% ability damage and pushes anyone in its range backwards.
Deep Cut (Knowledge Rank 3 required) and Disabling Strike (Knowledge Rank 5 required) only improve on this, respectively inflicting bleed on enemies and then knocking them backwards. All three of these Masteries are excellent for clearing the fray in a battle and ensuring that Yasuke is the last man standing.
Impale→Lethal Charge→Stampeding Charge
Impale (Knowledge Rank 3 required) lets you run at a guy, impale him, and move him up to 13 meters. Your opponent will be Vulnerable afterwards, and you can complete this vicious act by taking Lethal Charge (Knowledge Rank 4 required), which makes you move further with your impaled enemy, and Stampeding Charge (Knowledge Rank 5 required), which pushes back any other mooks who happen to be standing in your way.
The Impale Mastery branch is a little unpredictable, since you after all are stabbing someone through the chest and dashing forward. It works best in wide courtyards and other open areas, but if you can get used to its flashy and wild nature, it remains one of the most fun and brutal moves in Yasuke’s arsenal.
Whirlwind→Rising Storm→Persistent Storm
One of Yasuke’s more complex combo moves, activating Whirlwind (Knowledge Rank 2 required) requires some quick button presses. It’s worth it to deliver a series of attacks that deals 5% more damage with each strike.
Whirlwind goes further with Rising Storm (Knowledge Rank 4 required) and Persistent Storm (Knowledge Rank 6 required), which generate Adrenaline and let Yasuke spam the attack with a single button combo instead of a series of presses. This, along with Crescent Strike, will go a long way towards improving any Yasuke build focused on AoE damage.
Kanabo
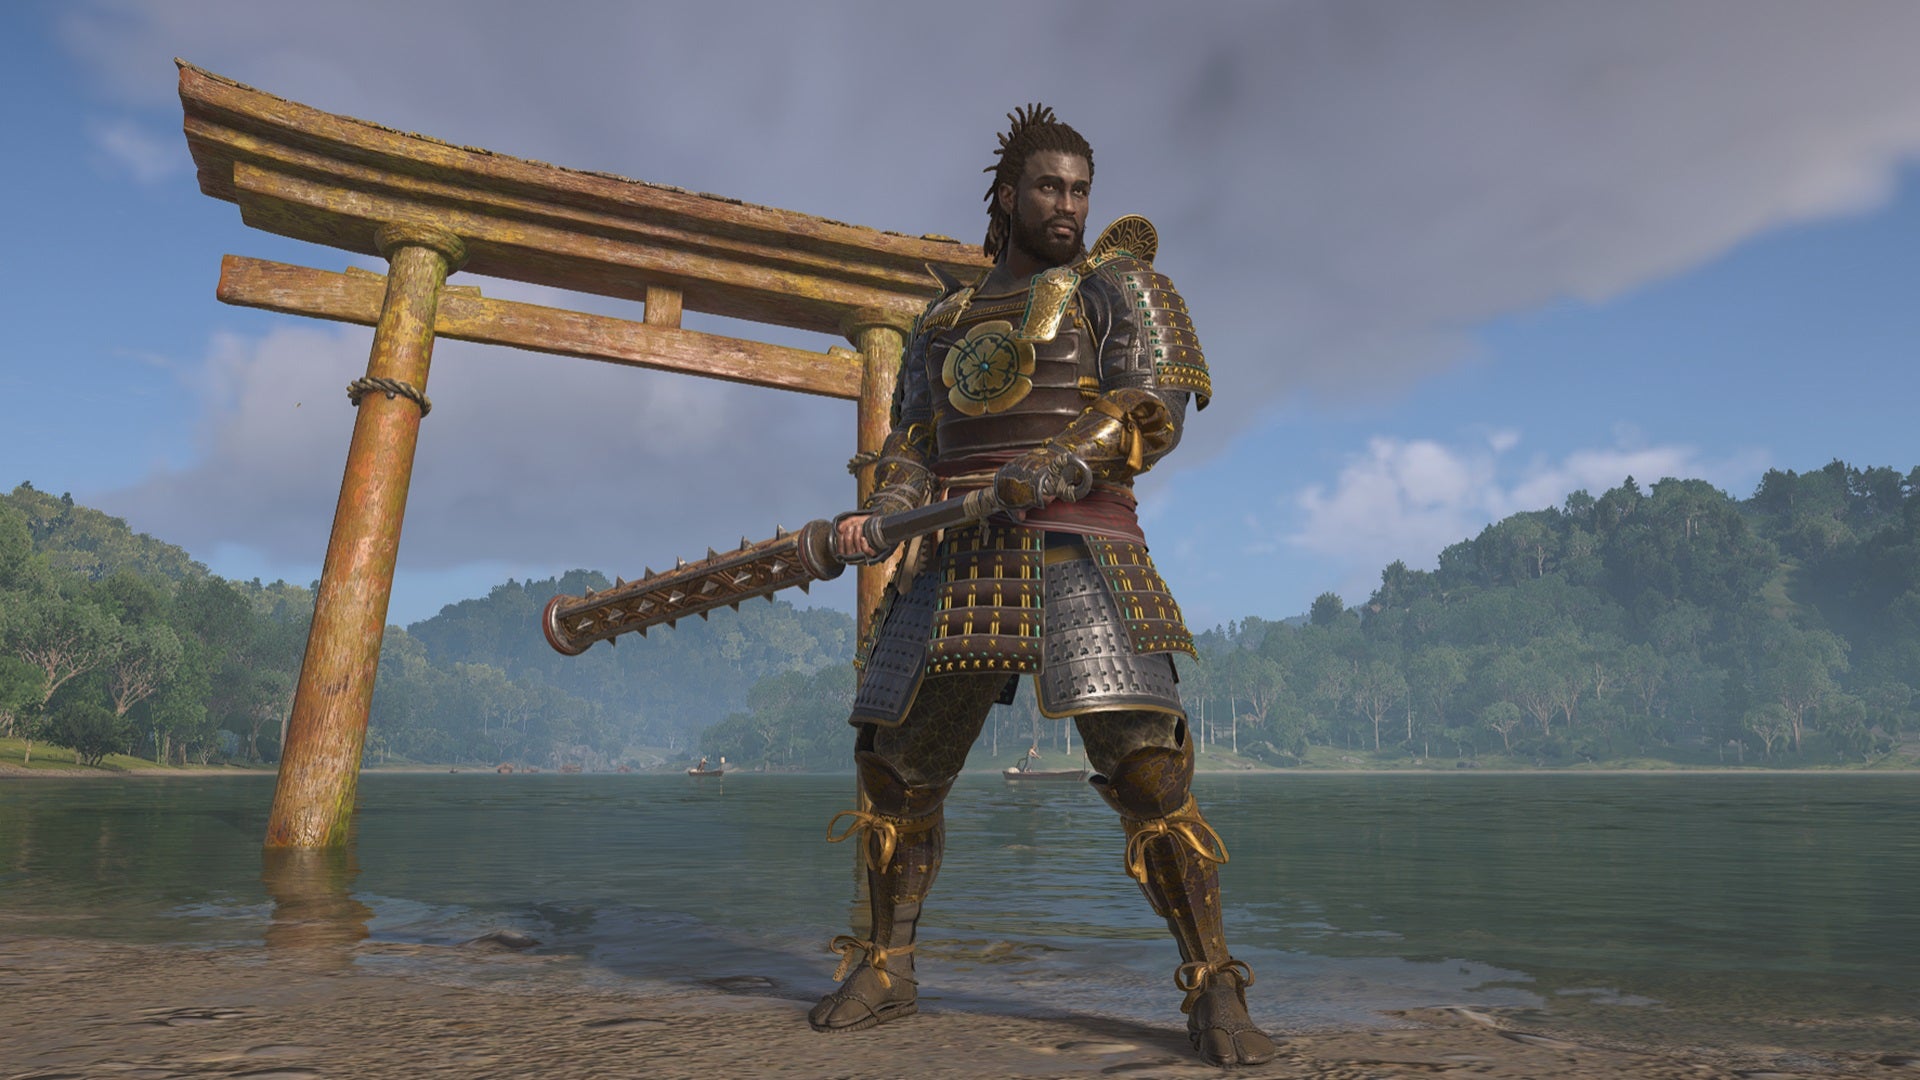
Use the kanabo to slam your way through fights with ease, leaving behind major shockwaves in your wake. |Image credit:Rock Paper Shotgun/Ubisoft
A huge club with spiked ridges, the kanabo is extremely powerful in Yasuke’s hands for swatting away enemy samurai like flies. All that impact comes with a detriment to speed, but if you enjoy heft, it’s hard to deny the satisfaction that comes from smashing the kanabo into the earth and seeing contenders crumple.
The best kanabo skills are:
- Slugging Rampage → Slugging Torrent → Slugging Fury
- Spine Breaker → Irresistible Force → Unstoppable Strength
- Crushing Shockwave → Greater Shockwave → Absolute Shockwave
Slugging Rampage→Slugging Torrent→Slugging Fury
Slugging Rampage (Knowledge Rank 4 required) makes Yasuke spin like a tornado, extending his kanabo outwards and knocking everyone astray. The upgrades for this are super simple - Slugging Torrent (Knowledge Rank 5 required) and Slugging Fury (Knowledge Rank 6 required) simply make Yasuke spin longer.
This is an AoE skill to get trash mobs off of your back, pure and simple. Like many of Yasuke’s abilities, its big and bold and a tad unpredictable, but the rush that comes from using it against multiple low level foes is unparalleled.
Spine Breaker→Irresistible Force→Unstoppable Strength
Grabbing someone in Assassin’s Creed Shadows usually means that you’ll slowly choke them out. Spine Breaker (Knowledge Rank 1 required), in comparison, means that you’ll squeeze them until they pop, dealing 50% ability damage and knocking out regular-sized enemies.
In order to make this backbreaker more flexible, upgrade it with Irresistible Force (Knowledge Rank 3 required), which increases its duration by 10 seconds, and then Unstoppable Strength (Knowledge Rank 4 required), which makes it fully effective against large enemies.
Crushing Shockwave→Greater Shockwave→Absolute Shockwave
If you’re carrying a big stick, you might as well slam it on the ground to send everyone skyward. Crushing Shockwave (Knowledge Rank 3 required) does just that, dealing 90% ability damage, disabling targets, and staggering everyone in a 3 metre radius.
Greater Shockwave (Knowledge Rank 4 required) goes one step further, inflicting enemies with the Daze condition, and Absolute Shockwave (Knowledge Rank 6 required) increases Crushing Shockwave’s size by a ridiculous 167%. You’ll move mountains with this Mastery!
Teppo

It’s slow, but aiming true with the teppo makes you a force to be reckoned with. |Image credit:Rock Paper Shotgun/Ubisoft
The teppo is Yasuke’s gun, and the name literally means “iron cannon” if you were wondering. This is an old school firearm through and through, and the reloading process is slow as heck. Invest in the passive skill Reload Speed if you’re going to use the teppo, and it will pay off to also take Larger Pouch and Larger Pouch II for increased ammo reserves.
The best teppo skills are:
- Explosive Surprise → Explosive Barrage → Explosive Warfare
- Armor Buster → Radial Effect → Deep Impact
- Close Quarters → Teppo’s Might → Brutal Takedown
Explosive Surprise→Explosive Barrage→Explosive Warfare
I find it tough to use the teppo while in the throes of combat, but Explosive Surprise (Knowledge Rank 3 required) helps. This interesting Mastery skill makes Yasuke toss a gunpowder pouch upwards and shoot it to make a burst that deals 35% ability damage.
Explosive Barrage (Knowledge Rank 4 required) lets you chain Explosive Surprise a second time, and Explosive Warfare knocks down everyone caught in the explosion, which is pretty handy and a nice demonstration of the power of guns in the 1500s.
Armor Buster→Radial Effect→Deep Impact
Going up against a well-protected opponent in Assassin’s Creed Shadows is a pain in the rear, so knock ’em away with Armor Buster (Knowledge Rank 1 required), which makes Yasuke reload and deliver a follow-up shot that deals 100% ability damage and shatters a target’s armor.
Radial Effect (Knowledge Rank 3 required) is similar to a shrapnel effect, making any armor fragments that fly off an enemy deal 25% ability damage within 4 metres. Finally, Deep Impact (Knowledge Rank 5 required) pushes enemies away on a hit.
Close Quarters→Teppo’s Might→Brutal Takedown
I mentioned before that I run into difficulty using the teppo in close combat. If you’re like me, take Close Quarters (Knowledge Rank 2 required) to use your teppo as a slugger, dealing 60% ability damage, knocking your foe to the ground and then shooting them in the face. Super satisfying!
Teppo’s Might (Knowledge Rank 3 required) and Brutal Takedown (Knowledge Rank 5 required) are simple enough follow-ups - the former makes Close Quarters deal 25% armor piercing damage, and the latter makes Close Quarters automatically knock out the target.
Samurai

The War Kick might be my favourite skill of all here, just based on the hilarity factor of how far Yasuke actually sends anyone he kicks. |Image credit:Rock Paper Shotgun/Ubisoft
Yasuke’s samurai Mastery skills are an interesting combination of abilities that assist in the midst of combat. There are some traversal skills, like the door-breaking Bull Rush , which you start the game with. And then there’s a move reminiscent of the Sparta Kick in Assassin’s Creed Odyssey , as well as Yasuke’s own version of the hidden blade assassination manoeuvre.
The best samurai skills are:
- Brutal Assassination → Improved Brutal Assassination → Assassination Damage I → Assassination Damage II
- Impenetrable Defense → Unbreachable Guard → Absolute Protection
- War Kick → Heavy Impact → Defensive Breach
Brutal Assassination→Improved Brutal Assassination→Assassination Damage I→Assassination Damage II
Yasuke isn’t a proper assassin, so he needs to invest in a Mastery skill if he wants to kill people like Naoe. The appropriately named Brutal Assassination (Knowledge Rank 1 required) might lack finesse, but is essential for ensuring that you can sneak up behind someone in a stealth situation and insta-kill them.
There are three tiers of improvement here - Improved Brutal Assassination (Knowledge Rank 2 required), Assassination Damage I (Knowledge Rank 3 required), and Assassination Damage II (Knowledge Rank 5 required), each of which make Yasuke remove additional health segments with successful assassinations. He might never be quite as sneaky as Naoe, but Yasuke can certainly hold his own.
Impenetrable Defense→Unbreachable Guard→Absolute Protection
A superb tanking ability, Impenetrable Defense (Knowledge Rank 3 required) makes Yasuke counter every attack for 20 seconds, for a maximum of 5 hits. Popping this before a big fight ensures that you’ll emerge victorious.
Unbreachable Guard (Knowledge Rank 4 required) and Absolute Protection (Knowledge Rank 6 required) are useful add-ons if you want to see this Mastery branch to its end - Unbreachable Guard makes attackers Vulnerable, and Absolute Protection ensures that Impenetrable Defense works against all unstoppable attacks except for grabs.
War Kick→Heavy Impact→Defensive Breach
War Kick (available at the start of the game) is the Assassin’s Creed Shadows’ version of the Sparta Kick from Odyssey, and it is fantastic. Whenever Yasuke kicks someone he sends them somersaulting through the air like a ragdoll, and the base version of this skill is already very nice, dealing 20% ability damage on top of the pushback.
To make War Kick effective on large enemies, you’ll need Heavy Impact (Knowledge Rank 2 required). Taking Defensive Breach (Knowledge Rank 4 required) is the final step on your journey to truly wrecking with a single kick, as it deals +100% damage on enemy collisions.
Bow

Yasuke’s far from a stealth master, but at least the bow allows him to get kills from afar. |Image credit:Rock Paper Shotgun/Ubisoft
Yasuke’s bow is his best option for ranged stealth kills. Quieter and less fussy than his teppo, the bow is a valuable companion, especially when you take the passives Swift Hand and Headshot Damage . The Large Quiver passive and its associated upgrades are also useful.
The best bow skills are:
- Staggering Blast → Headshot Lock → Hunter’s Mark
- Clear Mind → Effective Mindset → Level-Headed
- Silent Arrows → Silent Arrows II → Silent Arrows III
Staggering Blast→Headshot Lock→Hunter’s Mark
Staggering Blast (Knowledge Rank 1 required) is your starting bow skill, and fires an arrow that deals 60% ability damage and pushes the target back.
Like all ranged weapons, the bow works best when you use it on someone’s cranium. Headshot Lock (Knowledge Rank 3 required) does this for you, automatically making Staggering Blast aim at the head. Hunter’s Mark adds one final cherry on top, automatically making enemies dazed whenever you hit them with Staggering Blast.
Clear Mind→Effective Mindset→Level-Headed
Whether or not you decide to use your bow in the middle of a fight is up to you, but Clear Mind (Knowledge Rank 2 required) makes time slow for 10 seconds while aiming and is supremely useful in such scenarios. It’s only natural to go with Effective Mindset (Knowledge Rank 4 required) next, which increases the damage of each kill when Clear Mind is active by 15%.
Last but not least is Level-Headed (Knowledge Rank 5 required), which ensures that any Headshots done while Clear Mind is active increase the duration of the overall slowness by 4 seconds - meaning you can keep ‘bullet time’ going for quite a long while indeed.
Silent Arrows→Silent Arrows II→Silent Arrows III
Silent Arrows (Knowledge Rank 2 required), Silent Arrows II (Knowledge Rank 3 required), and Silent Arrows III (Knowledge Rank 4 required) are all passives that simply serve to make Yasuke’s arrows stronger.
This Mastery skill starts by offering up 100% armor piercing, and the later tiers remove additional health segments. You don’t necessarily need the Silent Arrows Masteries to survive with the bow, but investing in them ensures that your arrows shoot straight and decimate without any questions.
That completes our guide on the best Yasuke Mastery skills; now go out there and wreck your enemies like a true samurai. If you’d rather play as a ninja, see our guide to Naoe’s best Mastery skills . We also have a detailed comparison between Yasuke and Naoe , as well as how to change characters if you’re just starting out with Assassin’s Creed Shadows.
Assassin’s Creed Shadows
PS5 , Xbox Series X/S , PC , Mac , Nintendo Switch 2
Rock Paper Shotgun is better when you sign in
Sign in and join us on our journey to discover strange and compelling PC games.

All 75 Arc Raiders Blueprints and where to get them
These areas have the highest chance of giving you Blueprints

Image credit:Rock Paper Shotgun/Embark Studios

Looking for more Arc Raiders Blueprints? It’s a special day when you find a Blueprint, as they’re among the most valuable items in Arc Raiders. If you find a Blueprint that you haven’t already found, then you must make sure you hold onto it at all costs, because Blueprints are the key to one of the most important and powerful systems of meta-progression in the game.
This guide aims to be the very best guide on Blueprints you can find, starting with a primer on what exactly they are and how they work in Arc Raiders, before delving into exactly where to get Blueprints and the very best farming spots for you to take in your search.
We’ll also go over how to get Blueprints from other unlikely activities, such as destroying Surveyors and completing specific quests. And you’ll also find the full list of all 75 Blueprints in Arc Raiders on this page (including the newest Blueprints added with the Cold Snap update , such as the Deadline Blueprint and Firework Box Blueprint), giving you all the information you need to expand your own crafting repertoire.
In this guide:
- What are Blueprints in Arc Raiders?
- Full Blueprint list: All crafting recipes
- Where to find Blueprints in Arc Raiders Blueprints obtained from quests Blueprints obtained from Trials Best Blueprint farming locations

What are Blueprints in Arc Raiders?
Blueprints in Arc Raiders are special items which, if you manage to extract with them, you can expend to permanently unlock a new crafting recipe in your Workshop. If you manage to extract from a raid with an Anvil Blueprint, for example, you can unlock the ability to craft your very own Anvil Pistol, as many times as you like (as long as you have the crafting materials).
To use a Blueprint, simply open your Inventory while in the lobby, then right-click on the Blueprint and click “Learn And Consume” . This will permanently unlock the recipe for that item in your Workshop. As of the Stella Montis update, there are allegedly 75 different Blueprints to unlock - although only 68 are confirmed to be in the game so far. You can see all the Blueprints you’ve found and unlocked by going to the Workshop menu, and hitting “R” to bring up the Blueprint screen.
It’s possible to find duplicates of past Blueprints you’ve already unlocked. If you find these, then you can either sell them, or - if you like to play with friends - you can take it into a match and gift it to your friend so they can unlock that recipe for themselves. Another option is to keep hold of them until the time comes to donate them to the Expedition.
Full Blueprint list: All crafting recipes
Below is the full list of all the Blueprints that are currently available to find in Arc Raiders, and the crafting recipe required for each item:
| Blueprint | Type | Recipe | Crafted At |
|---|---|---|---|
| Bettina | Weapon | 3x Advanced Mechanical Components 3x Heavy Gun Parts 3x Canister | Gunsmith 3 |
| Blue Light Stick | Quick Use | 3x Chemicals | Utility Station 1 |
| Aphelion | Weapon | 3x Magnetic Accelerator 3x Complex Gun Parts 1x Matriarch Reactor | Gunsmith 3 |
| Combat Mk. 3 (Flanking) | Augment | 2x Advanced Electrical Components 3x Processor | Gear Bench 3 |
| Combat Mk. 3 (Aggressive) | Augment | 2x Advanced Electrical Components 3x Processor | Gear Bench 3 |
| Complex Gun Parts | Material | 2x Light Gun Parts 2x Medium Gun Parts 2x Heavy Gun Parts | Refiner 3 |
| Fireworks Box | Quick Use | 1x Explosive Compound 3x Pop Trigger | Explosives Station 2 |
| Gas Mine | Mine | 4x Chemicals 2x Rubber Parts | Explosives Station 1 |
| Green Light Stick | Quick Use | 3x Chemicals | Utility Station 1 |
| Pulse Mine | Mine | 1x Crude Explosives 1x Wires | Explosives Station 1 |
| Seeker Grenade | Grenade | 1x Crude Explosives 2x ARC Alloy | Explosives Station 1 |
| Looting Mk. 3 (Survivor) | Augment | 2x Advanced Electrical Components 3x Processor | Gear Bench 3 |
| Angled Grip II | Mod | 2x Mechanical Components 3x Duct Tape | Gunsmith 2 |
| Angled Grip III | Mod | 2x Mod Components 5x Duct Tape | Gunsmith 3 |
| Hullcracker | Weapon | 1x Magnetic Accelerator 3x Heavy Gun Parts 1x Exodus Modules | Gunsmith 3 |
| Launcher Ammo | Ammo | 5x Metal Parts 1x Crude Explosives | Workbench 1 |
| Anvil | Weapon | 5x Mechanical Components 5x Simple Gun Parts | Gunsmith 2 |
| Anvil Splitter | Mod | 2x Mod Components 3x Processor | Gunsmith 3 |
| ??? | ??? | ??? | ??? |
| Barricade Kit | Quick Use | 1x Mechanical Components | Utility Station 2 |
| Blaze Grenade | Grenade | 1x Explosive Compound 2x Oil | Explosives Station 3 |
| Bobcat | Weapon | 3x Advanced Mechanical Components 3x Light Gun Parts | Gunsmith 3 |
| Osprey | Weapon | 2x Advanced Mechanical Components 3x Medium Gun Parts 7x Wires | Gunsmith 3 |
| Burletta | Weapon | 3x Mechanical Components 3x Simple Gun Parts | Gunsmith 1 |
| Compensator II | Mod | 2x Mechanical Components 4x Wires | Gunsmith 2 |
| Compensator III | Mod | 2x Mod Components 8x Wires | Gunsmith 3 |
| Defibrillator | Quick Use | 9x Plastic Parts 1x Moss | Medical Lab 2 |
| ??? | ??? | ??? | ??? |
| Equalizer | Weapon | 3x Magnetic Accelerator 3x Complex Gun Parts 1x Queen Reactor | Gunsmith 3 |
| Extended Barrel | Mod | 2x Mod Components 8x Wires | Gunsmith 3 |
| Extended Light Mag II | Mod | 2x Mechanical Components 3x Steel Spring | Gunsmith 2 |
| Extended Light Mag III | Mod | 2x Mod Components 5x Steel Spring | Gunsmith 3 |
| Extended Medium Mag II | Mod | 2x Mechanical Components 3x Steel Spring | Gunsmith 2 |
| Extended Medium Mag III | Mod | 2x Mod Components 5x Steel Spring | Gunsmith 3 |
| Extended Shotgun Mag II | Mod | 2x Mechanical Components 3x Steel Spring | Gunsmith 2 |
| Extended Shotgun Mag III | Mod | 2x Mod Components 5x Steel Spring | Gunsmith 3 |
| Remote Raider Flare | Quick Use | 2x Chemicals 4x Rubber Parts | Utility Station 1 |
| Heavy Gun Parts | Material | 4x Simple Gun Parts | Refiner 2 |
| Venator | Weapon | 2x Advanced Mechanical Components 3x Medium Gun Parts 5x Magnet | Gunsmith 3 |
| Il Toro | Weapon | 5x Mechanical Components 6x Simple Gun Parts | Gunsmith 1 |
| Jolt Mine | Mine | 1x Electrical Components 1x Battery | Explosives Station 2 |
| Explosive Mine | Mine | 1x Explosive Compound 1x Sensors | Explosives Station 3 |
| Jupiter | Weapon | 3x Magnetic Accelerator 3x Complex Gun Parts 1x Queen Reactor | Gunsmith 3 |
| Light Gun Parts | Material | 4x Simple Gun Parts | Refiner 2 |
| Lightweight Stock | Mod | 2x Mod Components 5x Duct Tape | Gunsmith 3 |
| Lure Grenade | Grenade | 1x Speaker Component 1x Electrical Components | Utility Station 2 |
| Medium Gun Parts | Material | 4x Simple Gun Parts | Refiner 2 |
| Torrente | Weapon | 2x Advanced Mechanical Components 3x Medium Gun Parts 6x Steel Spring | Gunsmith 3 |
| Muzzle Brake II | Mod | 2x Mechanical Components 4x Wires | Gunsmith 2 |
| Muzzle Brake III | Mod | 2x Mod Components 8x Wires | Gunsmith 3 |
| Padded Stock | Mod | 2x Mod Components 5x Duct Tape | Gunsmith 3 |
| Shotgun Choke II | Mod | 2x Mechanical Components 4x Wires | Gunsmith 2 |
| Shotgun Choke III | Mod | 2x Mod Components 8x Wires | Gunsmith 3 |
| Shotgun Silencer | Mod | 2x Mod Components 8x Wires | Gunsmith 3 |
| Showstopper | Grenade | 1x Advanced Electrical Components 1x Voltage Converter | Explosives Station 3 |
| Silencer I | Mod | 2x Mechanical Components 4x Wires | Gunsmith 2 |
| Silencer II | Mod | 2x Mod Components 8x Wires | Gunsmith 3 |
| Snap Hook | Quick Use | 2x Power Rod 3x Rope 1x Exodus Modules | Utility Station 3 |
| Stable Stock II | Mod | 2x Mechanical Components 3x Duct Tape | Gunsmith 2 |
| Stable Stock III | Mod | 2x Mod Components 5x Duct Tape | Gunsmith 3 |
| Tagging Grenade | Grenade | 1x Electrical Components 1x Sensors | Utility Station 3 |
| Tempest | Weapon | 3x Advanced Mechanical Components 3x Medium Gun Parts 3x Canister | Gunsmith 3 |
| Trigger Nade | Grenade | 2x Crude Explosives 1x Processor | Explosives Station 2 |
| Vertical Grip II | Mod | 2x Mechanical Components 3x Duct Tape | Gunsmith 2 |
| Vertical Grip III | Mod | 2x Mod Components 5x Duct Tape | Gunsmith 3 |
| Vita Shot | Quick Use | 2x Antiseptic 1x Syringe | Medical Lab 3 |
| Vita Spray | Quick Use | 3x Antiseptic 1x Canister | Medical Lab 3 |
| Vulcano | Weapon | 1x Magnetic Accelerator 3x Heavy Gun Parts 1x Exodus Modules | Gunsmith 3 |
| Wolfpack | Grenade | 2x Explosive Compound 2x Sensors | Explosives Station 3 |
| Red Light Stick | Quick Use | 3x Chemicals | Utility Station 1 |
| Smoke Grenade | Grenade | 14x Chemicals 1x Canister | Utility Station 2 |
| Deadline | Mine | 3x Explosive Compound 2x ARC Circuitry | Explosives Station 3 |
| Trailblazer | Grenade | 1x Explosive Compound 1x Synthesized Fuel | Explosives Station 3 |
| Tactical Mk. 3 (Defensive) | Augment | 2x Advanced Electrical Components 3x Processor | Gear Bench 3 |
| Tactical Mk. 3 (Healing) | Augment | 2x Advanced Electrical Components 3x Processor | Gear Bench 3 |
| Yellow Light Stick | Quick Use | 3x Chemicals | Utility Station 1 |
Note: The missing Blueprints in this list likely have not actually been added to the game at the time of writing, because none of the playerbase has managed to find any of them. As they are added to the game, I will update this page with the most relevant information so you know exactly how to get all 75 Arc Raiders Blueprints.
Where to find Blueprints in Arc Raiders
Below is a list of all containers, modifiers, and events which maximise your chances of finding Blueprints:
- Certain quests reward you with specific Blueprints .
- Completing Trials has a high chance of offering Blueprints as rewards.
- Surveyors have a decent chance of dropping Blueprints on death.
- High loot value areas tend to have a greater chance of spawning Blueprints.
- Night Raids and Storms may increase rare Blueprint spawn chances in containers.
- Containers with higher numbers of items may have a higher tendency to spawn Blueprints. As a result, Blue Gate (which has many “large” containers containing multiple items) may give you a higher chance of spawning Blueprints.
- Raider containers (Raider Caches, Weapon Boxes, Medical Bags, Grenade Tubes) have increased Blueprint drop rates. As a result, the Uncovered Caches event gives you a high chance of finding Blueprints.
- Security Lockers have a higher than average chance of containing Blueprints.
- Certain Blueprints only seem to spawn under specific circumstances: Tempest Blueprint only spawns during Night Raid events. Vulcano Blueprint only spawns during Hidden Bunker events. Jupiter and Equaliser Blueprints only spawn during Harvester events.

Raider Caches, Weapon Boxes, and other raider-oriented container types have a good chance of offering Blueprints. |Image credit:Rock Paper Shotgun/Embark Studios
Blueprints have a very low chance of spawning in any container in Arc Raiders, around 1-2% on average. However, there is a higher chance of finding Blueprints in particular container types. Specifically, you can find more Blueprints in Raider containers and security lockers.
Beyond this, if you’re looking for Blueprints you should focus on regions of the map which are marked as having particularly high-value loot. Areas such as the Control Tower in Dam Battlegrounds, the Arrival and Departure Buildings in Spaceport, and Pilgrim’s Peak in Blue Gate all have a better-than-average chance of spawning Blueprints somewhere amongst all their containers. Night Raids and Electromagnetic Storm events also increase the drop chances of certain Blueprints .
In addition to these containers, you can often loot Blueprints from destroyed Surveyors - the largest of the rolling ball ARC. Surveyors are more commonly found on the later maps - Spaceport and Blue Gate - and if one spawns in your match, you’ll likely see it by the blue laser beam that it casts into the sky while “surveying”.
Surveyors are quite well-armoured and will very speedily run away from you once it notices you, but if you can take one down then make sure you loot all its parts for a chance of obtaining certain unusual Blueprints.
Blueprints obtained from quests
One way in which you can get Blueprints is by completing certain quests for the vendors in Speranza. Some quests will reward you with a specific item Blueprint upon completion, so as long as you work through all the quests in Arc Raiders, you are guaranteed those Blueprints.
Here is the full list of all Blueprints you can get from quest rewards:
- Trigger Nade Blueprint: Rewarded after completing “Sparks Fly”.
- Lure Grenade Blueprint: Rewarded after completing “Greasing Her Palms”.
- Burletta Blueprint: Rewarded after completing “Industrial Espionage”.
- Hullcracker Blueprint (and Launcher Ammo Blueprint): Rewarded after completing “The Major’s Footlocker”.
Alas, that’s only 4 Blueprints out of a total of 75 to unlock, so for the vast majority you will need to find them yourself during a raid. If you’re intent on farming Blueprints, then it’s best to equip yourself with cheap gear in case you lose it, but don’t use a free loadout because then you won’t get a safe pocket to stash any new Blueprint you find. No pain in Arc Raiders is sharper than failing to extract with a new Blueprint you’ve been after for a dozen hours already.

One of the best ways to get Blueprints is by hitting three stars on all five Trials every week. |Image credit:Rock Paper Shotgun/Embark Studios
Blueprints obtained from Trials
One of the very best ways to get Blueprints is as rewards for completing Trials in Arc Raiders. Trials are unlocked from Level 15 onwards, and allow you to earn rewards by focusing on certain tasks over the course of several raids. For example, one Trial might task you with dealing damage to Hornets, while another might challenge you to loot Supply Drops.
Trials refresh on a weekly basis, with a new week bringing five new Trials. Each Trial can offer up to three rewards after passing certain score milestones, and it’s possible to receive very high level loot from these reward crates - including Blueprints. So if you want to unlock as many Blueprints as possible, you should make a point of completing as many Trials as possible each week.
Best Blueprint farming locations
The very best way to get Blueprints is to frequent specific areas of the maps which combine high-tier loot pools with the right types of containers to search. Here are my recommendations for where to find Blueprints on every map, so you can always keep the search going for new crafting recipes to unlock.

Image credit:Rock Paper Shotgun/Embark Studios
Dam Battlegrounds
The best places to farm Blueprints on Dam Battlegrounds are the Control Tower, Power Generation Complex, Ruby Residence, and Pale Apartments . The first two regions, despite only being marked on the map as mid-tier loot, contain a phenomenal number of containers to loot. The Control Tower can also contain a couple of high-tier Security Lockers - though of course, you’ll need to have unlocked the Security Breach skill at the end of the Survival tree.
There’s also a lot of reporting amongst the playerbase that the Residential areas in the top-left of the map - Pale Apartments and Ruby Residence - give you a comparatively strong chance of finding Blueprints. Considering their size, there’s a high density of containers to loot in both locations, and they also have the benefit of being fairly out of the way. So you’re more likely to have all the containers to yourself.
Buried City
The best Blueprint farming locations on Buried City are the Santa Maria Houses, Grandioso Apartments, Town Hall, and the various buildings of the New District . Grandioso Apartments has a lower number of containers than the rest, but a high chance of spawning weapon cases - which have good Blueprint drop rates. The others are high-tier loot areas, with plenty of lootable containers - including Security Lockers.
Spaceport
The best places to find Blueprints on Spaceport are the Arrival and Departure Buildings, as well as Control Tower A6 and the Launch Towers . All these areas are labelled as high-value loot regions, and many of them are also very handily connected to one another by the Spaceport wall, which you can use to quickly run from one area to the next. At the tops of most of these buildings you’ll find at least one Security Locker, so this is an excellent farming route for players looking to find Blueprints.
The downside to looting Blueprints on Spaceport is that all these areas are hotly contested, particularly in Duos and Squads. You’ll need to be very focused and fast in order to complete the full farming route.

Image credit:Rock Paper Shotgun/Embark Studios
Blue Gate
Blue Gate tends to have a good chance of dropping Blueprints, potentially because it generally has a high number of containers which can hold lots of items; so there’s a higher chance of a Blueprint spawning in each container. In my experience, the best Blueprint farming spots on Blue Gate are Pilgrim’s Peak, Raider’s Refuge, the Ancient Fort, and the Underground Complex beneath the Warehouse .
All of these areas contain a wealth of containers to loot. Raider’s Refuge has less to loot, but the majority of the containers in and around the Refuge are raider containers, which have a high chance of containing Blueprints - particularly during major events.
Stella Montis
On the whole, Stella Montis seems to have a very low drop rate for Blueprints (though a high chance of dropping other high-tier loot). If you do want to try farming Blueprints on this map, the best places to find Blueprints in Stella Montis are Medical Research, Assembly Workshop, and the Business Center . These areas have the highest density of containers to loot on the map.
In addition to this, the Western Tunnel has a few different Security Lockers to loot, so while there’s very little to loot elsewhere in this area of the map, it’s worth hitting those Security Lockers if you spawn there at the start of a match.
That wraps up this primer on how to get all the Blueprints in Arc Raiders as quickly as possible. With the Expedition system constantly resetting a large number of players’ Blueprints, it’s more important than ever to have the most up-to-date information on where to find all these Blueprints.
While you’re here, be sure to check out our Arc Raiders best guns tier list , as well as our primers on the best skills to unlock and all the different Field Depot locations on every map.

ARC Raiders
PS5 , Xbox Series X/S , PC
Rock Paper Shotgun is better when you sign in
Sign in and join us on our journey to discover strange and compelling PC games.
