Best weapons in Elden Ring: Shadow Of The Erdtree
Here are the best weapons in Elden Ring: Shadow Of The Erdtree

Image credit:Rock Paper Shotgun/Bandai Namco

Looking for the best weapons in Elden Ring: Shadow Of The Erdtree? Not only has Shadow Of The Erdtree dropped a tonne of new weapons to try out, but there are also 8 new weapon types to choose from as well.
This means that now is the perfect time to switch up your playstyle and try something new for the DLC. In this guide, we’ve gathered up a list of the best weapons in Shadow Of The Erdtree that we’ve come across, and we’ve included a wide range to suit a variety of builds.
What are the best weapons in Shadow Of The Erdtree?
Below are the best weapons in Shadow Of The Erdtree, with Rellana’s Twin Blades taking the top spot. Click on the names or simply scroll down to see more details, including weapon locations and our top tips for each loadout.
- Devonia’s Hammer
- Ancient Meteoric Ore Greatsword
- Anvil Hammer
- Greatsword of Solitude
- Rakshasa’s Great Katana
- Red Bear’s Claw
- Backhand Blade
- Milady
- Star-Lined Sword
- Euporia
- Spear of the Impaler
- Rellana’s Twin Blades
12. Devonia’s Hammer

The Weapon Skill attack spins the hammer around until it gains momentum and is charged with Holy enegy. |Image credit:Rock Paper Shotgun/Bandai Namco
- Weight: 20.0
- Damage Type: Strike.
- Requirements: Strength 30, Dexterity 13, Faith 19.
- Attribute Scaling: Strength C, Dexterity E, Faith D
- Weapon Skill: Devonia’s Vortex.
- Attack Power: Physical 147, Holy 44.
Devonia’s Hammer is one of many new Strength/ Faith hybrid weapons in the Land of Shadow. Its Weapon Skill, Devonia’s Vortex summons a chargeable torrent of Holy fire that can target multiple foes at once in a powerful AOE. To use it, the Tarnished spins the hammer around, charges it, and then brings it crashing down on enemies.
As such, a loadout with Devonia’s Hammer would benefit from the Godfrey Icon Talisman, which enhances charged spell and Skill attacks. Thankfully, as a weapon that requires levels in three different skills, the stat requirements aren’t too high.
Despite being categorised as a Colossal weapon, the standard attacks of Devonia’s Hammer aren’t too slow and can be powerful in the right hands. As always, when dealing with weapons that deliver Holy damage, check the resistance of bosses before fights.
How to get Devonia’s Hammer
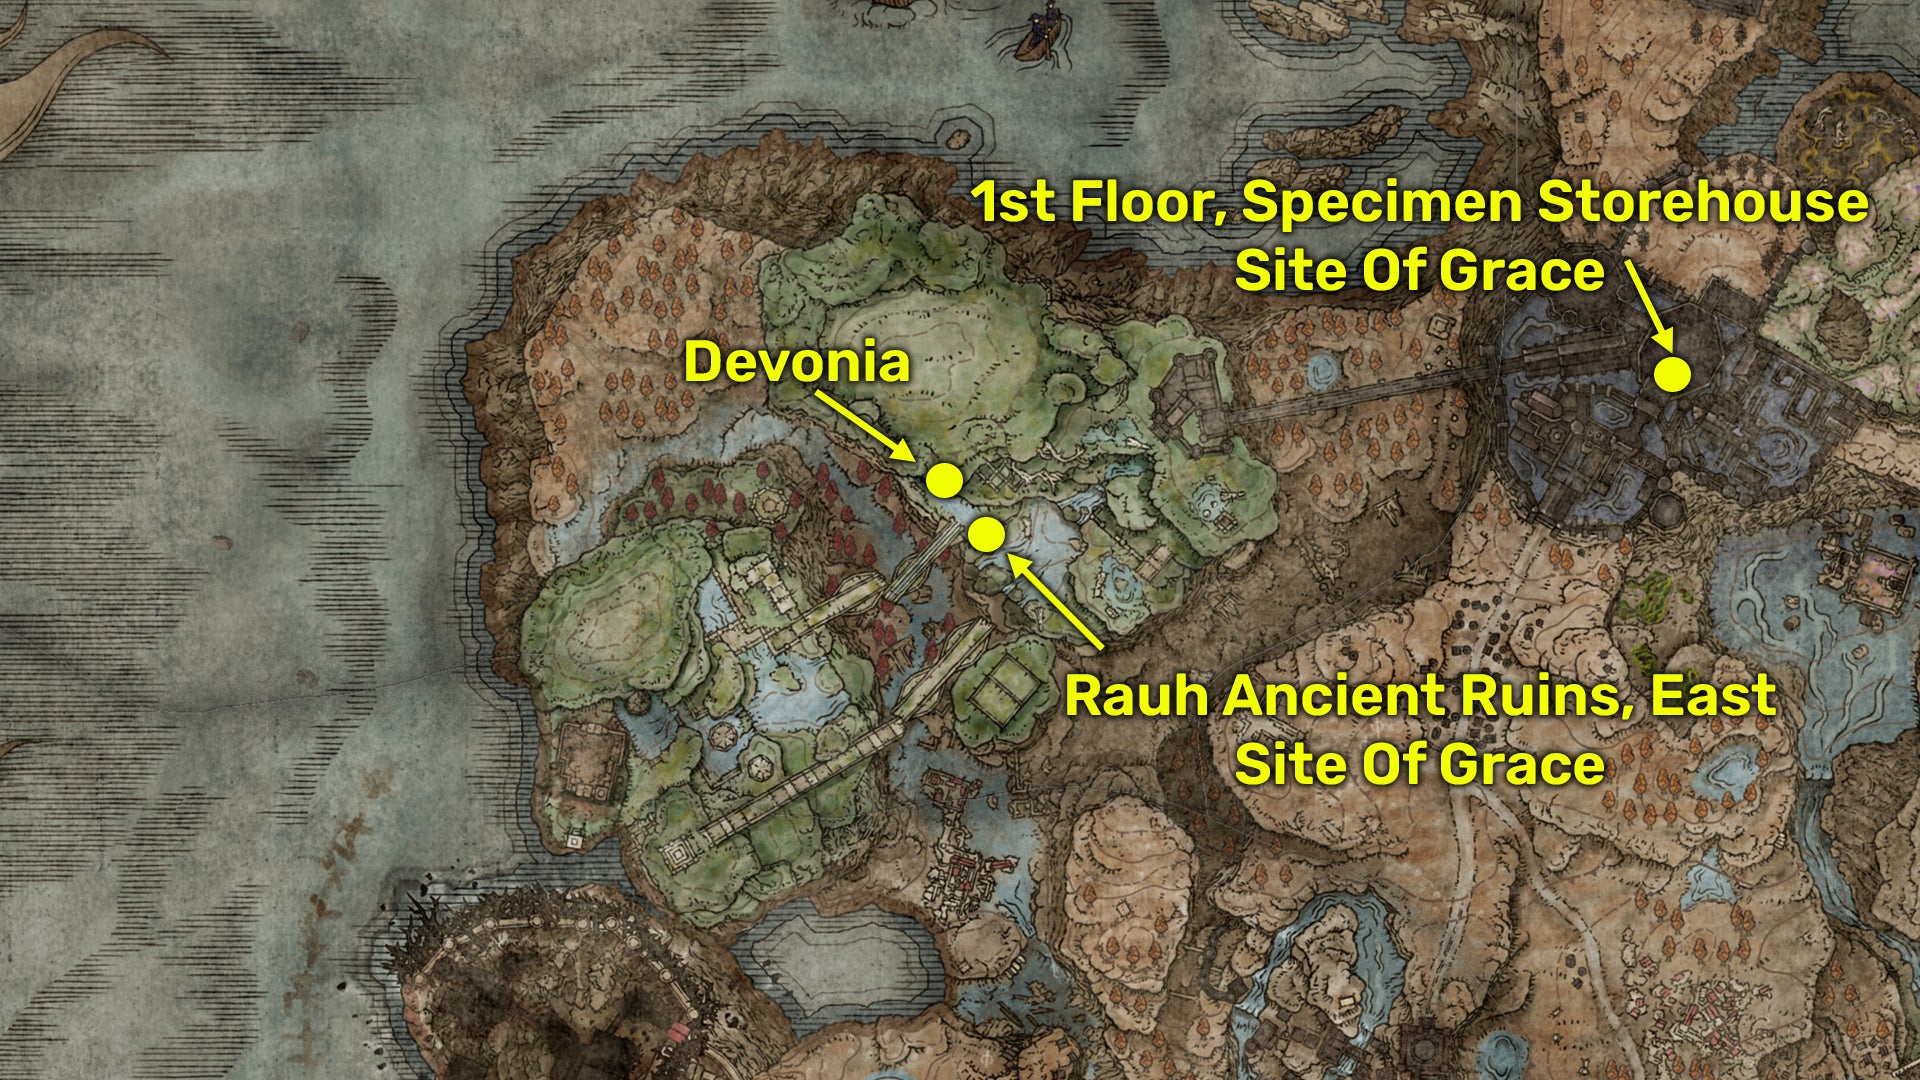
Here is the map location to find Devonia. |Image credit:Rock Paper Shotgun/Bandai Namco
To get Devonia’s Hammer, you must defeat Crucible Knight Devonia in the upper Ancient Ruins of Rauh . To find them, travel to the Rauh ruins from the entrance via The Shadow Keep. (Take the lift left of the First Floor Site Of Grace in the Specimen Storehouse). Devonia is located just before the large bridge, guarded by the Furnace Golem.
11. Ancient Meteoric Ore Greatsword

The Ancient Meteoric Ore Greatsword is large but perfect for combo attacks. |Image credit:Rock Paper Shotgun/Bandai Namco
- Weight: 22.0
- Damage Type: Standard/Pierce.
- Requirements: Strength 35, Dexterity 10, Intelligence 16.
- Attribute Scaling: Strength D, Dexterity E, Arcane D.
- Weapon Skill: White Light Charge.
- Attack Power: Physical 138.
The Ancient Meteoric Ore Greatsword looks like a giant piece of flint, and it has a mixture of slash and thrust attacks. Its heavy thrust can launch foes if they are near death, and its slash is heavy but not cumbersome.
The Weapon Skill, White Light Charge , does exactly what it says it does. It illuminates the blade with a bright light and allows the Tarnished to leap forward with a thrusting attack. This leap can cover a large distance and pincer more than one foe at once.
To make the most out of this, we recommend pairing the blade with the Axe Talisman for enhanced charged attacks and something to lighten your equip load and make it easier to dodge after using the skill, like the Arsenal Charm .
How to get the Ancient Meteoric Ore Greatsword

Here is the map location to find the Ancient Meteoric Ore Greatsword. |Image credit:Rock Paper Shotgun/Bandai Namco
To get the Ancient Meteoric Ore Greatsword, you need to complete the Ruined Forge of Starfell Past dungeon and retrieve it from the altar at the end. The key to getting the sword is using the second door as a lift. Pull the lever to raise it, then stand on top of it to gain access to the altar room.
10. Anvil Hammer
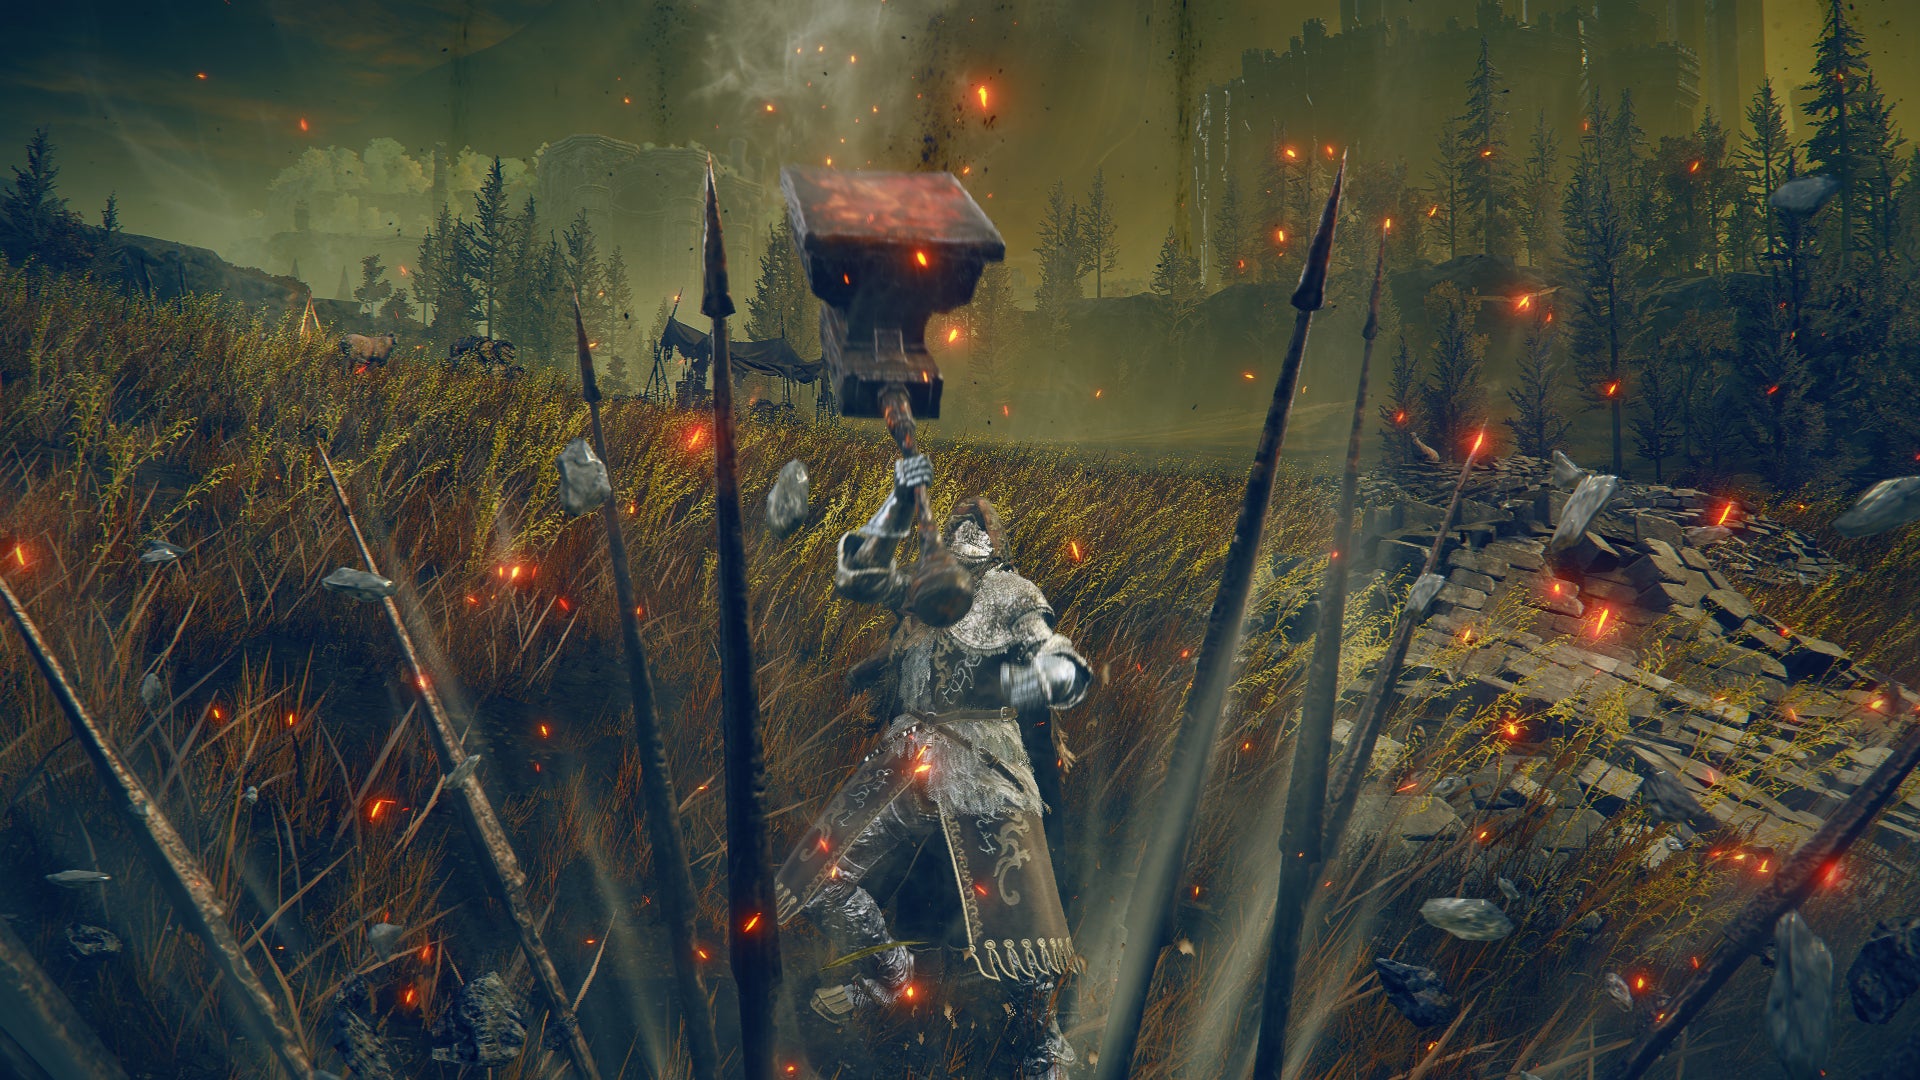
Messmer would be proud of those spears. |Image credit:Rock Paper Shotgun/Bandai Namco
- Weight: 22.0
- Damage Type: Strike.
- Requirements: Strength 39, Dexterity 10, Intelligence 11, Faith 20.
- Attribute Scaling: Strength C, Dexterity E, Intelligence E, Faith D.
- Weapon Skill: Smithing Art Spears.
- Attack Power: Physical 131, Fire 85.
The Anvil Hammer is a Colossal weapon that can deal both physical and Fire damage to enemies. Repetitive hits don’t feel too slow given the size, but the real beauty of this weapon comes through with its Weapon Skill, Smithing Art Spears .
With this, the Tarnished slams the hammer down to the ground and raises it back up again. As it rises, several spears erupt from the earth and deliver an AOE of piercing damage to foes. Usually, this is enough to cut through crowds of enemies.
We recommend pairing this huge hammer with the Fire Scorpion Charm Talisman for added Fire damage, and the Two Fingers Heirloom for added points to Faith.
How to get the Anvil Hammer

Here is the map location to find the Anvil Hammer. |Image credit:Rock Paper Shotgun/Bandai Namco
The Anvil Hammer is located on an altar, accessible once you complete the Ruined Forge Lava Intake dungeon and climb the large pipe up to the top of the room.
9. Greatsword of Solitude

This Weapon Skill can travel an impressive distance. |Image credit:Rock Paper Shotgun/Bandai Namco
- Weight: 15.5
- Damage Type: Standard/Pierce.
- Requirements: Strength 27, Dexterity 13.
- Attribute Scaling: Strength B, Dexterity E.
- Weapon Skill: Solitary Moon Slash.
- Attack Power: Physical 120.
The Greatsword of Solitude is quite simple in nature but can be highly effective. The Weapon Skill, Solitary Moon Slash , emits a downward thrust of light-infused damage which, when followed up by a heavy attack, can emit a step forward followed by a powerful chain of slashes. This moveset will quickly become your bread and butter after using the sword for a while.
The trajectory of light can travel quite far and is especially satisfying when you get a few enemies at once in a line. Although it is a Greatsword, normal attacks are speedy enough and you can increase this further by triggering attacks after running.
For this weapon, we recommend picking up something to help with Stamina regeneration. You can also use the Shard of Alexander to increase the damage dealt by the Weapon Skill projectile.
How to get the Greatsword of Solitude
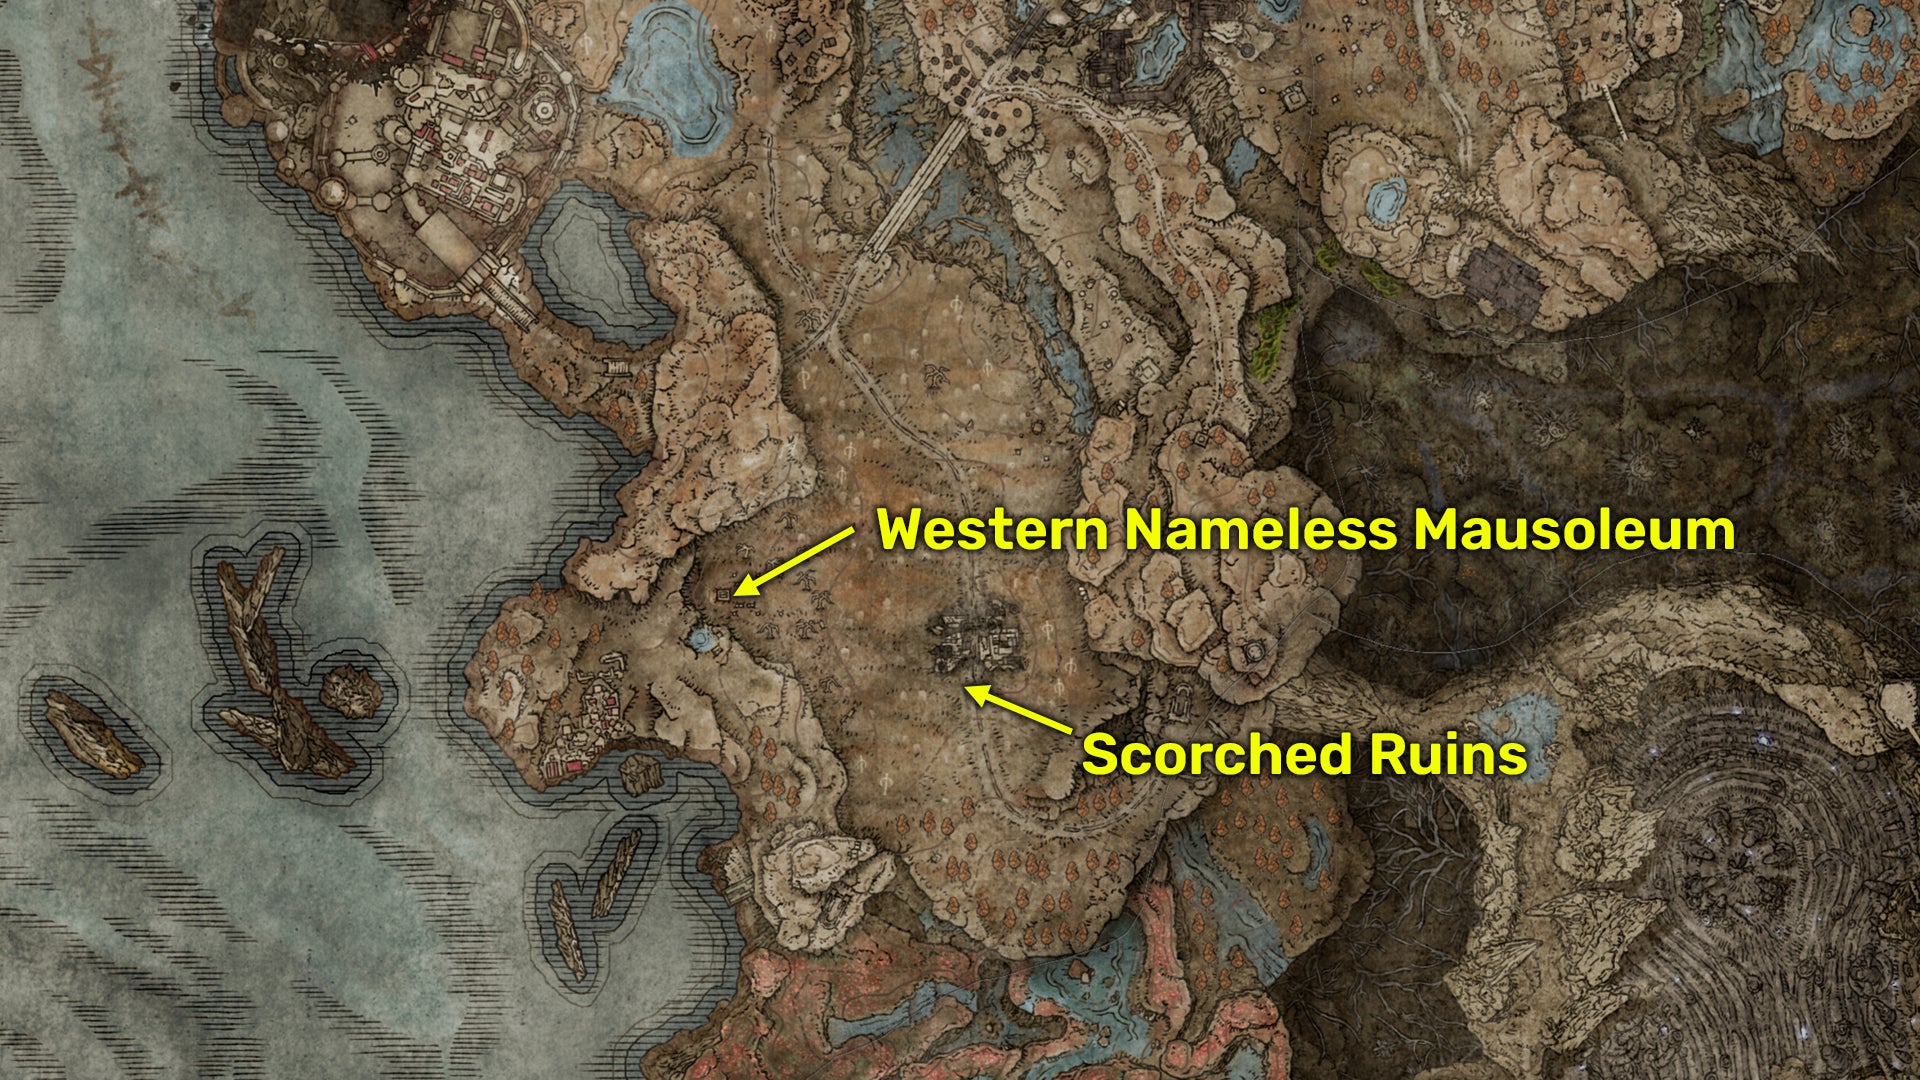
Here is the map location to find the Greatsword of Solitude. |Image credit:Rock Paper Shotgun/Bandai Namco
To get the Greatsword of Solitude, you must defeat the Blackgaol Knight boss , within the Western Nameless Mausoleum . This is located directly west of the Scorched Ruins Site of Grace in the Gravesite Plain.
8. Rakshasa’s Great Katana
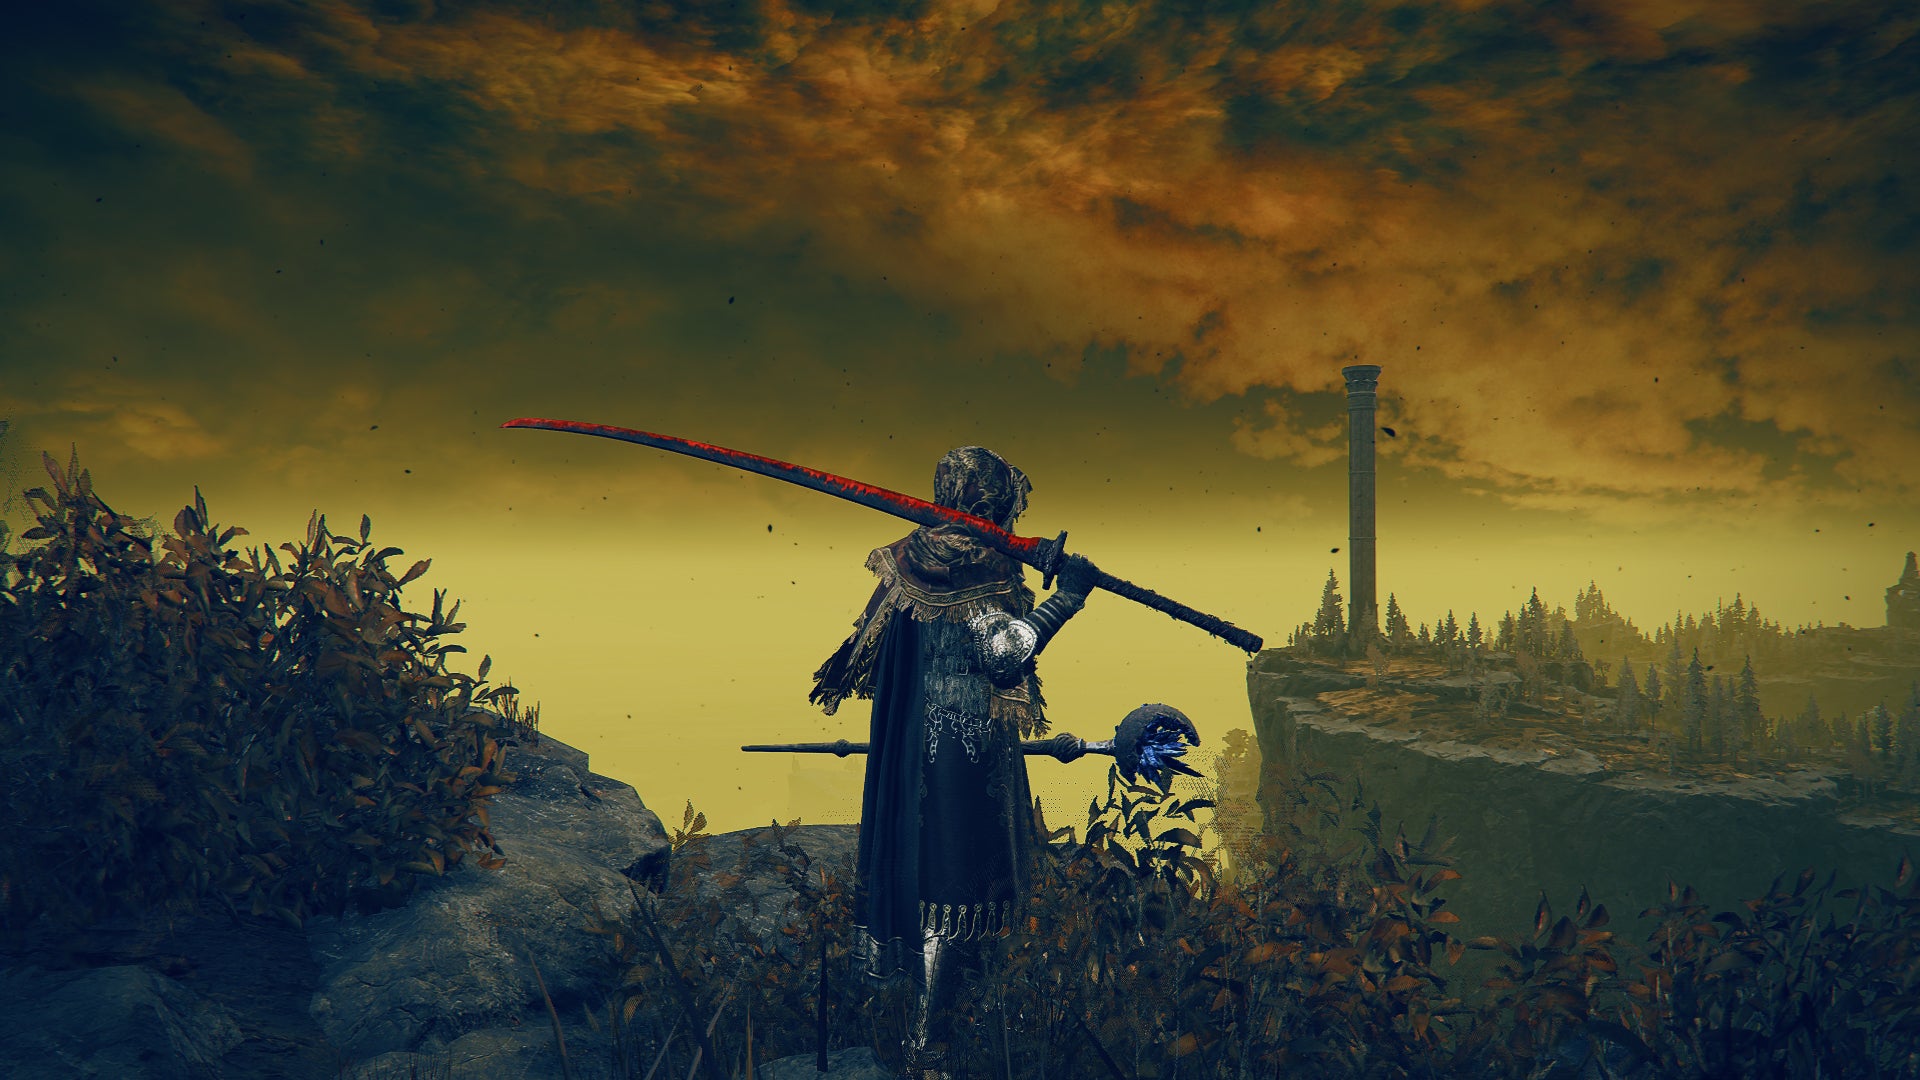
This Great Katana is made for chaining attacks together in short succession. |Image credit:Rock Paper Shotgun/Bandai Namco
- Weight: 9.5
- Damage Type: Slash/Pierce.
- Requirements: Strength 12, Dexterity 27.
- Attribute Scaling: Strength E, Dexterity C.
- Weapon Skill: Weed Cutter.
- Attack Power: Physical 155.
- Passives: Blood loss buildup (55).
The Great Katana category is another fantastic new type to come with the Shadow Of The Erdtree DLC. It offers the same blood loss buildup and high-damage capabilities as regular Katanas, but offers more range and heft. Rakshasa’s Great Katana is slightly slower than an average Katana, but makes up for it with its high-damage mixture of slash and thrust attacks.
Due to its impressive scaling attributes, this weapon is best suited for a Dexterity build, and you can still have an off-hand armament when wielding it. When executing the Weapon Skill ’ Weed Cutter ’ the Tarnished takes a step forward as the Katana delivers two consecutive slash attacks that cover a large range and can hit multiple enemies at once.
The Great Katana is a slightly earlier game option that is also a good choice. Rather than executing two slashes with its Weapon Skill, it makes the Tarnished hold a stance and deliver three downward cuts to enemies. The scaling and damage output is slightly lower than Rakshasa’s Great Katana, however.
For most samurai builds we recommend using the Rellana’s Cameo Talisman , which enhances attacks executed after maintaining the same stance for a period of time.
How to get Rakshasa’s Great Katana
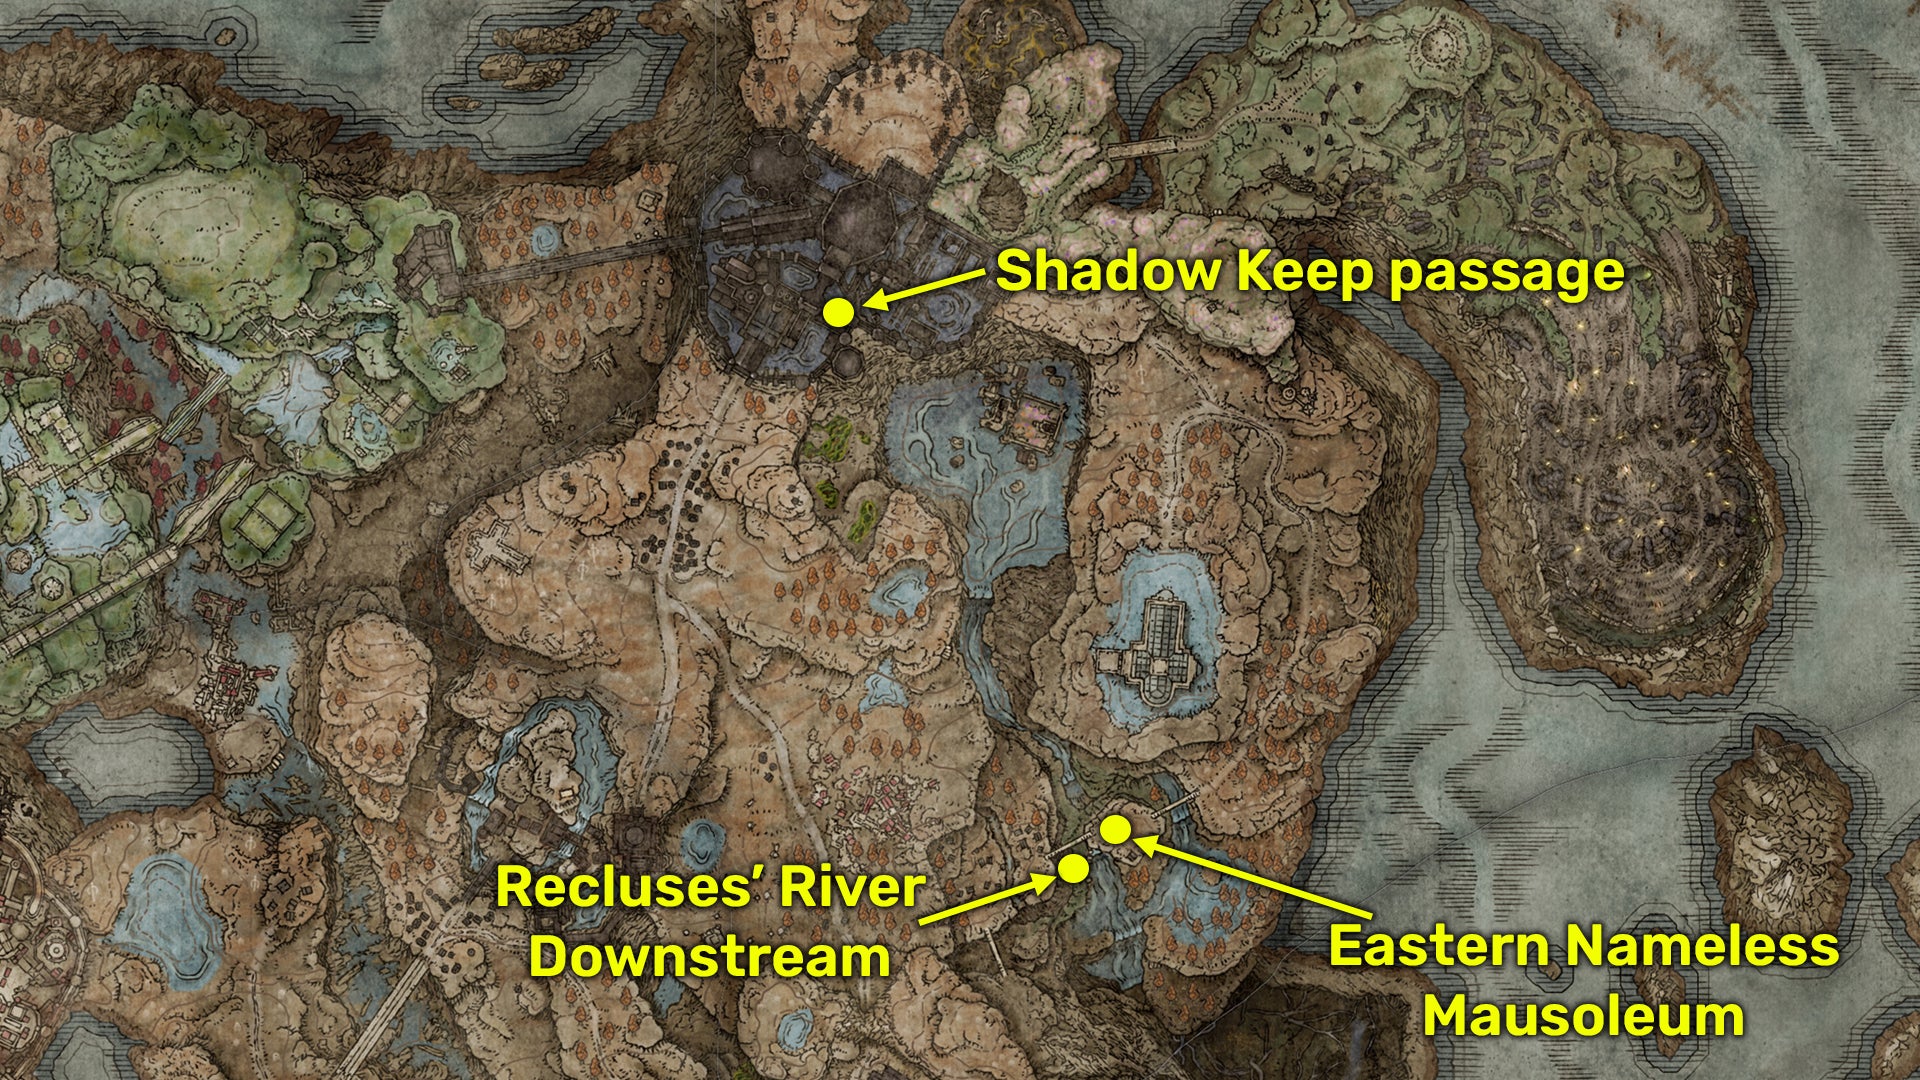
Here is the map location to find Rakshasa’s Great Katana. |Image credit:Rock Paper Shotgun/Bandai Namco
As the name might suggest, to get Rakshasa’s Great Katana you need to defeat the optional boss, Rakshasa . He is located at the Eastern Nameless Mausoleum , located opposite the Reclus’ River Downstream Site of Grace south of The Shadow Keep.
To reach this lower waterway, you must access the secret coffin within the Shadow Keep. See our guide to getting to the Abyssal Woods for details on the passage in question. Once you hit the Ruins of Unte , make your way south, down the waterways.
7. Red Bear’s Claw
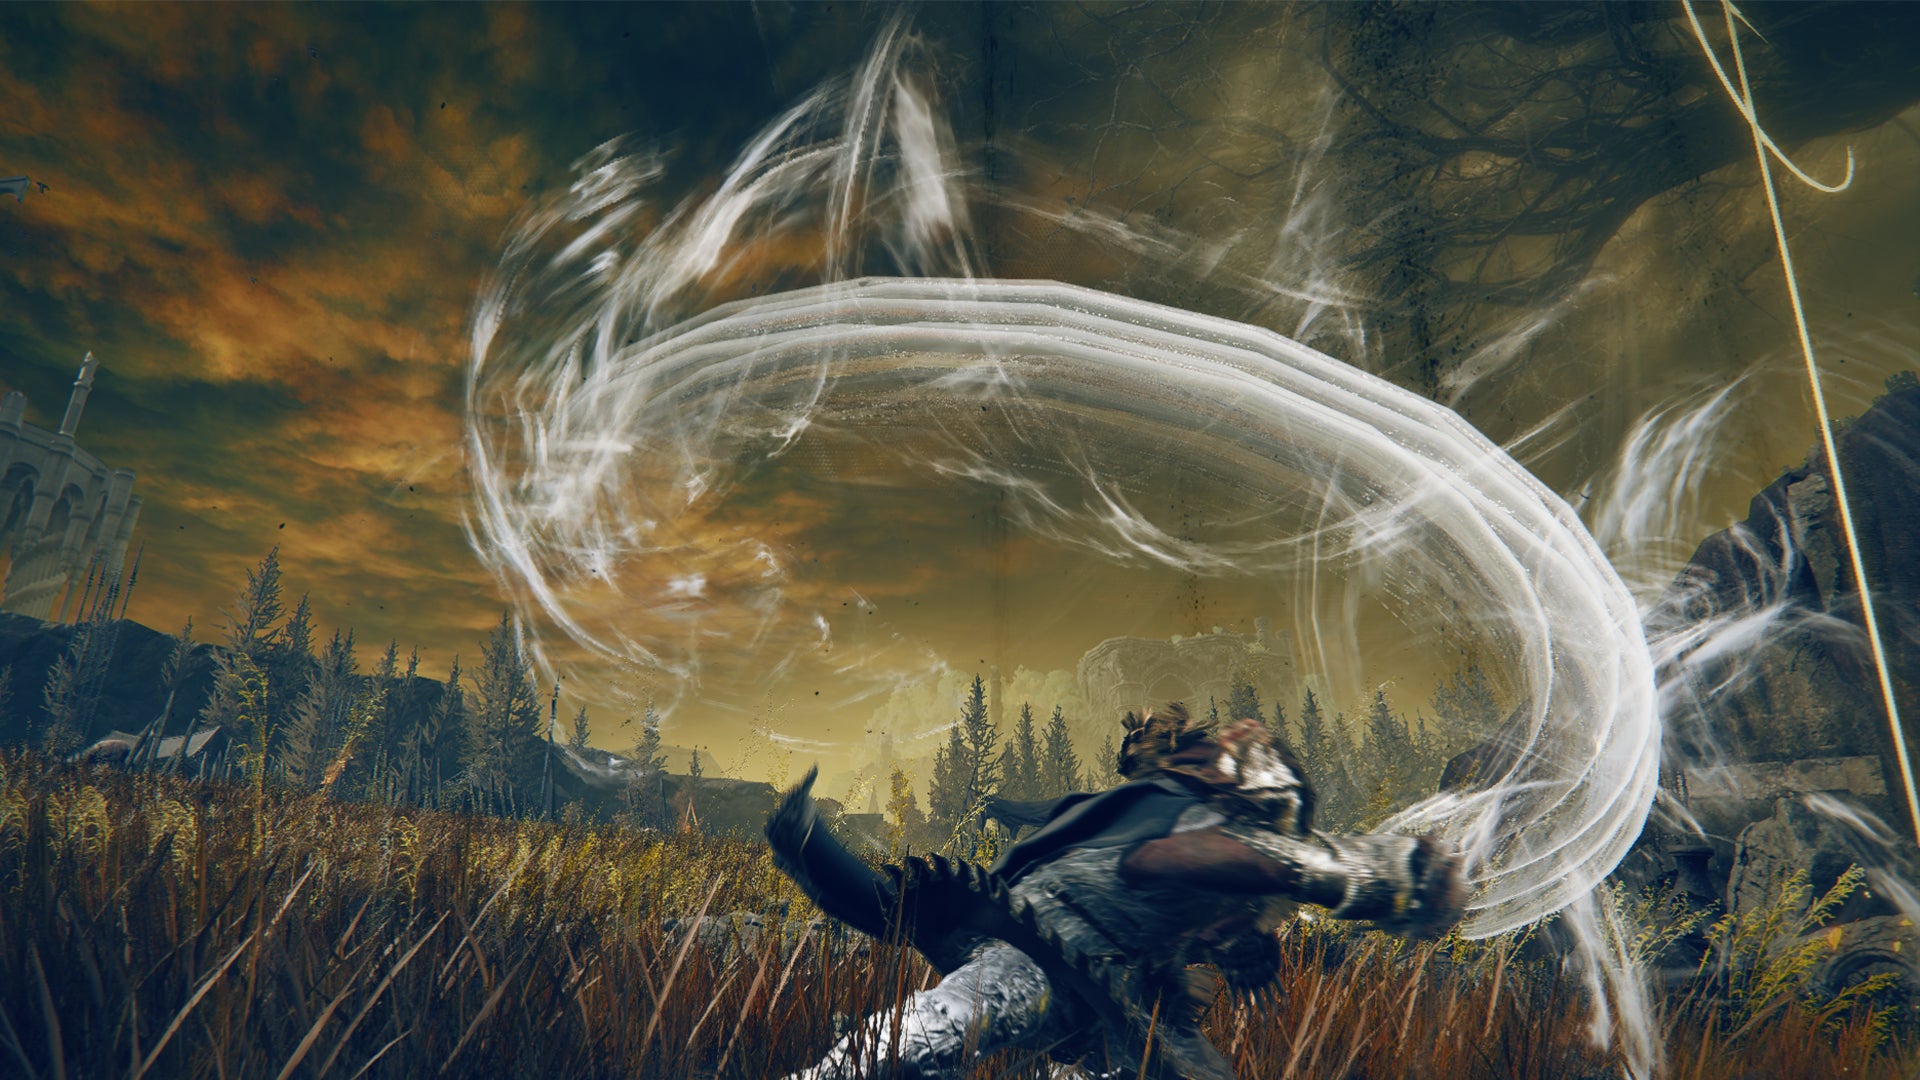
The Red Bear’s Claw is a step up from the original Beast Claw. |Image credit:Rock Paper Shotgun/Bandai Namco
- Weight: 4.0
- Damage Type: Slash.
- Requirements: Strength 20, Dexterity 10.
- Attribute Scaling: Strength C, Dexterity E.
- Weapon Skill: Red Bear Hunt.
- Attack Power: Physical 104.
- Passives: Blood loss buildup (45).
The Red Bear’s Claw is essentially the upgraded version of the Beast Claw Weapon. It’s an especially great option for anyone interested in a Strength-based bleed build. The claws will quickly wrack up and deliver blood loss to foes when combos are executed successfully.
The Weapon Skill, Red Bear Hunt , is a charged-up version of the normal attack and instantly deals large amounts of damage. When used three times in a row, the Skill will emit a claw attack from both hands individually, then together for a huge chunk of instant blood loss damage. This is super powerful, even more so if you can successfully stagger enemies in between these prompts so that they have no time to respond.
The standard and heavy attacks can be issued immediately after running, and this enables the Tarnished to do a step-dodge move. As this build is speedy and will take a chunk of your stamina, consider equipping a Talisman to buff this. We also recommend the Twinblade Talisman for an extra boost to chain attacks and the Claw Talisman for the extra boost to jump attacks.
How to get the Red Bear’s Claw

Here is the map location to find the Red Bear’s Claw. |Image credit:Rock Paper Shotgun/Bandai Namco
To get the Red Bear’s Claw, you must defeat the Red Bear boss located within the Northern Nameless Mausoleum in Rauh Base. This area is accessible by traversing two Spiritsprings opposite the pillar where the Rauh Map Fragment is located. Check out our Map Fragment locations guide for more info.
6. Backhand Blade
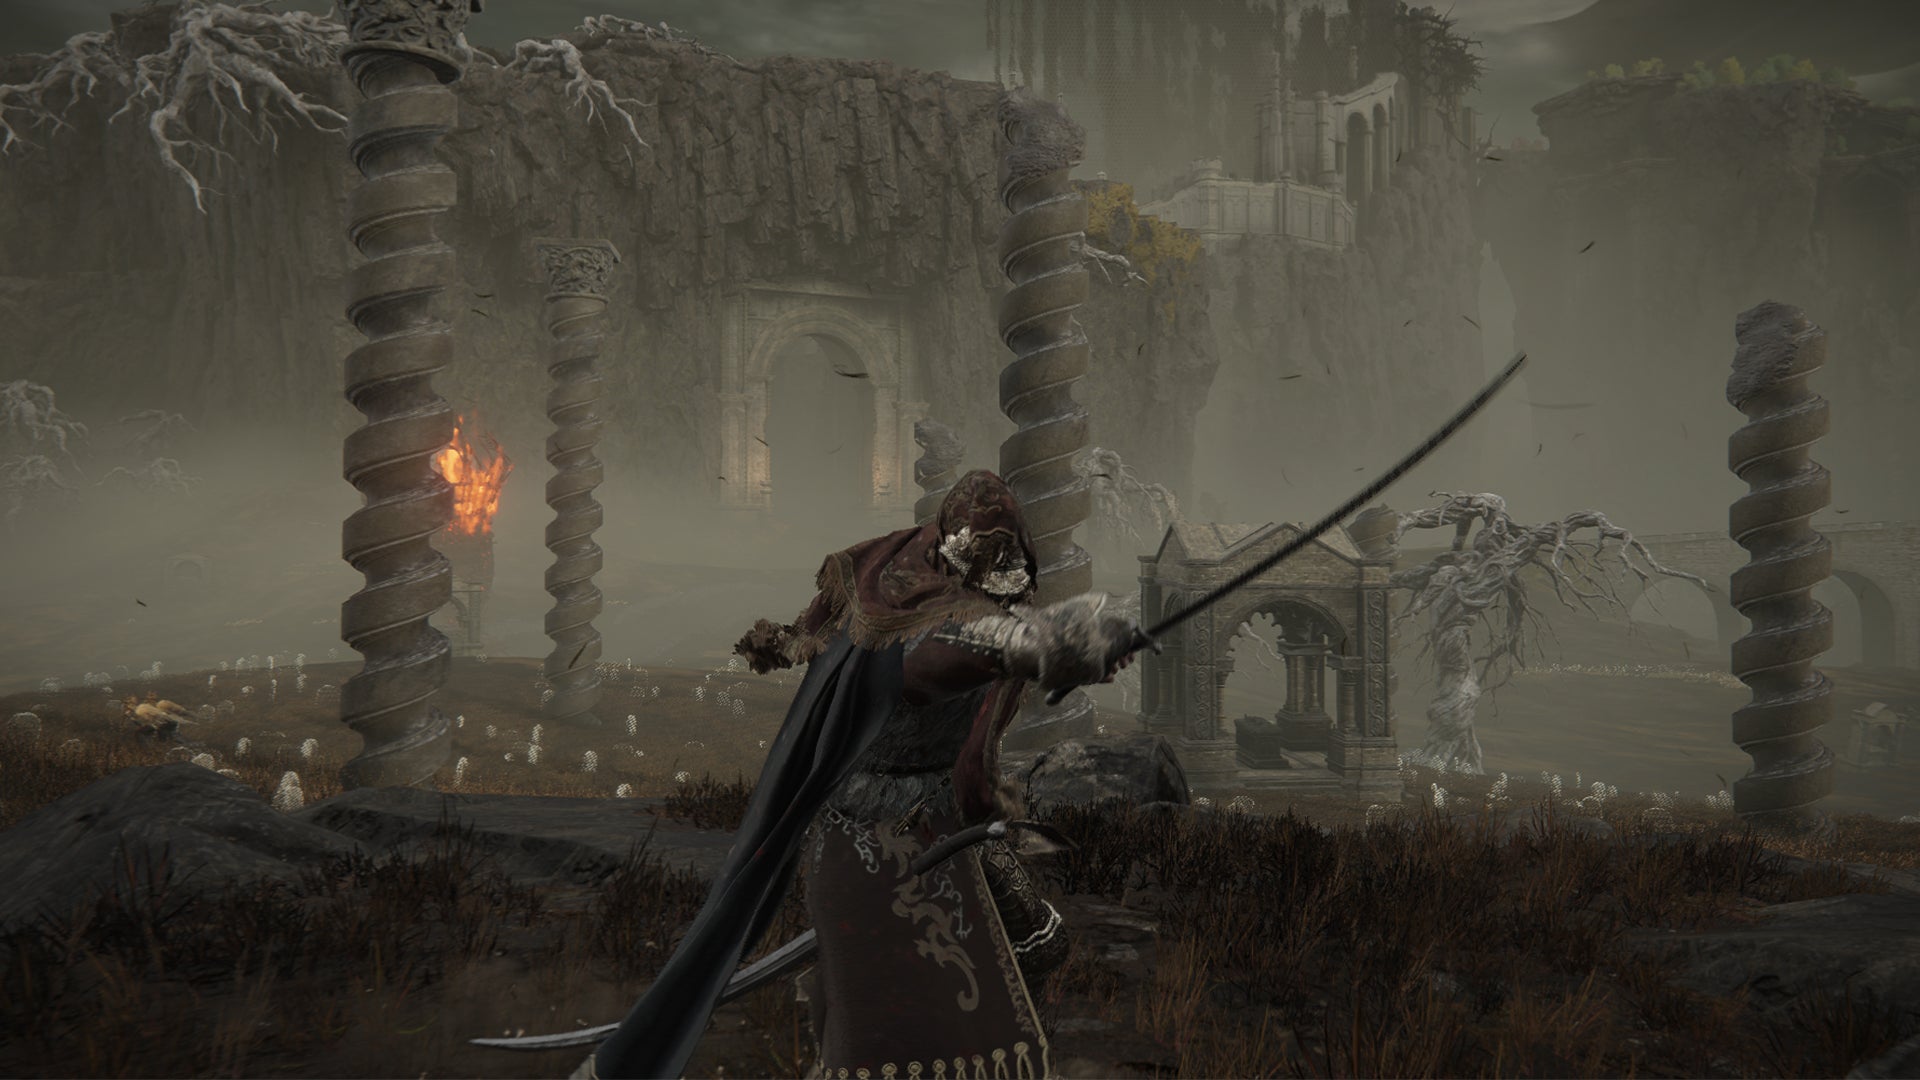
The Backhand Blade is a rogue’s dream weapon with backstab capabilities. |Image credit:Rock Paper Shotgun/Bandai Namco
- Weight: 2.0
- Damage Type: Slash/Pierce.
- Requirements: Strength 10, Dexterity 13.
- Attribute Scaling: Strength D, Dexterity D.
- Weapon Skill: Blind Spot.
- Attack Power: Physical 105.
FromSoftware fans are no strangers to the age-old tradition of skirting around bosses and stabbing them in the rear. Well, with the new Backhand Blade , this is not only celebrated but required. The Backhand Blade has a powerful ’ Blind Spot ’ Weapon Skill that allows the Tarnished to execute several side steps followed by a side-slash to enemies.
With this skill, you can essentially dance around your foes and chip away at them before they have a chance to react. The FP cost of this skill is remarkably low (9) and can be a recipe for success.
As this weapon caters to more of a stab-and-dodge playstyle, we recommend picking up the Retaliatory Crossed-Tree Talisman, which enhances attacks executed after rolling or backstepping. This can be obtained by following Leda’s questline .
How to get the Backhand Blade
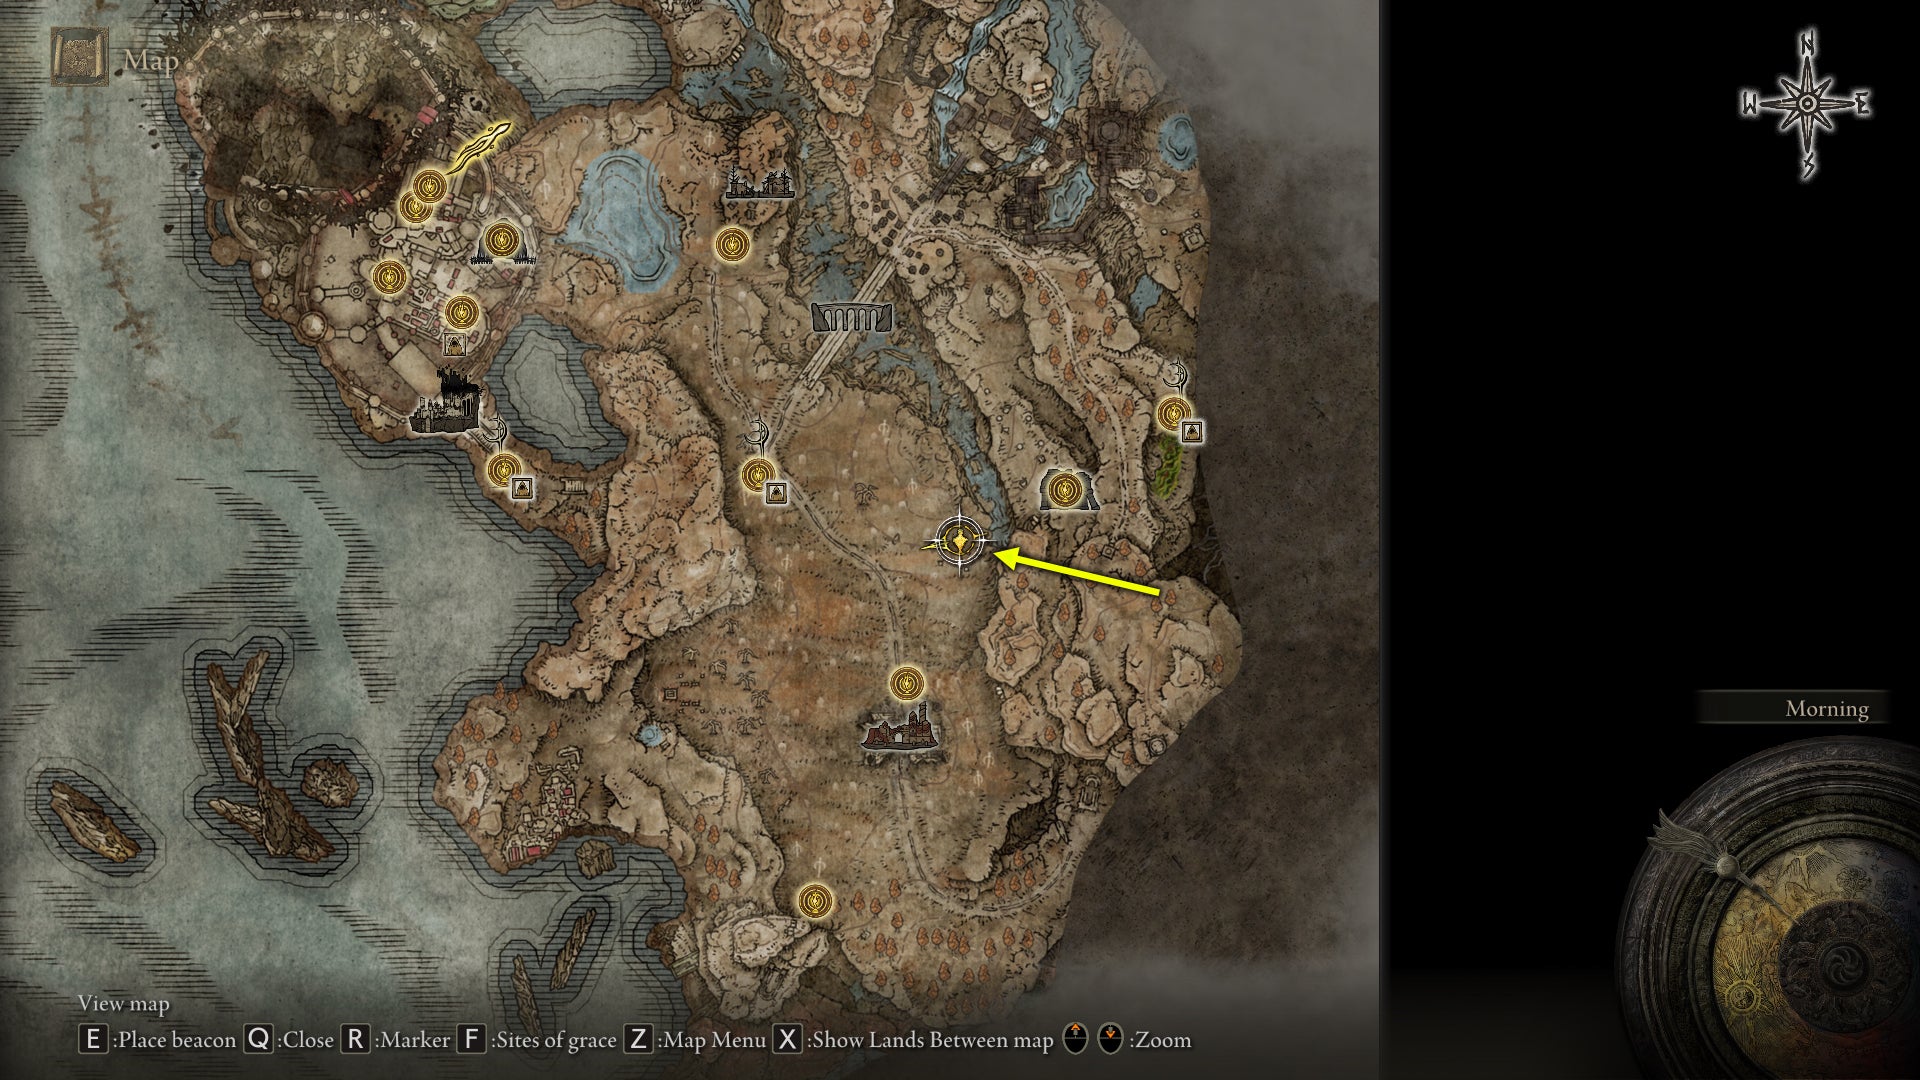
Here is the map location to find the Backhand Blade. |Image credit:Rock Paper Shotgun/Bandai Namco
You can pick up the Backhand Blade immediately after starting Shadow Of The Erdtree. Simply travel to the central east area of the Gravesite Plain, past the Smoldering Ruins . The sword is located within a mausoleum, on a corpse next to the stone coffin. (Beware of the Furnace Golem patrolling this area).
5. Milady

Milady is a good option if you want a weapon for a no-fuss Dexterity-based build. |Image credit:Rock Paper Shotgun/Bandai Namco
- Weight: 6.5
- Damage Type: Standard/Pierce.
- Requirements: Strength 12, Dexterity 17.
- Attribute Scaling: Strength D, Dexterity D.
- Weapon Skill: Impaling Thrust.
- Attack Power: Physical 116.
Milady was one of the first weapons accessible in Shadow of the Erdtree’s earliest previews, and immediately made waves due to its humourous name and powerful sweep attacks. The blade belongs to the new ‘Light Greatsword’ weapon category, meaning it doesn’t jeopardise speed for strength.
Its Impaling Thrust Weapon Skill delivers great damage for very little FP cost (9), meaning you can prioritise stat levels in endurance and either Strength or Dexterity . When experimenting with this blade, I noticed that the Impaling Thrust had surprising range, and I was able to target foes from a distance and then close the space with a chain of slash attacks. The move set for this weapon is geared towards combo attacks and the heavy attack prompt makes the Tarnished deliver two consecutive sweeping blows to targets.
Due to this, I recommend investing in Talismans that can bolster your Stamina recovery, seeing as you’ll be using a lot of combo and dodge moves. The Two-Headed Turtle Talisman , one of the new talismans in Shadow of the Erdtree , is a great option for this. I also recommend pairing it with the Wing Stance Ash of War, which is only available for Light Greatswords and allows the Tarnished to perform a quick three-slash combo, or a powerful leaping thrust towards a single enemy.
How to get Milady
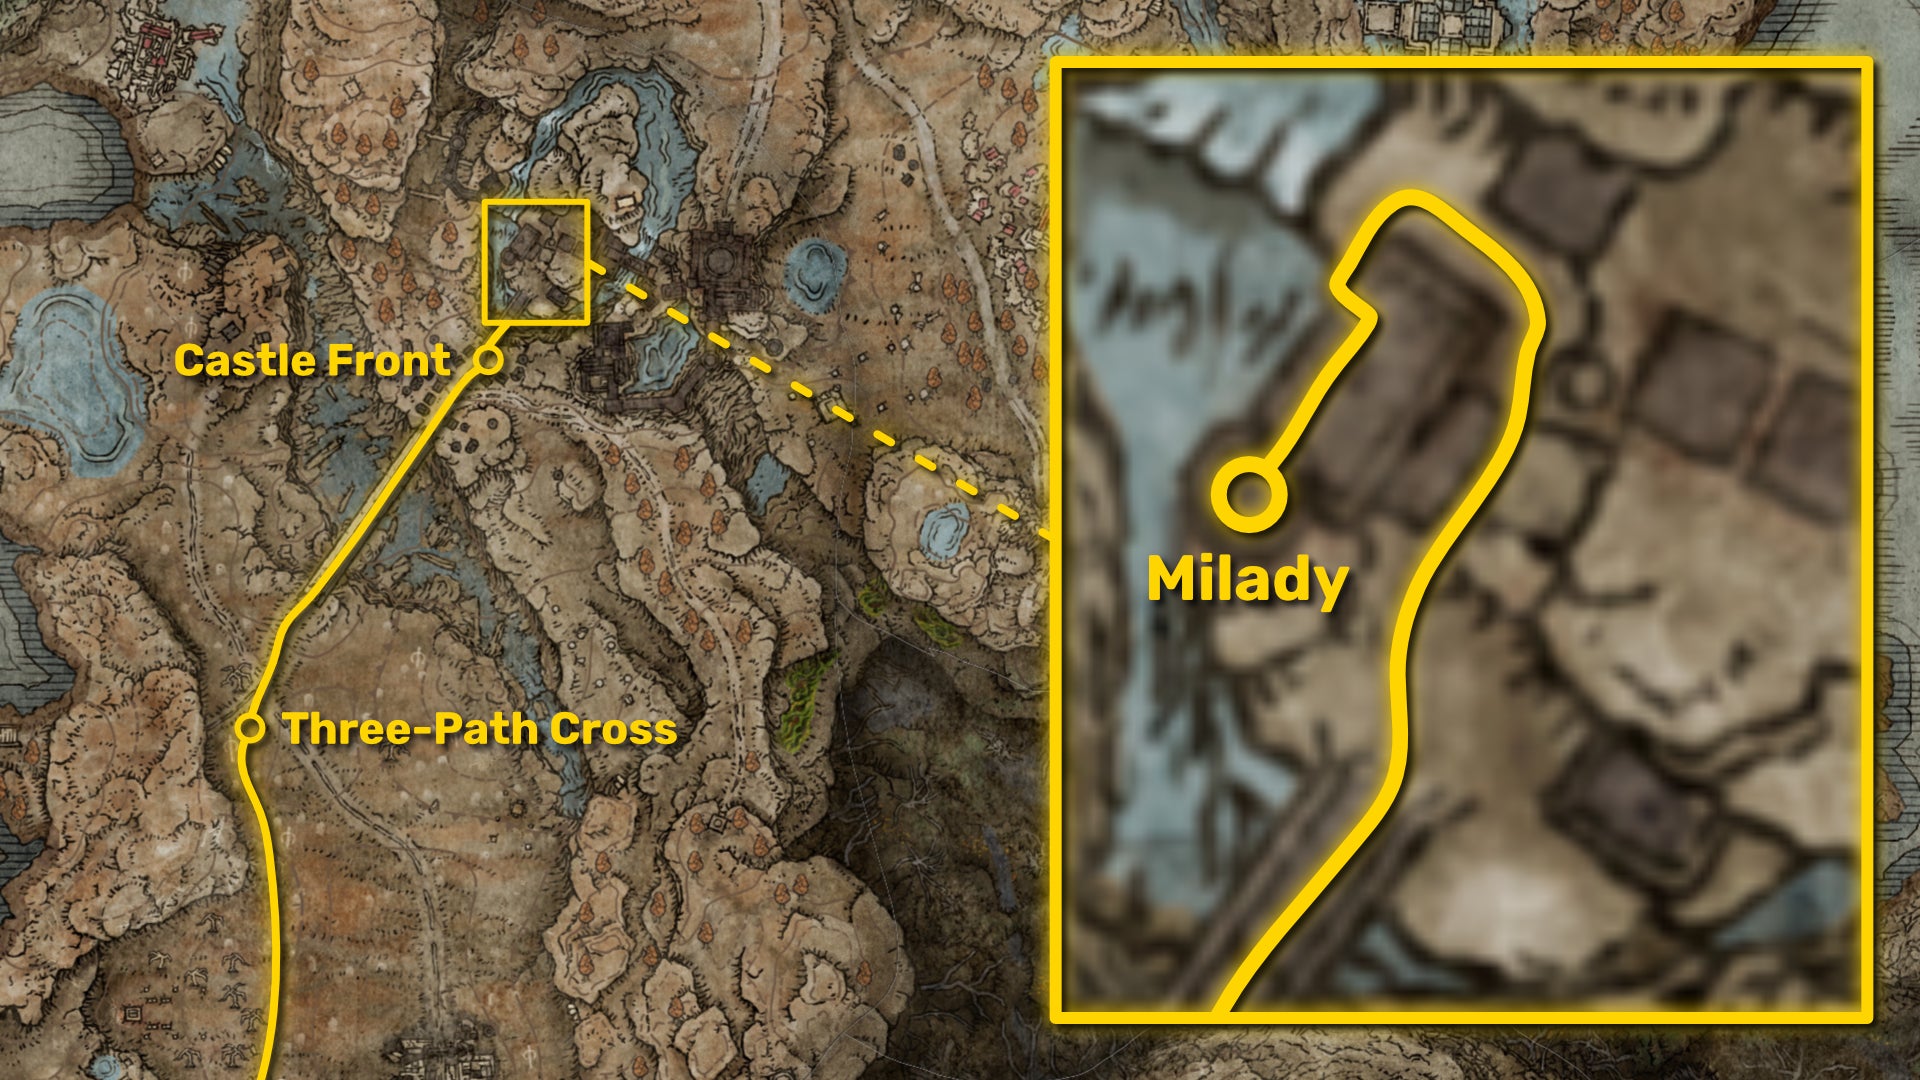
Here is the map location to find Milady. |Image credit:Rock Paper Shotgun/Bandai Namco
We have an extensive guide on how to get Milady in Elden Ring but essentially, you need to travel to Castle Ensis , east of the Gravesite Plain. The main road within this region will naturally lead to the castle, and once you’re past the entrance and Troll Knight, the sword will be at the top of a tower. The tower in question will be patrolled by a soldier and dog, and is located opposite the cave entrance which marks the route forward into the castle.
4. Star-Lined Sword
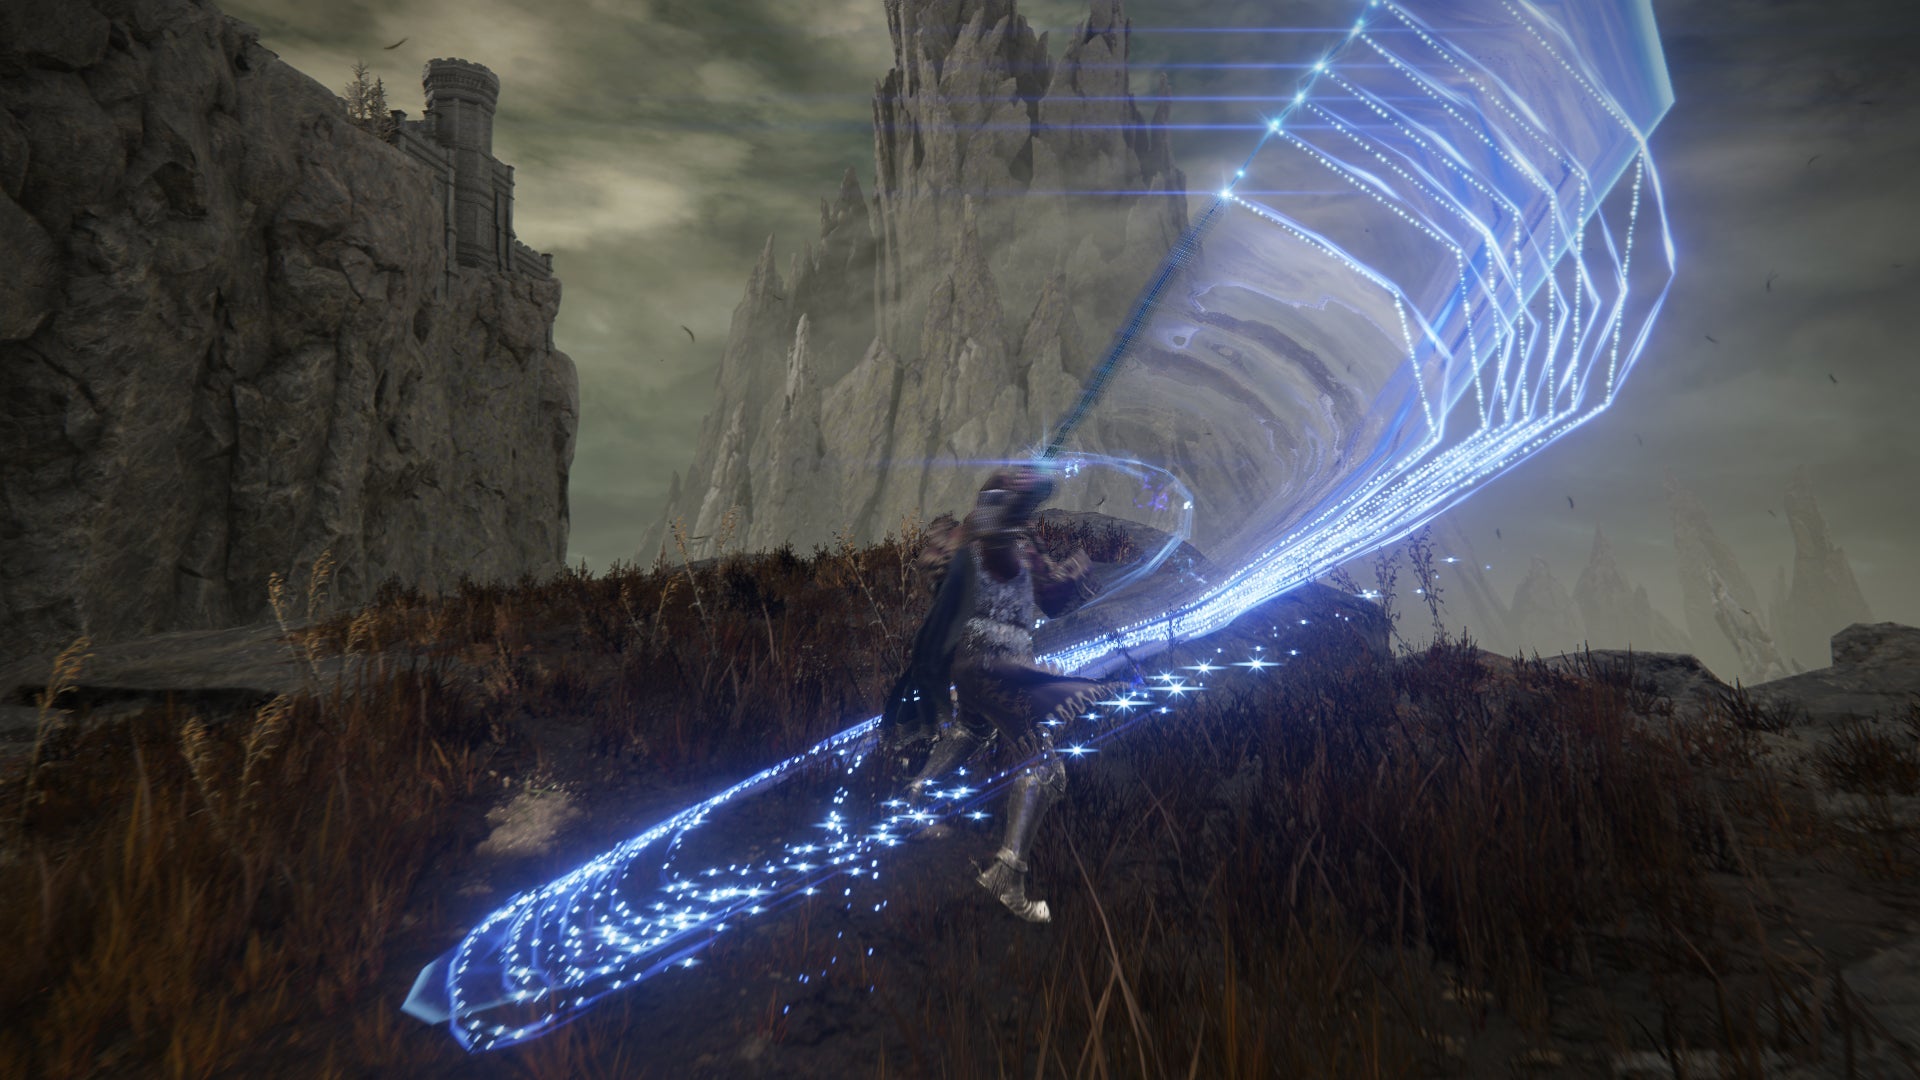
The Star-Lined Sword has a three-prong attack for its Weapon Skill. |Image credit:Rock Paper Shotgun/Bandai Namco
- Weight: 5.0
- Damage Type: Slash/Pierce.
- Requirements: Strength 10, Dexterity 23, Intelligence 21.
- Attribute Scaling: Strength E, Dexterity C, Intelligence D.
- Weapon Skill: Onze’s Line of Stars.
- Attack Power: Physical 82, Magic 82.
- Passives: Blood loss buildup (45).
The Star-Lined Sword is a curious and unassuming Katana at first. Its Weapon Skill, Onze’s Line of Stars has three variant movements that get more powerful as they are executed. The first prompt results in two large magical slash attacks, and the second is a charged form that emits two attacks (one in a jump). The last of the three enables the Tarnished to disappear, then reappear in the air and perform a powerful downward slash.
The FP cost is surprisingly low (10) and doesn’t get higher with each consecutive Weapon Skill attack. If you manage to pull off all three attacks, the impact on foes will be devastating. What’s more, with the passive bleed damage of the Katana, the normal attack is quick enough for you to deliver multiple blows and reap the benefit of its status effect capabilities.
We recommend pairing this blade with the Lord of Blood’s Exultation Talisman, which increases your attack power when blood loss is in the vicinity. This is usually a great option if you’re wielding a Katana or Claws weapon.
How to get the Star-Lined Sword

Here is the map location to find the Star-Lined Sword. |Image credit:Rock Paper Shotgun/Bandai Namco
To get the Star-Lined Sword you must defeat Demi-Human Queen Marigga , the optional boss within the northwest region of the Cerulean Coast .
We have a handy guide on how to get to the Cerulean Coast if you’re struggling to unlock this region. In short, take the pathway east of the Cerulean Coast West Site Of Grace (right of the large shipwreck) and follow this path all around, past the glowworms and demi-human enemies until you reach the other side of the western coastline where the boss resides on the beach with more shipwrecks.
3. Euporia
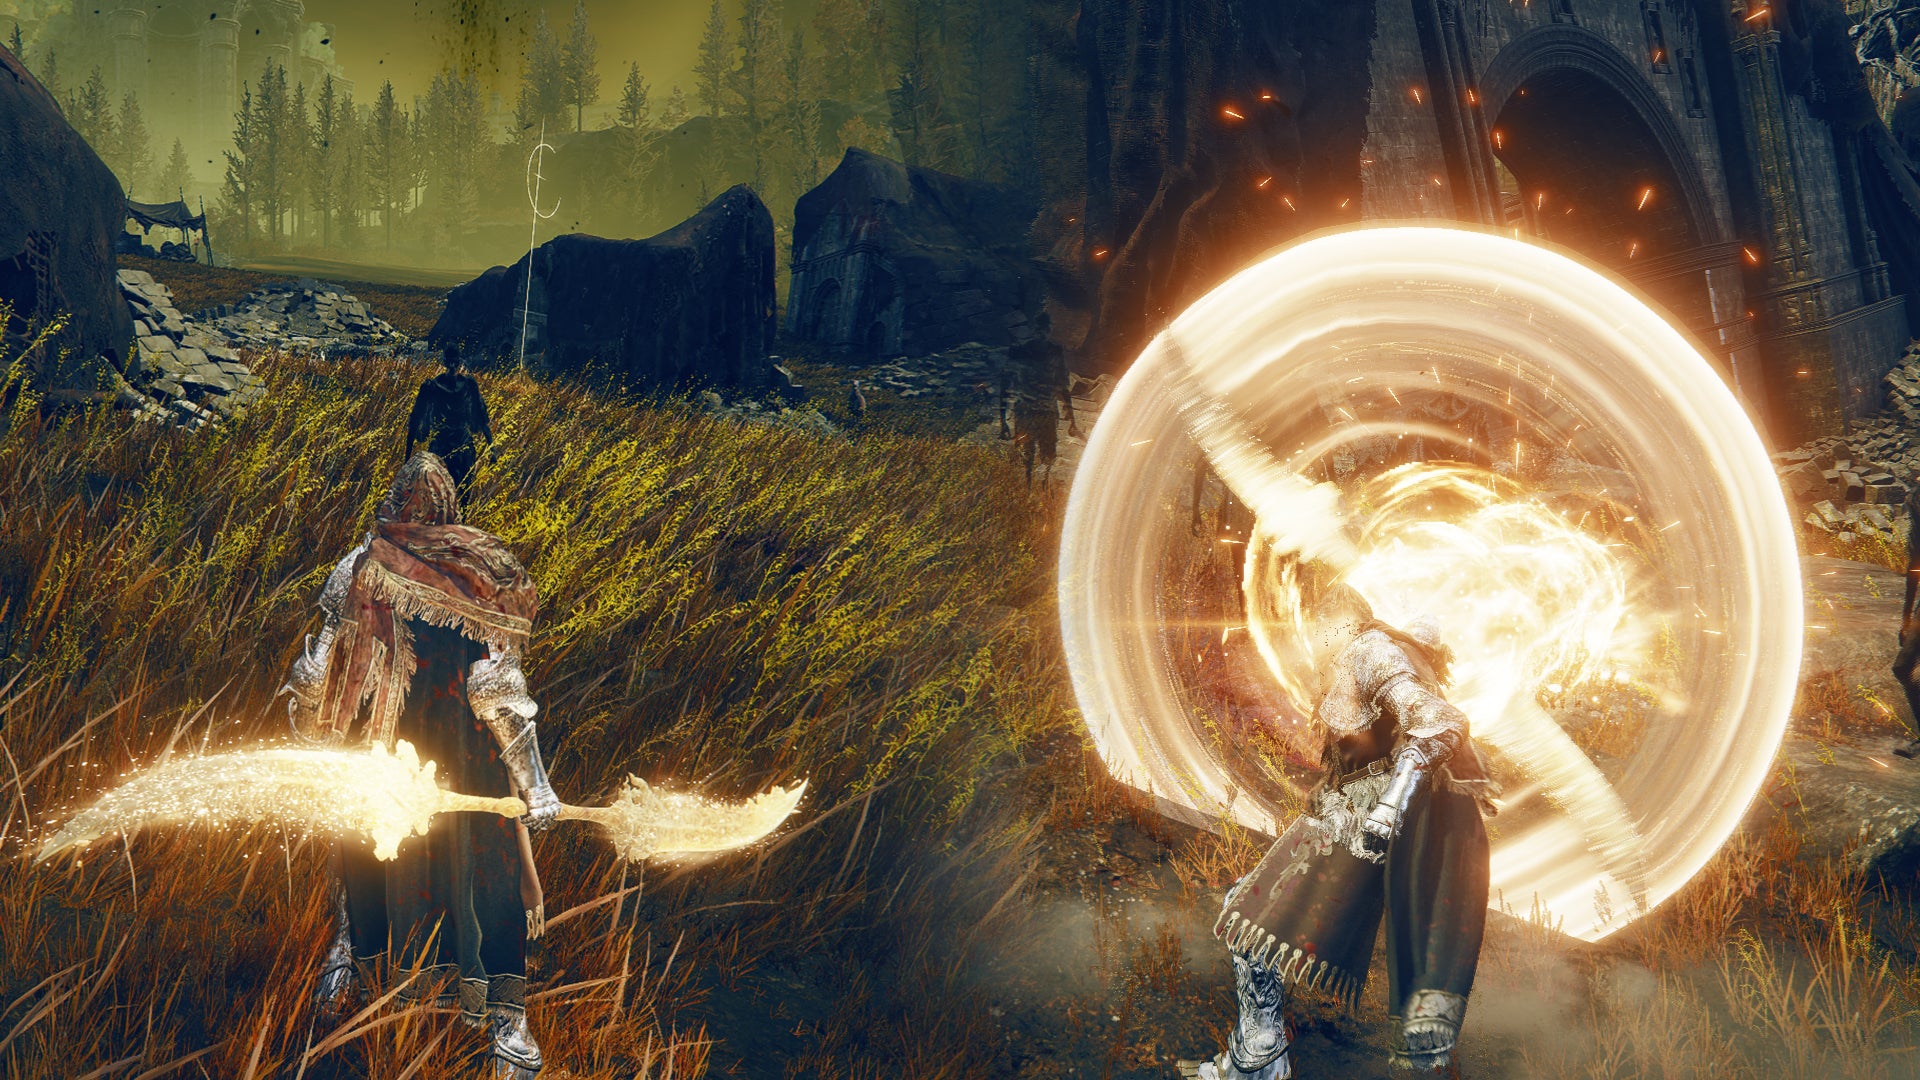
The trick with Euporia is triggering the Weapon Skill first, then walking closer to enemies to avoid being interrupted. |Image credit:Rock Paper Shotgun/Bandai Namco
- Weight: 8.5
- Damage Type: Standard/Pierce.
- Requirements: Strength 16, Dexterity 16, Faith 24.
- Attribute Scaling: Strength D, Dexterity D, Faith D.
- Weapon Skill: Euporia Vortex.
- Attack Power: Physical 84, Holy 100.
The Euporia is one of the best Twinblades in Elden Ring (possibly the best). It has a host of moves that meld together to form a formidable build. Essentially, the Weapon Skill, Euporia Vortex , allows the Tarnished to spin the blade around and emit a circular wave of Holy energy.
Although this can potentially be interrupted, if you pull it off, you can continuously hit enemies and deal sustained damage whilst doing so. When you follow this with a normal attack you may automatically stun enemies. What’s more, this Skill is fuelled by delivering consecutive hits. The blades will glow with every hit and chime once they are fully charged (for up to 2 charges). This fuels the Weapon Skill and allows it to deliver even more damage.
The glow does have a cooldown, so once charged you’ll want to trigger the Weapon Skill fairly quickly. Additionally, when running, if you perform an attack you will deliver a thrust or two slash attacks immediately.
Euporia has huge potential, which you can capitalise on further if you pair it with the Godfrey Icon Talisman (which enhances charged spells and Skills). Make sure you keep an eye on your stamina as the Weapon Skill will consume this as well as FP.
How to get the Euporia
To get the Euporia requires traversing a route along the battlements of Enir-Ilim . This means you need to progress the main DLC storyline a fair way to unlock this late-game area. Namely, you must defeat Messmer and set fire to the tree beyond the Church of the Bud .
Once completed, you can then take the route from Enir-Ilim back to the Belurat Tower and loot Euporia from a shrine on the way. Specifically, you’ll want to follow the steps below.

Here is a step-by-step of where to travel to find the Euporia Twinblade in Elden Ring.
- From the Spiral Rise Site Of Grace in Enir Ilim, travel back to where you came from, past the mage enemies.
- Take the stairs to the left and go through the antechamber below.
- From here, there will be a set of stairs you can jump down from the southeast.
- From the stairs, walk up and there will be a hole in the stone railing, jump down.
- You should now see a pathway you can take along the battlements. Here, there will also be a few items to loot.
- Make your way around and jump to the dragon head sculpture on the opposite building.
- Walk around these ramparts and drop down through the hole - watch out for the enemy that will immediately attack you.
- Walk to the end of the stairs. There will be a platform that juts out and leads to an open window in the building opposite. Make sure you run and jump at the last minute or you won’t make it.
- Once you’ve dropped down you’ll get the message that you’re back in Belurat Tower.
- Exit the room and take the stairs down from the statue (southeast).
- Take the lift down.
- Exit the room, walk downstairs and defeat the three enemies in the next room.
- Continue your descent and defeat the Lion Knight.
- Take the next lift down.
- Open the large double doors ahead and loot the sword from the corpse at the altar.
Warning: The next two entries contain spoilers for the main bosses in Shadow Of The Erdtree.
2. Spear of the Impaler
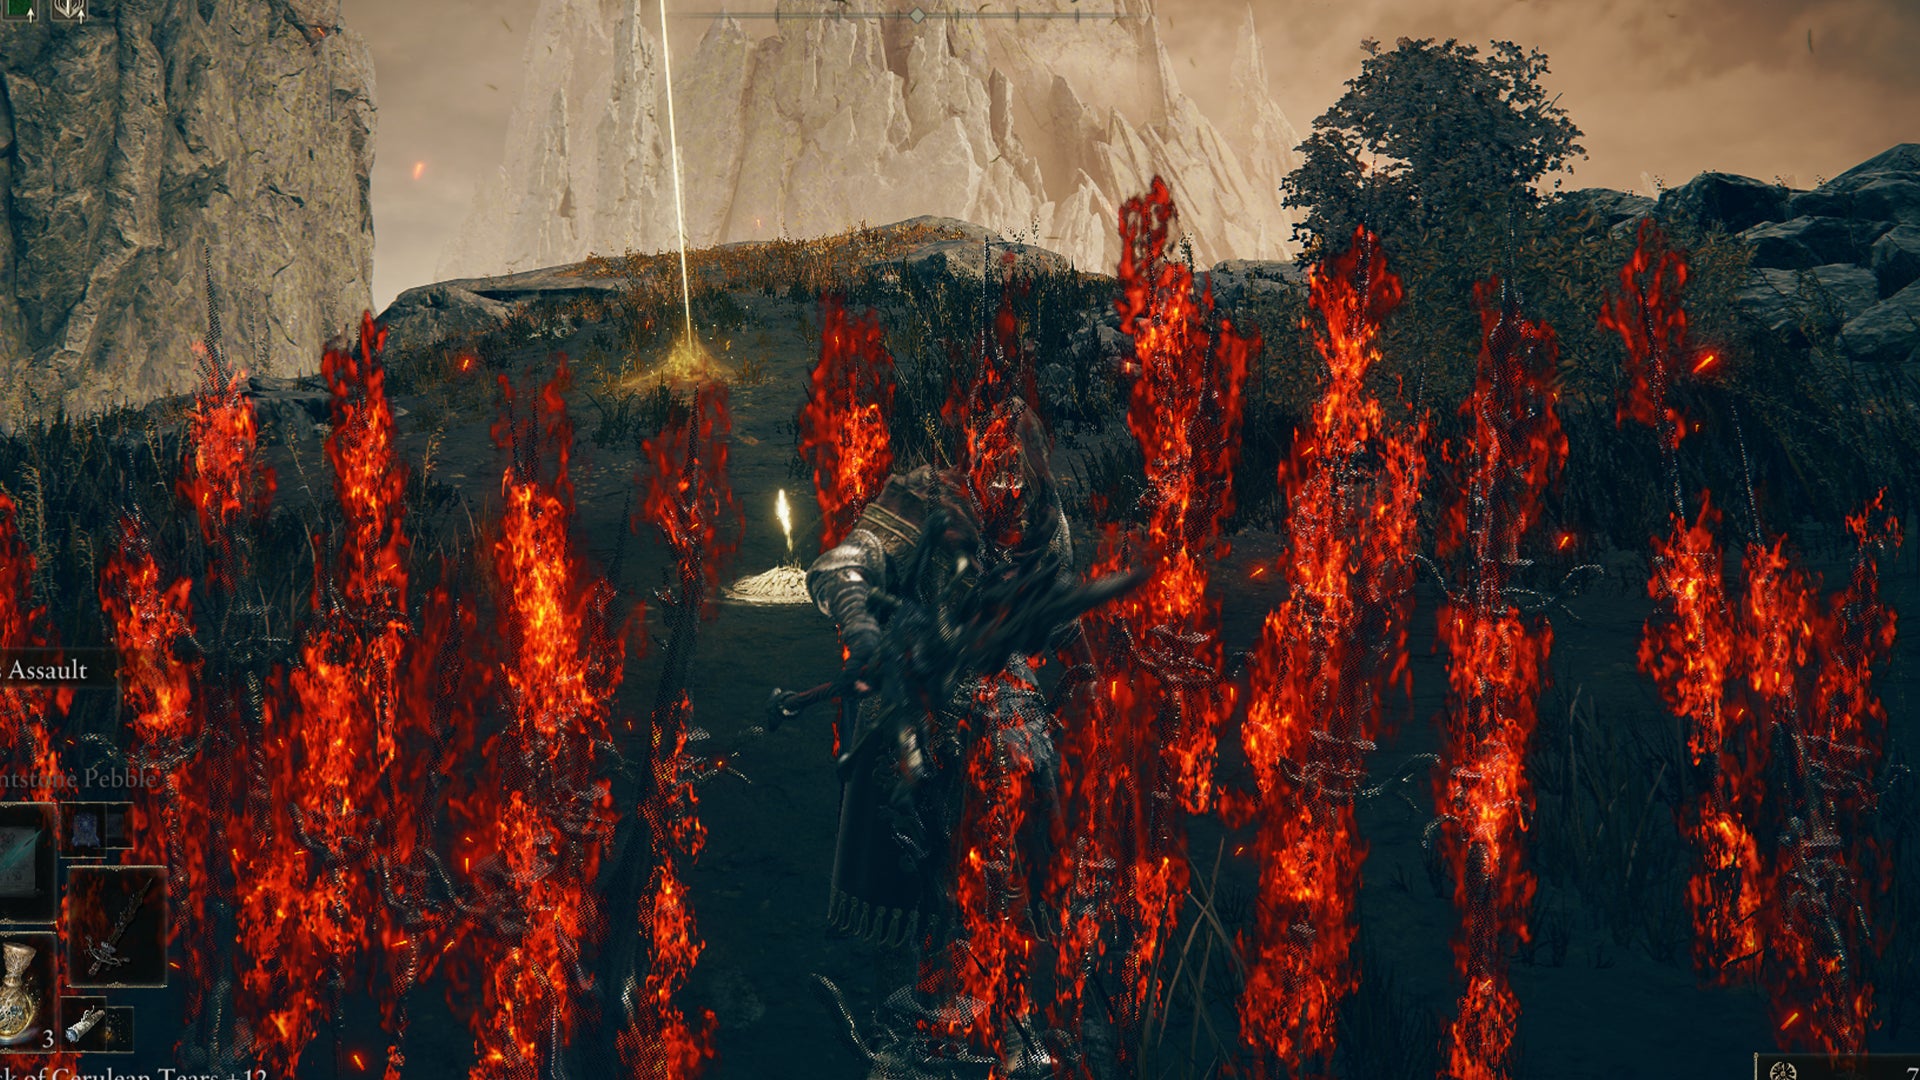
This Spear has range, Fire damage and a three-tier Weapon Skill attack like the Star-Lined Sword. |Image credit:Rock Paper Shotgun/Bandai Namco
- Weight: 9.5
- Damage Type: Standard/Pierce.
- Requirements: Strength 14, Dexterity 35, Faith 18.
- Attribute Scaling: Strength E, Dexterity C, Faith D.
- Weapon Skill: Messmer’s Assault.
- Attack Power: Physical 85, Fire 102.
What better way to celebrate defeating Messmer than controlling his own flames? The Spear of the Impaler is capable of three successive Weapon Skill attacks. When performed one after another, they get stronger.
The first of Messmer’s Assault summons three sweeping torrents of flames, which emit around the Tarnished as they leap into the air. The second attack makes the Tarnished leap and perform three thrust attacks. Lastly, if you have used the Weapon Skill prompt three times in a row, the Tarnished will plunge the spear into the ground and summon a field full of spears.
Additionally, the spear can be thrown (and will automatically return to your hand) either on foot or from the back of Torrent. We suggest pairing the Spear with something like the Fire Scorpion Charm for an extra buff to all fire attacks.
How to get the Spear of the Impaler

Here is the map location to find Messmer. |Image credit:Rock Paper Shotgun/Bandai Namco
To get the Spear of the Impaler you must defeat Messmer the Impaler at the Shadow Keep and exchange his Remembrance with Enia at the Roundtable Hold . Thankfully, you can return to the Lands Between at any point in your playthrough of the DLC.
The Shadow Keep is located in the Scadu Altus region and to get to Messmer (at the Dark Chamber Entrance Site Of Grace) you’ll need to navigate to the top of the complex maze-like Specimen Storehouse.
1. Rellana’s Twin Blades

Wield Fire, Magic and style with Rellana’s Twin Blades |Image credit:Rock Paper Shotgun/Bandai Namco
- Weight: 8.0
- Damage Type: Standard/Pierce.
- Requirements: Strength 13, Dexterity 16, Intelligence 16, Faith 16.
- Attribute Scaling: Strength D, Dexterity D, Intelligence D, Faith D.
- Weapon Skill: Moon-and-Fire Stance.
- Attack Power: Physical 103, Magic 66, Fire 66.
As another boss reward on this list, Rellana’s Twin Blades should be slightly easier to obtain and is just as impressive. You can quite literally get the best of both worlds with this weapon’s Moon-and-Fire Stance .
This Weapon Skill charges the twin blades with Fire and Magic damage. The next strong attack you make afterwards will emit a fiery torrent of damage or, if you use a light attack, it will summon arcs of glintstone light.
Dealing three different types of damage means that this weapon naturally requires more investment into different stats. These stat requirements aren’t too high, however, especially by the time you get to the DLC opening. We recommend using a Talisman which will bolster your Fire and Magic damage like the Fire Scorpion Charm and Magic Scorpion Charm Talismans.
How to get Rellana’s Twin Blades

Here is the map location to find Rellana. |Image credit:Rock Paper Shotgun/Bandai Namco
To get Rellana’s Twin Blades you must defeat Rellana , outside the Castle-Lord’s Chamber within Castle Ensis (east of the Graveste Plain). This is also one of the ways to gain access to the Scadu Altus region, so it’s worthwhile coming here anyway.
That rounds up our guide to the best weapons in Elden Ring: Shadow Of The Erdtree. For those just starting the DLC, take a look at our guide on what to do first in Shadow of the Erdtree . We’ve also got a list of all boss locations in the Land of Shadow, as well as all new armor in the DLC. If you’d rather just get a rundown of all new weapon types in Shadow of the Erdtree, we’ve got you covered as well.


Elden Ring
PS4 , PS5 , Xbox One , Xbox Series X/S , PC
Rock Paper Shotgun is better when you sign in
Sign in and join us on our journey to discover strange and compelling PC games.

All 75 Arc Raiders Blueprints and where to get them
These areas have the highest chance of giving you Blueprints

Image credit:Rock Paper Shotgun/Embark Studios

Looking for more Arc Raiders Blueprints? It’s a special day when you find a Blueprint, as they’re among the most valuable items in Arc Raiders. If you find a Blueprint that you haven’t already found, then you must make sure you hold onto it at all costs, because Blueprints are the key to one of the most important and powerful systems of meta-progression in the game.
This guide aims to be the very best guide on Blueprints you can find, starting with a primer on what exactly they are and how they work in Arc Raiders, before delving into exactly where to get Blueprints and the very best farming spots for you to take in your search.
We’ll also go over how to get Blueprints from other unlikely activities, such as destroying Surveyors and completing specific quests. And you’ll also find the full list of all 75 Blueprints in Arc Raiders on this page (including the newest Blueprints added with the Cold Snap update , such as the Deadline Blueprint and Firework Box Blueprint), giving you all the information you need to expand your own crafting repertoire.
In this guide:
- What are Blueprints in Arc Raiders?
- Full Blueprint list: All crafting recipes
- Where to find Blueprints in Arc Raiders Blueprints obtained from quests Blueprints obtained from Trials Best Blueprint farming locations

What are Blueprints in Arc Raiders?
Blueprints in Arc Raiders are special items which, if you manage to extract with them, you can expend to permanently unlock a new crafting recipe in your Workshop. If you manage to extract from a raid with an Anvil Blueprint, for example, you can unlock the ability to craft your very own Anvil Pistol, as many times as you like (as long as you have the crafting materials).
To use a Blueprint, simply open your Inventory while in the lobby, then right-click on the Blueprint and click “Learn And Consume” . This will permanently unlock the recipe for that item in your Workshop. As of the Stella Montis update, there are allegedly 75 different Blueprints to unlock - although only 68 are confirmed to be in the game so far. You can see all the Blueprints you’ve found and unlocked by going to the Workshop menu, and hitting “R” to bring up the Blueprint screen.
It’s possible to find duplicates of past Blueprints you’ve already unlocked. If you find these, then you can either sell them, or - if you like to play with friends - you can take it into a match and gift it to your friend so they can unlock that recipe for themselves. Another option is to keep hold of them until the time comes to donate them to the Expedition.
Full Blueprint list: All crafting recipes
Below is the full list of all the Blueprints that are currently available to find in Arc Raiders, and the crafting recipe required for each item:
| Blueprint | Type | Recipe | Crafted At |
|---|---|---|---|
| Bettina | Weapon | 3x Advanced Mechanical Components 3x Heavy Gun Parts 3x Canister | Gunsmith 3 |
| Blue Light Stick | Quick Use | 3x Chemicals | Utility Station 1 |
| Aphelion | Weapon | 3x Magnetic Accelerator 3x Complex Gun Parts 1x Matriarch Reactor | Gunsmith 3 |
| Combat Mk. 3 (Flanking) | Augment | 2x Advanced Electrical Components 3x Processor | Gear Bench 3 |
| Combat Mk. 3 (Aggressive) | Augment | 2x Advanced Electrical Components 3x Processor | Gear Bench 3 |
| Complex Gun Parts | Material | 2x Light Gun Parts 2x Medium Gun Parts 2x Heavy Gun Parts | Refiner 3 |
| Fireworks Box | Quick Use | 1x Explosive Compound 3x Pop Trigger | Explosives Station 2 |
| Gas Mine | Mine | 4x Chemicals 2x Rubber Parts | Explosives Station 1 |
| Green Light Stick | Quick Use | 3x Chemicals | Utility Station 1 |
| Pulse Mine | Mine | 1x Crude Explosives 1x Wires | Explosives Station 1 |
| Seeker Grenade | Grenade | 1x Crude Explosives 2x ARC Alloy | Explosives Station 1 |
| Looting Mk. 3 (Survivor) | Augment | 2x Advanced Electrical Components 3x Processor | Gear Bench 3 |
| Angled Grip II | Mod | 2x Mechanical Components 3x Duct Tape | Gunsmith 2 |
| Angled Grip III | Mod | 2x Mod Components 5x Duct Tape | Gunsmith 3 |
| Hullcracker | Weapon | 1x Magnetic Accelerator 3x Heavy Gun Parts 1x Exodus Modules | Gunsmith 3 |
| Launcher Ammo | Ammo | 5x Metal Parts 1x Crude Explosives | Workbench 1 |
| Anvil | Weapon | 5x Mechanical Components 5x Simple Gun Parts | Gunsmith 2 |
| Anvil Splitter | Mod | 2x Mod Components 3x Processor | Gunsmith 3 |
| ??? | ??? | ??? | ??? |
| Barricade Kit | Quick Use | 1x Mechanical Components | Utility Station 2 |
| Blaze Grenade | Grenade | 1x Explosive Compound 2x Oil | Explosives Station 3 |
| Bobcat | Weapon | 3x Advanced Mechanical Components 3x Light Gun Parts | Gunsmith 3 |
| Osprey | Weapon | 2x Advanced Mechanical Components 3x Medium Gun Parts 7x Wires | Gunsmith 3 |
| Burletta | Weapon | 3x Mechanical Components 3x Simple Gun Parts | Gunsmith 1 |
| Compensator II | Mod | 2x Mechanical Components 4x Wires | Gunsmith 2 |
| Compensator III | Mod | 2x Mod Components 8x Wires | Gunsmith 3 |
| Defibrillator | Quick Use | 9x Plastic Parts 1x Moss | Medical Lab 2 |
| ??? | ??? | ??? | ??? |
| Equalizer | Weapon | 3x Magnetic Accelerator 3x Complex Gun Parts 1x Queen Reactor | Gunsmith 3 |
| Extended Barrel | Mod | 2x Mod Components 8x Wires | Gunsmith 3 |
| Extended Light Mag II | Mod | 2x Mechanical Components 3x Steel Spring | Gunsmith 2 |
| Extended Light Mag III | Mod | 2x Mod Components 5x Steel Spring | Gunsmith 3 |
| Extended Medium Mag II | Mod | 2x Mechanical Components 3x Steel Spring | Gunsmith 2 |
| Extended Medium Mag III | Mod | 2x Mod Components 5x Steel Spring | Gunsmith 3 |
| Extended Shotgun Mag II | Mod | 2x Mechanical Components 3x Steel Spring | Gunsmith 2 |
| Extended Shotgun Mag III | Mod | 2x Mod Components 5x Steel Spring | Gunsmith 3 |
| Remote Raider Flare | Quick Use | 2x Chemicals 4x Rubber Parts | Utility Station 1 |
| Heavy Gun Parts | Material | 4x Simple Gun Parts | Refiner 2 |
| Venator | Weapon | 2x Advanced Mechanical Components 3x Medium Gun Parts 5x Magnet | Gunsmith 3 |
| Il Toro | Weapon | 5x Mechanical Components 6x Simple Gun Parts | Gunsmith 1 |
| Jolt Mine | Mine | 1x Electrical Components 1x Battery | Explosives Station 2 |
| Explosive Mine | Mine | 1x Explosive Compound 1x Sensors | Explosives Station 3 |
| Jupiter | Weapon | 3x Magnetic Accelerator 3x Complex Gun Parts 1x Queen Reactor | Gunsmith 3 |
| Light Gun Parts | Material | 4x Simple Gun Parts | Refiner 2 |
| Lightweight Stock | Mod | 2x Mod Components 5x Duct Tape | Gunsmith 3 |
| Lure Grenade | Grenade | 1x Speaker Component 1x Electrical Components | Utility Station 2 |
| Medium Gun Parts | Material | 4x Simple Gun Parts | Refiner 2 |
| Torrente | Weapon | 2x Advanced Mechanical Components 3x Medium Gun Parts 6x Steel Spring | Gunsmith 3 |
| Muzzle Brake II | Mod | 2x Mechanical Components 4x Wires | Gunsmith 2 |
| Muzzle Brake III | Mod | 2x Mod Components 8x Wires | Gunsmith 3 |
| Padded Stock | Mod | 2x Mod Components 5x Duct Tape | Gunsmith 3 |
| Shotgun Choke II | Mod | 2x Mechanical Components 4x Wires | Gunsmith 2 |
| Shotgun Choke III | Mod | 2x Mod Components 8x Wires | Gunsmith 3 |
| Shotgun Silencer | Mod | 2x Mod Components 8x Wires | Gunsmith 3 |
| Showstopper | Grenade | 1x Advanced Electrical Components 1x Voltage Converter | Explosives Station 3 |
| Silencer I | Mod | 2x Mechanical Components 4x Wires | Gunsmith 2 |
| Silencer II | Mod | 2x Mod Components 8x Wires | Gunsmith 3 |
| Snap Hook | Quick Use | 2x Power Rod 3x Rope 1x Exodus Modules | Utility Station 3 |
| Stable Stock II | Mod | 2x Mechanical Components 3x Duct Tape | Gunsmith 2 |
| Stable Stock III | Mod | 2x Mod Components 5x Duct Tape | Gunsmith 3 |
| Tagging Grenade | Grenade | 1x Electrical Components 1x Sensors | Utility Station 3 |
| Tempest | Weapon | 3x Advanced Mechanical Components 3x Medium Gun Parts 3x Canister | Gunsmith 3 |
| Trigger Nade | Grenade | 2x Crude Explosives 1x Processor | Explosives Station 2 |
| Vertical Grip II | Mod | 2x Mechanical Components 3x Duct Tape | Gunsmith 2 |
| Vertical Grip III | Mod | 2x Mod Components 5x Duct Tape | Gunsmith 3 |
| Vita Shot | Quick Use | 2x Antiseptic 1x Syringe | Medical Lab 3 |
| Vita Spray | Quick Use | 3x Antiseptic 1x Canister | Medical Lab 3 |
| Vulcano | Weapon | 1x Magnetic Accelerator 3x Heavy Gun Parts 1x Exodus Modules | Gunsmith 3 |
| Wolfpack | Grenade | 2x Explosive Compound 2x Sensors | Explosives Station 3 |
| Red Light Stick | Quick Use | 3x Chemicals | Utility Station 1 |
| Smoke Grenade | Grenade | 14x Chemicals 1x Canister | Utility Station 2 |
| Deadline | Mine | 3x Explosive Compound 2x ARC Circuitry | Explosives Station 3 |
| Trailblazer | Grenade | 1x Explosive Compound 1x Synthesized Fuel | Explosives Station 3 |
| Tactical Mk. 3 (Defensive) | Augment | 2x Advanced Electrical Components 3x Processor | Gear Bench 3 |
| Tactical Mk. 3 (Healing) | Augment | 2x Advanced Electrical Components 3x Processor | Gear Bench 3 |
| Yellow Light Stick | Quick Use | 3x Chemicals | Utility Station 1 |
Note: The missing Blueprints in this list likely have not actually been added to the game at the time of writing, because none of the playerbase has managed to find any of them. As they are added to the game, I will update this page with the most relevant information so you know exactly how to get all 75 Arc Raiders Blueprints.
Where to find Blueprints in Arc Raiders
Below is a list of all containers, modifiers, and events which maximise your chances of finding Blueprints:
- Certain quests reward you with specific Blueprints .
- Completing Trials has a high chance of offering Blueprints as rewards.
- Surveyors have a decent chance of dropping Blueprints on death.
- High loot value areas tend to have a greater chance of spawning Blueprints.
- Night Raids and Storms may increase rare Blueprint spawn chances in containers.
- Containers with higher numbers of items may have a higher tendency to spawn Blueprints. As a result, Blue Gate (which has many “large” containers containing multiple items) may give you a higher chance of spawning Blueprints.
- Raider containers (Raider Caches, Weapon Boxes, Medical Bags, Grenade Tubes) have increased Blueprint drop rates. As a result, the Uncovered Caches event gives you a high chance of finding Blueprints.
- Security Lockers have a higher than average chance of containing Blueprints.
- Certain Blueprints only seem to spawn under specific circumstances: Tempest Blueprint only spawns during Night Raid events. Vulcano Blueprint only spawns during Hidden Bunker events. Jupiter and Equaliser Blueprints only spawn during Harvester events.

Raider Caches, Weapon Boxes, and other raider-oriented container types have a good chance of offering Blueprints. |Image credit:Rock Paper Shotgun/Embark Studios
Blueprints have a very low chance of spawning in any container in Arc Raiders, around 1-2% on average. However, there is a higher chance of finding Blueprints in particular container types. Specifically, you can find more Blueprints in Raider containers and security lockers.
Beyond this, if you’re looking for Blueprints you should focus on regions of the map which are marked as having particularly high-value loot. Areas such as the Control Tower in Dam Battlegrounds, the Arrival and Departure Buildings in Spaceport, and Pilgrim’s Peak in Blue Gate all have a better-than-average chance of spawning Blueprints somewhere amongst all their containers. Night Raids and Electromagnetic Storm events also increase the drop chances of certain Blueprints .
In addition to these containers, you can often loot Blueprints from destroyed Surveyors - the largest of the rolling ball ARC. Surveyors are more commonly found on the later maps - Spaceport and Blue Gate - and if one spawns in your match, you’ll likely see it by the blue laser beam that it casts into the sky while “surveying”.
Surveyors are quite well-armoured and will very speedily run away from you once it notices you, but if you can take one down then make sure you loot all its parts for a chance of obtaining certain unusual Blueprints.
Blueprints obtained from quests
One way in which you can get Blueprints is by completing certain quests for the vendors in Speranza. Some quests will reward you with a specific item Blueprint upon completion, so as long as you work through all the quests in Arc Raiders, you are guaranteed those Blueprints.
Here is the full list of all Blueprints you can get from quest rewards:
- Trigger Nade Blueprint: Rewarded after completing “Sparks Fly”.
- Lure Grenade Blueprint: Rewarded after completing “Greasing Her Palms”.
- Burletta Blueprint: Rewarded after completing “Industrial Espionage”.
- Hullcracker Blueprint (and Launcher Ammo Blueprint): Rewarded after completing “The Major’s Footlocker”.
Alas, that’s only 4 Blueprints out of a total of 75 to unlock, so for the vast majority you will need to find them yourself during a raid. If you’re intent on farming Blueprints, then it’s best to equip yourself with cheap gear in case you lose it, but don’t use a free loadout because then you won’t get a safe pocket to stash any new Blueprint you find. No pain in Arc Raiders is sharper than failing to extract with a new Blueprint you’ve been after for a dozen hours already.

One of the best ways to get Blueprints is by hitting three stars on all five Trials every week. |Image credit:Rock Paper Shotgun/Embark Studios
Blueprints obtained from Trials
One of the very best ways to get Blueprints is as rewards for completing Trials in Arc Raiders. Trials are unlocked from Level 15 onwards, and allow you to earn rewards by focusing on certain tasks over the course of several raids. For example, one Trial might task you with dealing damage to Hornets, while another might challenge you to loot Supply Drops.
Trials refresh on a weekly basis, with a new week bringing five new Trials. Each Trial can offer up to three rewards after passing certain score milestones, and it’s possible to receive very high level loot from these reward crates - including Blueprints. So if you want to unlock as many Blueprints as possible, you should make a point of completing as many Trials as possible each week.
Best Blueprint farming locations
The very best way to get Blueprints is to frequent specific areas of the maps which combine high-tier loot pools with the right types of containers to search. Here are my recommendations for where to find Blueprints on every map, so you can always keep the search going for new crafting recipes to unlock.

Image credit:Rock Paper Shotgun/Embark Studios
Dam Battlegrounds
The best places to farm Blueprints on Dam Battlegrounds are the Control Tower, Power Generation Complex, Ruby Residence, and Pale Apartments . The first two regions, despite only being marked on the map as mid-tier loot, contain a phenomenal number of containers to loot. The Control Tower can also contain a couple of high-tier Security Lockers - though of course, you’ll need to have unlocked the Security Breach skill at the end of the Survival tree.
There’s also a lot of reporting amongst the playerbase that the Residential areas in the top-left of the map - Pale Apartments and Ruby Residence - give you a comparatively strong chance of finding Blueprints. Considering their size, there’s a high density of containers to loot in both locations, and they also have the benefit of being fairly out of the way. So you’re more likely to have all the containers to yourself.
Buried City
The best Blueprint farming locations on Buried City are the Santa Maria Houses, Grandioso Apartments, Town Hall, and the various buildings of the New District . Grandioso Apartments has a lower number of containers than the rest, but a high chance of spawning weapon cases - which have good Blueprint drop rates. The others are high-tier loot areas, with plenty of lootable containers - including Security Lockers.
Spaceport
The best places to find Blueprints on Spaceport are the Arrival and Departure Buildings, as well as Control Tower A6 and the Launch Towers . All these areas are labelled as high-value loot regions, and many of them are also very handily connected to one another by the Spaceport wall, which you can use to quickly run from one area to the next. At the tops of most of these buildings you’ll find at least one Security Locker, so this is an excellent farming route for players looking to find Blueprints.
The downside to looting Blueprints on Spaceport is that all these areas are hotly contested, particularly in Duos and Squads. You’ll need to be very focused and fast in order to complete the full farming route.

Image credit:Rock Paper Shotgun/Embark Studios
Blue Gate
Blue Gate tends to have a good chance of dropping Blueprints, potentially because it generally has a high number of containers which can hold lots of items; so there’s a higher chance of a Blueprint spawning in each container. In my experience, the best Blueprint farming spots on Blue Gate are Pilgrim’s Peak, Raider’s Refuge, the Ancient Fort, and the Underground Complex beneath the Warehouse .
All of these areas contain a wealth of containers to loot. Raider’s Refuge has less to loot, but the majority of the containers in and around the Refuge are raider containers, which have a high chance of containing Blueprints - particularly during major events.
Stella Montis
On the whole, Stella Montis seems to have a very low drop rate for Blueprints (though a high chance of dropping other high-tier loot). If you do want to try farming Blueprints on this map, the best places to find Blueprints in Stella Montis are Medical Research, Assembly Workshop, and the Business Center . These areas have the highest density of containers to loot on the map.
In addition to this, the Western Tunnel has a few different Security Lockers to loot, so while there’s very little to loot elsewhere in this area of the map, it’s worth hitting those Security Lockers if you spawn there at the start of a match.
That wraps up this primer on how to get all the Blueprints in Arc Raiders as quickly as possible. With the Expedition system constantly resetting a large number of players’ Blueprints, it’s more important than ever to have the most up-to-date information on where to find all these Blueprints.
While you’re here, be sure to check out our Arc Raiders best guns tier list , as well as our primers on the best skills to unlock and all the different Field Depot locations on every map.


ARC Raiders
PS5 , Xbox Series X/S , PC
Rock Paper Shotgun is better when you sign in
Sign in and join us on our journey to discover strange and compelling PC games.
