Best gaming monitors: the top 144Hz, 240Hz and 4K monitors
All the best monitors for gaming, including budget, HDR, and ultrawide displays

Image credit:Rock Paper Shotgun

It’s easy to think of the best gaming monitors as an extravagance – surely everything your games need for a smooth ride is within the PC itself, and any old screen will do the trick? Not so. It’s true that even the most opulently-specced monitor won’t technically make your games run faster, but they can make them look better , whether it’s by unlocking slicker framerates with a high refresh rate, letting colours bloom brigher, or eliminating ugly tearing effects with FreeSync and G-Sync . A proper gaming monitor, then, is a more than worthy addition to your desk, and these here are the best ones we’ve tested.

Looking for more RPS recommended hardware? Best graphics cards Best CPU for gaming Best SSD for gaming Best gaming headsets Best gaming mouse Best gaming keyboards Best VR headsets Best gaming microphones Best 4K gaming monitors Best Steam Deck accessories Best microSD cards for the Steam Deck
As with all our top hardware guides, there’s something for everyone here. On a tight budget? You can still nab yourself a quality 1080p monitor. Or, if you’re looking to get the most out of a powerful graphics card , a sharper 1440p display may be the one for you. We have a separate guide to the best 4K gaming monitors , but you’ll also find a few highlights in this list, in case you want the very finest, sharpest screen for your high-end rig. We’ve tested all of them in the same way: regular games-playing, combined with more technical recordings of colour, contrast and brightness performance.
There’s also a growing selection of ultrawide gaming monitors, which can add a striking wraparound effect that’s especially suited for sims. Just keep in mind that as with 4K and, to a lesser extent, 1440p monitors, ultrawide models will put extra strain on your GPU by virtue of having so many pixels to fill out. Make sure your PC comes adequately equipped for such hefty displays, and make use of performance-saving upscalers like DLSS and FSR when you can.
Now, about those monitor picks…
Best gaming monitors
- AOC 27G4X - the best 1080p gaming monitor
- Iiyama G-Master G2755HSU - the best cheap 1080p gaming monitor
- Lenovo Legion Y25-30 - the best 240Hz gaming monitor
- NZXT Canvas 27Q - the best 1440p gaming monitor
- Philips Evnia 32M2C5500W - the best large 16:9 gaming monitor
- Lenovo Legion R45w-30 - the best ultrawide gaming monitor
- BenQ Mobiuz EX3410R - the best cheap ultrawide gaming monitor
- Corsair Xeneon 32UHD144 - the best 4K gaming monitor
- MSI MAG 274UPF - the best value 4K gaming monitor
AOC 27G4X
The best 1080p gaming monitor
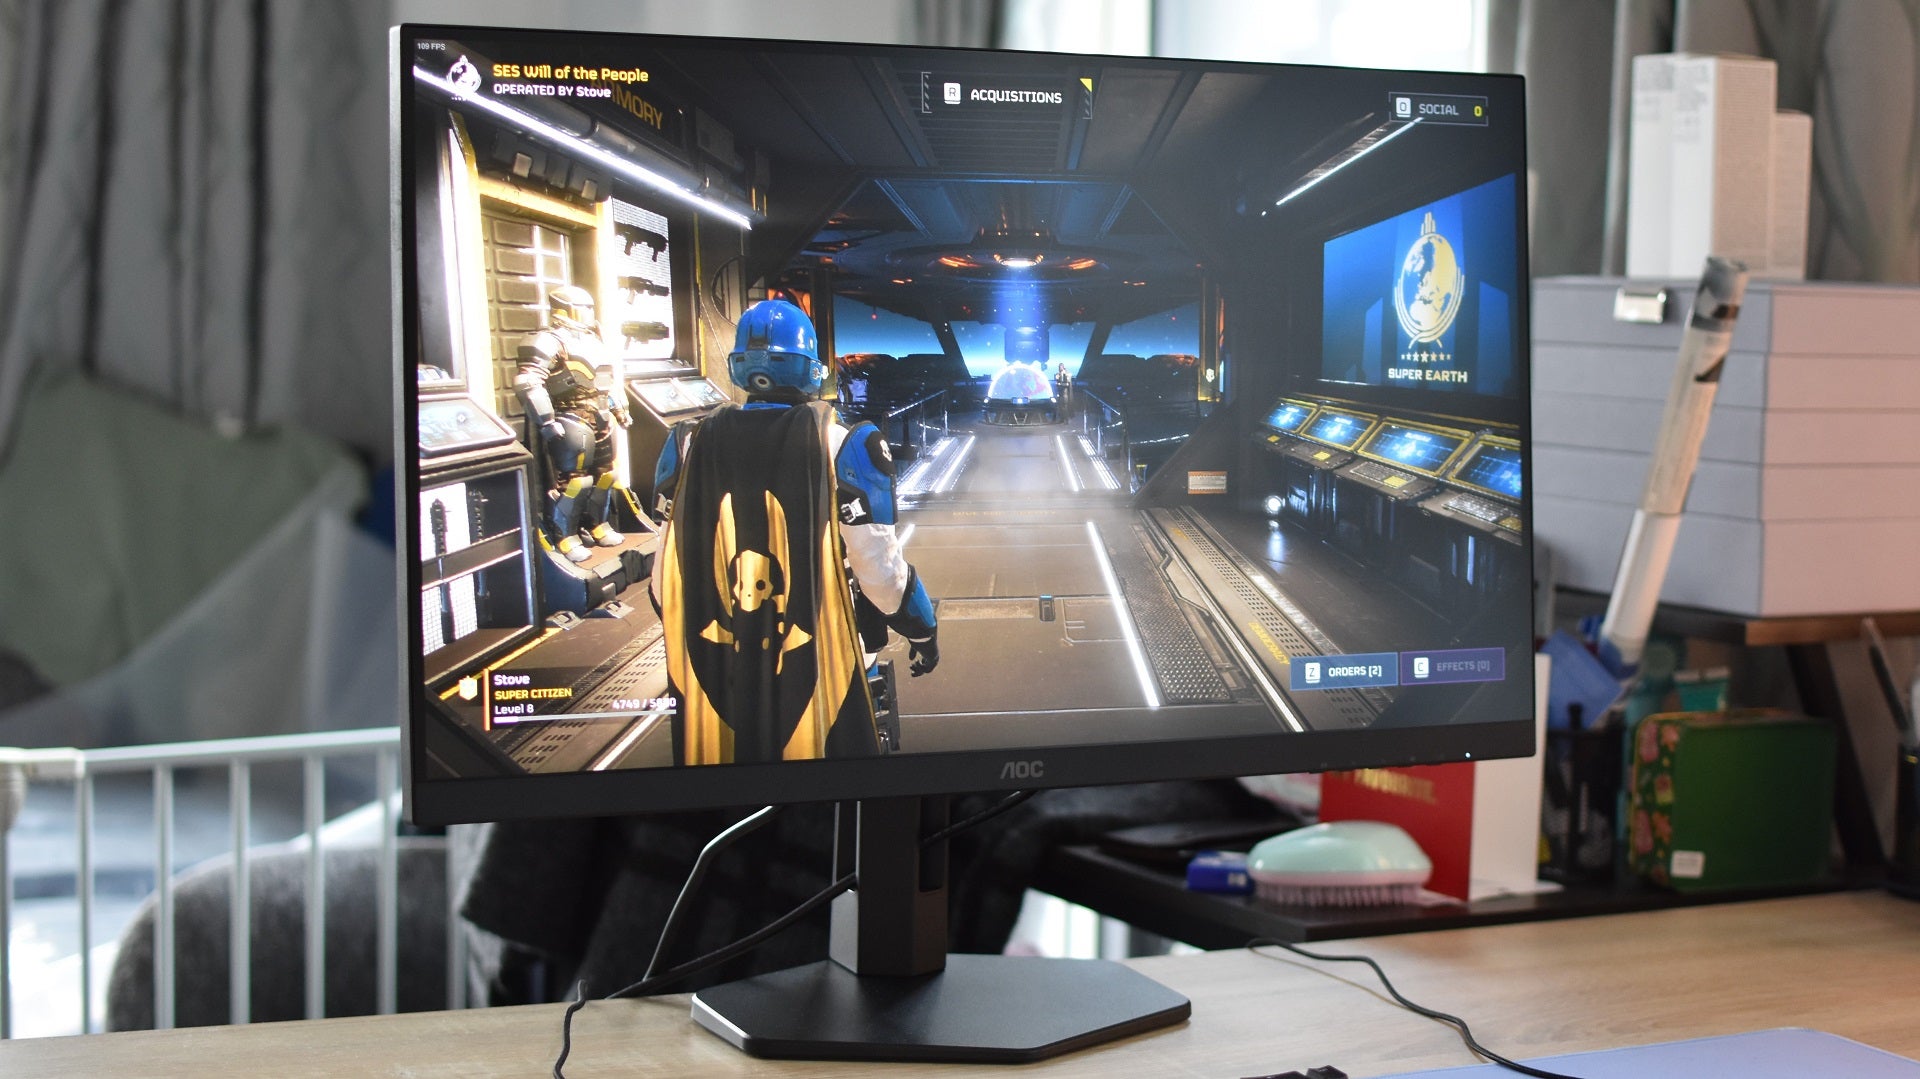
Image credit:Rock Paper Shotgun
AOC 27G4X specs: Screen size: 27in Resolution: 1920x1080 Panel: IPS Refresh rate: 180Hz Extras: Adaptive Sync, Nvidia G-Sync Compatible, height-adjustable stand Price: £221 / $282
It’s always nice when the high-end features of premium, usually 1440p displays trickle down to more affordable 1080p gaming monitors. The AOC 27G4X takes full advantage of its Fast IPS panel and zippy 180Hz refresh rate, delivering the pixel-pushing goods as a responsive Full HD champion that still won’t break the bank. And it’s a healthy 27in diagonally, not the more cramped 24in form factor that a lot of 1080p monitors stick to.
There’s also a lovely, rich vibrancy to the 27G4X. While colour reproduction doesn’t have the perfect 1:1 accuracy of a professional monitor, that fact that it also covers 99.7% of the sRGB gamut shows that this IPS panel has plenty of pop, and personally I think a touch of saturation can be better for games. We’re not shopping photos, here, yeah? Contrast passes muster as well, at 1284:1, as does peak brightness at 325.88cd/m2. G-Sync compatibility, as well as a neat, fully adjustable stand, round out a top-notch screen overall.
Iiyama G-Master G2755HSU
The best cheap 1080p gaming monitor
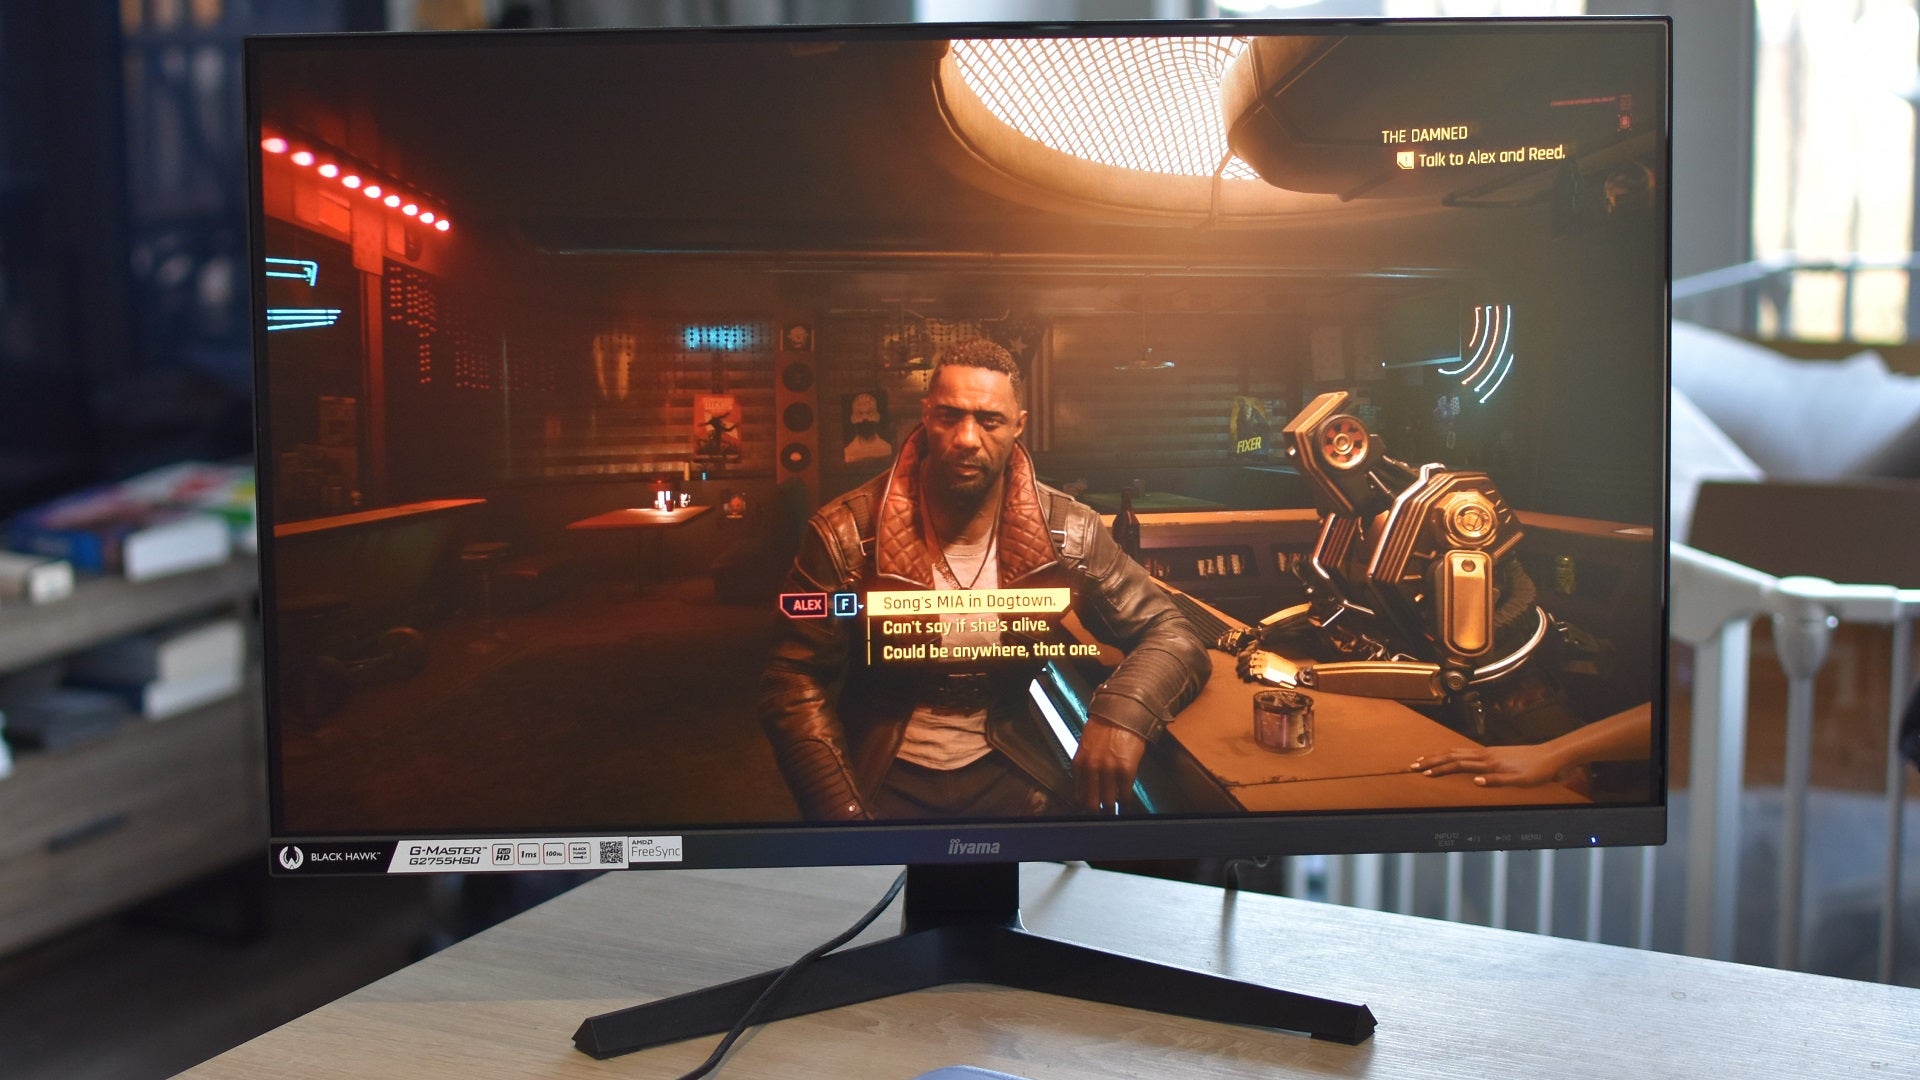
Image credit:Rock Paper Shotgun
Iiyama G-Master G2755HSU specs: Screen size: 27in Resolution: 1920x1080 Panel: VA Refresh rate: 100Hz Extras: AMD FreeSync, Nvidia G-Sync compatible Price: £115 / $TBC
Staying thrifty doesn’t have to mean confining yourself to a tiny 60Hz office monitor that thinks adaptive sync is a new type of plumbing fixture. The Iiyama G-Master G2755HSU asks for little and offers much in exchange, from its 100Hz refresh rate – more than enough for a visible smoothness improvement over 60Hz – to a comfortably spacious 27in VA panel. And yes, there’s FreeSync, which turns into G-Sync when connected to an Nvidia GPU.
It is missing some of the trappings that a few extra twenties will buy you, most notably in its lack of stand adjustment. But the screen itself is a great budget performer, with its lofty contrast ratio (3692:1) and rock-bottom black level (0.07cd/m2, the closer to 0 the better). Although it does exhibit a dash of the ghosting that’s common on VA monitors, I never felt I was having to squint through it when playing games, shooters included. Between the upped refresh rate and improvised G-Sync, it usually looks nice and smooth. It’s not short on vibrancy either, covering 97.6% of the sRGB colour gamut, and at a 263.9cd/m2 peak, brightness is high for a cheap gaming monitor.
Lenovo Legion Y25-30
The best 240Hz gaming monitor

Lenovo Legion Y25-30 specs: Screen size: 24.5in Resolution: 1920x1080 Panel: IPS Refresh rate: 240Hz Extras: AMD Freesync Premium, Nvidia G-Sync compatible, height-adjustable stand, USB hub, DisplayHDR 400 Price: £246 / $252
A lot of 240Hz monitors – that is, monitors that can refresh their image 240 times a second – are simply not worth their inflated price. The Lenovo Legion Y25-30 , by contrast, makes a compelling case for itself. The IPS panel, while only 1080p, delivers brilliantly rich colours, and its non-HDR peak brightness of 363cd/m2 keeps them popping. In games that support HDR, that can rise up to 467cd/m2: more than enough to shine.
You get plenty else for your money, including a fully adjustable (if plasticky) stand and an onboard USB hub. And, of course, the 240Hz refresh rate is excellent for racing games and competitive shooters. It’s true that most other games won’t benefit as much, making the Legion Y25-30 more of a specialist monitor, but don’t entirely believe the framerate Luddites: 240fps does look smoother than 144fps. Sorry. It just does.
The real problem is getting that high, as you’ll need a very powerful GPU indeed to produce enough frames that the Legion Y25-30 can take full advantage of them. Tick that box, though, and it’s a strong niche-filler.
NZXT Canvas 27Q
The best 1440p gaming monitor

NZXT Canvas 27Q specs: Screen size: 27in Resolution: 2560x1440 Panel: IPS Refresh rate: 165Hz Extras: AMD FreeSync Premium, Nvidia G-Sync Compatible, height-adjustable stand Price: £339 / $380 (with standard monitor stand)
Seemingly not content with successful debuts in the gaming keyboard and USB microphone arenas, NZXT have launched a brilliant new 1440p gaming monitor as well. The NZXT Canvas 27Q is a sharp and vivid IPS monitor that, between its 165Hz refresh rate and generally strong motion handling, presents a match for far more experienced monitor makers on gaming performance.
You could argue it looks basic with the default stand, but I’d rather have a clean, mature design over something that screams “Aaaaaargh look here I’m a gamer wot plays games.” It’s a good stand, too: strong and steady, with the full set of height, tilt and rotation adjustment capabilities. The rear OSD joystick also feels a tad bigger than average, so it’s easy to use when you want to make display adjustments.
Not that many are necessary. In its “Standard” image profile, the Canvas 27Q covers 99.5% of the sRGB gamut, with a good peak brightness of 382cd/m2 and a 1058:1 contrast ratio. Every game I ran on this display looked smooth and sumptuous, and it all comes at a surprisingly competitive price.
The only drawbacks are twofold: one, it’s not quite bright enough for HDR games, and two, the optional monitor arm makes for a far less affordable package. I found the arm itself quite well-made, and it has all the usual space-saving and adjustability advantages over the regular stand, so I’d love to recommend it as well. For an extra £100 / $60, though? Maybe not.
Philips Evnia 32M2C5500W
The best large 16:9 gaming monitor
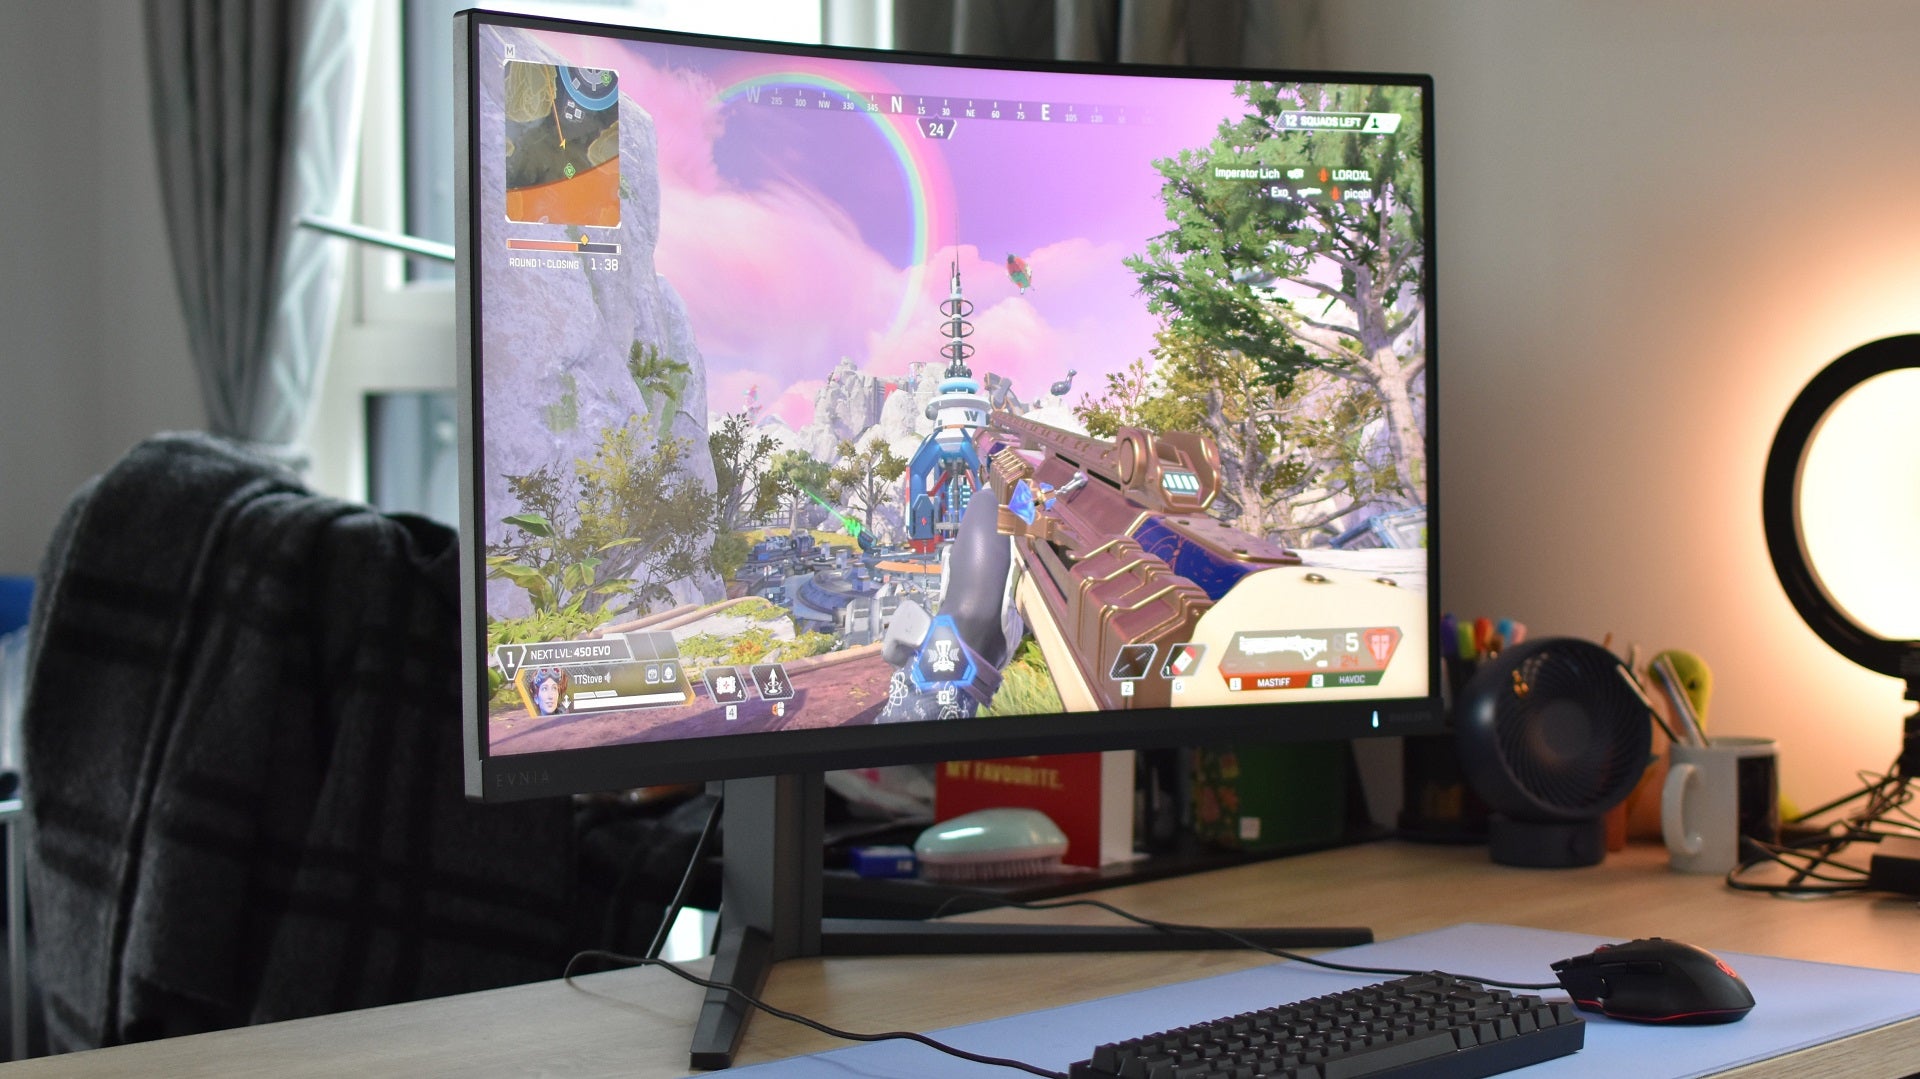
Image credit:Rock Paper Shotgun
Philips Evnia 32M2C5500W specs: Screen size: 32in Resolution: 2560x1440 Panel: VA Refresh rate: 240Hz Extras: AMD FreeSync Premium Pro, Nvidia G-Sync Compatible, USB hub, VESA DisplayHDR 400, height-adjustable stand Price: £430 / $567
A monitor like the Philips Evnia 32M2C5500W shouldn’t necessarily… work. VA panels have their strengths, but responsiveness isn’t one of them, hence why you don’t normally find them paired up with a 240Hz refresh rate. And yet, the Evnia 32M2C5500W is a (literally) huge success, keeping fast-running games looking smooth and sharp. Even on its default settings, ghosting – so often the bane of VA gaming monitors – was so mild that my brain usually failed to register it, and it was hard to spot even when I starting spinning viewmodels around in knowing attempts to induce it.
Besides this assured gaming performance, Philips’ big ’n’ bold monitor puts in an impressive set of benchmark results, from 99.7% sRGB coverage and 490cd/m2 peak brightness to a 3665:1 contrast ratio. It’s a looker, basically, and while that’s always important when weighing up desktop display, it feels even more vital when you’ve got 30-plus inches of screen dominating your view.
Lenovo Legion R45w-30
The best ultrawide gaming monitor

Image credit:Rock Paper Shotgun
Lenovo Legion R45w-30 specs: Screen size: 45in Resolution: 5120x1440 Panel: VA Refresh rate: 165Hz (overclockable to 170Hz) Extras: AMD FreeSync Premium, Nvidia G-Sync compatible, height-adjustable stand Price: £699 / $760
Hey, if you’re going to go wide, you might as well go reeeeeeeeally wide. The Lenovo Legion R45w-30 ’s 5120x1440 resolution makes for an aspect ratio of 32:9, basically the most stretched-out that games will commonly support. That’s as many pixels as two standard widescreen 1440p monitors glued together.
Assuming you’ve got a PC that can handle the load – and a desk that can handle that gigantic stand – it delivers on games performance too. High contrast and deep blacks maintain detail in dark scenes, and while there’s the tiniest smidge of ghosting on fast-moving objects, it’s actually quite clean for a VA panel. With FreeSync/G-Sync in action especially so. There’s plenty of colour – the R45w-30 covers a full 100% of the sRGB gamut – and brightness is high enough for basic HDR, peaking at 426cd/m2.
It’s also rather well-priced for the specs. I’ve seen curved 5120x1440 monitors regularly starting above £1000, so while this is far from the cheapest ultrawide gaming monitor around, it’s still a very, very good deal.
BenQ Mobiuz EX3410R
The best cheap ultrawide gaming monitor

BenQ Mobiuz EX3410R specs: Screen size: 34in Resolution: 3440x1440 Panel: Curved VA Refresh rate: 144Hz Extras: AMD FreeSync Premium Pro, Nvidia G-Sync compatible, height-adjustable stand, DisplayHDR 400 Price: £449 / $450
Only recently a true mid-ranger, sustained price cuts have brought the BenQ Mobiuz EX3410R into the ultrawide equivalent of budget territory. Which is excellent, as it’s still a cracking 21:9 screen. I have one myself!
It uses a curved VA panel, which often have more trouble with motion than IPS or TN screens, but some spot-on pixel overdrive saves it from any noticeable blurriness. Between this, a low G2G response time of 2ms, and the 144Hz refresh rate, the Mobiuz EX3410R is as agile as it is expansive. FreeSync Premium Pro helps as well, and Nvidia G-Sync is effective at denying screen tear while piggybacking on it.
With the sRGB colour profile, the Mobiuz EX3410R has a neutral, nicely balanced colour palette – one that covers 96.7% of the sRGB gamut and hits a super-accurate 1.08 average delta-E. Contrast is good too, reaching 3093:1, and peak non-HDR brightness is decent at 391.1cd/m2. This monitor is only rated at the most basic DisplayHDR 400 standard of high dynamic range capability, but if you do prefer a bit of pop, to more natural tones, turning HDR on does produce some richly vibrant hues in the games that support it.
If you can splash out even more, we’ll also recommend the sprawling, 49in Samsung CRG9 and its curved QLED panel.
Corsair Xeneon 32UHD144

Image credit:Rock Paper Shotgun
Corsair Xeneon 32UHD144 specs: Screen size: 32in Resolution: 3480x2160 Panel: IPS Refresh rate: 144Hz Extras: AMD FreeSync Premium, Nvidia G-Sync Compatible, VESA DisplayHDR 600, height-adjustable stand Price: £950 / $961
The Corsair Xeneon 32UHD144 manages to evoke a similar “Wow, that’s pretty” response to the Asus ROG Swift PG32UQX below, just at a much lower price. It’s still a premium prospect but its HDR-ready brightness, extremely wide colour reproduction, artifact-free smoothness and high build quality are worth the investment.
Even the Standard colour profile covers a near-perfect 99.8% of the sRGB gamut, and there’s no IPS contrast weakness here, hitting 1019:1. Nvidia G-Sync also works effectively to smother any potential screen tearing, even if it’s FreeSync Premium that get the native support. Provided you have room for the 32in panel and its metal stand, which looks and feels like it previously held up the Schwerer Gustav, it’s the ideal match for any 4K-capable GPU.
MSI MAG 274UPF
The best value 4K gaming monitor
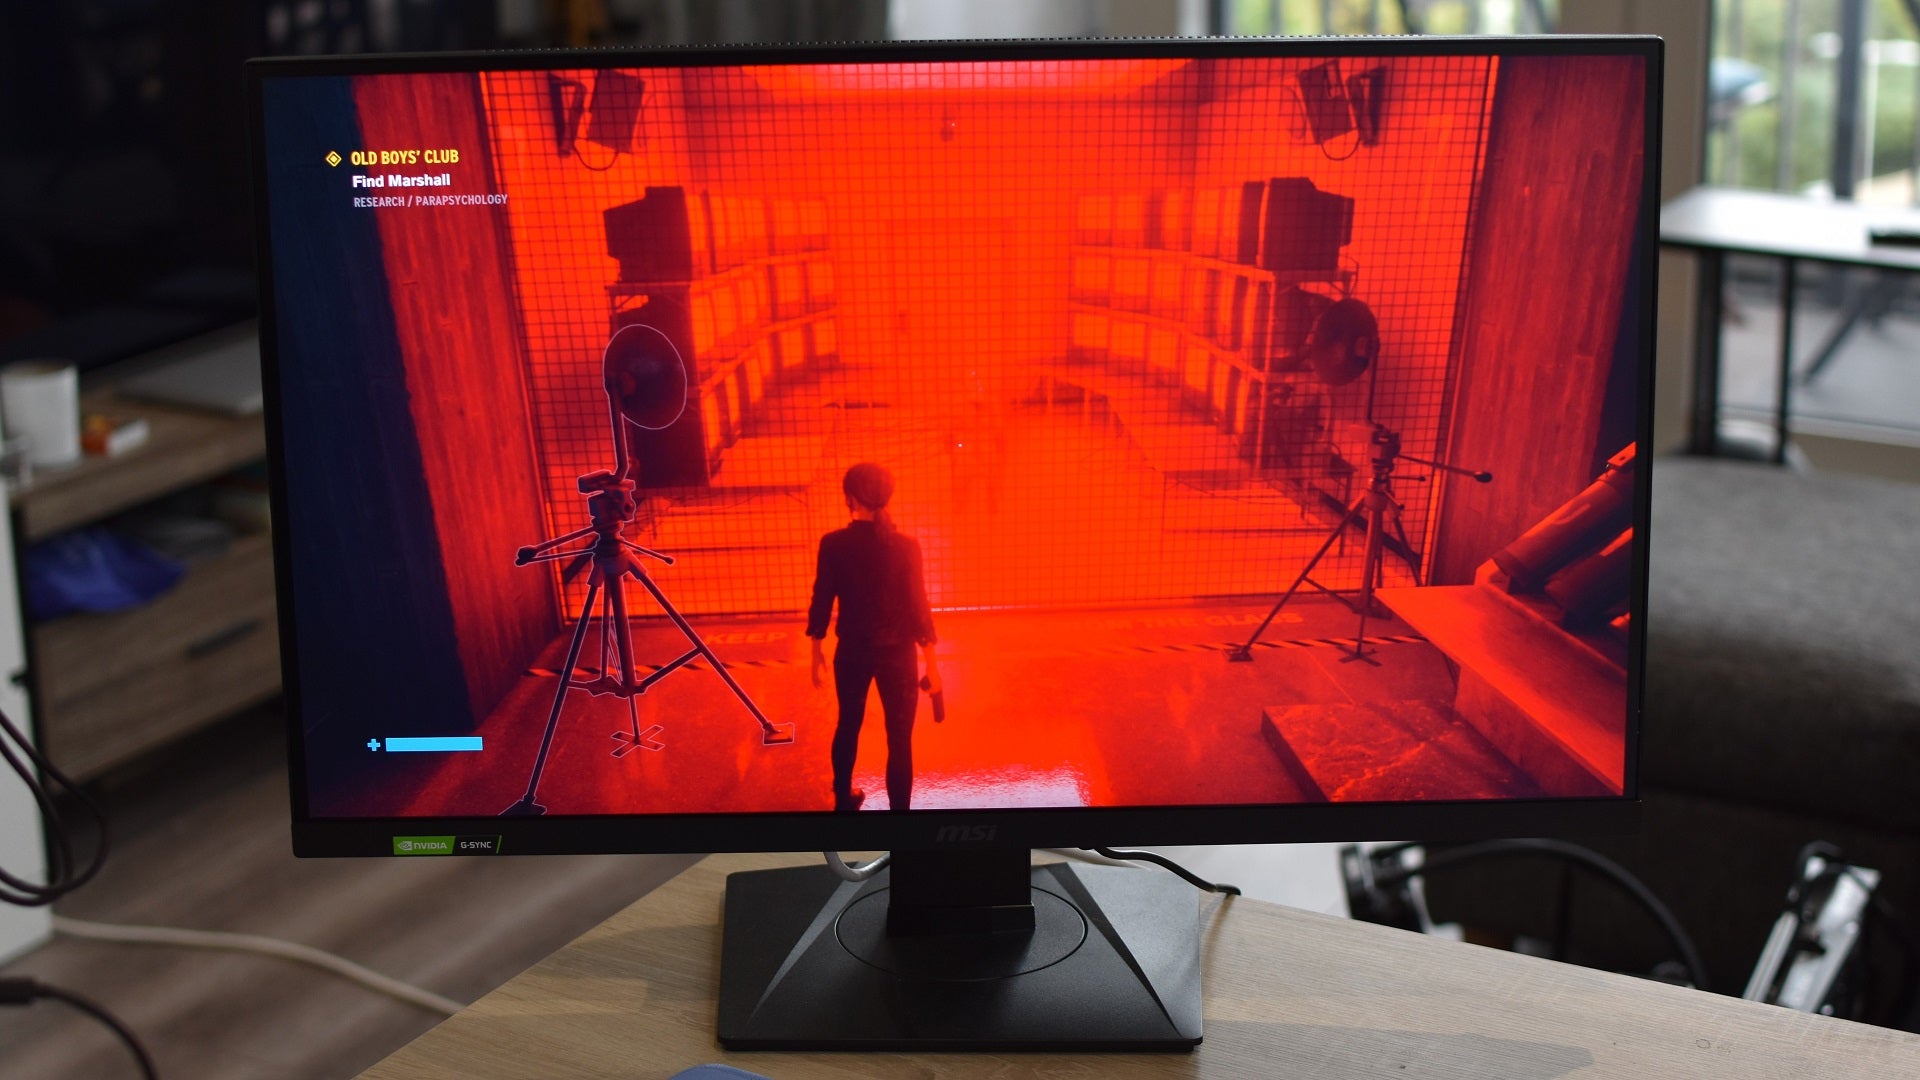
Image credit:Rock Paper Shotgun
MSI MAG 274UPF specs: Screen size: 27in Resolution: 3480x2160 Panel: IPS Refresh rate: 144Hz Extras: AMD FreeSync Premium, Nvidia G-Sync Compatible, VESA DisplayHDR 400, USB-C, HDMI 2.1, height-adjustable stand Price: £506 / $400
Outside of its mundane design and modestly proportioned 27in IPS panel, there’s little sense that the MSI MAG 274UPF is of the moneysaving persuasion. Yet there aren’t many 4K gaming monitors that, for comparable cash, manage to pile on so many perks: 144Hz, Nvidia-approved G-Sync compatibility on top of FreeSync, USB-C and HDMI 2.1 connectivity, a fully adjustable stand… it even has a fair crack at HDR-grade brightness, peaking at 519cd/m2 in Final Fantasy XV .
That would all be for naught if the screen itself was duff, but it’s free of ghosting, covers 99.3% of the sRGB gamut, and recorded a contrast ratio of 1020:1 in my tests. HDR isn’t needed for high brightness, either, as the MAG 274UPF managed to hit 489cd/m2 in standard dynamic range.
If that all sounds like technononsense, the short version is that games look bright, bold, and smooth, provided they’re running on a PC that can tango with the resolution. Not bad at all, for something that costs hundreds less than the average 4K/144Hz monitor.
How we test our gaming monitors
Want to read more? Check out our in-depth gaming monitor guides and explainers: What is HDR? What graphics card you need for HDR and what PC games support it? Every G-Sync Compatible monitor confirmed so far Gaming monitor panel types explained G-Sync vs Freesync vs G-Sync Compatible: which is best The best ultrawide PC games
When we get a gaming monitor in for testing, we measure the panel’s colour accuracy, contrast level, brightness and black level - both Katharine and myself use the X-Rite i1 DisplayPro calibrator for this. We’ll start by measuring the default settings that you get out of the box, and then go about optimising it through the monitor’s onboard menu system. The best gaming monitors won’t need any tweaking at all, as their panels should be configured correctly as soon as you take them out of the box.
HDR monitors require a few more specific tests, namely using specific scenes in Assassin’s Creed Odyssey and Final Fantasy XV to measure a monitor’s peak brightness level. To do this, the calibrator sits over their bright, in-game suns to see just how high the monitor’s brightness levels can go. We also see how easy it is to get a monitor’s HDR working and configured correctly. After all, no one wants to spend ages fiddling about with their monitor’s menu settings just to get a single game working properly.
In terms of what to expect from different types of of gaming monitor panels, IPS screens usually have the most accurate colours, but there are plenty of good-looking TN and VA panels around now these days as well. TN panels often have quicker response times than other panel types, which can make them a good choice for fast, competitive esports games, but you’re vanishingly unlikely to have serious problem playing games on slower IPS or VA panels. We’re often only talking about a different of a couple of milliseconds here, and most people won’t notice the difference whatsoever.
We also test to see how well a monitor copes with different types of graphics cards if they have AMD Freesync or Nvidia G-Sync support. This is particularly important if they’re not one of Nvidia’s officially certified G-Sync Compatible monitors. While all Freesync monitors are technically G-Sync compatible (with a small ‘c’), some are better suited to it than others. Bad G-Sync compatible screens, for example, can sometimes blink, pulse, produce off-colours or other visual defects, and nobody wants that. If you want to avoid the hassle of potentially going with a small ‘c’ G-Sync compatible screen, then you can always get one that’s been officially certified by Nvidia as big ‘C’ G-Sync Compatible.
Rock Paper Shotgun is better when you sign in
Sign in and join us on our journey to discover strange and compelling PC games.

All 75 Arc Raiders Blueprints and where to get them
These areas have the highest chance of giving you Blueprints

Image credit:Rock Paper Shotgun/Embark Studios

Looking for more Arc Raiders Blueprints? It’s a special day when you find a Blueprint, as they’re among the most valuable items in Arc Raiders. If you find a Blueprint that you haven’t already found, then you must make sure you hold onto it at all costs, because Blueprints are the key to one of the most important and powerful systems of meta-progression in the game.
This guide aims to be the very best guide on Blueprints you can find, starting with a primer on what exactly they are and how they work in Arc Raiders, before delving into exactly where to get Blueprints and the very best farming spots for you to take in your search.
We’ll also go over how to get Blueprints from other unlikely activities, such as destroying Surveyors and completing specific quests. And you’ll also find the full list of all 75 Blueprints in Arc Raiders on this page (including the newest Blueprints added with the Cold Snap update , such as the Deadline Blueprint and Firework Box Blueprint), giving you all the information you need to expand your own crafting repertoire.
In this guide:
- What are Blueprints in Arc Raiders?
- Full Blueprint list: All crafting recipes
- Where to find Blueprints in Arc Raiders Blueprints obtained from quests Blueprints obtained from Trials Best Blueprint farming locations

What are Blueprints in Arc Raiders?
Blueprints in Arc Raiders are special items which, if you manage to extract with them, you can expend to permanently unlock a new crafting recipe in your Workshop. If you manage to extract from a raid with an Anvil Blueprint, for example, you can unlock the ability to craft your very own Anvil Pistol, as many times as you like (as long as you have the crafting materials).
To use a Blueprint, simply open your Inventory while in the lobby, then right-click on the Blueprint and click “Learn And Consume” . This will permanently unlock the recipe for that item in your Workshop. As of the Stella Montis update, there are allegedly 75 different Blueprints to unlock - although only 68 are confirmed to be in the game so far. You can see all the Blueprints you’ve found and unlocked by going to the Workshop menu, and hitting “R” to bring up the Blueprint screen.
It’s possible to find duplicates of past Blueprints you’ve already unlocked. If you find these, then you can either sell them, or - if you like to play with friends - you can take it into a match and gift it to your friend so they can unlock that recipe for themselves. Another option is to keep hold of them until the time comes to donate them to the Expedition.
Full Blueprint list: All crafting recipes
Below is the full list of all the Blueprints that are currently available to find in Arc Raiders, and the crafting recipe required for each item:
| Blueprint | Type | Recipe | Crafted At |
|---|---|---|---|
| Bettina | Weapon | 3x Advanced Mechanical Components 3x Heavy Gun Parts 3x Canister | Gunsmith 3 |
| Blue Light Stick | Quick Use | 3x Chemicals | Utility Station 1 |
| Aphelion | Weapon | 3x Magnetic Accelerator 3x Complex Gun Parts 1x Matriarch Reactor | Gunsmith 3 |
| Combat Mk. 3 (Flanking) | Augment | 2x Advanced Electrical Components 3x Processor | Gear Bench 3 |
| Combat Mk. 3 (Aggressive) | Augment | 2x Advanced Electrical Components 3x Processor | Gear Bench 3 |
| Complex Gun Parts | Material | 2x Light Gun Parts 2x Medium Gun Parts 2x Heavy Gun Parts | Refiner 3 |
| Fireworks Box | Quick Use | 1x Explosive Compound 3x Pop Trigger | Explosives Station 2 |
| Gas Mine | Mine | 4x Chemicals 2x Rubber Parts | Explosives Station 1 |
| Green Light Stick | Quick Use | 3x Chemicals | Utility Station 1 |
| Pulse Mine | Mine | 1x Crude Explosives 1x Wires | Explosives Station 1 |
| Seeker Grenade | Grenade | 1x Crude Explosives 2x ARC Alloy | Explosives Station 1 |
| Looting Mk. 3 (Survivor) | Augment | 2x Advanced Electrical Components 3x Processor | Gear Bench 3 |
| Angled Grip II | Mod | 2x Mechanical Components 3x Duct Tape | Gunsmith 2 |
| Angled Grip III | Mod | 2x Mod Components 5x Duct Tape | Gunsmith 3 |
| Hullcracker | Weapon | 1x Magnetic Accelerator 3x Heavy Gun Parts 1x Exodus Modules | Gunsmith 3 |
| Launcher Ammo | Ammo | 5x Metal Parts 1x Crude Explosives | Workbench 1 |
| Anvil | Weapon | 5x Mechanical Components 5x Simple Gun Parts | Gunsmith 2 |
| Anvil Splitter | Mod | 2x Mod Components 3x Processor | Gunsmith 3 |
| ??? | ??? | ??? | ??? |
| Barricade Kit | Quick Use | 1x Mechanical Components | Utility Station 2 |
| Blaze Grenade | Grenade | 1x Explosive Compound 2x Oil | Explosives Station 3 |
| Bobcat | Weapon | 3x Advanced Mechanical Components 3x Light Gun Parts | Gunsmith 3 |
| Osprey | Weapon | 2x Advanced Mechanical Components 3x Medium Gun Parts 7x Wires | Gunsmith 3 |
| Burletta | Weapon | 3x Mechanical Components 3x Simple Gun Parts | Gunsmith 1 |
| Compensator II | Mod | 2x Mechanical Components 4x Wires | Gunsmith 2 |
| Compensator III | Mod | 2x Mod Components 8x Wires | Gunsmith 3 |
| Defibrillator | Quick Use | 9x Plastic Parts 1x Moss | Medical Lab 2 |
| ??? | ??? | ??? | ??? |
| Equalizer | Weapon | 3x Magnetic Accelerator 3x Complex Gun Parts 1x Queen Reactor | Gunsmith 3 |
| Extended Barrel | Mod | 2x Mod Components 8x Wires | Gunsmith 3 |
| Extended Light Mag II | Mod | 2x Mechanical Components 3x Steel Spring | Gunsmith 2 |
| Extended Light Mag III | Mod | 2x Mod Components 5x Steel Spring | Gunsmith 3 |
| Extended Medium Mag II | Mod | 2x Mechanical Components 3x Steel Spring | Gunsmith 2 |
| Extended Medium Mag III | Mod | 2x Mod Components 5x Steel Spring | Gunsmith 3 |
| Extended Shotgun Mag II | Mod | 2x Mechanical Components 3x Steel Spring | Gunsmith 2 |
| Extended Shotgun Mag III | Mod | 2x Mod Components 5x Steel Spring | Gunsmith 3 |
| Remote Raider Flare | Quick Use | 2x Chemicals 4x Rubber Parts | Utility Station 1 |
| Heavy Gun Parts | Material | 4x Simple Gun Parts | Refiner 2 |
| Venator | Weapon | 2x Advanced Mechanical Components 3x Medium Gun Parts 5x Magnet | Gunsmith 3 |
| Il Toro | Weapon | 5x Mechanical Components 6x Simple Gun Parts | Gunsmith 1 |
| Jolt Mine | Mine | 1x Electrical Components 1x Battery | Explosives Station 2 |
| Explosive Mine | Mine | 1x Explosive Compound 1x Sensors | Explosives Station 3 |
| Jupiter | Weapon | 3x Magnetic Accelerator 3x Complex Gun Parts 1x Queen Reactor | Gunsmith 3 |
| Light Gun Parts | Material | 4x Simple Gun Parts | Refiner 2 |
| Lightweight Stock | Mod | 2x Mod Components 5x Duct Tape | Gunsmith 3 |
| Lure Grenade | Grenade | 1x Speaker Component 1x Electrical Components | Utility Station 2 |
| Medium Gun Parts | Material | 4x Simple Gun Parts | Refiner 2 |
| Torrente | Weapon | 2x Advanced Mechanical Components 3x Medium Gun Parts 6x Steel Spring | Gunsmith 3 |
| Muzzle Brake II | Mod | 2x Mechanical Components 4x Wires | Gunsmith 2 |
| Muzzle Brake III | Mod | 2x Mod Components 8x Wires | Gunsmith 3 |
| Padded Stock | Mod | 2x Mod Components 5x Duct Tape | Gunsmith 3 |
| Shotgun Choke II | Mod | 2x Mechanical Components 4x Wires | Gunsmith 2 |
| Shotgun Choke III | Mod | 2x Mod Components 8x Wires | Gunsmith 3 |
| Shotgun Silencer | Mod | 2x Mod Components 8x Wires | Gunsmith 3 |
| Showstopper | Grenade | 1x Advanced Electrical Components 1x Voltage Converter | Explosives Station 3 |
| Silencer I | Mod | 2x Mechanical Components 4x Wires | Gunsmith 2 |
| Silencer II | Mod | 2x Mod Components 8x Wires | Gunsmith 3 |
| Snap Hook | Quick Use | 2x Power Rod 3x Rope 1x Exodus Modules | Utility Station 3 |
| Stable Stock II | Mod | 2x Mechanical Components 3x Duct Tape | Gunsmith 2 |
| Stable Stock III | Mod | 2x Mod Components 5x Duct Tape | Gunsmith 3 |
| Tagging Grenade | Grenade | 1x Electrical Components 1x Sensors | Utility Station 3 |
| Tempest | Weapon | 3x Advanced Mechanical Components 3x Medium Gun Parts 3x Canister | Gunsmith 3 |
| Trigger Nade | Grenade | 2x Crude Explosives 1x Processor | Explosives Station 2 |
| Vertical Grip II | Mod | 2x Mechanical Components 3x Duct Tape | Gunsmith 2 |
| Vertical Grip III | Mod | 2x Mod Components 5x Duct Tape | Gunsmith 3 |
| Vita Shot | Quick Use | 2x Antiseptic 1x Syringe | Medical Lab 3 |
| Vita Spray | Quick Use | 3x Antiseptic 1x Canister | Medical Lab 3 |
| Vulcano | Weapon | 1x Magnetic Accelerator 3x Heavy Gun Parts 1x Exodus Modules | Gunsmith 3 |
| Wolfpack | Grenade | 2x Explosive Compound 2x Sensors | Explosives Station 3 |
| Red Light Stick | Quick Use | 3x Chemicals | Utility Station 1 |
| Smoke Grenade | Grenade | 14x Chemicals 1x Canister | Utility Station 2 |
| Deadline | Mine | 3x Explosive Compound 2x ARC Circuitry | Explosives Station 3 |
| Trailblazer | Grenade | 1x Explosive Compound 1x Synthesized Fuel | Explosives Station 3 |
| Tactical Mk. 3 (Defensive) | Augment | 2x Advanced Electrical Components 3x Processor | Gear Bench 3 |
| Tactical Mk. 3 (Healing) | Augment | 2x Advanced Electrical Components 3x Processor | Gear Bench 3 |
| Yellow Light Stick | Quick Use | 3x Chemicals | Utility Station 1 |
Note: The missing Blueprints in this list likely have not actually been added to the game at the time of writing, because none of the playerbase has managed to find any of them. As they are added to the game, I will update this page with the most relevant information so you know exactly how to get all 75 Arc Raiders Blueprints.
Where to find Blueprints in Arc Raiders
Below is a list of all containers, modifiers, and events which maximise your chances of finding Blueprints:
- Certain quests reward you with specific Blueprints .
- Completing Trials has a high chance of offering Blueprints as rewards.
- Surveyors have a decent chance of dropping Blueprints on death.
- High loot value areas tend to have a greater chance of spawning Blueprints.
- Night Raids and Storms may increase rare Blueprint spawn chances in containers.
- Containers with higher numbers of items may have a higher tendency to spawn Blueprints. As a result, Blue Gate (which has many “large” containers containing multiple items) may give you a higher chance of spawning Blueprints.
- Raider containers (Raider Caches, Weapon Boxes, Medical Bags, Grenade Tubes) have increased Blueprint drop rates. As a result, the Uncovered Caches event gives you a high chance of finding Blueprints.
- Security Lockers have a higher than average chance of containing Blueprints.
- Certain Blueprints only seem to spawn under specific circumstances: Tempest Blueprint only spawns during Night Raid events. Vulcano Blueprint only spawns during Hidden Bunker events. Jupiter and Equaliser Blueprints only spawn during Harvester events.

Raider Caches, Weapon Boxes, and other raider-oriented container types have a good chance of offering Blueprints. |Image credit:Rock Paper Shotgun/Embark Studios
Blueprints have a very low chance of spawning in any container in Arc Raiders, around 1-2% on average. However, there is a higher chance of finding Blueprints in particular container types. Specifically, you can find more Blueprints in Raider containers and security lockers.
Beyond this, if you’re looking for Blueprints you should focus on regions of the map which are marked as having particularly high-value loot. Areas such as the Control Tower in Dam Battlegrounds, the Arrival and Departure Buildings in Spaceport, and Pilgrim’s Peak in Blue Gate all have a better-than-average chance of spawning Blueprints somewhere amongst all their containers. Night Raids and Electromagnetic Storm events also increase the drop chances of certain Blueprints .
In addition to these containers, you can often loot Blueprints from destroyed Surveyors - the largest of the rolling ball ARC. Surveyors are more commonly found on the later maps - Spaceport and Blue Gate - and if one spawns in your match, you’ll likely see it by the blue laser beam that it casts into the sky while “surveying”.
Surveyors are quite well-armoured and will very speedily run away from you once it notices you, but if you can take one down then make sure you loot all its parts for a chance of obtaining certain unusual Blueprints.
Blueprints obtained from quests
One way in which you can get Blueprints is by completing certain quests for the vendors in Speranza. Some quests will reward you with a specific item Blueprint upon completion, so as long as you work through all the quests in Arc Raiders, you are guaranteed those Blueprints.
Here is the full list of all Blueprints you can get from quest rewards:
- Trigger Nade Blueprint: Rewarded after completing “Sparks Fly”.
- Lure Grenade Blueprint: Rewarded after completing “Greasing Her Palms”.
- Burletta Blueprint: Rewarded after completing “Industrial Espionage”.
- Hullcracker Blueprint (and Launcher Ammo Blueprint): Rewarded after completing “The Major’s Footlocker”.
Alas, that’s only 4 Blueprints out of a total of 75 to unlock, so for the vast majority you will need to find them yourself during a raid. If you’re intent on farming Blueprints, then it’s best to equip yourself with cheap gear in case you lose it, but don’t use a free loadout because then you won’t get a safe pocket to stash any new Blueprint you find. No pain in Arc Raiders is sharper than failing to extract with a new Blueprint you’ve been after for a dozen hours already.

One of the best ways to get Blueprints is by hitting three stars on all five Trials every week. |Image credit:Rock Paper Shotgun/Embark Studios
Blueprints obtained from Trials
One of the very best ways to get Blueprints is as rewards for completing Trials in Arc Raiders. Trials are unlocked from Level 15 onwards, and allow you to earn rewards by focusing on certain tasks over the course of several raids. For example, one Trial might task you with dealing damage to Hornets, while another might challenge you to loot Supply Drops.
Trials refresh on a weekly basis, with a new week bringing five new Trials. Each Trial can offer up to three rewards after passing certain score milestones, and it’s possible to receive very high level loot from these reward crates - including Blueprints. So if you want to unlock as many Blueprints as possible, you should make a point of completing as many Trials as possible each week.
Best Blueprint farming locations
The very best way to get Blueprints is to frequent specific areas of the maps which combine high-tier loot pools with the right types of containers to search. Here are my recommendations for where to find Blueprints on every map, so you can always keep the search going for new crafting recipes to unlock.

Image credit:Rock Paper Shotgun/Embark Studios
Dam Battlegrounds
The best places to farm Blueprints on Dam Battlegrounds are the Control Tower, Power Generation Complex, Ruby Residence, and Pale Apartments . The first two regions, despite only being marked on the map as mid-tier loot, contain a phenomenal number of containers to loot. The Control Tower can also contain a couple of high-tier Security Lockers - though of course, you’ll need to have unlocked the Security Breach skill at the end of the Survival tree.
There’s also a lot of reporting amongst the playerbase that the Residential areas in the top-left of the map - Pale Apartments and Ruby Residence - give you a comparatively strong chance of finding Blueprints. Considering their size, there’s a high density of containers to loot in both locations, and they also have the benefit of being fairly out of the way. So you’re more likely to have all the containers to yourself.
Buried City
The best Blueprint farming locations on Buried City are the Santa Maria Houses, Grandioso Apartments, Town Hall, and the various buildings of the New District . Grandioso Apartments has a lower number of containers than the rest, but a high chance of spawning weapon cases - which have good Blueprint drop rates. The others are high-tier loot areas, with plenty of lootable containers - including Security Lockers.
Spaceport
The best places to find Blueprints on Spaceport are the Arrival and Departure Buildings, as well as Control Tower A6 and the Launch Towers . All these areas are labelled as high-value loot regions, and many of them are also very handily connected to one another by the Spaceport wall, which you can use to quickly run from one area to the next. At the tops of most of these buildings you’ll find at least one Security Locker, so this is an excellent farming route for players looking to find Blueprints.
The downside to looting Blueprints on Spaceport is that all these areas are hotly contested, particularly in Duos and Squads. You’ll need to be very focused and fast in order to complete the full farming route.

Image credit:Rock Paper Shotgun/Embark Studios
Blue Gate
Blue Gate tends to have a good chance of dropping Blueprints, potentially because it generally has a high number of containers which can hold lots of items; so there’s a higher chance of a Blueprint spawning in each container. In my experience, the best Blueprint farming spots on Blue Gate are Pilgrim’s Peak, Raider’s Refuge, the Ancient Fort, and the Underground Complex beneath the Warehouse .
All of these areas contain a wealth of containers to loot. Raider’s Refuge has less to loot, but the majority of the containers in and around the Refuge are raider containers, which have a high chance of containing Blueprints - particularly during major events.
Stella Montis
On the whole, Stella Montis seems to have a very low drop rate for Blueprints (though a high chance of dropping other high-tier loot). If you do want to try farming Blueprints on this map, the best places to find Blueprints in Stella Montis are Medical Research, Assembly Workshop, and the Business Center . These areas have the highest density of containers to loot on the map.
In addition to this, the Western Tunnel has a few different Security Lockers to loot, so while there’s very little to loot elsewhere in this area of the map, it’s worth hitting those Security Lockers if you spawn there at the start of a match.
That wraps up this primer on how to get all the Blueprints in Arc Raiders as quickly as possible. With the Expedition system constantly resetting a large number of players’ Blueprints, it’s more important than ever to have the most up-to-date information on where to find all these Blueprints.
While you’re here, be sure to check out our Arc Raiders best guns tier list , as well as our primers on the best skills to unlock and all the different Field Depot locations on every map.

ARC Raiders
PS5 , Xbox Series X/S , PC
Rock Paper Shotgun is better when you sign in
Sign in and join us on our journey to discover strange and compelling PC games.
