Best Dragon’s Dogma 2 mods: Cure Dragonsplague, infinite stamina, and more
Here are the best Dragon’s Dogma 2 mods you can download right now

Image credit:Rock Paper Shotgun/Capcom.

Looking for the best Dragon’s Dogma 2 mods? Although Dragon’s Dogma 2 has been out for a while, the game is still steamrolling ahead with more mods now available than ever.
We’ve gone through the rich offerings of Nexus Mods and picked out the most popular and useful out of the bunch. This includes quality-of-life fixes like more stamina and ways to make the game more streamlined with the removal of pesky mechanics like Dragonsplague .
Read below for our top ten picks of the best mods available for Dragon’s Dogma 2 right now.

This highlight reel shows off all the incredible adventures awaiting the new Arisen of Dragon’s Dogma 2.Watch on YouTube
The best Dragon’s Dogma 2 mods
The 10 best Dragon’s Dogma 2 mods right now are:
- Dragonsplague Cure
- Stop Selling Yourself
- Show Main Pawn Favorability
- Infinite Stamina out of Combat
- Early N’Cheap Art of Metamorphosis
- Better UI - Colorful Map Icons
- No Job Requirements
- Teleportation
- Turn Every Usable Item Infinite
- Riddle of Rumination Marker - A Game of Wits
Dragonsplague Cure

Pawns can return from the Rift with Dragonsplague and spread it among your party. |Image credit:Rock Paper Shotgun/Capcom
Whilst some players may welcome the challenge of Dragonsplague in Dragon’s Dogma 2, most see it as a ticking time bomb. Dragonsplague is essentially a disease that can spread amongst Pawns, turning them into mad killing machines that are capable of wiping out entire villages.
With this mod, you can toggle Dragonsplague on and off, safe in the knowledge that your Pawns are protected.
If you still want the plague to be present in your game but more manageable, there is also the Dragonsplague Counter mod . This adds a counter against infected Pawns heads, showing the level of disease they’re at - with 10 being the highest. This gives players some pre-warning before it gets too serious.
You can also download the Immersive Dragonsplague Cure mod which adds a cure to the game in the form of a potion vial.
Download link: Dragonsplague Cure
Stop Selling Yourself

Adventuring Pawns will frequently stop you for a conversation, sometimes mid-combat. |Image credit:Rock Paper Shotgun.
This Dragon’s Dogma 2 mod is more of a quality-of-life hack. As you’re adventuring in the game, you’ll notice that Pawns travelling in the wild will sometimes lock you into a conversation in a bid to get you to recruit them. This happens frequently, even if you already have a full party.
The ‘Stop Selling Yourself’ mod removes this so that the Pawns will only speak if spoken to. It’s a small fix but one that removes this immersion-breaking annoyance without having to toggle off online mode.
Download link: Stop Selling Yourself
Show Main Pawn Favorability
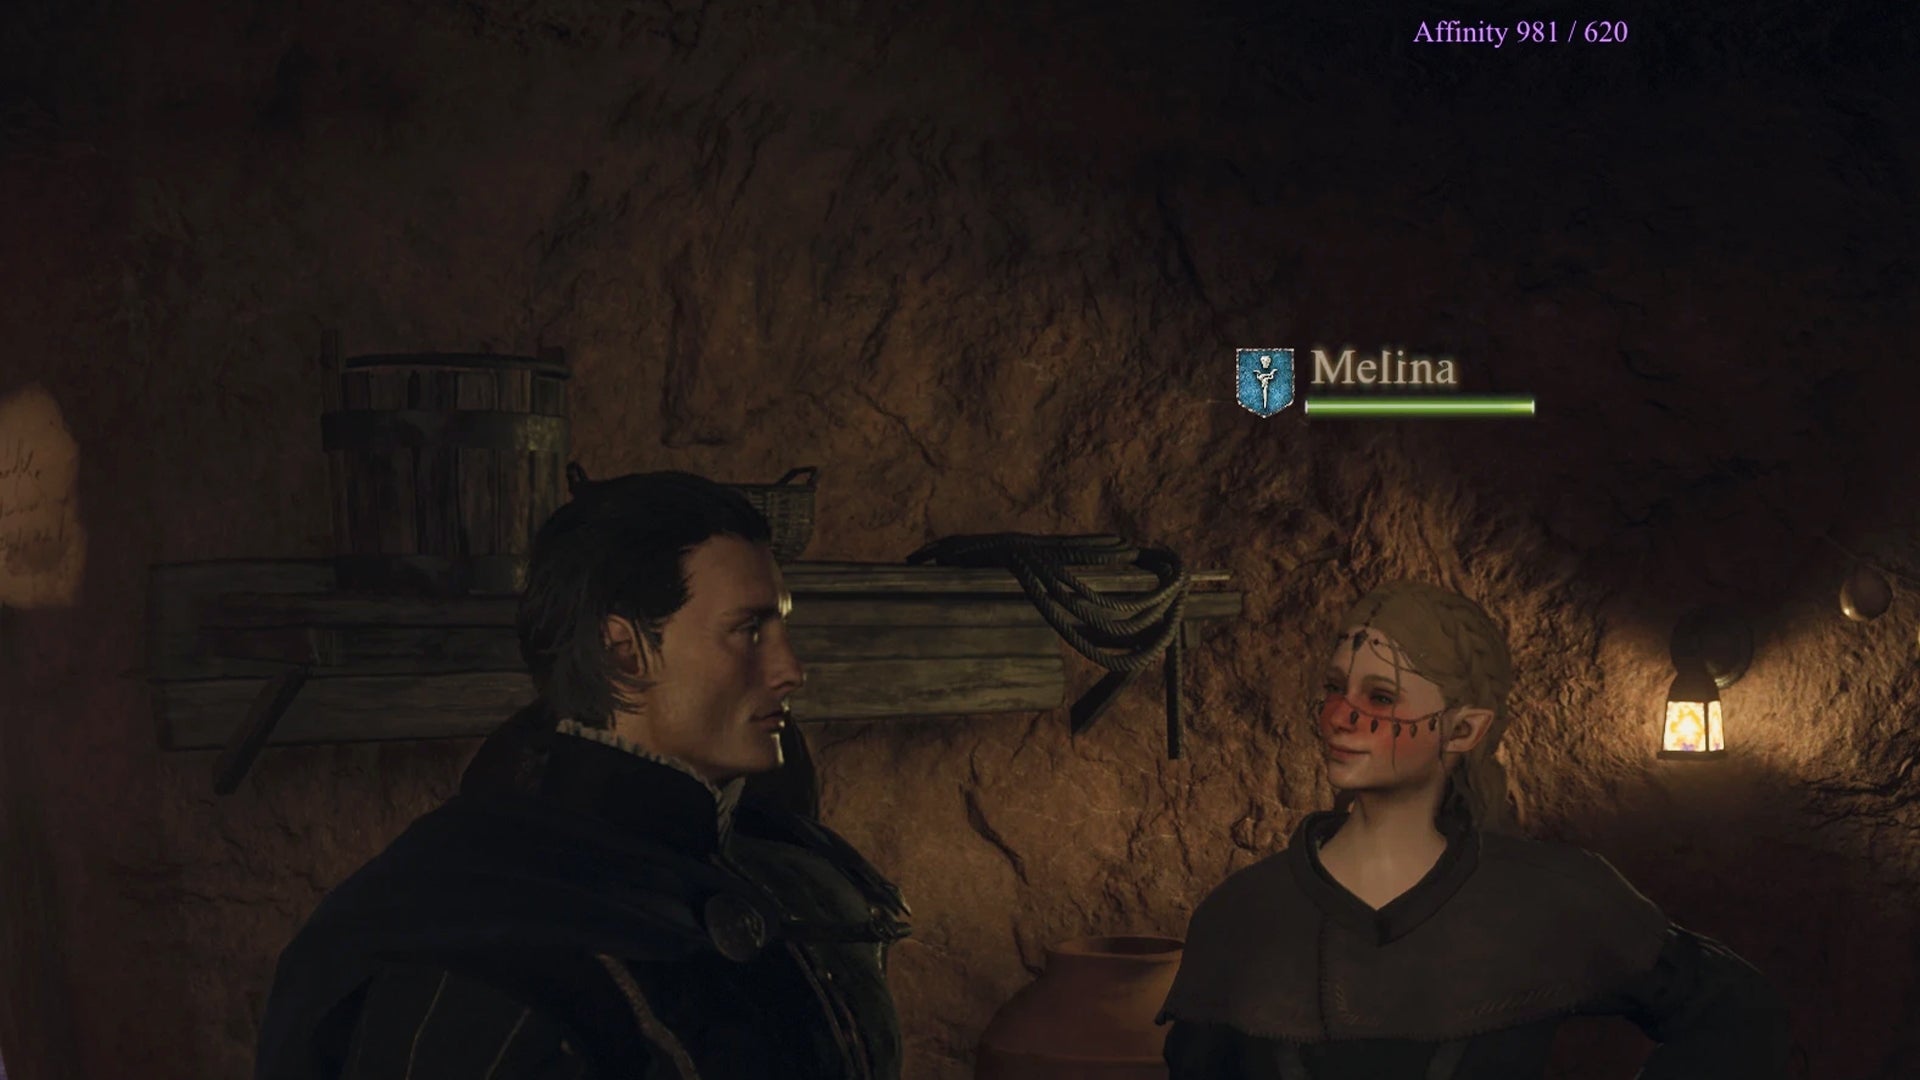
Pawns and NPCs will blush when you’ve raised their affinity past a certain level. |Image credit:Plaer1984/Nexus Mods.
Affinity is a hidden system in which you can get NPCs to befriend your Arisen and give them discounts, gifts and unique encounters. It is also possible to raise affinity with your Main Pawn , although it works slightly differently than with regular NPCs.
With the ‘Show Main Pawn Favorability’ mod, you can see exactly where your affinity level is at with your Main Pawn. This mod essentially makes it easier to track your friendship level.
Reaching max affinity with your Pawn leads to unique dialogue and a slight variation to a cutscene at the end of the game. There is also a ’ Show Favourability For Everyone ’ mod if you wish to see the same affinity measurement metric on the NPCs in the game.
Download link: Show Main Pawn Favorability
Infinite Stamina out of Combat

When you run out of stamina, a Pawn will usually lend a hand to help you recover. |Image credit:Rock Paper Shotgun/Capcom.
This mod, in my opinion, is a must-have for any Dragon’s Dogma 2 player. It gives you an infinite supply of stamina when adventuring, but inflicts the normal stamina limit whilst in combat.
This is a quality-of-life mod that doesn’t damage the structure or challenge of the game but allows you to roam freely without having to stop and gasp for breath every 10 seconds. This is especially handy as fast travel in Dragon’s Dogma 2 is quite limiting and you’ll spend most of your early playthrough having to run to and fro to places.
Download link: Infinite Stamina out of Combat
Early N’Cheap Art of Metamorphosis
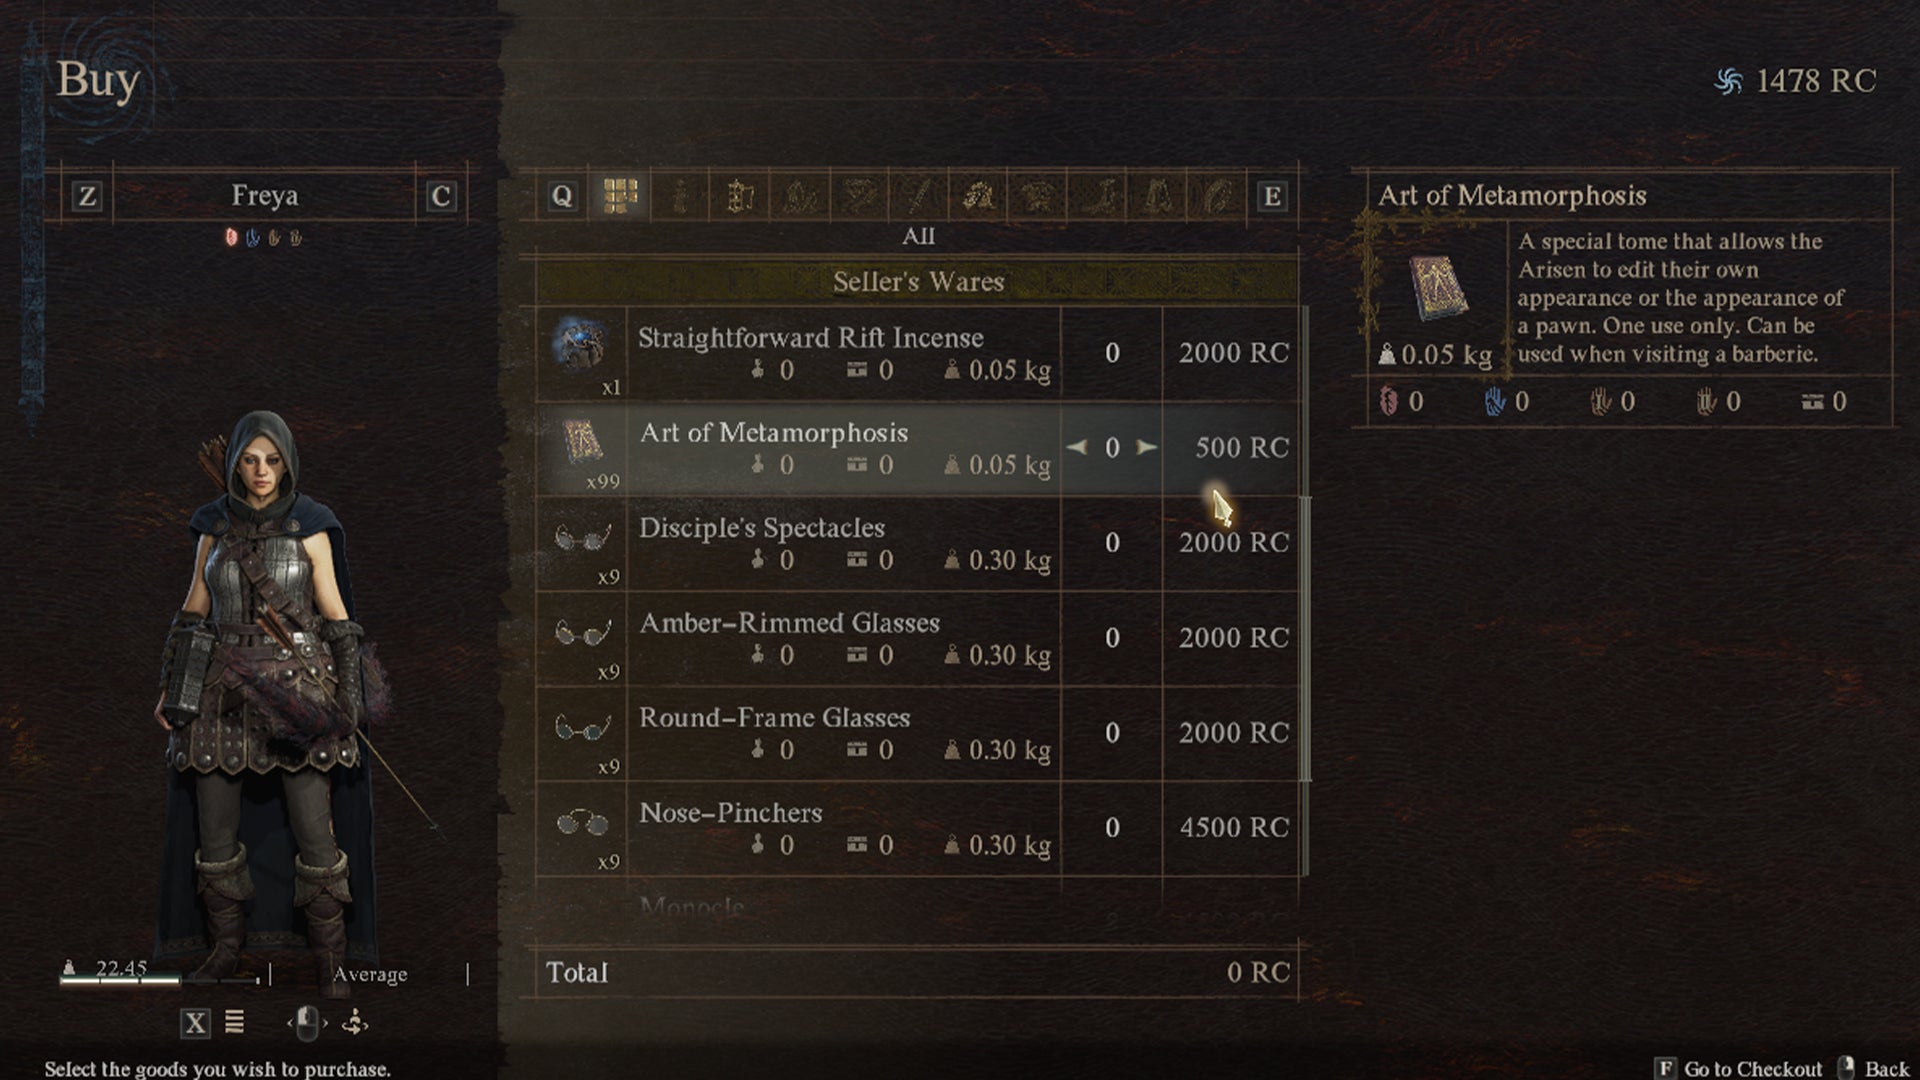
An Art of Metamorphosis tome will take you back to the character creator. |Image credit:Rock Paper Shotgun/Capcom.
We’ve all had character creator remorse in an RPG when you spend hours perfecting your character’s face, only to step into in-game lighting and realise you’ve created a troll.
Luckily, you can change your Arisen’s features in-game with an Art of Metamorphosis tome. Less lucky - you’ll have to wait until you reach the Pawn Guild vendor at Vernworth to get one.
This mod places an Art of Metamorphosis tome within the merchant’s stock rotation in Melve. Melve will likely be the first prominent village you encounter so you should gain access to the tome much quicker with this mod.
Download link: Early N’Cheap Art of Metamorphosis
Better UI - Colorful Map Icons

The map background and icons are normally a similar brown shade, making it hard to distinguish them. |Image credit:Caites/Nexus Mods.
Speaking of looks, the ‘Better UI - Colorful Map Icons’ mod gives the Dragon’s Dogma 2 map a facelift. It’s a small tweak but it essentially saturates the colours of the map icons so they stand out more against the brown wash of the map.
It’s a subtle change, but makes it a lot easier when looking for specific locations in the game.
Download link: Better UI - Colorful Map Icons
No Job Requirements
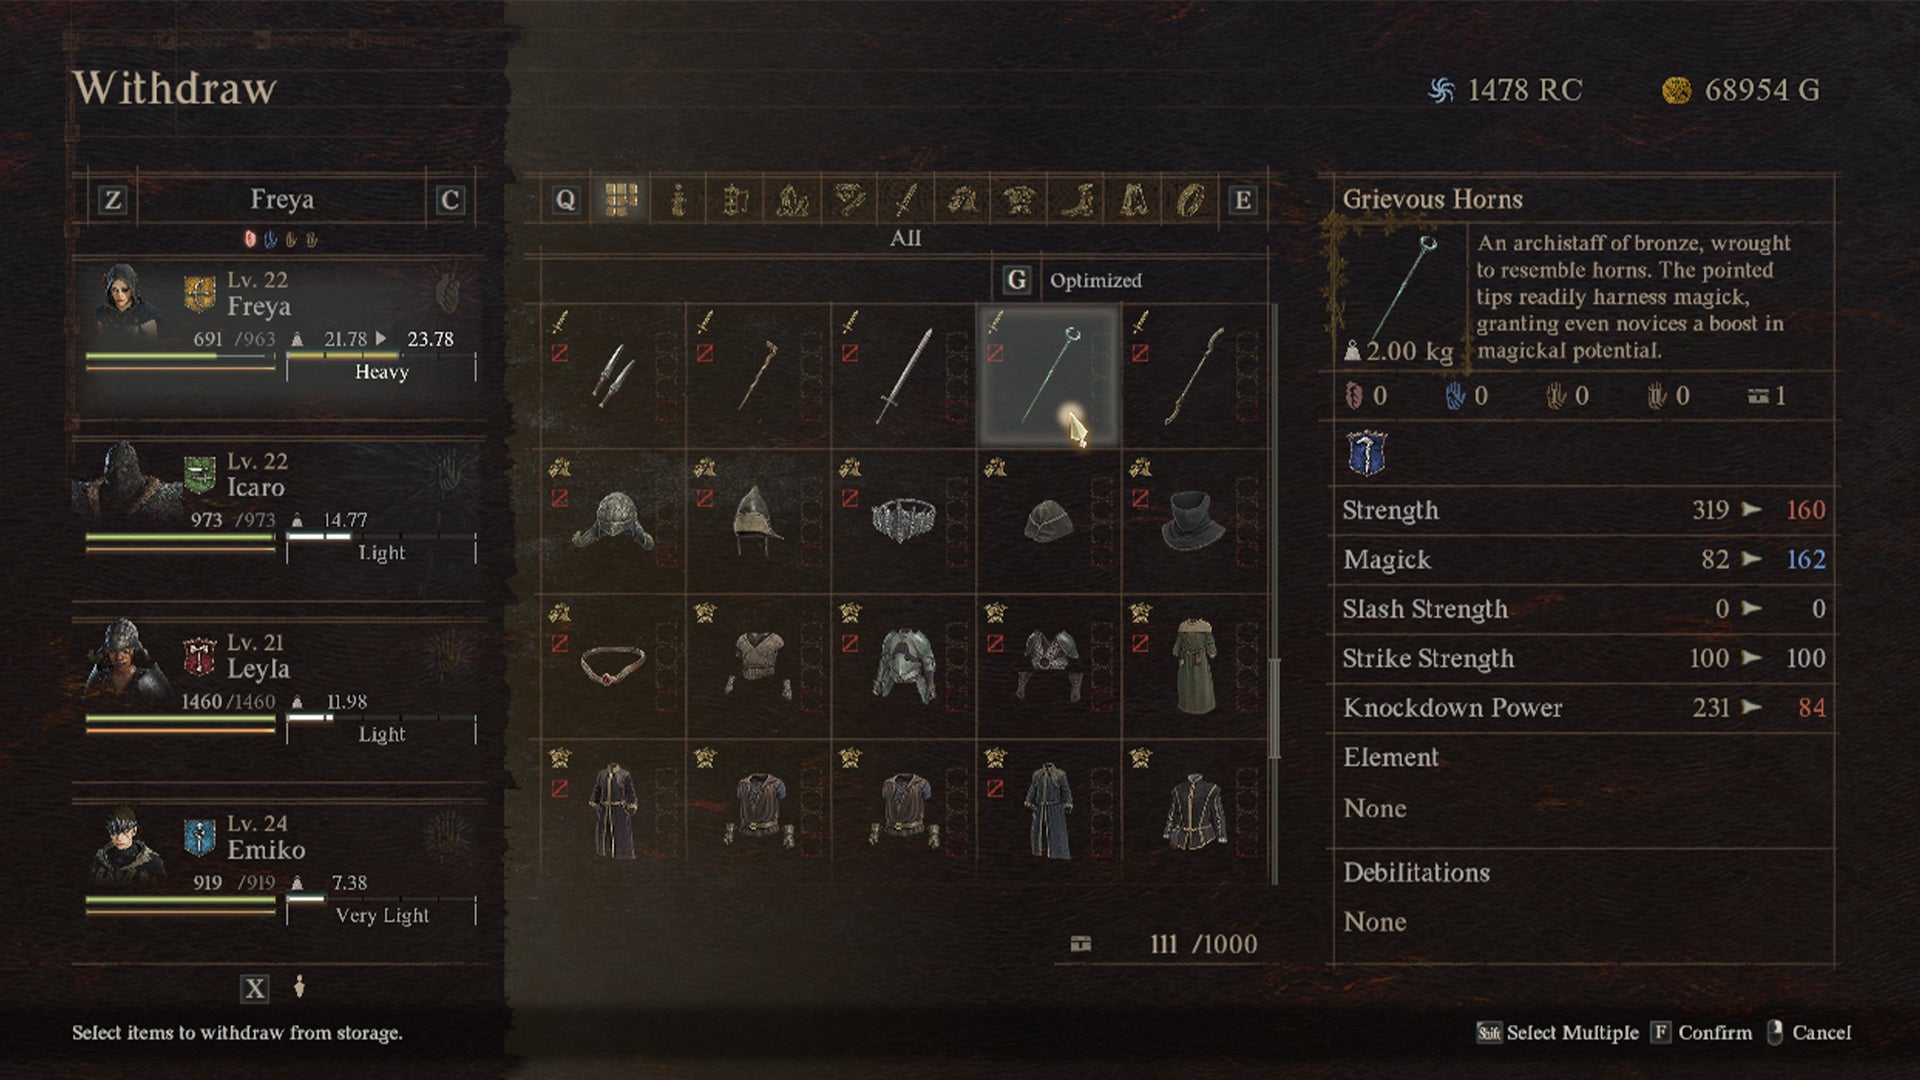
If you cannot use equipment, it will have a red box with a slash marked through it in your inventory. |Image credit:Rock Paper Shotgun/Capcom.
As you experiment with different vocations in Dragon’s Dogma 2 , you’ll notice that there are certain weapons and armour restrictions. For example, if you are an Archer , you won’t be able to wield a sword or wear certain armours.
The ‘No Job Requirements’ mod strips this and allows you to wear and wield whatever you like, regardless of your vocation. The mod does have some limitations, however. If you wield a weapon you’re not proficient in you’ll only have access to basic attacks. As such, we recommend using this mod mainly to switch out and wear whatever armour you like.
It is also helpful in a pinch if you need access to a bow but don’t have the Archer or Magick Archer vocation built or currently equipped. For me, I mostly use it to wear the pretty circlets that are shamefully only available for Sorcerers .
Download link: No Job Requirements
Teleportation

There are few Portcrystals in Dragon’s Dogma 2 and all require a Ferrystone to use. |Image credit:rthomasv3/Nexus Mods.
This mod may be a little controversial as it essentially makes fast travel free in Dragon’s Dogma 2. With the ‘Teleportation’ mod, you can fast travel without the need for a Ferrystone or Portcrytal to several key locations on the map.
This includes all major villages and cities like Bakbattahl, Melve, Nameless Village, Checkpoint Rest Town and more. You can also change the mod log to show all Golden Trove Beetle locations, Seeker Token locations and more, if you want to skip the grind of locating them all yourself.
If you’re a Dragon’s Dogma 2 purist, this won’t be the mod for you. If, however, you find the fast travel system more cumbersome than immersive, this mod will save you some time.
Download link: Teleportation
Turn Every Usable Item Infinite
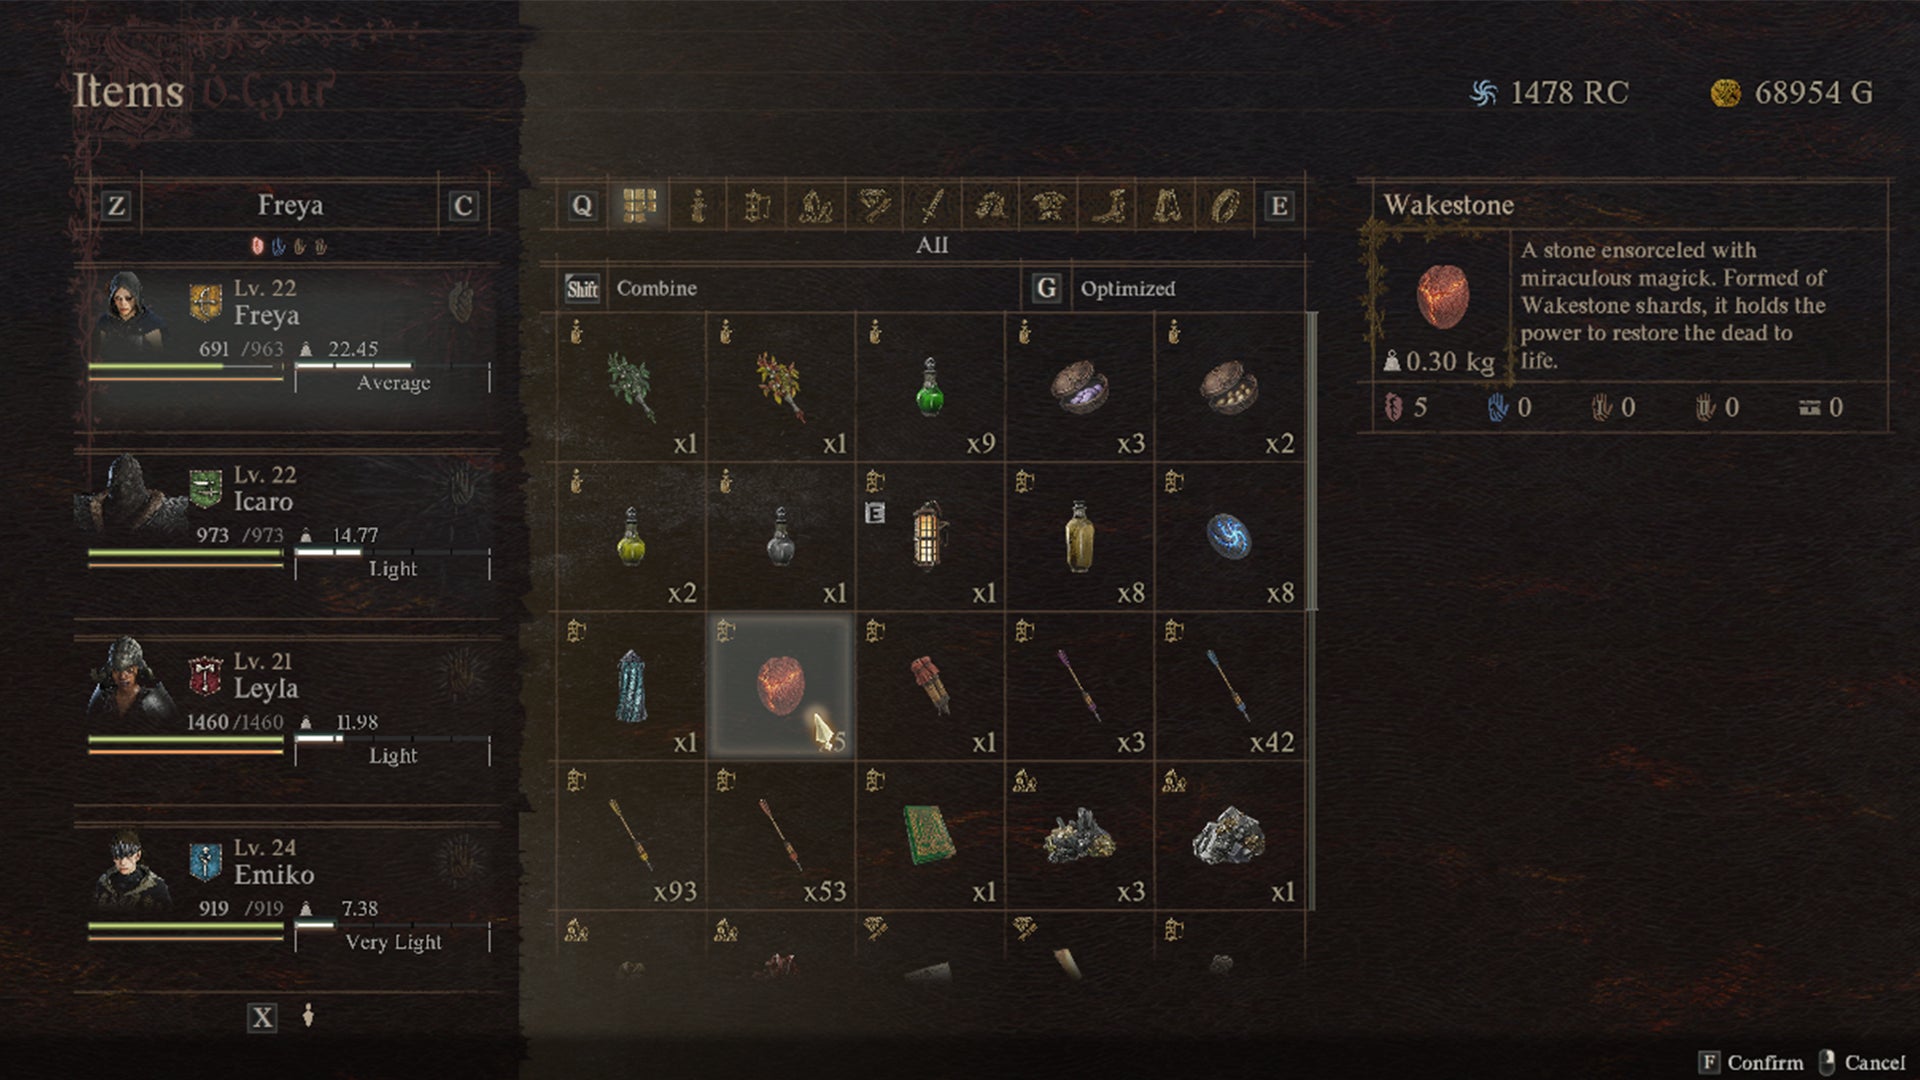
Wakestones are a one-use item that will revive you when killed in combat. |Image credit:Rock Paper Shotgun/Capcom.
With this mod, you can turn one-use items into an infinite supply in Dragon’s Dogma 2. This means you can use things like Ferrystones, Wakestones and spell tomes more than once, without them disappearing from your inventory.
This includes special items like the Eternal Wakestone (useful for resurrecting a large number of NPCs at once) and the Unmaking Arrow (which can instantly kill any foe).
Download link: Turn Every Usable Item Infinite
Note: Mild spoilers ahead regarding the Sphinx quest.
Riddle of Rumination Marker - A Game of Wits

There are 240 Seeker Tokens in Dragon’s Dogma 2. |Image credit:gibbed/Nexus Mods.
During the ‘A Game of Wits’ quest, you’ll be tasked with answering several riddles set by the Sphinx. One such riddle, the ‘Riddle of Rumination’ will task you with revisiting the location in which you found your first Seeker Token.
With over 200 tokens in the game, you may be hard-pressed to remember exactly where you picked up your first. Luckily this mod will mark the location for you on your map and save you some serious head-scratching. Although this mod is fairly niche, it’s extremely useful if like us, your memory is terrible.
Download link: Riddle of Rumination Marker - A Game of Wits
That rounds off our guide to the best Dragon’s Dogma 2 mods. For more Dragon’s Dogma 2 tips and tricks , see our guides for making the perfect Thief build , Mystic Spearhand build , Fighter build and more.


Dragon’s Dogma 2
PS5 , Xbox Series X/S , PC
Rock Paper Shotgun is better when you sign in
Sign in and join us on our journey to discover strange and compelling PC games.

All 75 Arc Raiders Blueprints and where to get them
These areas have the highest chance of giving you Blueprints

Image credit:Rock Paper Shotgun/Embark Studios

Looking for more Arc Raiders Blueprints? It’s a special day when you find a Blueprint, as they’re among the most valuable items in Arc Raiders. If you find a Blueprint that you haven’t already found, then you must make sure you hold onto it at all costs, because Blueprints are the key to one of the most important and powerful systems of meta-progression in the game.
This guide aims to be the very best guide on Blueprints you can find, starting with a primer on what exactly they are and how they work in Arc Raiders, before delving into exactly where to get Blueprints and the very best farming spots for you to take in your search.
We’ll also go over how to get Blueprints from other unlikely activities, such as destroying Surveyors and completing specific quests. And you’ll also find the full list of all 75 Blueprints in Arc Raiders on this page (including the newest Blueprints added with the Cold Snap update , such as the Deadline Blueprint and Firework Box Blueprint), giving you all the information you need to expand your own crafting repertoire.
In this guide:
- What are Blueprints in Arc Raiders?
- Full Blueprint list: All crafting recipes
- Where to find Blueprints in Arc Raiders Blueprints obtained from quests Blueprints obtained from Trials Best Blueprint farming locations

What are Blueprints in Arc Raiders?
Blueprints in Arc Raiders are special items which, if you manage to extract with them, you can expend to permanently unlock a new crafting recipe in your Workshop. If you manage to extract from a raid with an Anvil Blueprint, for example, you can unlock the ability to craft your very own Anvil Pistol, as many times as you like (as long as you have the crafting materials).
To use a Blueprint, simply open your Inventory while in the lobby, then right-click on the Blueprint and click “Learn And Consume” . This will permanently unlock the recipe for that item in your Workshop. As of the Stella Montis update, there are allegedly 75 different Blueprints to unlock - although only 68 are confirmed to be in the game so far. You can see all the Blueprints you’ve found and unlocked by going to the Workshop menu, and hitting “R” to bring up the Blueprint screen.
It’s possible to find duplicates of past Blueprints you’ve already unlocked. If you find these, then you can either sell them, or - if you like to play with friends - you can take it into a match and gift it to your friend so they can unlock that recipe for themselves. Another option is to keep hold of them until the time comes to donate them to the Expedition.
Full Blueprint list: All crafting recipes
Below is the full list of all the Blueprints that are currently available to find in Arc Raiders, and the crafting recipe required for each item:
| Blueprint | Type | Recipe | Crafted At |
|---|---|---|---|
| Bettina | Weapon | 3x Advanced Mechanical Components 3x Heavy Gun Parts 3x Canister | Gunsmith 3 |
| Blue Light Stick | Quick Use | 3x Chemicals | Utility Station 1 |
| Aphelion | Weapon | 3x Magnetic Accelerator 3x Complex Gun Parts 1x Matriarch Reactor | Gunsmith 3 |
| Combat Mk. 3 (Flanking) | Augment | 2x Advanced Electrical Components 3x Processor | Gear Bench 3 |
| Combat Mk. 3 (Aggressive) | Augment | 2x Advanced Electrical Components 3x Processor | Gear Bench 3 |
| Complex Gun Parts | Material | 2x Light Gun Parts 2x Medium Gun Parts 2x Heavy Gun Parts | Refiner 3 |
| Fireworks Box | Quick Use | 1x Explosive Compound 3x Pop Trigger | Explosives Station 2 |
| Gas Mine | Mine | 4x Chemicals 2x Rubber Parts | Explosives Station 1 |
| Green Light Stick | Quick Use | 3x Chemicals | Utility Station 1 |
| Pulse Mine | Mine | 1x Crude Explosives 1x Wires | Explosives Station 1 |
| Seeker Grenade | Grenade | 1x Crude Explosives 2x ARC Alloy | Explosives Station 1 |
| Looting Mk. 3 (Survivor) | Augment | 2x Advanced Electrical Components 3x Processor | Gear Bench 3 |
| Angled Grip II | Mod | 2x Mechanical Components 3x Duct Tape | Gunsmith 2 |
| Angled Grip III | Mod | 2x Mod Components 5x Duct Tape | Gunsmith 3 |
| Hullcracker | Weapon | 1x Magnetic Accelerator 3x Heavy Gun Parts 1x Exodus Modules | Gunsmith 3 |
| Launcher Ammo | Ammo | 5x Metal Parts 1x Crude Explosives | Workbench 1 |
| Anvil | Weapon | 5x Mechanical Components 5x Simple Gun Parts | Gunsmith 2 |
| Anvil Splitter | Mod | 2x Mod Components 3x Processor | Gunsmith 3 |
| ??? | ??? | ??? | ??? |
| Barricade Kit | Quick Use | 1x Mechanical Components | Utility Station 2 |
| Blaze Grenade | Grenade | 1x Explosive Compound 2x Oil | Explosives Station 3 |
| Bobcat | Weapon | 3x Advanced Mechanical Components 3x Light Gun Parts | Gunsmith 3 |
| Osprey | Weapon | 2x Advanced Mechanical Components 3x Medium Gun Parts 7x Wires | Gunsmith 3 |
| Burletta | Weapon | 3x Mechanical Components 3x Simple Gun Parts | Gunsmith 1 |
| Compensator II | Mod | 2x Mechanical Components 4x Wires | Gunsmith 2 |
| Compensator III | Mod | 2x Mod Components 8x Wires | Gunsmith 3 |
| Defibrillator | Quick Use | 9x Plastic Parts 1x Moss | Medical Lab 2 |
| ??? | ??? | ??? | ??? |
| Equalizer | Weapon | 3x Magnetic Accelerator 3x Complex Gun Parts 1x Queen Reactor | Gunsmith 3 |
| Extended Barrel | Mod | 2x Mod Components 8x Wires | Gunsmith 3 |
| Extended Light Mag II | Mod | 2x Mechanical Components 3x Steel Spring | Gunsmith 2 |
| Extended Light Mag III | Mod | 2x Mod Components 5x Steel Spring | Gunsmith 3 |
| Extended Medium Mag II | Mod | 2x Mechanical Components 3x Steel Spring | Gunsmith 2 |
| Extended Medium Mag III | Mod | 2x Mod Components 5x Steel Spring | Gunsmith 3 |
| Extended Shotgun Mag II | Mod | 2x Mechanical Components 3x Steel Spring | Gunsmith 2 |
| Extended Shotgun Mag III | Mod | 2x Mod Components 5x Steel Spring | Gunsmith 3 |
| Remote Raider Flare | Quick Use | 2x Chemicals 4x Rubber Parts | Utility Station 1 |
| Heavy Gun Parts | Material | 4x Simple Gun Parts | Refiner 2 |
| Venator | Weapon | 2x Advanced Mechanical Components 3x Medium Gun Parts 5x Magnet | Gunsmith 3 |
| Il Toro | Weapon | 5x Mechanical Components 6x Simple Gun Parts | Gunsmith 1 |
| Jolt Mine | Mine | 1x Electrical Components 1x Battery | Explosives Station 2 |
| Explosive Mine | Mine | 1x Explosive Compound 1x Sensors | Explosives Station 3 |
| Jupiter | Weapon | 3x Magnetic Accelerator 3x Complex Gun Parts 1x Queen Reactor | Gunsmith 3 |
| Light Gun Parts | Material | 4x Simple Gun Parts | Refiner 2 |
| Lightweight Stock | Mod | 2x Mod Components 5x Duct Tape | Gunsmith 3 |
| Lure Grenade | Grenade | 1x Speaker Component 1x Electrical Components | Utility Station 2 |
| Medium Gun Parts | Material | 4x Simple Gun Parts | Refiner 2 |
| Torrente | Weapon | 2x Advanced Mechanical Components 3x Medium Gun Parts 6x Steel Spring | Gunsmith 3 |
| Muzzle Brake II | Mod | 2x Mechanical Components 4x Wires | Gunsmith 2 |
| Muzzle Brake III | Mod | 2x Mod Components 8x Wires | Gunsmith 3 |
| Padded Stock | Mod | 2x Mod Components 5x Duct Tape | Gunsmith 3 |
| Shotgun Choke II | Mod | 2x Mechanical Components 4x Wires | Gunsmith 2 |
| Shotgun Choke III | Mod | 2x Mod Components 8x Wires | Gunsmith 3 |
| Shotgun Silencer | Mod | 2x Mod Components 8x Wires | Gunsmith 3 |
| Showstopper | Grenade | 1x Advanced Electrical Components 1x Voltage Converter | Explosives Station 3 |
| Silencer I | Mod | 2x Mechanical Components 4x Wires | Gunsmith 2 |
| Silencer II | Mod | 2x Mod Components 8x Wires | Gunsmith 3 |
| Snap Hook | Quick Use | 2x Power Rod 3x Rope 1x Exodus Modules | Utility Station 3 |
| Stable Stock II | Mod | 2x Mechanical Components 3x Duct Tape | Gunsmith 2 |
| Stable Stock III | Mod | 2x Mod Components 5x Duct Tape | Gunsmith 3 |
| Tagging Grenade | Grenade | 1x Electrical Components 1x Sensors | Utility Station 3 |
| Tempest | Weapon | 3x Advanced Mechanical Components 3x Medium Gun Parts 3x Canister | Gunsmith 3 |
| Trigger Nade | Grenade | 2x Crude Explosives 1x Processor | Explosives Station 2 |
| Vertical Grip II | Mod | 2x Mechanical Components 3x Duct Tape | Gunsmith 2 |
| Vertical Grip III | Mod | 2x Mod Components 5x Duct Tape | Gunsmith 3 |
| Vita Shot | Quick Use | 2x Antiseptic 1x Syringe | Medical Lab 3 |
| Vita Spray | Quick Use | 3x Antiseptic 1x Canister | Medical Lab 3 |
| Vulcano | Weapon | 1x Magnetic Accelerator 3x Heavy Gun Parts 1x Exodus Modules | Gunsmith 3 |
| Wolfpack | Grenade | 2x Explosive Compound 2x Sensors | Explosives Station 3 |
| Red Light Stick | Quick Use | 3x Chemicals | Utility Station 1 |
| Smoke Grenade | Grenade | 14x Chemicals 1x Canister | Utility Station 2 |
| Deadline | Mine | 3x Explosive Compound 2x ARC Circuitry | Explosives Station 3 |
| Trailblazer | Grenade | 1x Explosive Compound 1x Synthesized Fuel | Explosives Station 3 |
| Tactical Mk. 3 (Defensive) | Augment | 2x Advanced Electrical Components 3x Processor | Gear Bench 3 |
| Tactical Mk. 3 (Healing) | Augment | 2x Advanced Electrical Components 3x Processor | Gear Bench 3 |
| Yellow Light Stick | Quick Use | 3x Chemicals | Utility Station 1 |
Note: The missing Blueprints in this list likely have not actually been added to the game at the time of writing, because none of the playerbase has managed to find any of them. As they are added to the game, I will update this page with the most relevant information so you know exactly how to get all 75 Arc Raiders Blueprints.
Where to find Blueprints in Arc Raiders
Below is a list of all containers, modifiers, and events which maximise your chances of finding Blueprints:
- Certain quests reward you with specific Blueprints .
- Completing Trials has a high chance of offering Blueprints as rewards.
- Surveyors have a decent chance of dropping Blueprints on death.
- High loot value areas tend to have a greater chance of spawning Blueprints.
- Night Raids and Storms may increase rare Blueprint spawn chances in containers.
- Containers with higher numbers of items may have a higher tendency to spawn Blueprints. As a result, Blue Gate (which has many “large” containers containing multiple items) may give you a higher chance of spawning Blueprints.
- Raider containers (Raider Caches, Weapon Boxes, Medical Bags, Grenade Tubes) have increased Blueprint drop rates. As a result, the Uncovered Caches event gives you a high chance of finding Blueprints.
- Security Lockers have a higher than average chance of containing Blueprints.
- Certain Blueprints only seem to spawn under specific circumstances: Tempest Blueprint only spawns during Night Raid events. Vulcano Blueprint only spawns during Hidden Bunker events. Jupiter and Equaliser Blueprints only spawn during Harvester events.

Raider Caches, Weapon Boxes, and other raider-oriented container types have a good chance of offering Blueprints. |Image credit:Rock Paper Shotgun/Embark Studios
Blueprints have a very low chance of spawning in any container in Arc Raiders, around 1-2% on average. However, there is a higher chance of finding Blueprints in particular container types. Specifically, you can find more Blueprints in Raider containers and security lockers.
Beyond this, if you’re looking for Blueprints you should focus on regions of the map which are marked as having particularly high-value loot. Areas such as the Control Tower in Dam Battlegrounds, the Arrival and Departure Buildings in Spaceport, and Pilgrim’s Peak in Blue Gate all have a better-than-average chance of spawning Blueprints somewhere amongst all their containers. Night Raids and Electromagnetic Storm events also increase the drop chances of certain Blueprints .
In addition to these containers, you can often loot Blueprints from destroyed Surveyors - the largest of the rolling ball ARC. Surveyors are more commonly found on the later maps - Spaceport and Blue Gate - and if one spawns in your match, you’ll likely see it by the blue laser beam that it casts into the sky while “surveying”.
Surveyors are quite well-armoured and will very speedily run away from you once it notices you, but if you can take one down then make sure you loot all its parts for a chance of obtaining certain unusual Blueprints.
Blueprints obtained from quests
One way in which you can get Blueprints is by completing certain quests for the vendors in Speranza. Some quests will reward you with a specific item Blueprint upon completion, so as long as you work through all the quests in Arc Raiders, you are guaranteed those Blueprints.
Here is the full list of all Blueprints you can get from quest rewards:
- Trigger Nade Blueprint: Rewarded after completing “Sparks Fly”.
- Lure Grenade Blueprint: Rewarded after completing “Greasing Her Palms”.
- Burletta Blueprint: Rewarded after completing “Industrial Espionage”.
- Hullcracker Blueprint (and Launcher Ammo Blueprint): Rewarded after completing “The Major’s Footlocker”.
Alas, that’s only 4 Blueprints out of a total of 75 to unlock, so for the vast majority you will need to find them yourself during a raid. If you’re intent on farming Blueprints, then it’s best to equip yourself with cheap gear in case you lose it, but don’t use a free loadout because then you won’t get a safe pocket to stash any new Blueprint you find. No pain in Arc Raiders is sharper than failing to extract with a new Blueprint you’ve been after for a dozen hours already.

One of the best ways to get Blueprints is by hitting three stars on all five Trials every week. |Image credit:Rock Paper Shotgun/Embark Studios
Blueprints obtained from Trials
One of the very best ways to get Blueprints is as rewards for completing Trials in Arc Raiders. Trials are unlocked from Level 15 onwards, and allow you to earn rewards by focusing on certain tasks over the course of several raids. For example, one Trial might task you with dealing damage to Hornets, while another might challenge you to loot Supply Drops.
Trials refresh on a weekly basis, with a new week bringing five new Trials. Each Trial can offer up to three rewards after passing certain score milestones, and it’s possible to receive very high level loot from these reward crates - including Blueprints. So if you want to unlock as many Blueprints as possible, you should make a point of completing as many Trials as possible each week.
Best Blueprint farming locations
The very best way to get Blueprints is to frequent specific areas of the maps which combine high-tier loot pools with the right types of containers to search. Here are my recommendations for where to find Blueprints on every map, so you can always keep the search going for new crafting recipes to unlock.

Image credit:Rock Paper Shotgun/Embark Studios
Dam Battlegrounds
The best places to farm Blueprints on Dam Battlegrounds are the Control Tower, Power Generation Complex, Ruby Residence, and Pale Apartments . The first two regions, despite only being marked on the map as mid-tier loot, contain a phenomenal number of containers to loot. The Control Tower can also contain a couple of high-tier Security Lockers - though of course, you’ll need to have unlocked the Security Breach skill at the end of the Survival tree.
There’s also a lot of reporting amongst the playerbase that the Residential areas in the top-left of the map - Pale Apartments and Ruby Residence - give you a comparatively strong chance of finding Blueprints. Considering their size, there’s a high density of containers to loot in both locations, and they also have the benefit of being fairly out of the way. So you’re more likely to have all the containers to yourself.
Buried City
The best Blueprint farming locations on Buried City are the Santa Maria Houses, Grandioso Apartments, Town Hall, and the various buildings of the New District . Grandioso Apartments has a lower number of containers than the rest, but a high chance of spawning weapon cases - which have good Blueprint drop rates. The others are high-tier loot areas, with plenty of lootable containers - including Security Lockers.
Spaceport
The best places to find Blueprints on Spaceport are the Arrival and Departure Buildings, as well as Control Tower A6 and the Launch Towers . All these areas are labelled as high-value loot regions, and many of them are also very handily connected to one another by the Spaceport wall, which you can use to quickly run from one area to the next. At the tops of most of these buildings you’ll find at least one Security Locker, so this is an excellent farming route for players looking to find Blueprints.
The downside to looting Blueprints on Spaceport is that all these areas are hotly contested, particularly in Duos and Squads. You’ll need to be very focused and fast in order to complete the full farming route.

Image credit:Rock Paper Shotgun/Embark Studios
Blue Gate
Blue Gate tends to have a good chance of dropping Blueprints, potentially because it generally has a high number of containers which can hold lots of items; so there’s a higher chance of a Blueprint spawning in each container. In my experience, the best Blueprint farming spots on Blue Gate are Pilgrim’s Peak, Raider’s Refuge, the Ancient Fort, and the Underground Complex beneath the Warehouse .
All of these areas contain a wealth of containers to loot. Raider’s Refuge has less to loot, but the majority of the containers in and around the Refuge are raider containers, which have a high chance of containing Blueprints - particularly during major events.
Stella Montis
On the whole, Stella Montis seems to have a very low drop rate for Blueprints (though a high chance of dropping other high-tier loot). If you do want to try farming Blueprints on this map, the best places to find Blueprints in Stella Montis are Medical Research, Assembly Workshop, and the Business Center . These areas have the highest density of containers to loot on the map.
In addition to this, the Western Tunnel has a few different Security Lockers to loot, so while there’s very little to loot elsewhere in this area of the map, it’s worth hitting those Security Lockers if you spawn there at the start of a match.
That wraps up this primer on how to get all the Blueprints in Arc Raiders as quickly as possible. With the Expedition system constantly resetting a large number of players’ Blueprints, it’s more important than ever to have the most up-to-date information on where to find all these Blueprints.
While you’re here, be sure to check out our Arc Raiders best guns tier list , as well as our primers on the best skills to unlock and all the different Field Depot locations on every map.


ARC Raiders
PS5 , Xbox Series X/S , PC
Rock Paper Shotgun is better when you sign in
Sign in and join us on our journey to discover strange and compelling PC games.
