Best Dragon Age Veilguard Class: All skills and perks
Here is a rundown of all three Classes in Dragon Age Veilguard and which you should choose
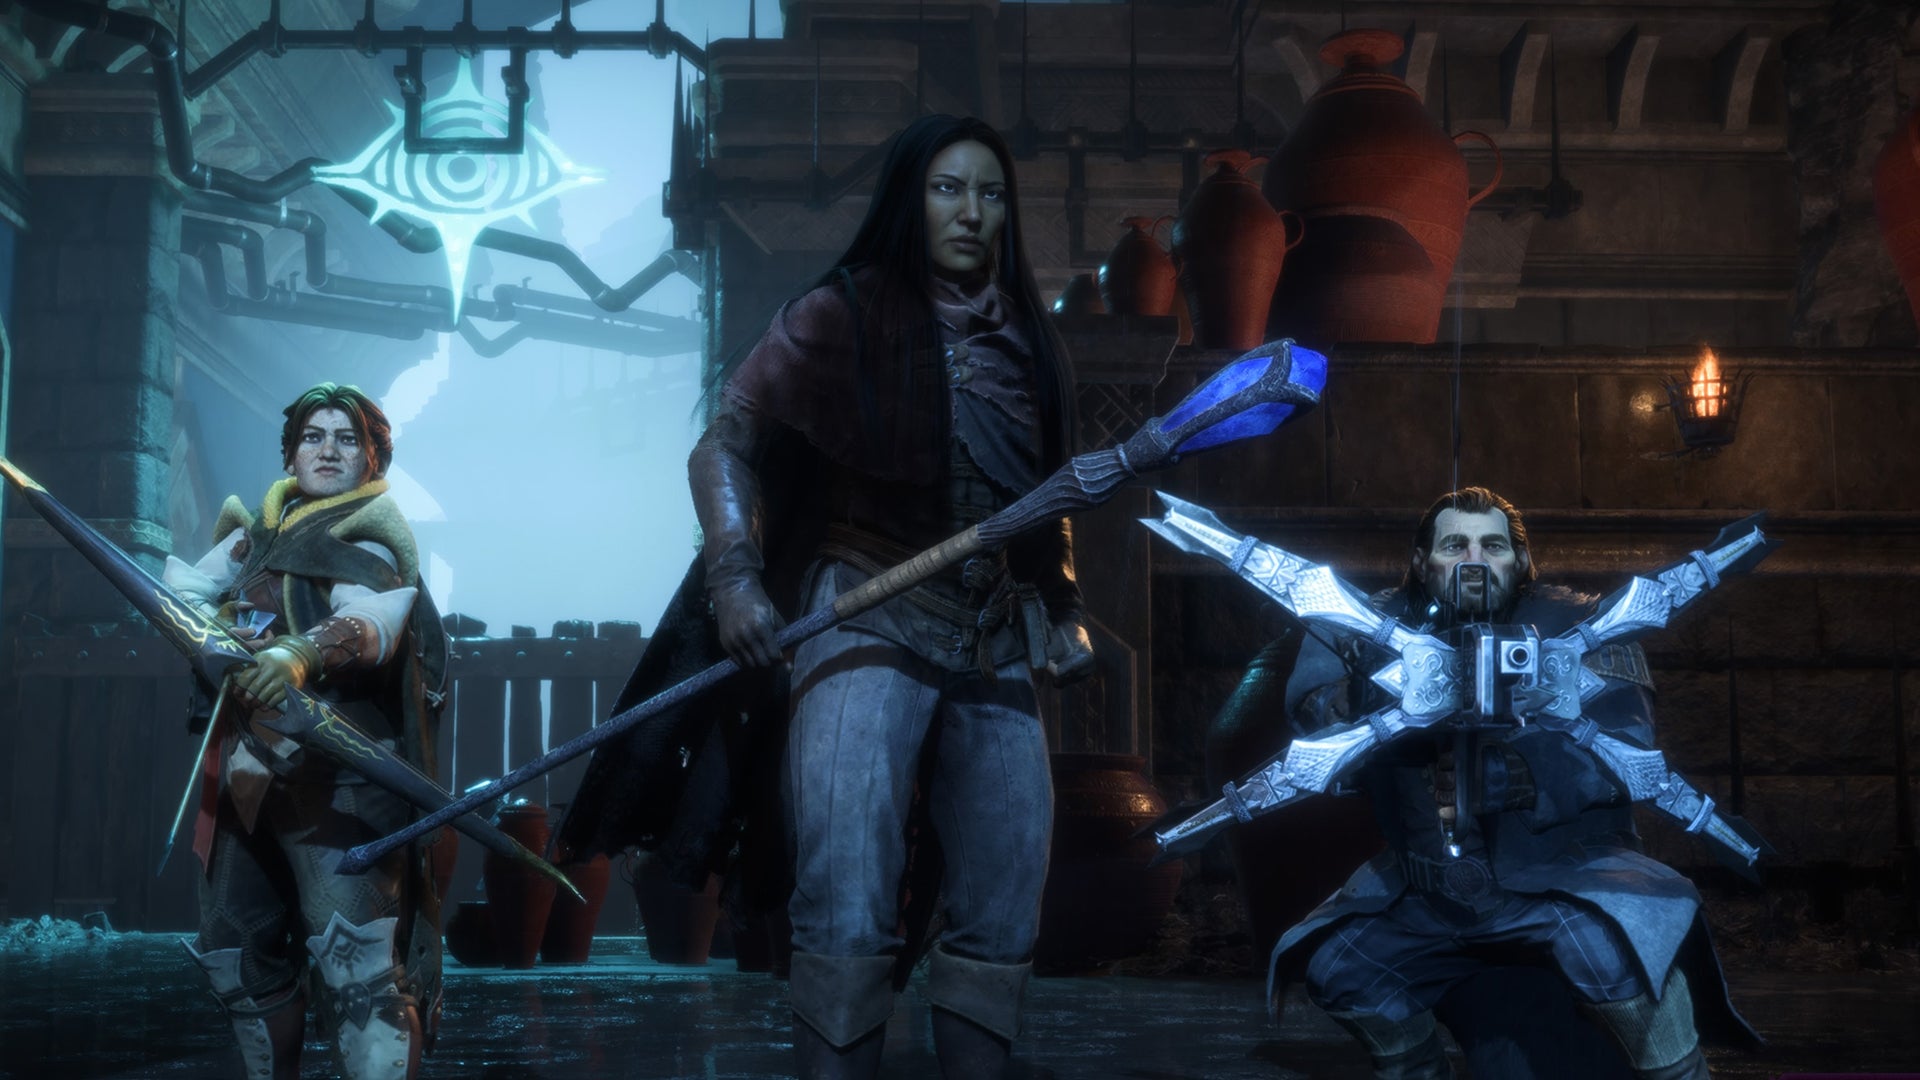
Image credit:Rock Paper Shotgun/Electronic Arts

Looking for the best Class in Dragon Age Veilguard? If you’re agonising over the character creator, unsure of how each Class will affect your playstyle in Dragon Age Veilguard , we have you covered.
We’ve played all 3 classes , the Mage, Warrior and Rogue and highlighted the pros and cons for each so you can make an informed choice. We’ve also included a rundown of the skill tree for all Classes so you can take a sneak peek ahead.
What is the best Dragon Age Veilguard Class?
The best class in Dragon Age Veilguard, in my opinion, is the Mage Class . The Mage can flit between the usual staff option for long-ranged attacks, and a dagger infused with frost magic (complete with a circling orb of frost that can be launched at enemies).
Most of the Mage specialisations involve your Rook excelling in one of the major elements, Shock, Fire, Frost or Necrotic. Of these, I recommend the Arcane Shot as one of the first skills you can acquire. This allows you to summon several arcane bolts of fire to hurl at enemies for massive potential damage. I also liked Wall of Fire as an early skill investment. It summons a wall of fire for enemies to traipse into and lasts several seconds for sustained damage. Thanks to Veilguard’s generous skill allocation you can refund points for free at any time and try out different skills to see what suits you best, so I recommend shopping around.
Take this with a pinch of salt, of course, as the choice of Class largely comes down to personal preference and playstyle. I played every Class and found the combat seemed just as challenging across the board. I preferred the speed of the Rogue zipping in and out of combat, the pure brute strength of the Warrior flinging their shield around and exploding it like a bomb and the Mage Class offered the coolest visual effects. Dragon Age Veilguard combat is immensely satisfying and each Class does a great job at making your Rook feel powerful. If you’re still unsure which to pick, we have all three classes and their major skills listed below.
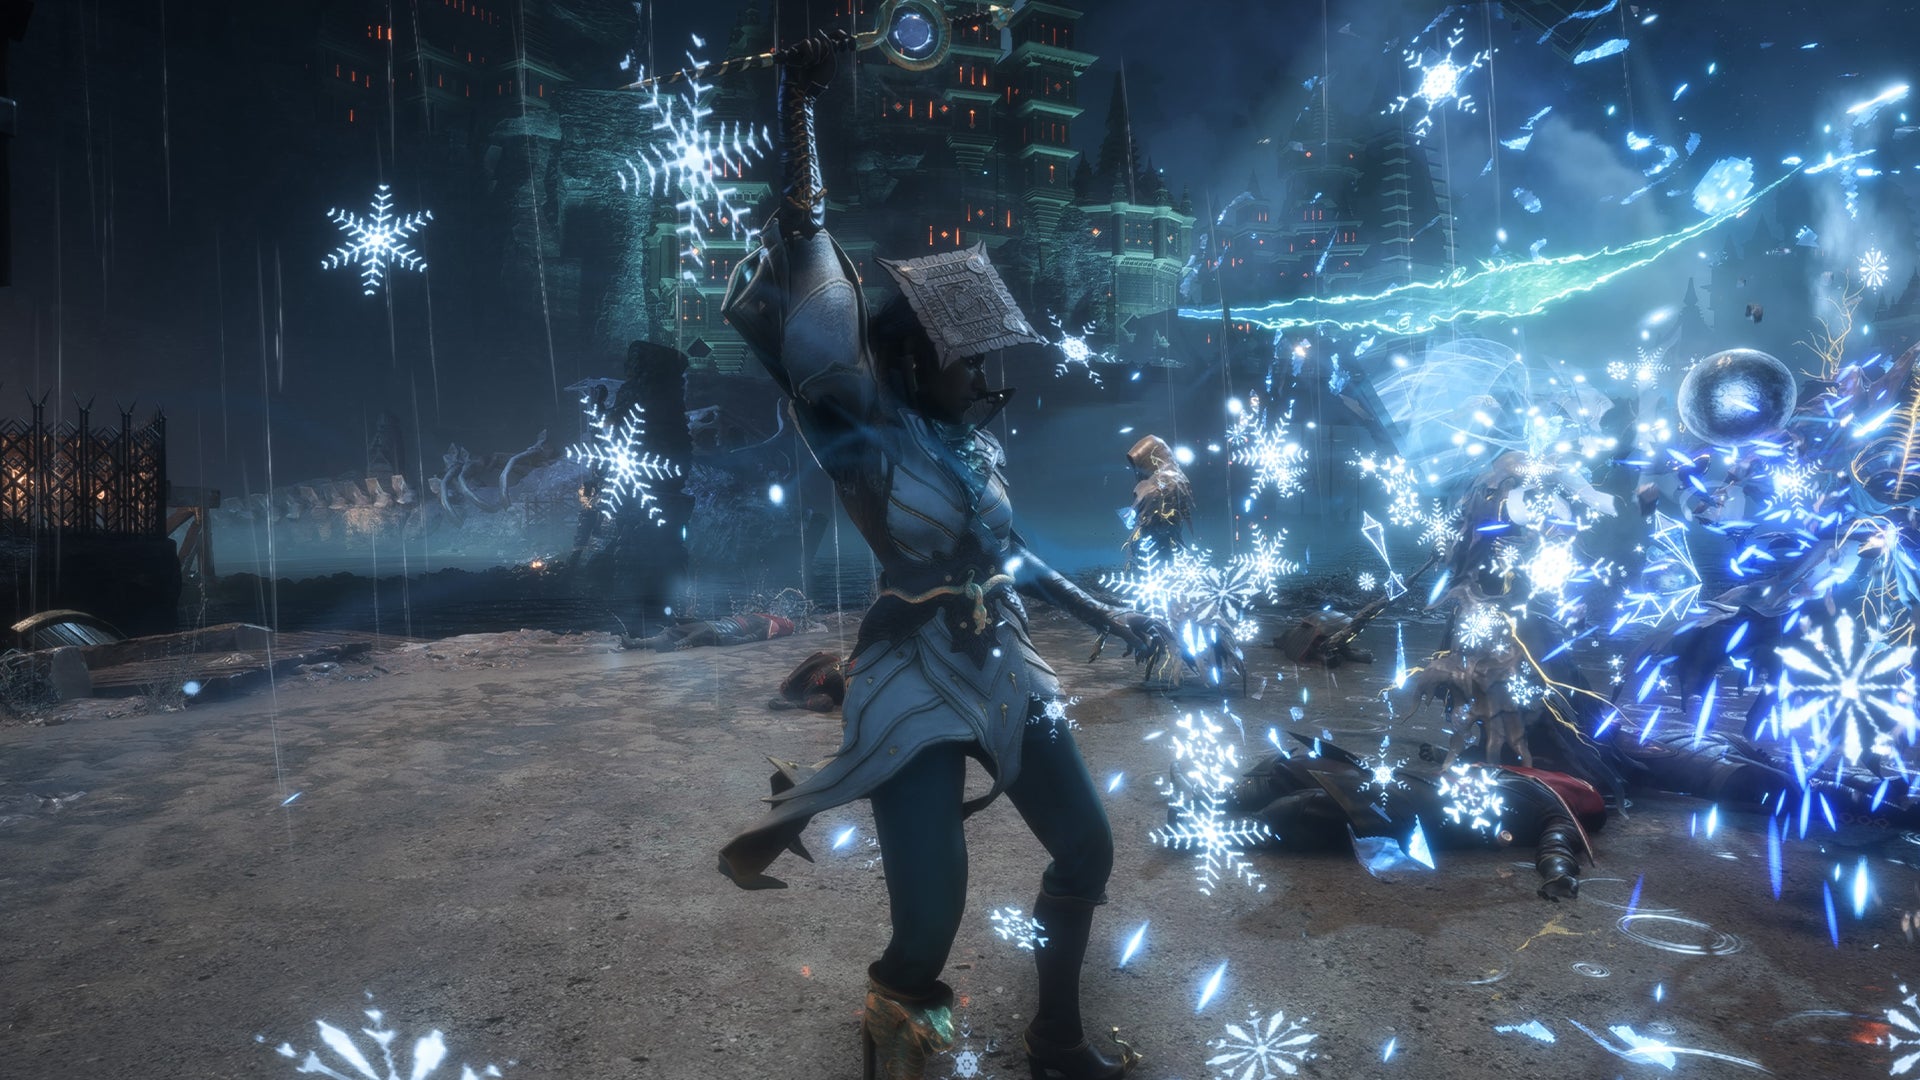
I wish I picked the Mage Class first. |Image credit:Rock Paper Shotgun/Electronic Arts
All Dragon Age Veilguard Classes explained
As mentioned above, there are 3 Classes to choose from in Dragon Age Veilguard, along with your race and Faction (see our best Factions guide for more info if you need help deciding on this too). There is either the Warrior , Mage or Rogue class to choose from.
Unlike previous Dragon Age titles, the combat in the game isn’t strictly turn-based. Whilst you’ll be able to command your party and access their skills, the combat is more streamlined and easier to get to grips with.
It’s worth noting that whichever class you choose, all of them have access to ranged and melee attacks. Like any traditional RPG, as you complete quests and level up your character level, you’ll unlock Perk Points for Rook and your party members. You can then spend these Perk Points within the skill trees for your chosen Class.
Further down, we’ve provided a more in-depth look at each Class and their skills in Dragon Age Veilguard. You can have up to 3 character profiles and saves in Dragon Age Veilguard. So, you can always make one of each Class and try out the opening hour if you’re still unsure!
Warrior Class
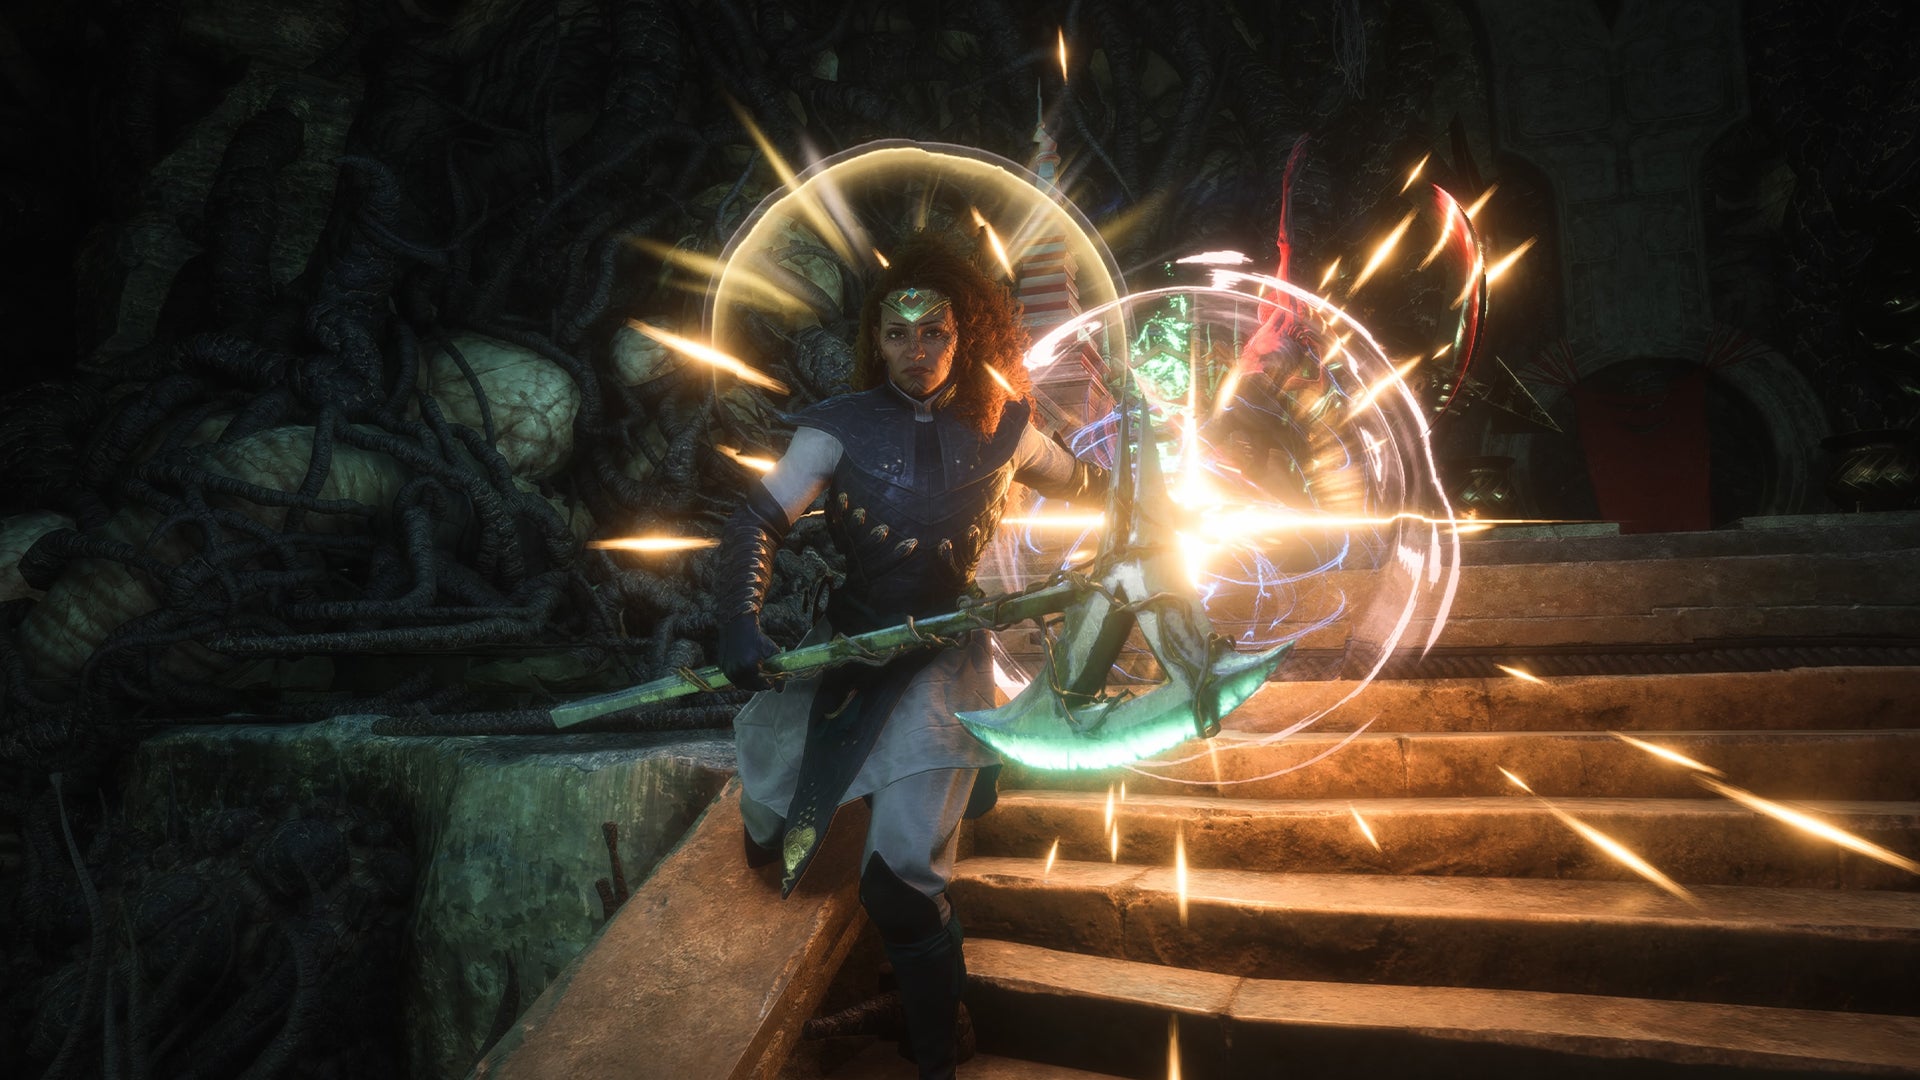
The Warrior Class specialises in Two-Handed heavy weapons and Longswords with Shields. |Image credit:Rock Paper Shotgun/Electronic Arts
The Warrior class can swap between a two-handed heavy weapon or a sword and shield. Combat is still fast-paced but attacks can be slightly slower compared to the Rogue and Mage Class, as can be expected.
The Warrior can charge up and throw their shield at enemies, then wait for it to return as their ranged attack. Their heavy attack emits several circular swings of their weapon and both of these combat mechanics can be improved via the skill tree.
The Class-specific resource for the Warrior is Rage . Once your Rage meter is full from executing successive combat prompts, Rook can perform a ground fist attack for AOE damage.
The other Warrior types you can recruit to your party are, Davrin from the Grey Wardens and Taash from the Lords of Fortune . However, these will be recruited further into the main campaign. The skill branches for the Warrior are:
- Abilities: These are a mixture of smash abilities that knock enemies away to improve spacing or offer defence.
- Survival: These abilities offer ways to stun enemies. Stunning enemies will leave them open to finisher moves and the potential for massive damage.
- Weapons: These offer charged heavy attacks and advanced weapon techniques with the ability to chain certain attacks together.
- Specialization Slayer: These abilities are coined from the Lord of Fortune Faction and centre around critical hits. These skills include whirlwind attacks, AOE stagger damage, and two-handed charged attacks.
- Specialization Reaper: Based on Mourn Watch tactics, these skills centre around weakening foes and shield tosses. Projectiles and Necrotic damage are common themes among these skills.
- Specialization Champion: Grey Warden tactics are used within this section of the tree. Included skills utilise both defensive and offensive techniques and Fire is a common status effect.
Rogue Class
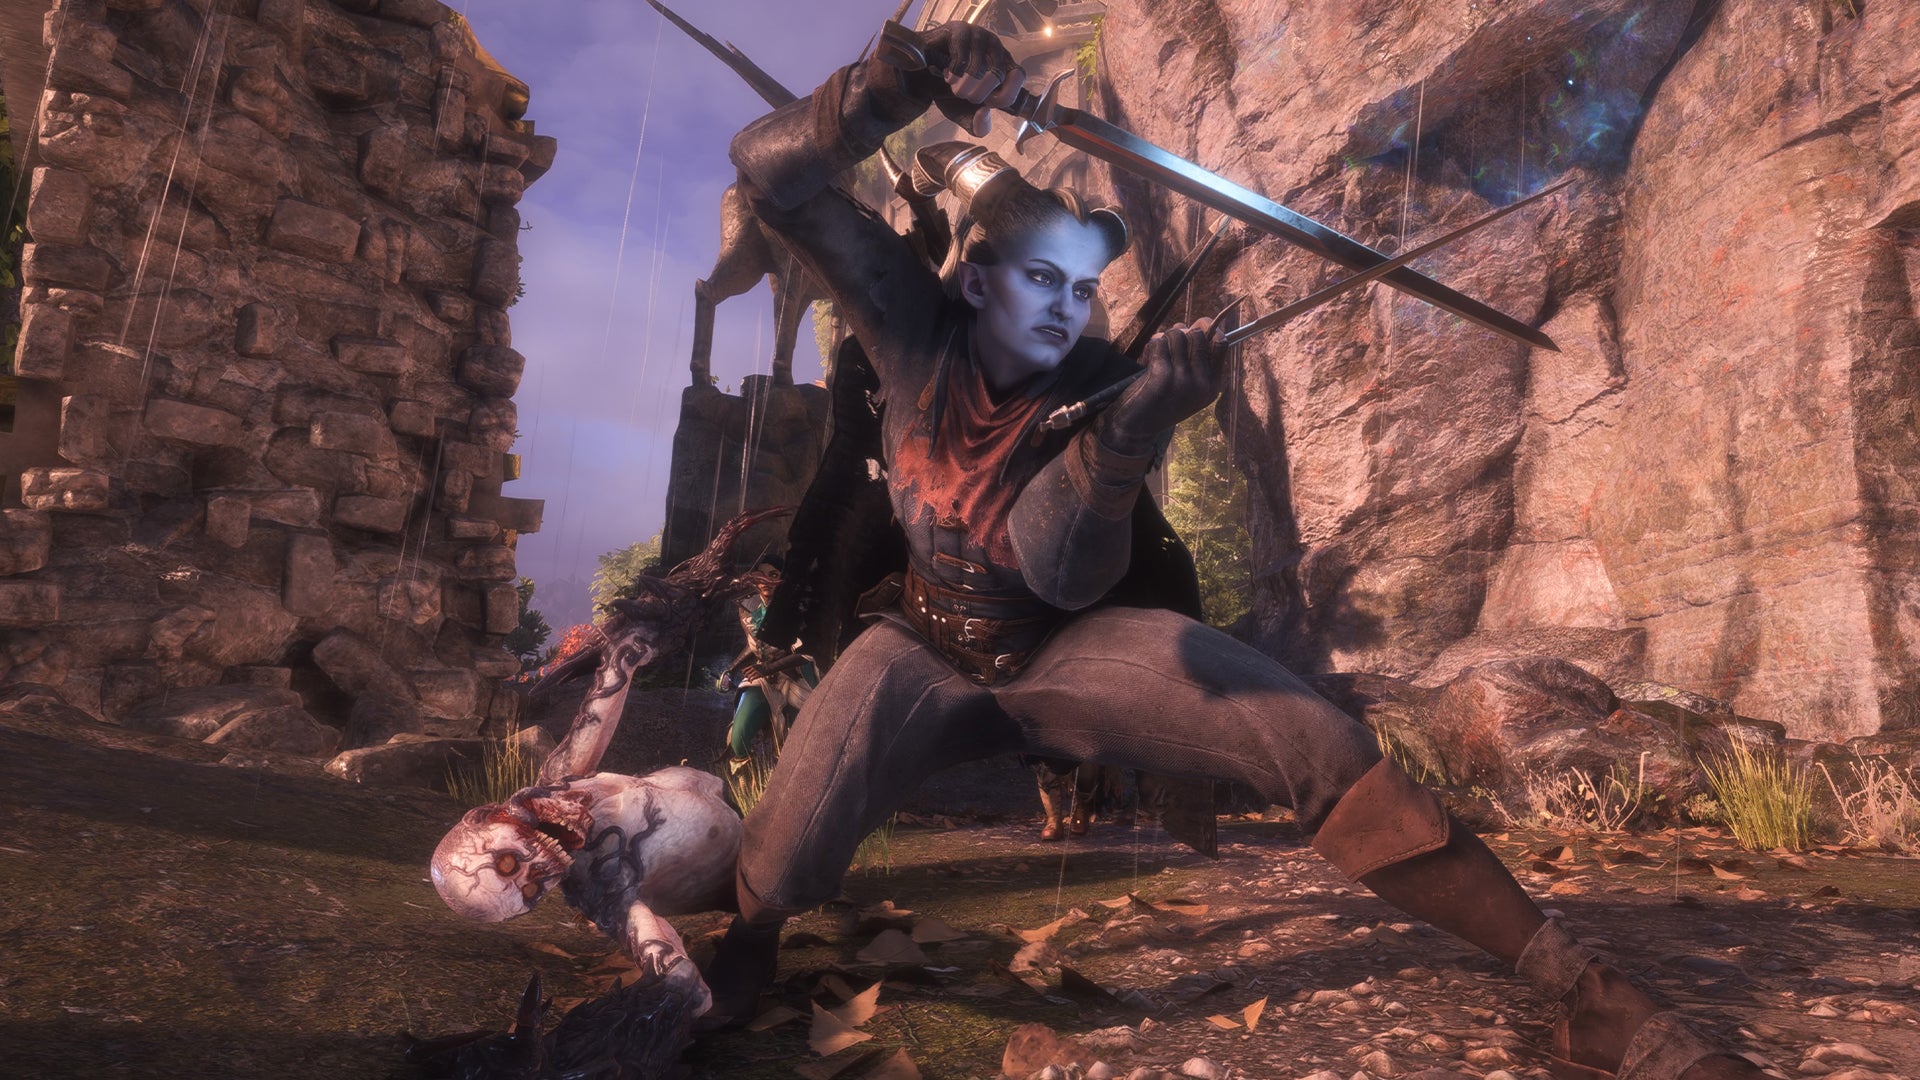
The Rogue flits between dual daggers and a bow. |Image credit:Rock Paper Shotgun/Electronic Arts
The Rogue Class is the fastest and in some cases, smoothest combat experience. The Rogue can flit between dual-wielding short swords and a bow for ranged shots. Their dodge looks more like a cartwheel (complete with raven feathers and squawks sometimes) and you’ll see them perform some impressive kicks and slash moves as they fight.
The Rogue builds up Momentum and can spend it on a power move that enables the Rogue to jump in the air and drop multiple bombs on enemies. A charged attack will either be a leap forward with an uppercut or the Rogue will jump into the air and swing their blades in circles.
The other recruitable Rogues in Dragon Age Veilguard are Harding (as seen from Dragon Age Inquisition) and Lucanis Dellamorte, a member of the Antivan Crows .
Here are the major skill tree sections and skills available to the Rogue on a playthrough:
- Burst: Includes high-impact skills like explosive daggers and a skill that emits a whirlwind of blades.
- Control: This includes skills made to maximise the impact of the bow. Includes skills that apply status effects to arrows like Necrotic and Shock.
- Sustain: These are mostly defensive abilities but also include interesting ones like Pilfer (stealing a potion from an enemy) and Lightning Flask (which involves throwing a flask of lightning).
- Specialization Veil Ranger: The Veil Ranger side of the Rogue tree specialises in Bow attacks and adds more attack types and rewards to charged bow shots and headshots.
- Specialization Saboteur: This side of the tree is formed from Lord of Fortune skills. These skills utilise explosions and throwables. Included are skills that allow you to summon weaponized turrets, bombs and other roguish traps.
- Specialization Duelist: This part of the Rogue tree uses Antivan Crow techniques to maximise Momentum, attacks and parries. This includes skills like A Thousand Cuts (rapid consecutive slashes) and other Necrotic-based effects.
Mage Class
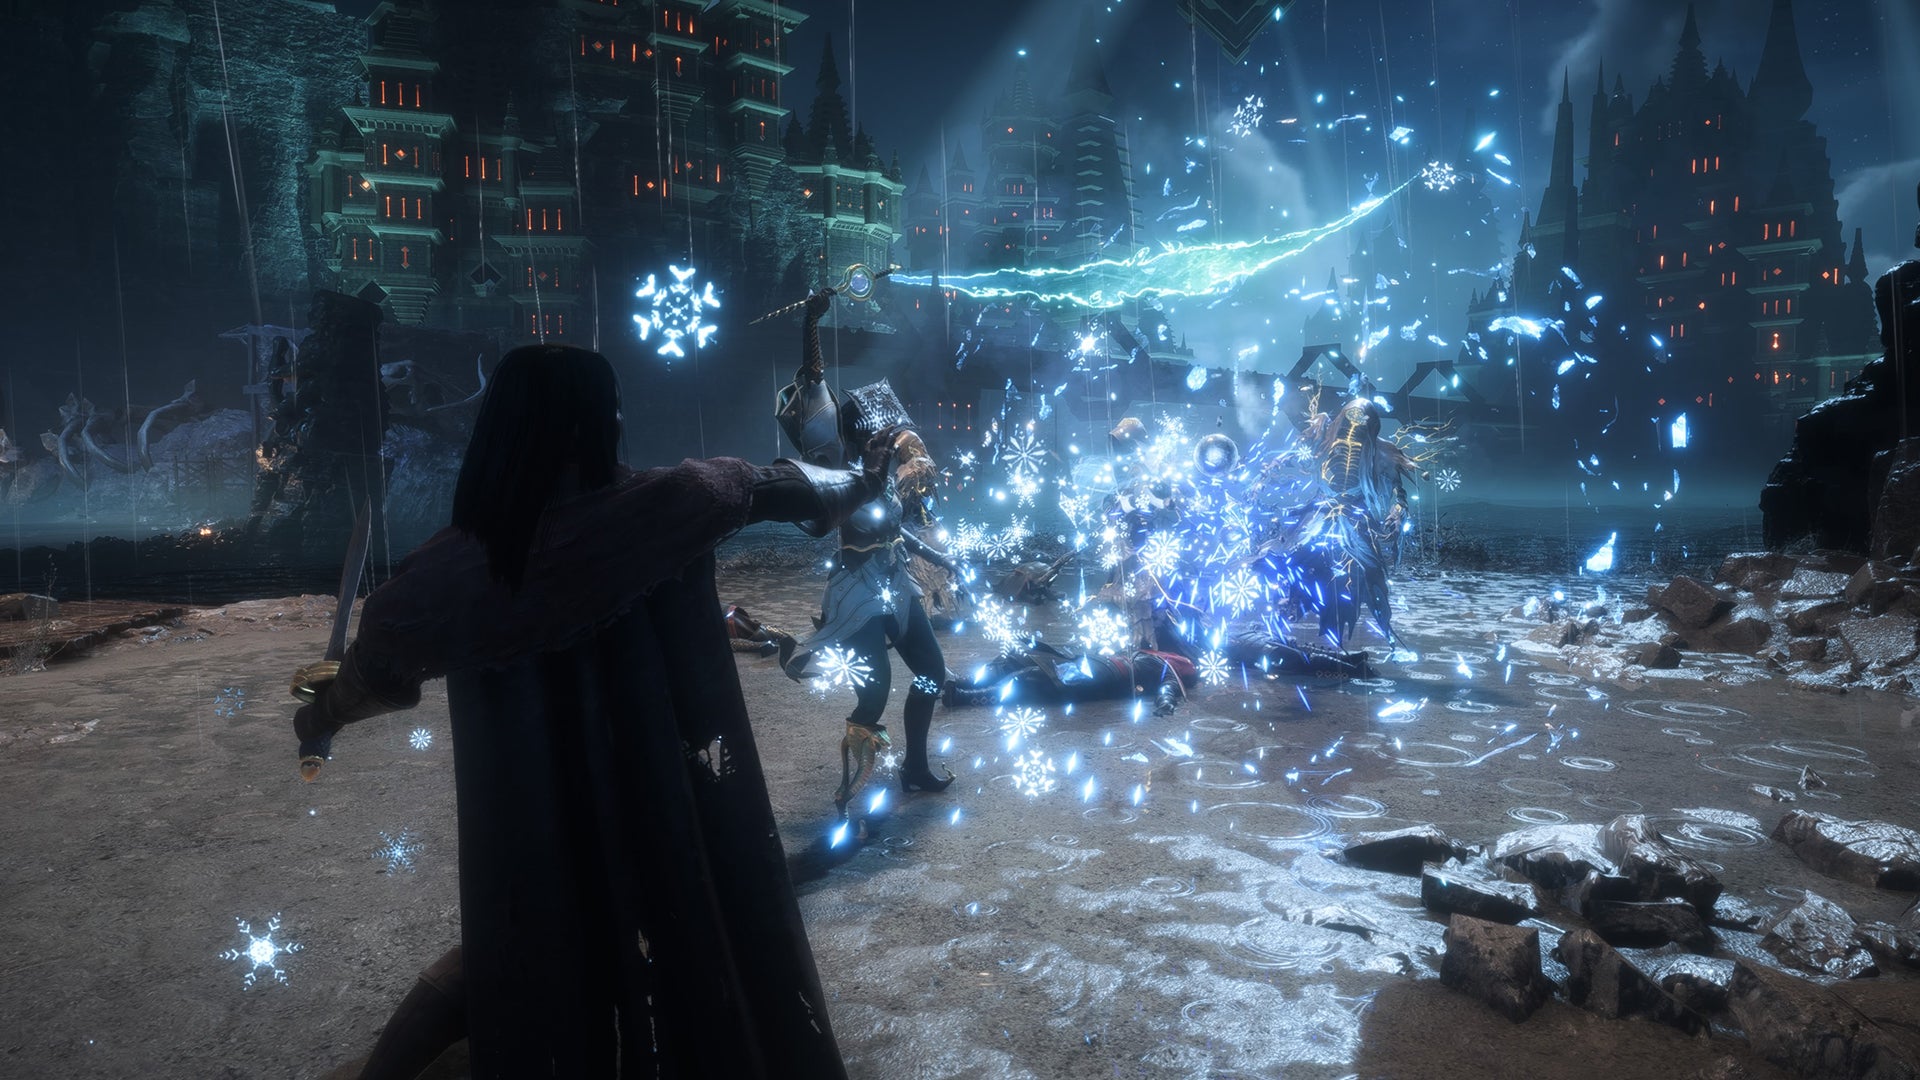
The Mage can specialise in different elemental magic. |Image credit:Rock Paper Shotgun/Electronic Arts
Interestingly, the Mage can swap between a staff and a frost dagger. The dagger summons a ball of chilled energy that can swipe at enemies with every dagger slash. Contrastingly, the staff can send forth a wave of energy in a swooping motion or emit a steady beam of cold damage at enemies from a distance.
When the Mage dodges, they temporarily disappear and then reappear in a ball of energy. The Mage doesn’t seem to have one big power like the other Classes. Instead, they gain Mana as their resource and this is used to fuel all of their Skills (other than the standard melee attack). This regenerates over time, in or out of combat.
To get a better sense of the playstyle offered to Mages, here are the major skills you can unlock on the Mage tree:
- Sustain: Specialises in Fire spells that emit damage over time. Includes skills like Meteor and Wall of Fire.
- Burst: Specialises in ‘Storm’ or shock abilities. These include skills like Chain Lightning (targets multiple foes) and Tempest (which weaves a thunderstorm around you).
- Control: Specialises in Frost abilities that also boost defense. Includes skills like Frost Nova (summons a cyclone of frost) and Ice Blast (impales enemies with summoned shards of ice).
- Specialization Spellblade: Utilises abilities from the Antivan Crows which focus on orb damage. These tend to have huge Electricity damage.
- Specialization Evoker: This part of the skill tree uses Shadow Dragon Faction techniques that focus on ice attacks. Includes a range of skills to stagger and slow down enemies.
- Specialization Death Caller: These skills are centred around the Mourn Watch Faction and use Necrotic damage with long-ranged staff attacks.
As of writing, I have found no way of changing Class in-game . It seems as though your Class is finalised after character creation . You can, however, refund Skill Points at any point in the skill menu for free and reallocate them. This is a generous game mechanic that allows you to diversify your playstyle and try out different abilities.
That rounds up our guide on the best Class in Dragon Age Veilguard. For more Dragon Age Veilguard tips and tricks, check out our guide to the best Faction in the game, or see our guide to choosing between Neve or Harding in the ‘The End of the Beginning’ quest.


Dragon Age: The Veilguard
PS5 , Xbox Series X/S , PC
Rock Paper Shotgun is better when you sign in
Sign in and join us on our journey to discover strange and compelling PC games.

All 75 Arc Raiders Blueprints and where to get them
These areas have the highest chance of giving you Blueprints

Image credit:Rock Paper Shotgun/Embark Studios

Looking for more Arc Raiders Blueprints? It’s a special day when you find a Blueprint, as they’re among the most valuable items in Arc Raiders. If you find a Blueprint that you haven’t already found, then you must make sure you hold onto it at all costs, because Blueprints are the key to one of the most important and powerful systems of meta-progression in the game.
This guide aims to be the very best guide on Blueprints you can find, starting with a primer on what exactly they are and how they work in Arc Raiders, before delving into exactly where to get Blueprints and the very best farming spots for you to take in your search.
We’ll also go over how to get Blueprints from other unlikely activities, such as destroying Surveyors and completing specific quests. And you’ll also find the full list of all 75 Blueprints in Arc Raiders on this page (including the newest Blueprints added with the Cold Snap update , such as the Deadline Blueprint and Firework Box Blueprint), giving you all the information you need to expand your own crafting repertoire.
In this guide:
- What are Blueprints in Arc Raiders?
- Full Blueprint list: All crafting recipes
- Where to find Blueprints in Arc Raiders Blueprints obtained from quests Blueprints obtained from Trials Best Blueprint farming locations

What are Blueprints in Arc Raiders?
Blueprints in Arc Raiders are special items which, if you manage to extract with them, you can expend to permanently unlock a new crafting recipe in your Workshop. If you manage to extract from a raid with an Anvil Blueprint, for example, you can unlock the ability to craft your very own Anvil Pistol, as many times as you like (as long as you have the crafting materials).
To use a Blueprint, simply open your Inventory while in the lobby, then right-click on the Blueprint and click “Learn And Consume” . This will permanently unlock the recipe for that item in your Workshop. As of the Stella Montis update, there are allegedly 75 different Blueprints to unlock - although only 68 are confirmed to be in the game so far. You can see all the Blueprints you’ve found and unlocked by going to the Workshop menu, and hitting “R” to bring up the Blueprint screen.
It’s possible to find duplicates of past Blueprints you’ve already unlocked. If you find these, then you can either sell them, or - if you like to play with friends - you can take it into a match and gift it to your friend so they can unlock that recipe for themselves. Another option is to keep hold of them until the time comes to donate them to the Expedition.
Full Blueprint list: All crafting recipes
Below is the full list of all the Blueprints that are currently available to find in Arc Raiders, and the crafting recipe required for each item:
| Blueprint | Type | Recipe | Crafted At |
|---|---|---|---|
| Bettina | Weapon | 3x Advanced Mechanical Components 3x Heavy Gun Parts 3x Canister | Gunsmith 3 |
| Blue Light Stick | Quick Use | 3x Chemicals | Utility Station 1 |
| Aphelion | Weapon | 3x Magnetic Accelerator 3x Complex Gun Parts 1x Matriarch Reactor | Gunsmith 3 |
| Combat Mk. 3 (Flanking) | Augment | 2x Advanced Electrical Components 3x Processor | Gear Bench 3 |
| Combat Mk. 3 (Aggressive) | Augment | 2x Advanced Electrical Components 3x Processor | Gear Bench 3 |
| Complex Gun Parts | Material | 2x Light Gun Parts 2x Medium Gun Parts 2x Heavy Gun Parts | Refiner 3 |
| Fireworks Box | Quick Use | 1x Explosive Compound 3x Pop Trigger | Explosives Station 2 |
| Gas Mine | Mine | 4x Chemicals 2x Rubber Parts | Explosives Station 1 |
| Green Light Stick | Quick Use | 3x Chemicals | Utility Station 1 |
| Pulse Mine | Mine | 1x Crude Explosives 1x Wires | Explosives Station 1 |
| Seeker Grenade | Grenade | 1x Crude Explosives 2x ARC Alloy | Explosives Station 1 |
| Looting Mk. 3 (Survivor) | Augment | 2x Advanced Electrical Components 3x Processor | Gear Bench 3 |
| Angled Grip II | Mod | 2x Mechanical Components 3x Duct Tape | Gunsmith 2 |
| Angled Grip III | Mod | 2x Mod Components 5x Duct Tape | Gunsmith 3 |
| Hullcracker | Weapon | 1x Magnetic Accelerator 3x Heavy Gun Parts 1x Exodus Modules | Gunsmith 3 |
| Launcher Ammo | Ammo | 5x Metal Parts 1x Crude Explosives | Workbench 1 |
| Anvil | Weapon | 5x Mechanical Components 5x Simple Gun Parts | Gunsmith 2 |
| Anvil Splitter | Mod | 2x Mod Components 3x Processor | Gunsmith 3 |
| ??? | ??? | ??? | ??? |
| Barricade Kit | Quick Use | 1x Mechanical Components | Utility Station 2 |
| Blaze Grenade | Grenade | 1x Explosive Compound 2x Oil | Explosives Station 3 |
| Bobcat | Weapon | 3x Advanced Mechanical Components 3x Light Gun Parts | Gunsmith 3 |
| Osprey | Weapon | 2x Advanced Mechanical Components 3x Medium Gun Parts 7x Wires | Gunsmith 3 |
| Burletta | Weapon | 3x Mechanical Components 3x Simple Gun Parts | Gunsmith 1 |
| Compensator II | Mod | 2x Mechanical Components 4x Wires | Gunsmith 2 |
| Compensator III | Mod | 2x Mod Components 8x Wires | Gunsmith 3 |
| Defibrillator | Quick Use | 9x Plastic Parts 1x Moss | Medical Lab 2 |
| ??? | ??? | ??? | ??? |
| Equalizer | Weapon | 3x Magnetic Accelerator 3x Complex Gun Parts 1x Queen Reactor | Gunsmith 3 |
| Extended Barrel | Mod | 2x Mod Components 8x Wires | Gunsmith 3 |
| Extended Light Mag II | Mod | 2x Mechanical Components 3x Steel Spring | Gunsmith 2 |
| Extended Light Mag III | Mod | 2x Mod Components 5x Steel Spring | Gunsmith 3 |
| Extended Medium Mag II | Mod | 2x Mechanical Components 3x Steel Spring | Gunsmith 2 |
| Extended Medium Mag III | Mod | 2x Mod Components 5x Steel Spring | Gunsmith 3 |
| Extended Shotgun Mag II | Mod | 2x Mechanical Components 3x Steel Spring | Gunsmith 2 |
| Extended Shotgun Mag III | Mod | 2x Mod Components 5x Steel Spring | Gunsmith 3 |
| Remote Raider Flare | Quick Use | 2x Chemicals 4x Rubber Parts | Utility Station 1 |
| Heavy Gun Parts | Material | 4x Simple Gun Parts | Refiner 2 |
| Venator | Weapon | 2x Advanced Mechanical Components 3x Medium Gun Parts 5x Magnet | Gunsmith 3 |
| Il Toro | Weapon | 5x Mechanical Components 6x Simple Gun Parts | Gunsmith 1 |
| Jolt Mine | Mine | 1x Electrical Components 1x Battery | Explosives Station 2 |
| Explosive Mine | Mine | 1x Explosive Compound 1x Sensors | Explosives Station 3 |
| Jupiter | Weapon | 3x Magnetic Accelerator 3x Complex Gun Parts 1x Queen Reactor | Gunsmith 3 |
| Light Gun Parts | Material | 4x Simple Gun Parts | Refiner 2 |
| Lightweight Stock | Mod | 2x Mod Components 5x Duct Tape | Gunsmith 3 |
| Lure Grenade | Grenade | 1x Speaker Component 1x Electrical Components | Utility Station 2 |
| Medium Gun Parts | Material | 4x Simple Gun Parts | Refiner 2 |
| Torrente | Weapon | 2x Advanced Mechanical Components 3x Medium Gun Parts 6x Steel Spring | Gunsmith 3 |
| Muzzle Brake II | Mod | 2x Mechanical Components 4x Wires | Gunsmith 2 |
| Muzzle Brake III | Mod | 2x Mod Components 8x Wires | Gunsmith 3 |
| Padded Stock | Mod | 2x Mod Components 5x Duct Tape | Gunsmith 3 |
| Shotgun Choke II | Mod | 2x Mechanical Components 4x Wires | Gunsmith 2 |
| Shotgun Choke III | Mod | 2x Mod Components 8x Wires | Gunsmith 3 |
| Shotgun Silencer | Mod | 2x Mod Components 8x Wires | Gunsmith 3 |
| Showstopper | Grenade | 1x Advanced Electrical Components 1x Voltage Converter | Explosives Station 3 |
| Silencer I | Mod | 2x Mechanical Components 4x Wires | Gunsmith 2 |
| Silencer II | Mod | 2x Mod Components 8x Wires | Gunsmith 3 |
| Snap Hook | Quick Use | 2x Power Rod 3x Rope 1x Exodus Modules | Utility Station 3 |
| Stable Stock II | Mod | 2x Mechanical Components 3x Duct Tape | Gunsmith 2 |
| Stable Stock III | Mod | 2x Mod Components 5x Duct Tape | Gunsmith 3 |
| Tagging Grenade | Grenade | 1x Electrical Components 1x Sensors | Utility Station 3 |
| Tempest | Weapon | 3x Advanced Mechanical Components 3x Medium Gun Parts 3x Canister | Gunsmith 3 |
| Trigger Nade | Grenade | 2x Crude Explosives 1x Processor | Explosives Station 2 |
| Vertical Grip II | Mod | 2x Mechanical Components 3x Duct Tape | Gunsmith 2 |
| Vertical Grip III | Mod | 2x Mod Components 5x Duct Tape | Gunsmith 3 |
| Vita Shot | Quick Use | 2x Antiseptic 1x Syringe | Medical Lab 3 |
| Vita Spray | Quick Use | 3x Antiseptic 1x Canister | Medical Lab 3 |
| Vulcano | Weapon | 1x Magnetic Accelerator 3x Heavy Gun Parts 1x Exodus Modules | Gunsmith 3 |
| Wolfpack | Grenade | 2x Explosive Compound 2x Sensors | Explosives Station 3 |
| Red Light Stick | Quick Use | 3x Chemicals | Utility Station 1 |
| Smoke Grenade | Grenade | 14x Chemicals 1x Canister | Utility Station 2 |
| Deadline | Mine | 3x Explosive Compound 2x ARC Circuitry | Explosives Station 3 |
| Trailblazer | Grenade | 1x Explosive Compound 1x Synthesized Fuel | Explosives Station 3 |
| Tactical Mk. 3 (Defensive) | Augment | 2x Advanced Electrical Components 3x Processor | Gear Bench 3 |
| Tactical Mk. 3 (Healing) | Augment | 2x Advanced Electrical Components 3x Processor | Gear Bench 3 |
| Yellow Light Stick | Quick Use | 3x Chemicals | Utility Station 1 |
Note: The missing Blueprints in this list likely have not actually been added to the game at the time of writing, because none of the playerbase has managed to find any of them. As they are added to the game, I will update this page with the most relevant information so you know exactly how to get all 75 Arc Raiders Blueprints.
Where to find Blueprints in Arc Raiders
Below is a list of all containers, modifiers, and events which maximise your chances of finding Blueprints:
- Certain quests reward you with specific Blueprints .
- Completing Trials has a high chance of offering Blueprints as rewards.
- Surveyors have a decent chance of dropping Blueprints on death.
- High loot value areas tend to have a greater chance of spawning Blueprints.
- Night Raids and Storms may increase rare Blueprint spawn chances in containers.
- Containers with higher numbers of items may have a higher tendency to spawn Blueprints. As a result, Blue Gate (which has many “large” containers containing multiple items) may give you a higher chance of spawning Blueprints.
- Raider containers (Raider Caches, Weapon Boxes, Medical Bags, Grenade Tubes) have increased Blueprint drop rates. As a result, the Uncovered Caches event gives you a high chance of finding Blueprints.
- Security Lockers have a higher than average chance of containing Blueprints.
- Certain Blueprints only seem to spawn under specific circumstances: Tempest Blueprint only spawns during Night Raid events. Vulcano Blueprint only spawns during Hidden Bunker events. Jupiter and Equaliser Blueprints only spawn during Harvester events.

Raider Caches, Weapon Boxes, and other raider-oriented container types have a good chance of offering Blueprints. |Image credit:Rock Paper Shotgun/Embark Studios
Blueprints have a very low chance of spawning in any container in Arc Raiders, around 1-2% on average. However, there is a higher chance of finding Blueprints in particular container types. Specifically, you can find more Blueprints in Raider containers and security lockers.
Beyond this, if you’re looking for Blueprints you should focus on regions of the map which are marked as having particularly high-value loot. Areas such as the Control Tower in Dam Battlegrounds, the Arrival and Departure Buildings in Spaceport, and Pilgrim’s Peak in Blue Gate all have a better-than-average chance of spawning Blueprints somewhere amongst all their containers. Night Raids and Electromagnetic Storm events also increase the drop chances of certain Blueprints .
In addition to these containers, you can often loot Blueprints from destroyed Surveyors - the largest of the rolling ball ARC. Surveyors are more commonly found on the later maps - Spaceport and Blue Gate - and if one spawns in your match, you’ll likely see it by the blue laser beam that it casts into the sky while “surveying”.
Surveyors are quite well-armoured and will very speedily run away from you once it notices you, but if you can take one down then make sure you loot all its parts for a chance of obtaining certain unusual Blueprints.
Blueprints obtained from quests
One way in which you can get Blueprints is by completing certain quests for the vendors in Speranza. Some quests will reward you with a specific item Blueprint upon completion, so as long as you work through all the quests in Arc Raiders, you are guaranteed those Blueprints.
Here is the full list of all Blueprints you can get from quest rewards:
- Trigger Nade Blueprint: Rewarded after completing “Sparks Fly”.
- Lure Grenade Blueprint: Rewarded after completing “Greasing Her Palms”.
- Burletta Blueprint: Rewarded after completing “Industrial Espionage”.
- Hullcracker Blueprint (and Launcher Ammo Blueprint): Rewarded after completing “The Major’s Footlocker”.
Alas, that’s only 4 Blueprints out of a total of 75 to unlock, so for the vast majority you will need to find them yourself during a raid. If you’re intent on farming Blueprints, then it’s best to equip yourself with cheap gear in case you lose it, but don’t use a free loadout because then you won’t get a safe pocket to stash any new Blueprint you find. No pain in Arc Raiders is sharper than failing to extract with a new Blueprint you’ve been after for a dozen hours already.

One of the best ways to get Blueprints is by hitting three stars on all five Trials every week. |Image credit:Rock Paper Shotgun/Embark Studios
Blueprints obtained from Trials
One of the very best ways to get Blueprints is as rewards for completing Trials in Arc Raiders. Trials are unlocked from Level 15 onwards, and allow you to earn rewards by focusing on certain tasks over the course of several raids. For example, one Trial might task you with dealing damage to Hornets, while another might challenge you to loot Supply Drops.
Trials refresh on a weekly basis, with a new week bringing five new Trials. Each Trial can offer up to three rewards after passing certain score milestones, and it’s possible to receive very high level loot from these reward crates - including Blueprints. So if you want to unlock as many Blueprints as possible, you should make a point of completing as many Trials as possible each week.
Best Blueprint farming locations
The very best way to get Blueprints is to frequent specific areas of the maps which combine high-tier loot pools with the right types of containers to search. Here are my recommendations for where to find Blueprints on every map, so you can always keep the search going for new crafting recipes to unlock.

Image credit:Rock Paper Shotgun/Embark Studios
Dam Battlegrounds
The best places to farm Blueprints on Dam Battlegrounds are the Control Tower, Power Generation Complex, Ruby Residence, and Pale Apartments . The first two regions, despite only being marked on the map as mid-tier loot, contain a phenomenal number of containers to loot. The Control Tower can also contain a couple of high-tier Security Lockers - though of course, you’ll need to have unlocked the Security Breach skill at the end of the Survival tree.
There’s also a lot of reporting amongst the playerbase that the Residential areas in the top-left of the map - Pale Apartments and Ruby Residence - give you a comparatively strong chance of finding Blueprints. Considering their size, there’s a high density of containers to loot in both locations, and they also have the benefit of being fairly out of the way. So you’re more likely to have all the containers to yourself.
Buried City
The best Blueprint farming locations on Buried City are the Santa Maria Houses, Grandioso Apartments, Town Hall, and the various buildings of the New District . Grandioso Apartments has a lower number of containers than the rest, but a high chance of spawning weapon cases - which have good Blueprint drop rates. The others are high-tier loot areas, with plenty of lootable containers - including Security Lockers.
Spaceport
The best places to find Blueprints on Spaceport are the Arrival and Departure Buildings, as well as Control Tower A6 and the Launch Towers . All these areas are labelled as high-value loot regions, and many of them are also very handily connected to one another by the Spaceport wall, which you can use to quickly run from one area to the next. At the tops of most of these buildings you’ll find at least one Security Locker, so this is an excellent farming route for players looking to find Blueprints.
The downside to looting Blueprints on Spaceport is that all these areas are hotly contested, particularly in Duos and Squads. You’ll need to be very focused and fast in order to complete the full farming route.

Image credit:Rock Paper Shotgun/Embark Studios
Blue Gate
Blue Gate tends to have a good chance of dropping Blueprints, potentially because it generally has a high number of containers which can hold lots of items; so there’s a higher chance of a Blueprint spawning in each container. In my experience, the best Blueprint farming spots on Blue Gate are Pilgrim’s Peak, Raider’s Refuge, the Ancient Fort, and the Underground Complex beneath the Warehouse .
All of these areas contain a wealth of containers to loot. Raider’s Refuge has less to loot, but the majority of the containers in and around the Refuge are raider containers, which have a high chance of containing Blueprints - particularly during major events.
Stella Montis
On the whole, Stella Montis seems to have a very low drop rate for Blueprints (though a high chance of dropping other high-tier loot). If you do want to try farming Blueprints on this map, the best places to find Blueprints in Stella Montis are Medical Research, Assembly Workshop, and the Business Center . These areas have the highest density of containers to loot on the map.
In addition to this, the Western Tunnel has a few different Security Lockers to loot, so while there’s very little to loot elsewhere in this area of the map, it’s worth hitting those Security Lockers if you spawn there at the start of a match.
That wraps up this primer on how to get all the Blueprints in Arc Raiders as quickly as possible. With the Expedition system constantly resetting a large number of players’ Blueprints, it’s more important than ever to have the most up-to-date information on where to find all these Blueprints.
While you’re here, be sure to check out our Arc Raiders best guns tier list , as well as our primers on the best skills to unlock and all the different Field Depot locations on every map.


ARC Raiders
PS5 , Xbox Series X/S , PC
Rock Paper Shotgun is better when you sign in
Sign in and join us on our journey to discover strange and compelling PC games.
