Best Dexterity weapons in Elden Ring
Here are the best Dexterity weapons in Elden Ring
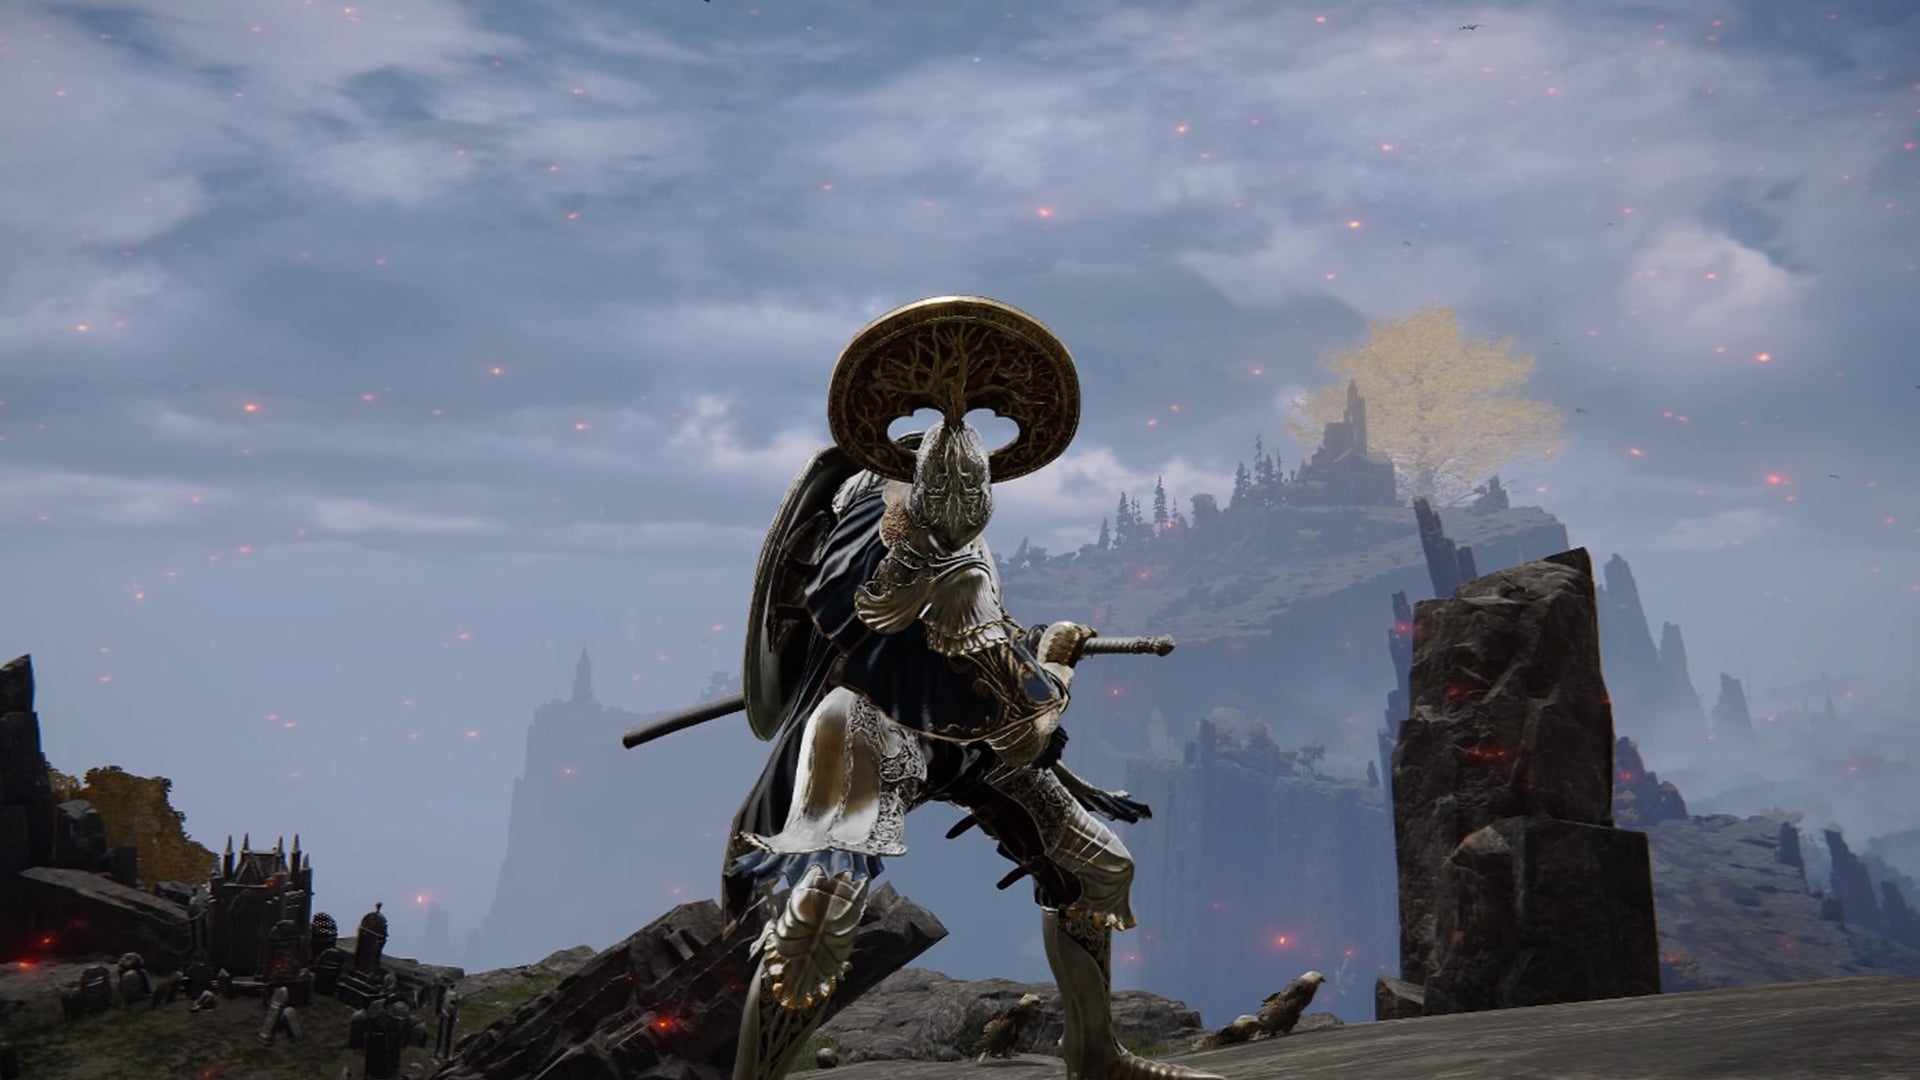
Image credit:Rock Paper Shotgun/FromSoftware

Looking for the best Dexterity weapons in Elden Ring? If you prefer speed over brawn, you’ll need our list of the best Dexterity weapons in Elden Ring . Dexterity is one of the most important stats in the game and determines how much damage you can deal when wielding a Dexterity-based weapon as well as the draw speed of bows.
If you’ve invested your runes into Dexterity, you’ll need a weapon that scales well with that stat. Join us as we go through the best of the bunch and provide a list of the best Dexterity weapons in Elden Ring for all types of builds. We’ll also tell you where to find each weapon so you’re fully equipped to take on the Lands Between, and prepared for all the additional challenges in the Shadow Of The Erdtree DLC.

Take a look at the trailer for Elden Ring: Shadow Of The Erdtree here, and then check out ourShadow Of The Erdtree trailer breakdownguide for all the hidden details!Watch on YouTube
Bloodhound’s Fang

The Bloodhound’s Fang is a great first weapon choice for any Dexterity build. |Image credit:Rock Paper Shotgun/FromSoftware
- Weight: 11.5
- Damage Type: Slash
- Requirements: Strength 18, Dexterity 17
- Attribute Scaling: Strength D, Dexterity C
- Weapon Skill: Bloodhound’s Finesse
- Attack Power: Physical 141
- Passives: Causes blood loss buildup (55)
If you want to create a solid Dexterity build , the Bloodhound’s Fang is a fantastic curved greatsword that is relatively easy to pick up near the beginning of Elden Ring, within Limgrave.
The Bloodhound’s Fang can inflict bleed buildup on enemies, which will take a huge chunk of any health bar over time. However, the power behind the Bloodhound’s Fang comes mostly from the Bloodhound’s Finesse Weapon Skill.
This skill essentially releases a devastating upward slash, after which, your Tarnished immediately takes a step back. This inflicts impressive damage whilst maintaining distance between yourself and enemies. You can then follow-up this skill with a heavy attack to deal more damage whilst dashing back towards the target.
This is a unique skill however, which means that it cannot be infused with different Ashes of War.
How to get the Bloodhound’s Fang
To get Bloodhound’s Fang you must defeat Bloodhound Knight Darriwil , a minor boss located within the Forlorn Hound Evergaol in southern Limgrave.
Uchigatana
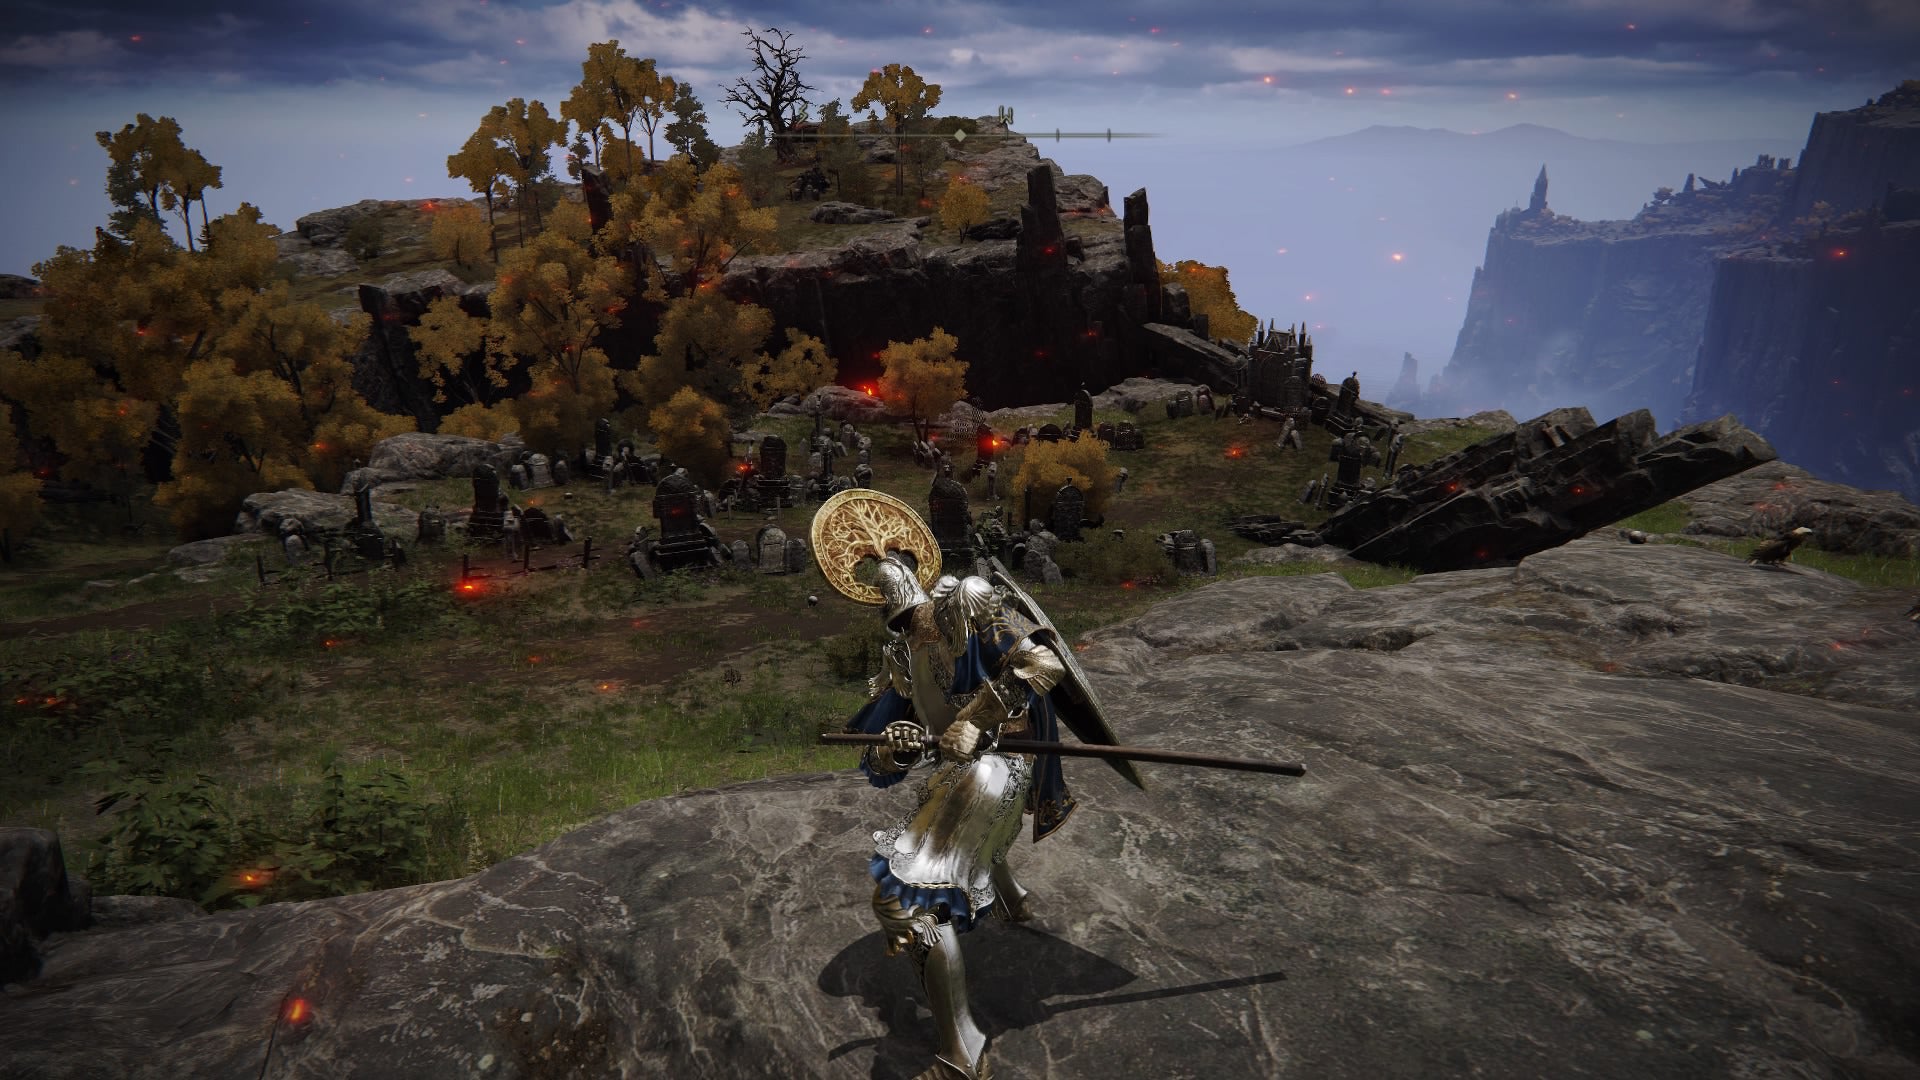
The Uchigatana is one of the best weapons to get with any starting class. |Image credit:Rock Paper Shotgun/FromSoftware
- Weight: 5.5
- Damage Type: Slash, Pierce
- Requirements: Strength 11, Dexterity 15
- Attribute Scaling: Strength D, Dexterity D
- Weapon Skill: Unsheathe
- Attack Power: Physical 115
- Passives: Causes blood loss buildup (45)
The Uchigatana is one of many excellent katana options for a Dexterity build and only requires common Smithing Stones to upgrade. If you’re looking for the perfect dex starting weapon, the Uchigatana is very accessible and even comes with the Samurai starting class .
As with other Katanas, the Uchigatana can cause blood loss buildup and can be infused with Ashes of War, although it does already come with the Unsheathe Weapon Skill. This skill unleashes a large sweeping strike with a follow-up swing.
Although the damage to poise was scaled back slightly in the 1.09 patch , this was just for PvP. The Uchigatana remains one of the strongest starting weapons in Elden Ring due to its fantastic range and surprisingly fast attacks that deal considerable damage for such an accessible early weapon.
How to get the Uchigatana
Either choose the Samurai staring class or pick up the Uchigatana inside the Deathtouched Catacombs in Stormhill, Limgrave.
Godskin Peeler
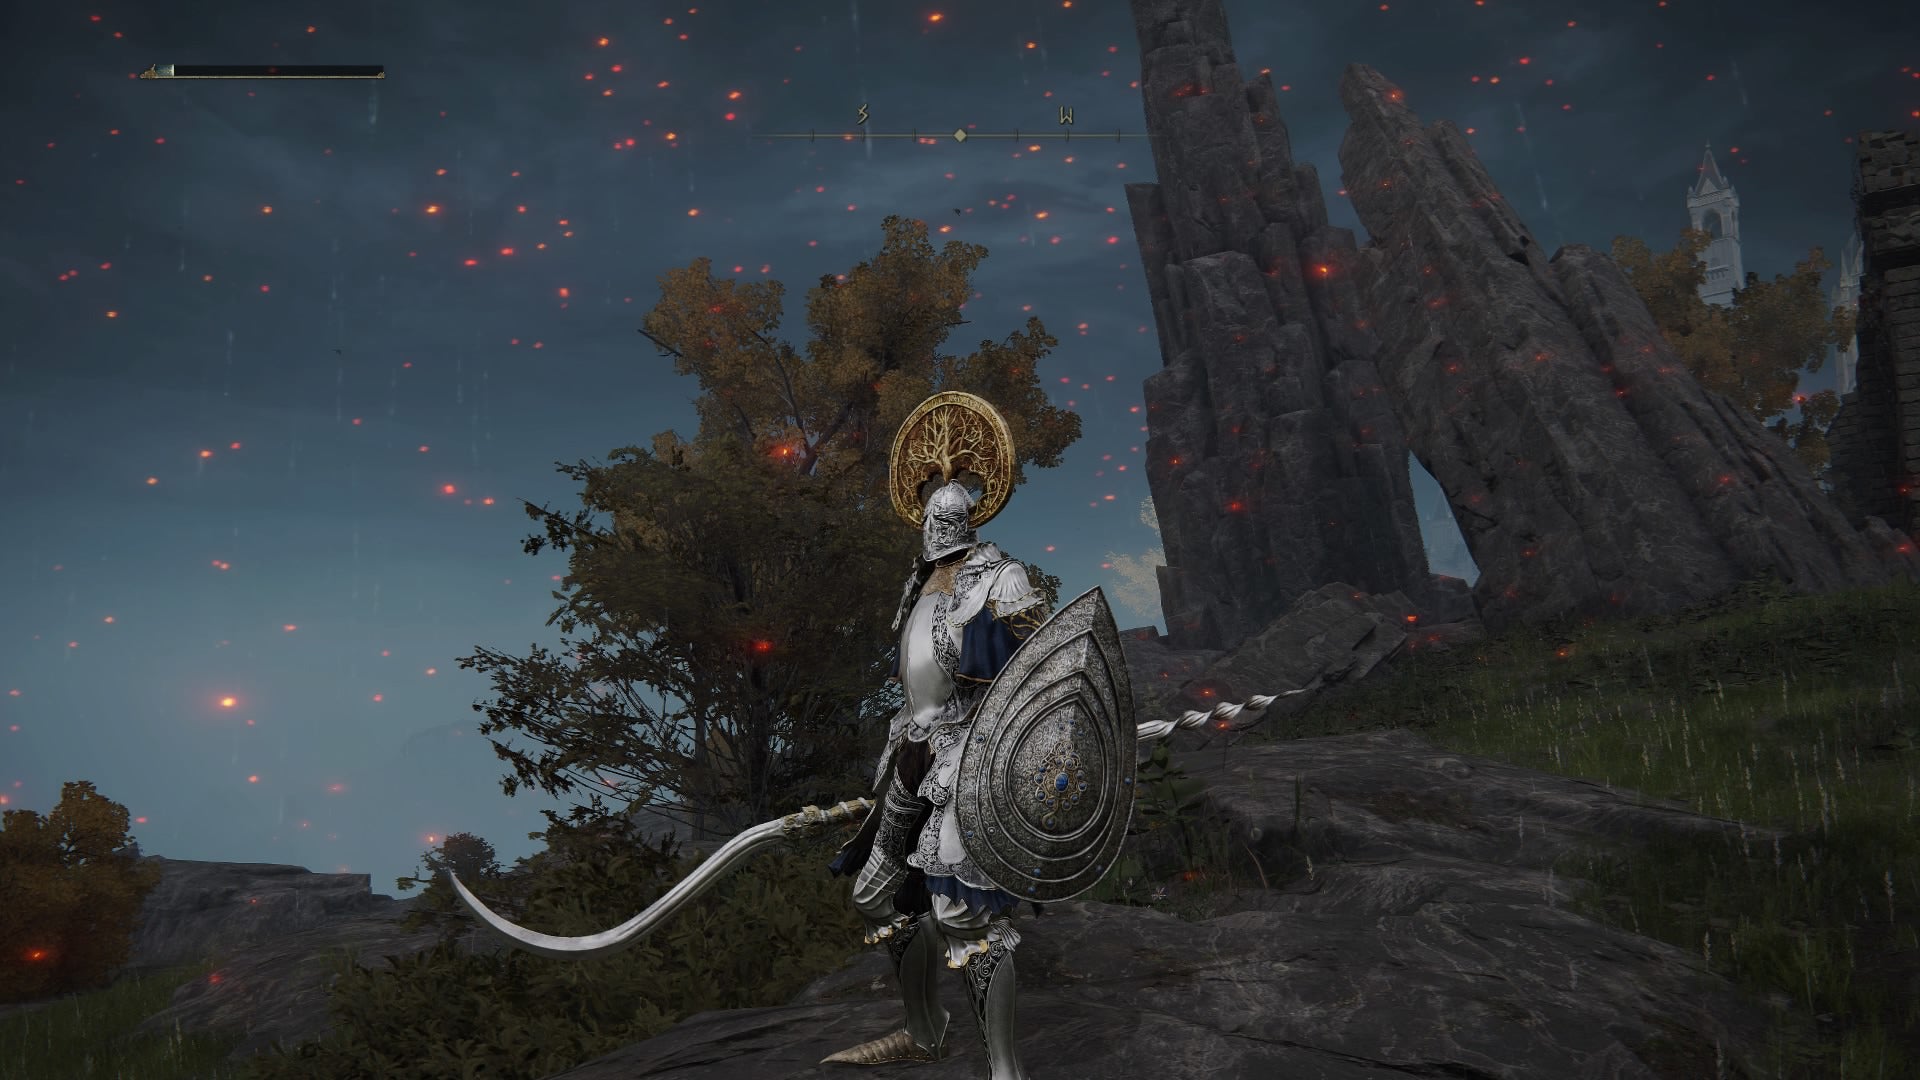
The Godskin Peeler is a Twinblade, embued with the powerful Black Flame Tornado skill. |Image credit:Rock Paper Shotgun/FromSoftware
- Weight: 8.0
- Damage Type: Standard, Pierce
- Requirements: Strength 17, Dexterity 22
- Attribute Scaling: Strength E, Dexterity C
- Weapon Skill: Black Flame Tornado
- Attack Power: Physical 121
The Godskin Peeler is classed as a Twinblade, meaning it has two blades at each end and can be wielded either single or two-handed. This weapon is best suited for players who have reached early to mid-game and are ready to move onto something a bit more specialised.
The power of the Godskin Peeler comes from its Weapon Skill, the Black Flame Tornado which unleashes a torrent of black flames within an overhead spin attack. You can swap this out with an alternative Ashes of War but, frankly, you’d be remiss to do so. This Weapon Skill is chargeable and cannot be parried, and delivers several powerful hits in a row.
How to get the Godskin Peeler
You can get the Godskin Peeler by defeating the Godskin Apostle within the Windmill Village in Altus Plateau . Thankfully, unlike the Godskin Duo boss fight, there is only one of these enemies to deal with in this encounter. Although, it’s worthwhile checking out our Godskin Duo boss fight walkthrough for tips on timing and battle general strategy.
Eleonora’s Poleblade
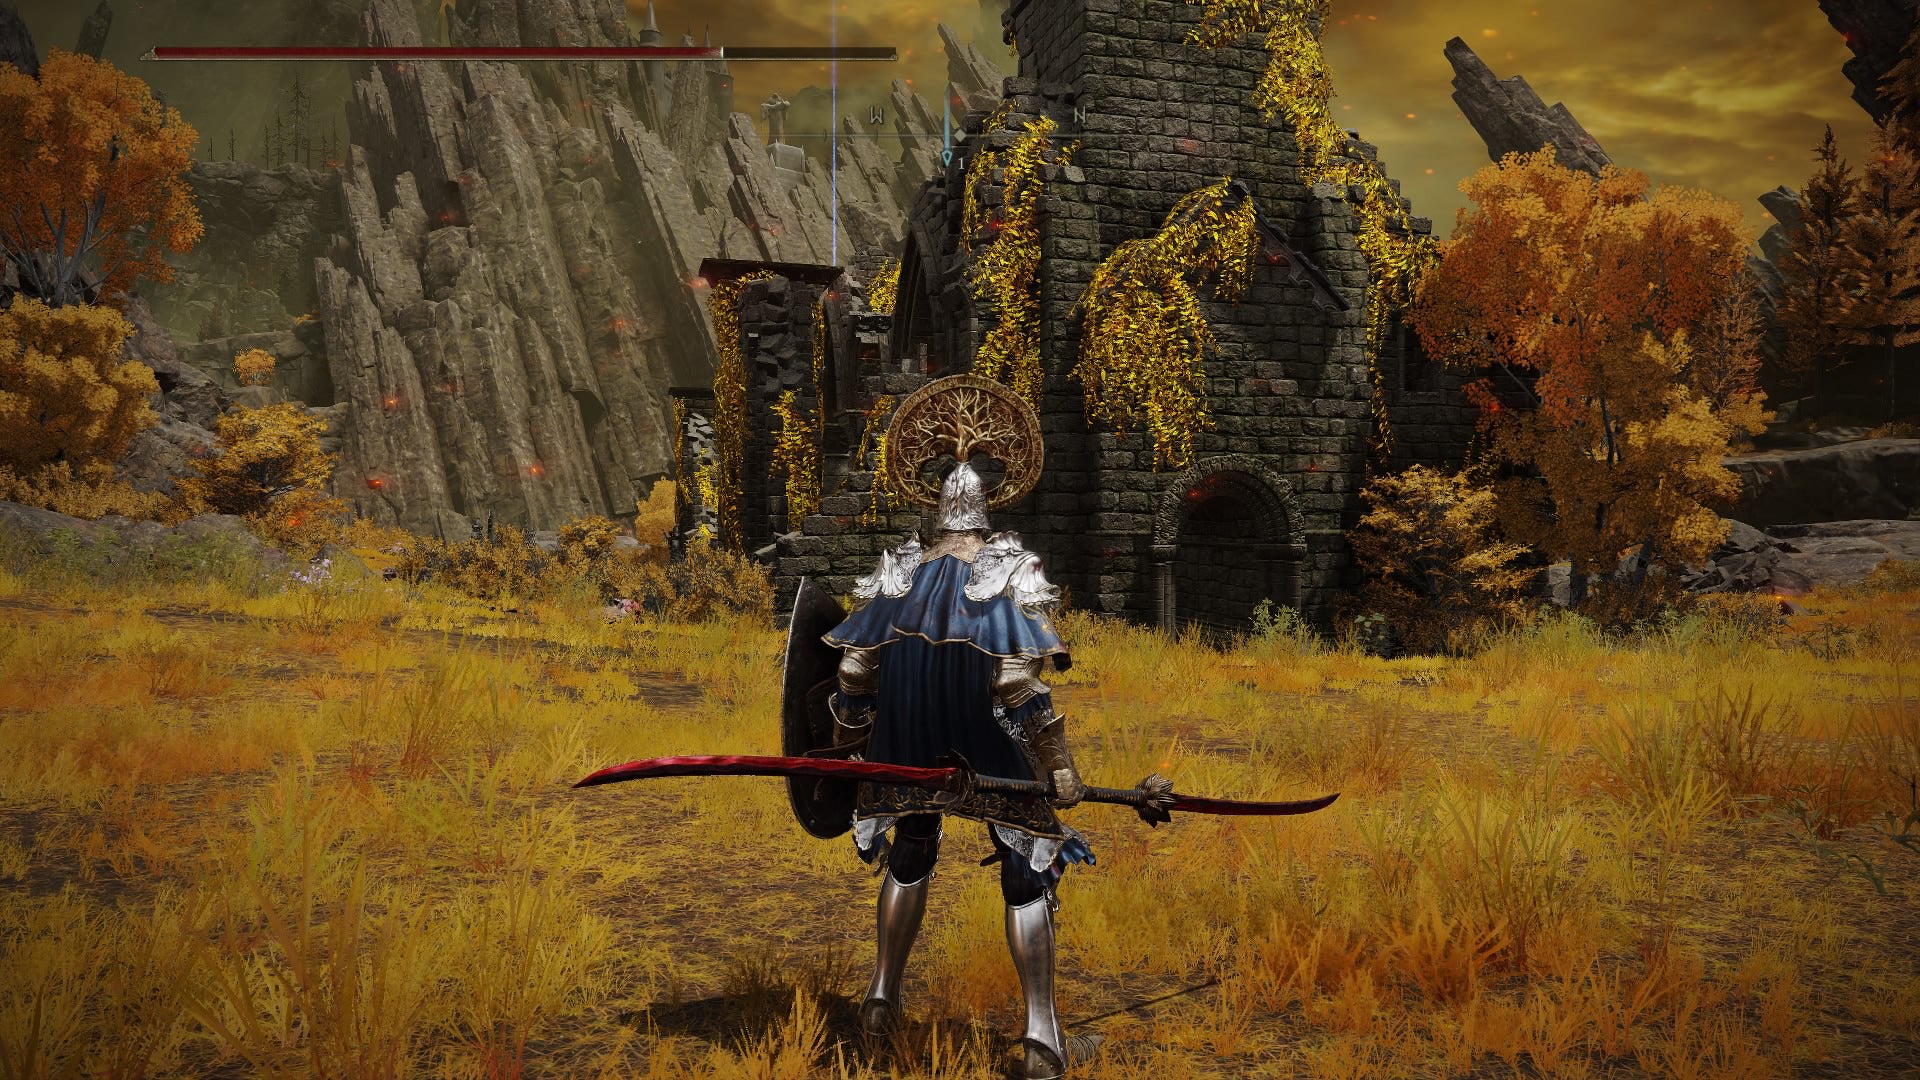
Eleonora’s Poleblade is as speedy as it is damaging. |Image credit:Rock Paper Shotgun/FromSoftware
- Weight: 6.0
- Damage Type: Standard, Pierce
- Requirements: Strength 12, Dexterity 21, Arcane 19
- Attribute Scaling: Strength E, Dexterity D, Arcane D
- Weapon Skill: Bloodblade Dance
- Attack Power: Physical 72, Fire 72
- Passives: Causes blood loss buildup (33)
As with the Godskin Peeler, Eleonora’s Poleblade is a Twinblade that can be challenging to wield at first, but very rewarding once mastered. Eleonora’s Poleblade cannot be infused with Ashes of War. Instead, it comes with the Bloodblade Dance Weapon Skill.
This Weapon Skill is a chain of flurry attacks, followed by a tactical backward step to gather distance on a target. The skill costs relatively low FP and received a nice little buff with the 1.07 patch to increase damage detection. When performed successfully, you can deal stance damage and blood loss buildup .
How to get Eleonora’s Poleblade
To get Eleonora’s Poleblade, you must defeat Bloody Finger Eleonora at the Second Church of Marika . To do so can be done in two different ways.
First, you can complete Yura’s questline (first encountered at Murkwater Cave, then at Raya Lucaria). See our guide to all NPC questlines in Elden Ring for more details.
Second, you can outright kill Yura and take his Nagakiba katana. Eleonora will spawn at the Second Church of Marika afterwards. We recommend following the quest, however, as you get both blades as well as the Ronin’s armor set and some interesting Church of Dragon Communion lore.
Wing Of Astel

The Wing Of Astel requires a journey into Nokstella, but is worth the voyage. |Image credit:Rock Paper Shotgun/FromSoftware
- Weight: 2.5
- Damage Type: Slash
- Requirements: Strength 7, Dexterity 17, Intelligence 20
- Attribute Scaling: Strength E, Dexterity D, Intelligence D
- Weapon Skill: Nebula
- Attack Power: Physical 65, Magic 78
The Wing Of Astel is a great option for players who have invested in a Dexterity and Intelligence build . With its unique Nebula Weapon Skill, you can spawn a cloud of exploding stars at enemies. This will additionally deal an extra 20% damage to gravity-type enemies like Onyx Lords and Fallingstar Beasts . Although, it cannot be replaced with other Ashes of War.
The Wing Of Astel is suited for players approaching mid-game playthroughs as it does require you to access Nokstella, Eternal City. Although the poise damage of the Curved Sword was reduced slightly for PvP in the 1.08 patch , it remains a popular Dexterity weapon and for good reason.
How to get the Wing Of Astel
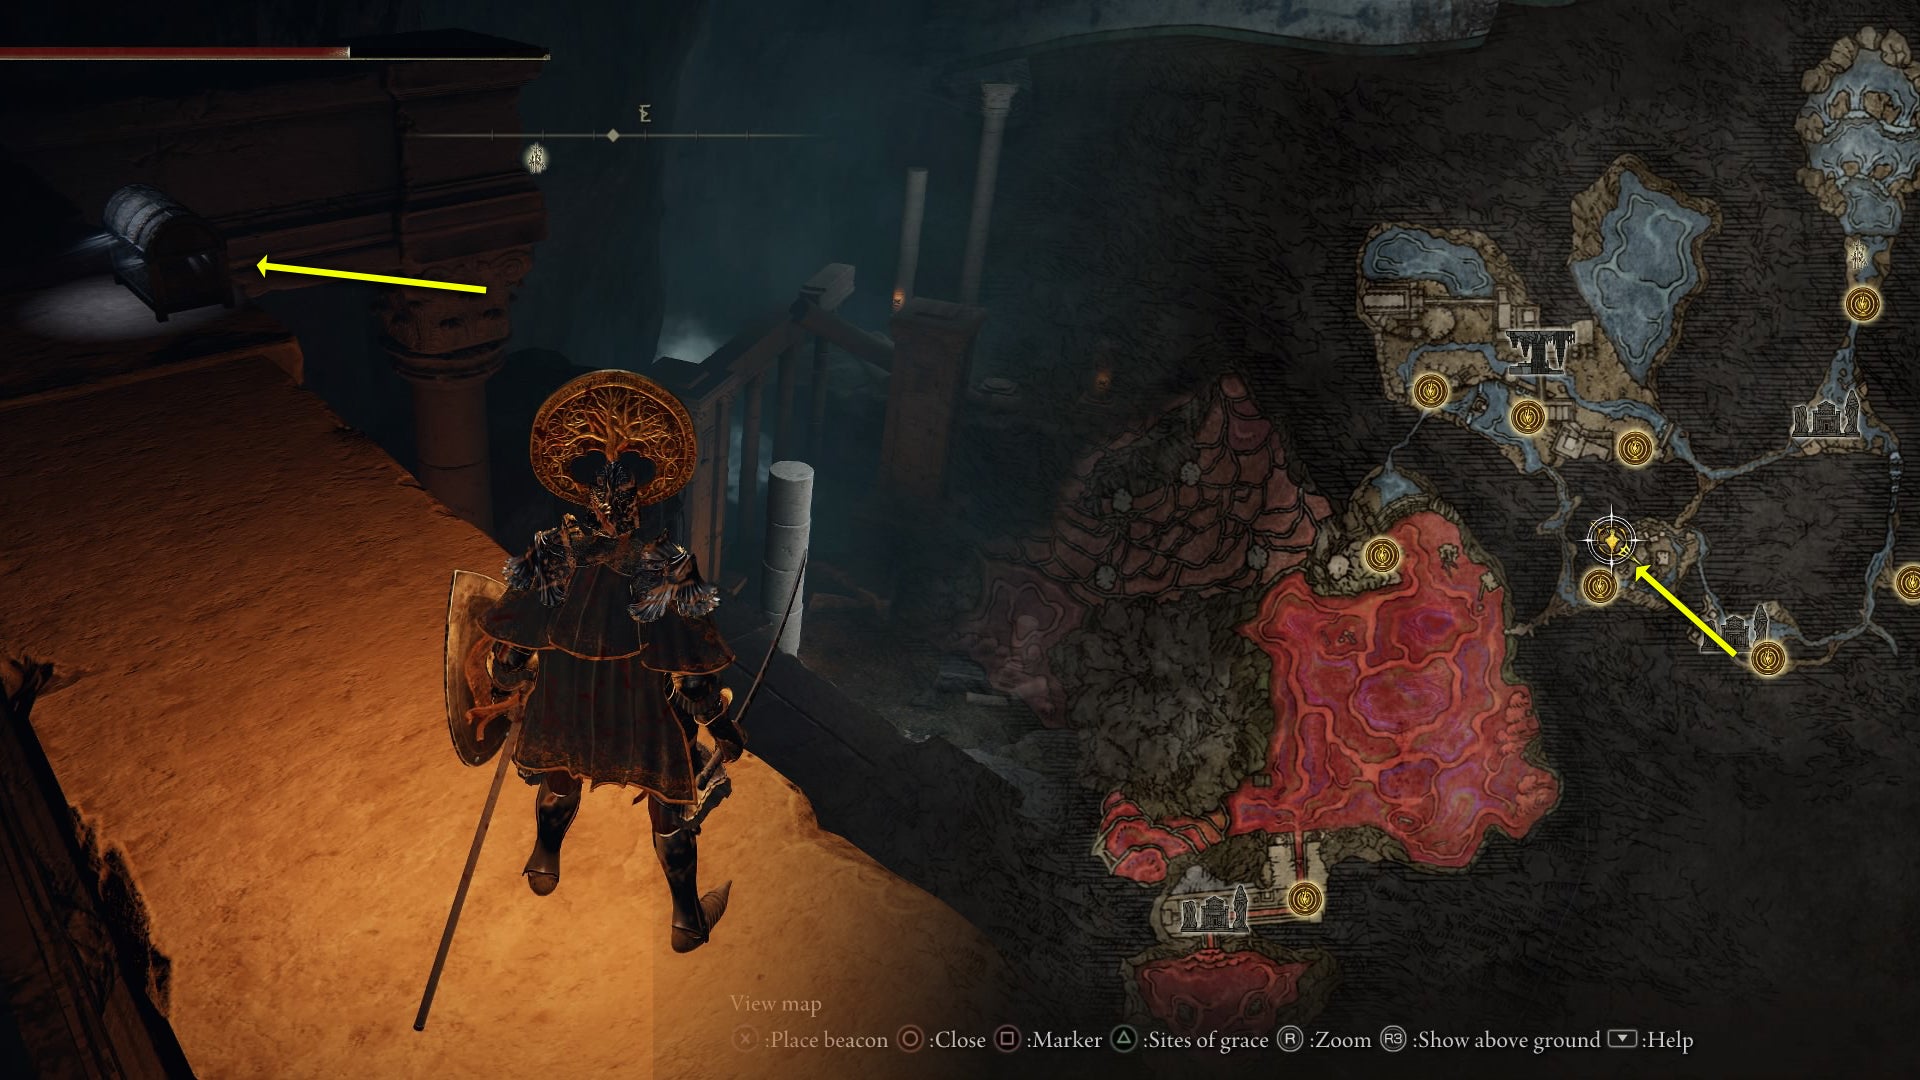
Here’s where to find the Wing Of Astel. |Image credit:Rock Paper Shotgun/FromSoftware
The Wing Of Astel is located within a chest at Nokstella, Eternal City. Specifically, above the Uhl Palace Ruins , on top of the wall guarded by a large bug with gravity attacks. You’ll need to head southwest, down the cave system to find the pathway that climbs up and around the ruins.
The Hand of Malenia
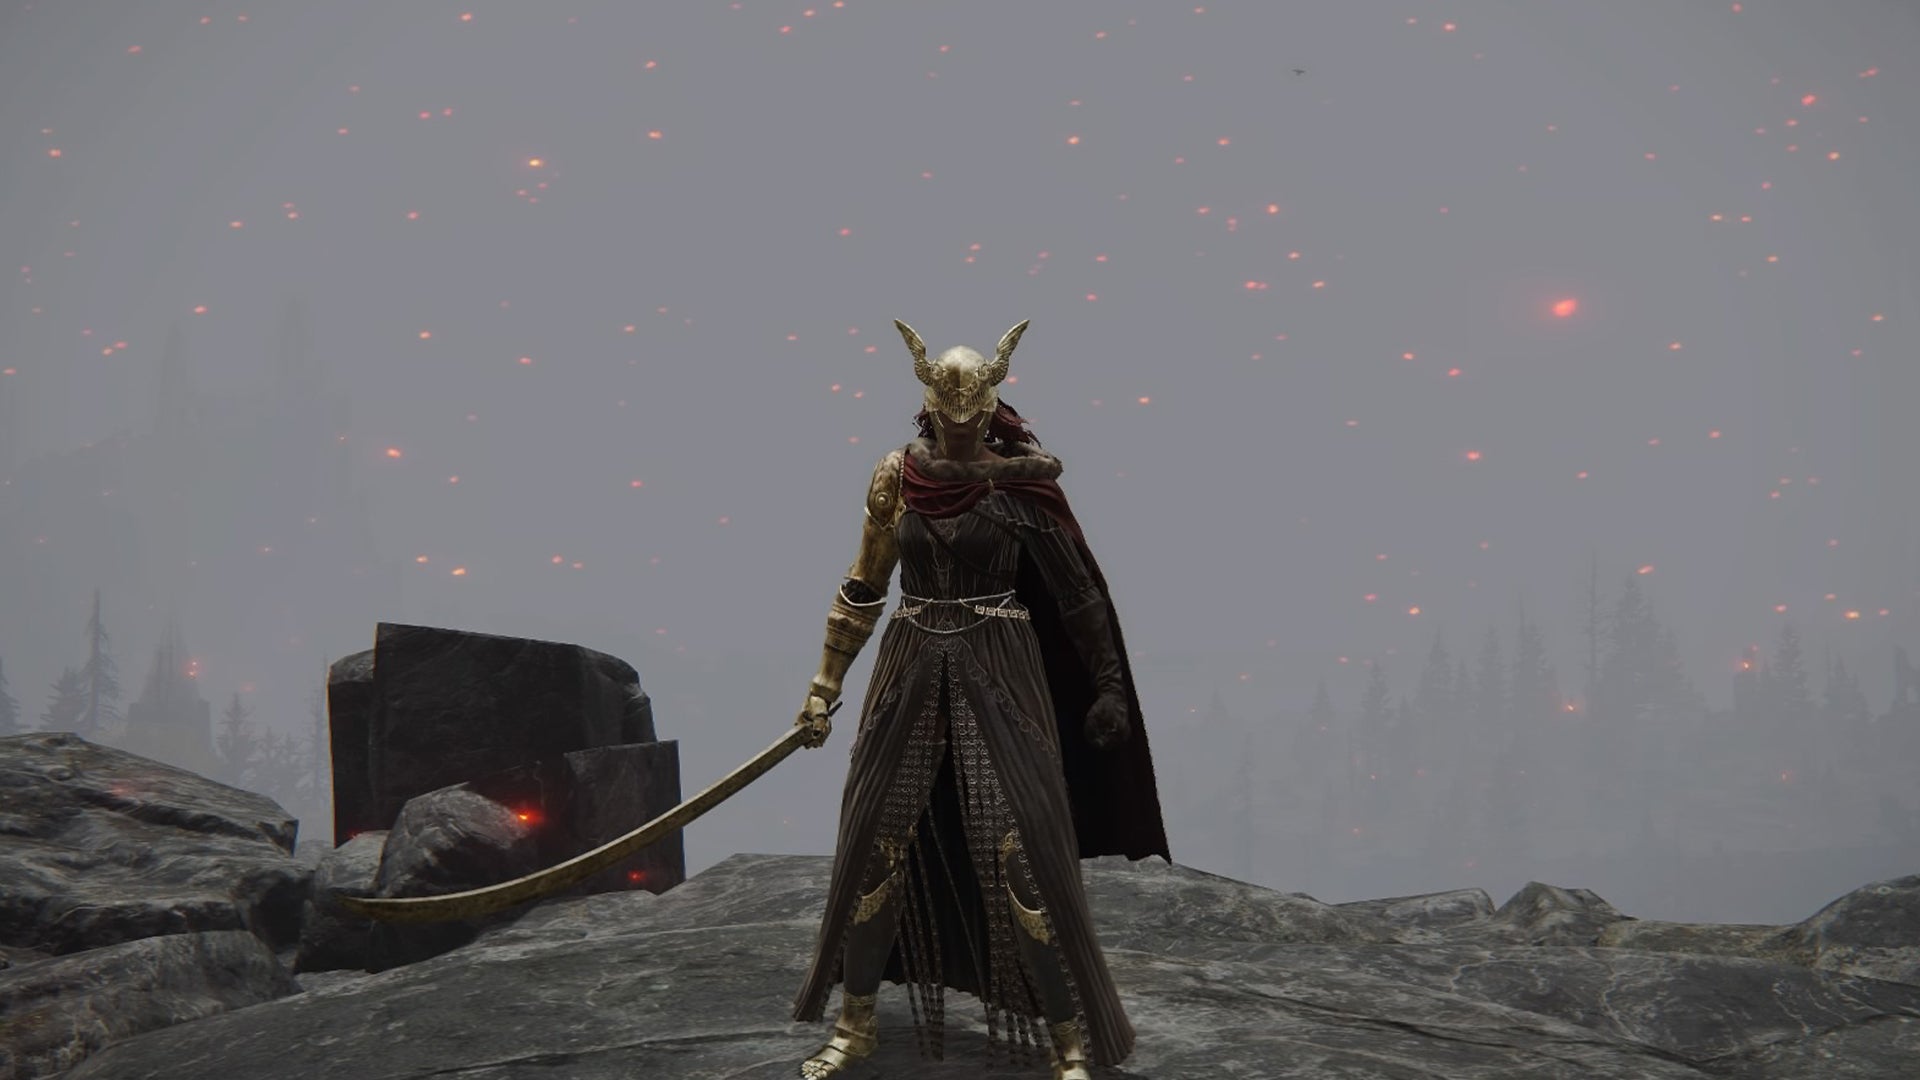
The Hand of Malenia is a great bleed build option. |Image credit:Rock Paper Shotgun/FromSoftware
- Weight: 7.0
- Damage Type: Slash, Pierce
- Requirements: Strength 16, Dexterity 48
- Attribute Scaling: Strength E, Dexterity C
- Weapon Skill: Waterfowl Dance
- Attack Power: Physical 117
- Passives: Causes blood loss buildup (50)
Moving onto late-game Dexterity weapons, The Hand of Malenia is a challenge to acquire but well worth the pursuit (if only for the bragging rights). The Hand of Malenia is a katana, once wielded by the infamous Goddess of Rot and perfect for anyone wishing to cultivate a bleed build.
The Hand of Malenia causes considerable blood loss buildup and poise damage and contains the Weapon Skill, Waterfowl Dance . This is a unique skill that allows the players to leap into the air and perform a flurry of slashes which can then be repeated up to two times in succession.
The speed and damage of this skill make the weapon a serious contender for the best Dexterity weapon in Elden Ring. The katana requires a hefty dex stat to wield but by the time you reach the Haligtree and have taken on the other bosses of the game, you will most likely be qualified.
How to get The Hand of Malenia
You get The Hand of Malenia, you must defeat the optional boss Malenia at Elphael, Brace of the Haligtree . Then, you must trade her Rembrance in with Enia at the Roundtable Hold in return for the weapon. For tips on how to take on the formidable Goddess, see our Malenia boss fight walkthrough .
Rivers Of Blood
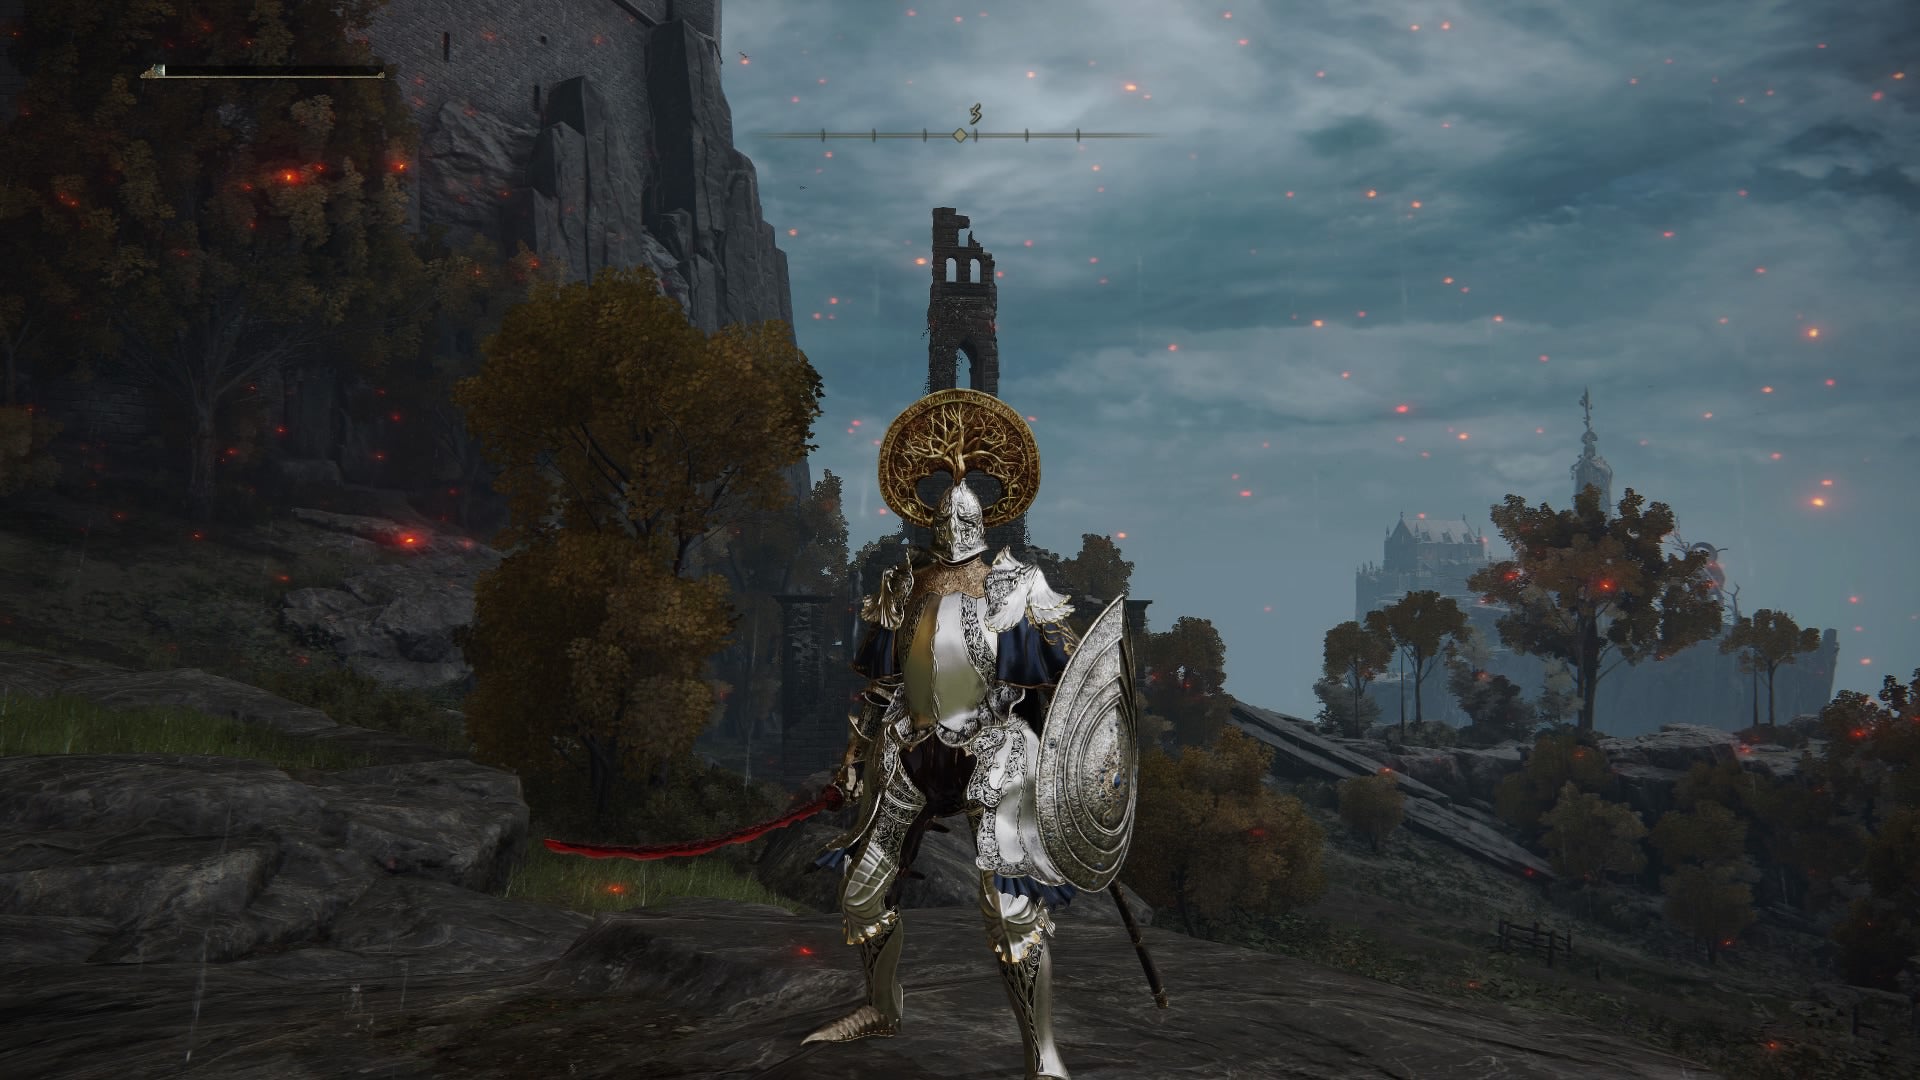
The Rivers Of Blood katana is capable of splashing cursed blood at foes. |Image credit:Rock Paper Shotgun/FromSoftware
- Weight: 6.5
- Damage Type: Slash, Pierce
- Requirements: Strength 12, Dexterity 18, Arcane 20
- Attribute Scaling: Strength E, Dexterity D, Arcane D
- Weapon Skill: Corpse Piler
- Attack Power: Physical 76, Fire 76
- Passives: Causes blood loss buildup (30)
The Rivers Of Blood is an impressive blade, so much so that it took our ranking as the best bleed weapon in Elden Ring. Although it cannot be infused with Ashes of War and its attacks can be parried, its Weapon Skill, Corpse Piler is well worth the trade off.
Corpse Piler essentially causes the player to perform multiple slashes of cursed blood. The skill executes a total of 6 slashes in a criss cross which deals stance damage per cut. Additionally, it is possible to perform follow-up attacks with this Weapon Skill. The attack power of the skill was further increased with the 1.07 patch , making it as formidable as ever.
How to get the Rivers Of Blood
To get the Rivers Of Blood katana, you’ll need to defeat Bloody Finger Okina , near the Church of Repose in eastern Mountaintops of the Giants.
Moonveil Katana
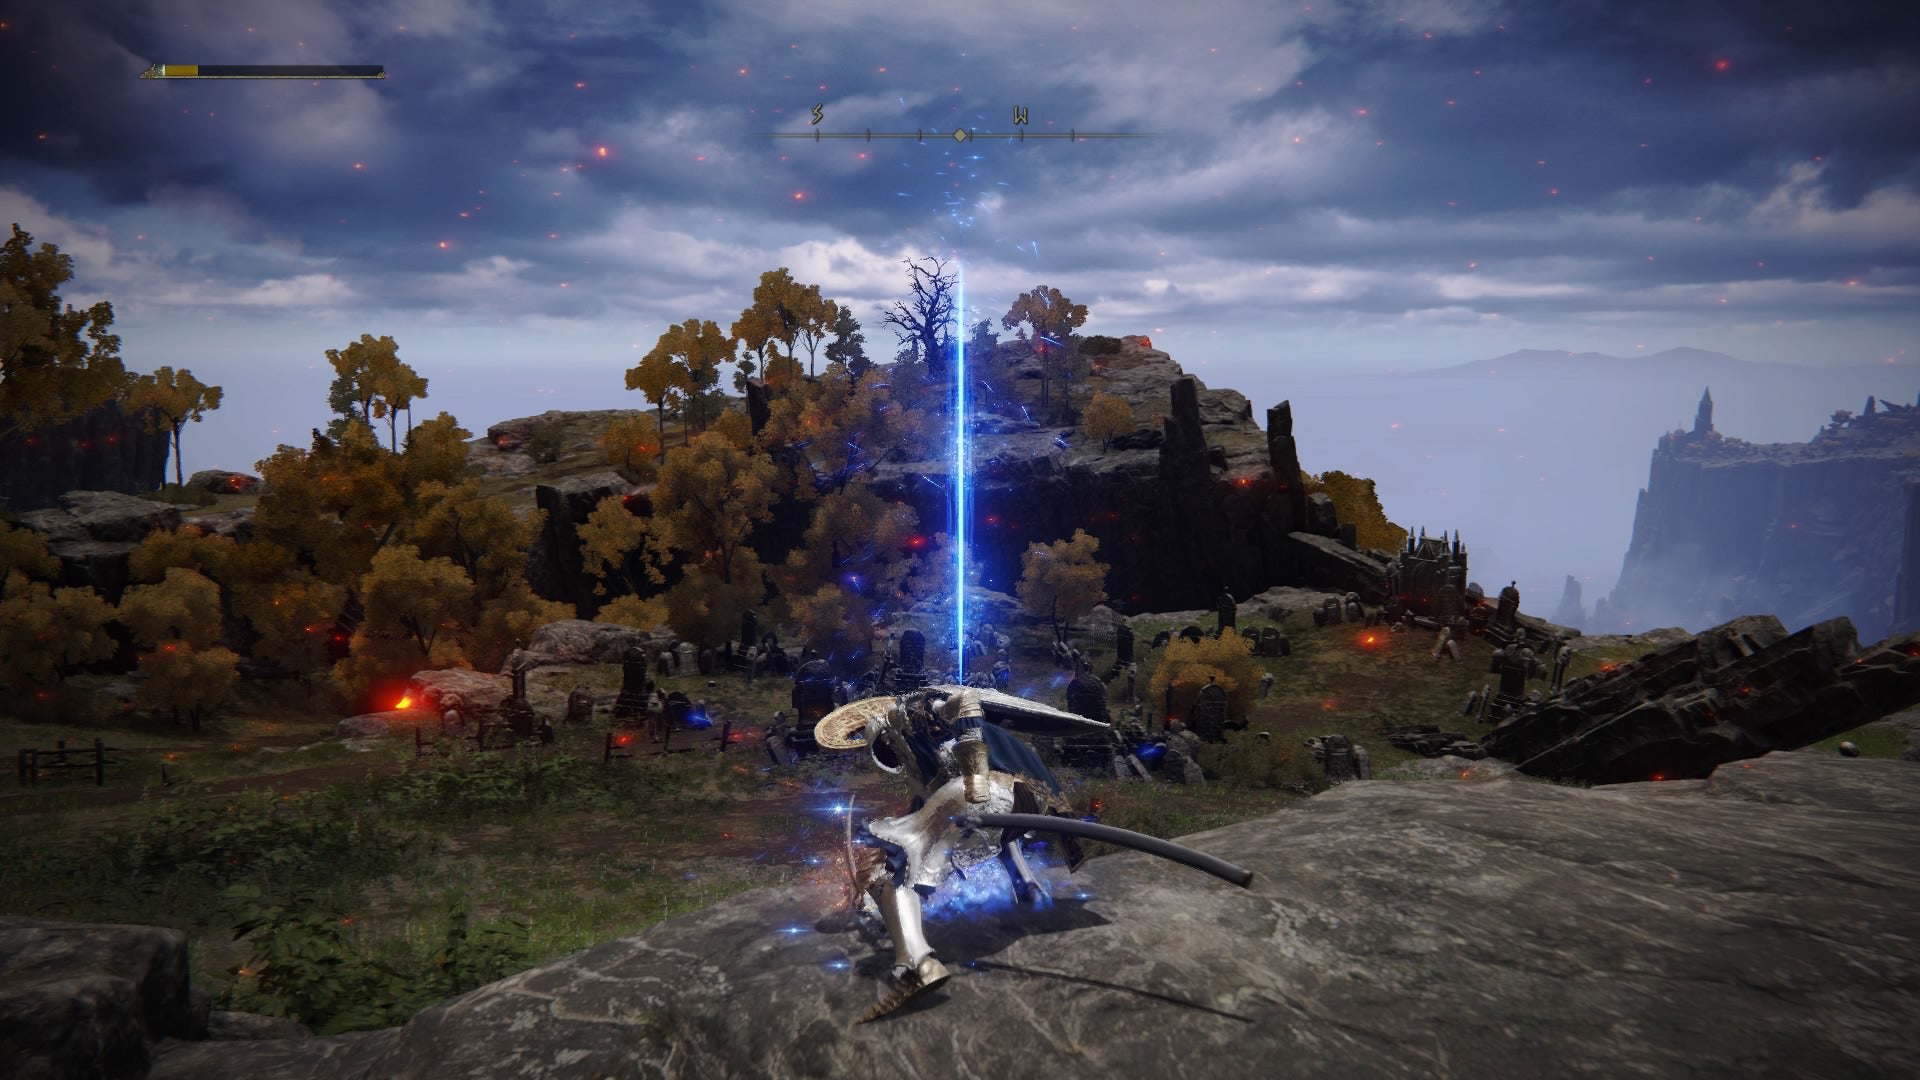
The Moonveil Katana is a perfect Dexterity weapon to carry you through to end-game territory. |Image credit:Rock Paper Shotgun/FromSoftware
- Weight: 6.5
- Damage Type: Slash, Pierce
- Requirements: Strength 12, Dexterity 18, Intelligence 23
- Attribute Scaling: Strength E, Dexterity B, Intelligence B
- Weapon Skill: Transient Moonlight
- Attack Power: Physical 73, Magic 87
- Passives: Causes blood loss buildup (50)
Although the Moonveil Katana received a nerf to its poise damage in patch 1.08 , it still stands as one of - if not the - best Dexterity weapon in Elden Ring. As a personal favourite of mine, I found that the Moonveil Katana holds up from mid-game all the way to the Elden Ring ending .
It does have a fairly high Intelligence requirement, but with a B-tier scaling in Dexterity, it is worth the short-term investment for long-term potential. Remember to also put a few levels into Mind to keep your FP pool nice and healthy.
The beauty of the Moonveil Katana lies in its Weapon Skill, Transient Moonlight , which deals a light and heavy attack of pure moonlight. With this attack, a jet of light slashes across to foes, delivering poise damage . Like with other katanas, it can also cause blood loss buildup over time.
The Moonveil Katana is perfect for any speed-conscious Tarnished who doesn’t want to trade power for speed. The slashes of the katana are both hard-hitting and fast. You can deliver multiple skill attacks in quick succession and often stagger enemies, finishing them off before they’ve even had the chance to attack.
The blade also complements any Intelligence builds . Handy for players looking to experiment with both blades and sorceries .
How to get the Moonveil Katana
To get the Moonveil Katana, you must defeat the Magma Wyrm located in the Gael Tunnel dungeon in Caelid.
That rounds off our guide to the best dexterity weapons in Elden Ring. For more Elden Ring tips and tricks to complete your Tarnished loadout, check out our best armor guide, best builds and best weapons guides.


Elden Ring
PS4 , PS5 , Xbox One , Xbox Series X/S , PC
Rock Paper Shotgun is better when you sign in
Sign in and join us on our journey to discover strange and compelling PC games.

All 75 Arc Raiders Blueprints and where to get them
These areas have the highest chance of giving you Blueprints

Image credit:Rock Paper Shotgun/Embark Studios

Looking for more Arc Raiders Blueprints? It’s a special day when you find a Blueprint, as they’re among the most valuable items in Arc Raiders. If you find a Blueprint that you haven’t already found, then you must make sure you hold onto it at all costs, because Blueprints are the key to one of the most important and powerful systems of meta-progression in the game.
This guide aims to be the very best guide on Blueprints you can find, starting with a primer on what exactly they are and how they work in Arc Raiders, before delving into exactly where to get Blueprints and the very best farming spots for you to take in your search.
We’ll also go over how to get Blueprints from other unlikely activities, such as destroying Surveyors and completing specific quests. And you’ll also find the full list of all 75 Blueprints in Arc Raiders on this page (including the newest Blueprints added with the Cold Snap update , such as the Deadline Blueprint and Firework Box Blueprint), giving you all the information you need to expand your own crafting repertoire.
In this guide:
- What are Blueprints in Arc Raiders?
- Full Blueprint list: All crafting recipes
- Where to find Blueprints in Arc Raiders Blueprints obtained from quests Blueprints obtained from Trials Best Blueprint farming locations

What are Blueprints in Arc Raiders?
Blueprints in Arc Raiders are special items which, if you manage to extract with them, you can expend to permanently unlock a new crafting recipe in your Workshop. If you manage to extract from a raid with an Anvil Blueprint, for example, you can unlock the ability to craft your very own Anvil Pistol, as many times as you like (as long as you have the crafting materials).
To use a Blueprint, simply open your Inventory while in the lobby, then right-click on the Blueprint and click “Learn And Consume” . This will permanently unlock the recipe for that item in your Workshop. As of the Stella Montis update, there are allegedly 75 different Blueprints to unlock - although only 68 are confirmed to be in the game so far. You can see all the Blueprints you’ve found and unlocked by going to the Workshop menu, and hitting “R” to bring up the Blueprint screen.
It’s possible to find duplicates of past Blueprints you’ve already unlocked. If you find these, then you can either sell them, or - if you like to play with friends - you can take it into a match and gift it to your friend so they can unlock that recipe for themselves. Another option is to keep hold of them until the time comes to donate them to the Expedition.
Full Blueprint list: All crafting recipes
Below is the full list of all the Blueprints that are currently available to find in Arc Raiders, and the crafting recipe required for each item:
| Blueprint | Type | Recipe | Crafted At |
|---|---|---|---|
| Bettina | Weapon | 3x Advanced Mechanical Components 3x Heavy Gun Parts 3x Canister | Gunsmith 3 |
| Blue Light Stick | Quick Use | 3x Chemicals | Utility Station 1 |
| Aphelion | Weapon | 3x Magnetic Accelerator 3x Complex Gun Parts 1x Matriarch Reactor | Gunsmith 3 |
| Combat Mk. 3 (Flanking) | Augment | 2x Advanced Electrical Components 3x Processor | Gear Bench 3 |
| Combat Mk. 3 (Aggressive) | Augment | 2x Advanced Electrical Components 3x Processor | Gear Bench 3 |
| Complex Gun Parts | Material | 2x Light Gun Parts 2x Medium Gun Parts 2x Heavy Gun Parts | Refiner 3 |
| Fireworks Box | Quick Use | 1x Explosive Compound 3x Pop Trigger | Explosives Station 2 |
| Gas Mine | Mine | 4x Chemicals 2x Rubber Parts | Explosives Station 1 |
| Green Light Stick | Quick Use | 3x Chemicals | Utility Station 1 |
| Pulse Mine | Mine | 1x Crude Explosives 1x Wires | Explosives Station 1 |
| Seeker Grenade | Grenade | 1x Crude Explosives 2x ARC Alloy | Explosives Station 1 |
| Looting Mk. 3 (Survivor) | Augment | 2x Advanced Electrical Components 3x Processor | Gear Bench 3 |
| Angled Grip II | Mod | 2x Mechanical Components 3x Duct Tape | Gunsmith 2 |
| Angled Grip III | Mod | 2x Mod Components 5x Duct Tape | Gunsmith 3 |
| Hullcracker | Weapon | 1x Magnetic Accelerator 3x Heavy Gun Parts 1x Exodus Modules | Gunsmith 3 |
| Launcher Ammo | Ammo | 5x Metal Parts 1x Crude Explosives | Workbench 1 |
| Anvil | Weapon | 5x Mechanical Components 5x Simple Gun Parts | Gunsmith 2 |
| Anvil Splitter | Mod | 2x Mod Components 3x Processor | Gunsmith 3 |
| ??? | ??? | ??? | ??? |
| Barricade Kit | Quick Use | 1x Mechanical Components | Utility Station 2 |
| Blaze Grenade | Grenade | 1x Explosive Compound 2x Oil | Explosives Station 3 |
| Bobcat | Weapon | 3x Advanced Mechanical Components 3x Light Gun Parts | Gunsmith 3 |
| Osprey | Weapon | 2x Advanced Mechanical Components 3x Medium Gun Parts 7x Wires | Gunsmith 3 |
| Burletta | Weapon | 3x Mechanical Components 3x Simple Gun Parts | Gunsmith 1 |
| Compensator II | Mod | 2x Mechanical Components 4x Wires | Gunsmith 2 |
| Compensator III | Mod | 2x Mod Components 8x Wires | Gunsmith 3 |
| Defibrillator | Quick Use | 9x Plastic Parts 1x Moss | Medical Lab 2 |
| ??? | ??? | ??? | ??? |
| Equalizer | Weapon | 3x Magnetic Accelerator 3x Complex Gun Parts 1x Queen Reactor | Gunsmith 3 |
| Extended Barrel | Mod | 2x Mod Components 8x Wires | Gunsmith 3 |
| Extended Light Mag II | Mod | 2x Mechanical Components 3x Steel Spring | Gunsmith 2 |
| Extended Light Mag III | Mod | 2x Mod Components 5x Steel Spring | Gunsmith 3 |
| Extended Medium Mag II | Mod | 2x Mechanical Components 3x Steel Spring | Gunsmith 2 |
| Extended Medium Mag III | Mod | 2x Mod Components 5x Steel Spring | Gunsmith 3 |
| Extended Shotgun Mag II | Mod | 2x Mechanical Components 3x Steel Spring | Gunsmith 2 |
| Extended Shotgun Mag III | Mod | 2x Mod Components 5x Steel Spring | Gunsmith 3 |
| Remote Raider Flare | Quick Use | 2x Chemicals 4x Rubber Parts | Utility Station 1 |
| Heavy Gun Parts | Material | 4x Simple Gun Parts | Refiner 2 |
| Venator | Weapon | 2x Advanced Mechanical Components 3x Medium Gun Parts 5x Magnet | Gunsmith 3 |
| Il Toro | Weapon | 5x Mechanical Components 6x Simple Gun Parts | Gunsmith 1 |
| Jolt Mine | Mine | 1x Electrical Components 1x Battery | Explosives Station 2 |
| Explosive Mine | Mine | 1x Explosive Compound 1x Sensors | Explosives Station 3 |
| Jupiter | Weapon | 3x Magnetic Accelerator 3x Complex Gun Parts 1x Queen Reactor | Gunsmith 3 |
| Light Gun Parts | Material | 4x Simple Gun Parts | Refiner 2 |
| Lightweight Stock | Mod | 2x Mod Components 5x Duct Tape | Gunsmith 3 |
| Lure Grenade | Grenade | 1x Speaker Component 1x Electrical Components | Utility Station 2 |
| Medium Gun Parts | Material | 4x Simple Gun Parts | Refiner 2 |
| Torrente | Weapon | 2x Advanced Mechanical Components 3x Medium Gun Parts 6x Steel Spring | Gunsmith 3 |
| Muzzle Brake II | Mod | 2x Mechanical Components 4x Wires | Gunsmith 2 |
| Muzzle Brake III | Mod | 2x Mod Components 8x Wires | Gunsmith 3 |
| Padded Stock | Mod | 2x Mod Components 5x Duct Tape | Gunsmith 3 |
| Shotgun Choke II | Mod | 2x Mechanical Components 4x Wires | Gunsmith 2 |
| Shotgun Choke III | Mod | 2x Mod Components 8x Wires | Gunsmith 3 |
| Shotgun Silencer | Mod | 2x Mod Components 8x Wires | Gunsmith 3 |
| Showstopper | Grenade | 1x Advanced Electrical Components 1x Voltage Converter | Explosives Station 3 |
| Silencer I | Mod | 2x Mechanical Components 4x Wires | Gunsmith 2 |
| Silencer II | Mod | 2x Mod Components 8x Wires | Gunsmith 3 |
| Snap Hook | Quick Use | 2x Power Rod 3x Rope 1x Exodus Modules | Utility Station 3 |
| Stable Stock II | Mod | 2x Mechanical Components 3x Duct Tape | Gunsmith 2 |
| Stable Stock III | Mod | 2x Mod Components 5x Duct Tape | Gunsmith 3 |
| Tagging Grenade | Grenade | 1x Electrical Components 1x Sensors | Utility Station 3 |
| Tempest | Weapon | 3x Advanced Mechanical Components 3x Medium Gun Parts 3x Canister | Gunsmith 3 |
| Trigger Nade | Grenade | 2x Crude Explosives 1x Processor | Explosives Station 2 |
| Vertical Grip II | Mod | 2x Mechanical Components 3x Duct Tape | Gunsmith 2 |
| Vertical Grip III | Mod | 2x Mod Components 5x Duct Tape | Gunsmith 3 |
| Vita Shot | Quick Use | 2x Antiseptic 1x Syringe | Medical Lab 3 |
| Vita Spray | Quick Use | 3x Antiseptic 1x Canister | Medical Lab 3 |
| Vulcano | Weapon | 1x Magnetic Accelerator 3x Heavy Gun Parts 1x Exodus Modules | Gunsmith 3 |
| Wolfpack | Grenade | 2x Explosive Compound 2x Sensors | Explosives Station 3 |
| Red Light Stick | Quick Use | 3x Chemicals | Utility Station 1 |
| Smoke Grenade | Grenade | 14x Chemicals 1x Canister | Utility Station 2 |
| Deadline | Mine | 3x Explosive Compound 2x ARC Circuitry | Explosives Station 3 |
| Trailblazer | Grenade | 1x Explosive Compound 1x Synthesized Fuel | Explosives Station 3 |
| Tactical Mk. 3 (Defensive) | Augment | 2x Advanced Electrical Components 3x Processor | Gear Bench 3 |
| Tactical Mk. 3 (Healing) | Augment | 2x Advanced Electrical Components 3x Processor | Gear Bench 3 |
| Yellow Light Stick | Quick Use | 3x Chemicals | Utility Station 1 |
Note: The missing Blueprints in this list likely have not actually been added to the game at the time of writing, because none of the playerbase has managed to find any of them. As they are added to the game, I will update this page with the most relevant information so you know exactly how to get all 75 Arc Raiders Blueprints.
Where to find Blueprints in Arc Raiders
Below is a list of all containers, modifiers, and events which maximise your chances of finding Blueprints:
- Certain quests reward you with specific Blueprints .
- Completing Trials has a high chance of offering Blueprints as rewards.
- Surveyors have a decent chance of dropping Blueprints on death.
- High loot value areas tend to have a greater chance of spawning Blueprints.
- Night Raids and Storms may increase rare Blueprint spawn chances in containers.
- Containers with higher numbers of items may have a higher tendency to spawn Blueprints. As a result, Blue Gate (which has many “large” containers containing multiple items) may give you a higher chance of spawning Blueprints.
- Raider containers (Raider Caches, Weapon Boxes, Medical Bags, Grenade Tubes) have increased Blueprint drop rates. As a result, the Uncovered Caches event gives you a high chance of finding Blueprints.
- Security Lockers have a higher than average chance of containing Blueprints.
- Certain Blueprints only seem to spawn under specific circumstances: Tempest Blueprint only spawns during Night Raid events. Vulcano Blueprint only spawns during Hidden Bunker events. Jupiter and Equaliser Blueprints only spawn during Harvester events.

Raider Caches, Weapon Boxes, and other raider-oriented container types have a good chance of offering Blueprints. |Image credit:Rock Paper Shotgun/Embark Studios
Blueprints have a very low chance of spawning in any container in Arc Raiders, around 1-2% on average. However, there is a higher chance of finding Blueprints in particular container types. Specifically, you can find more Blueprints in Raider containers and security lockers.
Beyond this, if you’re looking for Blueprints you should focus on regions of the map which are marked as having particularly high-value loot. Areas such as the Control Tower in Dam Battlegrounds, the Arrival and Departure Buildings in Spaceport, and Pilgrim’s Peak in Blue Gate all have a better-than-average chance of spawning Blueprints somewhere amongst all their containers. Night Raids and Electromagnetic Storm events also increase the drop chances of certain Blueprints .
In addition to these containers, you can often loot Blueprints from destroyed Surveyors - the largest of the rolling ball ARC. Surveyors are more commonly found on the later maps - Spaceport and Blue Gate - and if one spawns in your match, you’ll likely see it by the blue laser beam that it casts into the sky while “surveying”.
Surveyors are quite well-armoured and will very speedily run away from you once it notices you, but if you can take one down then make sure you loot all its parts for a chance of obtaining certain unusual Blueprints.
Blueprints obtained from quests
One way in which you can get Blueprints is by completing certain quests for the vendors in Speranza. Some quests will reward you with a specific item Blueprint upon completion, so as long as you work through all the quests in Arc Raiders, you are guaranteed those Blueprints.
Here is the full list of all Blueprints you can get from quest rewards:
- Trigger Nade Blueprint: Rewarded after completing “Sparks Fly”.
- Lure Grenade Blueprint: Rewarded after completing “Greasing Her Palms”.
- Burletta Blueprint: Rewarded after completing “Industrial Espionage”.
- Hullcracker Blueprint (and Launcher Ammo Blueprint): Rewarded after completing “The Major’s Footlocker”.
Alas, that’s only 4 Blueprints out of a total of 75 to unlock, so for the vast majority you will need to find them yourself during a raid. If you’re intent on farming Blueprints, then it’s best to equip yourself with cheap gear in case you lose it, but don’t use a free loadout because then you won’t get a safe pocket to stash any new Blueprint you find. No pain in Arc Raiders is sharper than failing to extract with a new Blueprint you’ve been after for a dozen hours already.

One of the best ways to get Blueprints is by hitting three stars on all five Trials every week. |Image credit:Rock Paper Shotgun/Embark Studios
Blueprints obtained from Trials
One of the very best ways to get Blueprints is as rewards for completing Trials in Arc Raiders. Trials are unlocked from Level 15 onwards, and allow you to earn rewards by focusing on certain tasks over the course of several raids. For example, one Trial might task you with dealing damage to Hornets, while another might challenge you to loot Supply Drops.
Trials refresh on a weekly basis, with a new week bringing five new Trials. Each Trial can offer up to three rewards after passing certain score milestones, and it’s possible to receive very high level loot from these reward crates - including Blueprints. So if you want to unlock as many Blueprints as possible, you should make a point of completing as many Trials as possible each week.
Best Blueprint farming locations
The very best way to get Blueprints is to frequent specific areas of the maps which combine high-tier loot pools with the right types of containers to search. Here are my recommendations for where to find Blueprints on every map, so you can always keep the search going for new crafting recipes to unlock.

Image credit:Rock Paper Shotgun/Embark Studios
Dam Battlegrounds
The best places to farm Blueprints on Dam Battlegrounds are the Control Tower, Power Generation Complex, Ruby Residence, and Pale Apartments . The first two regions, despite only being marked on the map as mid-tier loot, contain a phenomenal number of containers to loot. The Control Tower can also contain a couple of high-tier Security Lockers - though of course, you’ll need to have unlocked the Security Breach skill at the end of the Survival tree.
There’s also a lot of reporting amongst the playerbase that the Residential areas in the top-left of the map - Pale Apartments and Ruby Residence - give you a comparatively strong chance of finding Blueprints. Considering their size, there’s a high density of containers to loot in both locations, and they also have the benefit of being fairly out of the way. So you’re more likely to have all the containers to yourself.
Buried City
The best Blueprint farming locations on Buried City are the Santa Maria Houses, Grandioso Apartments, Town Hall, and the various buildings of the New District . Grandioso Apartments has a lower number of containers than the rest, but a high chance of spawning weapon cases - which have good Blueprint drop rates. The others are high-tier loot areas, with plenty of lootable containers - including Security Lockers.
Spaceport
The best places to find Blueprints on Spaceport are the Arrival and Departure Buildings, as well as Control Tower A6 and the Launch Towers . All these areas are labelled as high-value loot regions, and many of them are also very handily connected to one another by the Spaceport wall, which you can use to quickly run from one area to the next. At the tops of most of these buildings you’ll find at least one Security Locker, so this is an excellent farming route for players looking to find Blueprints.
The downside to looting Blueprints on Spaceport is that all these areas are hotly contested, particularly in Duos and Squads. You’ll need to be very focused and fast in order to complete the full farming route.

Image credit:Rock Paper Shotgun/Embark Studios
Blue Gate
Blue Gate tends to have a good chance of dropping Blueprints, potentially because it generally has a high number of containers which can hold lots of items; so there’s a higher chance of a Blueprint spawning in each container. In my experience, the best Blueprint farming spots on Blue Gate are Pilgrim’s Peak, Raider’s Refuge, the Ancient Fort, and the Underground Complex beneath the Warehouse .
All of these areas contain a wealth of containers to loot. Raider’s Refuge has less to loot, but the majority of the containers in and around the Refuge are raider containers, which have a high chance of containing Blueprints - particularly during major events.
Stella Montis
On the whole, Stella Montis seems to have a very low drop rate for Blueprints (though a high chance of dropping other high-tier loot). If you do want to try farming Blueprints on this map, the best places to find Blueprints in Stella Montis are Medical Research, Assembly Workshop, and the Business Center . These areas have the highest density of containers to loot on the map.
In addition to this, the Western Tunnel has a few different Security Lockers to loot, so while there’s very little to loot elsewhere in this area of the map, it’s worth hitting those Security Lockers if you spawn there at the start of a match.
That wraps up this primer on how to get all the Blueprints in Arc Raiders as quickly as possible. With the Expedition system constantly resetting a large number of players’ Blueprints, it’s more important than ever to have the most up-to-date information on where to find all these Blueprints.
While you’re here, be sure to check out our Arc Raiders best guns tier list , as well as our primers on the best skills to unlock and all the different Field Depot locations on every map.


ARC Raiders
PS5 , Xbox Series X/S , PC
Rock Paper Shotgun is better when you sign in
Sign in and join us on our journey to discover strange and compelling PC games.
