Best Boons in Hades 2
Here is a full list of God Boons in Hades 2 and our top picks for the best ones
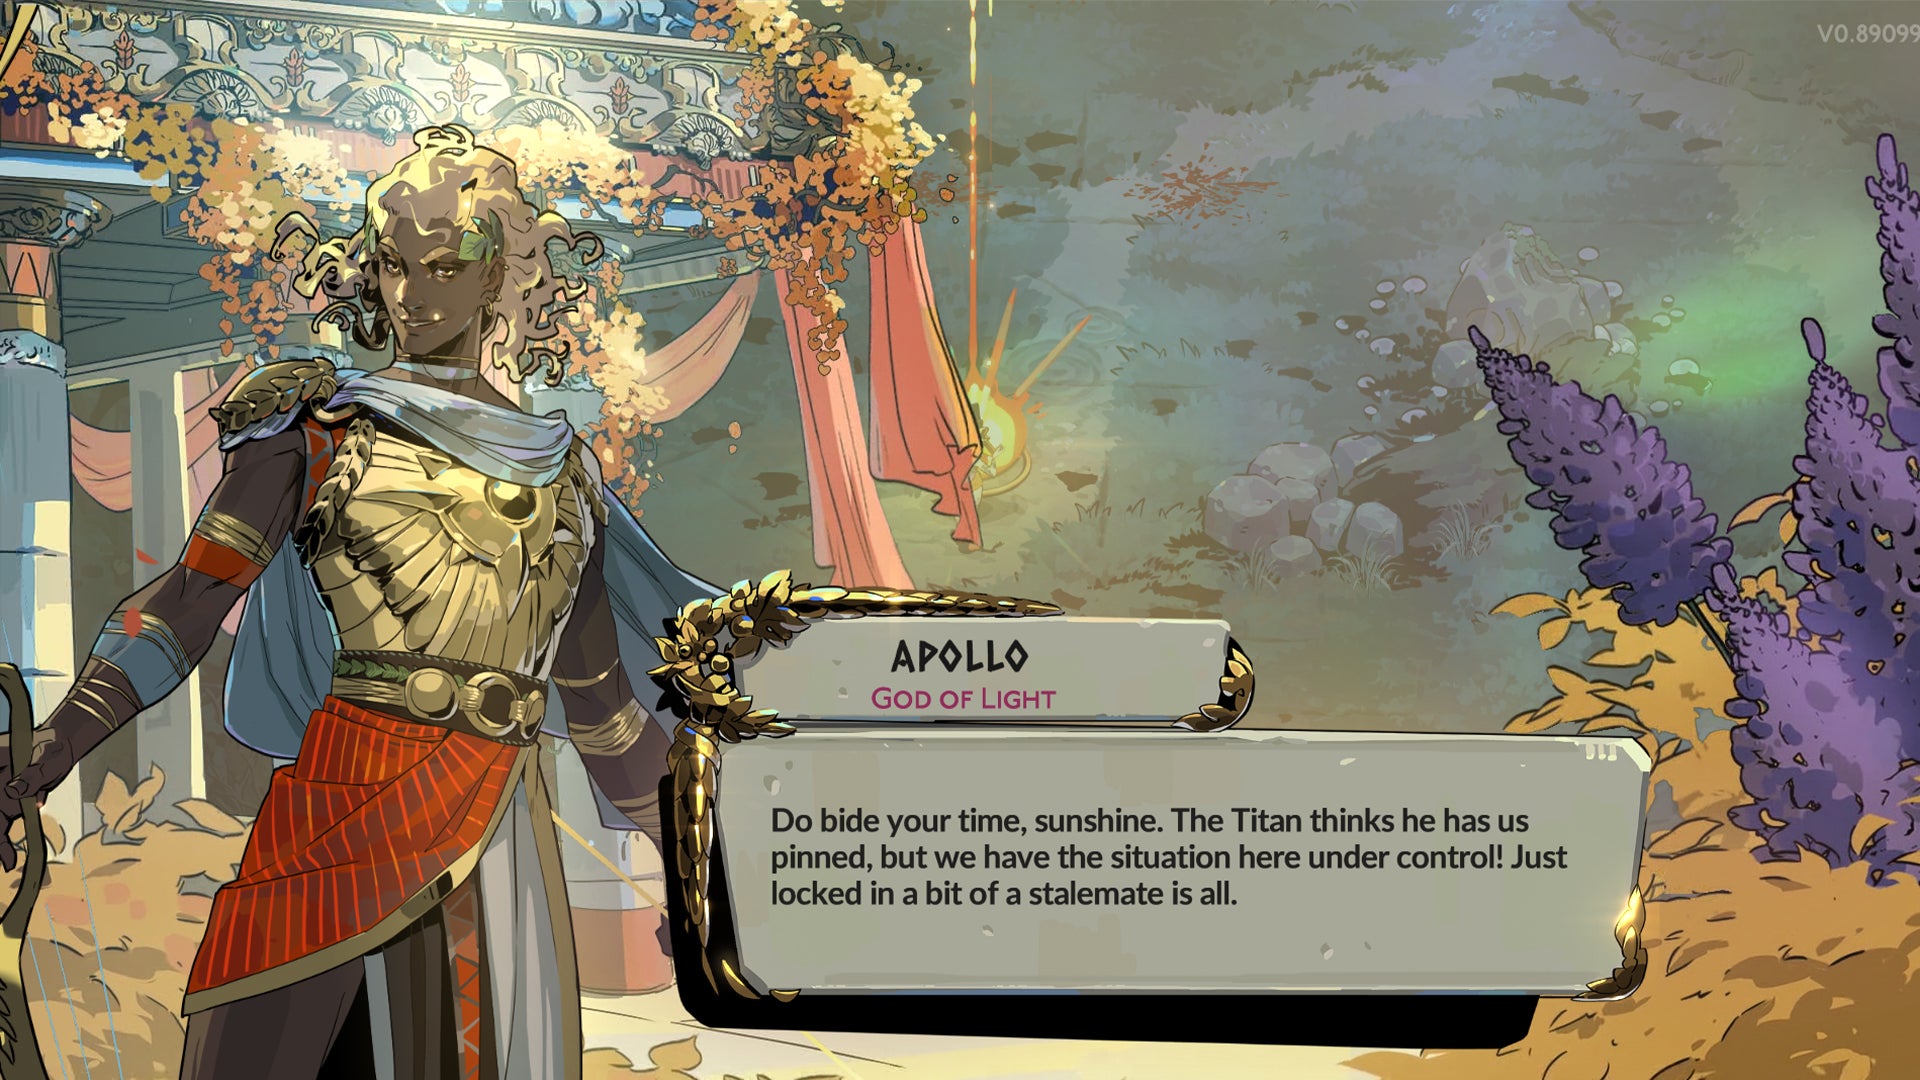
Image credit:Rock Paper Shotgun/Supergiant Games

Looking for the best Boons in Hades 2? Like its predecessor, Boons play a major role in Hades 2 . They’re essentially blessings from Gods that give you added perks in and out of combat and can mean life or death on a run in Erebus and beyond.
With returning faces as well as some new ones, each God in the Pantheon of Hades 2 offers unique Boons and specialities (or Curses). We’ll go through these as well as the best Boons for each major God. If you’re interested in seeing a full list of all Boons in the game we have that too.
Beware spoilers ahead for the different Gods featured in Hades 2.
In this guide:
- How Boons work in Hades 2
- Best Boons in Hades 2
- Full Hades 2 Boons list
- Hades 2 Curses list

Check out the official Hades 2 reveal trailer here and see what adventures await Melinoe.Watch on YouTube
How Boons work in Hades 2
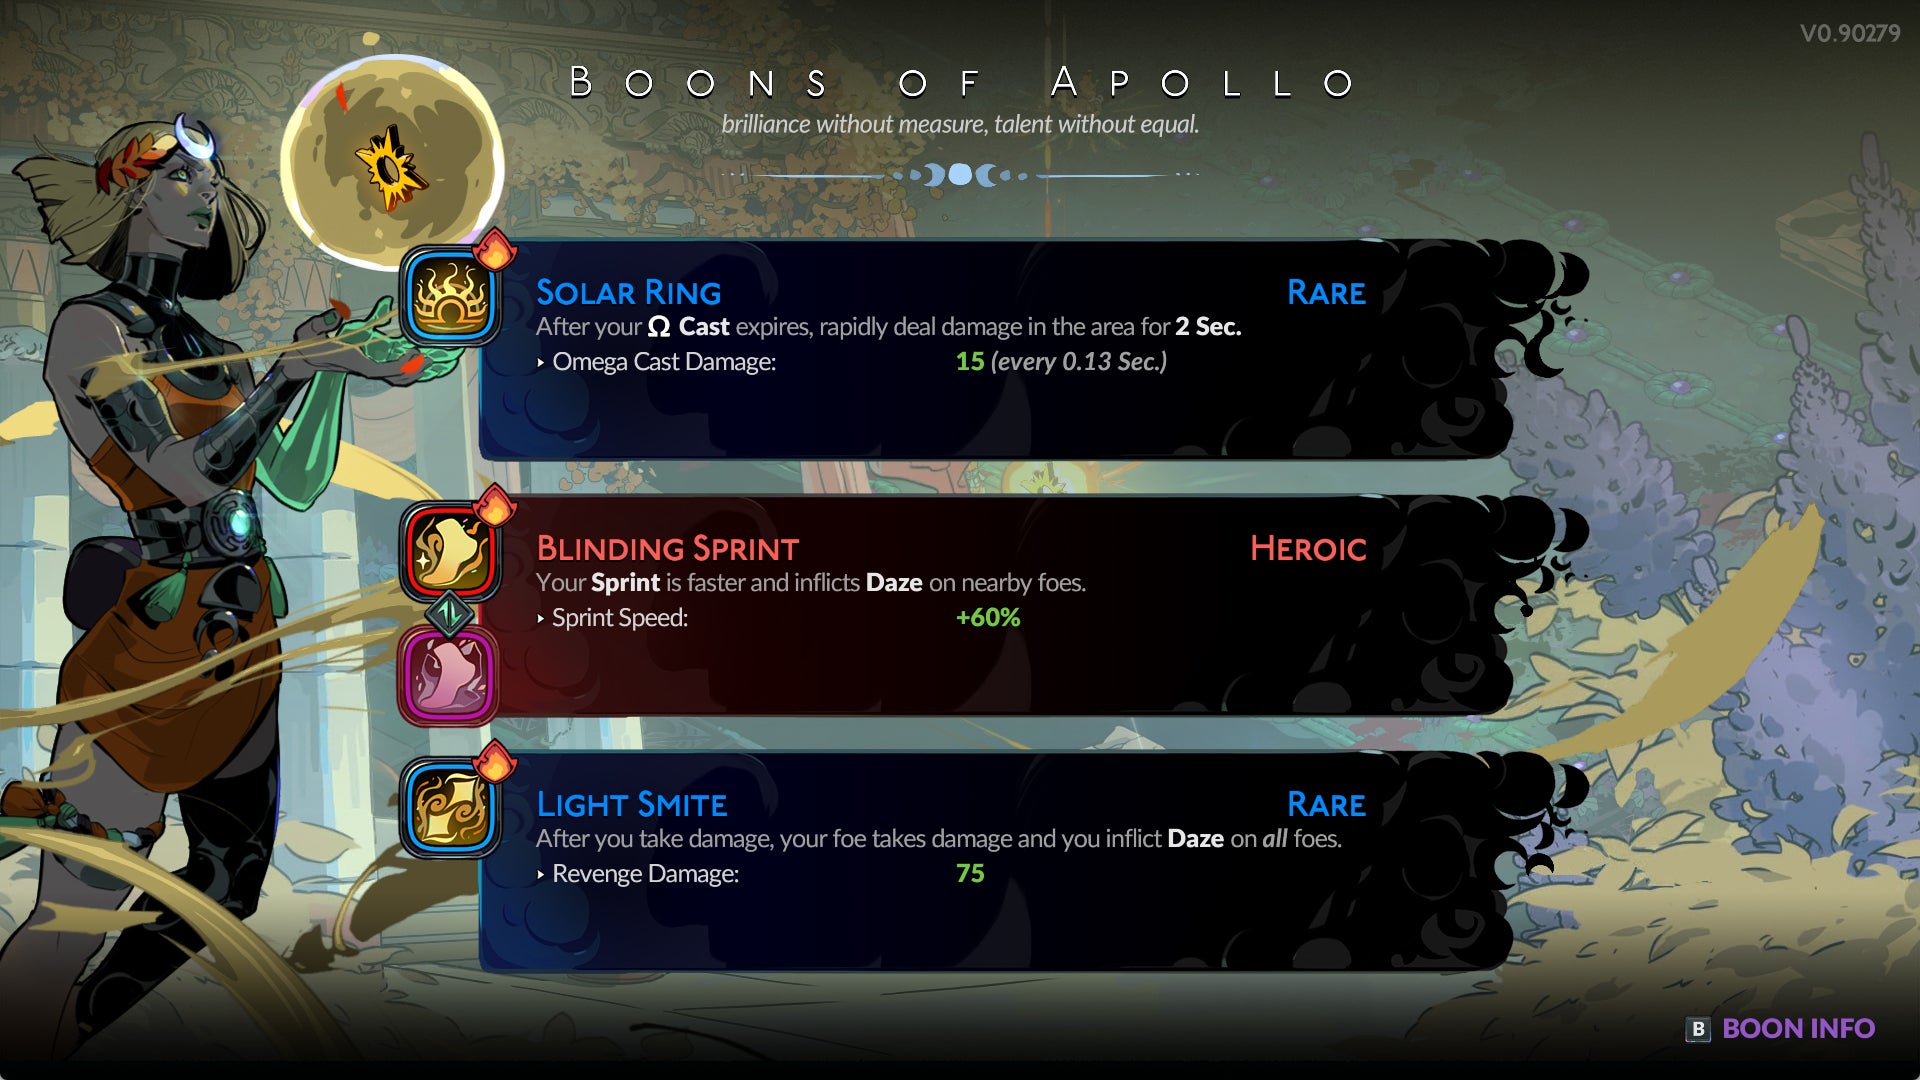
Each God has a unique symbol , which you will occasionally see on gates throughout Erebus. As a reward for clearing encounters, you’ll get a choice of three Boons from that God to choose from. These Boons are randomly rotated in rarity and you can only pick one at a time.
The rarity of Boons are as follows:
- Common: White.
- Rare: Blue.
- Epic: Purple.
- Legendary: Orange.
- Heroic: Red.
There are 5 different rarity types of Boons in Hades 2. |Image credit:Rock Paper Shotgun/Supergiant Games
You can increase the likelihood of receiving a specific God’s Boon and receive the option to upgrade one of their Boons in rarity by equipping their Keepsake . Earn a Keepsake from each God by gifting them a Nectar. Remember to offer the gift before you accept their Boon or their sigil will disappear.
You can also upgrade the quality of your Boon by consuming a Pom of Power which looks like a pomegranate. These can appear on doorways or within Charon’s shop.
Other than normal God Boons, there are also the following Boon types in Hades 2:
- Boons of Chaos: offered by Chaos. These Boons require you to take on a stipulation in return for a reward.
- Infusion Boons: Boons that grow stronger if you have the necessary elemental Essence requirement. Gain Essences from Chaos. These Essences are Earth, Water, Air, Fire and Aether.
- Gifts of The Moon: Special Boons offered by Selene. These Boons usually revolve around a special power connected to your Hex, which you can unleash after using a certain amount of Magick on foes.
- Duo Boons: An enhanced version of a Boon that combines the effects of two different Gods.
- Legendary Boons: Each God has one Legendary Boon each. These are powerful Boons which require you to have favoured a particular God during the run.
Gods may also offer to swap out one of your equipped Boons for one of theirs. This is usually indicated with dialogue and a switch arrow symbol on the Boon they are offering a trade for.
Once you reach the final region beyond Erebus, you’ll receive the recipe for the Insight into Offerings Incantation. This will essentially provide you access to a list of all God Boons via your Book of Shadows and show which ones you haven’t acquired. If you haven’t accessed this late-game mechanic yet, we’ve listed all Boons below.
Best Boons in Hades 2

You can pick one of three Boon choices per encounter. |Image credit:Rock Paper Shotgun/Supergiant Games
Of course, picking the best Boons in Hades 2 is largely down to preference and the type of build you’re going for. We generally recommend elemental boons from Gods like Demeter, Poseidon or Hestia when wielding close-range weapons like the Sister Blades. It’s also worthwhile focusing on Boons that improve or add effects to your Dodge when zipping in and out of combat.
For longer-range weapons like the Umbral Flames and Witch’s Staff we recommend Boons that will buff your Casts and Magick Reseverve like Hera’s Keen Intuition (Omega moves deal more damage when you have 100% Magick) or Demeter’s Tranquil Gain which will bump up your Magick restoration. Boons from Selene are additionally good candidates for the use of Hex abilities.
For the Moonstone Axe, I found particular luck with Zeus and Hephaestus Boons. Zeus will usually inflict Blitz which will maximise the amount of damage you inflict and strike foes with lightning, sometimes chain lightning if you’re lucky. Whilst Hephaestus offers large damage output to consecutive Attacks (which you’ll be doing a lot of with the Moonstone Axe’s Omega Attack).
You can see our best weapons guide for more precise recommendations, but for the Best Boons, we’ve gathered a shortlist of the ones we particularly found effective for each God below.
Aphrodite - Healthy Rebound
Healthy rebound is a great way to ensure you go into boss encounters with max health. It essentially allows you to restore any lost health when you exit a location. The Boon doesn’t have limited uses, you can use it for as long as you have the required max health percentage and essentially have constantly replenished health.
Demeter - Frigid Sprint
Due to the fast-paced nature of combat in Hades 2, chances are, you’ll be Sprinting a fair bit. With the Frigid Sprint Boon, your Sprint forms a Cyclone around you that lingers after you stop. Enemies can then get caught up in the Cyclone and freeze, giving you enough time to re-position yourself for attack. Freeze in general is a fantastic condition to apply to foes for better crowd control.
Poseidon - Wave Strike
Speaking of crowd control, the Wave Strike Boon can knock enemies away with a splash when you Attack. Most of Poseidon’s Boons concentrate on minor finds or knock-back damage. This is especially helpful if you’re using close-ranged weapons like the Sister Blades or Moonstone Axe as it can give you a few vital seconds in-between Attacks. The Crashing Wave Boon can also be extremely useful (particularly in the third major area) as you can use the splash to slam enemies into barriers and create a blast for added damage.
Hestia - Flame Strike
I like most of Hestia’s Boons for the Scorch they can inflict on foes. Scorch is a fire attack that can add considerably to your damage total. The Flame Strike Boon is simple in function but very effective and effectively applies Scorch to your attacks. This can be extremely powerful if you’re chaining multiple Attacks together or using the Moonstone Axe Omega Attack, which can emit up to 20 consecutive spinning attacks in a short amount of time.
Zeus - Static Shock
Most of the Boons offered by Zeus are pretty substantial. The Static Shock Boon in particular is incredibly useful against large crowds as it enables you to perform a chain-lighting attack that travels across foes. To use it, you need to Prime 50 Magick after entering a location. I suggest using this one once you have upgraded your Magick pool a couple of times. You can then pair this Boon with the Spirit Surge Boon, also offered by Zeus. This will strike foes with lightning when you have no more than 10 Magick. This means you can perform these Boons one after another to great effect. Zeus’ Boons in general work extremely well when stacked together.
Hephaestus - Volcanic Strike and Molten Touch
Volcanic Strike is possibly my favourite of all Boons. It essentially creates a blast that deals 200 damage in an AOE. This blast is triggered when you perform Attacks. For a Moonstone Axe build, it will trigger fairly often and will usually be a fantastic aid in boss fights. In smaller skirmishes, it will blast multiple foes at once and will often one-shot them.
I also recommend picking up the Molten Touch Boon from Hephaestus if you can. This will allow your Attacks and Specials to deal bonus damage to enemies in armor. Armor can be cumbersome and often you’ll have to whittle it away for some time before the enemy is vulnerable to attacks. With this Boon, you can shortcut this process.
Most of Hephaestus’ Boons are useful and will amp up your damage. The Mint Condition Boon is also fantastic as it will turn you immune to damage at the start of encounters for a brief spell. For obvious reasons, this is particularly helpful in boss fights where you can focus on delivering as much damage as possible before adopting a more tactical approach.
Artemis - Support Fire
Support Fire is one of my favourite Boons across the board and can be criminally overlooked. It essentially shoots enemies with an arrow after you perform an Attack or Special. These arrows usually offer around 10 damage each. Although this sounds small, they will release an arrow after every single Special or Attack which will soon add up. Often, they’ll contribute to finishing off bosses and other enemies when they only have a sliver of health left and you’re seconds away from being smacked. Artemis’ Boons in general buff the chances for critical damage and tend to be worth picking up if you encounter the wandering Goddess.
Gifts of the Moon - Phase Shift and Dark Side
The Gifts of the Moon Boons offered by Selene are all unique powers that you can perform once your Hex has charged up. The Phase Shift Boon is particularly useful as it will slow time and allow you to get in some cheap shots on your enemies whilst they lumber about slowly. The Dark Side Boon is also helpful as it will make you immune to all damage for a short while and give you a new Attack in the process. With this, you can stand in harm’s way and concentrate on blasting foes, removing a chunk of their health before the Hex wears off and you can continue a tactical approach.
Hera - Bridal Glow
Hera’s Bridal Glow Boon is considerably powerful. It allows you to turn all equipped Boons to Heroic quality. The rarity will then lower every 7 encounters. Of course, it’s a Boon best picked towards the end of your run or near a boss battle. The perks of the Boon completely outweigh the negatives, however, especially if you can time it right.
Apollo - Critical Miss
Apollo usually provides Boons that inflict Daze. This is a curse that offers the chance for enemies to deal no damage during an attack. As such, if you choose a Boon like Dazzling Display (which adds the chance for Daze on all your attacks) and pair that with the Critical Miss Boon, you’ll have a strong loadout. Critical Miss deals out damage to foes that miss because of Daze. In a way, it’s like you’re reversing the damage back onto enemies. If you’re wielding the Sister Blades and have access to its powerful back-slash Dodge Attack, I also recommend picking up the Back Burner Boon which applies more damage to foes struck from behind.
Hermes - Mean Streak
Hermes usually specialises in speed buffs or wealth gain. Something like the Swift Flourish Boon is helpful for most builds, especially arcana-focused ones as it will speed up your Special Attacks. I particularly like the Mean Streak Boon as it allows you to increase more damage output every time you slay a foe. During encounters with large groups of enemies, this can be a powerful boost and allow you to tear through crowds with relative ease.
Full Hades 2 Boons list
The following Boons are all the ones included in Hades 2, as of writing.
Aphrodite Boons
| Aphrodite Boons | Boon type | Boon effect |
|---|---|---|
| Flutter Strike | Normal | Your Attacks deal more damage to nearby foes. |
| Flutter Flourish | Normal | Your Specials deal more damage to nearby foes. |
| Secret Crush | Normal | After you enter a location, Prime 20 Magick and add power to your Attack. |
| Passion Dash | Normal | Your Dash blasts foes near where you start and end and inflicts Weak. |
| Glamour Gain | Normal | In each encounter, 1 foe is always Weak. You gradually restore Magick near Weak foes. |
| Shameless Attitude | Normal | While you have at least 80% health, you deal more damage. |
| Heart Breaker | Normal | Whenever you use 30 Magick create a Heartthrob. |
| Life Affirmation | Normal | Any Health rewards you find have a greater effect. |
| Rapture Ring | Normal | Your Casts drag foes in and inflict Weak. |
| Healthy Rebound | Normal | Whenever you exit a Location, restore 100% health if you have not lost too much. |
| Broken Resolve | Normal | Your Weak effects are more potent. |
| Sweet Surrender | Normal | Weak-afflicted foes take more damage. |
| Island Getaway | Duo | You take less damage from nearby foes. Boons of Aphrodite treat all foes as nearby. |
| Soft Caress | Duo | The first time you would take damage each encounter, get health instead. |
| Sunny Disposition | Duo | Whenever you create Heartthrobs, create more. |
| Hearty Appetite | Duo | You deal more damage the more health you have. |
| Soul Mate | Duo | Foes with Hitch take more damage and are Weak, but only 2 can be afflicted at a time. |
| Burning Desire | Duo | Up to +12 Lone Shades appear in locations. Sprint into them to launch a fiery blast. |
| Romantic Spark | Duo | If you Sprint into Blitz-afflicted foes, the effect activates immediately and is stronger. |
| Wispy Wiles | Infusion | While you have at least 4 Air Essence, you may Dodge any damage. |
| Ecstatic Obsession | Legendary | During encounters with multiple foes, 1 foe is always afflicted with Charm. |
Apollo Boons
| Apollo Boons | Boon Type | Boon effect |
|---|---|---|
| Nova Strike | Normal | Your Attacks deal more damage in a larger area. |
| Blinding Sprint | Normal | Your Sprint is faster and inflicts Daze on nearby foes. |
| Lucid Gain | Normal | While standing in your Casts, gradually restore Magick. |
| Extra Dose | Normal | Your Attack has a chance to hit 2 times. |
| Perfect Image | Normal | In each encounter, you deal more damage until you take damage. |
| Nova Flourish | Normal | Your Attacks deal more damage in a larger area. |
| Light Smite | Normal | After you take damage, your foe takes damage and you inflict Daze on all foes. |
| Solar Ring | Normal | After your Omega Cast expires, rapidly deal damage in an area for 2 seconds. |
| Super Nova | Normal | Your Casts expand in size until they expire. |
| Dazzling Display | Normal | Your Attacks may inflict Daze. |
| Critical Miss | Normal | Foes take damage whenever Daze causes them to miss. |
| Back Burner | Normal | Foes with Daze take more damage if struck from behind. |
| Glorious Disaster | Duo | You can Channel +30 Magick into your Omega Cast to repeatedly strike foes with lightning bolts. |
| Torrential Downpour | Duo | Each time you use your Omega Cast in an Encounter, it gets stronger but also uses +5 Magick. |
| Phoenix Skin | Duo | Give up -100 health. If you do not take or deal damage for 3 seconds, rapidly restore health. |
| Sunny Disposition | Duo | Whenever you create Heartthrobs, create more. |
| Stellar Slam | Duo | Your blast effects from Hephaestus deal damage in a larger area. |
| Beach Ball | Duo | Your Sprint creates a watery sphere behind you. After you stop, it surges ahead and bursts. |
| Sun Worshiper | Duo | In each encounter, the first foe you slay returns to fight for you. |
| Self Healing | Infusion | While you have at least 3 Fire Essence, whenever you take damage, restore some health. |
| Exceptional Talent | Legendary | Your Omega Attack and Omega Special fire 2 times, but use more Magick. |
Artemis Boons
| Artemis Boons | Boon type | Boon effect |
|---|---|---|
| Death Warrant | Normal | A random foe occasionally becomes Marked. If it takes critical damage, this repeats. |
| Lethal Snare | Normal | Foes in your Casts may take critical damage from your Attacks. |
| Easy Shot | Normal | A piercing arrow fires toward any foe damaged by your Omega Cast |
| Silver Streak | Normal | After you Dash, your Omega moves deal more damage for 2 seconds. |
| Pressure Points | Normal | Any damage you deal may be critical. |
| First Blood | Normal | Foes with at least 80% health or 80% armor may take critical damage. |
| Support Fire | Normal | After you hit with your Attacks or Specials, fire a seeking arrow. |
Boons of Chaos
Chaos Boons are organised slightly differently. The first table contains stipulations which are usually a negative effect, whilst the second contains the rewards. Chaos Boons can be a random mix of the two tables and you’ll need to discover all possible combinations to fulfil the Chaos Prophecy via The Fated List. There is also one Legendary Chaos Boon and Infusion Boon, found at the bottom of these tables.
| Chaos Boons | Boon effect |
|---|---|
| Addled | For the next encounters, each time you use Casts, get hit for -3 health. |
| Ordinary | The next Boons you find are limited to common blessings. |
| Excruciating | For the next encounters, you take +42% damage. |
| Hobbled | For the next encounters, your Dash is slower and also uses Magick. |
| Caustic | For the next encounters, slain foes toss an Interno-Bomb at you. |
| Gagged | For the next encounters, each time you use Omega moves, get hit for -7 health. |
| Fixated | For the next encounters, whenever you use Magick, Prime it. |
| Enshrouded | For the next locations, location reward previews are hidden. |
| Atrophic | For the next encounters, you have -26 health. |
| Barren | For the next encounters, your Arcana Cards have no effect. |
| Pauper’s | For the next encounters, you cannot earn Coins. |
| Maimed | For the next encounters, each time you use Attacks, get hit for -4 health. |
| Rejected | The next Boons you find have 1 fewer blessing to choose from. |
| Flayed | For the next encounters, each time you use Specials, get hit for -5 health. |
| Slothful | For the next encounters, you move and Sprint 53% slower. |
| Paralyzing | For the next encounters, whenever you take damage, you are stunned for 1.1 seconds. |
| Doomed | You have 120 seconds to clear a number of encounters or get hit for -500 health. |
| Chaos Boons | Boon reward |
|---|---|
| Chasm | Afterwards, your Casts deal +32% damage. |
| Blood | Afterwards, whenever you exit a location, restore 4 health. |
| Creation | Afterwards gain +1 Earth, Water, Air, Fire and Aether Essence. |
| Revelation | Afterwards, you Channel your Omega moves 10% faster. |
| Discovery | Afterwards, you have A 56% chance to find +100% resources with your Gathering Tools. |
| Soul | Afterwards, gain +27 maximum health. |
| Mind | Afterwards, gain +39 maximum Magick. |
| Talent | Afterwards, you use -25% Magick. |
| Will | Afterwards, restore 4.5 Magick every 1 sec. |
| Affluence | Afterwards, any Coins you find are worth +40%. |
| Favor | Afterwards, Boons have a +44% chance of being Rare or better. |
| Flourish | Afterwards, your Specials deal +48% damage. |
| Celerity | Afterwards, you move and Sprint 15% faster. |
| Strike | Afterwards, your Attacks deal +32% damage. |
| Chant (Infusion) | Afterwards, your Omega moves deal +30% damage for each Aether Essence you have. |
| Defiance (Legendary) | Afterwards, gain +1 Death Defiance this night. |
Demeter Boons
| Demeter Boons | Boon type | Boon effect |
|---|---|---|
| Ice Flourish | Normal | Your Specials deal more damage and inflict Freeze. |
| Frigid Sprint | Normal | Your Sprint forms a Cyclone around you that lingers after you stop. |
| Tranquil Gain | Normal | After remaining inactive for 1 second, rapidly restore Magick until you act. |
| Weed Killer | Normal | Your Omega Attack deals more damage but uses +10 Magick. |
| Winter Coat | Normal | After you enter a location, Prime a barrier that absorbs 1 instance of damage. |
| Ice Strike | Normal | Your Attacks deal more damage and inflict Freeze. |
| Gale Force | Normal | Your Casts also create a Cyclone at the binding circle. |
| Arctic Ring | Normal | Your Cast repeatedly deals damage in the area and inflicts Freeze. |
| Plentiful Forage | Normal | Whenever you gather plants, seeds or mushrooms, gain health. Receive one Mystery Seed now. |
| Local Climate | Normal | Your Omega Cast deals bonus damage and follows you, even as you start to Channel it. |
| Rare Crop | Normal | Your Boons become common, then gain rarity every 3 encounters. |
| Cold Storage | Normal | Your Freeze effects last longer. |
| Torrential Downpour | Duo | Each time you use your Omega Cast in an Encounter, it gets stronger but also uses +5 Magick. |
| Freezer Burn | Duo | Whenever you inflict Freeze, amplify any Scorch effects already on the foe. |
| Apocalyptic Storm | Duo | Your Blitz effects last longer and activate against all Blitz foes at once. |
| Room Temperature | Duo | Your blast effects from Hephaestus clear Freeze, so you Freeze foes again right away. |
| Hearty Appetite | Duo | You deal more damage the more health you have. |
| Natural Selection | Duo | Location rewards exclude Coins, health and Magick maximum increases. Boons are more likely to be Rare or better. |
| Cherished Heirloom | Duo | Most other Keepsakes you equip are stronger this night (if possible). |
| Coarse Grit | Infusion | While you have at least 6 Earth Essence, you cannot take more damage per hit than the limit. |
| Winter Harvest | Legendary | Freeze-afflicted foes shatter at 10% health, dealing damage in the area. |
Hades Boons
| Hades Boons | Boon type | Boon effect |
|---|---|---|
| Howling Soul | Normal | Your Casts launch a projectile dead ahead. The blinding circle forms where it hits. |
| Deep Dissent | Normal | In your confrontation, Chronos summons fewer reinforcements. |
| Last Gasp | Normal | Deal more damage for each spent Death Defiance. |
| Old Grudge | Normal | In your confrontation, Chronos takes a burst of damage after the first 3 seconds. |
| Life Tax | Normal | Restore Life for 1% of damage you deal, until you reach the limit. |
| Unseen Ire | Normal | After you take damage, go Dark for 10 seconds. |
Hera Boons
| Hera Boons | Boon type | Boon effect |
|---|---|---|
| Sworn Flourish | Normal | Your Specials deal more damage and inflict Hitch. |
| Engagement Ring | Normal | Your Casts last 200% longer and deal damage to every foe that joins the encounter. |
| Nexus Sprint | Normal | Your Sprint inflicts Hitch on nearby foes, which spreads to other foes near them. |
| Born Gain | Normal | Whenever you run out of Magick, Prime to restore all Magick up to the reduced limit. |
| Uncommon Grace | Normal | While none of your other Boons are common, deal more damage. |
| Nasty Comeback | Normal | After you take damage, inflict your foes with Hitch and deal damage in greater measure. |
| Sworn Strike | Normal | Your Attacks deal more damage and inflict Hitch. |
| Dying Wish | Normal | Whenever Hitch-afflicted foes are slain, damage all other Hitch-afflicted foes. |
| Hereditary Bane | Normal | Your Hitch effects deal more damage and last +5 seconds. |
| Queen’s Ransom | Duo | Give up all your Boons of Zeus. For each one, raise the rarity level of all your Boons of Hera. |
| Bridal Glow | Normal | Your Boons become Heroic, then lose rarity every 7 encounters. |
| Keen Intuition | Normal | Whenever you use Omega moves while you have 100% Magick, they deal more damage. |
| Family Trade | Normal | Any Sacrifice Boons you choose are stronger. One will be offered as soon as possible. |
| Funeral Pyre | Duo | While you Channel your Omega moves, repeatedly inflict Scorch on nearby foes. |
| Cherished Heirloom | Duo | Most other Keepsakes you equip are stronger this night (if possible). |
| Spiteful Strength | Duo | Your Attacks and Specials deal more damage while not empowered by Boons. |
| Soul Mate | Duo | Foes with Hitch take more damage and are Weak, but only 2 can be afflicted at a time. |
| Sun Worshiper | Duo | In each encounter, the first foe you slay returns to fight for you. |
| Queen’s Ransom | Duo | Give up all your Boons of Zeus. For each one, raise the rarity level of all your Boons of Hera. |
| Golden Rule | Duo | You deal more damage the more Coins you have. |
| Proper Upbringing | Infusion | While you have at least 3 Earth Essence, all your common Boons gain rarity. |
| Brave Face | Legendary | Automatically use Magick to resist up to 50% of any damage. |
Hermes Boons
| Hermes Boons | Boon type | Boon effect |
|---|---|---|
| Saved Breath | Normal | Your Omega Cast uses less Magick. |
| Hard Target | Normal | Most foe’s ranged shots are slower. |
| Quick Buck | Normal | You find Coins in greater quantities. Receive 100 Coins now, plus the bonus. |
| Swift Flourish | Normal | Your Specials are faster. |
| Swift Strike | Normal | Your Attacks are faster. |
| Mean Streak | Normal | Each time you slay a foe, deal more damage for the next 30 seconds. |
| Greater Evasion | Normal | Whenever you are struck, you may Dodge any damage. |
| Nitro Boost | Normal | Your Sprint is 20% faster and gives you a barrier that ignores instances of damage. |
| Midnight Oil | Normal | While your Hex is ready, you move and strike faster. |
| Witty Retort | Normal | Your Hex requires using less Magick before it is ready. |
| Tall Order | Infusion | While you have at least 2 Earth, Water, Air and Fire Essences, you deal more damage. |
| Close Call | Legendary | Gain +1 use of Death Defiance that makes everything else move 90% slower. |
Hephaestus Boons
| Hephaestus Boons | Boon Type | Boon effect |
|---|---|---|
| Volcanic Flourish | Normal | Your Specials occasionally create a blast that deals 400 damage in the area. |
| Anvil Ring | Normal | Your Casts deal damage 3 times in succession but in a smaller area. |
| Fixed Gain | Normal | You take -10% damage and restore some Magick whenever you take damage. |
| Volcanic Strike | Normal | Your Attacks occasionally create a blast that deals 200 damage in the area. |
| Smithy Sprint | Normal | After you Sprint for 1 sec, use 10 Magick to create a blast that deals damage to nearby foes. |
| Uncanny Fortitude | Normal | Gain bonus health based on your Magick limit. |
| Molten Touch | Normal | Your Attacks and Specials deal bonus damage to armor. |
| Mint Condition | Normal | At the start of each Encounter, you are briefly Impervious. |
| Trusty Shield | Normal | After you enter a Location, Prime 30 Magick to gain Armor until the next location. |
| Tough Trade | Normal | If you take damage during your Attacks or Specials, they are stronger if they hit. |
| Heavy Metal | Normal | Your Attacks and Specials deal bonus damage to armor. |
| Furnace Blast | Normal | Your blast effects from Hephaestus also inflict Vent on foes. |
| Room Temperature | Duo | Your blast effects from Hephaestus clear Freeze, so you Freeze foes again right away. |
| Spiteful Strength | Duo | Your Attacks and Specials deal more damage while not empowered by Boons. |
| Soft Caress | Duo | The first time you would take damage each encounter, get health instead. |
| Chain Reaction | Duo | If you use your blast effects from Hephaestus just after they recharge, they fire 2 times. |
| Stellar Slam | Duo | Your blast effects from Hephaestus deal damage in a larger area. |
| Seismic Hammer | Duo | Your Omega Cast occasionally creates a blast that deals 500 damage in the area. |
| Master Conductor | Duo | Your chain-lightning deals more damage per bounce and can bounce to you. |
| Martial Art | Infusion | Your Attack and Special deal more damage for each Earth Essence you have. |
| Fine Tuning | Legendary | Your Aspect of the Nocturnal Arms is even stronger. |
Hestia Boons
| Hestia Boons | Boon type | Boon effect |
|---|---|---|
| Flame Strike | Normal | Your Attacks inflict Scorch. |
| Flame Flourish | Normal | Your Specials inflict Scorch. |
| Hearth Gain | Normal | Rapidly restore Magick but you have -20% health. |
| Soot Sprint | Normal | Your Sprint destroys most ranged shots near you and inflicts Scorch on foes that fired. |
| Controlled Burn | Normal | Your Omega Special also launched a fiery projectile but uses +10 Magick. |
| Smolder Ring | Normal | Your Casts repeatedly inflict Scorch on foes. |
| Glowing Coal | Normal | Hold Cast to aim a fiery projectile that explodes on impact. The binding circle forms there. |
| Burnt Offering | Normal | Gain max health and Magick but give up 1 Boon selected by Hestia. |
| Flammable Coating | Normal | Your Scorch effects deal bonus damage to armor. |
| Fire Extinguisher | Normal | Foes with at least 300 Scorch take a burst of damage that consumes the effect. |
| Natural Gas | Normal | Whenever Scorch-afflicted foes are slain, they damage nearby foes. |
| Spontaneous Combustion | Normal | Your Omega Special inflicts bonus Scorch if foes are unafflicted. |
| Freezer Burn | Duo | Whenever you inflict Freeze, amplify any Scorch effects already on the foe. |
| Funeral Pyre | Duo | While you Channel your Omega moves, repeatedly inflict Scorch on nearby foes. |
| Phoenix Skin | Duo | Give up -100 health. If you do not take or deal damage for 3 seconds, rapidly restore health. |
| Chain Reaction | Duo | If you use your blast effects from Hephaestus just after they recharge, they fire 2 times. |
| Burning Desire | Duo | Up to +12 Lone Shades appear in locations. Sprint into them to launch a fiery blast. |
| Scalding Vapor | Duo | If foes with Slip are struck by fire from Hestia, they are engulfed in Steam. |
| Thermal Dynamics | Duo | Your Blitz effects also inflict Scorch whenever they deal damage. |
| Slow Cooker | Infusion | Your Attacks and Specials gain power for each Fire Essence you have. |
| Pyro Technique | Legendary | Your Scorch effects deal damage faster. |
Poseidon Boons
| Poseidon Boons | Boon type | Boon effect |
|---|---|---|
| Wave Strike | Normal | Your Attacks hit foes with a splash that knocks other foes away. |
| Breaker Sprint | Normal | Your Sprint deals damage on impact and knocks foes away but uses 5 Magick per hit. |
| Fluid Gain | Normal | After you strike foes with your weapon, a spirit bubble may appear. |
| Ocean’s Bounty | Normal | Any Minor Finds and Coins are worth more. |
| Sunken Treasure | Normal | Gain Coins health, and sometimes Ashes and Psyche. |
| Hydraulic Might | Normal | At the start of each encounter, your Attacks and Specials are stronger for 10 seconds. |
| Double up | Normal | Whenever you claim a minor find or similar resource reward, a copy may appear. |
| Wave Flourish | Normal | Your Specials hit foes with a splash that knocks other foes away. |
| Geyser Ring | Normal | Your Omega Casts immediately, dealing damage and knocking foes away. |
| Flood Control | Normal | After you enter a location, Prime 30 Magick to reduce any damage. |
| Crashing Wave | Normal | Whenever your knock-away effects slam foes into barriers, create a blast in the area. |
| Slippery Slope | Normal | Your slash effects from Poseidon also inflict Slip on foes. |
| Island Getaway | Duo | You take less damage from nearby foes. Boons of Aphrodite treat all foes as nearby. |
| Natural Selection | Duo | Location rewards exclude Coins, health and Magick maximum increases. Boons are more likely to be Rare or better. |
| Seismic Hammer | Duo | Your Omega Cast occasionally creates a blast that deals 500 damage in the area. |
| Killer Current | Duo | Your lightning deals more damage to Slip-afflicted foes. |
| Golden Rule | Duo | You deal more damage the more Coins you have. |
| Beach Ball | Duo | Your Sprint creates a watery sphere behind you. After you stop, it surges ahead and bursts. |
| Scalding Vapor | Duo | If foes with Slip are struck by fire from Hestia, they are engulfed in Steam. |
| Water Fitness | Infusion | While you have at least 4 Water Essence, gain health. |
| King Tide | Legendary | Your splash effects from Poseidon are larger and deal bonus damage to Guardians. |
Selene Boons (Gifts of the Moon)
Selene’s Boons usually impact your Hex, a separate combat skill/spell. Once you accept a Gift of the Moon from Selene, you can increase the effectiveness of the Hex’s properties by visiting additional gates with Selene’s symbol . Acquiring additional blessings will lead you to the ‘Path of Stars’ screen where you can upgrade your original Boon choice. These upgrades vary from Normal (white), Bright (blue) and Sublime (purple) rarity, with Sublime being the most powerful.
| Selene Boons | Boon type | Boon effect |
|---|---|---|
| Lunar Ray | Normal | Your Hex fires a beam that deals up to 1200 damage over 3 seconds. |
| Phase Shift | Normal | Your Hex makes everything else move 80% slower for 5 seconds. |
| Twilight Curse | Normal | Your Hex launches a seeking projectile that inflicts Morph on up to 10 susceptible foes. |
| Night Bloom | Normal | Your Hex raises 1 random slain foe from this encounter to fight for you for 12 seconds. |
| Wolf Howl | Normal | Your Hex makes you rise, then crash down in the target area for 200 damage. |
| Moon Water | Normal | Your Hex restores 25 health up to 3 times which reset whenever you use Fountains. |
| Total Eclipse | Normal | Your Hex blasts the target area for 1,000 damage after 4 seconds. |
| Dark Side | Normal | Your Hex turns you into an Impervious living nightmare with her own abilities for 5 seconds. |
Zeus Boons
| Zeus Boons | Boon type | Boon effect |
|---|---|---|
| Heaven Strike | Normal | Your Attacks inflict Blitz. |
| Heaven Flourish | Normal | Your Specials inflict Blitz. |
| Thunder Sprint | Normal | Your Sprint causes nearby foes to be struck by lightning bolts which use 3 Magick each. |
| Storm Ring | Normal | Your Omega Cast also causes lightning bolts to repeatedly strike 1 foe at a time. |
| Ionic Gain | Normal | Gradually restore Magick but your total is reduced by 70%. |
| Static Shock | Normal | After you enter a Location, Prime 50 Magick to make your strikes emit chain lightning. |
| Spirit Surge | Normal | While you have no more than 10 Magick, all foes are occasionally struck by lightning. |
| Lightning Lance | Normal | Hold Cast to aim where the binding circle appears. Foes within are struck by lightning. |
| Divine Vengeance | Normal | After you take damage, your foe is struck by lightning and again 50% of the time. |
| Double Strike | Normal | Your lightning bolt effects may strike 1 more time. |
| Electric Overload | Normal | Whenever your Blitz effects activate, a bolt of chain-lightning fires from the foe. |
| Toasting Fork | Normal | Your Blitz effects deal damage even if they expire without being activated. |
| Apocalyptic Storm | Duo | Your Blitz effects last longer and activate against all Blitz foes at once. |
| Glorious Disaster | Duo | You can Channel +30 Magick into your Omega Cast to repeatedly strike foes with lightning bolts. |
| Thermal Dynamics | Duo | Your Blitz effects also inflict Scorch whenever they deal damage. |
| Killer Current | Duo | Your lightning deals more damage to Slip-afflicted foes. |
| Master Conductor | Duo | Your chain-lightning deals more damage per bounce and can bounce to you. |
| Romantic Spark | Duo | If you Sprint into Blitz-afflicted foes, the effect activates immediately and is stronger. |
| King’s Ransom | Duo | Give up all your Boons of Hera. For each one, raise the rarity level of all your Boons of Zeus. |
| Air Quality | Infusion | While you have at least 5 Air Essence, you can never deal less damage than the limit. |
| Shocking Loss | Legendary | Most foes may be instantly destroyed as soon as they enter the encounter. |
Hades 2 Curses list
You’ll notice that a lot of the Boons mention specific conditions called Curses. These all have unique effects and are usually implemented by a specific God. We’ve offered a list of all Curses below along with the Curse effect and which God usually implements them.
| Curse | Curse effect | God |
|---|---|---|
| Blitz | Afflicted foes get struck by lightning. | Zeus |
| Charm | Causes the afflicted foe to turn against your other foes. | Aphrodite |
| Dark | Vanish for 10 seconds and deal bonus damage. | Hades |
| Daze | Afflicted foes have a chance to deal no damage. | Apollo |
| Dodge | Automatically avoid an instance of damage you would have otherwise taken. | Hermes |
| Freeze | Afflicted foes can become frozen in ice. | Demeter |
| Hex | After using enough Magick while foes are near, invoke the Moon’s might with various abilities. | Selene |
| Hitch | Afflicted foes take the damage dealt to other afflicted foes. | Hera |
| Marked | Afflicted foes have a chance to take critical damage. | Artemis |
| Morph | Afflicted foes turn into harmless critters | Selene |
| Slip | Afflicted foes take more damage and are knocked farther away. | Poseidon |
| Scorch | Applies fire damage to Attacks. | Hestia |
| Vent | After 5 seconds, afflicted foes take a burst of damage. | Hephaestus |
| Weak | Afflicted foes deal less damage. | Aphrodite |
That rounds off our guide to the best Boons in Hades 2. For more Hades 2 tips and tricks , see our guides to the best weapons and all symbol meanings in the game.
Hades II
PC , Nintendo Switch , Nintendo Switch 2
Rock Paper Shotgun is better when you sign in
Sign in and join us on our journey to discover strange and compelling PC games.

All 75 Arc Raiders Blueprints and where to get them
These areas have the highest chance of giving you Blueprints

Image credit:Rock Paper Shotgun/Embark Studios

Looking for more Arc Raiders Blueprints? It’s a special day when you find a Blueprint, as they’re among the most valuable items in Arc Raiders. If you find a Blueprint that you haven’t already found, then you must make sure you hold onto it at all costs, because Blueprints are the key to one of the most important and powerful systems of meta-progression in the game.
This guide aims to be the very best guide on Blueprints you can find, starting with a primer on what exactly they are and how they work in Arc Raiders, before delving into exactly where to get Blueprints and the very best farming spots for you to take in your search.
We’ll also go over how to get Blueprints from other unlikely activities, such as destroying Surveyors and completing specific quests. And you’ll also find the full list of all 75 Blueprints in Arc Raiders on this page (including the newest Blueprints added with the Cold Snap update , such as the Deadline Blueprint and Firework Box Blueprint), giving you all the information you need to expand your own crafting repertoire.
In this guide:
- What are Blueprints in Arc Raiders?
- Full Blueprint list: All crafting recipes
- Where to find Blueprints in Arc Raiders Blueprints obtained from quests Blueprints obtained from Trials Best Blueprint farming locations

What are Blueprints in Arc Raiders?
Blueprints in Arc Raiders are special items which, if you manage to extract with them, you can expend to permanently unlock a new crafting recipe in your Workshop. If you manage to extract from a raid with an Anvil Blueprint, for example, you can unlock the ability to craft your very own Anvil Pistol, as many times as you like (as long as you have the crafting materials).
To use a Blueprint, simply open your Inventory while in the lobby, then right-click on the Blueprint and click “Learn And Consume” . This will permanently unlock the recipe for that item in your Workshop. As of the Stella Montis update, there are allegedly 75 different Blueprints to unlock - although only 68 are confirmed to be in the game so far. You can see all the Blueprints you’ve found and unlocked by going to the Workshop menu, and hitting “R” to bring up the Blueprint screen.
It’s possible to find duplicates of past Blueprints you’ve already unlocked. If you find these, then you can either sell them, or - if you like to play with friends - you can take it into a match and gift it to your friend so they can unlock that recipe for themselves. Another option is to keep hold of them until the time comes to donate them to the Expedition.
Full Blueprint list: All crafting recipes
Below is the full list of all the Blueprints that are currently available to find in Arc Raiders, and the crafting recipe required for each item:
| Blueprint | Type | Recipe | Crafted At |
|---|---|---|---|
| Bettina | Weapon | 3x Advanced Mechanical Components 3x Heavy Gun Parts 3x Canister | Gunsmith 3 |
| Blue Light Stick | Quick Use | 3x Chemicals | Utility Station 1 |
| Aphelion | Weapon | 3x Magnetic Accelerator 3x Complex Gun Parts 1x Matriarch Reactor | Gunsmith 3 |
| Combat Mk. 3 (Flanking) | Augment | 2x Advanced Electrical Components 3x Processor | Gear Bench 3 |
| Combat Mk. 3 (Aggressive) | Augment | 2x Advanced Electrical Components 3x Processor | Gear Bench 3 |
| Complex Gun Parts | Material | 2x Light Gun Parts 2x Medium Gun Parts 2x Heavy Gun Parts | Refiner 3 |
| Fireworks Box | Quick Use | 1x Explosive Compound 3x Pop Trigger | Explosives Station 2 |
| Gas Mine | Mine | 4x Chemicals 2x Rubber Parts | Explosives Station 1 |
| Green Light Stick | Quick Use | 3x Chemicals | Utility Station 1 |
| Pulse Mine | Mine | 1x Crude Explosives 1x Wires | Explosives Station 1 |
| Seeker Grenade | Grenade | 1x Crude Explosives 2x ARC Alloy | Explosives Station 1 |
| Looting Mk. 3 (Survivor) | Augment | 2x Advanced Electrical Components 3x Processor | Gear Bench 3 |
| Angled Grip II | Mod | 2x Mechanical Components 3x Duct Tape | Gunsmith 2 |
| Angled Grip III | Mod | 2x Mod Components 5x Duct Tape | Gunsmith 3 |
| Hullcracker | Weapon | 1x Magnetic Accelerator 3x Heavy Gun Parts 1x Exodus Modules | Gunsmith 3 |
| Launcher Ammo | Ammo | 5x Metal Parts 1x Crude Explosives | Workbench 1 |
| Anvil | Weapon | 5x Mechanical Components 5x Simple Gun Parts | Gunsmith 2 |
| Anvil Splitter | Mod | 2x Mod Components 3x Processor | Gunsmith 3 |
| ??? | ??? | ??? | ??? |
| Barricade Kit | Quick Use | 1x Mechanical Components | Utility Station 2 |
| Blaze Grenade | Grenade | 1x Explosive Compound 2x Oil | Explosives Station 3 |
| Bobcat | Weapon | 3x Advanced Mechanical Components 3x Light Gun Parts | Gunsmith 3 |
| Osprey | Weapon | 2x Advanced Mechanical Components 3x Medium Gun Parts 7x Wires | Gunsmith 3 |
| Burletta | Weapon | 3x Mechanical Components 3x Simple Gun Parts | Gunsmith 1 |
| Compensator II | Mod | 2x Mechanical Components 4x Wires | Gunsmith 2 |
| Compensator III | Mod | 2x Mod Components 8x Wires | Gunsmith 3 |
| Defibrillator | Quick Use | 9x Plastic Parts 1x Moss | Medical Lab 2 |
| ??? | ??? | ??? | ??? |
| Equalizer | Weapon | 3x Magnetic Accelerator 3x Complex Gun Parts 1x Queen Reactor | Gunsmith 3 |
| Extended Barrel | Mod | 2x Mod Components 8x Wires | Gunsmith 3 |
| Extended Light Mag II | Mod | 2x Mechanical Components 3x Steel Spring | Gunsmith 2 |
| Extended Light Mag III | Mod | 2x Mod Components 5x Steel Spring | Gunsmith 3 |
| Extended Medium Mag II | Mod | 2x Mechanical Components 3x Steel Spring | Gunsmith 2 |
| Extended Medium Mag III | Mod | 2x Mod Components 5x Steel Spring | Gunsmith 3 |
| Extended Shotgun Mag II | Mod | 2x Mechanical Components 3x Steel Spring | Gunsmith 2 |
| Extended Shotgun Mag III | Mod | 2x Mod Components 5x Steel Spring | Gunsmith 3 |
| Remote Raider Flare | Quick Use | 2x Chemicals 4x Rubber Parts | Utility Station 1 |
| Heavy Gun Parts | Material | 4x Simple Gun Parts | Refiner 2 |
| Venator | Weapon | 2x Advanced Mechanical Components 3x Medium Gun Parts 5x Magnet | Gunsmith 3 |
| Il Toro | Weapon | 5x Mechanical Components 6x Simple Gun Parts | Gunsmith 1 |
| Jolt Mine | Mine | 1x Electrical Components 1x Battery | Explosives Station 2 |
| Explosive Mine | Mine | 1x Explosive Compound 1x Sensors | Explosives Station 3 |
| Jupiter | Weapon | 3x Magnetic Accelerator 3x Complex Gun Parts 1x Queen Reactor | Gunsmith 3 |
| Light Gun Parts | Material | 4x Simple Gun Parts | Refiner 2 |
| Lightweight Stock | Mod | 2x Mod Components 5x Duct Tape | Gunsmith 3 |
| Lure Grenade | Grenade | 1x Speaker Component 1x Electrical Components | Utility Station 2 |
| Medium Gun Parts | Material | 4x Simple Gun Parts | Refiner 2 |
| Torrente | Weapon | 2x Advanced Mechanical Components 3x Medium Gun Parts 6x Steel Spring | Gunsmith 3 |
| Muzzle Brake II | Mod | 2x Mechanical Components 4x Wires | Gunsmith 2 |
| Muzzle Brake III | Mod | 2x Mod Components 8x Wires | Gunsmith 3 |
| Padded Stock | Mod | 2x Mod Components 5x Duct Tape | Gunsmith 3 |
| Shotgun Choke II | Mod | 2x Mechanical Components 4x Wires | Gunsmith 2 |
| Shotgun Choke III | Mod | 2x Mod Components 8x Wires | Gunsmith 3 |
| Shotgun Silencer | Mod | 2x Mod Components 8x Wires | Gunsmith 3 |
| Showstopper | Grenade | 1x Advanced Electrical Components 1x Voltage Converter | Explosives Station 3 |
| Silencer I | Mod | 2x Mechanical Components 4x Wires | Gunsmith 2 |
| Silencer II | Mod | 2x Mod Components 8x Wires | Gunsmith 3 |
| Snap Hook | Quick Use | 2x Power Rod 3x Rope 1x Exodus Modules | Utility Station 3 |
| Stable Stock II | Mod | 2x Mechanical Components 3x Duct Tape | Gunsmith 2 |
| Stable Stock III | Mod | 2x Mod Components 5x Duct Tape | Gunsmith 3 |
| Tagging Grenade | Grenade | 1x Electrical Components 1x Sensors | Utility Station 3 |
| Tempest | Weapon | 3x Advanced Mechanical Components 3x Medium Gun Parts 3x Canister | Gunsmith 3 |
| Trigger Nade | Grenade | 2x Crude Explosives 1x Processor | Explosives Station 2 |
| Vertical Grip II | Mod | 2x Mechanical Components 3x Duct Tape | Gunsmith 2 |
| Vertical Grip III | Mod | 2x Mod Components 5x Duct Tape | Gunsmith 3 |
| Vita Shot | Quick Use | 2x Antiseptic 1x Syringe | Medical Lab 3 |
| Vita Spray | Quick Use | 3x Antiseptic 1x Canister | Medical Lab 3 |
| Vulcano | Weapon | 1x Magnetic Accelerator 3x Heavy Gun Parts 1x Exodus Modules | Gunsmith 3 |
| Wolfpack | Grenade | 2x Explosive Compound 2x Sensors | Explosives Station 3 |
| Red Light Stick | Quick Use | 3x Chemicals | Utility Station 1 |
| Smoke Grenade | Grenade | 14x Chemicals 1x Canister | Utility Station 2 |
| Deadline | Mine | 3x Explosive Compound 2x ARC Circuitry | Explosives Station 3 |
| Trailblazer | Grenade | 1x Explosive Compound 1x Synthesized Fuel | Explosives Station 3 |
| Tactical Mk. 3 (Defensive) | Augment | 2x Advanced Electrical Components 3x Processor | Gear Bench 3 |
| Tactical Mk. 3 (Healing) | Augment | 2x Advanced Electrical Components 3x Processor | Gear Bench 3 |
| Yellow Light Stick | Quick Use | 3x Chemicals | Utility Station 1 |
Note: The missing Blueprints in this list likely have not actually been added to the game at the time of writing, because none of the playerbase has managed to find any of them. As they are added to the game, I will update this page with the most relevant information so you know exactly how to get all 75 Arc Raiders Blueprints.
Where to find Blueprints in Arc Raiders
Below is a list of all containers, modifiers, and events which maximise your chances of finding Blueprints:
- Certain quests reward you with specific Blueprints .
- Completing Trials has a high chance of offering Blueprints as rewards.
- Surveyors have a decent chance of dropping Blueprints on death.
- High loot value areas tend to have a greater chance of spawning Blueprints.
- Night Raids and Storms may increase rare Blueprint spawn chances in containers.
- Containers with higher numbers of items may have a higher tendency to spawn Blueprints. As a result, Blue Gate (which has many “large” containers containing multiple items) may give you a higher chance of spawning Blueprints.
- Raider containers (Raider Caches, Weapon Boxes, Medical Bags, Grenade Tubes) have increased Blueprint drop rates. As a result, the Uncovered Caches event gives you a high chance of finding Blueprints.
- Security Lockers have a higher than average chance of containing Blueprints.
- Certain Blueprints only seem to spawn under specific circumstances: Tempest Blueprint only spawns during Night Raid events. Vulcano Blueprint only spawns during Hidden Bunker events. Jupiter and Equaliser Blueprints only spawn during Harvester events.

Raider Caches, Weapon Boxes, and other raider-oriented container types have a good chance of offering Blueprints. |Image credit:Rock Paper Shotgun/Embark Studios
Blueprints have a very low chance of spawning in any container in Arc Raiders, around 1-2% on average. However, there is a higher chance of finding Blueprints in particular container types. Specifically, you can find more Blueprints in Raider containers and security lockers.
Beyond this, if you’re looking for Blueprints you should focus on regions of the map which are marked as having particularly high-value loot. Areas such as the Control Tower in Dam Battlegrounds, the Arrival and Departure Buildings in Spaceport, and Pilgrim’s Peak in Blue Gate all have a better-than-average chance of spawning Blueprints somewhere amongst all their containers. Night Raids and Electromagnetic Storm events also increase the drop chances of certain Blueprints .
In addition to these containers, you can often loot Blueprints from destroyed Surveyors - the largest of the rolling ball ARC. Surveyors are more commonly found on the later maps - Spaceport and Blue Gate - and if one spawns in your match, you’ll likely see it by the blue laser beam that it casts into the sky while “surveying”.
Surveyors are quite well-armoured and will very speedily run away from you once it notices you, but if you can take one down then make sure you loot all its parts for a chance of obtaining certain unusual Blueprints.
Blueprints obtained from quests
One way in which you can get Blueprints is by completing certain quests for the vendors in Speranza. Some quests will reward you with a specific item Blueprint upon completion, so as long as you work through all the quests in Arc Raiders, you are guaranteed those Blueprints.
Here is the full list of all Blueprints you can get from quest rewards:
- Trigger Nade Blueprint: Rewarded after completing “Sparks Fly”.
- Lure Grenade Blueprint: Rewarded after completing “Greasing Her Palms”.
- Burletta Blueprint: Rewarded after completing “Industrial Espionage”.
- Hullcracker Blueprint (and Launcher Ammo Blueprint): Rewarded after completing “The Major’s Footlocker”.
Alas, that’s only 4 Blueprints out of a total of 75 to unlock, so for the vast majority you will need to find them yourself during a raid. If you’re intent on farming Blueprints, then it’s best to equip yourself with cheap gear in case you lose it, but don’t use a free loadout because then you won’t get a safe pocket to stash any new Blueprint you find. No pain in Arc Raiders is sharper than failing to extract with a new Blueprint you’ve been after for a dozen hours already.

One of the best ways to get Blueprints is by hitting three stars on all five Trials every week. |Image credit:Rock Paper Shotgun/Embark Studios
Blueprints obtained from Trials
One of the very best ways to get Blueprints is as rewards for completing Trials in Arc Raiders. Trials are unlocked from Level 15 onwards, and allow you to earn rewards by focusing on certain tasks over the course of several raids. For example, one Trial might task you with dealing damage to Hornets, while another might challenge you to loot Supply Drops.
Trials refresh on a weekly basis, with a new week bringing five new Trials. Each Trial can offer up to three rewards after passing certain score milestones, and it’s possible to receive very high level loot from these reward crates - including Blueprints. So if you want to unlock as many Blueprints as possible, you should make a point of completing as many Trials as possible each week.
Best Blueprint farming locations
The very best way to get Blueprints is to frequent specific areas of the maps which combine high-tier loot pools with the right types of containers to search. Here are my recommendations for where to find Blueprints on every map, so you can always keep the search going for new crafting recipes to unlock.

Image credit:Rock Paper Shotgun/Embark Studios
Dam Battlegrounds
The best places to farm Blueprints on Dam Battlegrounds are the Control Tower, Power Generation Complex, Ruby Residence, and Pale Apartments . The first two regions, despite only being marked on the map as mid-tier loot, contain a phenomenal number of containers to loot. The Control Tower can also contain a couple of high-tier Security Lockers - though of course, you’ll need to have unlocked the Security Breach skill at the end of the Survival tree.
There’s also a lot of reporting amongst the playerbase that the Residential areas in the top-left of the map - Pale Apartments and Ruby Residence - give you a comparatively strong chance of finding Blueprints. Considering their size, there’s a high density of containers to loot in both locations, and they also have the benefit of being fairly out of the way. So you’re more likely to have all the containers to yourself.
Buried City
The best Blueprint farming locations on Buried City are the Santa Maria Houses, Grandioso Apartments, Town Hall, and the various buildings of the New District . Grandioso Apartments has a lower number of containers than the rest, but a high chance of spawning weapon cases - which have good Blueprint drop rates. The others are high-tier loot areas, with plenty of lootable containers - including Security Lockers.
Spaceport
The best places to find Blueprints on Spaceport are the Arrival and Departure Buildings, as well as Control Tower A6 and the Launch Towers . All these areas are labelled as high-value loot regions, and many of them are also very handily connected to one another by the Spaceport wall, which you can use to quickly run from one area to the next. At the tops of most of these buildings you’ll find at least one Security Locker, so this is an excellent farming route for players looking to find Blueprints.
The downside to looting Blueprints on Spaceport is that all these areas are hotly contested, particularly in Duos and Squads. You’ll need to be very focused and fast in order to complete the full farming route.

Image credit:Rock Paper Shotgun/Embark Studios
Blue Gate
Blue Gate tends to have a good chance of dropping Blueprints, potentially because it generally has a high number of containers which can hold lots of items; so there’s a higher chance of a Blueprint spawning in each container. In my experience, the best Blueprint farming spots on Blue Gate are Pilgrim’s Peak, Raider’s Refuge, the Ancient Fort, and the Underground Complex beneath the Warehouse .
All of these areas contain a wealth of containers to loot. Raider’s Refuge has less to loot, but the majority of the containers in and around the Refuge are raider containers, which have a high chance of containing Blueprints - particularly during major events.
Stella Montis
On the whole, Stella Montis seems to have a very low drop rate for Blueprints (though a high chance of dropping other high-tier loot). If you do want to try farming Blueprints on this map, the best places to find Blueprints in Stella Montis are Medical Research, Assembly Workshop, and the Business Center . These areas have the highest density of containers to loot on the map.
In addition to this, the Western Tunnel has a few different Security Lockers to loot, so while there’s very little to loot elsewhere in this area of the map, it’s worth hitting those Security Lockers if you spawn there at the start of a match.
That wraps up this primer on how to get all the Blueprints in Arc Raiders as quickly as possible. With the Expedition system constantly resetting a large number of players’ Blueprints, it’s more important than ever to have the most up-to-date information on where to find all these Blueprints.
While you’re here, be sure to check out our Arc Raiders best guns tier list , as well as our primers on the best skills to unlock and all the different Field Depot locations on every map.

ARC Raiders
PS5 , Xbox Series X/S , PC
Rock Paper Shotgun is better when you sign in
Sign in and join us on our journey to discover strange and compelling PC games.
