Avowed Beginner’s Guide: 10 tips for new players
10 vital tips on everything from casting magic to multiclassing

Image credit:Rock Paper Shotgun/Obsidian

Looking for some beginner’s tips for Avowed? Avowed , an action-focused spin-off of the Pillars of Eternity series, is Obsidian’s latest RPG , and it’s set in a beautiful world of magic and mystery known as the Living Lands. Players will take on the role of a godlike Envoy, a representative of the Aedyr Empire sent to investigate a plague known as the Dreamscourge. Defined by hallucinations and some mushroom-sprouting body horror, the Dreamscourge is spreading throughout the Living Lands’ frontier, and it’ll take dozens of hours of exploration and a little bit of steel and gunpowder to find the sickness’ source.
Avowed features a giant world with a fair amount of character customisation at your disposal. If you’re just diving into the game and feeling overwhelmed at the possibilities, this beginner’s guide will give you 10 tips to make the first hours of Avowed as smooth as possible . Good luck out there, Envoy - you’re going to need it.
You can multiclass early on

I like a mix of Ranger and Wizard skills - soak ’em up with critical hits, then knock ’em down with elemental damage. |Image credit:Rock Paper Shotgun/Obsidian
Avowed presents you with three character classes - Fighter, Ranger, and Wizard - and each has its own skill tree. These classes are what you might expect if you’ve played an RPG before, with Fighters good at tankiness and strength, Rangers specialising in ranged combat and mobility, and Wizards excelling at magic. But you needn’t lock yourself into a singular class, as Avowed lets you freely choose skills from whichever skill tree you prefer, and respeccing is a snap that only requires 100 gold the first time you do it, and 250 every time afterwards .
From the getgo, I quickly settled on making my Envoy into a Ranger/Wizard multiclass. Even if you don’t normally gravitate towards spells in RPGs, I’d recommend investing a little in the magic route, which takes me to my next point…
Magic is darn useful
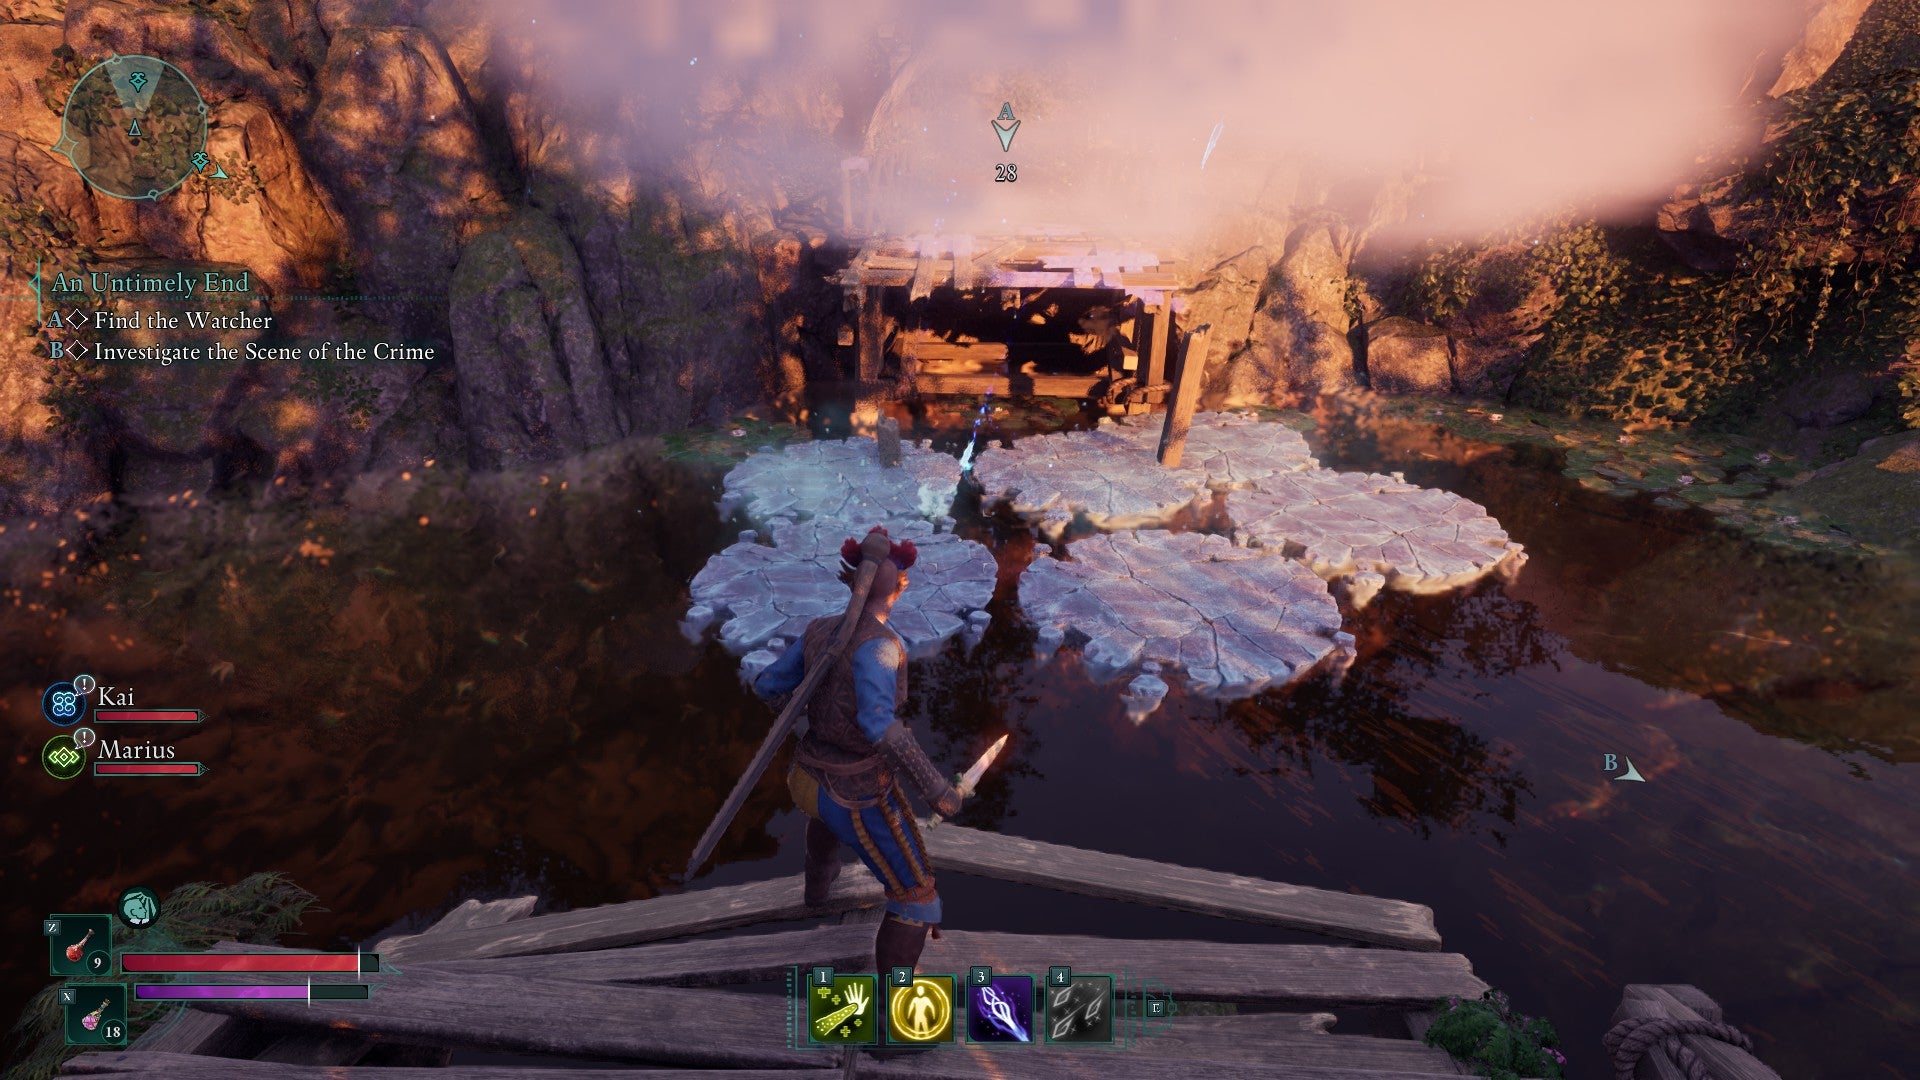
The number of times an ice spell has let me cross a pit, I can’t actually count. |Image credit:Rock Paper Shotgun/Obsidian
Magic in Avowed feels essential in a manner that stands out from other RPGs. You cast spells via grimoires, and you can dual wield two grimoires for double the spell shenanigans, or equip a melee weapon in one hand and your book in the other. Spellcasting in the midst of a fight is fast and furious, and you’ll have to juggle cooldowns and keep an eye on your Essence meter, which is the equivalent of Mana. But magic feels fun and varied in a way that a pure melee build isn’t .
Spellcasting is also important for traversing the world . You’ll come across brambles that block your way in dungeons and watery pits that you won’t be able to jump, for instance. But magic fixes this - cast a Fireball spell to burn the brambles, and cast Chill Blades to summon icicles to create frost platforms to walk across. While there are other ways to get around not having these spells (such as grenades which cause similar fire/frost effects), having magic makes things ten times easier .
Fast travel is a snap
You can thankfully fast travel from anywhere, not just from other travel beacons. |Image credit:Rock Paper Shotgun/Obsidian
Avowed boasts a lot of user-friendly features, such as easy respeccing, the ability to transmogrify your armour, and perhaps most important of all, simple fast travel. You’ll run across fast travel beacons with great regularity once you reach the first region of the Living Lands, known as Dawnshore. They always look like stone torch-holders with purple flames radiating from the top. Once you’ve encountered a fast travel beacon, it’ll appear as an icon on your map. You can fast travel between beacons simply by clicking on their icons - and you can also travel between your party camps, which also appear as map icons !
Movement is key in battle
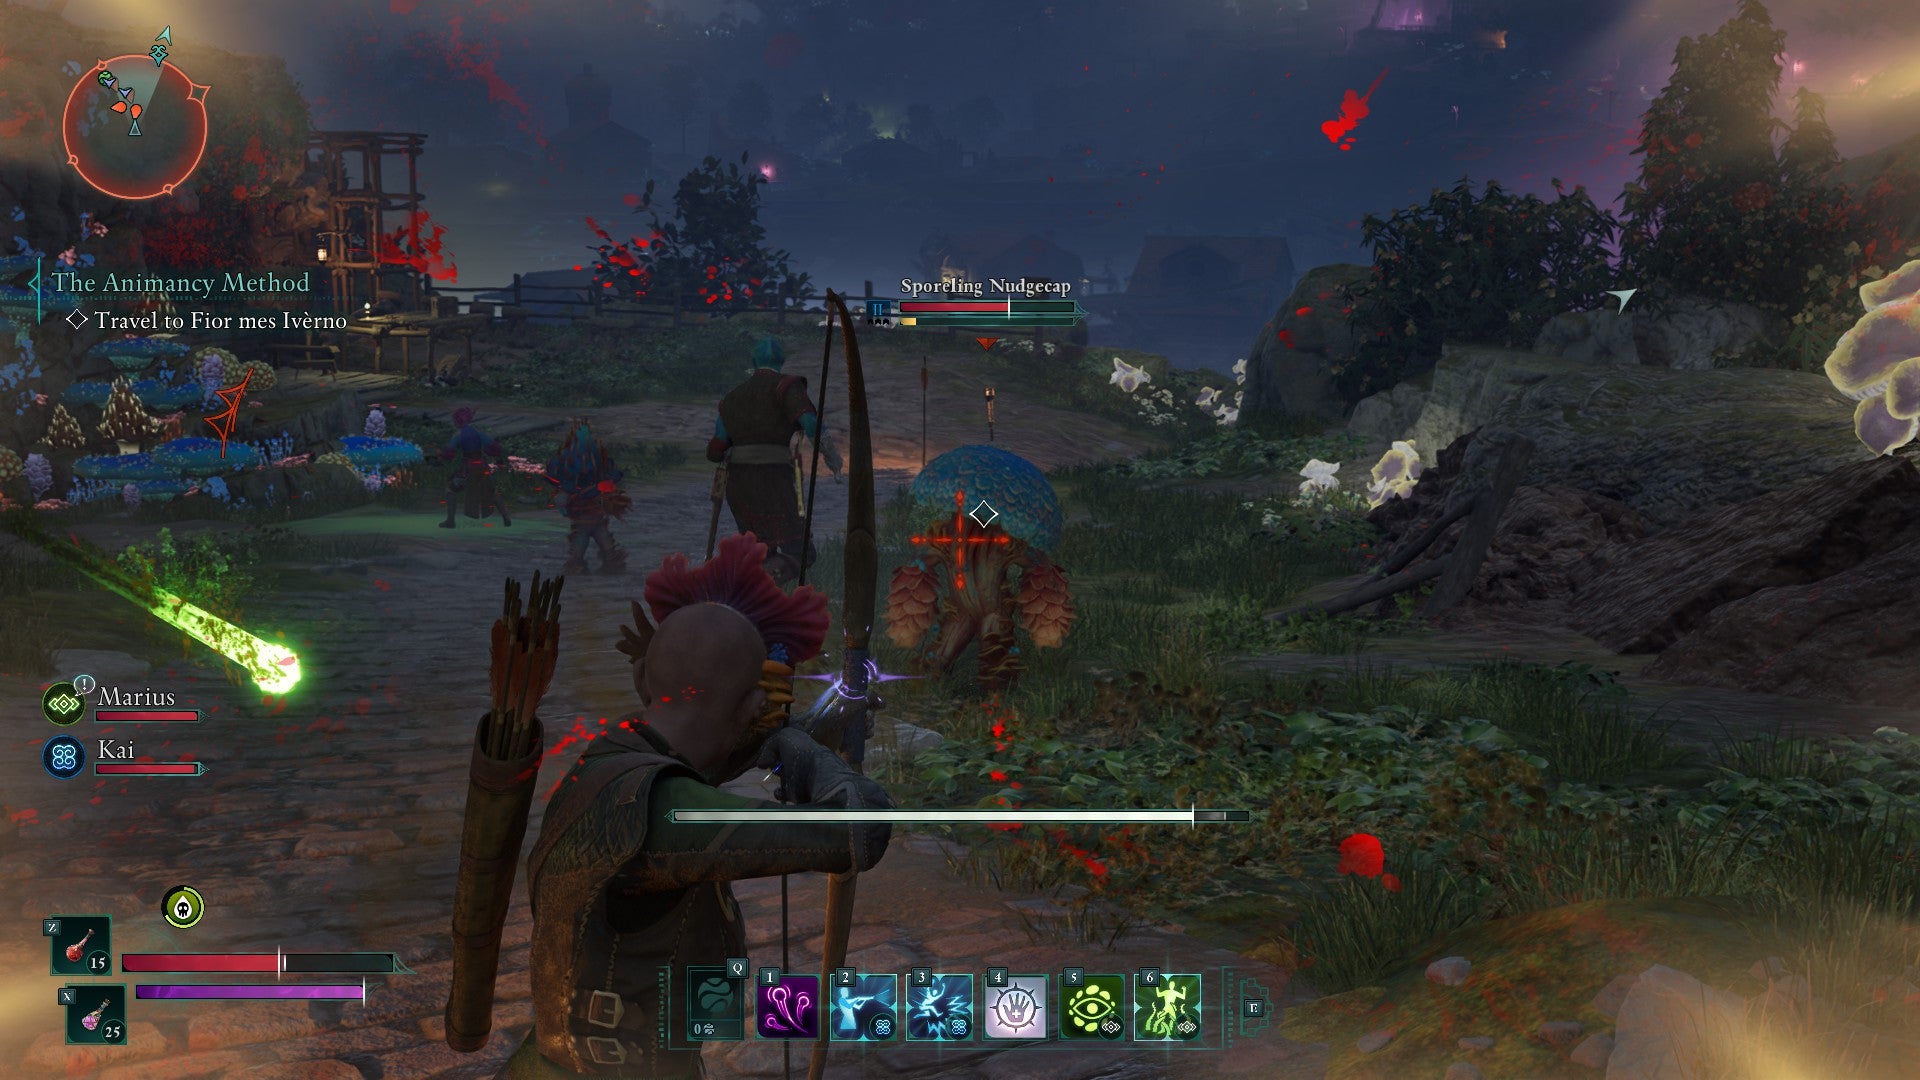
That green missile is about to hit me because I’m not moving very well in this screenshot, alas. |Image credit:Rock Paper Shotgun/Obsidian
If you’re concerned with survivability in combat, stay on your toes. Avowed is an action RPG for a reason, and its fast-paced gameplay is a far cry from the slower, real-time with pause combat that was in the Pillars of Eternity games. Be prepared to jump around to dodge attacks and enemy AoE abilities, which are telegraphed via red auras, and be aware that this athleticism is going to make your Stamina meter drop.
For those of you playing as a ranged Envoy, movement is extremely imporant, as lining up your shots requires you to pay attention to the terrain of the battlefield while targeting enemy weak points. It’s entirely possible to let your companions soak up melee while you duck behind a pair of rocks to deliver headshots - just be aware that foes might sneak up behind you for a surprise stab as you do so.
If you are having trouble in combat with the speedy movement, you can always open up the game’s radial menu , which is how you access items and spells. This slows down time and acts as a pause feature of sorts. Use the radial menu to give yourself a breather and to get out of scrapes .
Use your companions’ abilities in combat
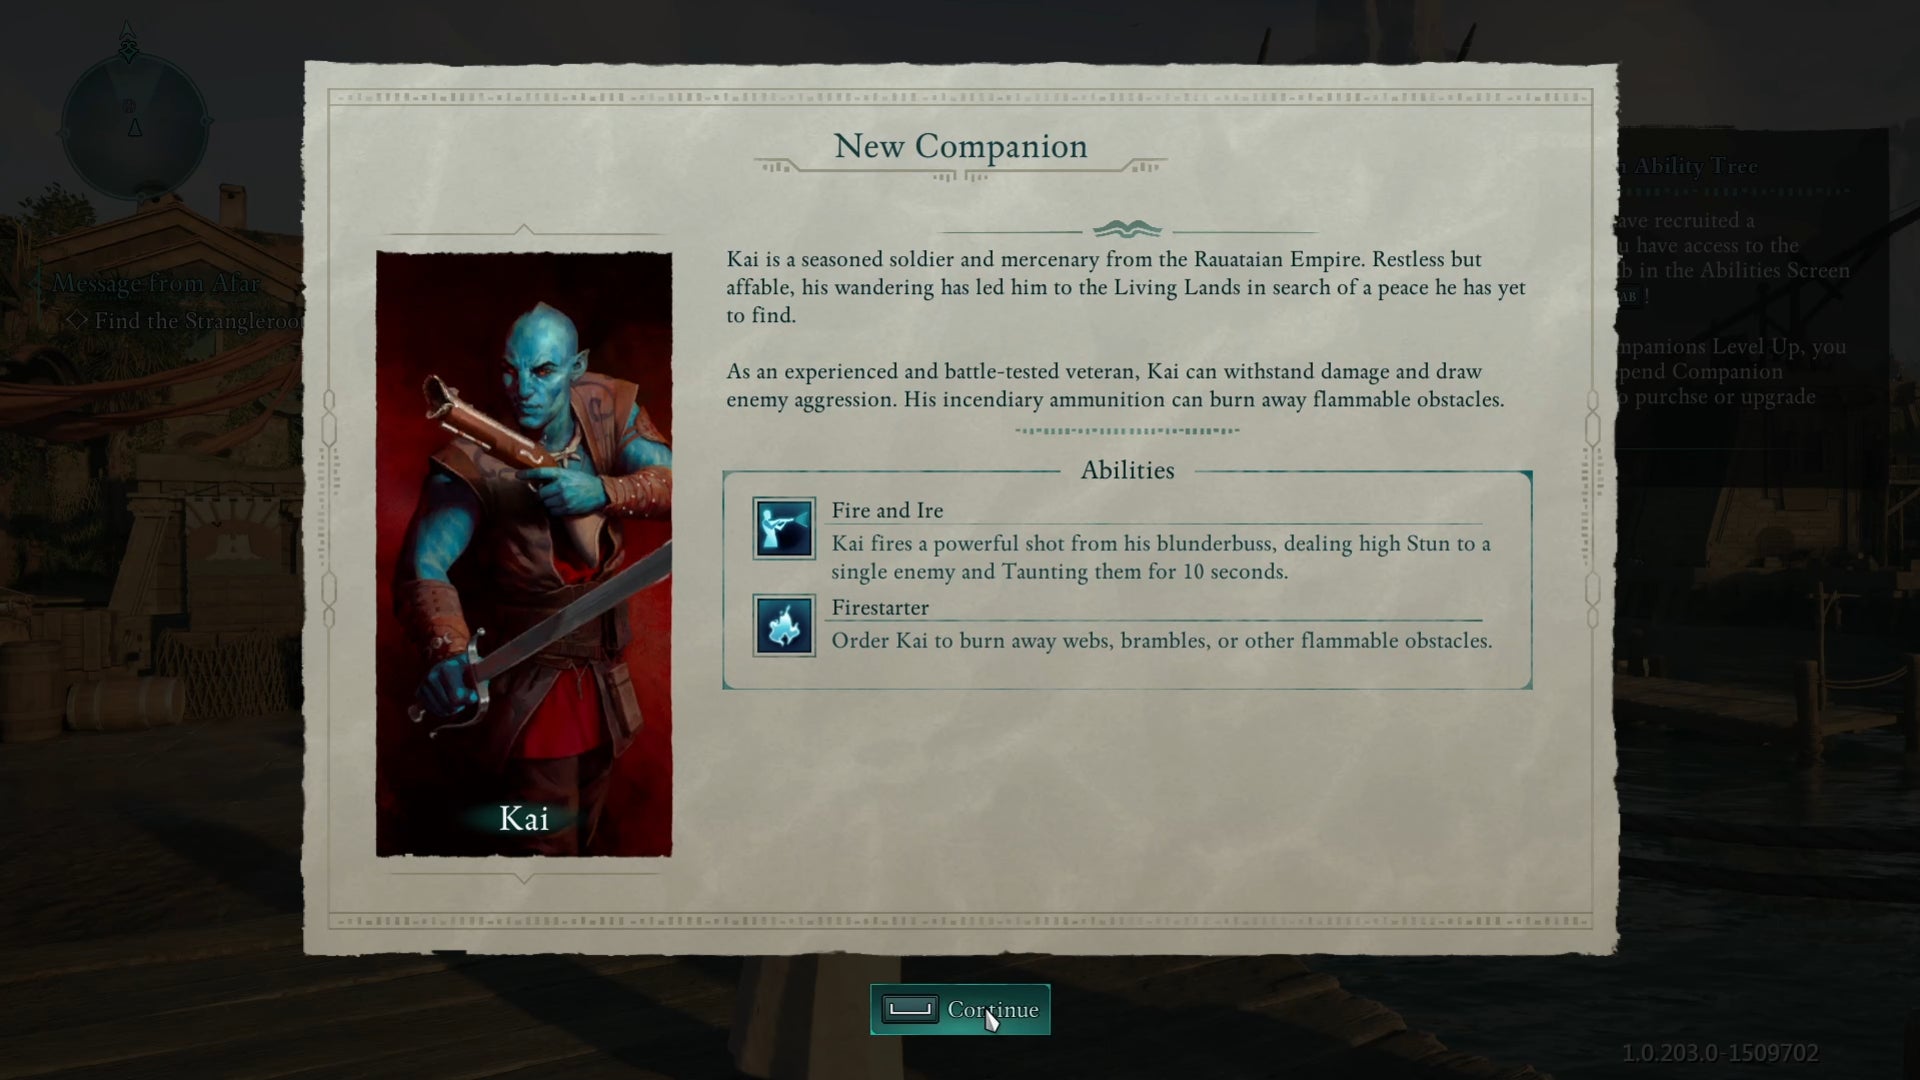
Kai is the first of four, and his melee potential will be a nice assist in Avowed’s early hours. |Image credit:Rock Paper Shotgun/Obsidian
Avowed features four companions, and they each have talents that correspond with one of the game’s three classes. Kai, your first buddy, is a Fighter. You’ll next meet Marius the Ranger and then Yatzli and Giatta, who are both Wizards. You can have two companions at once, and you can level up their respective abilities as you see fit. Their abilities will appear on your radial menu for activation whenever you like.
Get started by experimenting with Kai’s skillset as soon as possible. He’s a hardy fish-skinned fellow, and his Fire and Ice ability fires a blunderbuss shot that can stun a monster in their tracks. Use this to soften up foes for your own attacks, and follow this approach with all companion skills to find your own synergy combos. I’d recommend maxing out two preferred abilities on each companion’s skill tree as soon as you can .
Don’t buy too much Common gear
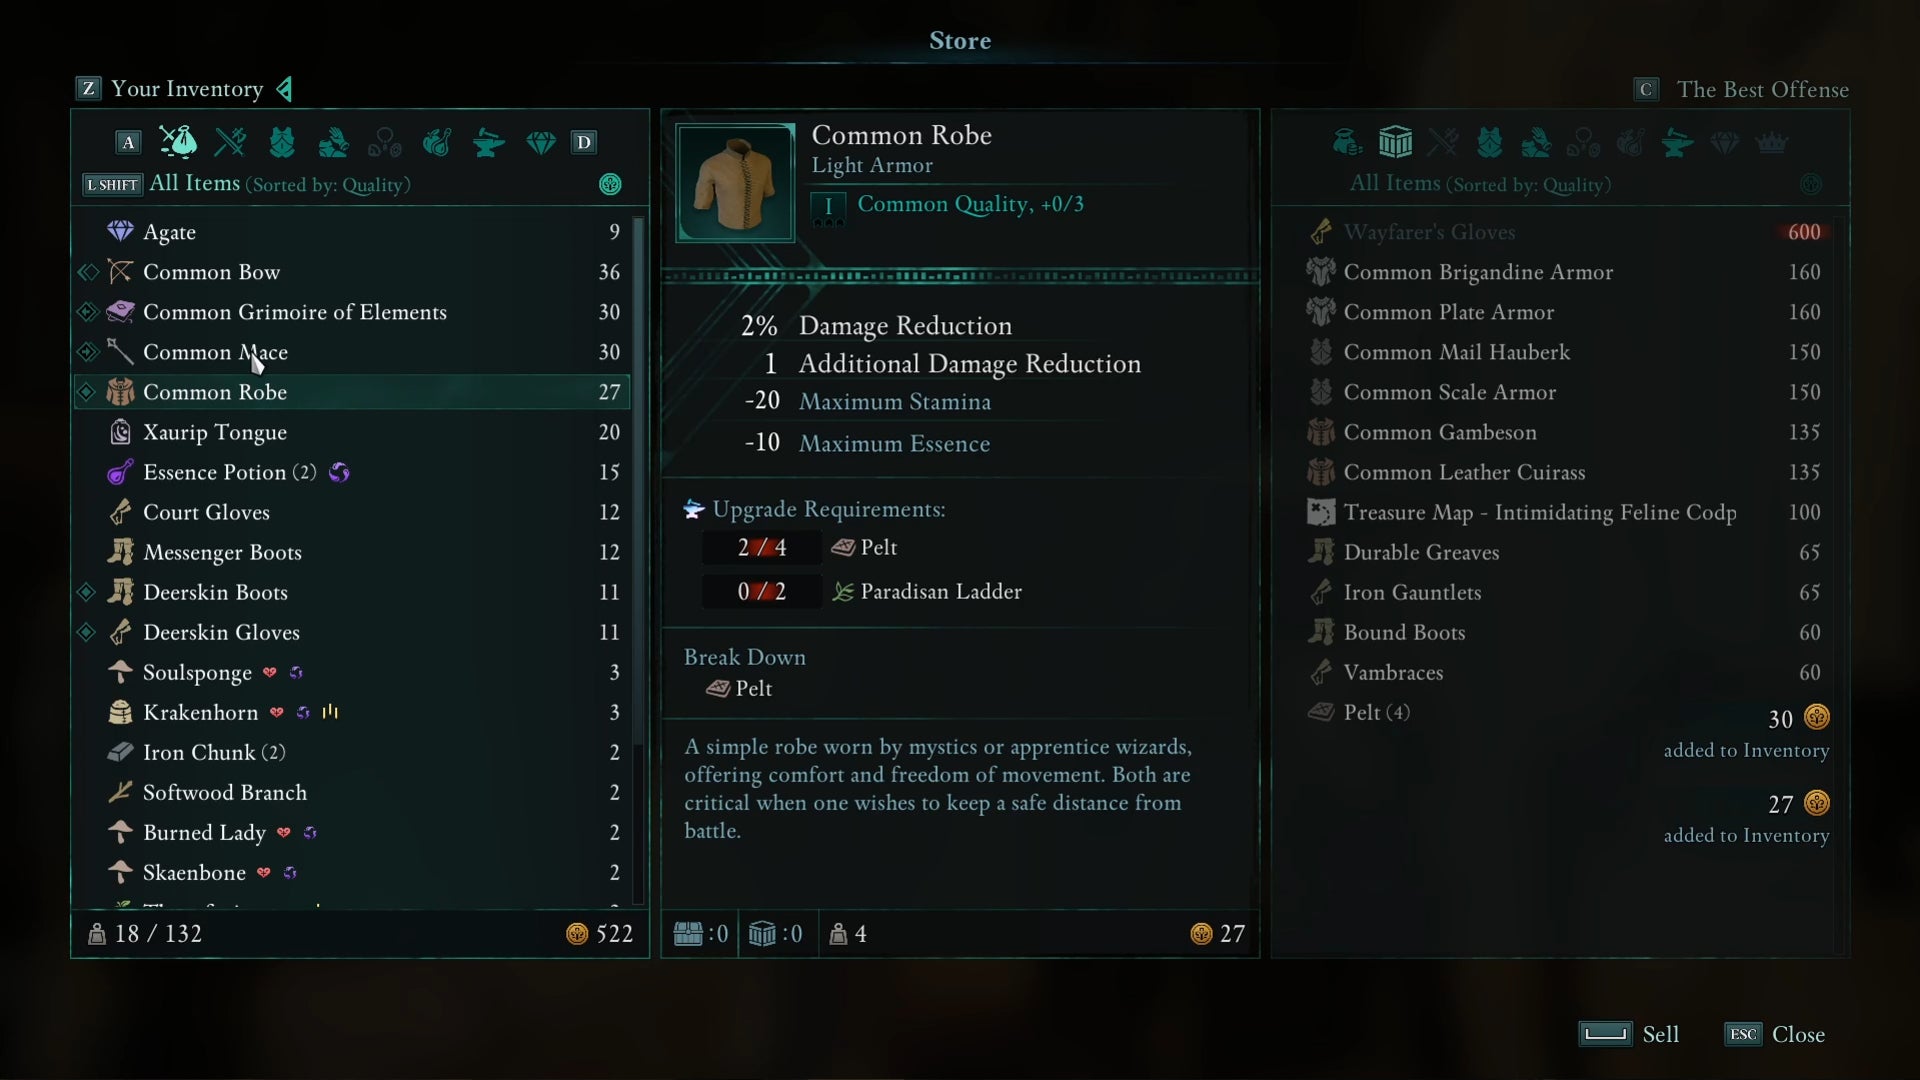
Most of this stuff isn’t worth it after you’ve progressed more than a few hours into the game. |Image credit:Rock Paper Shotgun/Obsidian
Item rarity in Avowed matters, and Common is the lowest tier when it comes to weapons and armour, with Fine, Exceptional, Superb, and Legendary rising in rank. Each tier has a base level and three tiers of improvement.
You’ll find shops selling Common gear as soon as you reach Claviger’s Landing, a docks area that opens up after Avowed’s first 45 minutes. I’d resist the urge to spend too much of your hard-earned coin on Common stuff, because you’re going to be picking it up later after defeating monsters and opening chests. As a rule of thumb, it’s only worth purchasing items from vendors if they’re of Fine quality or above .
Loot everything
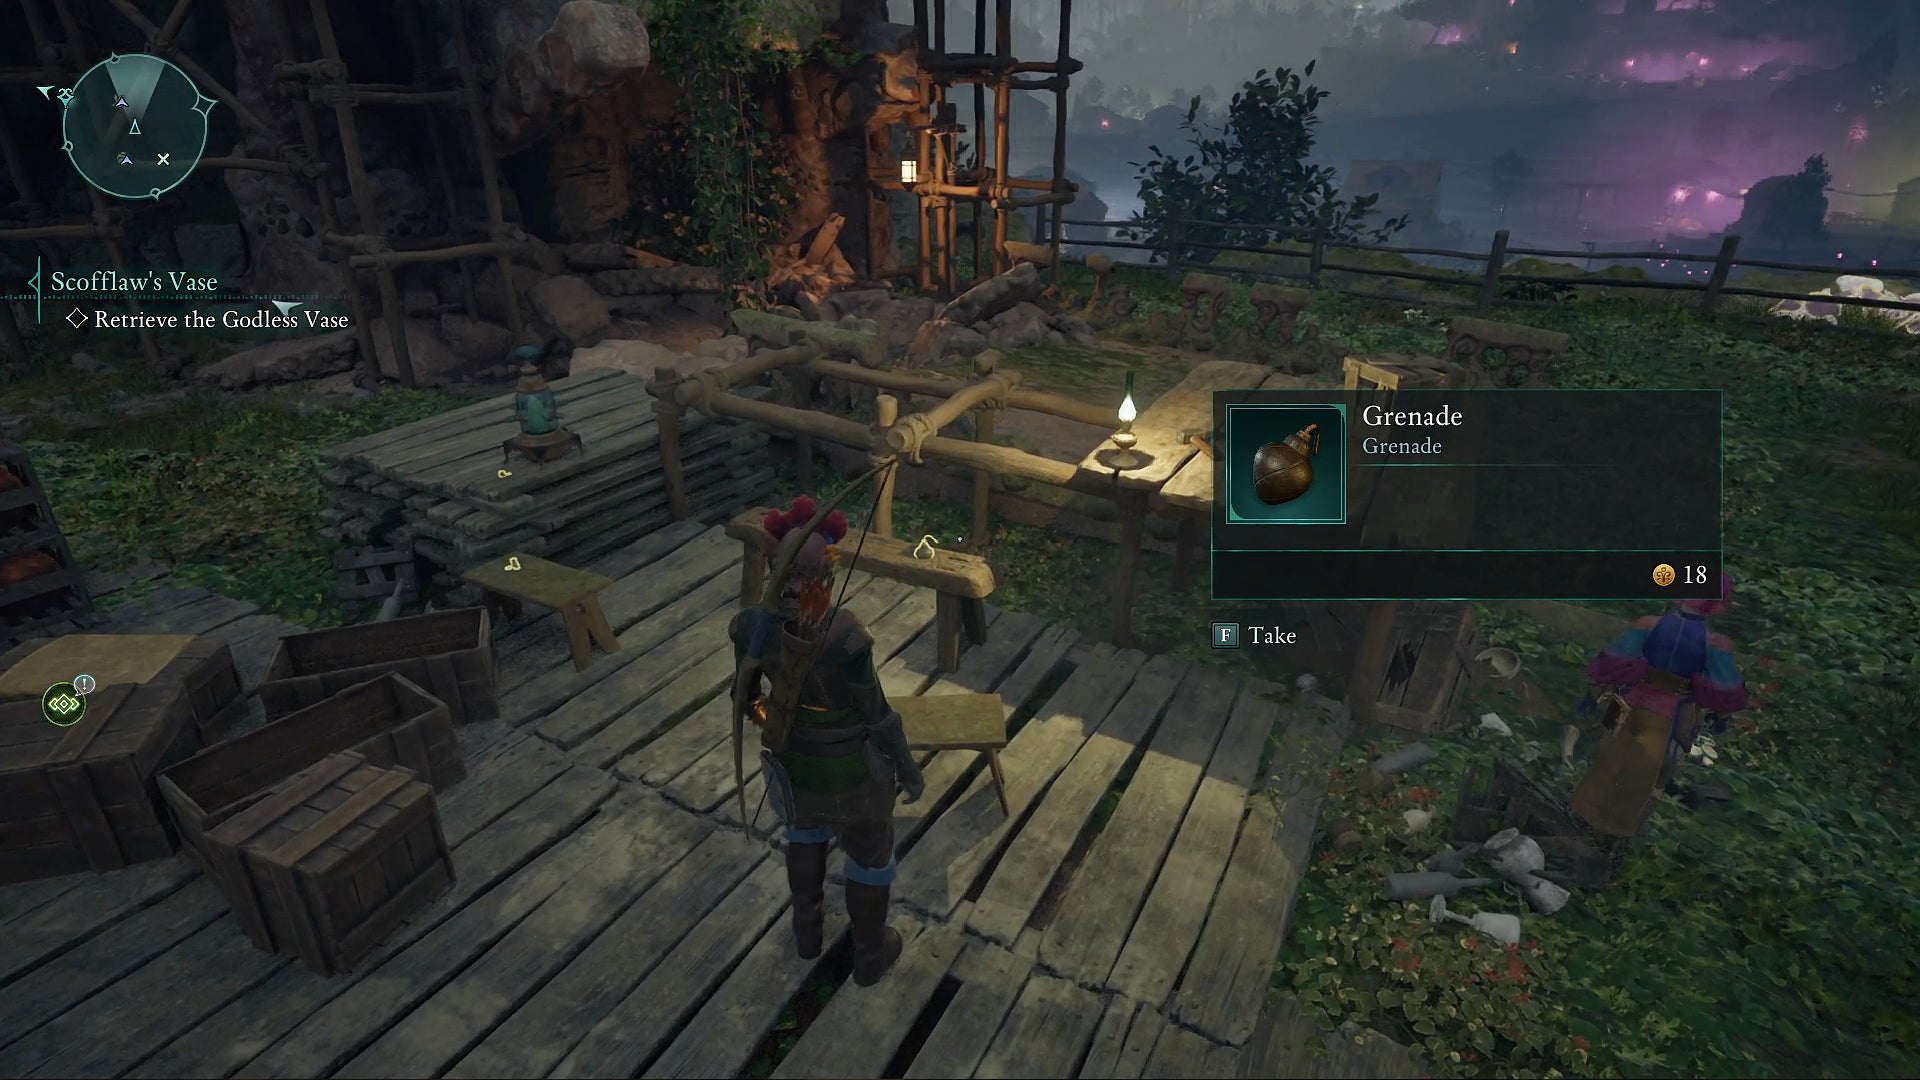
Oh, a free grenade? I’ll take that, thank you kindly. |Image credit:Rock Paper Shotgun/Obsidian
This one ties in with the advice on not buying Common gear. From what I’ve seen, there is no penalty for robbing everyone blind in Avowed. Whenever you can interact with something, loot it. Pick up whatever isn’t nailed down - every vegetable, spare coin lying on the ground, and plant that you come across - because you’ll likely need it for upgrading your gear later. Even if you don’t use it for upgrading, there’s a tonne of edible tidbits that can be used for cooking, as well as other goodies like grenades hanging out in plain sight. The folks of the Living Lands are a generous sort - abuse their generosity!
Upgrade and cook at party camps
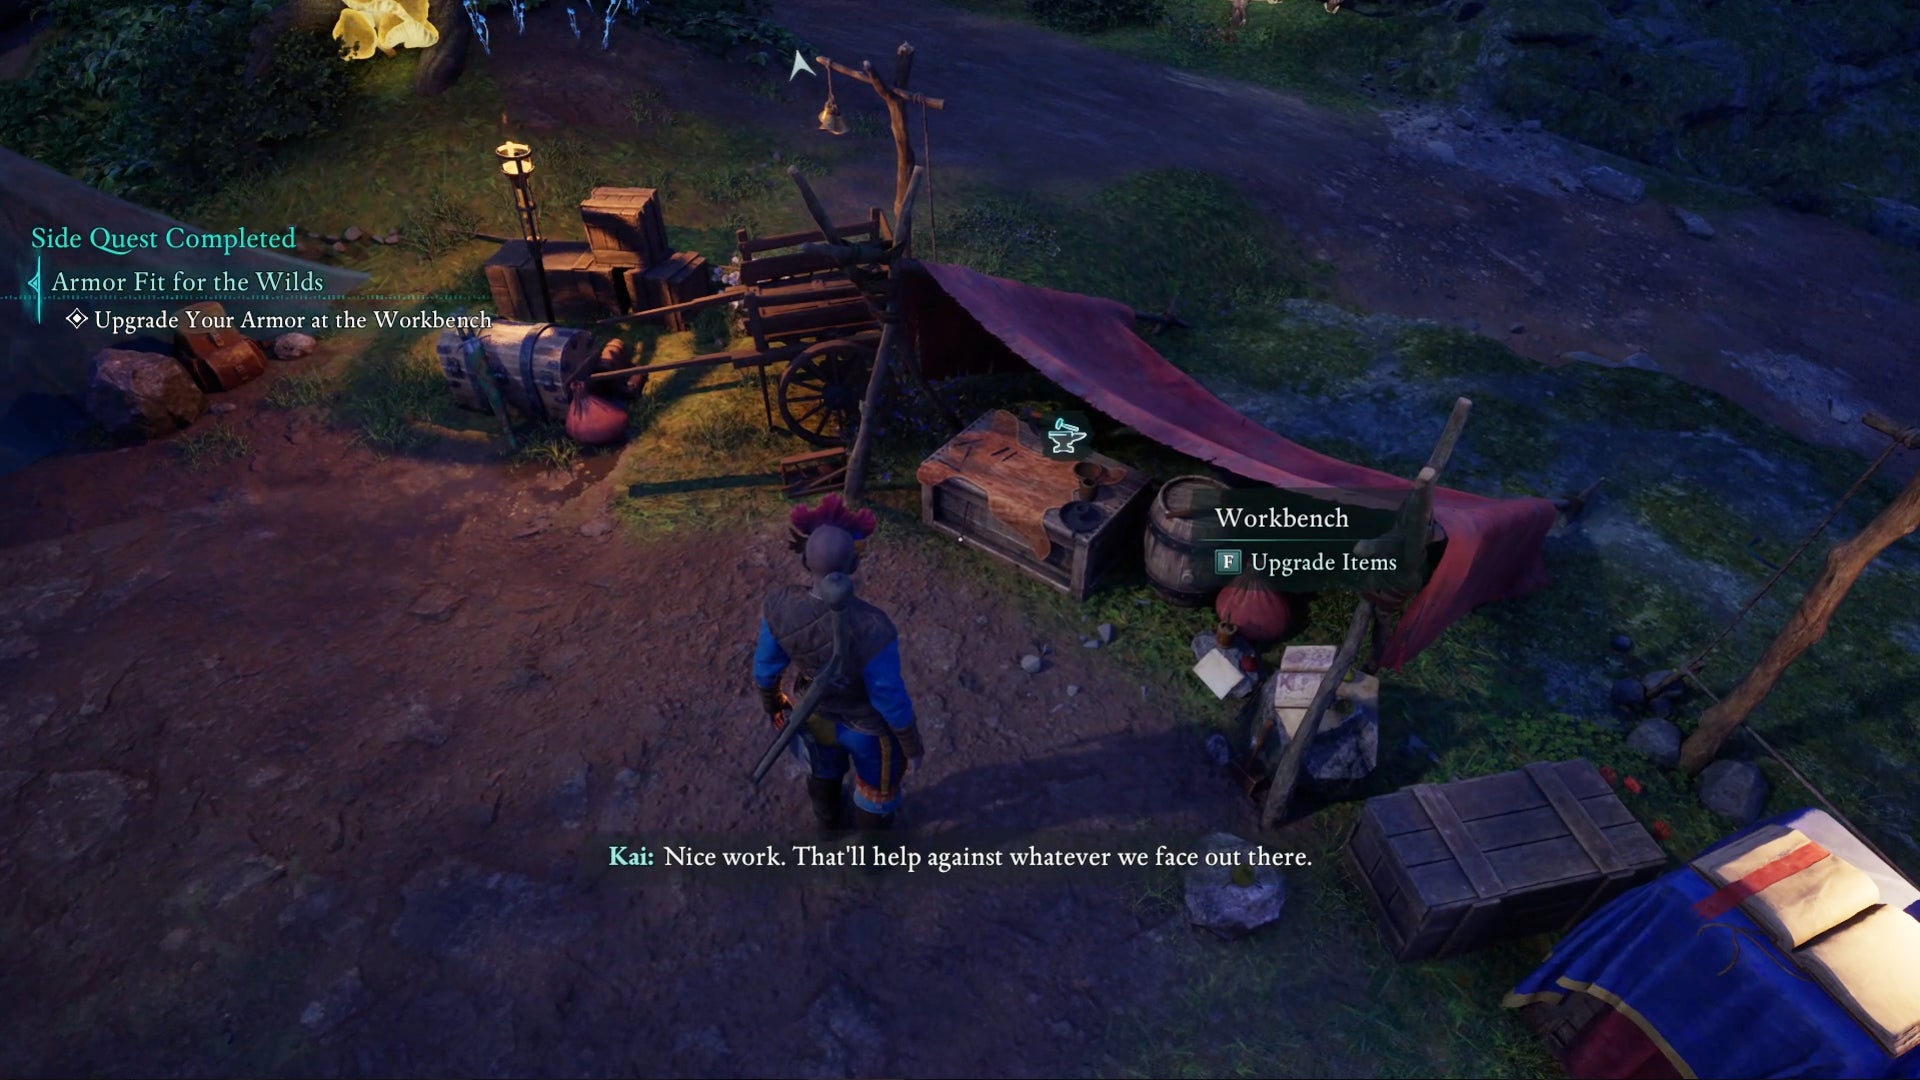
Be prepare to spend many minutes tinkering every time you set up camp. |Image credit:Rock Paper Shotgun/Obsidian
You can set up a party camp whenever you come across an Adra Waystone, which are those big purple-glowing crystals scattered across the map. Once in camp, you can chat with your party members and more importantly, upgrade your stuff. As previously mentioned, gear in Avowed features a tier system, and entering a party camp is the only way to access the upgrade workbench . Party camps also feature a workbench for upgrading unique weapons, which you’ll increasingly use as you progress through the game and get bigger and better armaments.
Cooking is the other major activity you’ll do at camp. All of those bits and bobs you’ve been looting can be combined into unique recipes, like a lovely fish stew that’ll boost your Envoy’s stats on the field. Also, be aware that you can cook rotten food that you otherwise wouldn’t be able to eat due to negative status effects.
Experiment with multiple weapon loadouts
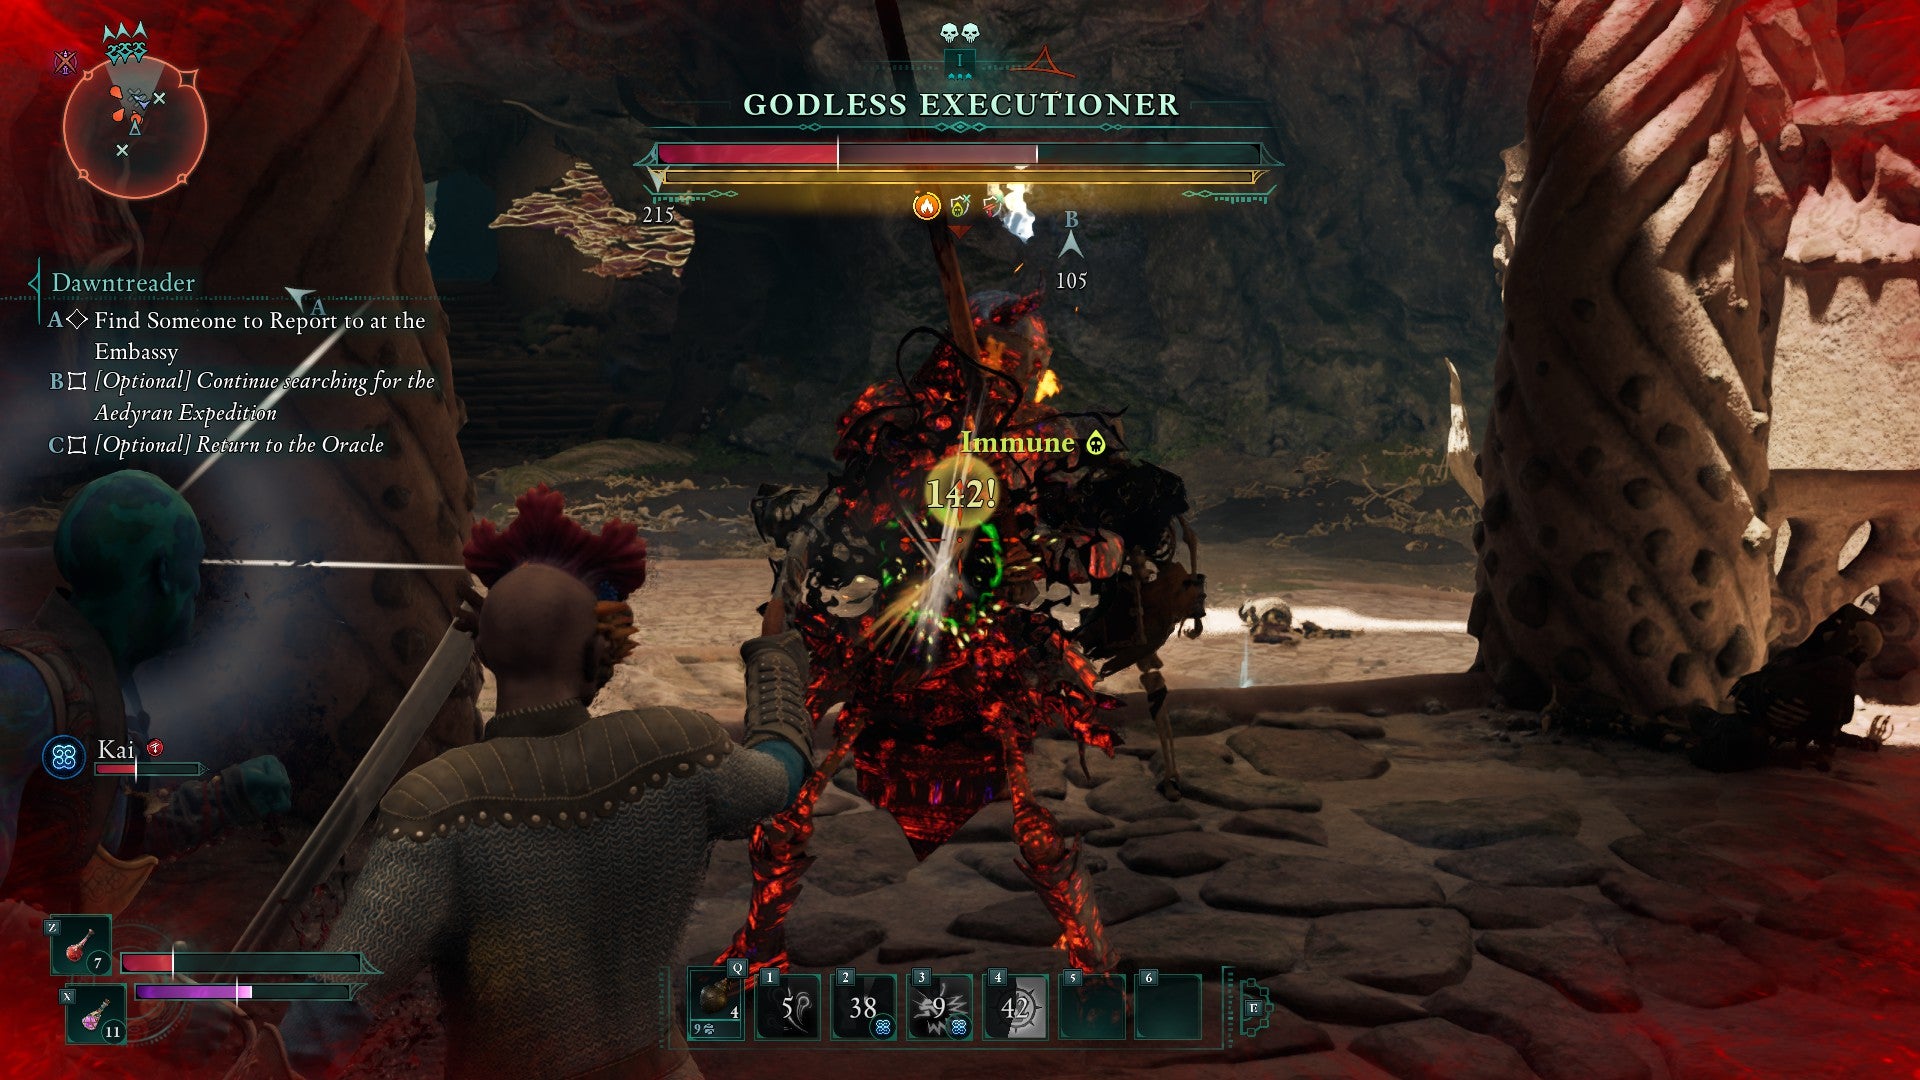
One-handed pistols are cool, but eventually I went with the two-handed arquebus for bigger explosions. |Image credit:Rock Paper Shotgun/Obsidian
Avowed features the following weapon types: arquebus, bows, daggers, great axes, great hammers, great swords, grimoires, maces, pistols, spears, swords, and wands. And yes, you can dual-wield whatever isn’t a two-handed weapon. That’s a lot of variety, and it pays to experiment with a variety of weapons to see what loadout gets you going.
My personal favourite weapon loadout includes a dagger, since I like the heavy emphasis on critical hits, and a grimoire in the other hand for magic-using. I switch it up sometimes with ranged weapons, and I’ve got both a bow for silent strikes and an arquebus for explosive power. Basically, I think of myself as a melee/spellcasting magus. I even tried to dual wield flintlocks at one point to add a degree of gunslinging, but found that I prefer the pure strength of an arquebus shot when it comes to explosive firepower, even though the process of loading one is time consuming.
Don’t ignore side quests
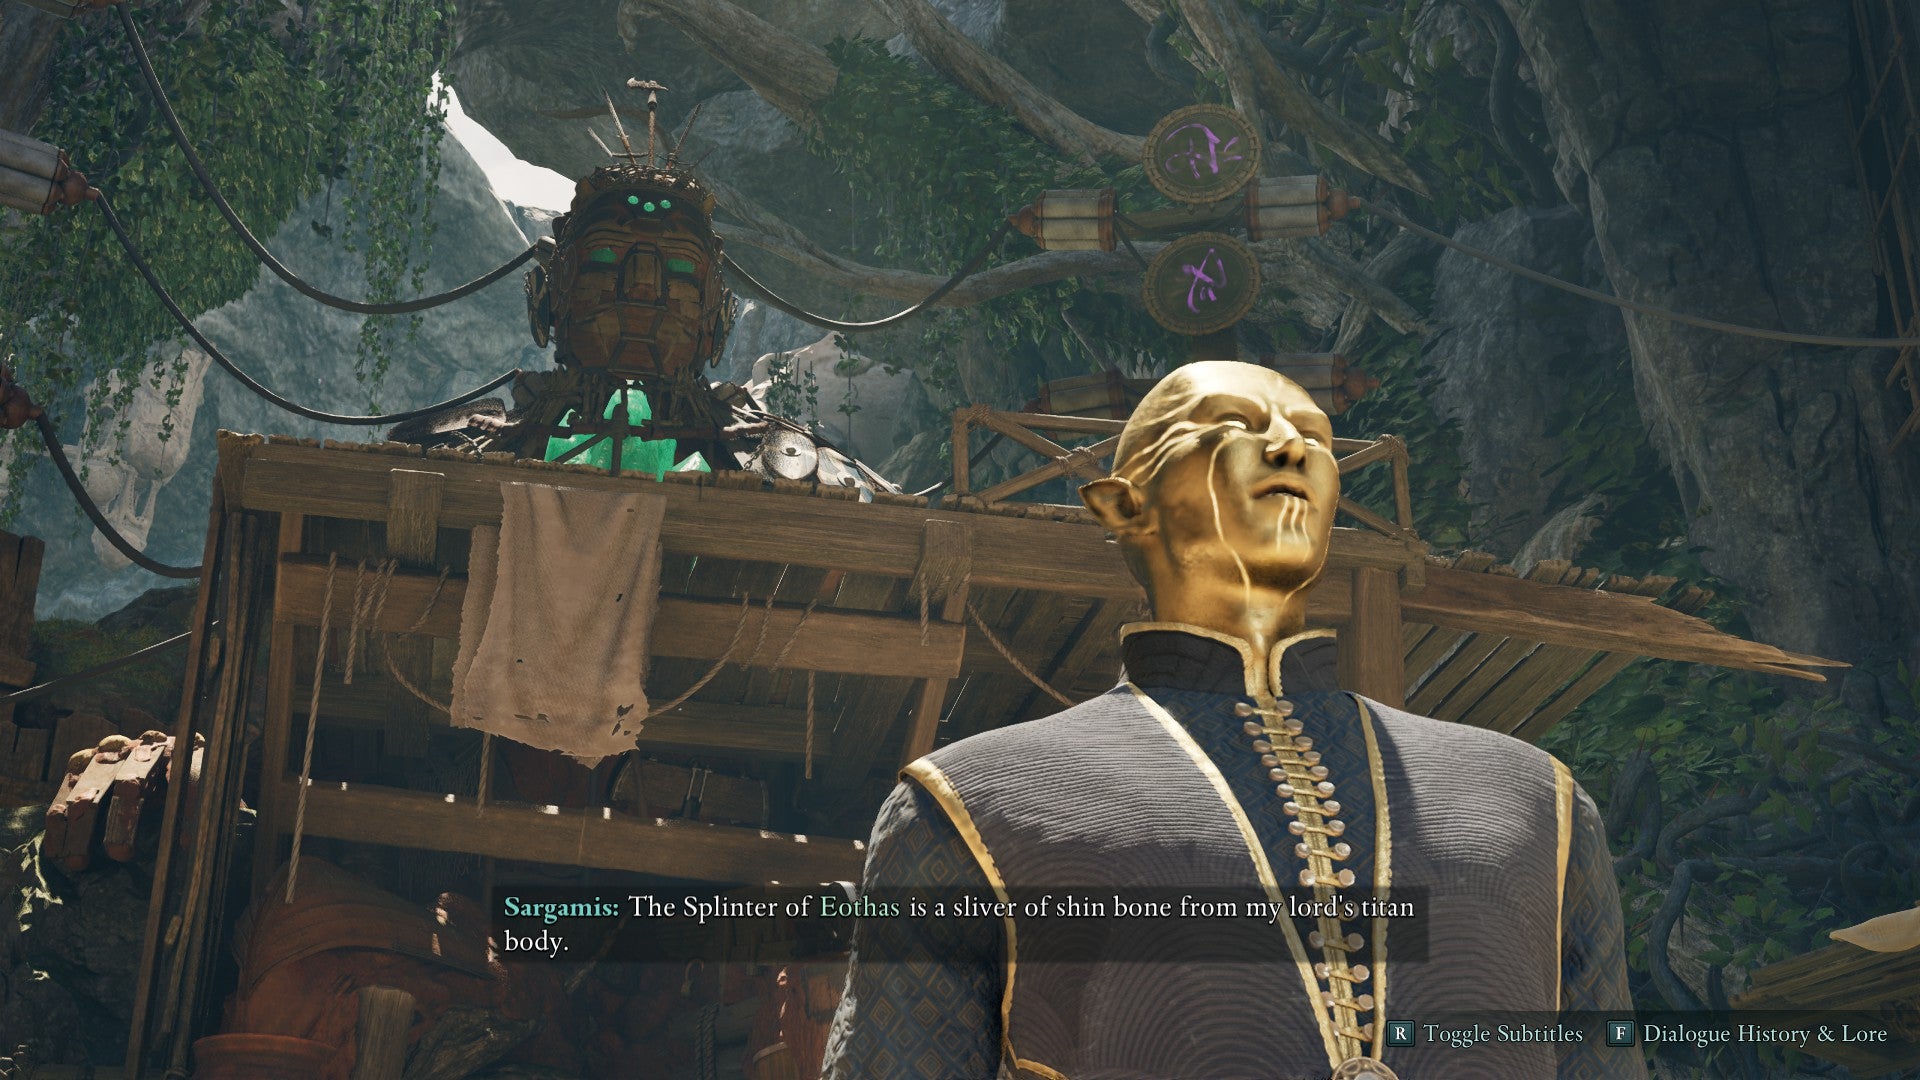
This guy’s got a grand plan, and you’ll miss it if you ignore Avowed’s side quests. |Image credit:Rock Paper Shotgun/Obsidian
While it’s totally possible to zoom along on Avowed’s main story and ignore all of the side stuff, know that you’ll quickly encounter some tough foes if you do so. You can usually denote the difficulty of a foe by checking the status bar next to their name when they appear - if there’s one or more skulls displayed there, it means they’re tougher than your current level. To match enemies in level and grow stronger, try exploring off the beaten path and navigating a side quest or two, especially since the story revelations and gear rewards are pretty decent.
The Dawntreader quest is perhaps the first big side quest that become available in the starting Dawnshore area , and features you delving into an underground temple and coming face-to-face with another godlike with some unusual plans up his golden sleeves. Completing this quest gives you a good melee weapon called Last Light of Day , which deals fire damage and restores health on hits.
With these tips under your belt, you should be well on your way towards defining a new destiny for Aedyr in the wild frontier. Stay tuned to Rock Paper Shotgun for more on all that Avowed has to offer - in the upcoming days, we’ll drop guides on all aspects of this RPG, including your four companions and the many unique pieces of weaponry and armor that lie in the Living Lands.


Avowed
Xbox Series X/S , PC
Rock Paper Shotgun is better when you sign in
Sign in and join us on our journey to discover strange and compelling PC games.

All 75 Arc Raiders Blueprints and where to get them
These areas have the highest chance of giving you Blueprints

Image credit:Rock Paper Shotgun/Embark Studios

Looking for more Arc Raiders Blueprints? It’s a special day when you find a Blueprint, as they’re among the most valuable items in Arc Raiders. If you find a Blueprint that you haven’t already found, then you must make sure you hold onto it at all costs, because Blueprints are the key to one of the most important and powerful systems of meta-progression in the game.
This guide aims to be the very best guide on Blueprints you can find, starting with a primer on what exactly they are and how they work in Arc Raiders, before delving into exactly where to get Blueprints and the very best farming spots for you to take in your search.
We’ll also go over how to get Blueprints from other unlikely activities, such as destroying Surveyors and completing specific quests. And you’ll also find the full list of all 75 Blueprints in Arc Raiders on this page (including the newest Blueprints added with the Cold Snap update , such as the Deadline Blueprint and Firework Box Blueprint), giving you all the information you need to expand your own crafting repertoire.
In this guide:
- What are Blueprints in Arc Raiders?
- Full Blueprint list: All crafting recipes
- Where to find Blueprints in Arc Raiders Blueprints obtained from quests Blueprints obtained from Trials Best Blueprint farming locations

What are Blueprints in Arc Raiders?
Blueprints in Arc Raiders are special items which, if you manage to extract with them, you can expend to permanently unlock a new crafting recipe in your Workshop. If you manage to extract from a raid with an Anvil Blueprint, for example, you can unlock the ability to craft your very own Anvil Pistol, as many times as you like (as long as you have the crafting materials).
To use a Blueprint, simply open your Inventory while in the lobby, then right-click on the Blueprint and click “Learn And Consume” . This will permanently unlock the recipe for that item in your Workshop. As of the Stella Montis update, there are allegedly 75 different Blueprints to unlock - although only 68 are confirmed to be in the game so far. You can see all the Blueprints you’ve found and unlocked by going to the Workshop menu, and hitting “R” to bring up the Blueprint screen.
It’s possible to find duplicates of past Blueprints you’ve already unlocked. If you find these, then you can either sell them, or - if you like to play with friends - you can take it into a match and gift it to your friend so they can unlock that recipe for themselves. Another option is to keep hold of them until the time comes to donate them to the Expedition.
Full Blueprint list: All crafting recipes
Below is the full list of all the Blueprints that are currently available to find in Arc Raiders, and the crafting recipe required for each item:
| Blueprint | Type | Recipe | Crafted At |
|---|---|---|---|
| Bettina | Weapon | 3x Advanced Mechanical Components 3x Heavy Gun Parts 3x Canister | Gunsmith 3 |
| Blue Light Stick | Quick Use | 3x Chemicals | Utility Station 1 |
| Aphelion | Weapon | 3x Magnetic Accelerator 3x Complex Gun Parts 1x Matriarch Reactor | Gunsmith 3 |
| Combat Mk. 3 (Flanking) | Augment | 2x Advanced Electrical Components 3x Processor | Gear Bench 3 |
| Combat Mk. 3 (Aggressive) | Augment | 2x Advanced Electrical Components 3x Processor | Gear Bench 3 |
| Complex Gun Parts | Material | 2x Light Gun Parts 2x Medium Gun Parts 2x Heavy Gun Parts | Refiner 3 |
| Fireworks Box | Quick Use | 1x Explosive Compound 3x Pop Trigger | Explosives Station 2 |
| Gas Mine | Mine | 4x Chemicals 2x Rubber Parts | Explosives Station 1 |
| Green Light Stick | Quick Use | 3x Chemicals | Utility Station 1 |
| Pulse Mine | Mine | 1x Crude Explosives 1x Wires | Explosives Station 1 |
| Seeker Grenade | Grenade | 1x Crude Explosives 2x ARC Alloy | Explosives Station 1 |
| Looting Mk. 3 (Survivor) | Augment | 2x Advanced Electrical Components 3x Processor | Gear Bench 3 |
| Angled Grip II | Mod | 2x Mechanical Components 3x Duct Tape | Gunsmith 2 |
| Angled Grip III | Mod | 2x Mod Components 5x Duct Tape | Gunsmith 3 |
| Hullcracker | Weapon | 1x Magnetic Accelerator 3x Heavy Gun Parts 1x Exodus Modules | Gunsmith 3 |
| Launcher Ammo | Ammo | 5x Metal Parts 1x Crude Explosives | Workbench 1 |
| Anvil | Weapon | 5x Mechanical Components 5x Simple Gun Parts | Gunsmith 2 |
| Anvil Splitter | Mod | 2x Mod Components 3x Processor | Gunsmith 3 |
| ??? | ??? | ??? | ??? |
| Barricade Kit | Quick Use | 1x Mechanical Components | Utility Station 2 |
| Blaze Grenade | Grenade | 1x Explosive Compound 2x Oil | Explosives Station 3 |
| Bobcat | Weapon | 3x Advanced Mechanical Components 3x Light Gun Parts | Gunsmith 3 |
| Osprey | Weapon | 2x Advanced Mechanical Components 3x Medium Gun Parts 7x Wires | Gunsmith 3 |
| Burletta | Weapon | 3x Mechanical Components 3x Simple Gun Parts | Gunsmith 1 |
| Compensator II | Mod | 2x Mechanical Components 4x Wires | Gunsmith 2 |
| Compensator III | Mod | 2x Mod Components 8x Wires | Gunsmith 3 |
| Defibrillator | Quick Use | 9x Plastic Parts 1x Moss | Medical Lab 2 |
| ??? | ??? | ??? | ??? |
| Equalizer | Weapon | 3x Magnetic Accelerator 3x Complex Gun Parts 1x Queen Reactor | Gunsmith 3 |
| Extended Barrel | Mod | 2x Mod Components 8x Wires | Gunsmith 3 |
| Extended Light Mag II | Mod | 2x Mechanical Components 3x Steel Spring | Gunsmith 2 |
| Extended Light Mag III | Mod | 2x Mod Components 5x Steel Spring | Gunsmith 3 |
| Extended Medium Mag II | Mod | 2x Mechanical Components 3x Steel Spring | Gunsmith 2 |
| Extended Medium Mag III | Mod | 2x Mod Components 5x Steel Spring | Gunsmith 3 |
| Extended Shotgun Mag II | Mod | 2x Mechanical Components 3x Steel Spring | Gunsmith 2 |
| Extended Shotgun Mag III | Mod | 2x Mod Components 5x Steel Spring | Gunsmith 3 |
| Remote Raider Flare | Quick Use | 2x Chemicals 4x Rubber Parts | Utility Station 1 |
| Heavy Gun Parts | Material | 4x Simple Gun Parts | Refiner 2 |
| Venator | Weapon | 2x Advanced Mechanical Components 3x Medium Gun Parts 5x Magnet | Gunsmith 3 |
| Il Toro | Weapon | 5x Mechanical Components 6x Simple Gun Parts | Gunsmith 1 |
| Jolt Mine | Mine | 1x Electrical Components 1x Battery | Explosives Station 2 |
| Explosive Mine | Mine | 1x Explosive Compound 1x Sensors | Explosives Station 3 |
| Jupiter | Weapon | 3x Magnetic Accelerator 3x Complex Gun Parts 1x Queen Reactor | Gunsmith 3 |
| Light Gun Parts | Material | 4x Simple Gun Parts | Refiner 2 |
| Lightweight Stock | Mod | 2x Mod Components 5x Duct Tape | Gunsmith 3 |
| Lure Grenade | Grenade | 1x Speaker Component 1x Electrical Components | Utility Station 2 |
| Medium Gun Parts | Material | 4x Simple Gun Parts | Refiner 2 |
| Torrente | Weapon | 2x Advanced Mechanical Components 3x Medium Gun Parts 6x Steel Spring | Gunsmith 3 |
| Muzzle Brake II | Mod | 2x Mechanical Components 4x Wires | Gunsmith 2 |
| Muzzle Brake III | Mod | 2x Mod Components 8x Wires | Gunsmith 3 |
| Padded Stock | Mod | 2x Mod Components 5x Duct Tape | Gunsmith 3 |
| Shotgun Choke II | Mod | 2x Mechanical Components 4x Wires | Gunsmith 2 |
| Shotgun Choke III | Mod | 2x Mod Components 8x Wires | Gunsmith 3 |
| Shotgun Silencer | Mod | 2x Mod Components 8x Wires | Gunsmith 3 |
| Showstopper | Grenade | 1x Advanced Electrical Components 1x Voltage Converter | Explosives Station 3 |
| Silencer I | Mod | 2x Mechanical Components 4x Wires | Gunsmith 2 |
| Silencer II | Mod | 2x Mod Components 8x Wires | Gunsmith 3 |
| Snap Hook | Quick Use | 2x Power Rod 3x Rope 1x Exodus Modules | Utility Station 3 |
| Stable Stock II | Mod | 2x Mechanical Components 3x Duct Tape | Gunsmith 2 |
| Stable Stock III | Mod | 2x Mod Components 5x Duct Tape | Gunsmith 3 |
| Tagging Grenade | Grenade | 1x Electrical Components 1x Sensors | Utility Station 3 |
| Tempest | Weapon | 3x Advanced Mechanical Components 3x Medium Gun Parts 3x Canister | Gunsmith 3 |
| Trigger Nade | Grenade | 2x Crude Explosives 1x Processor | Explosives Station 2 |
| Vertical Grip II | Mod | 2x Mechanical Components 3x Duct Tape | Gunsmith 2 |
| Vertical Grip III | Mod | 2x Mod Components 5x Duct Tape | Gunsmith 3 |
| Vita Shot | Quick Use | 2x Antiseptic 1x Syringe | Medical Lab 3 |
| Vita Spray | Quick Use | 3x Antiseptic 1x Canister | Medical Lab 3 |
| Vulcano | Weapon | 1x Magnetic Accelerator 3x Heavy Gun Parts 1x Exodus Modules | Gunsmith 3 |
| Wolfpack | Grenade | 2x Explosive Compound 2x Sensors | Explosives Station 3 |
| Red Light Stick | Quick Use | 3x Chemicals | Utility Station 1 |
| Smoke Grenade | Grenade | 14x Chemicals 1x Canister | Utility Station 2 |
| Deadline | Mine | 3x Explosive Compound 2x ARC Circuitry | Explosives Station 3 |
| Trailblazer | Grenade | 1x Explosive Compound 1x Synthesized Fuel | Explosives Station 3 |
| Tactical Mk. 3 (Defensive) | Augment | 2x Advanced Electrical Components 3x Processor | Gear Bench 3 |
| Tactical Mk. 3 (Healing) | Augment | 2x Advanced Electrical Components 3x Processor | Gear Bench 3 |
| Yellow Light Stick | Quick Use | 3x Chemicals | Utility Station 1 |
Note: The missing Blueprints in this list likely have not actually been added to the game at the time of writing, because none of the playerbase has managed to find any of them. As they are added to the game, I will update this page with the most relevant information so you know exactly how to get all 75 Arc Raiders Blueprints.
Where to find Blueprints in Arc Raiders
Below is a list of all containers, modifiers, and events which maximise your chances of finding Blueprints:
- Certain quests reward you with specific Blueprints .
- Completing Trials has a high chance of offering Blueprints as rewards.
- Surveyors have a decent chance of dropping Blueprints on death.
- High loot value areas tend to have a greater chance of spawning Blueprints.
- Night Raids and Storms may increase rare Blueprint spawn chances in containers.
- Containers with higher numbers of items may have a higher tendency to spawn Blueprints. As a result, Blue Gate (which has many “large” containers containing multiple items) may give you a higher chance of spawning Blueprints.
- Raider containers (Raider Caches, Weapon Boxes, Medical Bags, Grenade Tubes) have increased Blueprint drop rates. As a result, the Uncovered Caches event gives you a high chance of finding Blueprints.
- Security Lockers have a higher than average chance of containing Blueprints.
- Certain Blueprints only seem to spawn under specific circumstances: Tempest Blueprint only spawns during Night Raid events. Vulcano Blueprint only spawns during Hidden Bunker events. Jupiter and Equaliser Blueprints only spawn during Harvester events.

Raider Caches, Weapon Boxes, and other raider-oriented container types have a good chance of offering Blueprints. |Image credit:Rock Paper Shotgun/Embark Studios
Blueprints have a very low chance of spawning in any container in Arc Raiders, around 1-2% on average. However, there is a higher chance of finding Blueprints in particular container types. Specifically, you can find more Blueprints in Raider containers and security lockers.
Beyond this, if you’re looking for Blueprints you should focus on regions of the map which are marked as having particularly high-value loot. Areas such as the Control Tower in Dam Battlegrounds, the Arrival and Departure Buildings in Spaceport, and Pilgrim’s Peak in Blue Gate all have a better-than-average chance of spawning Blueprints somewhere amongst all their containers. Night Raids and Electromagnetic Storm events also increase the drop chances of certain Blueprints .
In addition to these containers, you can often loot Blueprints from destroyed Surveyors - the largest of the rolling ball ARC. Surveyors are more commonly found on the later maps - Spaceport and Blue Gate - and if one spawns in your match, you’ll likely see it by the blue laser beam that it casts into the sky while “surveying”.
Surveyors are quite well-armoured and will very speedily run away from you once it notices you, but if you can take one down then make sure you loot all its parts for a chance of obtaining certain unusual Blueprints.
Blueprints obtained from quests
One way in which you can get Blueprints is by completing certain quests for the vendors in Speranza. Some quests will reward you with a specific item Blueprint upon completion, so as long as you work through all the quests in Arc Raiders, you are guaranteed those Blueprints.
Here is the full list of all Blueprints you can get from quest rewards:
- Trigger Nade Blueprint: Rewarded after completing “Sparks Fly”.
- Lure Grenade Blueprint: Rewarded after completing “Greasing Her Palms”.
- Burletta Blueprint: Rewarded after completing “Industrial Espionage”.
- Hullcracker Blueprint (and Launcher Ammo Blueprint): Rewarded after completing “The Major’s Footlocker”.
Alas, that’s only 4 Blueprints out of a total of 75 to unlock, so for the vast majority you will need to find them yourself during a raid. If you’re intent on farming Blueprints, then it’s best to equip yourself with cheap gear in case you lose it, but don’t use a free loadout because then you won’t get a safe pocket to stash any new Blueprint you find. No pain in Arc Raiders is sharper than failing to extract with a new Blueprint you’ve been after for a dozen hours already.

One of the best ways to get Blueprints is by hitting three stars on all five Trials every week. |Image credit:Rock Paper Shotgun/Embark Studios
Blueprints obtained from Trials
One of the very best ways to get Blueprints is as rewards for completing Trials in Arc Raiders. Trials are unlocked from Level 15 onwards, and allow you to earn rewards by focusing on certain tasks over the course of several raids. For example, one Trial might task you with dealing damage to Hornets, while another might challenge you to loot Supply Drops.
Trials refresh on a weekly basis, with a new week bringing five new Trials. Each Trial can offer up to three rewards after passing certain score milestones, and it’s possible to receive very high level loot from these reward crates - including Blueprints. So if you want to unlock as many Blueprints as possible, you should make a point of completing as many Trials as possible each week.
Best Blueprint farming locations
The very best way to get Blueprints is to frequent specific areas of the maps which combine high-tier loot pools with the right types of containers to search. Here are my recommendations for where to find Blueprints on every map, so you can always keep the search going for new crafting recipes to unlock.

Image credit:Rock Paper Shotgun/Embark Studios
Dam Battlegrounds
The best places to farm Blueprints on Dam Battlegrounds are the Control Tower, Power Generation Complex, Ruby Residence, and Pale Apartments . The first two regions, despite only being marked on the map as mid-tier loot, contain a phenomenal number of containers to loot. The Control Tower can also contain a couple of high-tier Security Lockers - though of course, you’ll need to have unlocked the Security Breach skill at the end of the Survival tree.
There’s also a lot of reporting amongst the playerbase that the Residential areas in the top-left of the map - Pale Apartments and Ruby Residence - give you a comparatively strong chance of finding Blueprints. Considering their size, there’s a high density of containers to loot in both locations, and they also have the benefit of being fairly out of the way. So you’re more likely to have all the containers to yourself.
Buried City
The best Blueprint farming locations on Buried City are the Santa Maria Houses, Grandioso Apartments, Town Hall, and the various buildings of the New District . Grandioso Apartments has a lower number of containers than the rest, but a high chance of spawning weapon cases - which have good Blueprint drop rates. The others are high-tier loot areas, with plenty of lootable containers - including Security Lockers.
Spaceport
The best places to find Blueprints on Spaceport are the Arrival and Departure Buildings, as well as Control Tower A6 and the Launch Towers . All these areas are labelled as high-value loot regions, and many of them are also very handily connected to one another by the Spaceport wall, which you can use to quickly run from one area to the next. At the tops of most of these buildings you’ll find at least one Security Locker, so this is an excellent farming route for players looking to find Blueprints.
The downside to looting Blueprints on Spaceport is that all these areas are hotly contested, particularly in Duos and Squads. You’ll need to be very focused and fast in order to complete the full farming route.

Image credit:Rock Paper Shotgun/Embark Studios
Blue Gate
Blue Gate tends to have a good chance of dropping Blueprints, potentially because it generally has a high number of containers which can hold lots of items; so there’s a higher chance of a Blueprint spawning in each container. In my experience, the best Blueprint farming spots on Blue Gate are Pilgrim’s Peak, Raider’s Refuge, the Ancient Fort, and the Underground Complex beneath the Warehouse .
All of these areas contain a wealth of containers to loot. Raider’s Refuge has less to loot, but the majority of the containers in and around the Refuge are raider containers, which have a high chance of containing Blueprints - particularly during major events.
Stella Montis
On the whole, Stella Montis seems to have a very low drop rate for Blueprints (though a high chance of dropping other high-tier loot). If you do want to try farming Blueprints on this map, the best places to find Blueprints in Stella Montis are Medical Research, Assembly Workshop, and the Business Center . These areas have the highest density of containers to loot on the map.
In addition to this, the Western Tunnel has a few different Security Lockers to loot, so while there’s very little to loot elsewhere in this area of the map, it’s worth hitting those Security Lockers if you spawn there at the start of a match.
That wraps up this primer on how to get all the Blueprints in Arc Raiders as quickly as possible. With the Expedition system constantly resetting a large number of players’ Blueprints, it’s more important than ever to have the most up-to-date information on where to find all these Blueprints.
While you’re here, be sure to check out our Arc Raiders best guns tier list , as well as our primers on the best skills to unlock and all the different Field Depot locations on every map.


ARC Raiders
PS5 , Xbox Series X/S , PC
Rock Paper Shotgun is better when you sign in
Sign in and join us on our journey to discover strange and compelling PC games.
