An absolute beginner’s guide to getting started with Total War: Warhammer and Immortal Empires
Plus what DLC to buy first depending on your favourite faction

Image credit:Creative Assembly

The Total War: Warhammer series is big. You just won’t believe how vastly, hugely, mind-bogglingly big it is. Luckily, coming up with completely original quotes is not my only skill. I’ve also become very adept at pouring hundreds of hours into this series of strategy games . The aim of this guide is to save you some time, and give some tips on what they’re all about.
For my money, they’re the best Total War games available, but they’re also very dense and a bit complicated to get started with. I’m hoping this will stand as a comprehensive one-stop beginner’s guide for anyone looking to jump into the series for the first time, without getting too bogged down with the details. Included is an exhaustive list of which DLC to buy depending on what faction you like the look of the most, since navigating the expansions can sometimes feel more complicated than the game itself. Onward!
In this guide:
- What is Total War: Warhammer?
- What DLC to buy for Total War: Warhammer
- Your first turns in Total War: Warhammer
- General tips for your first few turns and beyond
What is Total War: Warhammer?
Simply put, Total War: Warhammer is a series of strategy games set in the world of Warhammer Fantasy, a tabletop wargame setting some enterprising British blokes came up with in the eighties so they’d have a paycheque’d excuse to paint more wizards. The Total War series is notable because it actually combines two different genres of strategy game into one, which I’ll refer to as the campaign map and the battles.
Campaign Map
The campaign map is a zoomed-out representation of the entire Warhammer world, divided into provinces and settlements, each of which is controlled by a different faction. You can think of this part as a very elaborate board game. It’s here you’ll make decisions on how to run your empire, research technologies, upgrade your settlements, play with your economy, recruit your troops, level up your characters, take territory from your enemies, make deals with your allies, and control your armies.
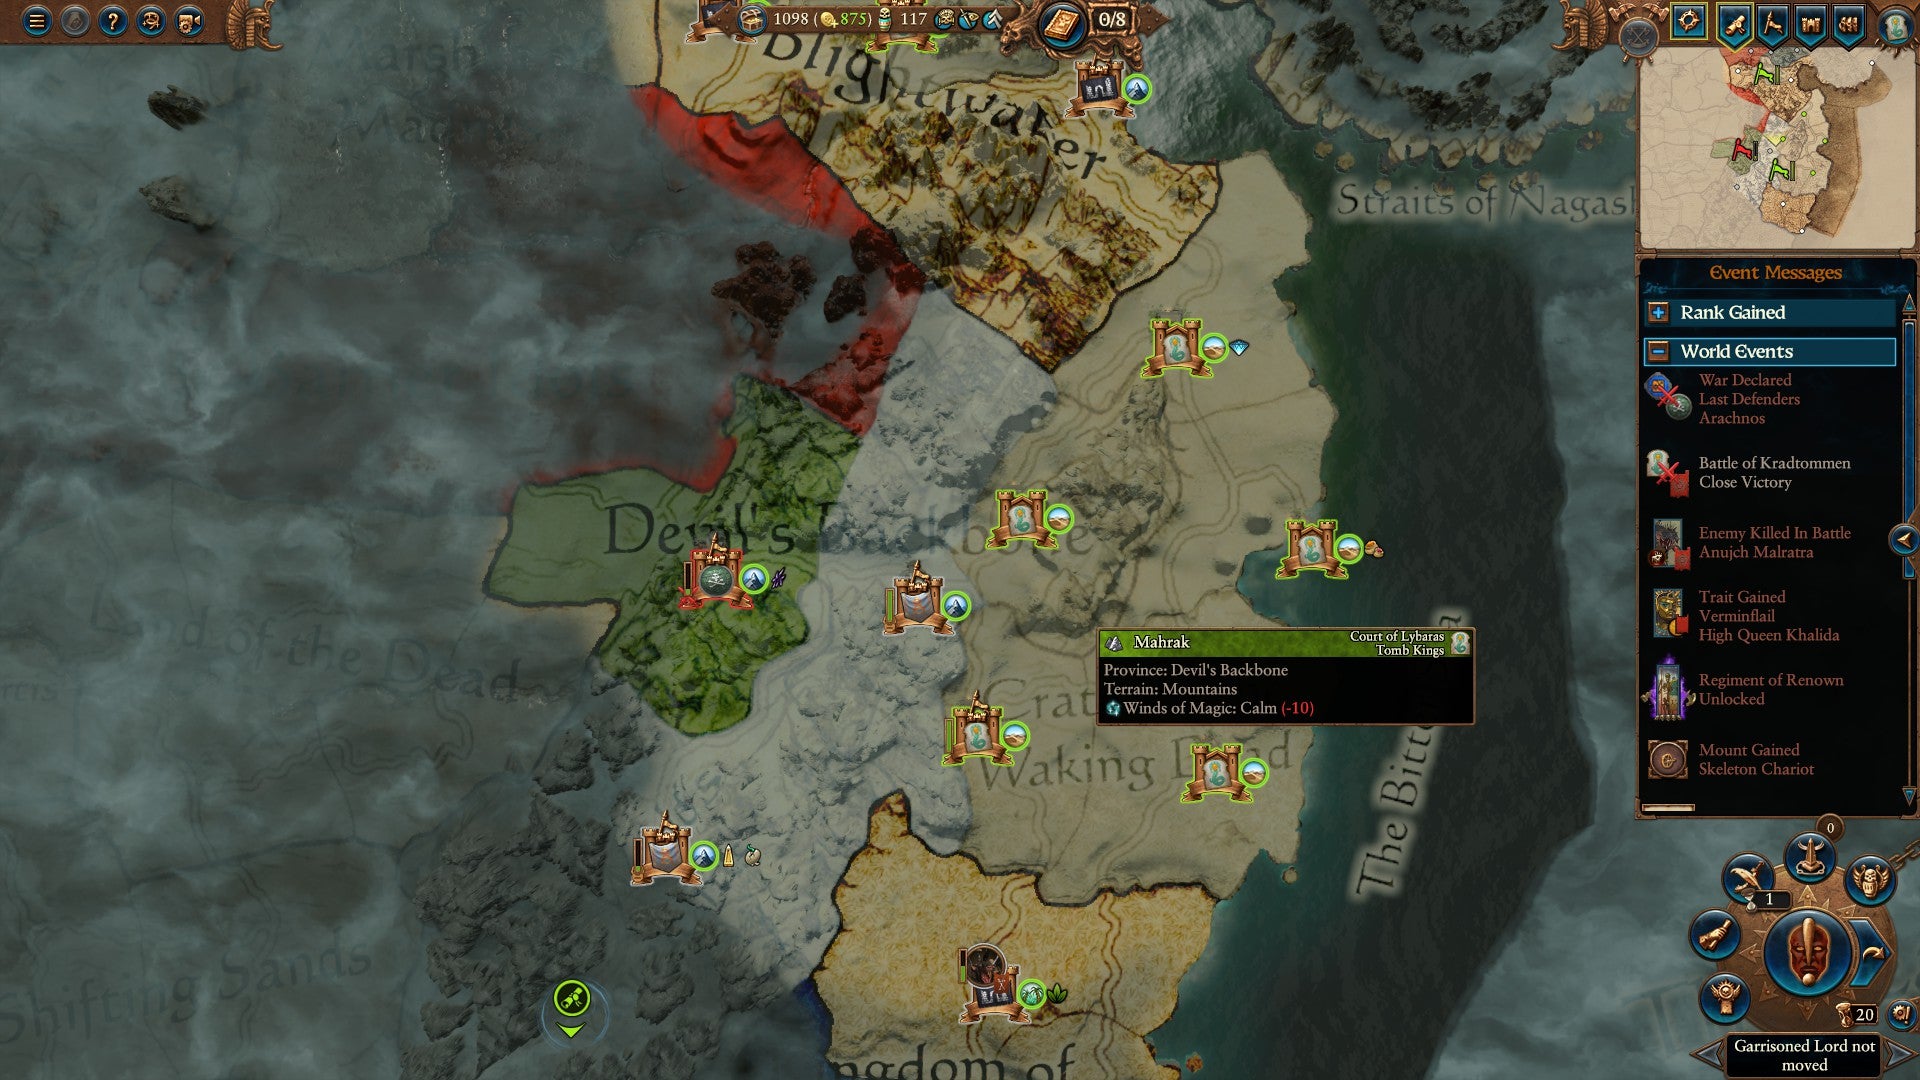
Image credit:Creative Assembly
You’re not under any sort of pressure or time limit during all this, so you can take as long as you want to make your choices and figure out what to do next. After you’re done making all your decisions, you end your turn, then everyone else on the map takes theirs. There’s no turn limit for the game, although the longer the game progresses, the stronger your surviving enemies will become, simply because they’ll be doing the same things that you are: research, recruiting armies, levelling up characters, and upgrading settlements.
Sometimes, two armies engage in battle by meeting each other on the campaign map, and the game turns into the other type of strategy game: the extremely violent type. Yay!
Battles
Broadly speaking, battles in the Total War games are real-time strategy, or RTS. You set up your army in whatever formation you choose and start the battle. After that, all your units move and attack as soon as you tell them to.
While RTS like Starcraft or Warhammer 40,000: Dawn Of War divide units into individuals, Total War uses formations. So the equivalent of one Terran marine in Starcraft might be a big block of 120 elf archers in Total War: Warhammer. There are still individuals, like army commanders and the odd giant or dragon, but you’ll mainly be commanding units as the formations.
While you can pause, issue commands, and unpause at any time, the standard flow of a battle is usually quite fast paced, and you’ll often want to be constantly making decisions on-the-fly to outmanoeuvre your enemy, or try to force them into suboptimal positions.
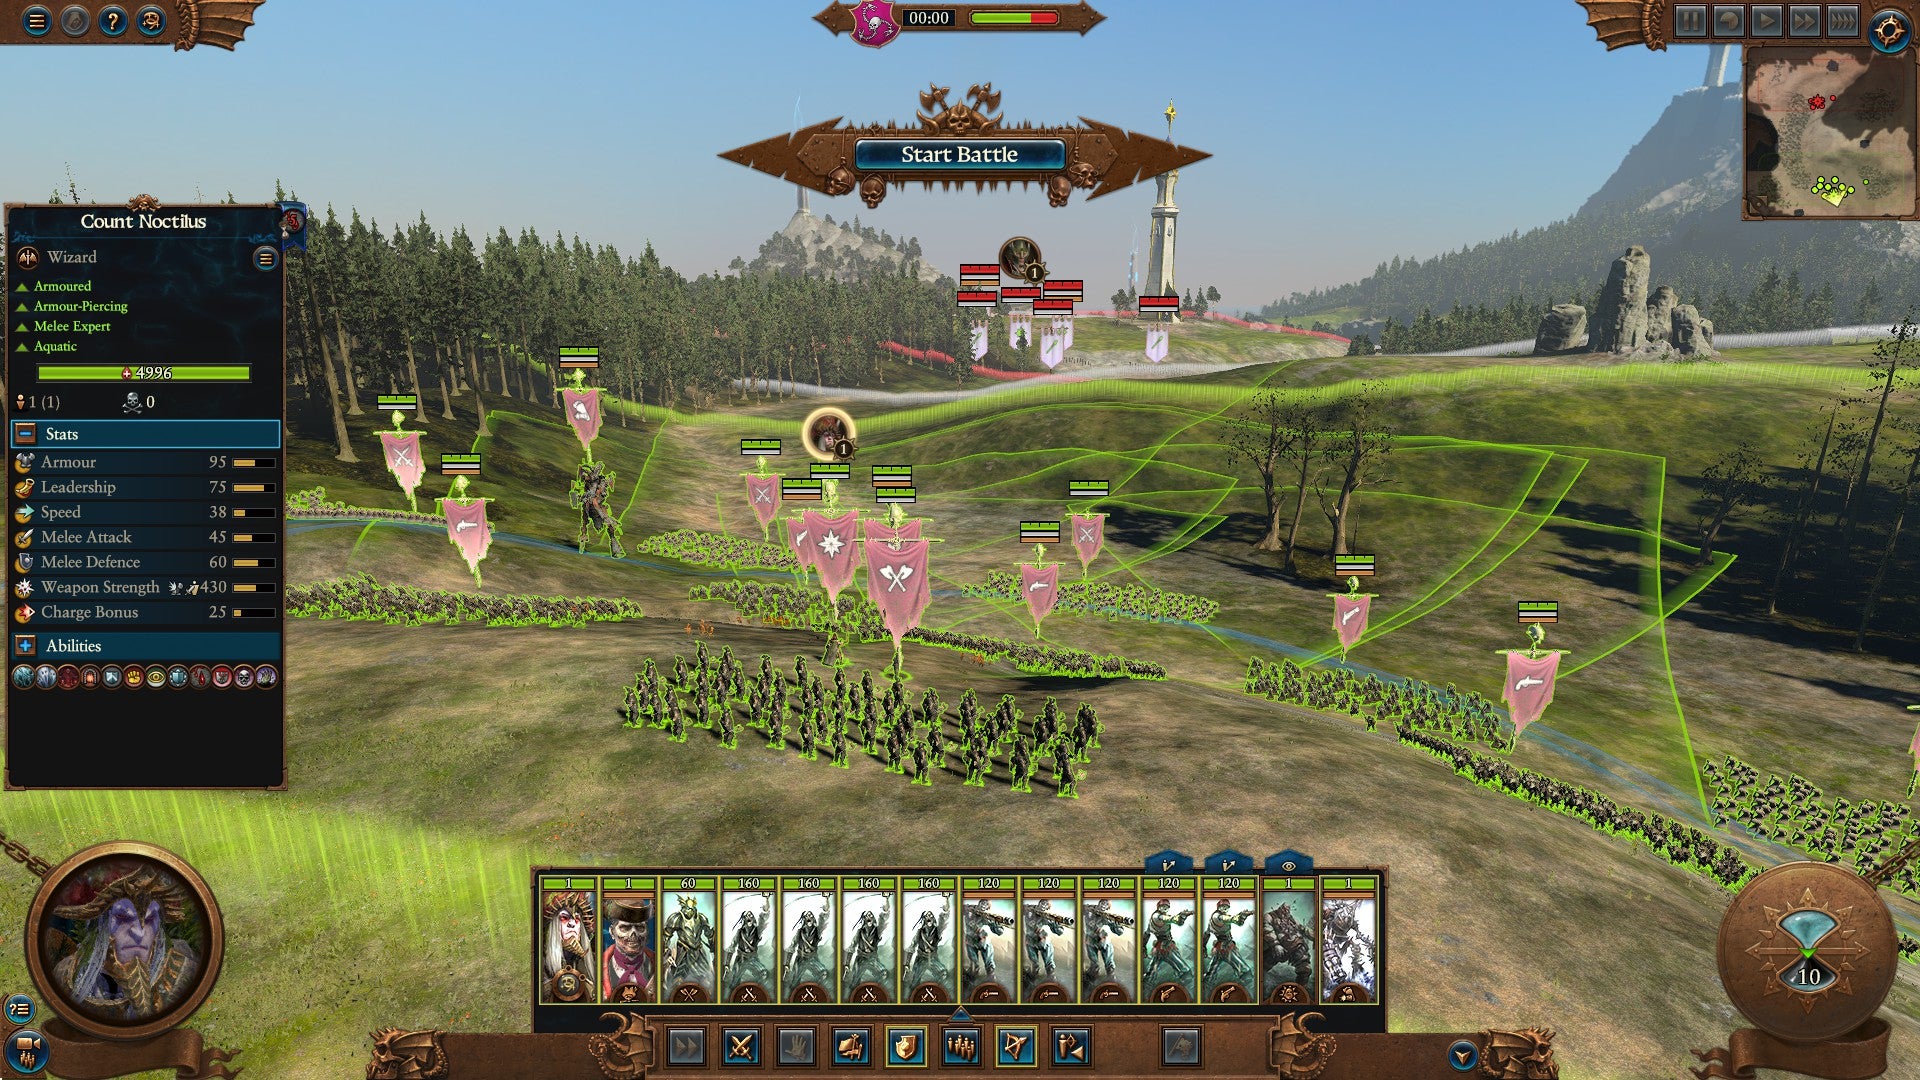
Image credit:Sega/Creative Assembly
A classic example of this is known as ‘Hammer and Anvil’. This is where you lock the enemy’s frontline units in melee combat with your own, then use cavalry or other fast moving units to run behind them and charge into their unprotected flanks or rear. Things like positioning and flanking have big effects on morale and defence in Total War, so this sort of thing is extremely effective. Most of the time, you aren’t even necessarily trying to wipe out the enemy army - you’re just trying to freak them out enough that they run away.
There are lots of other factors to consider: can the unit of goblins I’m sending to attack this throng of heavily-armoured dwarfs actually pierce through their armour? Am I wasting this spell on a unit with a high resistance to magic? Do I really want to charge my calvary into that battle line when there’s a unit of spearmen waiting to counter-attack? As I said above, though, you’ll pick most of this stuff up as you play, and most of it is quite intuitive anyway. If you think a tactic might work in a real battle, there’s a fair chance it’ll work in Total War.
Setting
What DLC to buy for Total War: Warhammer
The Total War: Warhammer series has 21 pieces of paid DLC across 3 separate main games, alongside dozens of free lords, heroes, and other updates. Put simply, it’s a confusing mess for a new player. To make things easier, I’ve created a list below, based on the only question you should ask yourself when it comes to which expansions to buy and which to skip: what faction do I think is the coolest and would have the most fun playing? First, a few important tips to keep in mind:
- The only main entry in the series you absolutely need to purchase in order to play the newest and best version of Immortal Empires (the massive sandbox map that most people are talking about when they talk about playing the game) is Total War: Warhammer 3. At the time of writing, it’s 50% off on Steam . This is also its lowest recorded price so far.
- You make two decisions before you start any campaign: which faction to play as, and which legendary lord (hereafter just lord) to command. Dwarfs, Lizardmen, and The Empire are all factions . Malakai, Mazdamundi, and Karl Franz are all lords . Every faction has multiple lords, but lords can’t belong to multiple factions.
- Even without any DLC, the Warhammer 3 base game lets you play Immortal Empires as some (but not all) lords from the following factions: Kislev, Cathay, Khorne, Slaanesh, Nurgle, Tzeentch, Daemons of Chaos, and Warriors of Chaos. You’ll also be able to play as any of the four Bretonnian lords, since they’re all free. Although, as with much of the trilogy’s free content, you will need to connect your Steam account to Creative Assembly’s website.
- You’ll also be able to play a story-based tutorial and the narrative Realms of Chaos campaign, which is worth doing at least once.
- Whether you own no DLC, or every piece of DLC, the world you’ll be playing Immortal Empires in will be identical. You’ll still encounter every faction in the game, and still face off against every new lord, unit, and spell. Put simply, you’ll always have access to the most up-to-date version of the game, you just won’t be able to play with all the toys yourself, either in campaign, multiplayer, or custom battle.
- It used to be that if you wanted the base roster for an older faction that first appeared in a mainline numbered game - e.g The Empire or Lizardmen - you’d need to buy the game they first appeared in. Now, if you own Warhammer 3, you just need to buy any DLC pack for the faction you want, and you get access to that DLC’s lord, the base roster of units from the mainline game that faction first appeared in, and any and all ‘FreeLC’ lords released for that faction.
What should I buy first if my favourite faction is:
- Beastmen: Buy The Silence & The Fury . You’ll get the best Beastmen campaign with Taurox the Brass Bull, and full access to the roster. You’ll even get to play as the other Beastmen legendary lords later in the campaign as part of the faction’s unique recruitment mechanics
- Dwarfs: Buy Malakai , and you’ll also get access to Grombindal the White Dwarf, and Throrek Ironbrow. That’s the three most interesting Dwarf campaigns for the price of one, and most of their roster. If you want to round out the roster with some fun but less essential units, buy The King & the Warlord next.
- The Empire : Buy the first Total War: Warhammer if you want the classic Karl Franz experience, or Elspeth if you want some absolutely ridiculous magic-infused gunlines. Either way, you’ll get Balthasar Gelt for free. He’s supreme, I hear.
- Greenskins (Orcs and Goblins) : Buy The Warden & The Paunch . You’ll get access to Grom The Paunch, the most fun Greenskin campaign. You’ll also be able to play as Azhag the Slaughterer and Wurrzag da Great Green Prophet, and you’ll get access to most of the Greenskin roster. If you want to round out your collection with extra squigs, you’ll want to buy The King & the Warlord next.
- Vampire Counts: Buy the first Total War: Warhammer .
- Warriors of Chaos: This is the mortal side of the Chaos roster, mainly consisting of dudes in armour. You’ll want to buy The Champions Of Chaos , and this will synergise nicely with the daemonic roster already found in Warhammer 3’s base game.
- Nurgle: You’ll get a good chunk of the roster in Warhammer 3’s base game, and you can round out your forces with Tamurkhan .
- Tzeentch: You’ll get a good chunk of the roster in Warhammer 3’s base game, and you can round out your forces with Shadows Of Change . I’d recommend just playing the base game Tzeentch first, though, to make sure you like the faction before buying what’s quite an expensive expansion for the content.
- Slaanesh: Warhammer 3 base game.
- Khorne: Warhammer 3 base game. There’s a free dog too.
- Wood Elves: Buy The Twisted & The Twilight .
- Norsca: Buy Norsca .
- Lizardmen: If you want a bunch of lords for Lizardmen, Dark Elves, High Elves, and Skaven all bundled together, buy Total War: Warhammer 2 . Otherwise, buy The Silence & The Fury . You’ll get a fun, experimental Lizardmen campaign with Oxyotl, plus two more traditional campaigns for free with Gorok and Tiqtak’to.
- Dark Elves: Buy Total War: Warhammer 2, and you’ll get a whopping six Dark Elf lords to choose from, including the excellent Rakarth, voiced by Ramsay Bolton from Game Of Thrones.
- High Elves: This is a slightly tough one, because both DLCs that feature the High Elves include key units for their rosters, but the Total War: Warhammer 2 base game comes with Tyrion - the quintessential high elf experience and one of the best beginner campaigns in the game. For a single pick, I’d say go with Total War: Warhammer 2, and you’ll also get Teclis, Alith Anar and Imrik’s campaigns. Two vanilla campaigns, and two more creative, experimental ways to play.
- Skaven: For a long time, The Prophet & The Warlock was an essential purchase for Skaven players. While it’s still a key DLC for huge parts of the roster, it really comes down to which rat is your favourite. If you want machine guns, nuclear missiles, and other death contraptions, get that one. If you prefer horrible, sewn-together beasties and unnatural biological experiments, get The Twisted & The Twilight . Either way, you’ll also get top-quality meme-rat Tretch Craventail for free.
- Tomb Kings: Only one option. You’ll want Rise Of The Tomb Kings . Make sure to find the free Bone Giant download, too.
- Vampire Coast: Only one option. You’ll want Curse Of The Vampire Coast .
- Ogre Kingdoms: Again, one option, helpfully called Ogre Kingdoms .
- Chaos Dwarfs: Once more, an easy choice. Buy Forge Of The Chaos Dwarfs .
- Kislev: No need for DLC, you’ll get most of the good stuff with base Warhammer 3. Grab Shadows Of Change if they’re your absolute favourites, but it’s not a necessity.
- Grand Cathay: Same again. You’ll get the majority of the roster with base Warhammer 3. Again, grab Shadows Of Change , but only if you’re really into Cathay, or it doubles up with another faction you like.
Other things to keep in mind before starting a campaign
- Do you like blood? Sadly, that’ll cost you. If you want blood, gore, and a few unique dismemberment animations in battle, you’ll want to pick up Blood For The Blood God 3 . I know. I know.
- Difficulty is somewhat modular, but comes down to two broad choices. ‘Battle difficulty’ is how many stat buffs the enemy gets. Set this to ’normal’ for your first game. ‘Campaign difficulty’ is, broadly, how many economy cheats the enemy get. Either set this to ’normal’ or ‘hard’. I actually recommend ‘hard’, since you’ll get into better habits in the long run. Stick with ’normal’ if this is your first time playing a strategy game. Also, if you ever hear anyone shaming anyone else about difficulty in this game, you can safely write them off as a muppet.
- Set advice frequency to ‘high’. Make sure the ‘enable endgame scenarios’ box is unchecked. Leave everything else on default.
Your first turn in Total War: Warhammer
There’s a full tutorial alongside the short narrative campaign in the game. You should absolutely play this first, and I won’t be going over things like controls and menus too much here. Instead, I’ll walk through your first few turns with the game, and try to get you set up for success with some tips. This is just the way I play, though. There are many different viable approaches and strategies, and each faction has its own unique systems and considersations. Don’t be afraid to experiment!
We’ll start our first campaign with Katarin of Kislev, since you’ll all have access to her campaign just by buying the Total War: Warhammer 3. Kislev are a hardy, Slavic-inspired human faction. They act as the bulwark of humanity against the forces of chaos encroaching from the north, and worship a bear god. Also, Katarin is voiced by Lae’zel actress Devora Wilde!

Image credit:Creative Assembly
Every first turn features an introductory battle nearby with a warring faction, and you’ll always want to fight this. Before this, however, we’re going to want do a couple of Kislev-only faction specific things.

Image credit:Creative Assembly
First, click on the crown in the bottom right hand corner to bring up the Ice Court menu, and start training a Frost Maiden hero. Heroes are powerful units you’ll want in your armies, and starting this process early is useful. You’ll notice it costs 1200 gold, which seems like a lot, but we start with a large stockpile and there aren’t that many opportunities to spend it in the early turns.

Image credit:Creative Assembly
Next, click on the palace icon on the top middle on the screen to bring up The Motherland menu, and pick whichever of the four options you like the sound of. I like ‘Salyak’ because of the growth and replenishment, but it’s up to you. The other bonus here is a resource called ‘supporters’, although they aren’t very relevant until much later in your campaign, so don’t worry too much about them now.

Right, now we’re ready to fight! Right click on the bad dude with the red name, and let’s get into it. |Image credit:Creative Assembly
Before the battle starts, you’ll see three options at the bottom of the screen. Autoresolve, fight, and retreat. Fight does what you’d expect. Retreat cancels the fight. and Katarin will move away from the army on the campaign map. Autoresolve calculates the battle results for you in a few seconds, and will give you a result close to the one specified after ‘Battle Result:’. A ‘close victory’ means we’ll win but take quite a few losses. We don’t want that. Also, you paid for fighting, not mathing. Click the middle button with the crossed swords.

Image credit:Creative Assembly
Before the battle starts, you can do two things. First, you can gamble your available magic points for a chance at a few more. Secondly, you’ll be able to organise your army. The very basic idea here is this: melee troops at the front, ranged troops at the back, calvary or fast moving units on the flanks. As for your lord, it depends. Katarin is a spellcaster, so we’re going to keep her away from the frontline for now.
As an additional tip, remember to keep some space between your units rather than making solid, unbroken battle lines. This has a number of advantages, like letting you cover more space, making certain spells less effective, and giving your ranged units more manoeuvrability and better lines of sight. When you’re ready, start the battle.

A lot of Kislev’s units are hybrids. The very simple explanation here is that their ranged units do better in melee that many others, and their melee frontline units have guns. Fun! |Image credit:Creative Assembly
The enemy have decided to stay still, since I have the range advantage. That’s fine. I drag a box around my whole army to select them, then hold alt+shift to keep formation, and move them up the field. Then, I click the speed button at the bottom to make sure they aren’t running. This will cause fatigue, and they’ll fight worse. If you find watching the army march across the field gets a bit too slow for you, you can speed things up in the top right corner. But do make sure to go back to normal speed, or even pause, when the action starts.
When the enemy army are just in range of my cones, I stop. You’d usually want to wait until they’re a bit closer to start firing, since missiles lose some effectiveness at maximum range, but this battle won’t last long enough to need to worry about running out of ammunition.

They’ve send some ranged cavalry to harass our right flank, so I’m going to send my big snow cat to chew them up, or at least deter them, making sure to retreat before the bulk of the army closes in and surrounds it. |Image credit:Creative Assembly
I’m also going to use Katarin’s Ice Sheet spell, slowing down the approaching army and hopefully letting us get a few more shots off. As they close in, I have my ranged units focus fire on the ice trolls, since that’s their most dangerous unit.

Image credit:Creative Assembly
In my haste, I’ve waited too long to set up my calvary, so I hold shift to set a movement path. This will pull them out of danger, and set them up for a rear-charge in a little while.

Image credit:Creative Assembly
As the enemy clumps up, I use Katarin’s other spell to deal some damage. You’ll need to set the direction on the spell cone yourself. Make it count!

Image credit:Creative Assembly
Even though these trolls are running off, they’ll come back soon once they rally. Worse, trolls have regeneration, so they’ll also get some health back. I continue shooting at them to deal more damage, then send my horses to chase them. As long as a retreating (pale flag) unit is being chased by another, they can’t rally and return to the fight. Also, I got my cat beaten up. Just ignore that.

Image credit:Creative Assembly
Ah, the bullets did their job! You’ll notice a skull above the troll’s banner. That means they won’t come back, and we don’t have to worry about them any more. I use my horses to sweep their back lines instead, wiping out their ranged units and chasing down any stragglers. Remember - the more enemy models you kill, the more gold and experience you’ll gain from the fight.
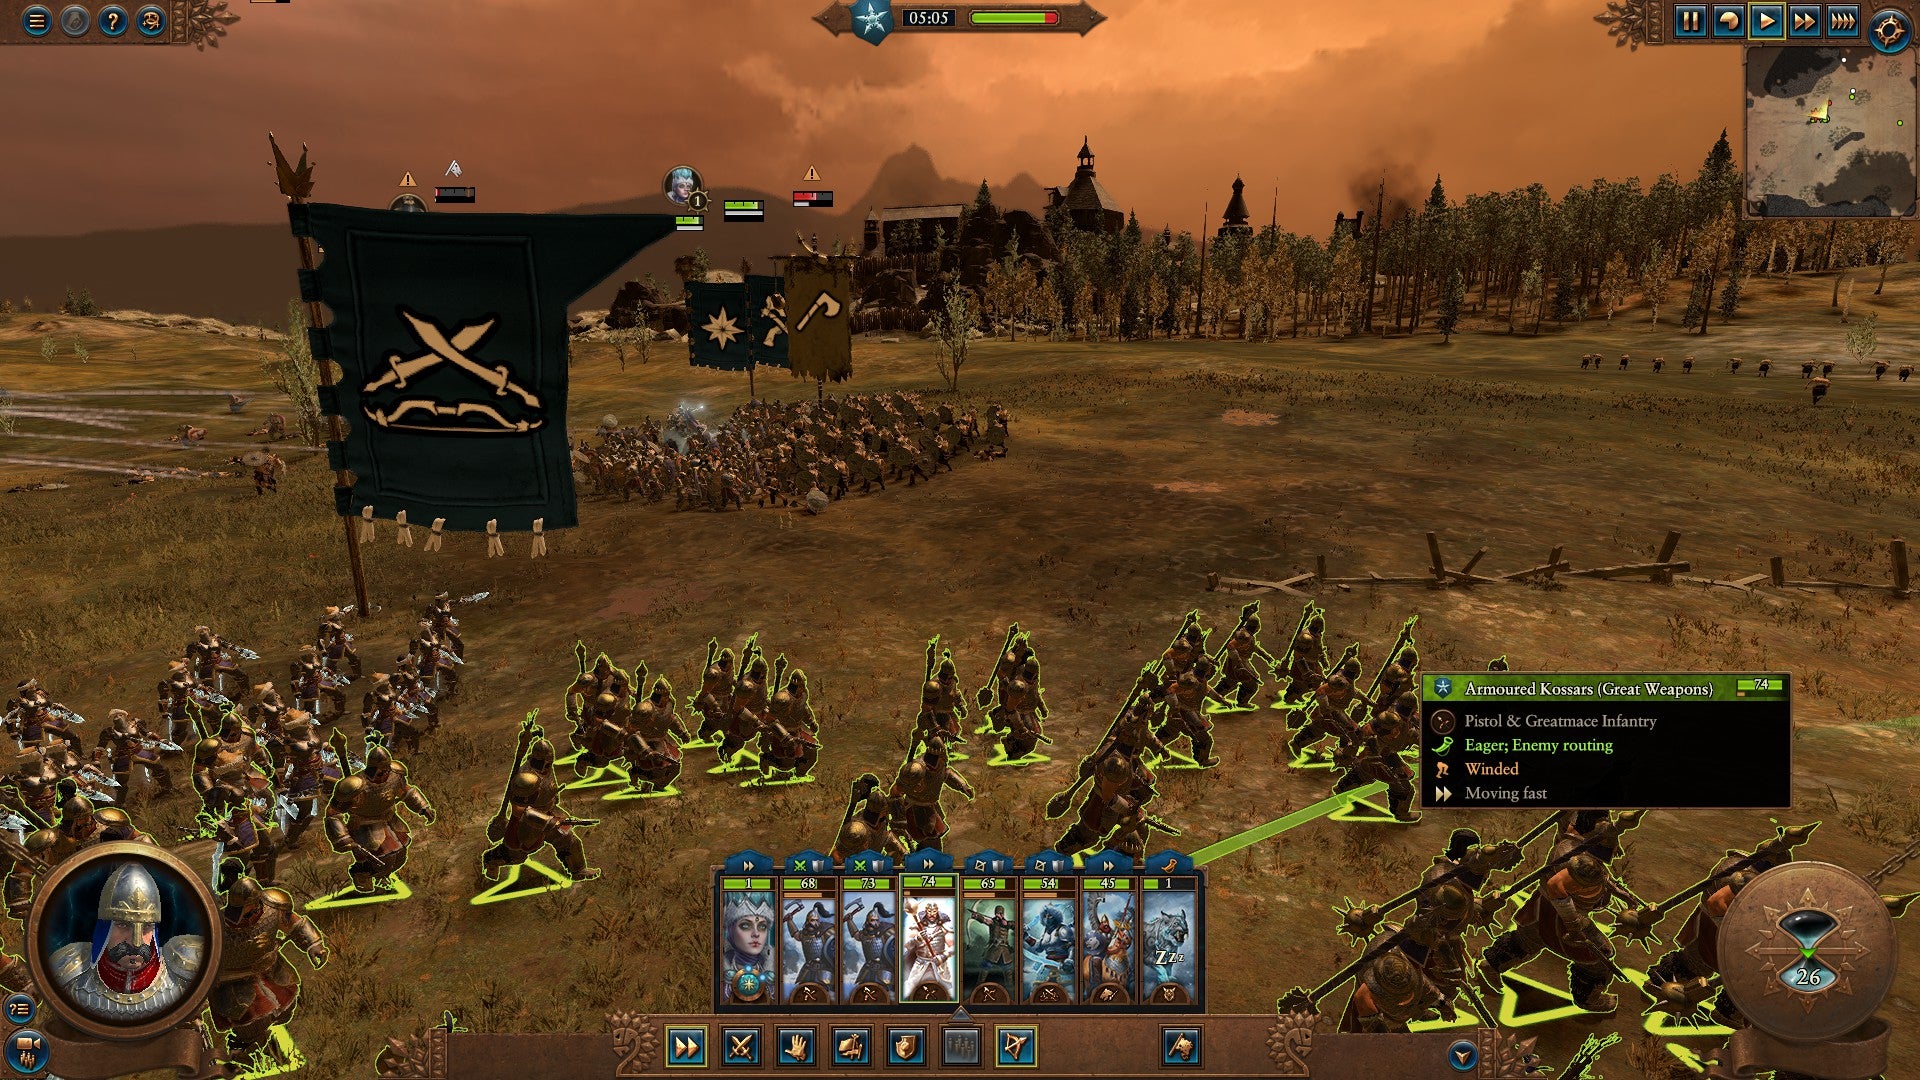
Image credit:Creative Assembly
I bring my archers around the side of this enemy unit to help my melee lads out. And soon, the entire army breaks and runs off. We’ve won!

Image credit:Creative Assembly
After battle, we’ve got a few different options to choose from. I grab the replenishment to apologise to my neglected cat. I am so sorry, my cold friend.
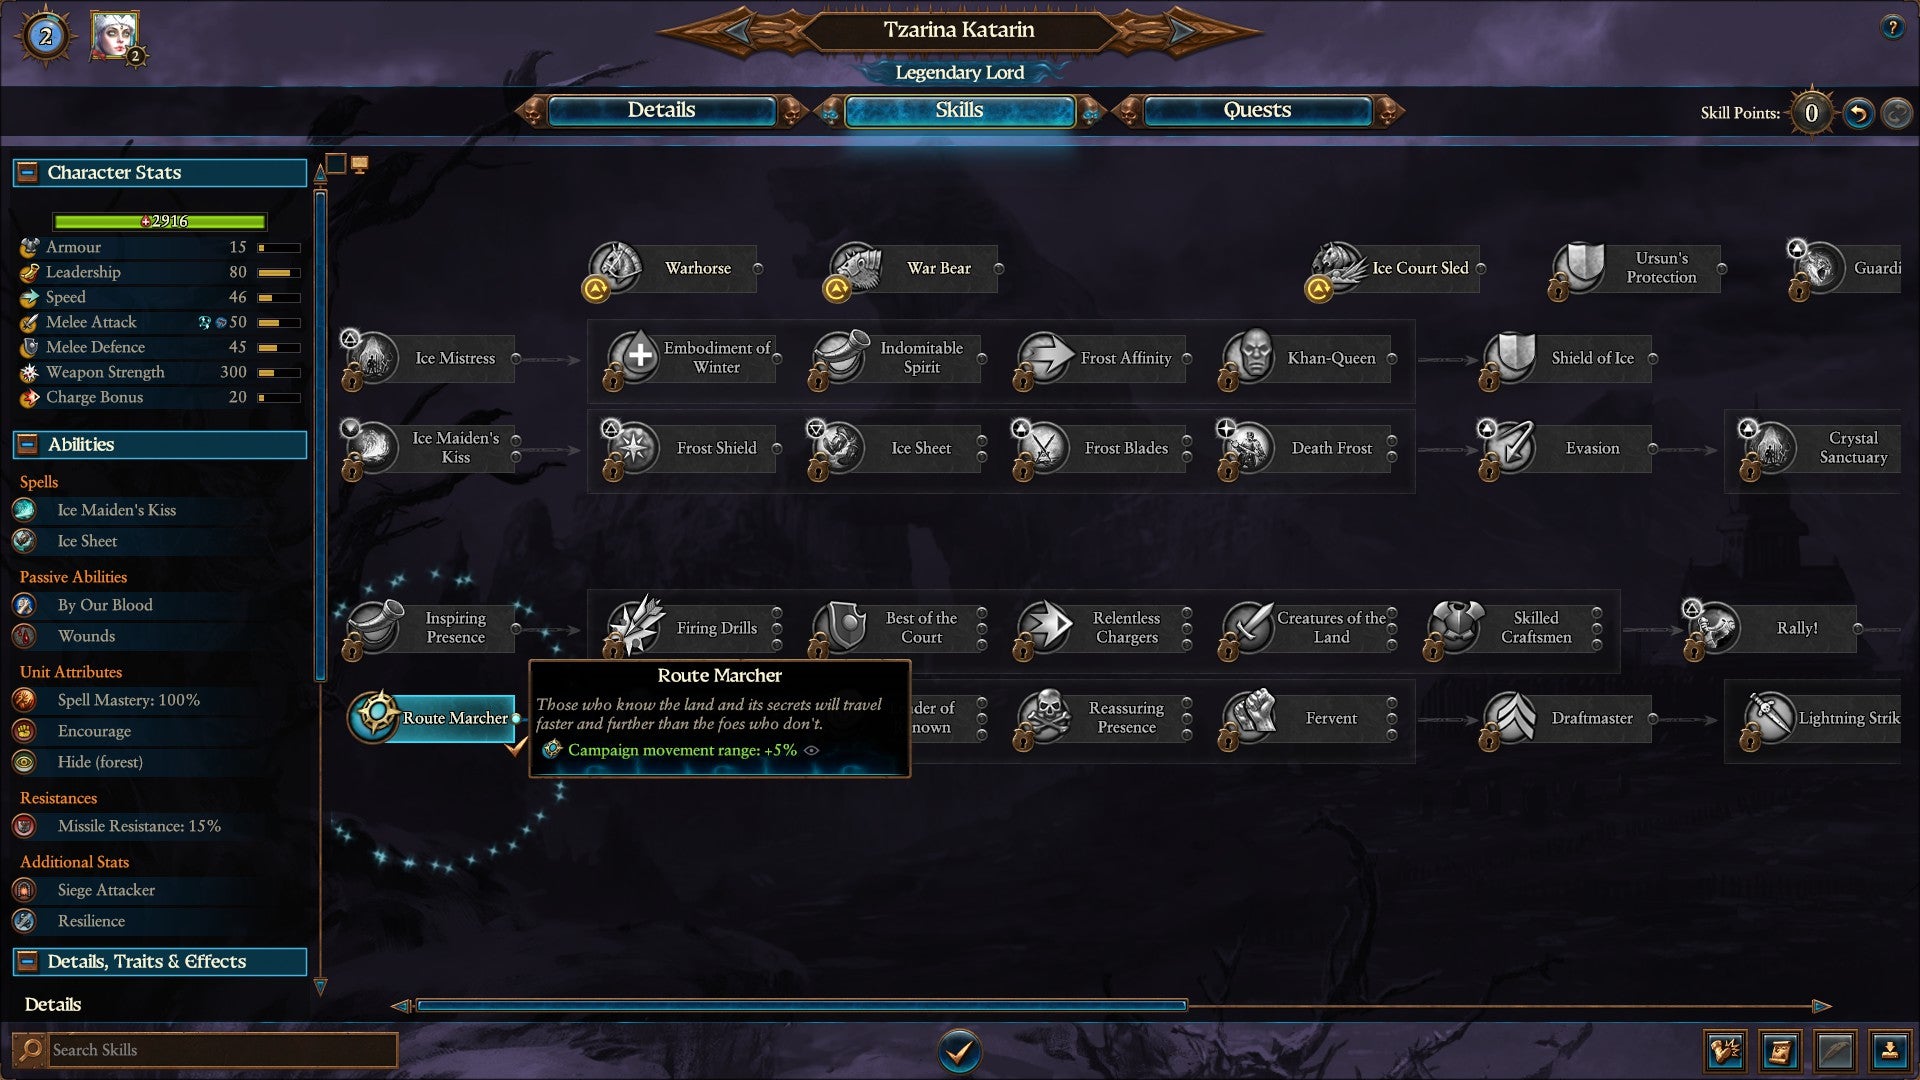
Image credit:Creative Assembly
After battle, Katarin’s got enough experience to gain a skill point. ‘Route marcher’ is the mandatory first pick in almost all situations, so grab that first.
Next up, you’ll attack the nearest enemy settlement. You can either auto resolve this or fight the battle, although I’d recommend getting the practise in. We plan on keeping this settlement, so occupy it. With settlements you might not want to keep later, you can sack them first. This will give you a nice cash bonus but make the actual settlement less useful to own
We get another skill point, so lets put it into Katarin’s magic skill tree. Spells can really turn the tide of battle, so having a powerful caster is a great way to make an average army perform much better than normal. You’ll also notice we got some swanky magic armour. This will equip on to Katarin automatically, but you can give it to another lord or hero later.

Image credit:Creative Assembly
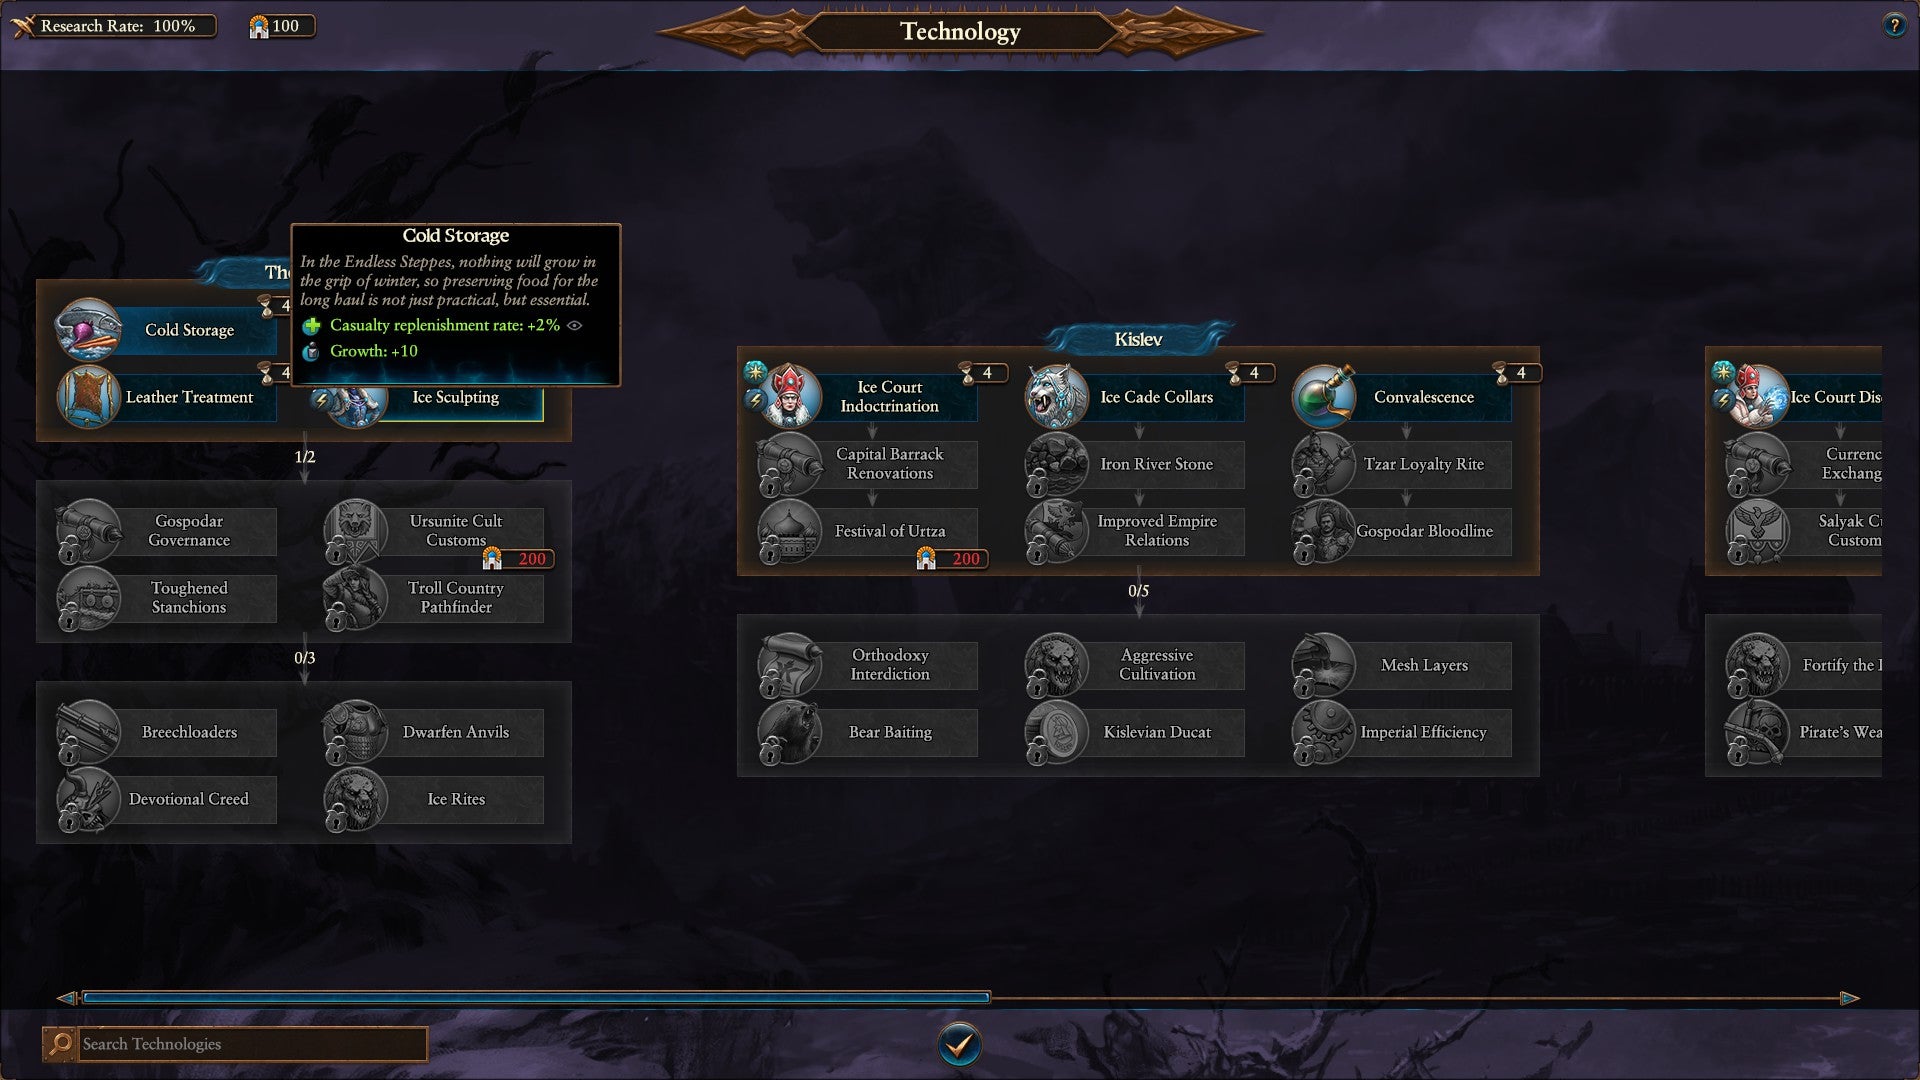
Next up, it’s time to do some building. The basic order of building priority to keep in mind is growth, then economy, then military. First, get as much growth bonus as you can, then focus on getting more money, then build structures that let you recruit new units. With your lords and heroes, the basic units available at the start of the game will be just fine for capturing your first few provinces. Don’t cripple your economy by trying to chase the powerful stuff straight out of the gate, and you won’t have access to most of it for a while anyway.

There’s two more things we need to do before hitting the end turn button. First, you’ll notice a notification in the bottom right corner that you have a ‘commandment available’. This means you own an entire province, and can set a bonus for that province. Usually, a province consists of multiple individual settlements, but the city of Kislev itself also counts as an entire province.
Choose ‘Purge the Steppes’, which gives the province a bonus to public order. This prevents rebellions, but more immediately, the higher your control, the bigger bonus to growth you get. Alongside the growth bonus buildings we built, plus the special Motherland edict, plus the research, we’re stockpiling growth very fast. This gives us a huge headstart.

Image credit:Creative Assembly
The final thing we’ll do this turn is recruit a second lord. Later, he’ll lead his own army. For now, though, we’ll just send him to tail Katarin and reinforce her in battle, meaning he’ll build up experience points. There’s also some other tricks you can do with this extra lord, like preventing city garrisons from reinforcing nearby armies by sieging their cities, but don’t worry about this for now!

Image credit:Creative Assembly
And that’s it! That’s our first turn sorted. Apply these tips going forward, plus the more general tips below, and you’ll be well on your way to being an unstoppable force in the Warhammer world!
General tips for your first few turns and beyond
- ABK (Always Be Krumping): There is little to no advantage to ever playing passively in Total War: Warhammer. While you don’t want to rush to take new territory too quickly because of public order and defensive considerations, you do always want to be working out where your next fight is. If you can’t find it, just go sack an enemy settlement a few times. Fights mean experience and money, and each lord has game-defining abilities at a certain point in their skill tree. Get to fighting!
- Spend your gold: Similarly to the first point, money in Total Warhammer is only really useful as a means to be better at fighting. While it’s worth keeping a bit of a stockpile, in case you need to raise an army in a hurry, you should look to spend your gold as soon as you get it, or else know exactly what your going to spend it on as soon as you have enough.
- Army composition: While you may be a fan of the many flavours of melee infantry in the game, these usually aren’t the troops that are going to win you battles. Make sure you include lots of ranged troops, and a few fast movers and heavy hitters, in every army. Also, make sure every army has at least one spellcaster in it, whether that’s a lord or a hero. Magic is available to every faction (except Khorne!) and not taking advantage of it is just leaving a critical part of your toolset on the table.
- Don’t end battles immediately after you win: As mentioned above, the more enemy models you kill in a battle, the more gold and experience you’ll get at the end. What’s sometimes more important, though, is that by killing important enemy units as they flee the field at the end, you’re preventing powerful foes from hitting you next turn with a counter attack. Winning a battle doesn’t wipe out an army, although winning a second battle against that army in the same turn will. The end of a battle is your chance to make that second fight a lot easier for yourself.
- Grimgor is da best: Seriously. He’s absolutely cracked right now. Either wipe him out early or just let everyone else deal with him. Don’t pursue. Trust me.
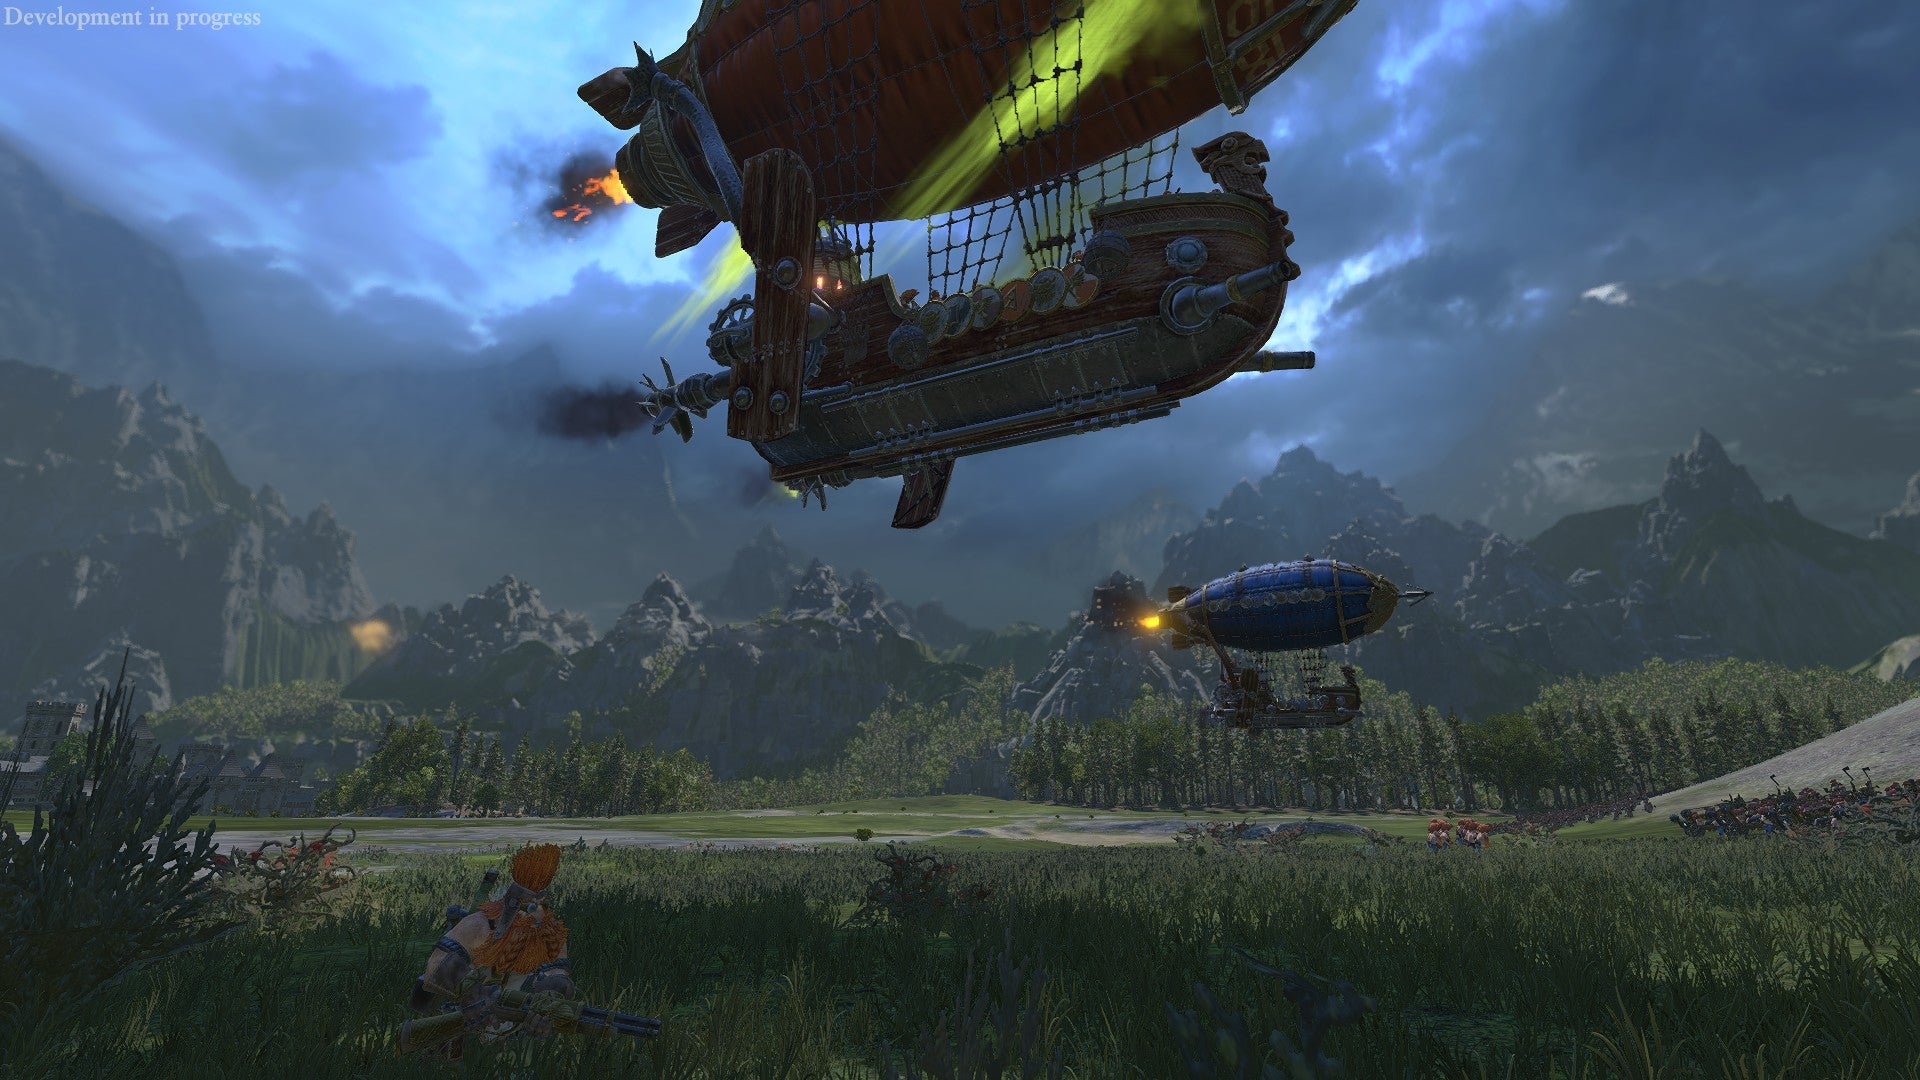
Total War: Warhammer III
Video Game
Rock Paper Shotgun is better when you sign in
Sign in and join us on our journey to discover strange and compelling PC games.

All 75 Arc Raiders Blueprints and where to get them
These areas have the highest chance of giving you Blueprints

Image credit:Rock Paper Shotgun/Embark Studios

Looking for more Arc Raiders Blueprints? It’s a special day when you find a Blueprint, as they’re among the most valuable items in Arc Raiders. If you find a Blueprint that you haven’t already found, then you must make sure you hold onto it at all costs, because Blueprints are the key to one of the most important and powerful systems of meta-progression in the game.
This guide aims to be the very best guide on Blueprints you can find, starting with a primer on what exactly they are and how they work in Arc Raiders, before delving into exactly where to get Blueprints and the very best farming spots for you to take in your search.
We’ll also go over how to get Blueprints from other unlikely activities, such as destroying Surveyors and completing specific quests. And you’ll also find the full list of all 75 Blueprints in Arc Raiders on this page (including the newest Blueprints added with the Cold Snap update , such as the Deadline Blueprint and Firework Box Blueprint), giving you all the information you need to expand your own crafting repertoire.
In this guide:
- What are Blueprints in Arc Raiders?
- Full Blueprint list: All crafting recipes
- Where to find Blueprints in Arc Raiders Blueprints obtained from quests Blueprints obtained from Trials Best Blueprint farming locations

What are Blueprints in Arc Raiders?
Blueprints in Arc Raiders are special items which, if you manage to extract with them, you can expend to permanently unlock a new crafting recipe in your Workshop. If you manage to extract from a raid with an Anvil Blueprint, for example, you can unlock the ability to craft your very own Anvil Pistol, as many times as you like (as long as you have the crafting materials).
To use a Blueprint, simply open your Inventory while in the lobby, then right-click on the Blueprint and click “Learn And Consume” . This will permanently unlock the recipe for that item in your Workshop. As of the Stella Montis update, there are allegedly 75 different Blueprints to unlock - although only 68 are confirmed to be in the game so far. You can see all the Blueprints you’ve found and unlocked by going to the Workshop menu, and hitting “R” to bring up the Blueprint screen.
It’s possible to find duplicates of past Blueprints you’ve already unlocked. If you find these, then you can either sell them, or - if you like to play with friends - you can take it into a match and gift it to your friend so they can unlock that recipe for themselves. Another option is to keep hold of them until the time comes to donate them to the Expedition.
Full Blueprint list: All crafting recipes
Below is the full list of all the Blueprints that are currently available to find in Arc Raiders, and the crafting recipe required for each item:
| Blueprint | Type | Recipe | Crafted At |
|---|---|---|---|
| Bettina | Weapon | 3x Advanced Mechanical Components 3x Heavy Gun Parts 3x Canister | Gunsmith 3 |
| Blue Light Stick | Quick Use | 3x Chemicals | Utility Station 1 |
| Aphelion | Weapon | 3x Magnetic Accelerator 3x Complex Gun Parts 1x Matriarch Reactor | Gunsmith 3 |
| Combat Mk. 3 (Flanking) | Augment | 2x Advanced Electrical Components 3x Processor | Gear Bench 3 |
| Combat Mk. 3 (Aggressive) | Augment | 2x Advanced Electrical Components 3x Processor | Gear Bench 3 |
| Complex Gun Parts | Material | 2x Light Gun Parts 2x Medium Gun Parts 2x Heavy Gun Parts | Refiner 3 |
| Fireworks Box | Quick Use | 1x Explosive Compound 3x Pop Trigger | Explosives Station 2 |
| Gas Mine | Mine | 4x Chemicals 2x Rubber Parts | Explosives Station 1 |
| Green Light Stick | Quick Use | 3x Chemicals | Utility Station 1 |
| Pulse Mine | Mine | 1x Crude Explosives 1x Wires | Explosives Station 1 |
| Seeker Grenade | Grenade | 1x Crude Explosives 2x ARC Alloy | Explosives Station 1 |
| Looting Mk. 3 (Survivor) | Augment | 2x Advanced Electrical Components 3x Processor | Gear Bench 3 |
| Angled Grip II | Mod | 2x Mechanical Components 3x Duct Tape | Gunsmith 2 |
| Angled Grip III | Mod | 2x Mod Components 5x Duct Tape | Gunsmith 3 |
| Hullcracker | Weapon | 1x Magnetic Accelerator 3x Heavy Gun Parts 1x Exodus Modules | Gunsmith 3 |
| Launcher Ammo | Ammo | 5x Metal Parts 1x Crude Explosives | Workbench 1 |
| Anvil | Weapon | 5x Mechanical Components 5x Simple Gun Parts | Gunsmith 2 |
| Anvil Splitter | Mod | 2x Mod Components 3x Processor | Gunsmith 3 |
| ??? | ??? | ??? | ??? |
| Barricade Kit | Quick Use | 1x Mechanical Components | Utility Station 2 |
| Blaze Grenade | Grenade | 1x Explosive Compound 2x Oil | Explosives Station 3 |
| Bobcat | Weapon | 3x Advanced Mechanical Components 3x Light Gun Parts | Gunsmith 3 |
| Osprey | Weapon | 2x Advanced Mechanical Components 3x Medium Gun Parts 7x Wires | Gunsmith 3 |
| Burletta | Weapon | 3x Mechanical Components 3x Simple Gun Parts | Gunsmith 1 |
| Compensator II | Mod | 2x Mechanical Components 4x Wires | Gunsmith 2 |
| Compensator III | Mod | 2x Mod Components 8x Wires | Gunsmith 3 |
| Defibrillator | Quick Use | 9x Plastic Parts 1x Moss | Medical Lab 2 |
| ??? | ??? | ??? | ??? |
| Equalizer | Weapon | 3x Magnetic Accelerator 3x Complex Gun Parts 1x Queen Reactor | Gunsmith 3 |
| Extended Barrel | Mod | 2x Mod Components 8x Wires | Gunsmith 3 |
| Extended Light Mag II | Mod | 2x Mechanical Components 3x Steel Spring | Gunsmith 2 |
| Extended Light Mag III | Mod | 2x Mod Components 5x Steel Spring | Gunsmith 3 |
| Extended Medium Mag II | Mod | 2x Mechanical Components 3x Steel Spring | Gunsmith 2 |
| Extended Medium Mag III | Mod | 2x Mod Components 5x Steel Spring | Gunsmith 3 |
| Extended Shotgun Mag II | Mod | 2x Mechanical Components 3x Steel Spring | Gunsmith 2 |
| Extended Shotgun Mag III | Mod | 2x Mod Components 5x Steel Spring | Gunsmith 3 |
| Remote Raider Flare | Quick Use | 2x Chemicals 4x Rubber Parts | Utility Station 1 |
| Heavy Gun Parts | Material | 4x Simple Gun Parts | Refiner 2 |
| Venator | Weapon | 2x Advanced Mechanical Components 3x Medium Gun Parts 5x Magnet | Gunsmith 3 |
| Il Toro | Weapon | 5x Mechanical Components 6x Simple Gun Parts | Gunsmith 1 |
| Jolt Mine | Mine | 1x Electrical Components 1x Battery | Explosives Station 2 |
| Explosive Mine | Mine | 1x Explosive Compound 1x Sensors | Explosives Station 3 |
| Jupiter | Weapon | 3x Magnetic Accelerator 3x Complex Gun Parts 1x Queen Reactor | Gunsmith 3 |
| Light Gun Parts | Material | 4x Simple Gun Parts | Refiner 2 |
| Lightweight Stock | Mod | 2x Mod Components 5x Duct Tape | Gunsmith 3 |
| Lure Grenade | Grenade | 1x Speaker Component 1x Electrical Components | Utility Station 2 |
| Medium Gun Parts | Material | 4x Simple Gun Parts | Refiner 2 |
| Torrente | Weapon | 2x Advanced Mechanical Components 3x Medium Gun Parts 6x Steel Spring | Gunsmith 3 |
| Muzzle Brake II | Mod | 2x Mechanical Components 4x Wires | Gunsmith 2 |
| Muzzle Brake III | Mod | 2x Mod Components 8x Wires | Gunsmith 3 |
| Padded Stock | Mod | 2x Mod Components 5x Duct Tape | Gunsmith 3 |
| Shotgun Choke II | Mod | 2x Mechanical Components 4x Wires | Gunsmith 2 |
| Shotgun Choke III | Mod | 2x Mod Components 8x Wires | Gunsmith 3 |
| Shotgun Silencer | Mod | 2x Mod Components 8x Wires | Gunsmith 3 |
| Showstopper | Grenade | 1x Advanced Electrical Components 1x Voltage Converter | Explosives Station 3 |
| Silencer I | Mod | 2x Mechanical Components 4x Wires | Gunsmith 2 |
| Silencer II | Mod | 2x Mod Components 8x Wires | Gunsmith 3 |
| Snap Hook | Quick Use | 2x Power Rod 3x Rope 1x Exodus Modules | Utility Station 3 |
| Stable Stock II | Mod | 2x Mechanical Components 3x Duct Tape | Gunsmith 2 |
| Stable Stock III | Mod | 2x Mod Components 5x Duct Tape | Gunsmith 3 |
| Tagging Grenade | Grenade | 1x Electrical Components 1x Sensors | Utility Station 3 |
| Tempest | Weapon | 3x Advanced Mechanical Components 3x Medium Gun Parts 3x Canister | Gunsmith 3 |
| Trigger Nade | Grenade | 2x Crude Explosives 1x Processor | Explosives Station 2 |
| Vertical Grip II | Mod | 2x Mechanical Components 3x Duct Tape | Gunsmith 2 |
| Vertical Grip III | Mod | 2x Mod Components 5x Duct Tape | Gunsmith 3 |
| Vita Shot | Quick Use | 2x Antiseptic 1x Syringe | Medical Lab 3 |
| Vita Spray | Quick Use | 3x Antiseptic 1x Canister | Medical Lab 3 |
| Vulcano | Weapon | 1x Magnetic Accelerator 3x Heavy Gun Parts 1x Exodus Modules | Gunsmith 3 |
| Wolfpack | Grenade | 2x Explosive Compound 2x Sensors | Explosives Station 3 |
| Red Light Stick | Quick Use | 3x Chemicals | Utility Station 1 |
| Smoke Grenade | Grenade | 14x Chemicals 1x Canister | Utility Station 2 |
| Deadline | Mine | 3x Explosive Compound 2x ARC Circuitry | Explosives Station 3 |
| Trailblazer | Grenade | 1x Explosive Compound 1x Synthesized Fuel | Explosives Station 3 |
| Tactical Mk. 3 (Defensive) | Augment | 2x Advanced Electrical Components 3x Processor | Gear Bench 3 |
| Tactical Mk. 3 (Healing) | Augment | 2x Advanced Electrical Components 3x Processor | Gear Bench 3 |
| Yellow Light Stick | Quick Use | 3x Chemicals | Utility Station 1 |
Note: The missing Blueprints in this list likely have not actually been added to the game at the time of writing, because none of the playerbase has managed to find any of them. As they are added to the game, I will update this page with the most relevant information so you know exactly how to get all 75 Arc Raiders Blueprints.
Where to find Blueprints in Arc Raiders
Below is a list of all containers, modifiers, and events which maximise your chances of finding Blueprints:
- Certain quests reward you with specific Blueprints .
- Completing Trials has a high chance of offering Blueprints as rewards.
- Surveyors have a decent chance of dropping Blueprints on death.
- High loot value areas tend to have a greater chance of spawning Blueprints.
- Night Raids and Storms may increase rare Blueprint spawn chances in containers.
- Containers with higher numbers of items may have a higher tendency to spawn Blueprints. As a result, Blue Gate (which has many “large” containers containing multiple items) may give you a higher chance of spawning Blueprints.
- Raider containers (Raider Caches, Weapon Boxes, Medical Bags, Grenade Tubes) have increased Blueprint drop rates. As a result, the Uncovered Caches event gives you a high chance of finding Blueprints.
- Security Lockers have a higher than average chance of containing Blueprints.
- Certain Blueprints only seem to spawn under specific circumstances: Tempest Blueprint only spawns during Night Raid events. Vulcano Blueprint only spawns during Hidden Bunker events. Jupiter and Equaliser Blueprints only spawn during Harvester events.

Raider Caches, Weapon Boxes, and other raider-oriented container types have a good chance of offering Blueprints. |Image credit:Rock Paper Shotgun/Embark Studios
Blueprints have a very low chance of spawning in any container in Arc Raiders, around 1-2% on average. However, there is a higher chance of finding Blueprints in particular container types. Specifically, you can find more Blueprints in Raider containers and security lockers.
Beyond this, if you’re looking for Blueprints you should focus on regions of the map which are marked as having particularly high-value loot. Areas such as the Control Tower in Dam Battlegrounds, the Arrival and Departure Buildings in Spaceport, and Pilgrim’s Peak in Blue Gate all have a better-than-average chance of spawning Blueprints somewhere amongst all their containers. Night Raids and Electromagnetic Storm events also increase the drop chances of certain Blueprints .
In addition to these containers, you can often loot Blueprints from destroyed Surveyors - the largest of the rolling ball ARC. Surveyors are more commonly found on the later maps - Spaceport and Blue Gate - and if one spawns in your match, you’ll likely see it by the blue laser beam that it casts into the sky while “surveying”.
Surveyors are quite well-armoured and will very speedily run away from you once it notices you, but if you can take one down then make sure you loot all its parts for a chance of obtaining certain unusual Blueprints.
Blueprints obtained from quests
One way in which you can get Blueprints is by completing certain quests for the vendors in Speranza. Some quests will reward you with a specific item Blueprint upon completion, so as long as you work through all the quests in Arc Raiders, you are guaranteed those Blueprints.
Here is the full list of all Blueprints you can get from quest rewards:
- Trigger Nade Blueprint: Rewarded after completing “Sparks Fly”.
- Lure Grenade Blueprint: Rewarded after completing “Greasing Her Palms”.
- Burletta Blueprint: Rewarded after completing “Industrial Espionage”.
- Hullcracker Blueprint (and Launcher Ammo Blueprint): Rewarded after completing “The Major’s Footlocker”.
Alas, that’s only 4 Blueprints out of a total of 75 to unlock, so for the vast majority you will need to find them yourself during a raid. If you’re intent on farming Blueprints, then it’s best to equip yourself with cheap gear in case you lose it, but don’t use a free loadout because then you won’t get a safe pocket to stash any new Blueprint you find. No pain in Arc Raiders is sharper than failing to extract with a new Blueprint you’ve been after for a dozen hours already.

One of the best ways to get Blueprints is by hitting three stars on all five Trials every week. |Image credit:Rock Paper Shotgun/Embark Studios
Blueprints obtained from Trials
One of the very best ways to get Blueprints is as rewards for completing Trials in Arc Raiders. Trials are unlocked from Level 15 onwards, and allow you to earn rewards by focusing on certain tasks over the course of several raids. For example, one Trial might task you with dealing damage to Hornets, while another might challenge you to loot Supply Drops.
Trials refresh on a weekly basis, with a new week bringing five new Trials. Each Trial can offer up to three rewards after passing certain score milestones, and it’s possible to receive very high level loot from these reward crates - including Blueprints. So if you want to unlock as many Blueprints as possible, you should make a point of completing as many Trials as possible each week.
Best Blueprint farming locations
The very best way to get Blueprints is to frequent specific areas of the maps which combine high-tier loot pools with the right types of containers to search. Here are my recommendations for where to find Blueprints on every map, so you can always keep the search going for new crafting recipes to unlock.

Image credit:Rock Paper Shotgun/Embark Studios
Dam Battlegrounds
The best places to farm Blueprints on Dam Battlegrounds are the Control Tower, Power Generation Complex, Ruby Residence, and Pale Apartments . The first two regions, despite only being marked on the map as mid-tier loot, contain a phenomenal number of containers to loot. The Control Tower can also contain a couple of high-tier Security Lockers - though of course, you’ll need to have unlocked the Security Breach skill at the end of the Survival tree.
There’s also a lot of reporting amongst the playerbase that the Residential areas in the top-left of the map - Pale Apartments and Ruby Residence - give you a comparatively strong chance of finding Blueprints. Considering their size, there’s a high density of containers to loot in both locations, and they also have the benefit of being fairly out of the way. So you’re more likely to have all the containers to yourself.
Buried City
The best Blueprint farming locations on Buried City are the Santa Maria Houses, Grandioso Apartments, Town Hall, and the various buildings of the New District . Grandioso Apartments has a lower number of containers than the rest, but a high chance of spawning weapon cases - which have good Blueprint drop rates. The others are high-tier loot areas, with plenty of lootable containers - including Security Lockers.
Spaceport
The best places to find Blueprints on Spaceport are the Arrival and Departure Buildings, as well as Control Tower A6 and the Launch Towers . All these areas are labelled as high-value loot regions, and many of them are also very handily connected to one another by the Spaceport wall, which you can use to quickly run from one area to the next. At the tops of most of these buildings you’ll find at least one Security Locker, so this is an excellent farming route for players looking to find Blueprints.
The downside to looting Blueprints on Spaceport is that all these areas are hotly contested, particularly in Duos and Squads. You’ll need to be very focused and fast in order to complete the full farming route.

Image credit:Rock Paper Shotgun/Embark Studios
Blue Gate
Blue Gate tends to have a good chance of dropping Blueprints, potentially because it generally has a high number of containers which can hold lots of items; so there’s a higher chance of a Blueprint spawning in each container. In my experience, the best Blueprint farming spots on Blue Gate are Pilgrim’s Peak, Raider’s Refuge, the Ancient Fort, and the Underground Complex beneath the Warehouse .
All of these areas contain a wealth of containers to loot. Raider’s Refuge has less to loot, but the majority of the containers in and around the Refuge are raider containers, which have a high chance of containing Blueprints - particularly during major events.
Stella Montis
On the whole, Stella Montis seems to have a very low drop rate for Blueprints (though a high chance of dropping other high-tier loot). If you do want to try farming Blueprints on this map, the best places to find Blueprints in Stella Montis are Medical Research, Assembly Workshop, and the Business Center . These areas have the highest density of containers to loot on the map.
In addition to this, the Western Tunnel has a few different Security Lockers to loot, so while there’s very little to loot elsewhere in this area of the map, it’s worth hitting those Security Lockers if you spawn there at the start of a match.
That wraps up this primer on how to get all the Blueprints in Arc Raiders as quickly as possible. With the Expedition system constantly resetting a large number of players’ Blueprints, it’s more important than ever to have the most up-to-date information on where to find all these Blueprints.
While you’re here, be sure to check out our Arc Raiders best guns tier list , as well as our primers on the best skills to unlock and all the different Field Depot locations on every map.

ARC Raiders
PS5 , Xbox Series X/S , PC
Rock Paper Shotgun is better when you sign in
Sign in and join us on our journey to discover strange and compelling PC games.
