All quests in Elden Ring: Shadow Of The Erdtree
Here is a walkthrough of every quest in Shadow Of The Erdtree in order
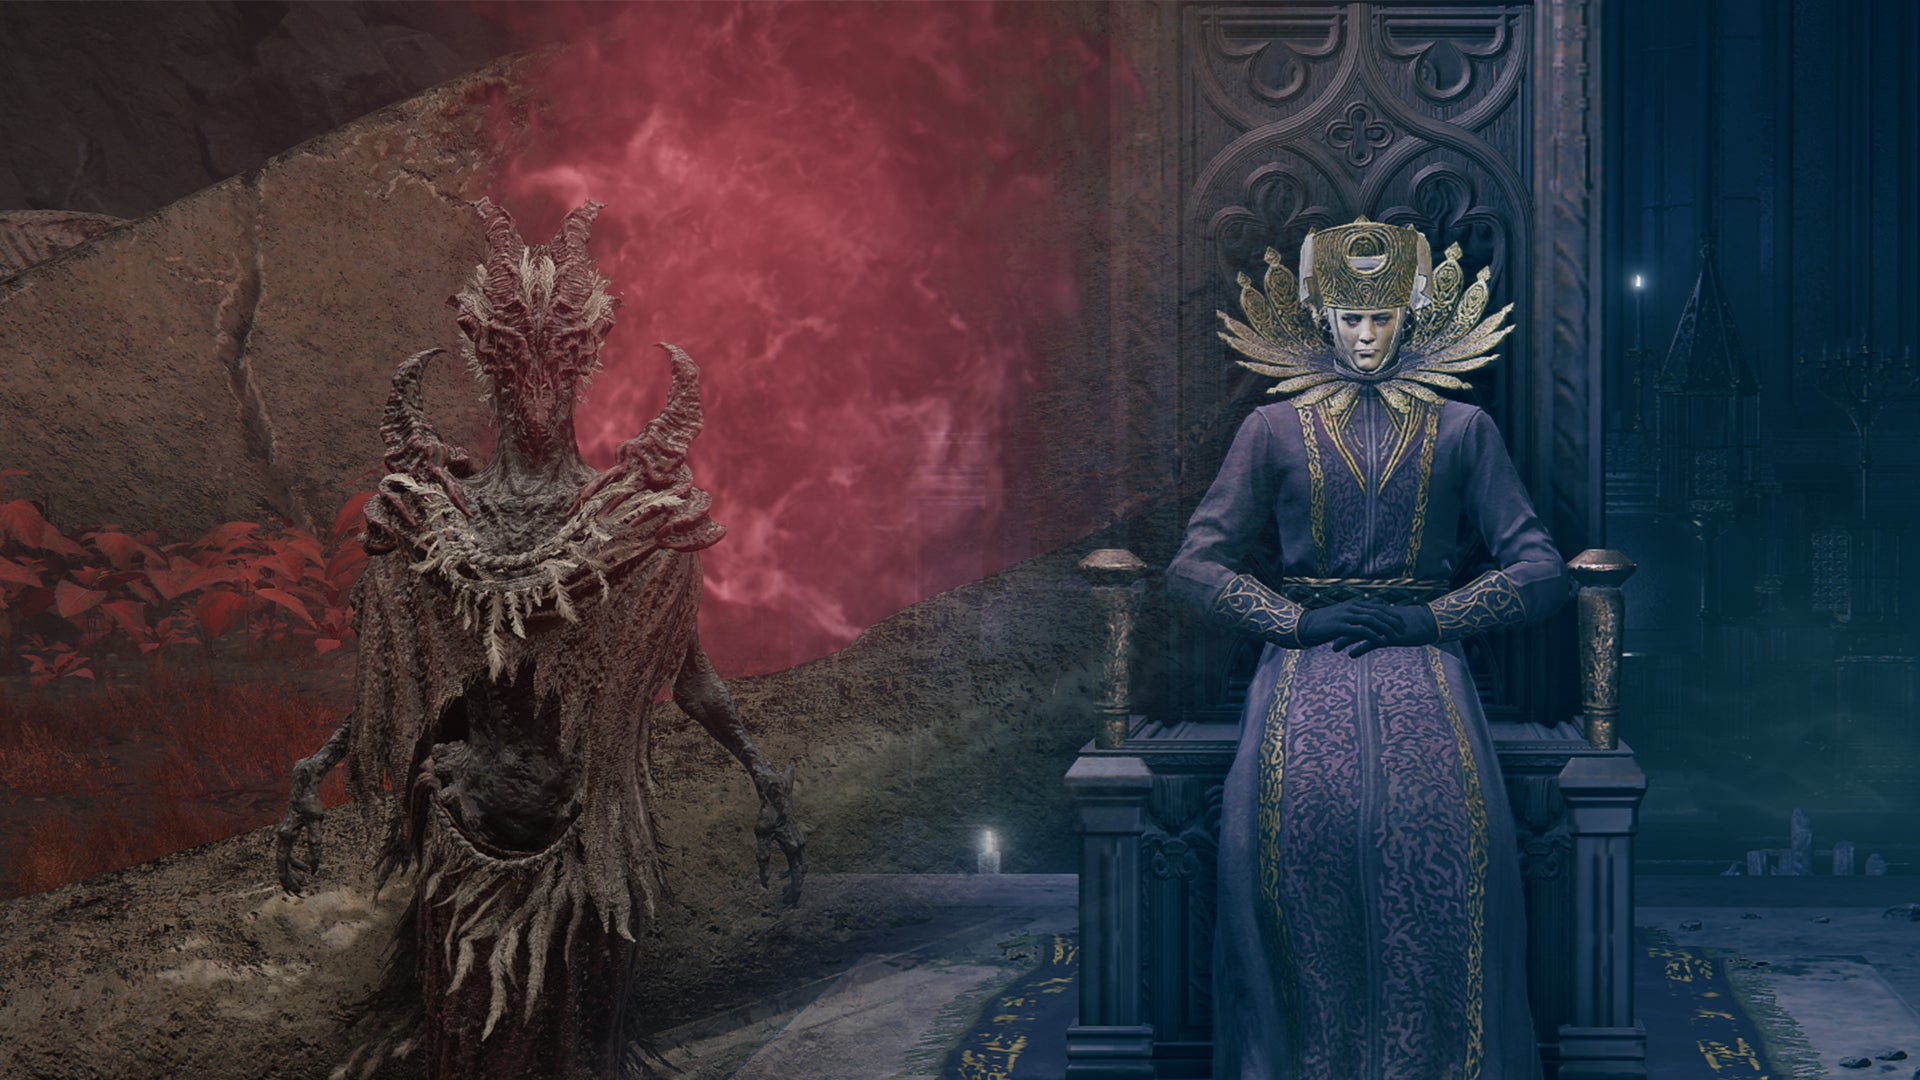
Image credit:Rock Paper Shotgun/Bandai Namco

Looking for all Shadow Of The Erdtree quests in Elden Ring? Like the base game, Shadow Of The Erdtree is full of interlocking NPC quests , some of which can be missed if you progress past two major points of no return .
If you’re concerned about completing all quests before progressing the main story, we have a full walkthrough of each individual quest in Elden Ring : Shadow Of The Erdtree as well as the Elden Ring side quests in order so you can avoid missing out on any rewards or time-sensitive DLC questlines.
In this guide:
- All Elden Ring: Shadow Of The Erdtree NPC locations
- Elden Ring DLC quests in order
- Best NPC quests to complete
- Leda questline
- Freyja questline
- Hornsent questline
- Ansbach questline
- Moore questline
- Fire Knight Queelign questline
- Hornsent Grandam questline
- Thiollier and St. Trina questline
- Igon questline
- Dragon Communion Priestess questline
- Dryleaf Dane questline
- Ymir and Jolán questline
All Elden Ring: Shadow Of The Erdtree NPC locations
Here is a list of all NPCs in Elden Ring: Shadow Of The Erdtree and where you can start their quests. Click on each character to be directed to a walkthrough of each DLC quest.
| NPC | Starting location |
|---|---|
| Needle Knight Leda | At Mohgwyn Palace before starting the Elden Ring DLC. |
| Freyja | Three-Path Cross (Gravesite Plain). |
| Hornsent | Three-Path Cross (Gravesite Plain). |
| Ansbach | Main Gate Cross, outside Belurat (Gravesite Plain). |
| Moore | Main Gate Cross, outside Belurat (Gravesite Plain). |
| Fire Knight Queelign | Invades within the large courtyard in Belurat (Gravesite Plain). Northeast of the Small Private Altar Site Of Grace. |
| Hornsent Grandam | Within the Storeroom in Belurat (Gravesite Plain). Head across the bridge left of the Small Private Altar Site of Grace. |
| Thiollier | Pillar Path Cross (Gravesite Plain). |
| St. Trina | In the Garden Of Deep Purple (Stone Coffin Fissure). |
| Igon | Opposite the Pillar Path Waypoint Site Of Grace (Gravesite Plain). |
| Dragon Communion Priestess | Next to the Grand Altar of Dragon Communion (Jagged Peak). |
| Dryleaf Dane | Next to the Moorth Ruins Cross (Scadu Altus). |
| Ymir | Inside the Cathedral Of Manus Metyr (Scadu Altus). |
| Jolán | Inside the Cathedral Of Manus Metyr (Scadu Altus). |
Important points of no return There are two major points of no return in Shadow of the Erdtree. First, once you break Miquella’s charm , most NPCs will move location and their quests will progress to their next stages. Miquella’s charm is broken when you first enter Shadow Keep, Rauh Base, or Eastern Scadu Altus. Second, once you burn the Sealing Tree at the Church of the Bud almost all NPCs will disappear off the map and most of their quests will stop here. For that reason, you should follow our tips below on the Shadow Of The Erdtree quest order . This lists the best order to approach everything and ensures you don’t miss any questlines with overlapping steps.
Elden Ring DLC quests in order
The following list includes all 88 steps of every Shadow Of The Erdtree quest in order . We suggest following this if you want to complete every NPC quest in the DLC and avoid being locked out of any choices or rewards.
Gravesite Plain:
- Meet Freyja at the Three-Path Cross Site Of Grace and speak to Hornsent to get the Crosses Map from him.
- Meet Ansbach and Moore at the Main Gate Cross Site Of Grace.
- Progress through the Belurat, Tower Settlement.
- Defeat the invader, Fire Knight Queelign within the courtyard northeast of the Small Private Altar Site Of Grace.
- Defeat the boss of Belurat, Tower Settlement, the Divine Beast Dancing Lion .
- Optional: Pick up Leda’s note (located above the boss chamber, on the tower stairs).
- Access the Storeroom across the bridge from the Small Private Altar Site Of Grace.
- Put on the Lion’s head and speak with Hornsent Grandam to get the Watchful Spirit spell.
- Acquire the Scorpion Stew from Grandam after resting and speaking with her again.
- Visit Thiollier at the Pillar Path Cross Site Of Grace.
- Travel back to Moore at the Main Gate Cross Site Of Grace and he will give you some Black Syrup to pass onto Thiollier.
- Give Thiollier the Black Syrup.
- Tell Thiollier " I’m weary of life " to receive Thiollier’s Concoction.
- Speak to Igon opposite the Pillar Path Waypoint Site Of Grace on the east side of the Gravesite Plain. (Take the main road from Castle Ensis east and follow it almost all the way).
- Optional: Visit the Hornsent at the Three-Path Cross Site Of Grace and give him Grandam’s Scorpion Stew.
- Optional: Collect all 6 Forager Brood Cookbooks and return to Moore for the 7th (cannot be done after breaking Miquella’s Charm).
Castle Ensis:
- Progress through Castle Ensis.
- Optional: Pick up Leda’s note at the Castle Ensis Checkpoint Site Of Grace.
- Optional: Summon Leda or Dryleaf Dane to help with the Rellana, Twin Moon Knight boss fight.
- Progress past Castle Ensis to the Highroad Cross Site Of Grace in Scadu Altus (on the way to The Shadow Keep). Here, speak with Leda and Hornsent to get the next Crosses Map.
- Pick up the ‘May the Best Win’ gesture and the ‘Monk’s Missive’ message from the Highroad Cross Site Of Grace.
Break Miquella’s charm: This is the first ‘point of no return’. Some of the above quest steps will not be available after breaking Miquella’s charm. Mainly, the Moore/Thiollier interaction.
Gravesite Plain part 2:
- Speak to Ansbach, Thiollier and Freya again. All of these NPCs will move location after this.
- Speak to Moore and give him advice on whether he should ‘put it behind you’ or ‘remain sad forever’ (both choices will have consequences).
Scadu Altus:
- Speak to both Leda and Hornsent at the Highroad Cross Site Of Grace in Scadu Altus. Leda will resolve to ‘weed out’ some of the other followers.
- Choose either Thiollier or Hornset for her to target.
- Perform the ‘May the Best Win’ gesture to Dryleaf Dane at the Moorth ruins (north of the Highroad Cross).
- Defeat Dryleaf Dane.
- Defeat Queelign at the Church of the Crusade (northwest of the Highroad Cross and the Moorth Ruins). Make sure you pick up the Prayer Room Key.
- Travel back to the Moorth Ruins and head inside. The underground ruins of the city will eventually lead to a ladder which will take you up through the well of Bonny Village.
- Travel directly north from Bonny Village until you see a headless corpse crouched in front of a tree. Loot it to get the ‘O, Mother’ gesture.
Cathedral Of Manus Metyr:
- Meet Count Ymir at the Cathedral Of Manus Metyr (travel here by going through Bonny Village and taking the main route east of The Shadow Keep).
- Speak with him to get a Ruins Map and Hole-Laden Necklace.
Cerulean Coast:
- Advance through the Stone Coffin Fissure dungeon in the south of the Cerulean Coast .
- Defeat the Putrescent Knight boss at the end of the Fissure and meet St. Trina in the cave beyond.
- Speak to Thiollier here and ‘imbibe’ the nectar four times by interacting with St. Trina and choosing the option to do so. Dying and respawning as you do
- Tell Thiollier what you heard and exhaust the dialogue with him (rest and try to speak with him at least twice).
- Rest at a Site Of Grace within the Garden of Deep Purple area and fight Thiollier’s invader form.
- Return to the cave and speak with Thiollier again.
- Imbibe the nectar two more times and pass on St. Trina’s words to Thiollier.
- Leave the Fissure.
- From the Cerulean Coast’s southern beach, travel up the stone slab of ancient ruins and make your way to the Finger Ruins Of Rhia. Ring the bell within for the next part of Ymir’s quest.
Cathedral Of Manus Metyr part 2:
- Return to Ymir at the Cathedral Of Manus Metyr to get the second Ruins Map.
- Rest and interact with Ymir’s throne to gain access to the hidden Finger Ruins of Miyr.
- Defeat the Swordhand Of Night Anna invader and report back to Ymir after resting at a Site Of Grace again.
The Hinterland:
- Within the Shadow Keep, locate the headless statue of Marika (north of the Back Gate Site of Grace) and perform the ‘O, Mother’ gesture to open the secret pathway to The Hinterland.
- Travel to the Ruins of Dheo and ring the bell within for Ymir (this will be at the southernmost part of the Hinterland).
- Return to Ymir at the Cathedral Of Manus Metyr for the last Ruins Map.
The Shadow Keep (Scadu Altus):
- From the Storehouse Front in The Shadow Keep (the area in front of the lift that leads to the Specimen Storehouse, full of Vulgar Militiamen and golden funeral pyre boats), choose between aiding Hornsent or Leda via their summon signs.
- Speak to Ansbach at the Specimen Storehouse 1st Floor.
- Speak to Freyja on the 7th Floor.
- Collect the Secret Rite Scroll from the 4th floor.
- Give the scroll to Ansbach.
- Choose whether you wish to give Ansbach’s letter to Freyja or not.
- From the 1st Floor Site Of Grace, travel left down the lift and to the Living Jar hall to pick up the Iris Of Grace (located on the altar behind the Living Jar enemy). Alternatively, pick one up from the statue of Marika in the Tree-Worship Passage below The Shadow Keep.
- Pick up an Iris of Occultation. One is dropped by the Omenkiller below the Fort Of Reprimand, one is dropped by the Ulcerated Tree Spirit in the Church District of The Shadow Keep.
- Access the Prayer Room within the Church District, lower levels of The Shadow Keep (accessible via the main pathway northwest of the Cathedral of Manus Metyr.).
- Queelign will be here. Give him either the Iris of Grace (you’ll receive Fire Knight Queelign Ash Summons) or the Iris of Occultation (you’ll receive Queelign’s Greatsword).
- Go back to the Cathedral Of Manus Metyr and interact with Ymir’s throne to travel to the Finger Ruins of Miyr beneath.
Cathedral Of Manus Metyr part 3:
- Sound the bell and defeat the Metyr, Mother Of Fingers boss.
- Return to the Cathedral Of Manus Metyr, defeat invader Jolán and Count Ymir, Mother Of Fingers .
- Speak to Jolán and either give her the Iris of Grace (you will receive the Swordhand Of Night Jolán Spirit Ash) or the Iris of Occultation (you’ll receive the Sword Of Night).
- Loot the graveyard via the cathedral exit for the Cherishing Fingers Sorcery.
- Access the top of Rabbath’s Rise (north of the cathedral) and interact with Anna’s body. If you choose to give Jolán the Iris of Grace, you’ll receive the Jolán and Anna combined Spirit Ash.
The Shadow Keep part 2:
- Defeat Messmer at the top of The Shadow Keep.
- If you assisted Hornsent or ignored his and Leda’s summon signs altogether you may summon Hornsent for the fight against Messmer.
- Return to the Highroad Cross Site of Grace and speak with both Leda and Hornsent (if alive).
- Leda will turn her attention to Ansbach. Hornsent will move on (if alive) in his quest for vengeance.
- Return to Ansbach at the Specimen Storehouse 1st floor.
- Choose between the summon signs to assist either Ansbach or Leda.
- Travel back to the Belurat, Tower Settlement Storeroom and speak with Hornsent Grandam now that Messmer is gone. Accept the the Gourmet Scorpion Stew.
The Jagged Peak:
- Complete the Dragon’s Pit dungeon (located within a cave at the end of the eastern road from the Castle Front Site Of Grace outside Castle Ensis). Technically, Igon’s remaining quest steps can be done at any point in the DLC but we recommend doing it now when you have levelled up a bit, as the area is immensely dangerous and contains one of the toughest bosses in the game.
- Outside the Dragon’s Pit and from the Jagged Peak, travel along the main pathway south to the Grand Altar of Dragon Communion and speak with the priestess here.
- Choose to ‘devour the draconic essence’.
- Travel back to the main road and this time turn north and follow the cliffside up and around (taking Spiritsprings as you go).
- At the Foot of the Jagged Peak Site Of Grace, watch the two drakes fighting and kill whoever is the victor.
- Travel southeast and speak to a laughing Igon. Take his Furled Finger.
- Continue up and around the Jagged Peak until you reach the Jagged Peak Summit Site Of Grace.
- Optional: return to the Dragon Communion Priestess and give her Thiollier’s Concoction for a different quest reward. Then rest and pass the time (2 days in total). Speak with her and exhaust her dialogue to get the Dragonbolt of Florissax Incantation (calls down red lightning and increases all forms of damage negation to the caster and nearby allies) and the Ancient Dragon Florissax Ash Summons. If you forgo this option you will end the quest with her Priestess Heart (boosts Dragon Cult incantations and allows the Tarnished to take on the Dragon Priestess form) and the Flowerstone Gavel (a Strength/Arcane-based weapon with a red lightning strike attack) instead.
- Defeat Bayle the Dread.
- Return to Igon’s last known location to get his Bow and armor set.
- Return to the Dragon Communion Priestess and pick up her Heart and Gavel from where she once stood (unless the option was chosen above).
Ancient Ruins of Rauh:
- If Hornsent is still alive and you discover the Ancient Ruins of Rauh after defeating Messmer, he will invade and you’ll have to fight him. This is just above the steps that lead to the Church Of The Bud in upper Rauh.
- Defeat Romina, Saint Of The Bud at the Church Of The Bud. You may summon Dryleaf Dane for this fight.
Burn the Sealing Tree at the Church Of The Bud: This is the last and major ‘point of no return’. After defeating Messmer and burning the Sealing Tree, most NPCs will disappear off the map.
Enir-Ilim:
- Fight Leda and the other NPCs within the Cleansing Chamber Anteroom (your option of summons and enemies will depend on the choices you have made thus far).
- If he is alive, speak with Ansbach before approaching the last main boss of the DLC. He will be available as a summon for the fight.
- If you followed Thiollier’s questline to fruition and summoned him in the above fight, he will also be available as a summon in the last main boss fight.
- Summon both Ansbach and Thiollier for the final boss. After the fight, take Ansbach’s and Thiollier’s weapons - the Obsidian Lamina, and Thiollier’s Hidden Needle - from the arena.
- Return to St. Trina after defeating the final boss to receive St. Trina’s Blossom.
What are the best NPC quests?
If you wish to speed your way through Shadow Of The Erdtree and simply want a definitive list of quests you should not miss, we have you covered. The following quests offer rewards and incentives that we think should be a priority for any DLC playthrough.
- Ansbach: Completing Ansbach’s quest should be a priority as doing so can get you a summon for the last (and most difficult) boss of the game.
- Thiollier: Similarly, completing Thiollier’s questline can get you an optional summon for the last boss depending on choices made.
- Dragon Communion Priestess and Igon : These quests will take you through the Jagged Peak region (which you could otherwise miss) and lead you towards one of the most interesting and toughest optional bosses of the game, Bayle The Dread. During this process, you should also uncover both hidden Dragon forms which when consumed, give your Tarnished a unique withered appearance and buffs.
- Needle Knight Leda: This NPC questline is the largest of the DLC and certain sections are in fact, unavoidable. As such, it yields the most rewards depending on the choices you make throughout. This includes several armor sets, weapons and Talismans.
- Ymir and Jolán: This NPC questline offers the second largest pool of potential rewards and also explores the fascinating lore surrounding the fingers religion in Elden Ring.
Below, we’ve listed all of the individual quest steps for each Elden Ring DLC quest. So, if you’re struggling with a particular questline, you can check to see what you need to do next to complete that character’s particular quest.
Elden Ring DLC quest steps: Leda
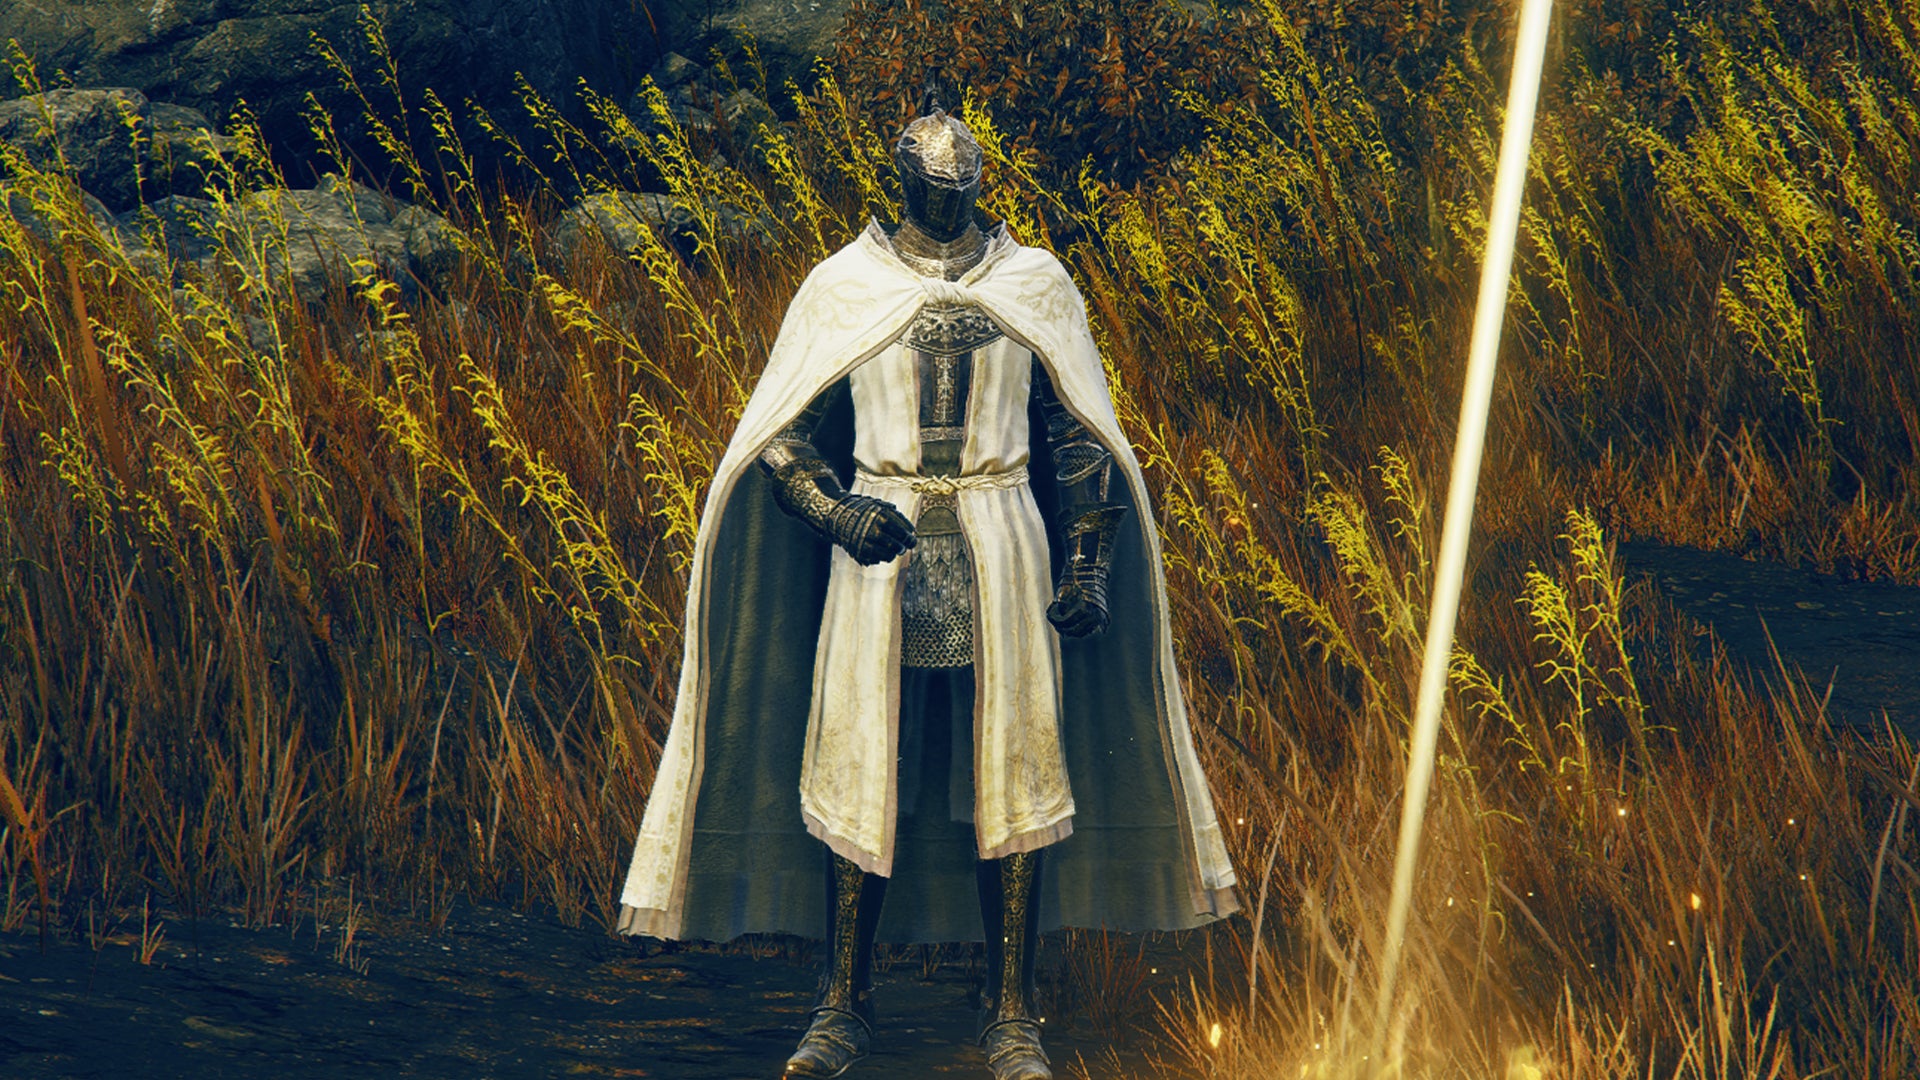
Leda is the fiercest and most loyal of Miquella’s followers. |Image credit:Rock Paper Shotgun/Bandai Namco
Needle Knight Leda is a devout follower of Miquella and the leader of a band of NPCs. Her questline is one of the main ones and encompasses many of the NPCs in the Land of Shadow. For a complete walkthrough, see the key steps below.
- Speak with Leda within Mohgwyn Palace and touch the withered arm to be teleported to the Land of Shadow.
- Take your time to explore and speak with the other NPCs in the Gravesite Plain (Thiollier, Moore, Hornsent, Freyja and Ansbach).
- Optional: Defeat the boss of Belurat, Tower Settlement.
- Optional: Pick up Leda’s note (located above the boss chamber, on the tower stairs).
- Progress through Castle Ensis.
- Optional: Pick up Leda’s note at the Castle Ensis Checkpoint Site Of Grace.
- Optional: Summon either her or Dryleaf Dane to assist with the Castle Ensis boss.
- Continue to Scadu Altus and speak with Leda at the Highroad Cross Site Of Grace.
- Finish up any dialogue with other NPCs before progressing to the next step.
- Break Miquella’s charm.
- Speak with Leda at the Highroad Cross, she will ask you who she should target now that Miquella’s charm is not subduing everyone.
- Choose between Thiollier or Hornsent . Whichever you choose, she will eventually settle on Hornsent.
- Progress through the Shadow Keep legacy dungeon.
- Progress to the Storehouse Front. This is the area before the lift that leads to the Specimen Storehouse and is an area full of Vulgar Miltiamen and golden funeral pyre boats.
- Here, there will be two summon signs and the option to either assist Leda or Hornsent. Make your decision.
- If you assist Hornsent, you will later see Leda at the Cleansing Chamber Anteroom fight in Enir-Ilim.
- If you ignore the summon signs (Hornsent will survive) or assist Leda (Hornsent will die), the quest will continue.
- Continue through The Shadow Keep and defeat Messmer .
- Return to Leda at the Highroad Cross. She will now turn her attention to Ansbach.
- Advance through Ansbach’s questline . Namely, retrieve the Secret Rite Scroll from the 4th floor of the Specimen Storehouse in The Shadow Keep and give it to him (he will be in a room adjacent to the 1st Floor Site of Grace).
- Rest and return to Ansbach’s room where there will now be two summon signs.
- Choose to either side with Leda or Ansbach. Notably, siding with Ansbach will get you a summon for the last main boss and siding with Leda will get you a unique Retaliatory Crossed-Tree Talisman which enhances attacks executed after rolling or backstepping.
- Whichever you choose, you’ll end up facing Leda and a group of followers at the Cleansing Chamber Anteroom fight in Enir-Ilim.
- Progress through the rest of your NPC questlines before proceeding to the next step.
- Burn the Sealing Tree at the Church of the Bud to be teleported to Enir-Ilim.
- Progress through the city to the Cleansing Chamber Anteroom and defeat everyone including Leda.
- Take Leda’s Sword and armor set as well as those of her fallen comrades.
Possible quest rewards: Falx curved sword, Caterpillar Mask, Braided Cord Robe, Braided Arm Wraps, Soiled Loincloth, Leda’s Rune, Leda’s Spirit Ashes (Swift Slash), Lacerating Crossed-Tree Talisman, Ansbach’s Longbow, Wise Man’s Mask, Ansbach’s Attire, Retaliatory Crossed-Tree Talisman, Ansbach summon, Leda’s Sword, 300,000 Runes (via Enir-Ilim fight), Oathseeker Knight set, Obsidian Lamina, Furious Blade of Ansbach, armor dropped by other NPCs depending on choices made.
For a more thorough rundown of Leda’s questline and all quest rewards and outcomes, see our Leda quest guide here.
Elden Ring DLC quest steps: Freyja
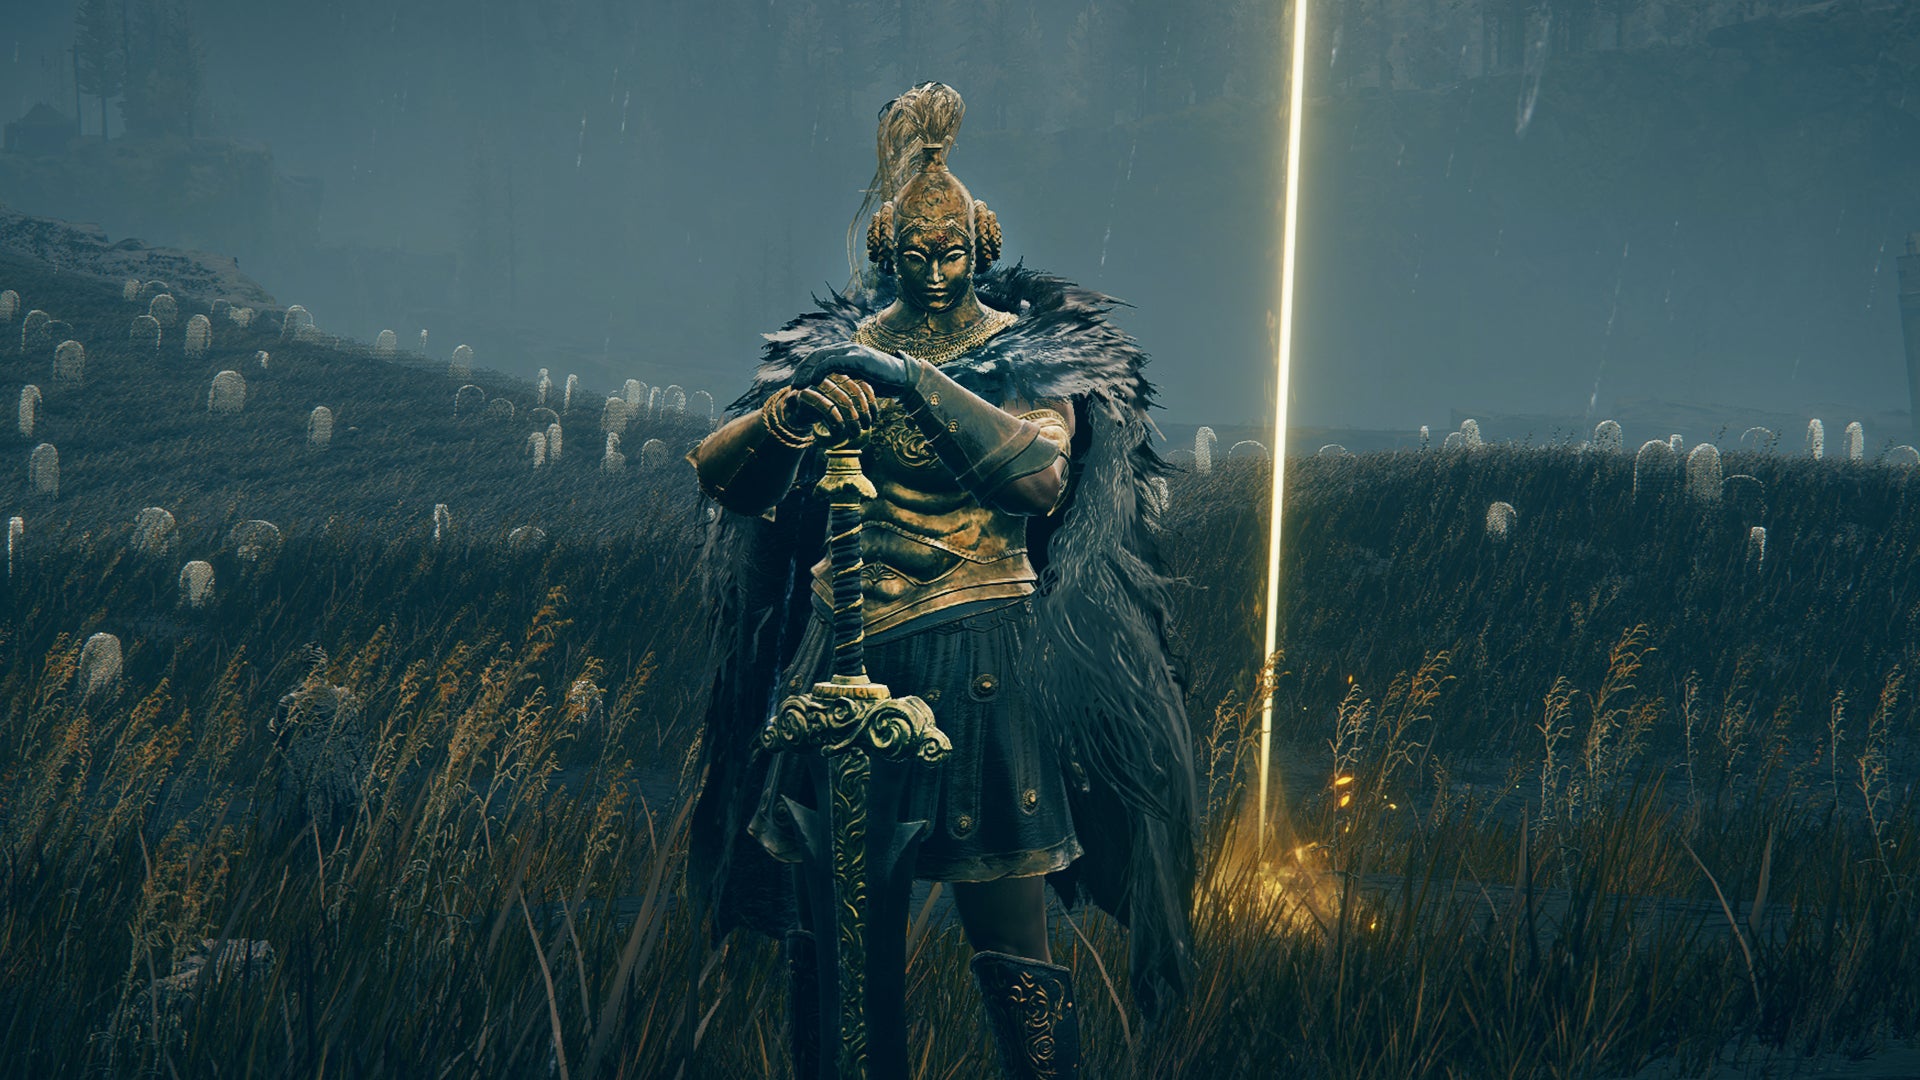
Freyja is a proud Redmane, a past comrade-in-arms to Radahn. |Image credit:Rock Paper Shotgun/Bandai Namco
Redmane Freyja was once a comrade-in-arms with Radahn and is now a follower of Miquella. During her questline, she will try to determine the ‘promise’ made between the two gods to better understand her role in the events of the Land of Shadow. Here is a walkthrough of Freyja’s questline.
- Speak with Freyja at the Three-Path Cross Site Of Grace in the Gravesite Plain.
- Break Miquella’s charm.
- Return to Freyja and speak with her.
- See Freyja again, this time opposite the 7th Floor Site of Grace within the Specimen Storehouse of the Shadow Keep.
- Locate the Secret Rite Scroll (in a room on the 4th floor of the Specimen Storehouse).
- Give the scroll to Ansbach (who is located in a room adjacent to the 1st Floor Site Of Grace within the Specimen Storehouse).
- Either choose to give Ansbach’s letter to Freyja now or wait until you have discovered Enir-Ilim. Collect the Golden Lion Shield and return to Ansbach with Freyja’s response.
- Giving her the letter now will guarantee her presence against the Tarnished in the Enir-Ilim Cleansing Chamber Anteroom fight. After which, you can get her greatsword and armor. Alternatively, wait until after the fight and return to the 7th Floor Site Of Grace to collect her belongings.
Possible quest rewards: Golden Lion Shield, Freyja’s Greatsword, Freyja’s Helm, Armor, Gauntlets and Greaves.
For a more thorough rundown of Freyja’s questline and all quest rewards and outcomes, see our Freyja guide here.
Elden Ring DLC quest steps: Hornsent
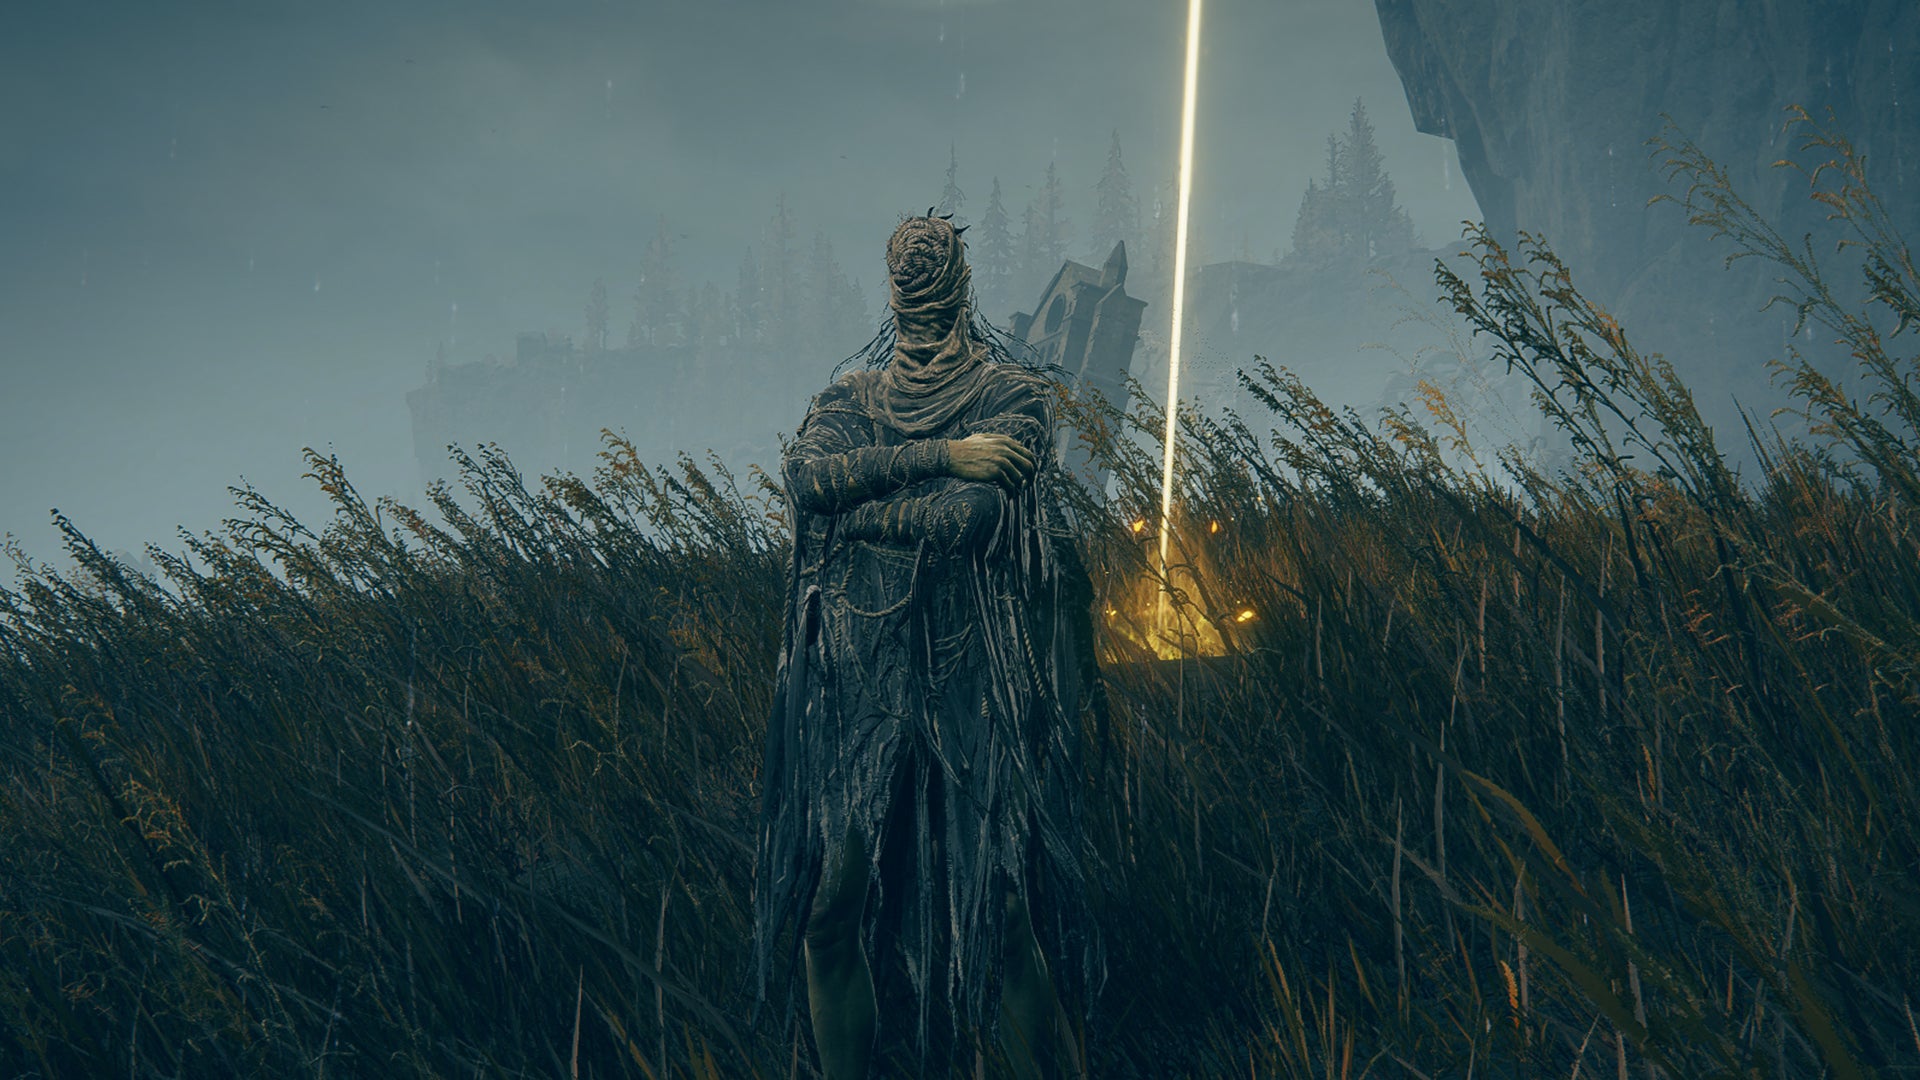
The Hornsent is named after his people, who lived under Messmer’s tyranny. As such, he has a low opinion of Marika and her brood. |Image credit:Rock Paper Shotgun/Bandai Namco
Hornsent is an interesting, revenge-driven NPC in Elden Ring: Shadow Of The Erdtree who finds himself on a quest for vengeance against Messmer. Under his rule, the Hornsent people have suffered and almost been eradicated. To follow his questline to fruition, see the below steps.
- Speak with Hornsent at the Three-Path Cross Site Of Grace and acquire the Crosses Map from him.
- Beat the boss of Belurat, Tower Settlement - the Divine Beast Dancing Lion .
- Optional: wear its head (the Divine Beast Head ) and speak to Hornsent Grandam in the Storeroom (opposite the Small Private Altar Site Of Grace).
- Optional: bring Grandam’s Scorpion Stew to the Hornsent at the Three-Path Cross Site Of Grace for more information about his people.
- Speak to Hornsent, who has now moved to the Highroad Cross Site of Grace in Scadu Altus, for the next Crosses Map. Exhaust his dialogue for more information about the Crosses and Miquella.
- Make sure you have spoken to Thiollier, Ansbach, Freyja and Moore before continuing.
- Break Miquella’s charm.
- Speak to Hornsent again, he will move to The Shadow Keep after this.
- Speak to Leda and she will ask you who she should target, Thiollier or Hornsent . Whichever you choose, she will ultimately decide on the Hornsent and you will receive another chance to pick him over Leda if you wish later on.
- As you advance through The Shadow Keep entrance, you may summon Hornsent in the boss fight against the Golden Hippopotamus .
- Progress to the Storehouse Front. This is the area before the lift that leads to the Specimen Storehouse and is an area full of Vulgar Miltiamen and golden funeral pyre boats.
- Here, there will be two summon signs and the option to either assist Leda or Hornsent. Make your decision.
- If you chose to assist Hornsent or ignored the signs altogether, he is an optional summon against Messmer at the top of The Shadow Keep. (He may also aid you in the Enir-Ilim Cleansing Chamber Anteroom fight depending on your choices in other quests).
- If you side with Leda, Hornsent’s quest will end here.
- After defeating Messmer , return to the Highroad Cross Site of Grace and speak with both Leda and Hornsent (if alive). Leda will conclude that he is no longer a threat and the Hornsent will move from here and pursue more carnage in his quest for vengeance.
- If you have yet to travel to the Ancient Ruins of Rauh, Hornsent will invade. Defeat him. Otherwise, he won’t appear. The quest will have ended either way.
Possible quest rewards: Falx, Hornsent’s Braided Arm Wraps, Braided Cord Robe, Soiled Loincloth, Caterpillar Mask, Lacerating Crossed-Tree Talisman, Leda’s Rune, Swift Slash Ash of War, Hornsent summon for second-to-last boss fight.
We have a full rundown of the Leda vs Hornsent choice here if you wish to see all quest outcomes and rewards.
Elden Ring DLC quest steps: Ansbach
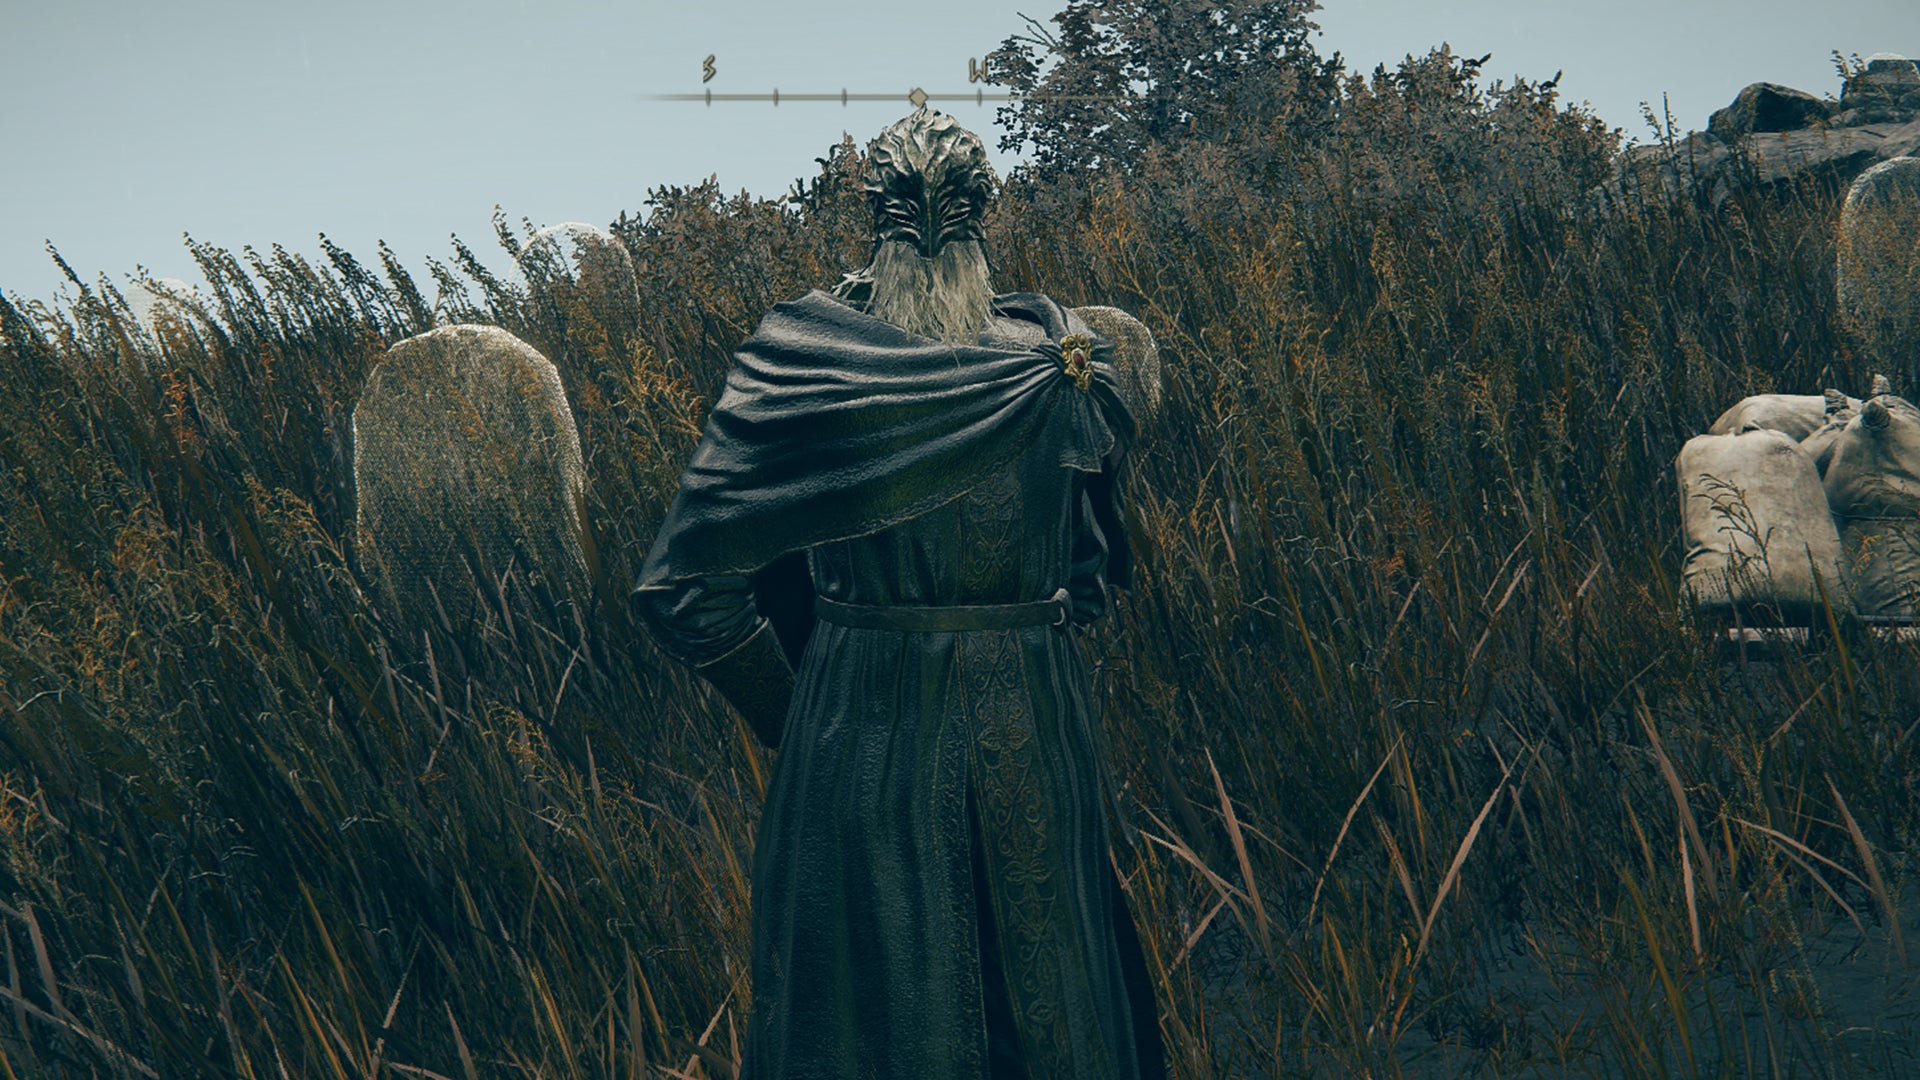
Ansbach’s questline will take you through The Shadow Keep and is heavily interlinked with Freyja and Leda. |Image credit:Rock Paper Shotgun/Bandai Namco
Sir Ansbach is a retired soldier and follower of Mohg , (who you may remember as the main boss of the Mohgwyn Palace ), a necessary character to beat to access the DLC. Ansbach’s questline heavily features both Redmane Freyja and Needle Knight Leda, so you’ll notice some cross-over in the following quest steps.
- Speak to Ansbach at the Main Gate Cross Site Of Grace in the Gravesite Plain where he will introduce himself and his comrade Moore.
- Once you have spoken with the NPCs and you feel ready to progress, break Miquella’s charm (information on how to do so is listed in the above section).
- Return to Ansbach at the Main Gate Cross.
- Check in with Freyja at the Three-Path Cross Site Of Grace in the Gravesite Plain if you haven’t done so already.
- Advance through The Shadow Keep legacy dungeon in Scadu Altus.
- Once you reach the Specimen Storehouse, speak with Ansbach in his room adjacent to the 1st Floor Site Of Grace.
- Collect the Secret Rite Scroll from a room near the 4th floor.
- Reach the 7th Floor Site of Grace and speak with Freyja.
- Give the Secret Rite Scroll to Ansbach back on the 1st floor.
- Choose to pass on Ansbach’s letter to Freyja or not.
- Progress Leda’s questline until you have chosen between Thiollier and Hornsent.
- Return to Ansbach’s room and choose to assist either him or Leda via the two summon signs.
- Either his quest concludes here or you have the option to summon Ansbach for the Enir-Ilim Cleansing Chamber Anteroom fight and the last boss fight of the game.
If you give Ansbach’s letter to Freyja before discovering Enir-Ilim, she will likely appear at the Cleansing Chamber Anteroom fight. If you wish to avoid fighting her, you can wait and give her the letter after this fight concludes. Her belongings will be waiting within the Specimen Storehouse, 7th floor.
Possible quest rewards: Leda’s Rune, Ansbach’s Longbow, Ansbach summon, Retaliatory Crossed-Tree Talisman, Wise Man’s Mask, Ansbach’s Attire, Ansbach’s Manchettes, Ansbach’s Boots, Anbach’s Longbow, Obsidian Lamina and the Furious Blade of Ansbach.
For a more in-depth walkthrough, see our rundown of the full Ansbach questline here.
Elden Ring DLC quest steps: Moore
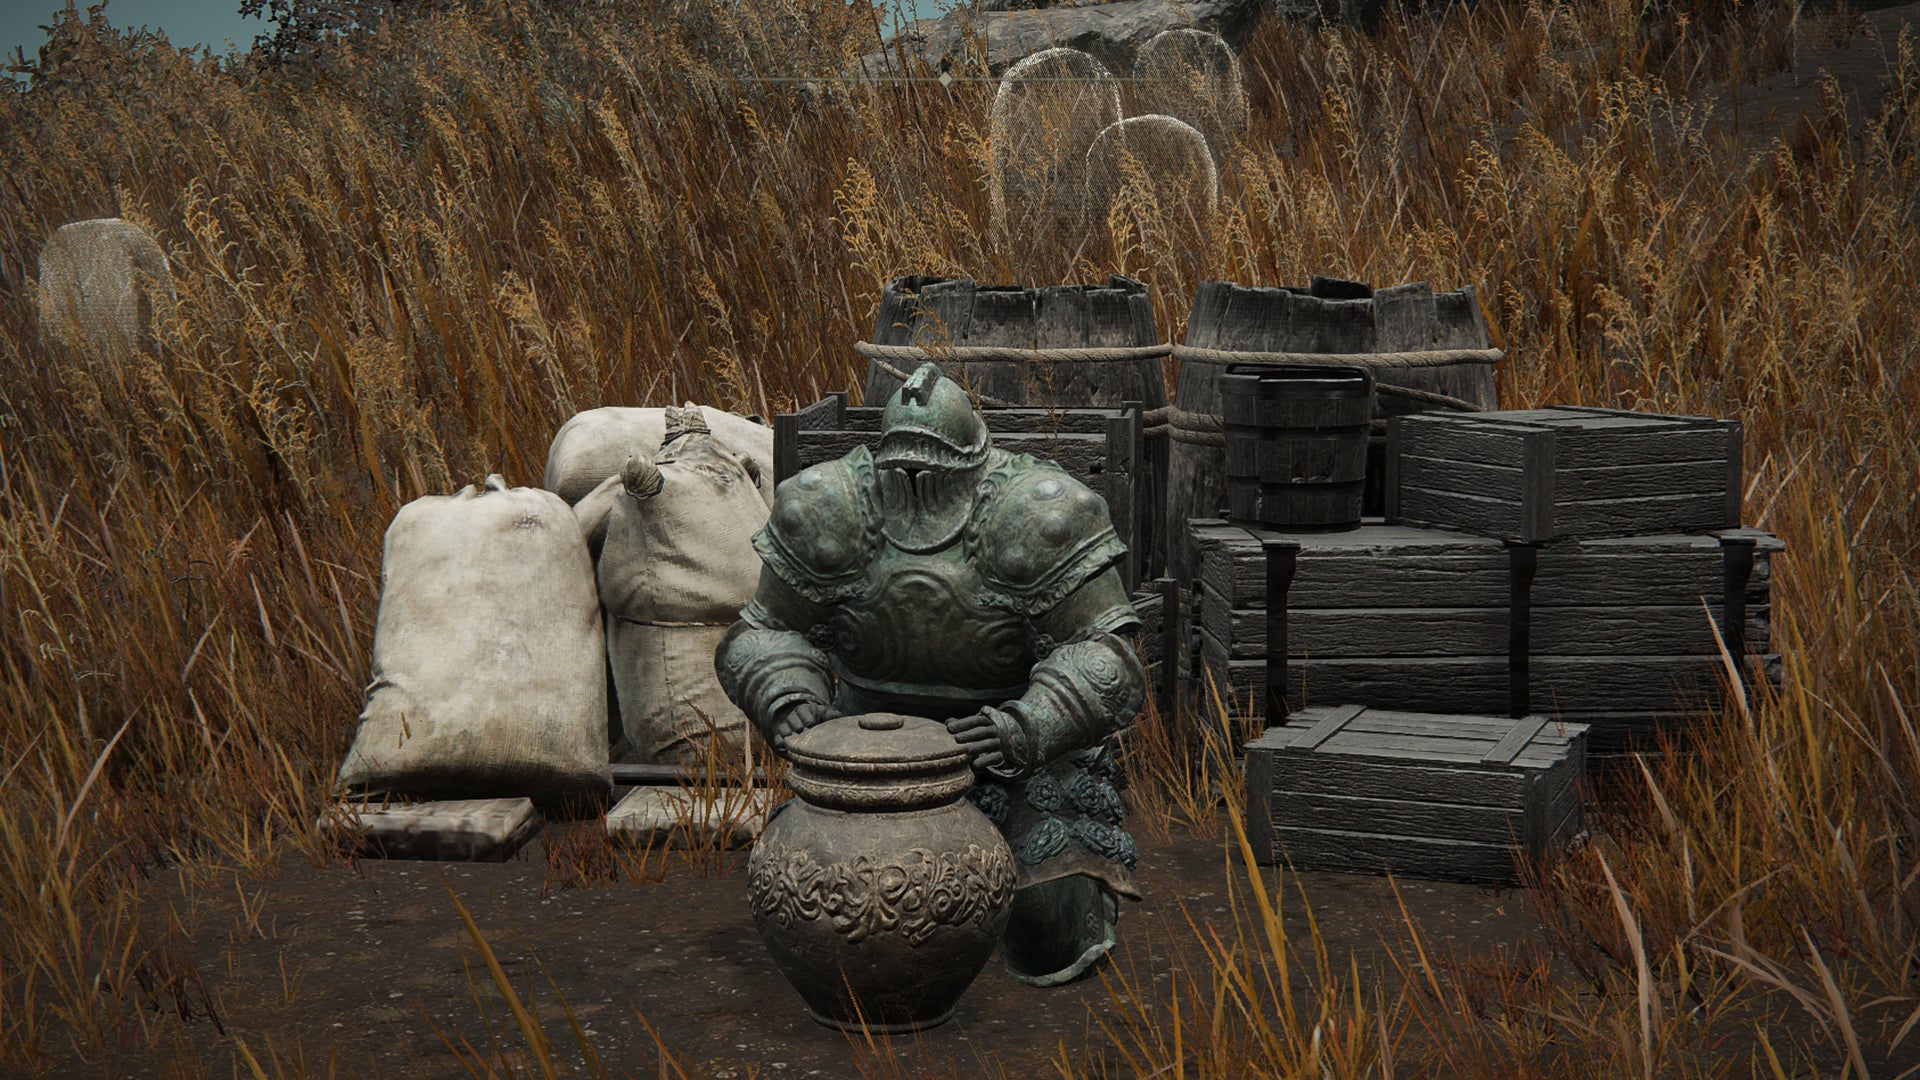
Moore is also a merchant and sells valuable consumables like Pickled Livers and Turtle Necks. |Image credit:Rock Paper Shotgun/Bandai Namco
Moore is part of a cohort called the ‘Forager Brood’, a group of scavengers who source resources for Leda and Miquella’s other followers. Moore’s questline intersects with both Thiollier and Leda and the outcomes can vary depending on the choice you make. Here is a step-by-step of Moore’s quest in Shadow Of The Erdtree.
- Meet Moore at the Main Gate Cross Site Of Grace in the Gravesite Plain.
- Speak with Thiollier at the Pillar Path Cross in the Gravesite Plain.
- Return to Moore and collect the Black Syrup from him (to give to Thiollier and progress his quest).
- Optional: Locate all 6 Forager Brood Cookbooks .
- Return to Moore and speak with him to collect the 7th Cookbook.
- Speak to Ansbach, Hornsent and Freyja before continuing.
- Break Miquella’s charm.
- Return to Moore and choose from the following dialogue options: ‘put it behind you’ or ‘remain sad forever’.
- If you chose ‘remain sad forever’ you’ll next find Moore dead and interlocked with a Servent of Rot opposite the Church of the Crusade in Scadu Altus.
- If you chose ‘put it behind you’, you’ll next see Moore at the Enir-Ilim Cleansing Chamber Anteroom fight.
Possible quest rewards: Verdigris Set, Forager Brood Cookbook (7), Moore’s Bell Bearing, Verdigris Greatshield.
For a more thorough rundown of Moore’s questline and all quest rewards and outcomes, see our Moore quest guide here.
Elden Ring DLC quest steps: Fire Knight Queelign
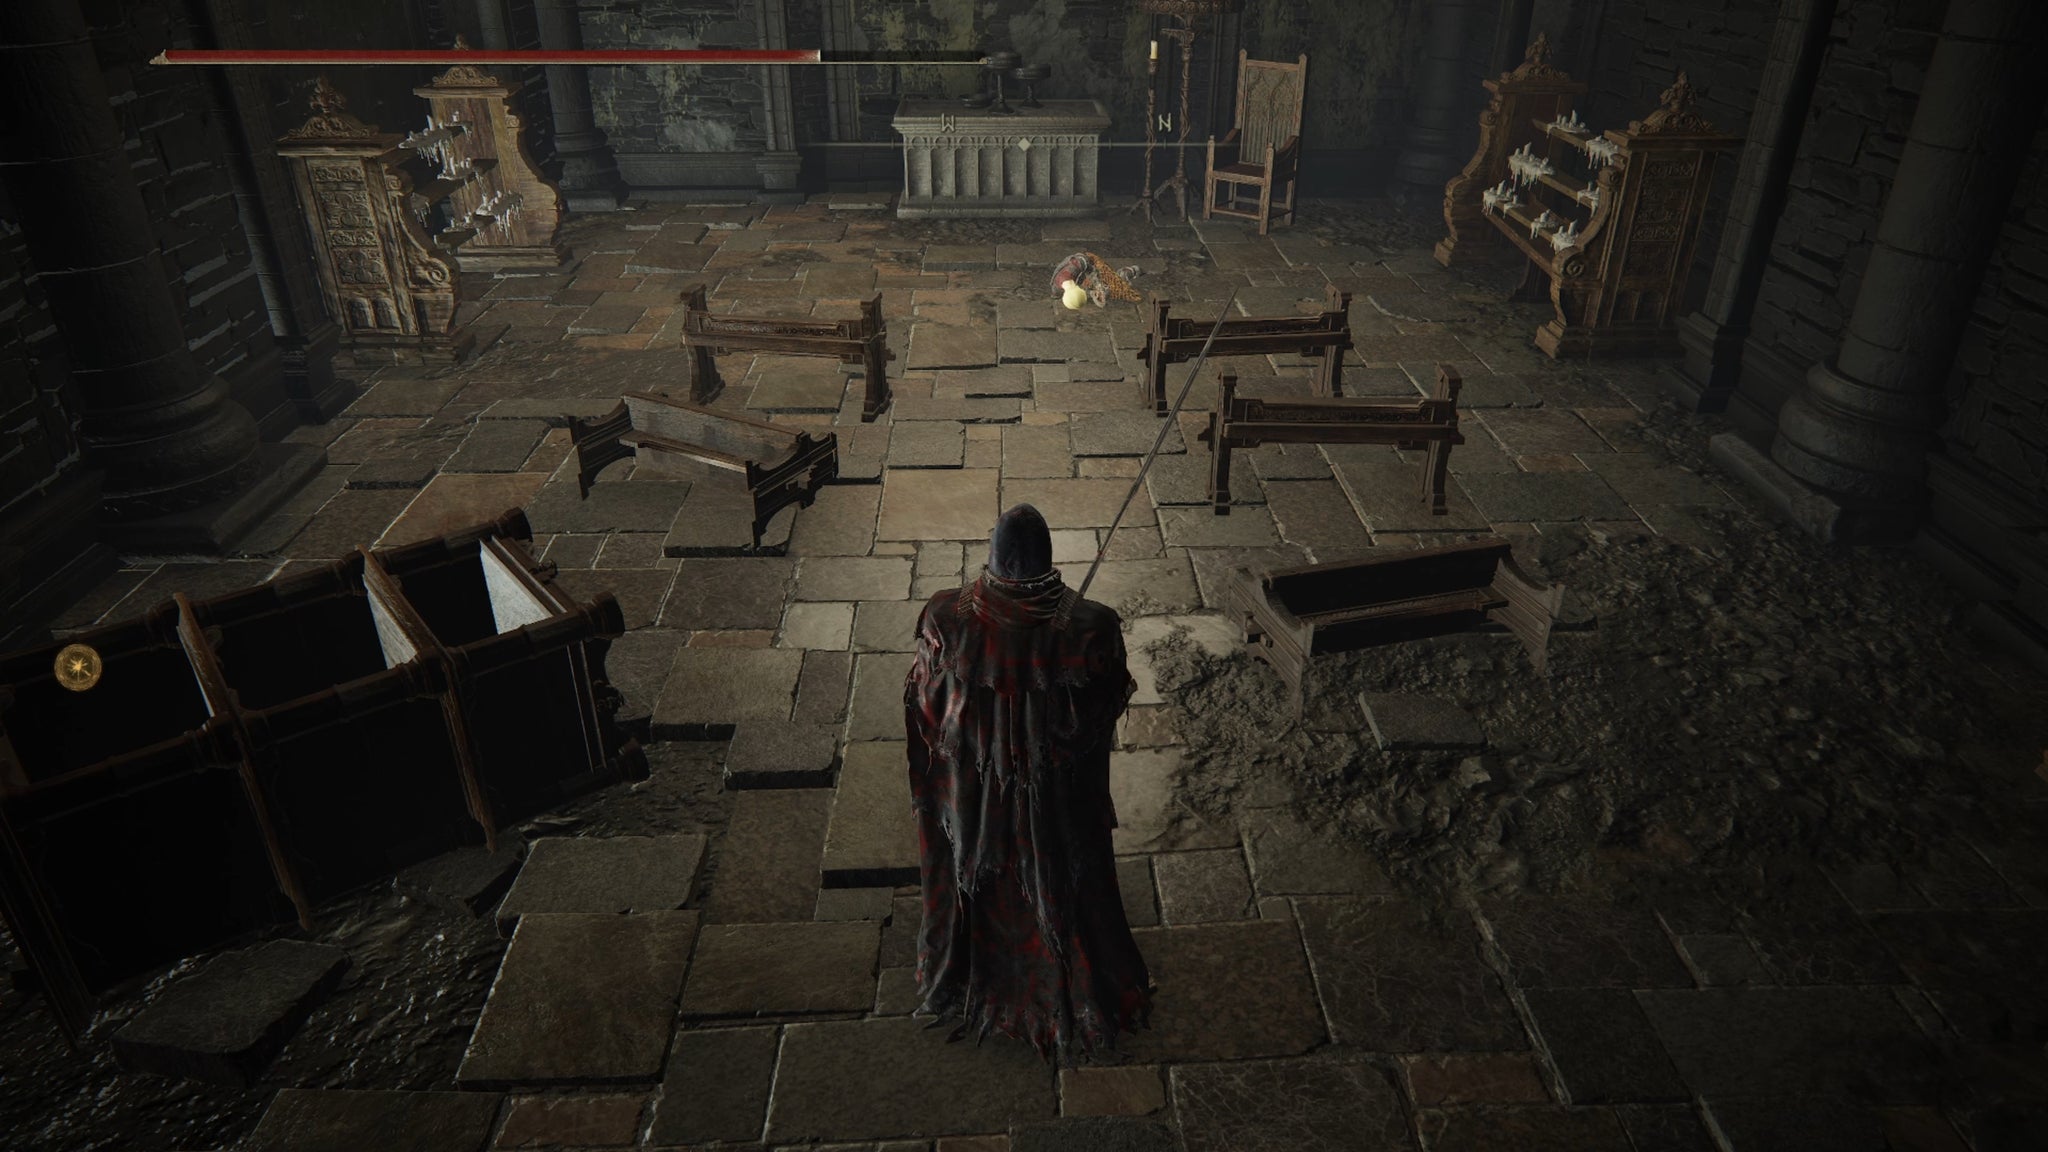
Following Queelign’s questline will take you to the hidden Prayer Room underneath The Shadow Keep. |Image credit:Rock Paper Shotgun/Bandai Namco
Fire Knight Queelign is a repeat NPC invader in Shadow Of The Erdtree. To access their quest and get the Prayer Room Key , follow these quest steps:
- Defeat Queelign within the large courtyard in Belurat, Tower Settlement (northeast of the Small Private Altar Site Of Grace).
- Defeat Queelign again, this time at the Church of the Crusade in Scadu Altus and pick up the Prayer Room Key from them. (If you fight him at the tower second instead of first, you will still recieve the Key from him).
- Obtain an Iris of Grace (there are two in total). One Iris of Grace is located at the altar within the Living Jar hall beneath the Specimen Storehouse in the Shadow Keep (accessible via the lift to the left of the 1st Floor Site Of Grace). The other is located in the Tree-Worship Passage (accessible via the Church District underneath The Shadow Keep once it has been drained of water).
- Make sure you also have an Iris of Occultation, there are two you can collect in the DLC. One is dropped by the Omenkiller below the Fort Of Reprimand, the other is dropped by the Ulcerated Tree Spirit in the Church District of The Shadow Keep.
- Travel to the Prayer Room within the Church District and give Queelign either the Iris of Grace (you’ll receive Fire Knight Queelign Ash Summons) or the Iris of Occultation (you’ll receive Queelign’s Greatsword).
Possible quest rewards: Fire Knight Queelign Spirit Ash Summons, Queelign’s Greatsword.
See our rundown of the Fire Knight Queelign questline here for a more thorough rundown of his questline.
Elden Ring DLC quest steps: Hornsent Grandam
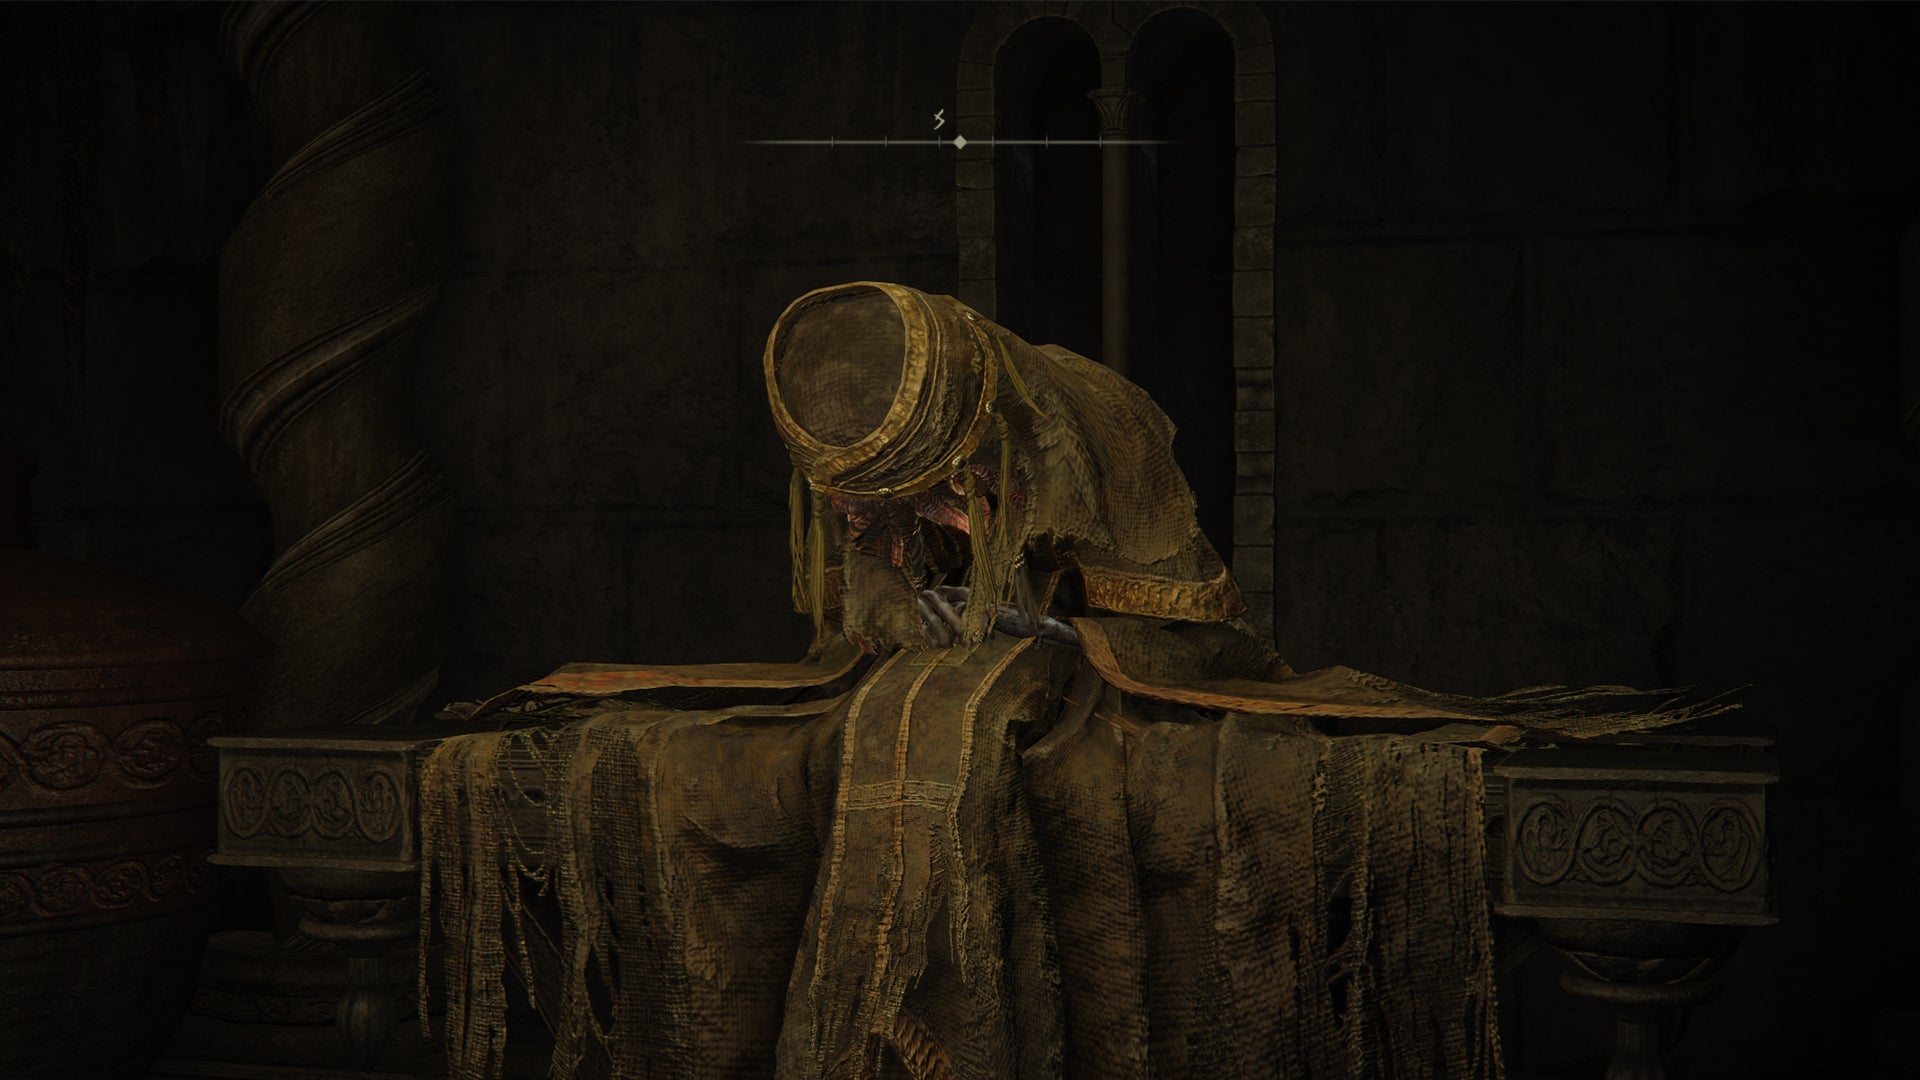
The Hornsent Grandam will be unresponsive until you wear the specified head piece below. |Image credit:Rock Paper Shotgun/Bandai Namco
The Hornsent Grandam questline is fairly straightforward and should happen naturally as you progress through the main storyline of the DLC. Here is a step-by-step.
- Travel to Belurat, Tower Settlement in the Gravesite Plain.
- From the Small Private Altar Site of Grace, turn right, head around the first building on the right, past the waterfall and into the right-side room. Collect the Storeroom Key from a corpse above the ladders in the room.
- Beat the boss of Belurat, Tower Settlement - the Divine Beast Dancing Lion .
- Now, go to the Storeroom. This is located across the bridge, left of the Small Private Altar Site Of Grace.
- Once inside, equip the Divine Beast Head and speak to Grandam who will give you some background lore about the Hornsent people and the Watchful Spirit spell.
- Rest and return to her to get the Scorpion Stew consumable.
- Optional: Give a Scorpion Stew to Hornsent at the Three-Path Cross Site Of Grace.
- You can come back for more stew if you wish but cannot have more than one at a time in your inventory it seems.
- Defeat Messmer at The Shadow Keep.
- Return to Grandam and tell her the good news. She will now give you Gourmet Scorpion Stew, an upgraded version of the old one.
Possible quest rewards: Scorpion Stew, Gourmet Scorpion Stew, Watchful Spirit Incantation.
Elden Ring DLC quest steps: Thiollier and St. Trina
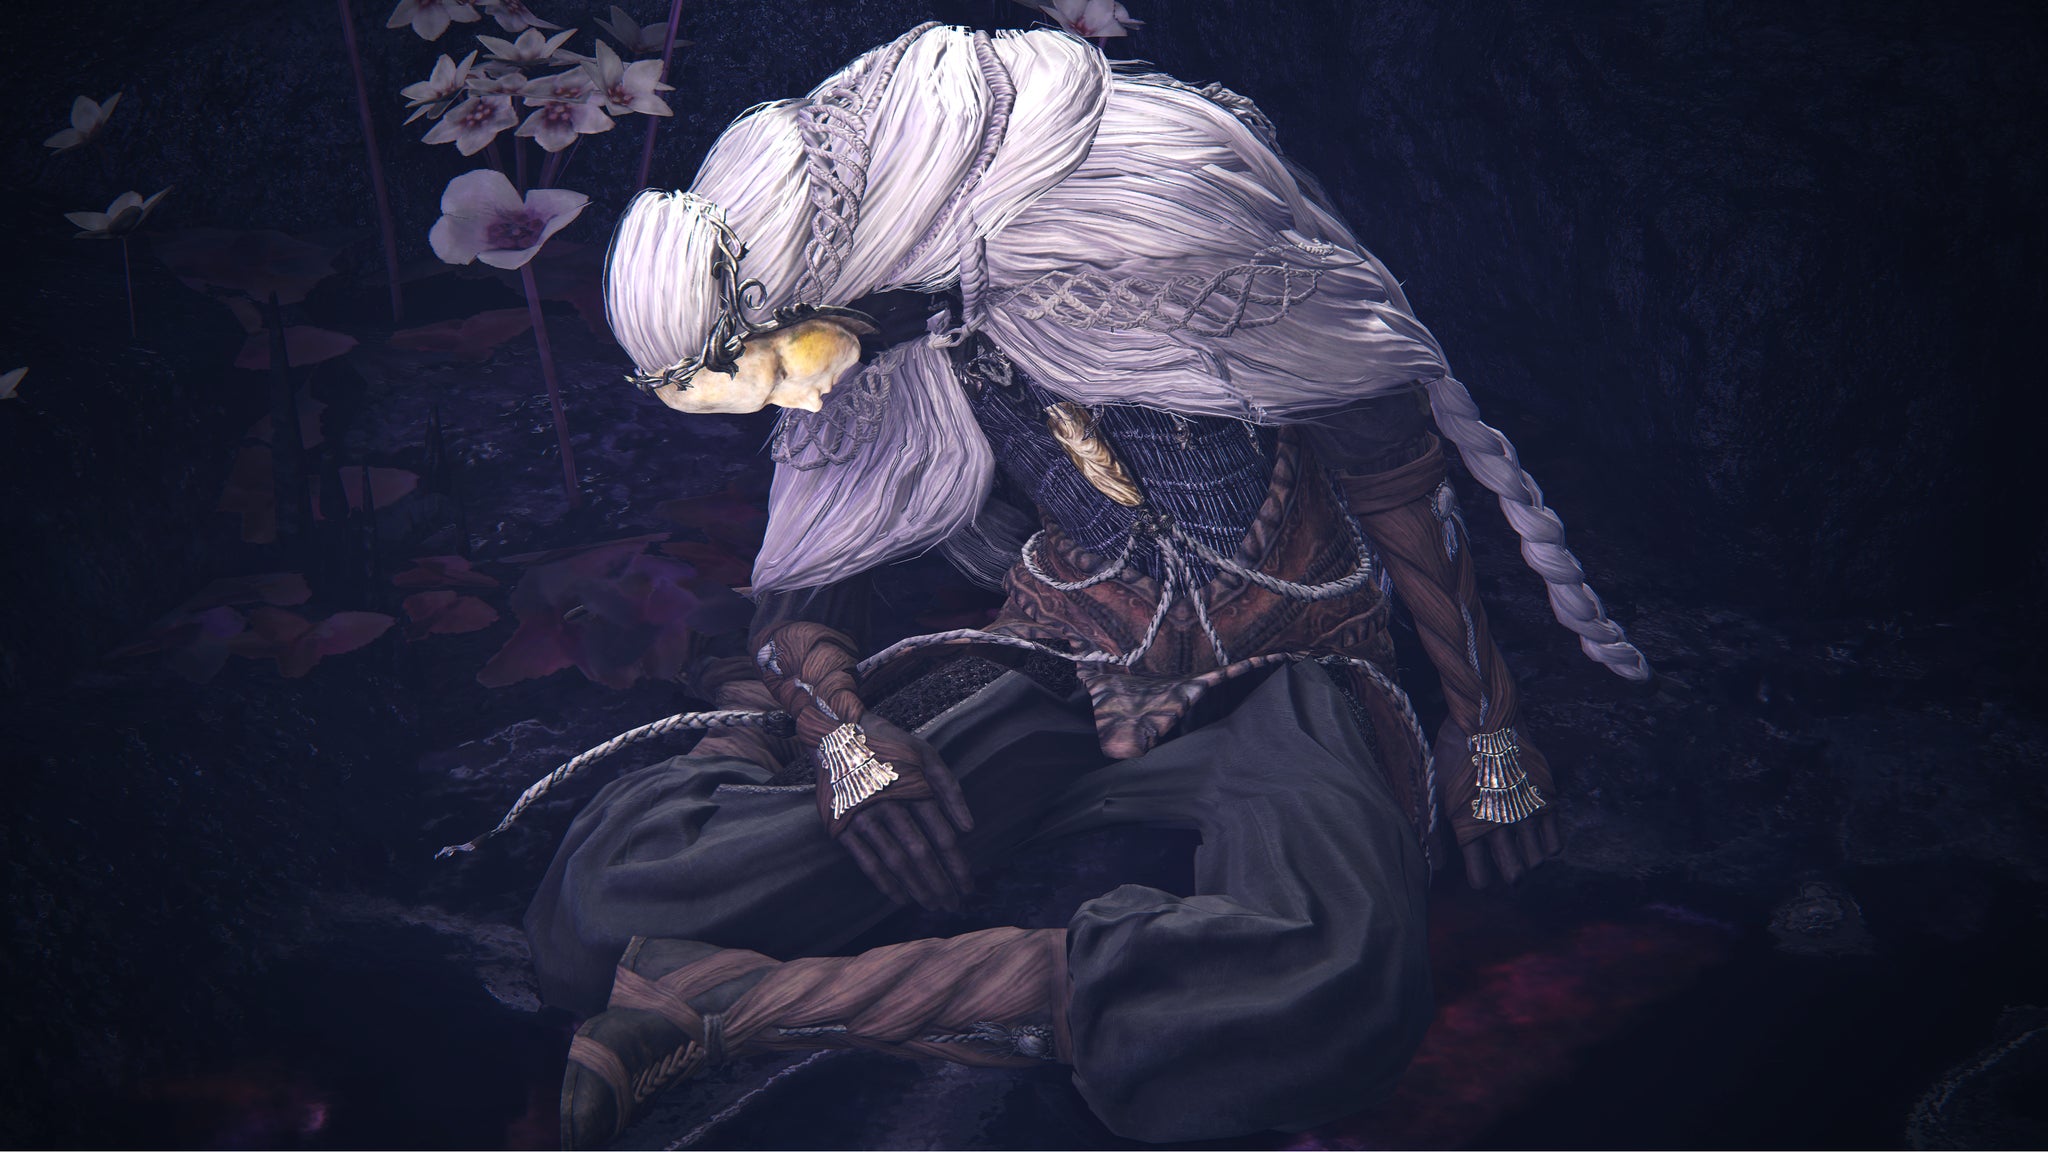
Thiollier is also a merchant and offers poison expertise. |Image credit:Rock Paper Shotgun/Bandai Namco
Thiollier is a poison expert and follower of St. Trina. When you first meet him he seems unsure of himself but his questline will lead you through to the most picturesque area of Shadow of The Erdtree and to one of the most interesting-looking bosses. Below is a step-by-step of everything you need to know about Thiollier’s and St. Trina’s questlines.
- Meet Thiollier at the Pillar Path Cross Site Of Grace in the Gravesite Plain (southeast of Castle Ensis).
- Speak with Moore at the Main Gate Cross in the Gravesite Plain until he gives you the Black Syrup.
- Take the Black Syrup to Thiollier.
- Tell Thiollier you are ’ weary of life ’ and he’ll give you Thiollier’s Concoction for free.
- Break Miquella’s charm.
- Speak to Thiollier who says he will be travelling south now.
- Rest at a Site of Grace.
- Travel to the Stone Coffin Fissure in the Cerulean Coast . The Fissure is a large hole in the ground towards the southernmost part of the Cerulean Coast. You’ll need to use Torrent to jump down the various platforms and get to this underground region.
- Travel through the Fissure until you get to the end of the dungeon - there will be a Site Of Grace surrounded by animals and a ghost kneeling by a statue head. Jump off the head and fall to the ground.
- Here, defeat the Putrescent Knight boss.
- Rest and continue through the passageway towards Thiollier and St. Trina .
- Imbibe St. Trina’s nectar four times. You will die and respawn each time. On the fourth time, you will hear a voice.
- Tell Thiollier what you heard. Persist until you exhaust all dialogue.
- Rest and reload the area.
- Defeat Thiollier.
- Return to the cave and speak with Thiollier once again.
- Imbibe the nectar two more times.
- Speak to Thiollier again.
- Optional: Summon Thiollier to help in the Cleansing Chamber Anteroom fight in Enir-Ilim.
- Optional: Summon Thiollier to help in the final boss fight.
- Optional: If Thiollier was summoned in the last boss fight, pick up Thiollier’s Hidden Needle from the arena.
- Return to St. Trina after beating the final boss to receive St. Trina’s Blossom.
Possible quest rewards: Thiollier summon, Thiollier’s Concoction, Thiollier’s Hidden Needle, St. Trina’s Blossom, 220,000 Runes (via the Putrescent Knight ), Remembrance of Putrescence, Thiollier’s Mask, Thiollier’s Set.
For a more thorough rundown of Thiollier’s questline and all quest rewards and outcomes, see our Thiollier quest walkthrough here.
Elden Ring DLC quest steps: Igon
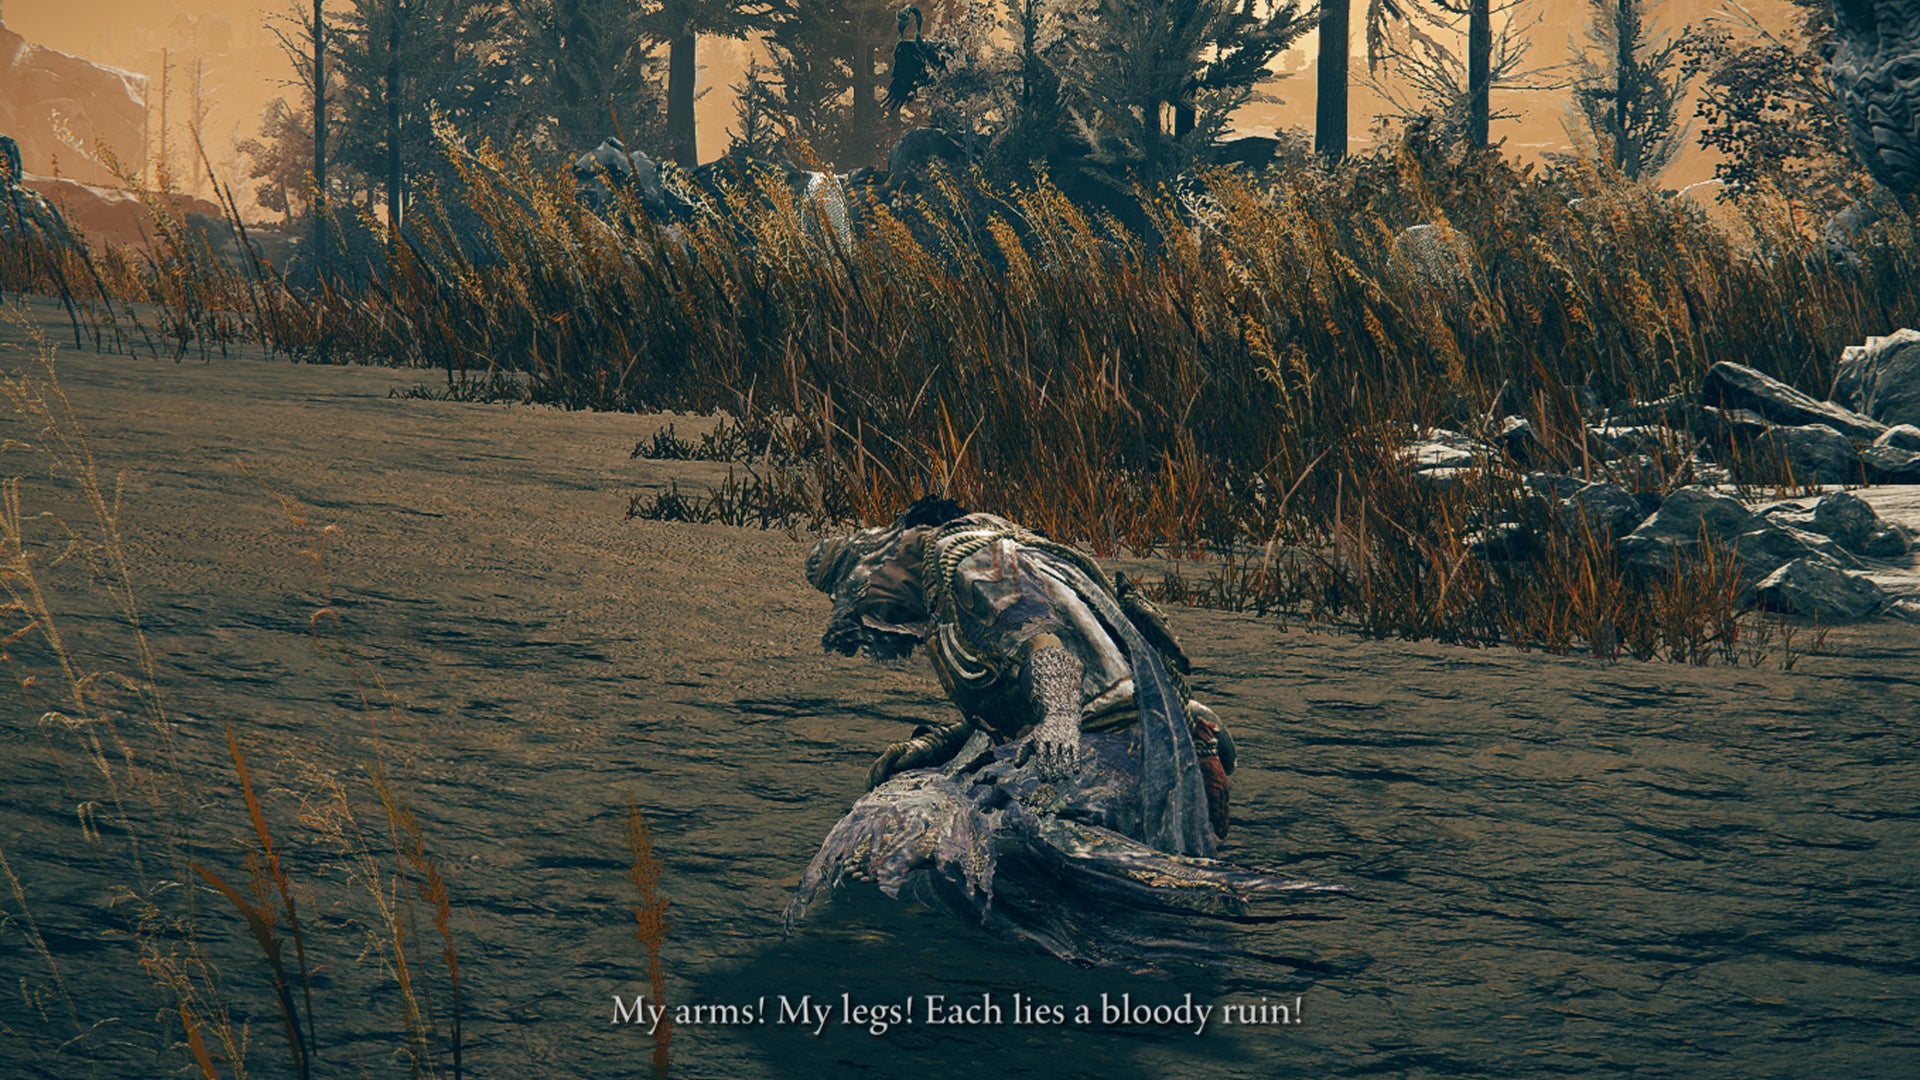
Igon will mostly cry out in pain and speak to himself until you make a fair headway into this questline. |Image credit:Rock Paper Shotgun/Bandai Namco
Igon and the Dragon Communion Priestess’s quest are interlinked as both NPCs ultimately want you to take on and defeat Bayle the Dread. This is a fearsome and particularly strong boss - even by Elden Ring’s standards. Here is a step-by-step of the full questline.
- Speak to Igon opposite the Pillar Path Waypoint Site Of Grace on the east side of the Gravesite Plain. (Take the main road from Castle Ensis east and follow it almost all the way).
- Rest and speak with him again, although the conversation will be fairly one-sided.
- Continue up the path southwest from where Igon lies to gain access to the Dragon’s Pit area.
- On the road you’ll be invaded by Ancient Dragon-Man. Defeat him and watch out for his dragon breath weapon attack.
- Proceed to the cave which will lead you through the Dragon’s Pit.
- Complete the Dragon’s Pit dungeon and defeat the true form of the Ancient Dragon-Man.
- Exit the cave and travel down through the Jagged Peak, fighting the Jagged Peak Dragon on your way (if you wish).
- Follow the trail south to visit the Grand Altar of Dragon Communion and Dragon Communion Priestess if you wish.
- Return to the valley where you fought the Jagged Peak Dragon, this time take the road north.
- As you follow the path around the cliff, you’ll come across a Spiritspring. Take it.
- Continue across the footbridge to the Foot Of The Jagged Peak Site Of Grace.
- Move south, up the cliff pathway. Here, there will be two Drakes battling. Watch from afar and let them dwindle each other down.
- When there is a victor, walk in and finish the job.
- Follow Igon’s laughter to the east of here, where he will be lying down and praising your display against the drakes.
- Take his Furled Finger (he will also implore you to defeat Bayle and ask you to summon him when you do) and continue up the Spiritspring behind him.
- Take two more Spiritsprings and continue through the cave southeast.
- Walk through the clearing (watching out for boulders) and face Ancient Dragon Senessax.
- After defeating or running past him, travel up the long upward passage north, past all of the dead drakes to the Jagged Peak Mountainside Site Of Grace.
- Travel upwards, southwest and up the next Spiritspring.
- Continue southwest and upwards. There will be another two Spiritsprings before you reach the Jagged Peak Summit Site Of Grace, where Bayle awaits.
- Defeat Bayle the Dread (seriously, good luck. This is one of the toughest bosses in the DLC). Bayle is weak to pierce damage but strong against almost all magic and status effects. Don’t forget to summon Igon via the yellow summon sign just in front of the clearing entrance and use the Priestess’s Ancient Dragon’s Blessing here if you need to.
- Travel back to where you last saw Igon (southeast of the Foot of the Jagged Peak Site Of Grace) and collect his belongings.
- You can also trade in Bayle’s Heart for one of these options at the Grand Altar of Dragon Communion: Bayle’s Flame Lightning or Bayle’s Tyranny.
Possible quest rewards: Igon’s Set, Igon’s Greatbow, Igon’s Bell Bearing, Igon;s Drake Hunt Ash of War, Dragon-Hunter’s Great Katana, 130,000 Runes (via the Ancient Dragon-Man ), 490,000 Runes (from defeating Bayle ).
Elden Ring DLC quest steps: Dragon Communion Priestess
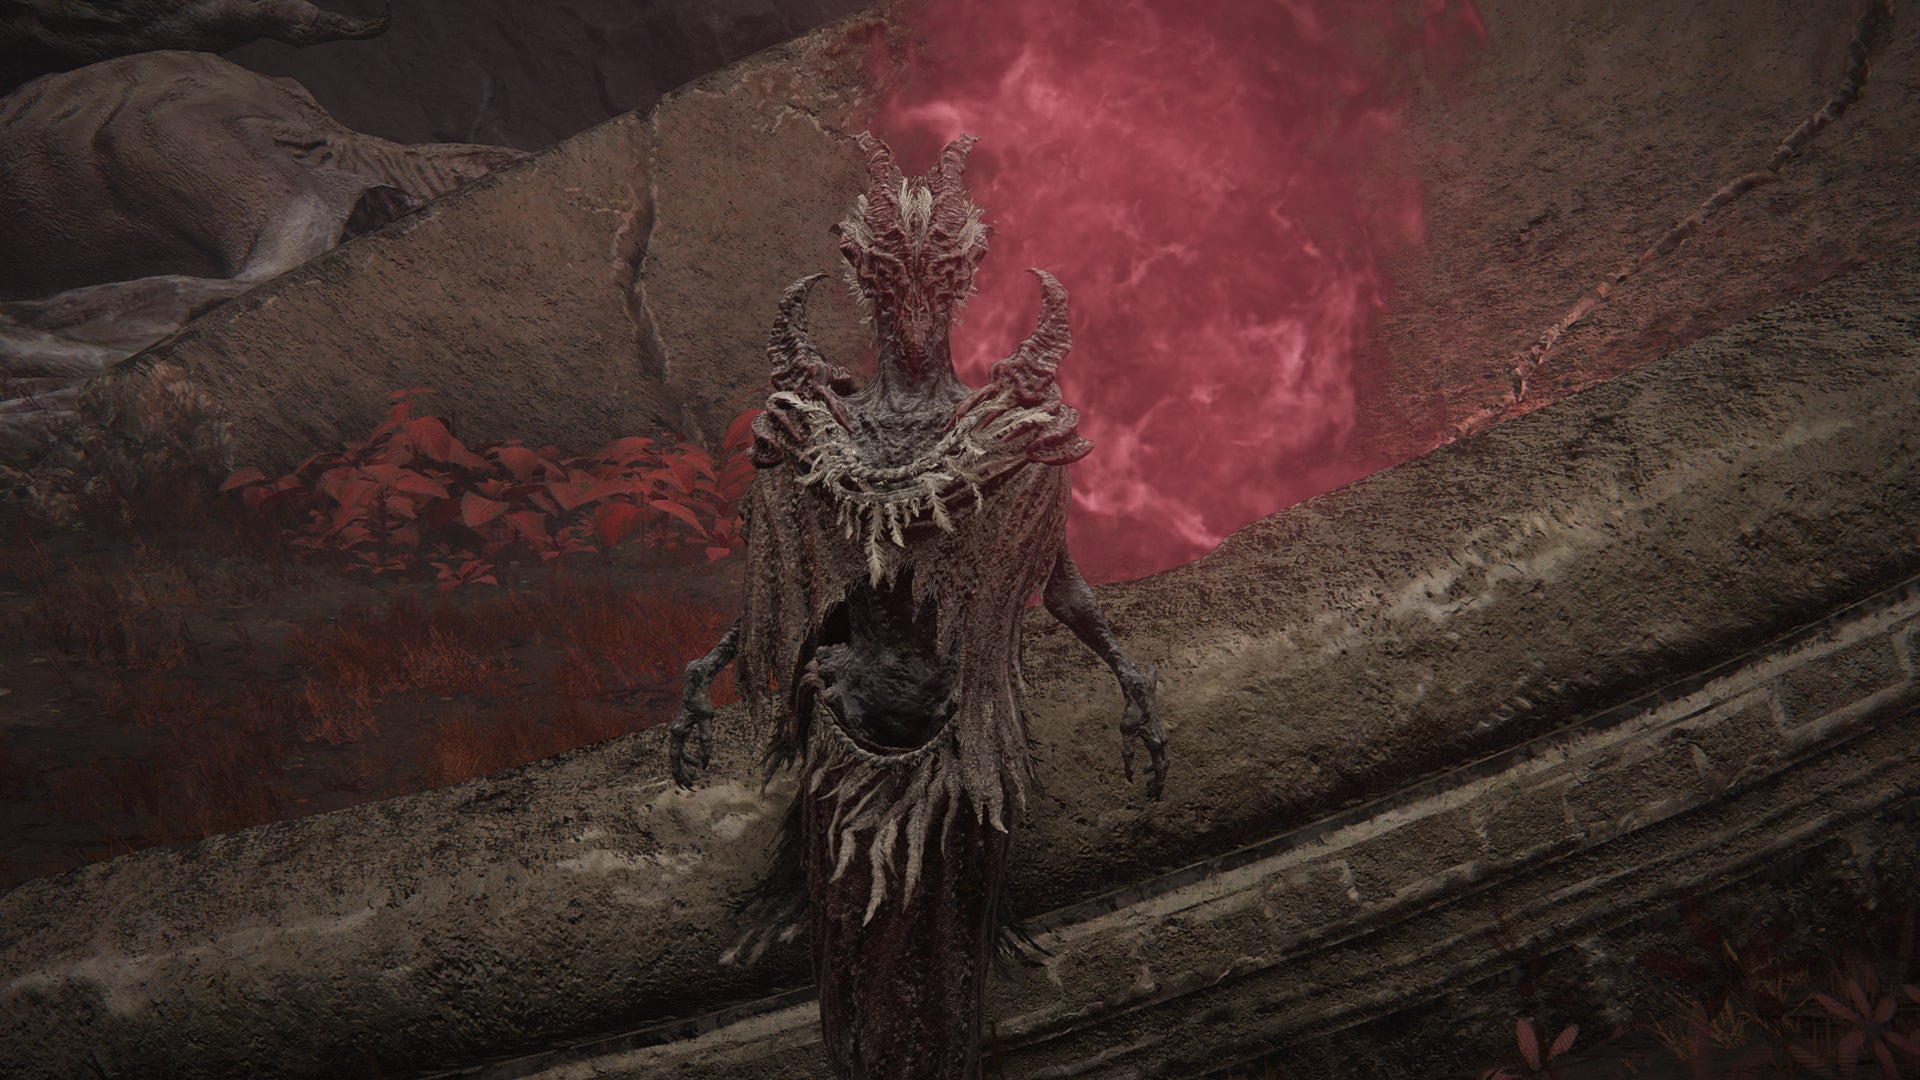
If you choose the ‘Priestess Heart’ quest reward, you can look just like the Priestess and take on a dragon-like appearance. |Image credit:Rock Paper Shotgun/Bandai Namco
The Dragon Communion Priestess can be found within the Jagged Peak, a mountainous area which is home to Bayle The Dread, one of the toughest bosses in the Shadow Of The Erdtree DLC. The Priestess can offer a number of different quest rewards depending on your choices. Her quest is heavily interlinked with Igon , who also has a grudge against the winged terror.
- Complete the Dragon’s Pit dungeon (located along the southeastern road from the Castle Front Site Of Grace).
- Travel down through the Jagged Peak, fighting the Jagged Peak Dragon on your way (if you wish).
- Follow the trail south and travel to the Grand Altar of Dragon Communion. You shouldn’t miss it, it’s quite literally at the head of the massive dead dragon which forms part of this map.
- Rest at the Site Of Grace here and then speak with the Dragon Commuion Priestess by the basin.
- Choose to ‘devour the draconic essence’ and you’ll receive the Ancient Dragon’s Blessing as well as her instruction to defeat the terror of this land, Bayle.
- Optional: speak with her again to get additional lore about Bayle.
- Return to the valley where you fought the Jagged Peak Dragon, this time take the road north.
- Continue upwards until you reach the Jagged Peak Summit Site Of Grace, where Bayle awaits.
- Defeat Bayle the Dread.
- Return to the Grand Altar of Dragon Communion where you can collect the Priestess’s rewards from where the Priestess once stood (depending on your choice from the above section).
- You can also trade in Bayle’s Heart for one of these options at the altar: Bayle’s Flame Lightning or Bayle’s Tyranny.
Possible quest rewards: Dragonbolt of Florissax Incantation, Ancient Dragon Florissax Spirit Ash, Priestess Heart, Flowerstone Gavel, 490,000 Runes (from defeating Bayle ).
See our rundown of the Dragon Communion Priestess questline here for a more thorough rundown of her questline.
Elden Ring DLC quest steps: Dryleaf Dane
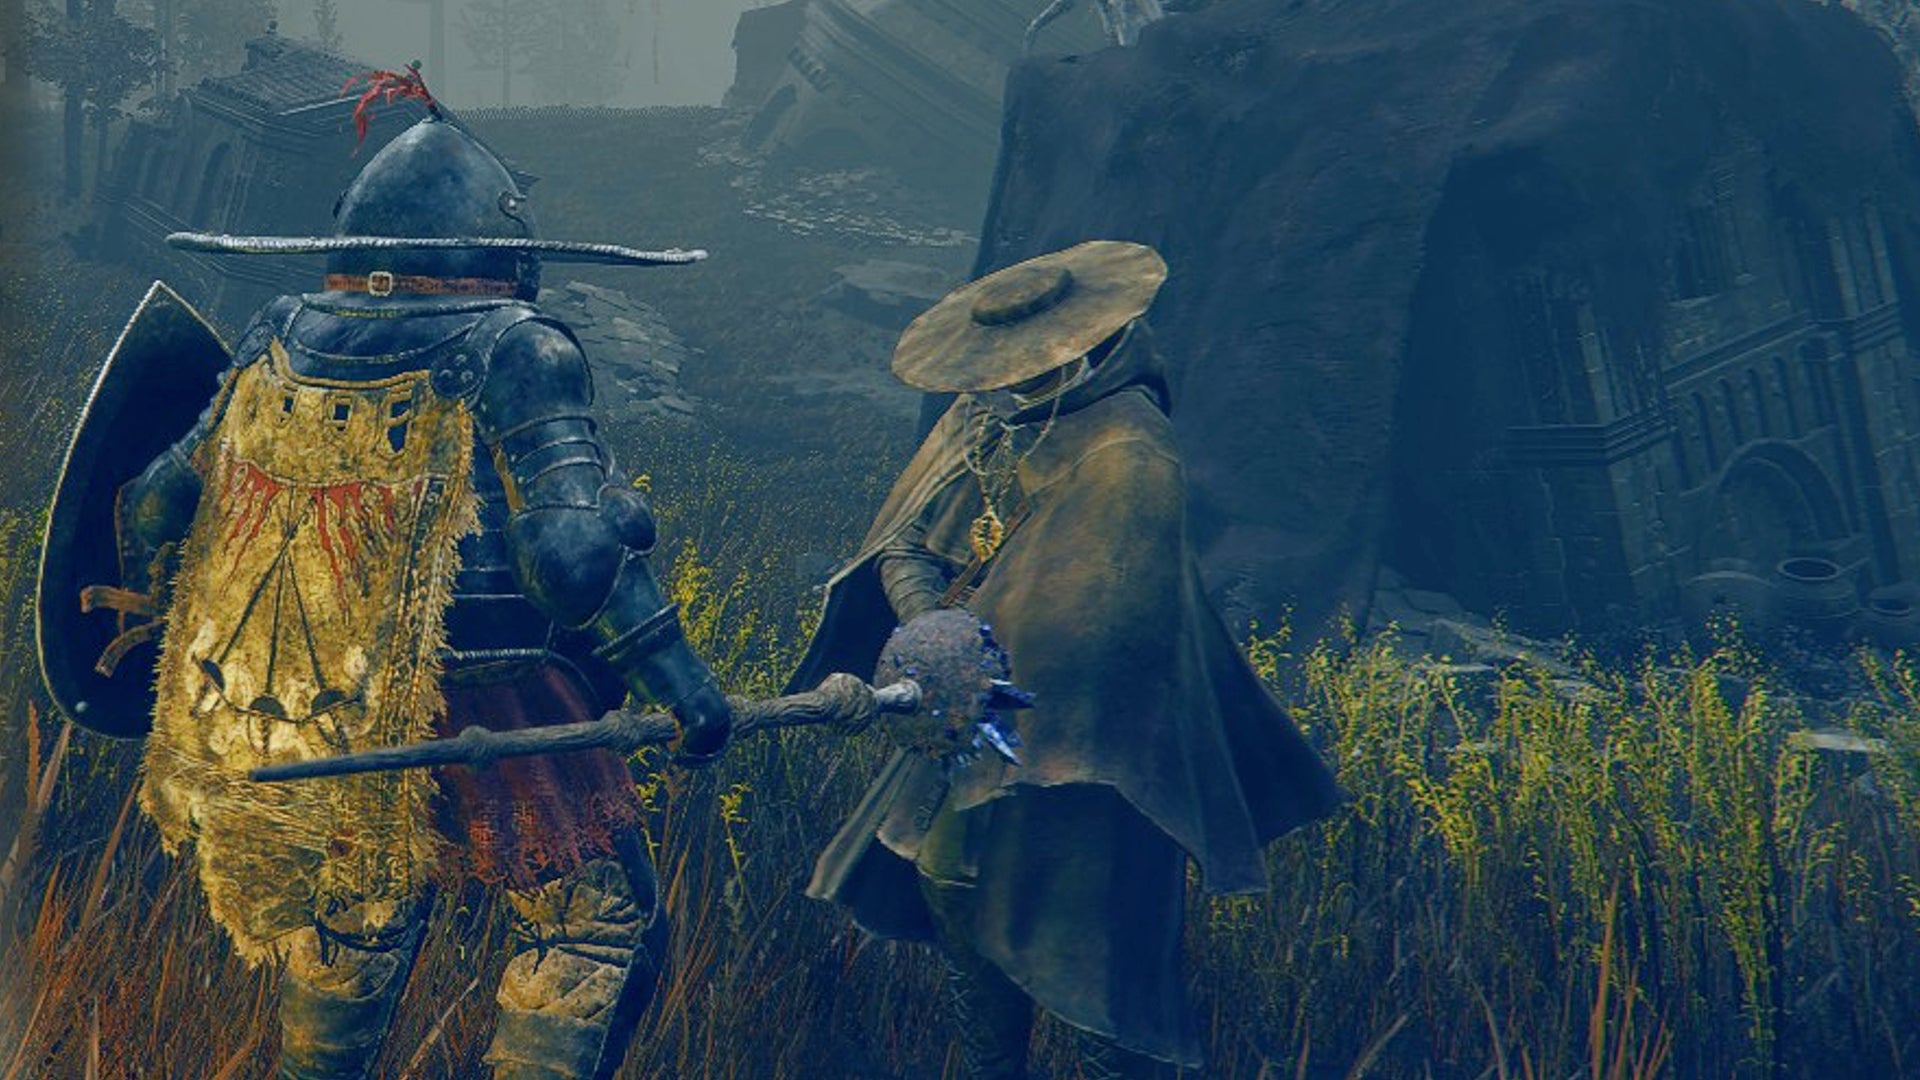
Dryleaf Dane is a monk who can teach you to perform the Dryleaf Arts. |Image credit:Rock Paper Shotgun/Bandai Namco
Dryleaf Dane is a martial arts expert and a fellow follower of Miquella. Through him, you can learn the Dryleaf Arts, a new weapon type to arrive with the DLC which acts as a mixed martial arts moveset.
Curiously, Dryleaf Dane isn’t much of a speaker but you can get a few rewards by following his questline with these following steps:
- Advance to Scadu Altus.
- Pick up the ‘May the Best Win’ gesture and the ‘Monk’s Missive’ message from the Highroad Cross Site Of Grace.
- Meet Dryleaf Dane at Moorth Ruins, just further up the road to The Shadow Keep.
- Perform the gesture to Dane.
- Defeat Dane and acquire the Dryleaf Arts.
- Dryleaf Dane will be an optional summon against Rellana, Twin Moon Knight in Castle Ensis.
- You may also summon Dryleaf Dane against Romina, Saint of the Bud at the Church of The Bud.
- Dryleaf Dane will appear at the Enir-Ilim Cleansing Chamber Anteroom fight.
- Defeat him for his armor and an upgraded Dryleaf Arts weapon.
Possible quest rewards: Dryleaf Arts, Dane’s Footwork, Dane’s Set.
For more information, we have a guide to completing the Dryleaf Dane questline here.
Elden Ring DLC quest steps: Ymir and Jolán

Count Ymir’s questline will lead you all over the Land of Shadow. |Image credit:Rock Paper Shotgun/Bandai Namco
This questline involves both Ymir and Jolán and will have you exploring the hidden Hinterland area of the Land of Shadow. To gain access to this area and for a walkthrough of all Ymir quest steps, see below.
- Travel to the Cathedral Of Manus Metyr and speak to Count Ymir (southeast of The Shadow Keep in Scadu Altus). He will give you the Hole-Laden Necklace and a map to a set of ruins with instructions to ‘ring the bell’ therein. You can get to the Cathedral area by travelling past Bonny Village and the Whipping Hut.
- Optional: rest and reload the area to speak with Swordhand Of Night Jolán (opposite Ymir) and Ymir again.
- Travel to the Finger Ruins Of Rhia. This area can be accessed via the route from the Cerulean Coast’s southern beach, up and past the stone slab of ancient ruins in the area.
- Inside, make your way to the centre of the stone fingers and interact with the finger hanging downwards. This will ring the bell.
- Return to Ymir for the second Ruins Map and a Beloved Stardust Talisman.
- Optional: speak to Jolán and ask Ymir about Miquella for more background lore.
- Rest and return to Ymir’s throne. Interact with it to reveal a secret passage to the Finger Ruins of Miyr.
- Defeat the Swordhand Of Night Anna invader.
- Optional: reload the area and speak with Jolán and Ymir again. This time about what you saw below.
- Travel to the Ruins Of Dheo in the Hinterland. To gain access to this area you need to perform the ‘O, Mother’ gesture to the headless statue of Marika in The Shadow Keep (north of the Back Gate Site of Grace). The gesture can be picked up from the headless corpse under the tree directly north of Bonny Village.
- The Ruins of Dheo are located in the southernmost region of the Hinterland.
- Once inside, repeat the steps from the first ruins and interact with the stone finger in the centre of the area.
- Return to Ymir and Jolán. Speak with them and retrieve the third and final Ruins Map.
- This time, rest and travel to the underground Finger Ruins of Miyr beneath Ymir’s throne.
- Sound the bell to be transported to the Metyr, Mother Of Fingers boss.
- Defeat Metyr, Mother Of Fingers .
- Return to the cathedral and defeat the invader form of Jolán.
- Once defeated, Count Ymir will return but in his new form.
- Kill Count Ymir, Mother Of Fingers and reload the area.
- Speak to Jolán and either give her the Iris of Grace (you will receive the Swordhand Of Night Jolán Spirit Ash) or the Iris of Occultation (you’ll receive the Sword Of Night). See the above Queelign section for more details on where to get the various Irises in the game.
- Access the top of Rabbath’s Rise (north of the cathedral) and interact with Anna’s body. If you choose to give Jolán the Iris of Grace, you’ll receive the Jolán and Anna combined Spirit Ash.
- Loot the graveyard via the cathedral exit for the Cherishing Fingers Sorcery.
Possible quest rewards: Hole-Laden Necklace, Beloved Stardust Talisman, Swordhand Of Night Jolán Spirit Ash, Sword Of Night, Jolán and Anna combined Spirit Ash, Cherishing Fingers Sorcery, 420,000 Runes (from defeating Metyr, Mother Of Fingers ), Remembrance of the Mother of Fingers, 210,000 Runes (from defeating Count Ymir, Mother of Fingers ), Ymir’s Bell Bearing, Maternal Staff, High Priest Set, Crimson Seed Talisman +1, Cerulean Seed Talisman +1, Claws Of Night.
See our rundown of the Ymir questline here for a more thorough rundown of his questline.
That rounds up our walkthrough of all in Elden Ring: Shadow Of The Erdtree quests. For more Elden Ring tips and tricks , check out our guide to the best early weapons in Shadow Of The Erdtree to get you started. Or, if you’re further along in the DLC, see our best weapons guide that goes through the best of the bunch. Be sure to also check out our Map Fragment locations guide to help you access and uncover every region in the DLC and see our boss locations guide so you won’t miss a single one.


Elden Ring
PS4 , PS5 , Xbox One , Xbox Series X/S , PC
Rock Paper Shotgun is better when you sign in
Sign in and join us on our journey to discover strange and compelling PC games.

All 75 Arc Raiders Blueprints and where to get them
These areas have the highest chance of giving you Blueprints

Image credit:Rock Paper Shotgun/Embark Studios

Looking for more Arc Raiders Blueprints? It’s a special day when you find a Blueprint, as they’re among the most valuable items in Arc Raiders. If you find a Blueprint that you haven’t already found, then you must make sure you hold onto it at all costs, because Blueprints are the key to one of the most important and powerful systems of meta-progression in the game.
This guide aims to be the very best guide on Blueprints you can find, starting with a primer on what exactly they are and how they work in Arc Raiders, before delving into exactly where to get Blueprints and the very best farming spots for you to take in your search.
We’ll also go over how to get Blueprints from other unlikely activities, such as destroying Surveyors and completing specific quests. And you’ll also find the full list of all 75 Blueprints in Arc Raiders on this page (including the newest Blueprints added with the Cold Snap update , such as the Deadline Blueprint and Firework Box Blueprint), giving you all the information you need to expand your own crafting repertoire.
In this guide:
- What are Blueprints in Arc Raiders?
- Full Blueprint list: All crafting recipes
- Where to find Blueprints in Arc Raiders Blueprints obtained from quests Blueprints obtained from Trials Best Blueprint farming locations

What are Blueprints in Arc Raiders?
Blueprints in Arc Raiders are special items which, if you manage to extract with them, you can expend to permanently unlock a new crafting recipe in your Workshop. If you manage to extract from a raid with an Anvil Blueprint, for example, you can unlock the ability to craft your very own Anvil Pistol, as many times as you like (as long as you have the crafting materials).
To use a Blueprint, simply open your Inventory while in the lobby, then right-click on the Blueprint and click “Learn And Consume” . This will permanently unlock the recipe for that item in your Workshop. As of the Stella Montis update, there are allegedly 75 different Blueprints to unlock - although only 68 are confirmed to be in the game so far. You can see all the Blueprints you’ve found and unlocked by going to the Workshop menu, and hitting “R” to bring up the Blueprint screen.
It’s possible to find duplicates of past Blueprints you’ve already unlocked. If you find these, then you can either sell them, or - if you like to play with friends - you can take it into a match and gift it to your friend so they can unlock that recipe for themselves. Another option is to keep hold of them until the time comes to donate them to the Expedition.
Full Blueprint list: All crafting recipes
Below is the full list of all the Blueprints that are currently available to find in Arc Raiders, and the crafting recipe required for each item:
| Blueprint | Type | Recipe | Crafted At |
|---|---|---|---|
| Bettina | Weapon | 3x Advanced Mechanical Components 3x Heavy Gun Parts 3x Canister | Gunsmith 3 |
| Blue Light Stick | Quick Use | 3x Chemicals | Utility Station 1 |
| Aphelion | Weapon | 3x Magnetic Accelerator 3x Complex Gun Parts 1x Matriarch Reactor | Gunsmith 3 |
| Combat Mk. 3 (Flanking) | Augment | 2x Advanced Electrical Components 3x Processor | Gear Bench 3 |
| Combat Mk. 3 (Aggressive) | Augment | 2x Advanced Electrical Components 3x Processor | Gear Bench 3 |
| Complex Gun Parts | Material | 2x Light Gun Parts 2x Medium Gun Parts 2x Heavy Gun Parts | Refiner 3 |
| Fireworks Box | Quick Use | 1x Explosive Compound 3x Pop Trigger | Explosives Station 2 |
| Gas Mine | Mine | 4x Chemicals 2x Rubber Parts | Explosives Station 1 |
| Green Light Stick | Quick Use | 3x Chemicals | Utility Station 1 |
| Pulse Mine | Mine | 1x Crude Explosives 1x Wires | Explosives Station 1 |
| Seeker Grenade | Grenade | 1x Crude Explosives 2x ARC Alloy | Explosives Station 1 |
| Looting Mk. 3 (Survivor) | Augment | 2x Advanced Electrical Components 3x Processor | Gear Bench 3 |
| Angled Grip II | Mod | 2x Mechanical Components 3x Duct Tape | Gunsmith 2 |
| Angled Grip III | Mod | 2x Mod Components 5x Duct Tape | Gunsmith 3 |
| Hullcracker | Weapon | 1x Magnetic Accelerator 3x Heavy Gun Parts 1x Exodus Modules | Gunsmith 3 |
| Launcher Ammo | Ammo | 5x Metal Parts 1x Crude Explosives | Workbench 1 |
| Anvil | Weapon | 5x Mechanical Components 5x Simple Gun Parts | Gunsmith 2 |
| Anvil Splitter | Mod | 2x Mod Components 3x Processor | Gunsmith 3 |
| ??? | ??? | ??? | ??? |
| Barricade Kit | Quick Use | 1x Mechanical Components | Utility Station 2 |
| Blaze Grenade | Grenade | 1x Explosive Compound 2x Oil | Explosives Station 3 |
| Bobcat | Weapon | 3x Advanced Mechanical Components 3x Light Gun Parts | Gunsmith 3 |
| Osprey | Weapon | 2x Advanced Mechanical Components 3x Medium Gun Parts 7x Wires | Gunsmith 3 |
| Burletta | Weapon | 3x Mechanical Components 3x Simple Gun Parts | Gunsmith 1 |
| Compensator II | Mod | 2x Mechanical Components 4x Wires | Gunsmith 2 |
| Compensator III | Mod | 2x Mod Components 8x Wires | Gunsmith 3 |
| Defibrillator | Quick Use | 9x Plastic Parts 1x Moss | Medical Lab 2 |
| ??? | ??? | ??? | ??? |
| Equalizer | Weapon | 3x Magnetic Accelerator 3x Complex Gun Parts 1x Queen Reactor | Gunsmith 3 |
| Extended Barrel | Mod | 2x Mod Components 8x Wires | Gunsmith 3 |
| Extended Light Mag II | Mod | 2x Mechanical Components 3x Steel Spring | Gunsmith 2 |
| Extended Light Mag III | Mod | 2x Mod Components 5x Steel Spring | Gunsmith 3 |
| Extended Medium Mag II | Mod | 2x Mechanical Components 3x Steel Spring | Gunsmith 2 |
| Extended Medium Mag III | Mod | 2x Mod Components 5x Steel Spring | Gunsmith 3 |
| Extended Shotgun Mag II | Mod | 2x Mechanical Components 3x Steel Spring | Gunsmith 2 |
| Extended Shotgun Mag III | Mod | 2x Mod Components 5x Steel Spring | Gunsmith 3 |
| Remote Raider Flare | Quick Use | 2x Chemicals 4x Rubber Parts | Utility Station 1 |
| Heavy Gun Parts | Material | 4x Simple Gun Parts | Refiner 2 |
| Venator | Weapon | 2x Advanced Mechanical Components 3x Medium Gun Parts 5x Magnet | Gunsmith 3 |
| Il Toro | Weapon | 5x Mechanical Components 6x Simple Gun Parts | Gunsmith 1 |
| Jolt Mine | Mine | 1x Electrical Components 1x Battery | Explosives Station 2 |
| Explosive Mine | Mine | 1x Explosive Compound 1x Sensors | Explosives Station 3 |
| Jupiter | Weapon | 3x Magnetic Accelerator 3x Complex Gun Parts 1x Queen Reactor | Gunsmith 3 |
| Light Gun Parts | Material | 4x Simple Gun Parts | Refiner 2 |
| Lightweight Stock | Mod | 2x Mod Components 5x Duct Tape | Gunsmith 3 |
| Lure Grenade | Grenade | 1x Speaker Component 1x Electrical Components | Utility Station 2 |
| Medium Gun Parts | Material | 4x Simple Gun Parts | Refiner 2 |
| Torrente | Weapon | 2x Advanced Mechanical Components 3x Medium Gun Parts 6x Steel Spring | Gunsmith 3 |
| Muzzle Brake II | Mod | 2x Mechanical Components 4x Wires | Gunsmith 2 |
| Muzzle Brake III | Mod | 2x Mod Components 8x Wires | Gunsmith 3 |
| Padded Stock | Mod | 2x Mod Components 5x Duct Tape | Gunsmith 3 |
| Shotgun Choke II | Mod | 2x Mechanical Components 4x Wires | Gunsmith 2 |
| Shotgun Choke III | Mod | 2x Mod Components 8x Wires | Gunsmith 3 |
| Shotgun Silencer | Mod | 2x Mod Components 8x Wires | Gunsmith 3 |
| Showstopper | Grenade | 1x Advanced Electrical Components 1x Voltage Converter | Explosives Station 3 |
| Silencer I | Mod | 2x Mechanical Components 4x Wires | Gunsmith 2 |
| Silencer II | Mod | 2x Mod Components 8x Wires | Gunsmith 3 |
| Snap Hook | Quick Use | 2x Power Rod 3x Rope 1x Exodus Modules | Utility Station 3 |
| Stable Stock II | Mod | 2x Mechanical Components 3x Duct Tape | Gunsmith 2 |
| Stable Stock III | Mod | 2x Mod Components 5x Duct Tape | Gunsmith 3 |
| Tagging Grenade | Grenade | 1x Electrical Components 1x Sensors | Utility Station 3 |
| Tempest | Weapon | 3x Advanced Mechanical Components 3x Medium Gun Parts 3x Canister | Gunsmith 3 |
| Trigger Nade | Grenade | 2x Crude Explosives 1x Processor | Explosives Station 2 |
| Vertical Grip II | Mod | 2x Mechanical Components 3x Duct Tape | Gunsmith 2 |
| Vertical Grip III | Mod | 2x Mod Components 5x Duct Tape | Gunsmith 3 |
| Vita Shot | Quick Use | 2x Antiseptic 1x Syringe | Medical Lab 3 |
| Vita Spray | Quick Use | 3x Antiseptic 1x Canister | Medical Lab 3 |
| Vulcano | Weapon | 1x Magnetic Accelerator 3x Heavy Gun Parts 1x Exodus Modules | Gunsmith 3 |
| Wolfpack | Grenade | 2x Explosive Compound 2x Sensors | Explosives Station 3 |
| Red Light Stick | Quick Use | 3x Chemicals | Utility Station 1 |
| Smoke Grenade | Grenade | 14x Chemicals 1x Canister | Utility Station 2 |
| Deadline | Mine | 3x Explosive Compound 2x ARC Circuitry | Explosives Station 3 |
| Trailblazer | Grenade | 1x Explosive Compound 1x Synthesized Fuel | Explosives Station 3 |
| Tactical Mk. 3 (Defensive) | Augment | 2x Advanced Electrical Components 3x Processor | Gear Bench 3 |
| Tactical Mk. 3 (Healing) | Augment | 2x Advanced Electrical Components 3x Processor | Gear Bench 3 |
| Yellow Light Stick | Quick Use | 3x Chemicals | Utility Station 1 |
Note: The missing Blueprints in this list likely have not actually been added to the game at the time of writing, because none of the playerbase has managed to find any of them. As they are added to the game, I will update this page with the most relevant information so you know exactly how to get all 75 Arc Raiders Blueprints.
Where to find Blueprints in Arc Raiders
Below is a list of all containers, modifiers, and events which maximise your chances of finding Blueprints:
- Certain quests reward you with specific Blueprints .
- Completing Trials has a high chance of offering Blueprints as rewards.
- Surveyors have a decent chance of dropping Blueprints on death.
- High loot value areas tend to have a greater chance of spawning Blueprints.
- Night Raids and Storms may increase rare Blueprint spawn chances in containers.
- Containers with higher numbers of items may have a higher tendency to spawn Blueprints. As a result, Blue Gate (which has many “large” containers containing multiple items) may give you a higher chance of spawning Blueprints.
- Raider containers (Raider Caches, Weapon Boxes, Medical Bags, Grenade Tubes) have increased Blueprint drop rates. As a result, the Uncovered Caches event gives you a high chance of finding Blueprints.
- Security Lockers have a higher than average chance of containing Blueprints.
- Certain Blueprints only seem to spawn under specific circumstances: Tempest Blueprint only spawns during Night Raid events. Vulcano Blueprint only spawns during Hidden Bunker events. Jupiter and Equaliser Blueprints only spawn during Harvester events.

Raider Caches, Weapon Boxes, and other raider-oriented container types have a good chance of offering Blueprints. |Image credit:Rock Paper Shotgun/Embark Studios
Blueprints have a very low chance of spawning in any container in Arc Raiders, around 1-2% on average. However, there is a higher chance of finding Blueprints in particular container types. Specifically, you can find more Blueprints in Raider containers and security lockers.
Beyond this, if you’re looking for Blueprints you should focus on regions of the map which are marked as having particularly high-value loot. Areas such as the Control Tower in Dam Battlegrounds, the Arrival and Departure Buildings in Spaceport, and Pilgrim’s Peak in Blue Gate all have a better-than-average chance of spawning Blueprints somewhere amongst all their containers. Night Raids and Electromagnetic Storm events also increase the drop chances of certain Blueprints .
In addition to these containers, you can often loot Blueprints from destroyed Surveyors - the largest of the rolling ball ARC. Surveyors are more commonly found on the later maps - Spaceport and Blue Gate - and if one spawns in your match, you’ll likely see it by the blue laser beam that it casts into the sky while “surveying”.
Surveyors are quite well-armoured and will very speedily run away from you once it notices you, but if you can take one down then make sure you loot all its parts for a chance of obtaining certain unusual Blueprints.
Blueprints obtained from quests
One way in which you can get Blueprints is by completing certain quests for the vendors in Speranza. Some quests will reward you with a specific item Blueprint upon completion, so as long as you work through all the quests in Arc Raiders, you are guaranteed those Blueprints.
Here is the full list of all Blueprints you can get from quest rewards:
- Trigger Nade Blueprint: Rewarded after completing “Sparks Fly”.
- Lure Grenade Blueprint: Rewarded after completing “Greasing Her Palms”.
- Burletta Blueprint: Rewarded after completing “Industrial Espionage”.
- Hullcracker Blueprint (and Launcher Ammo Blueprint): Rewarded after completing “The Major’s Footlocker”.
Alas, that’s only 4 Blueprints out of a total of 75 to unlock, so for the vast majority you will need to find them yourself during a raid. If you’re intent on farming Blueprints, then it’s best to equip yourself with cheap gear in case you lose it, but don’t use a free loadout because then you won’t get a safe pocket to stash any new Blueprint you find. No pain in Arc Raiders is sharper than failing to extract with a new Blueprint you’ve been after for a dozen hours already.

One of the best ways to get Blueprints is by hitting three stars on all five Trials every week. |Image credit:Rock Paper Shotgun/Embark Studios
Blueprints obtained from Trials
One of the very best ways to get Blueprints is as rewards for completing Trials in Arc Raiders. Trials are unlocked from Level 15 onwards, and allow you to earn rewards by focusing on certain tasks over the course of several raids. For example, one Trial might task you with dealing damage to Hornets, while another might challenge you to loot Supply Drops.
Trials refresh on a weekly basis, with a new week bringing five new Trials. Each Trial can offer up to three rewards after passing certain score milestones, and it’s possible to receive very high level loot from these reward crates - including Blueprints. So if you want to unlock as many Blueprints as possible, you should make a point of completing as many Trials as possible each week.
Best Blueprint farming locations
The very best way to get Blueprints is to frequent specific areas of the maps which combine high-tier loot pools with the right types of containers to search. Here are my recommendations for where to find Blueprints on every map, so you can always keep the search going for new crafting recipes to unlock.

Image credit:Rock Paper Shotgun/Embark Studios
Dam Battlegrounds
The best places to farm Blueprints on Dam Battlegrounds are the Control Tower, Power Generation Complex, Ruby Residence, and Pale Apartments . The first two regions, despite only being marked on the map as mid-tier loot, contain a phenomenal number of containers to loot. The Control Tower can also contain a couple of high-tier Security Lockers - though of course, you’ll need to have unlocked the Security Breach skill at the end of the Survival tree.
There’s also a lot of reporting amongst the playerbase that the Residential areas in the top-left of the map - Pale Apartments and Ruby Residence - give you a comparatively strong chance of finding Blueprints. Considering their size, there’s a high density of containers to loot in both locations, and they also have the benefit of being fairly out of the way. So you’re more likely to have all the containers to yourself.
Buried City
The best Blueprint farming locations on Buried City are the Santa Maria Houses, Grandioso Apartments, Town Hall, and the various buildings of the New District . Grandioso Apartments has a lower number of containers than the rest, but a high chance of spawning weapon cases - which have good Blueprint drop rates. The others are high-tier loot areas, with plenty of lootable containers - including Security Lockers.
Spaceport
The best places to find Blueprints on Spaceport are the Arrival and Departure Buildings, as well as Control Tower A6 and the Launch Towers . All these areas are labelled as high-value loot regions, and many of them are also very handily connected to one another by the Spaceport wall, which you can use to quickly run from one area to the next. At the tops of most of these buildings you’ll find at least one Security Locker, so this is an excellent farming route for players looking to find Blueprints.
The downside to looting Blueprints on Spaceport is that all these areas are hotly contested, particularly in Duos and Squads. You’ll need to be very focused and fast in order to complete the full farming route.

Image credit:Rock Paper Shotgun/Embark Studios
Blue Gate
Blue Gate tends to have a good chance of dropping Blueprints, potentially because it generally has a high number of containers which can hold lots of items; so there’s a higher chance of a Blueprint spawning in each container. In my experience, the best Blueprint farming spots on Blue Gate are Pilgrim’s Peak, Raider’s Refuge, the Ancient Fort, and the Underground Complex beneath the Warehouse .
All of these areas contain a wealth of containers to loot. Raider’s Refuge has less to loot, but the majority of the containers in and around the Refuge are raider containers, which have a high chance of containing Blueprints - particularly during major events.
Stella Montis
On the whole, Stella Montis seems to have a very low drop rate for Blueprints (though a high chance of dropping other high-tier loot). If you do want to try farming Blueprints on this map, the best places to find Blueprints in Stella Montis are Medical Research, Assembly Workshop, and the Business Center . These areas have the highest density of containers to loot on the map.
In addition to this, the Western Tunnel has a few different Security Lockers to loot, so while there’s very little to loot elsewhere in this area of the map, it’s worth hitting those Security Lockers if you spawn there at the start of a match.
That wraps up this primer on how to get all the Blueprints in Arc Raiders as quickly as possible. With the Expedition system constantly resetting a large number of players’ Blueprints, it’s more important than ever to have the most up-to-date information on where to find all these Blueprints.
While you’re here, be sure to check out our Arc Raiders best guns tier list , as well as our primers on the best skills to unlock and all the different Field Depot locations on every map.


ARC Raiders
PS5 , Xbox Series X/S , PC
Rock Paper Shotgun is better when you sign in
Sign in and join us on our journey to discover strange and compelling PC games.
