All Origami Butterfly locations in Assassin’s Creed Shadows
How to complete The Butterfly Collector questline in AC Shadows
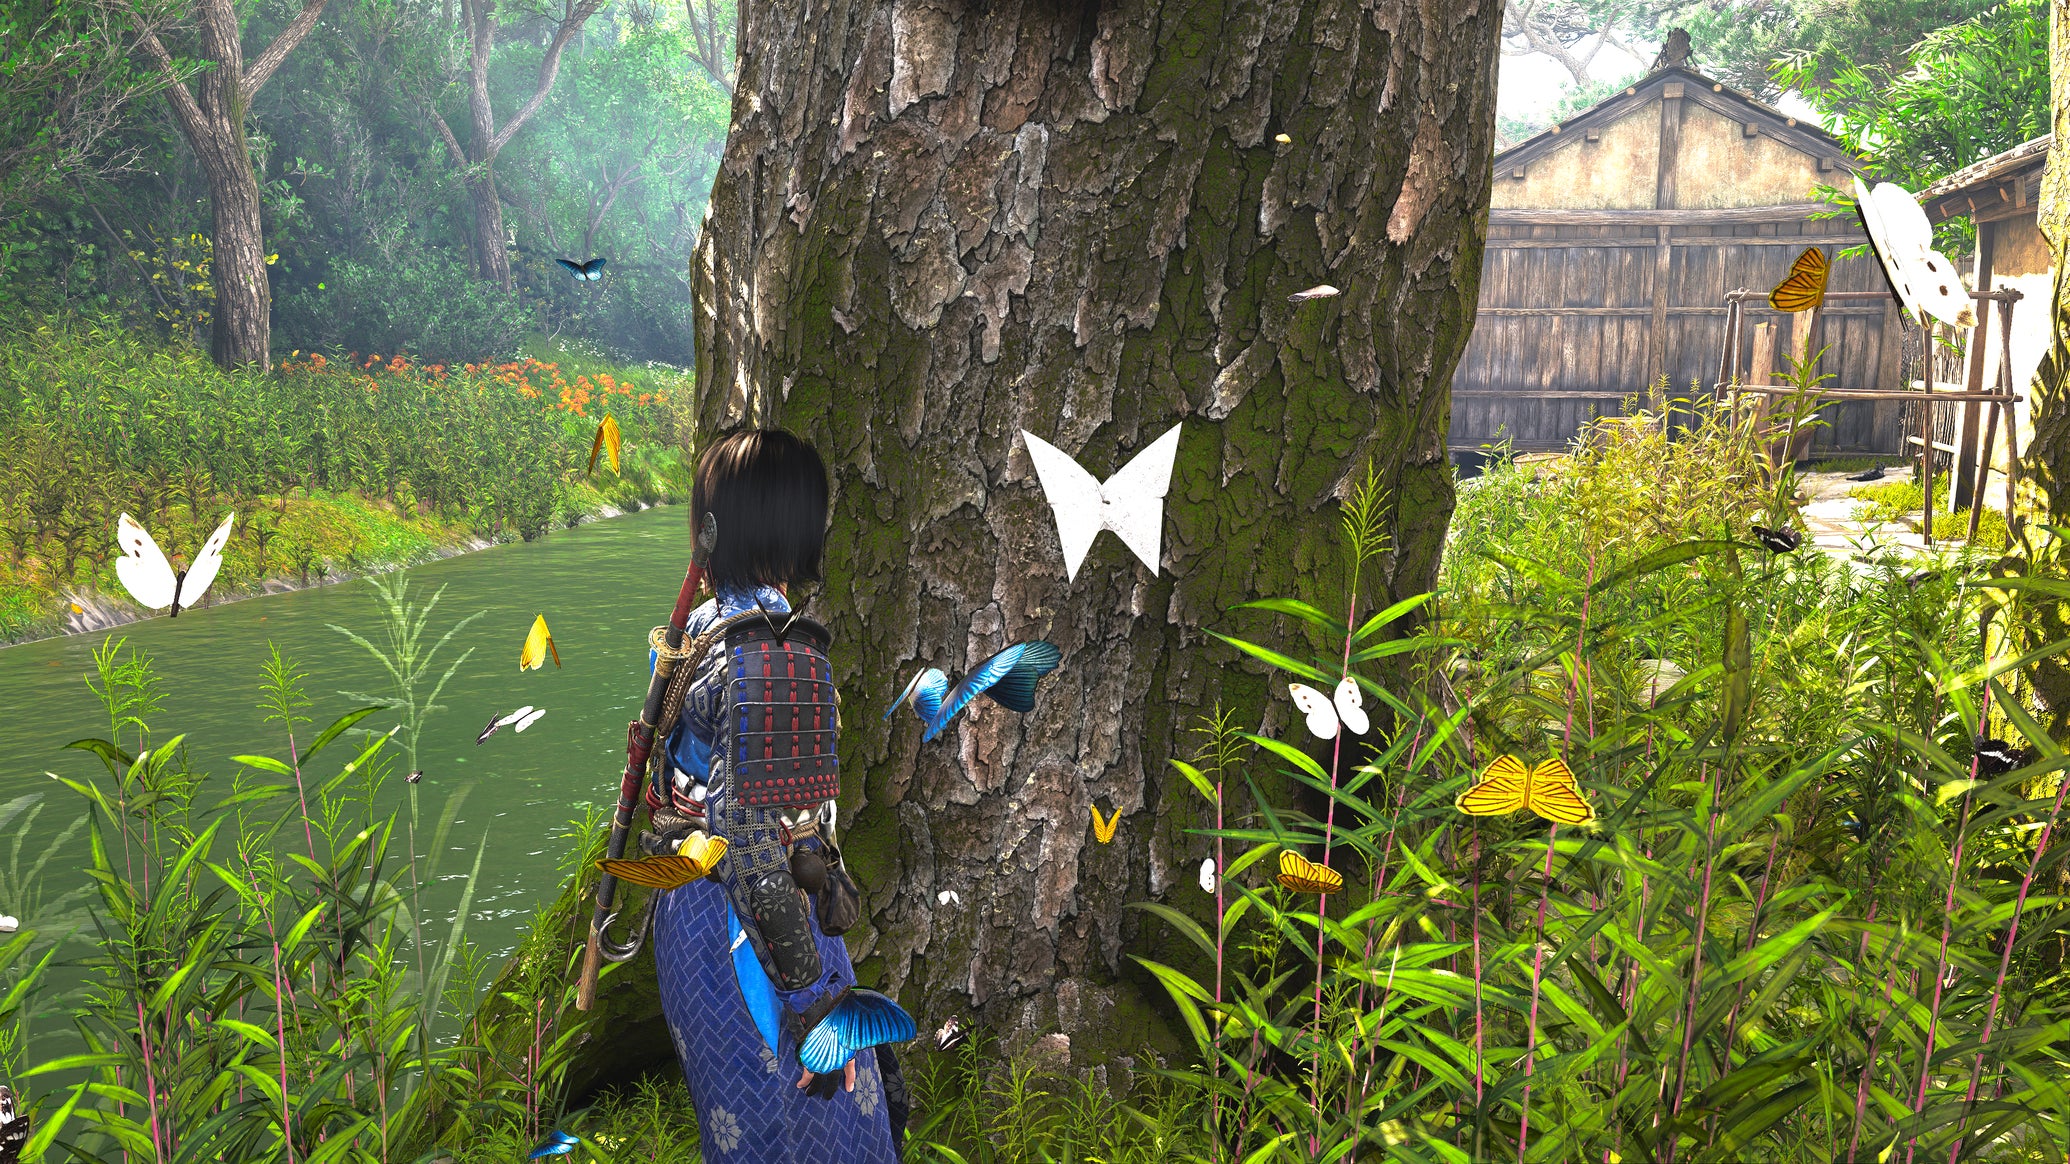
Image credit:Rock Paper Shotgun/Ubisoft

Trying to track down all 10 Origami Butterflies in Assassin’s Creed Shadows? These colourful paper Butterflies are part of a side quest based in Osaka, given to you by a mysterious woman called the Gamemaker. While it may seem like a simple collectibles mini-quest, The Butterfly Collector quickly blossoms into a far more intriguing story that makes it well worth tracking down all 10 Origami Butterfly locations.
In the guide below we’ve laid out the exact location of all 10 Butterflies in AC Shadows, both in map form and with screenshots pointing you to the exact tree where each Butterfly can be found. We’ll also guide you through the remainder of this questline, and the pivotal choice you must make at the very end of the quest.
All 10 Origami Butterfly locations
All 10 Origami Butterflies can be found on trees in the city of Osaka , on the west coast of the starting region, Izumi Settsu. Below is the full list of all the Butterfly locations in Assassin’s Creed Shadows , along with a handy interactive map of their exact positions in the city, courtesy of our friends at MapGenie !
Here are all the Origami Butterfly locations:
| No. | Butterfly | Location | Found! |
|---|---|---|---|
| 1 | Purple Origami Butterfly | On a tree at the north tip of Osaka’s main island. | |
| 2 | Green Origami Butterfly | On a tree in the backyard of a house in east Osaka. | |
| 3 | Richo’s Origami Butterfly | On a tree next to the middle bridge in east Osaka. | |
| 4 | Yellow Origami Butterfly | On a tree in a garden west of the middle bridge. | |
| 5 | Mucho’s Origami Butterfly | On a tree overlooking the river west of Osaka. | |
| 6 | Red Origami Butterfly | On a tree on the north side of the Temple of Osaka. | |
| 7 | Shucho’s Origami Butterfly | On a tree by the river south of the Kakurega. | |
| 8 | Blue Origami Butterfly | On a tree in a garden west of the Temple of Osaka. | |
| 9 | Pink Origami Butterfly | On a tree in a garden near the southwest bridge leading to Sakai. | |
| 10 | Orange Origami Butterfly | On a tree overlooking the river southeast of the Temple of Osaka. |
To help you track down each individual Butterfly, have a scroll through the sections below, as we point out exactly where to find them on each tree.
1. Purple Origami Butterfly location
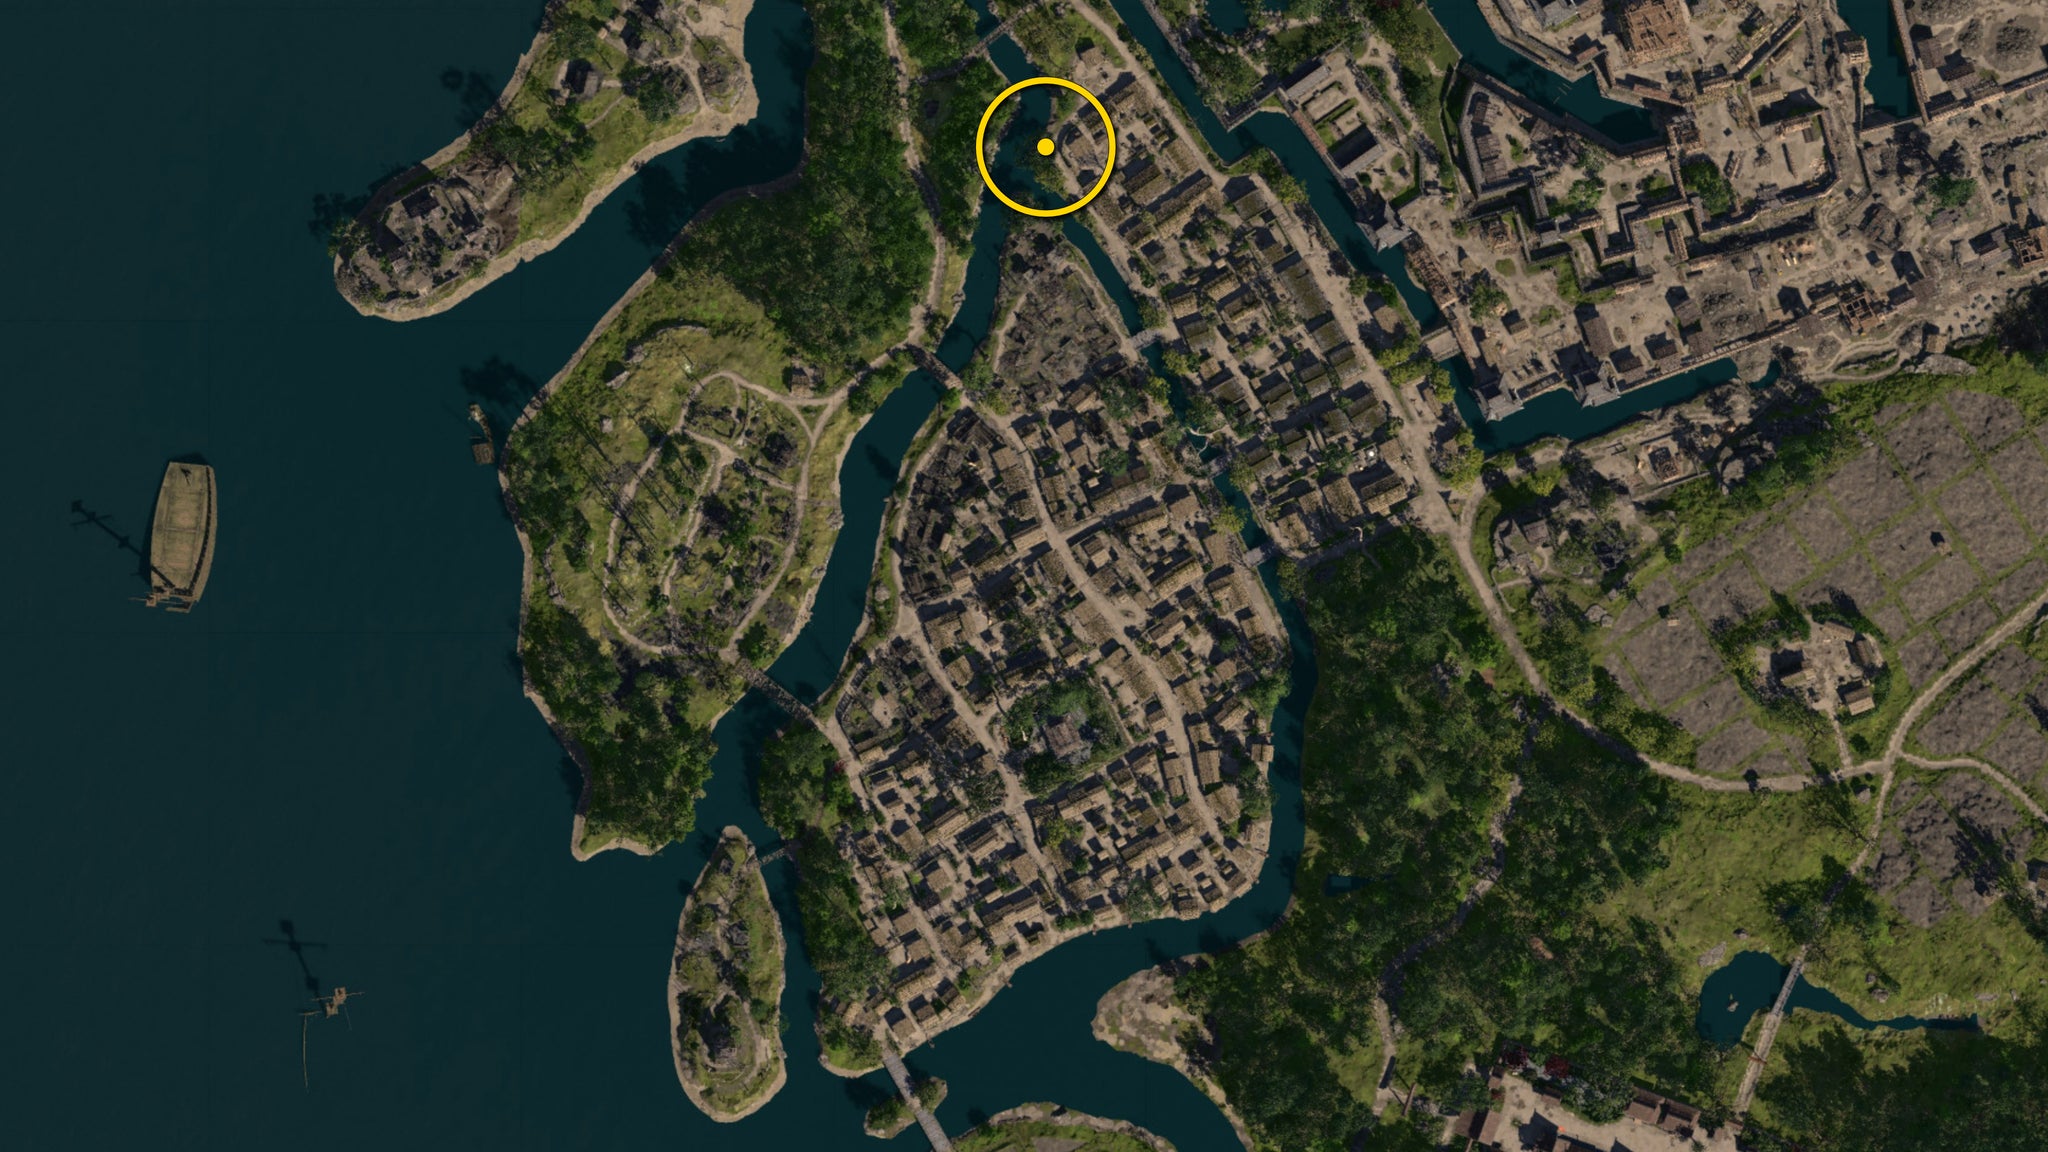
Here’s where to find the Purple Butterfly. |Image credit:Rock Paper Shotgun/Ubisoft
The Purple Origami Butterfly can be found just off the northernmost tip of the main island of Osaka, at the edge of a path by the river.
2. Green Origami Butterfly location

Here’s where to find the Green Butterfly. |Image credit:Rock Paper Shotgun/Ubisoft
The Green Origami Butterfly is found on a tree in the backyard of a house east of the main Osaka island, not far from the wide bridge between the city and the castle.
3. Richo’s Origami Butterfly location
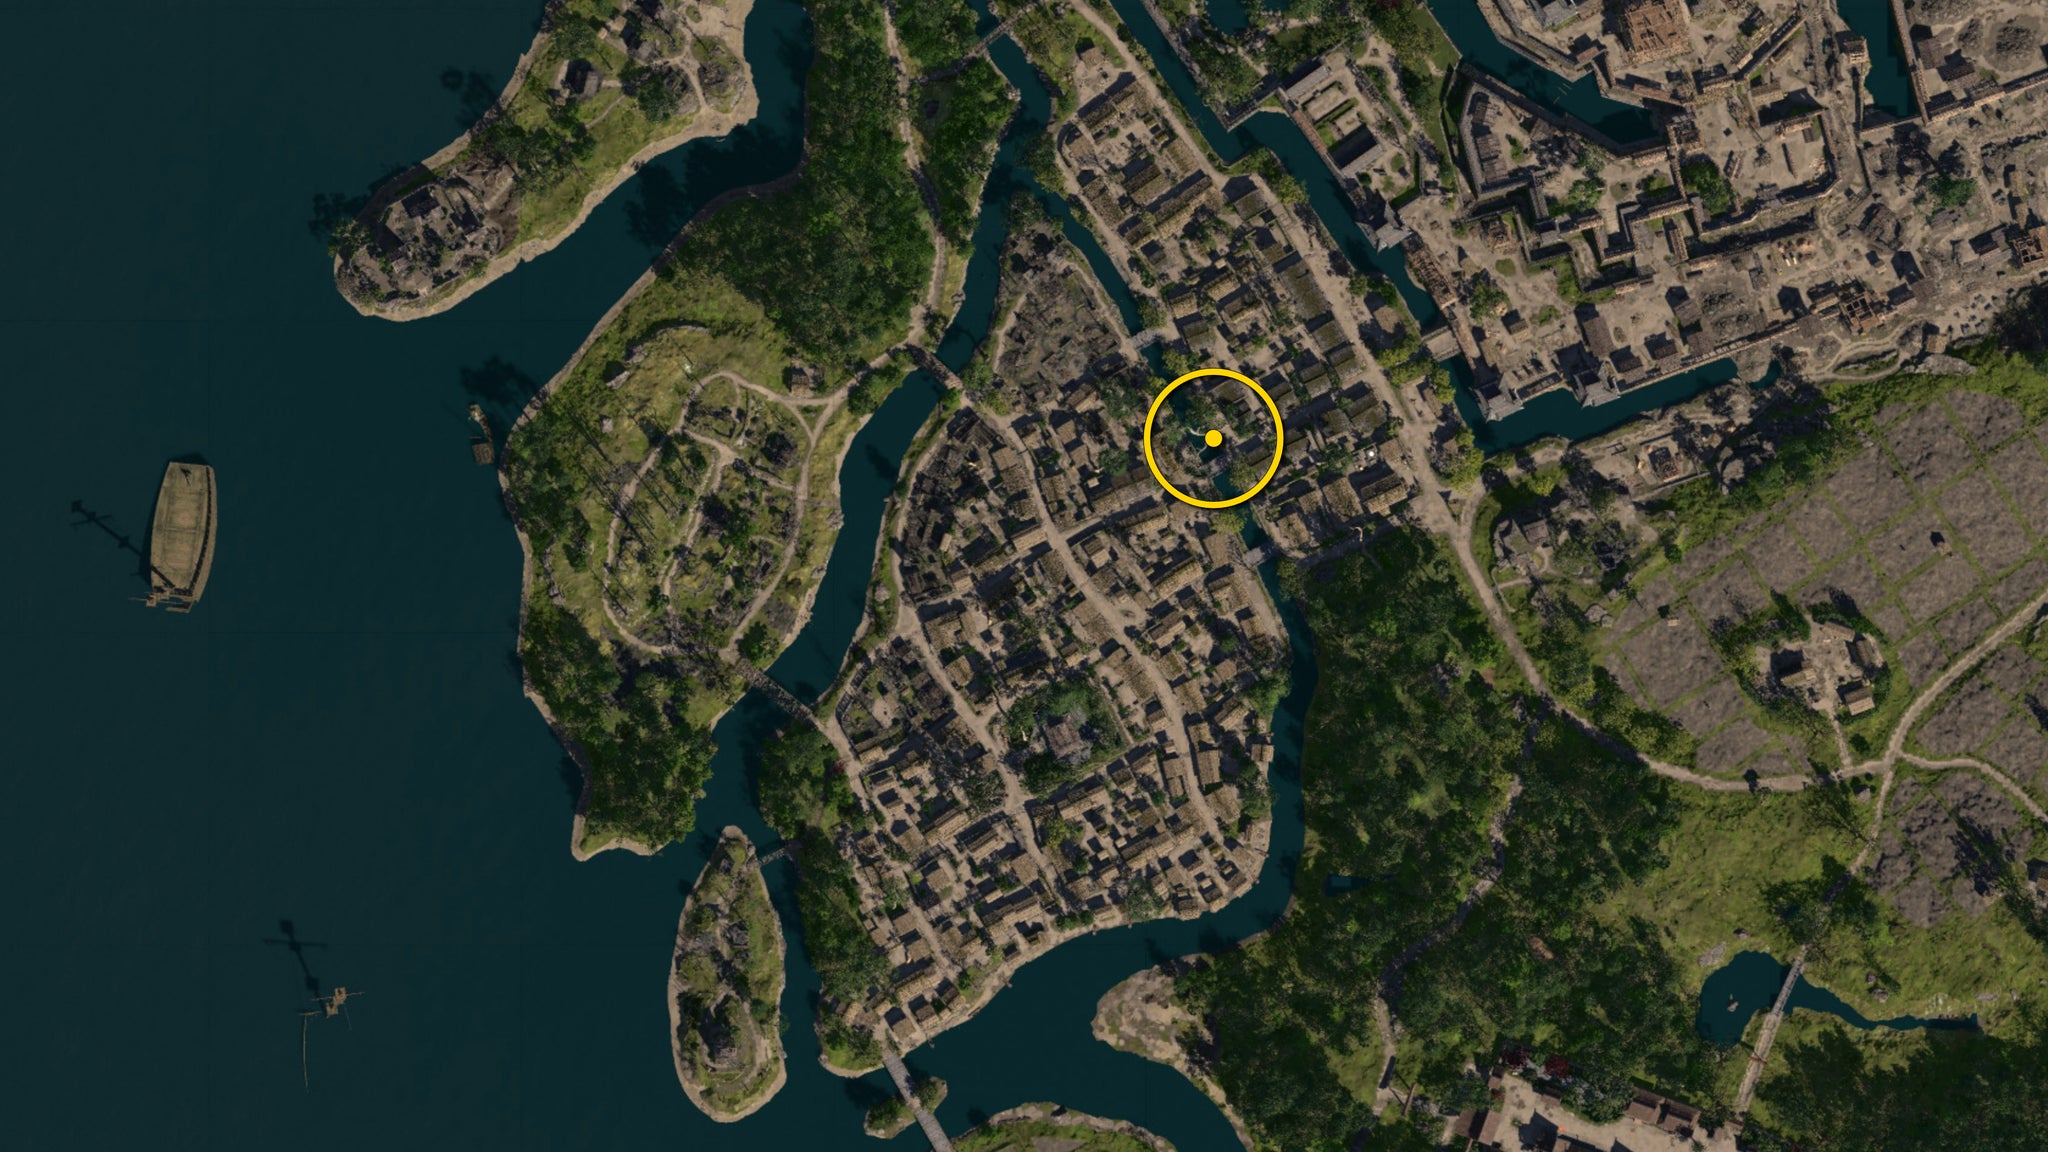
Here’s where you can find Richo’s White Butterfly. |Image credit:Rock Paper Shotgun/Ubisoft
This is the first of the “white” Origami Butterflies, each of which contains a note that hints at a wider purpose behind the Butterflies. This one can be found next to the middle of the three bridges separating the main island of Osaka to the land on its east side.
4. Yellow Origami Butterfly location
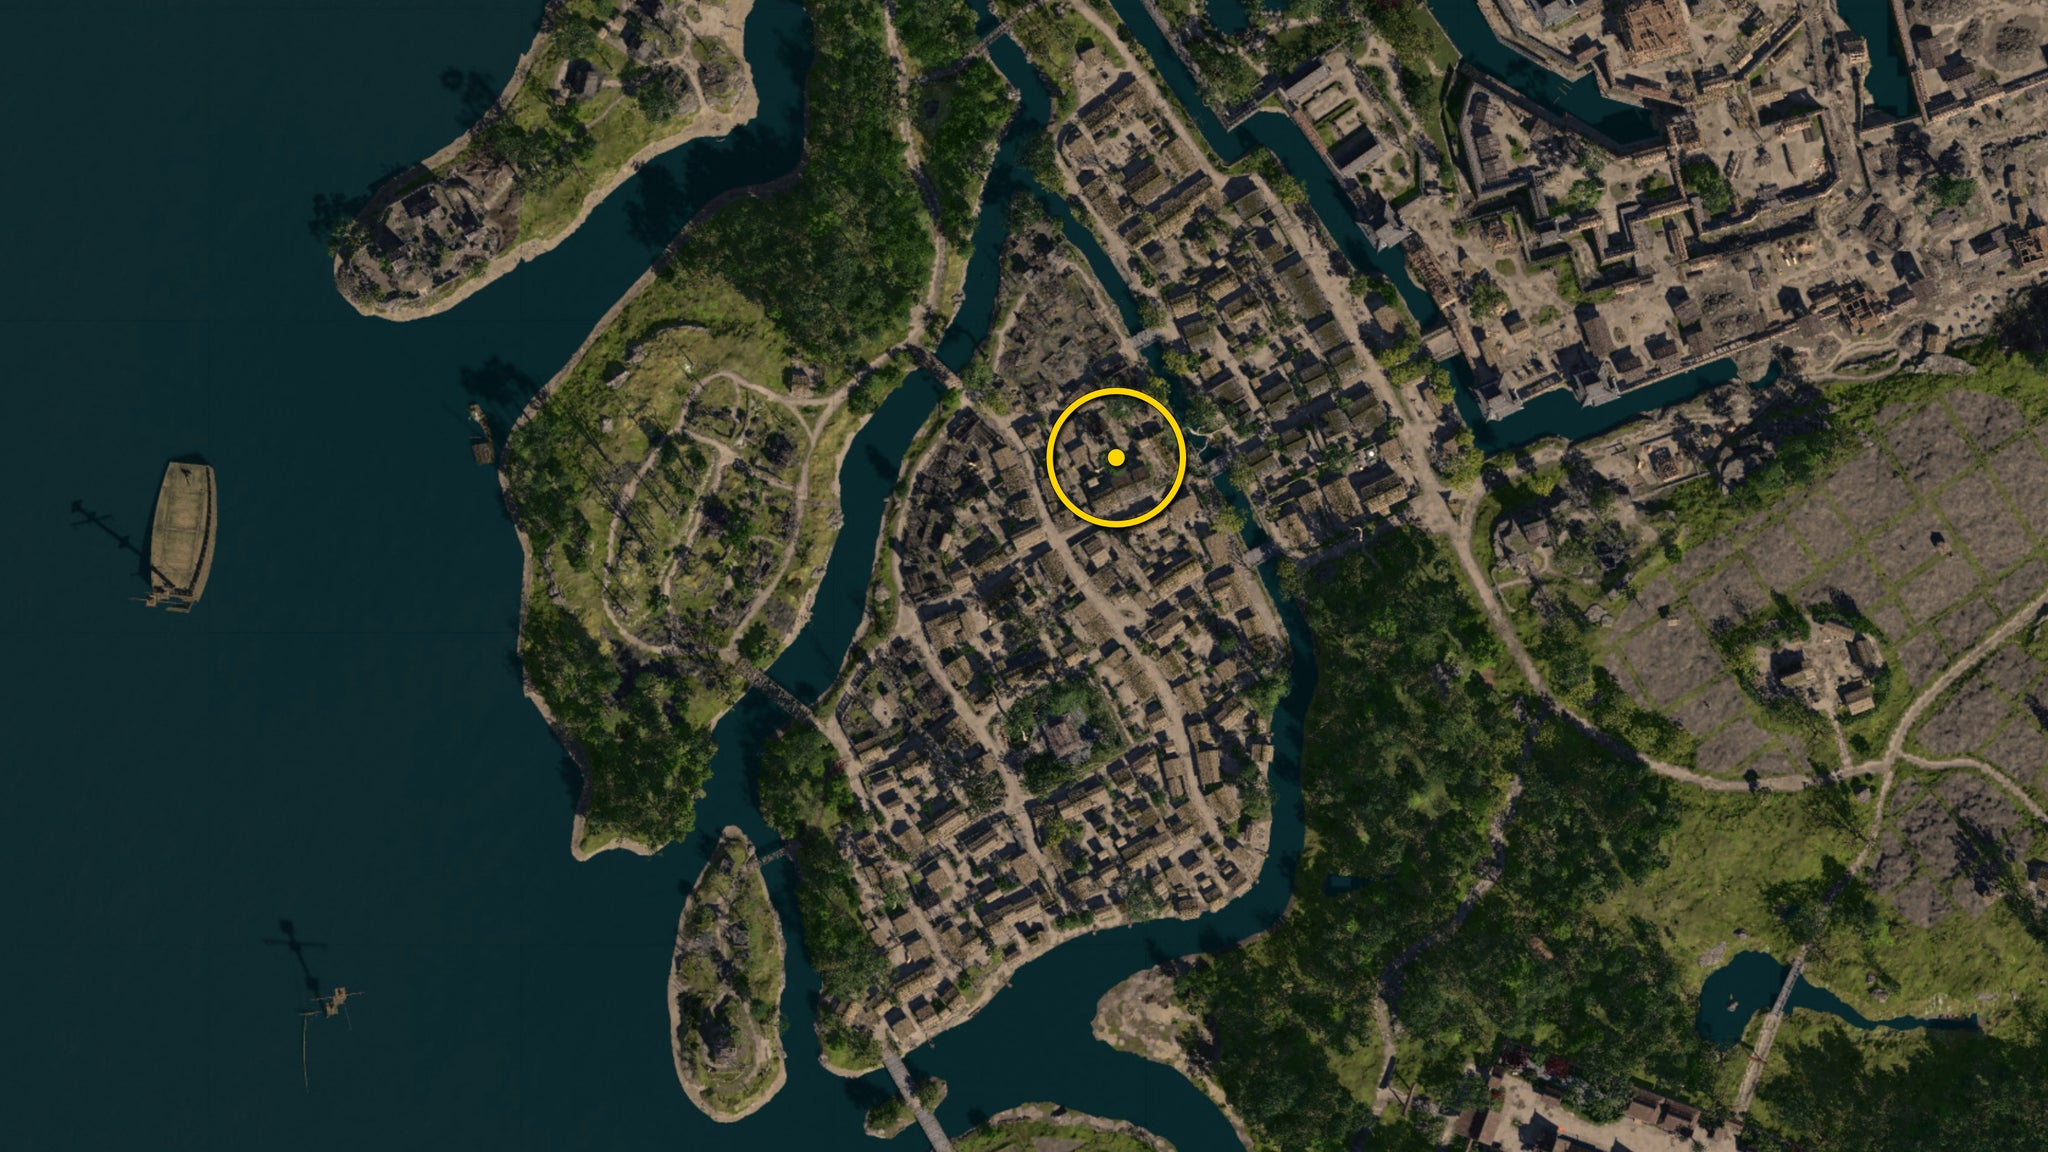
Here’s the location of the Yellow Butterfly. |Image credit:Rock Paper Shotgun/Ubisoft
The Yellow Origami Butterfly is found a very short distance from the previous Butterfly, on a large tree in a garden to the west across the bridge.
5. Mucho’s Origami Butterfly location
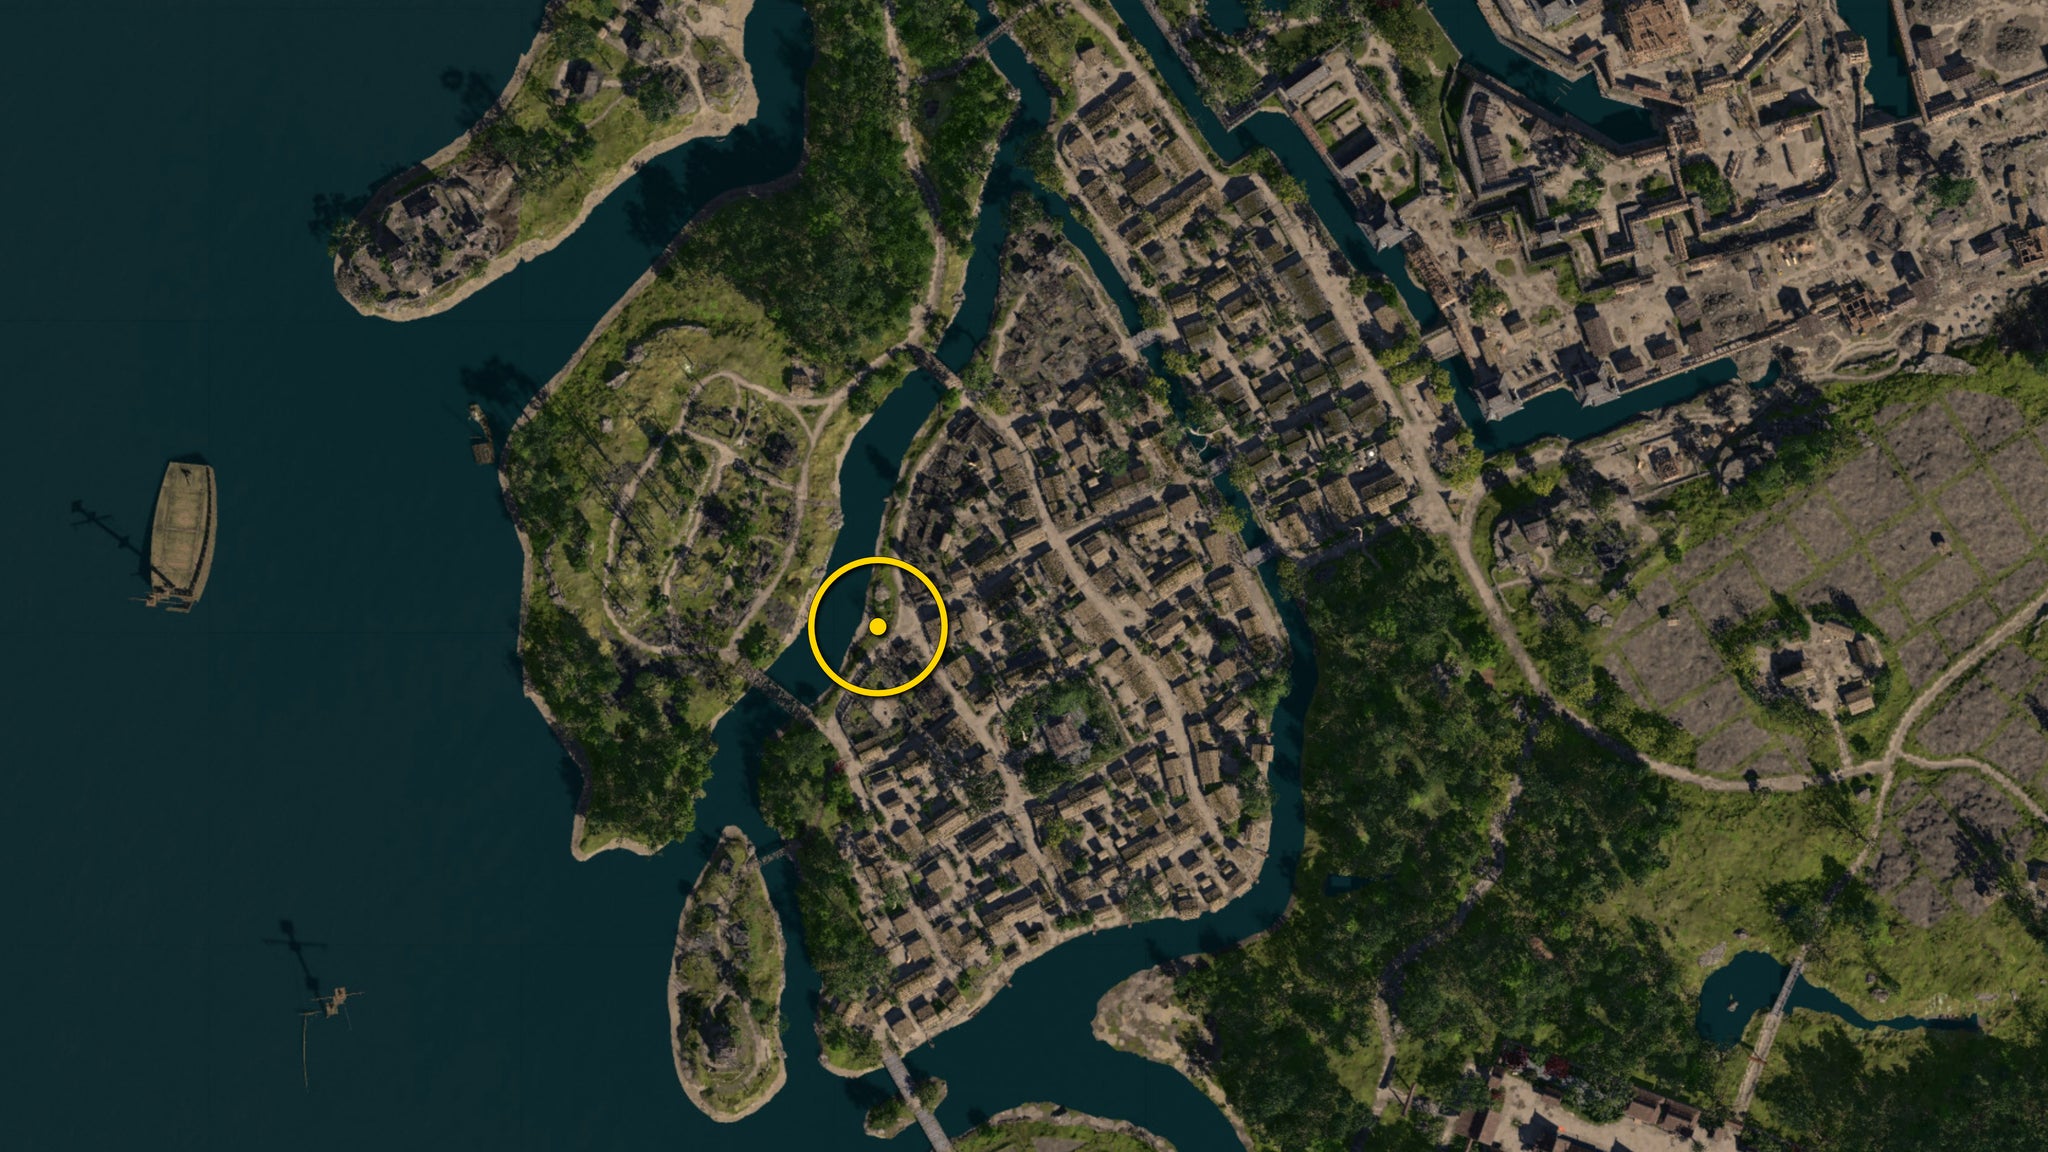
Here’s where to find Mucho’s White Butterfly. |Image credit:Rock Paper Shotgun/Ubisoft
Mucho’s Origami Butterfly is the second of the “white” Butterflies, and also contains a note. This Butterfly is located by the river that separates Osaka from Kojo Ruins to the northwest, roughly between the two bridges.
6. Red Origami Butterfly location

Here’s where you can find the Red Butterfly. |Image credit:Rock Paper Shotgun/Ubisoft
The Red Origami Butterfly can be found inside the densely green area surrounding the central Temple of Osaka, attached to a tree on the north side of the temple grounds.
7. Shucho’s Origami Butterfly location

Here’s the location of Shucho’s White Butterfly. |Image credit:Rock Paper Shotgun/Ubisoft
Shucho’s Origami Butterfly, the third of the “white” Butterflies containing a note, can be found by the corner of a road next to the river in east Osaka, just south of the city’s Kakurega.
8. Blue Origami Butterfly location
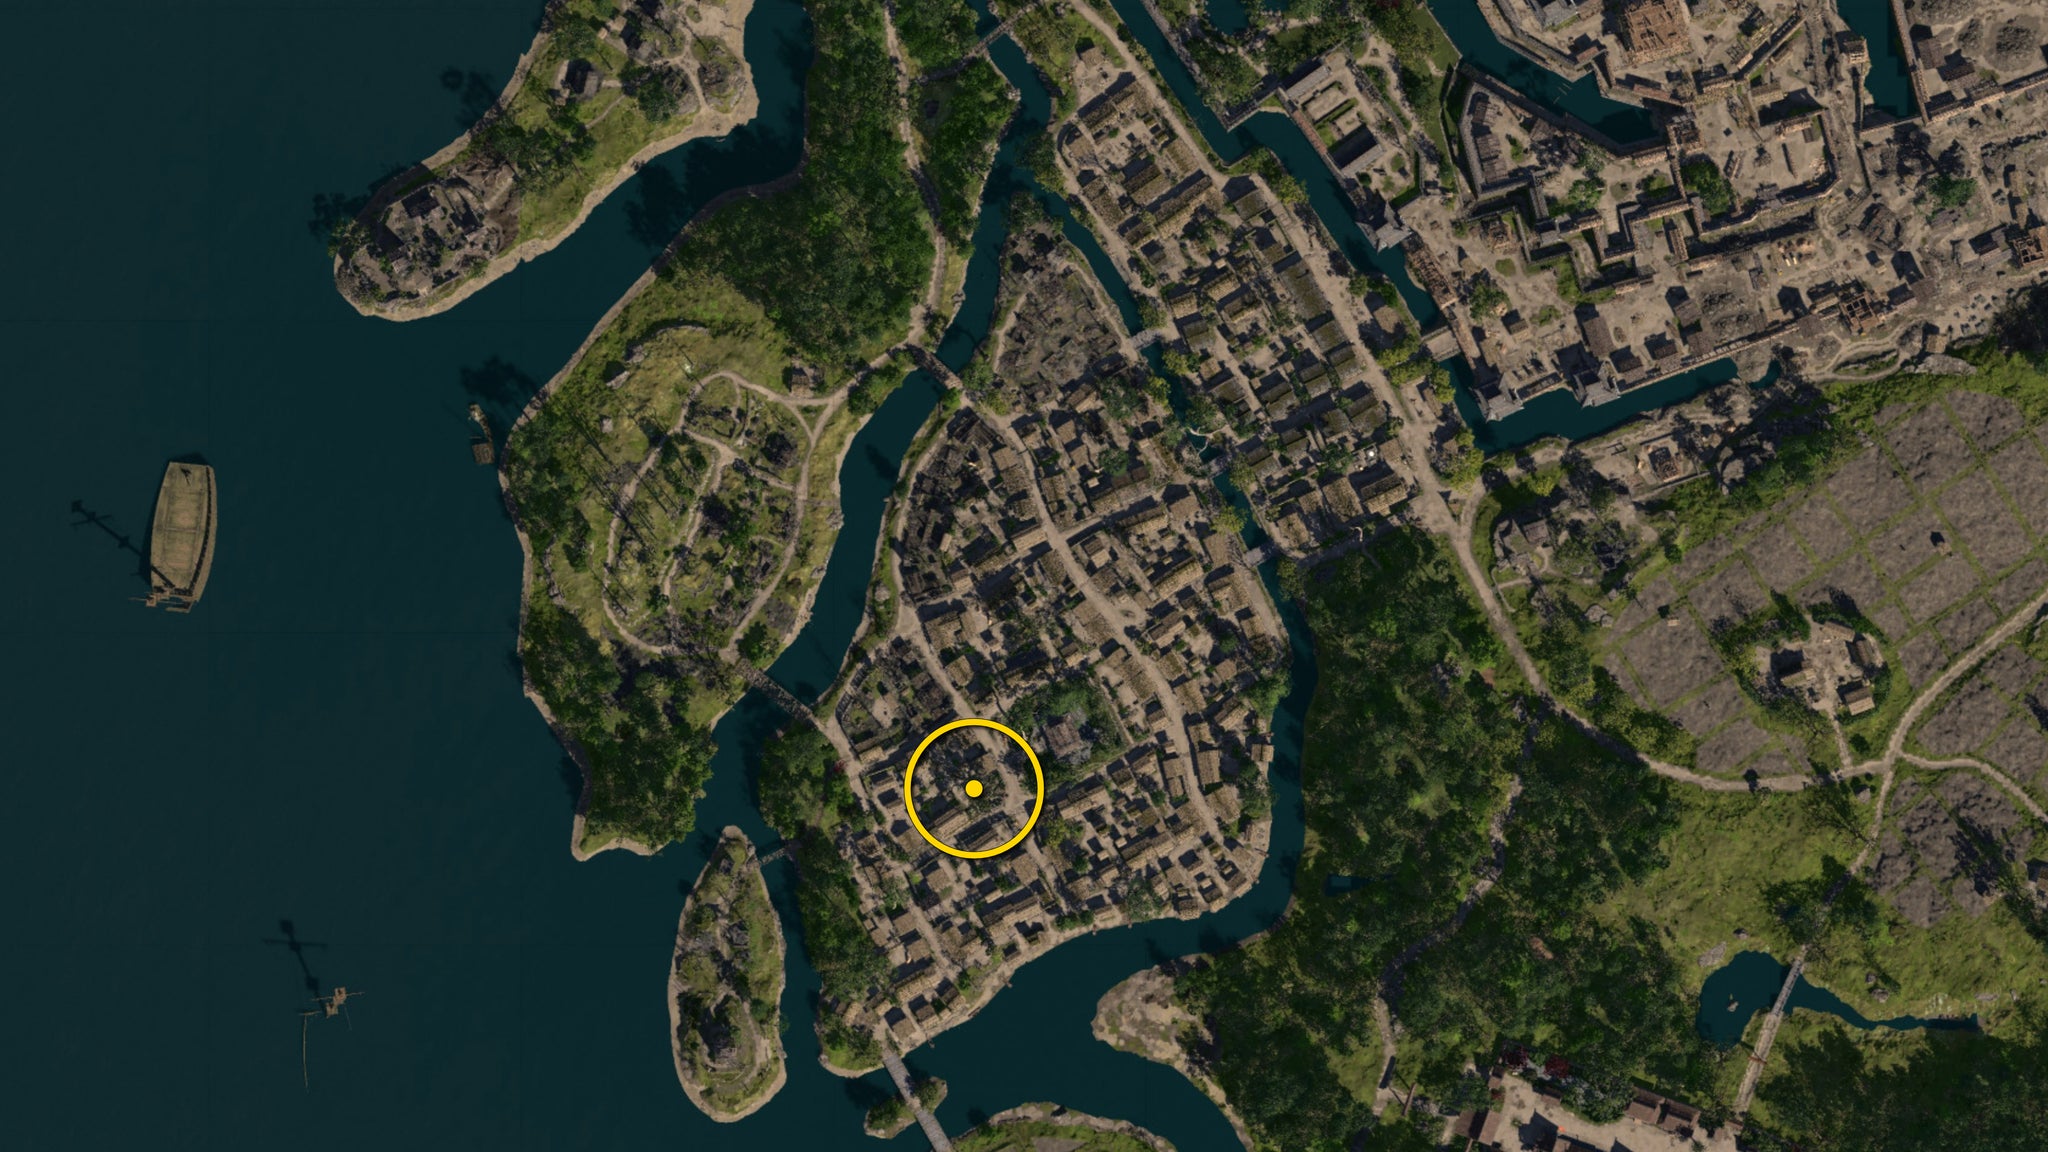
Here’s where to find the Blue Butterfly. |Image credit:Rock Paper Shotgun/Ubisoft
The Blue Origami Butterfly is on a tree located in the small garden opposite the Temple Of Osaka on the west side.
9. Pink Origami Butterfly location
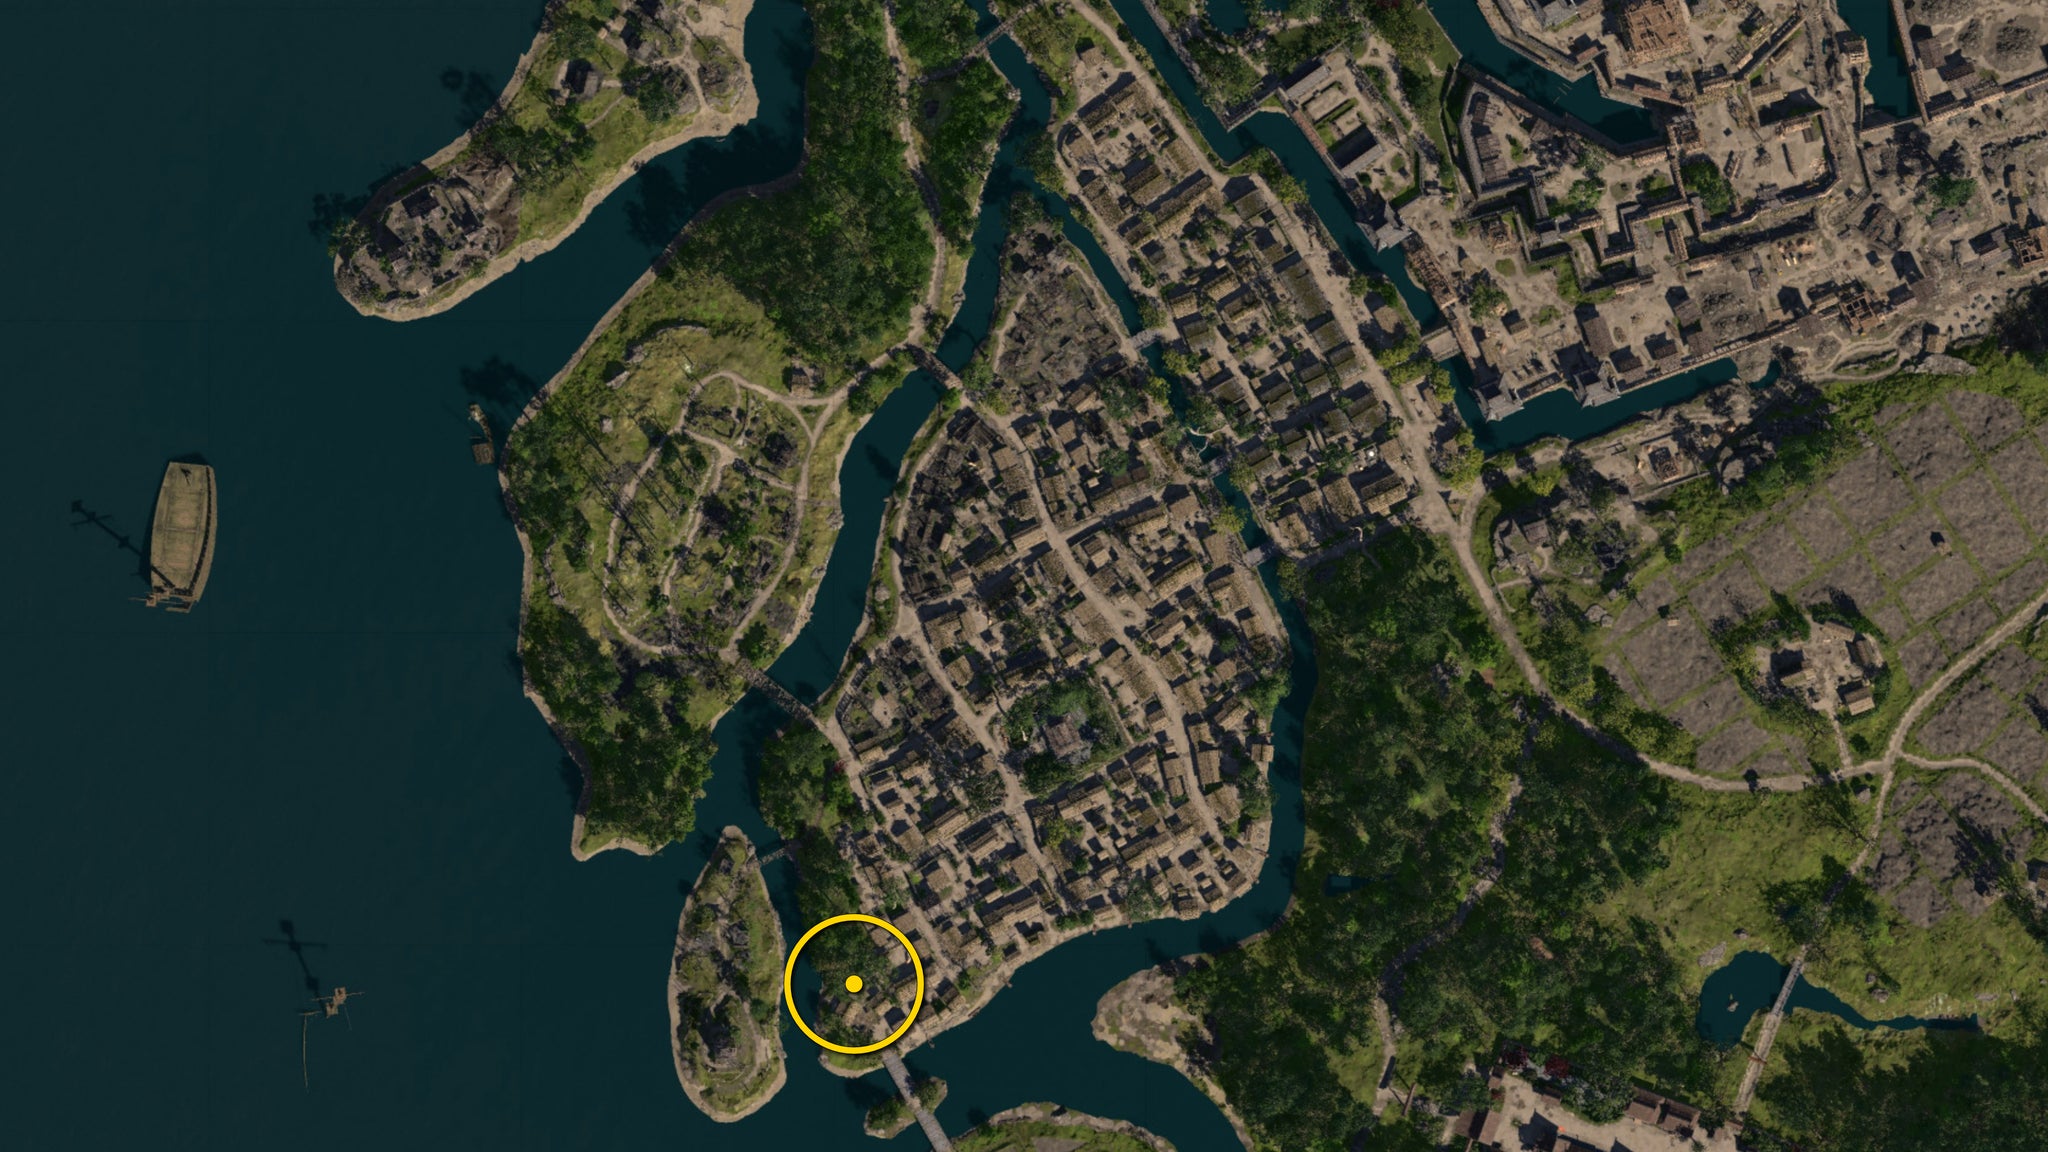
Here’s the location of the Pink Butterfly. |Image credit:Rock Paper Shotgun/Ubisoft
The Pink Origami Butterfly is found near the southern tip of Osaka, just north of the bridge that leads south towards Sakai. The tree is in the corner of a path enclosed by fences.
10. Orange Origami Butterfly location
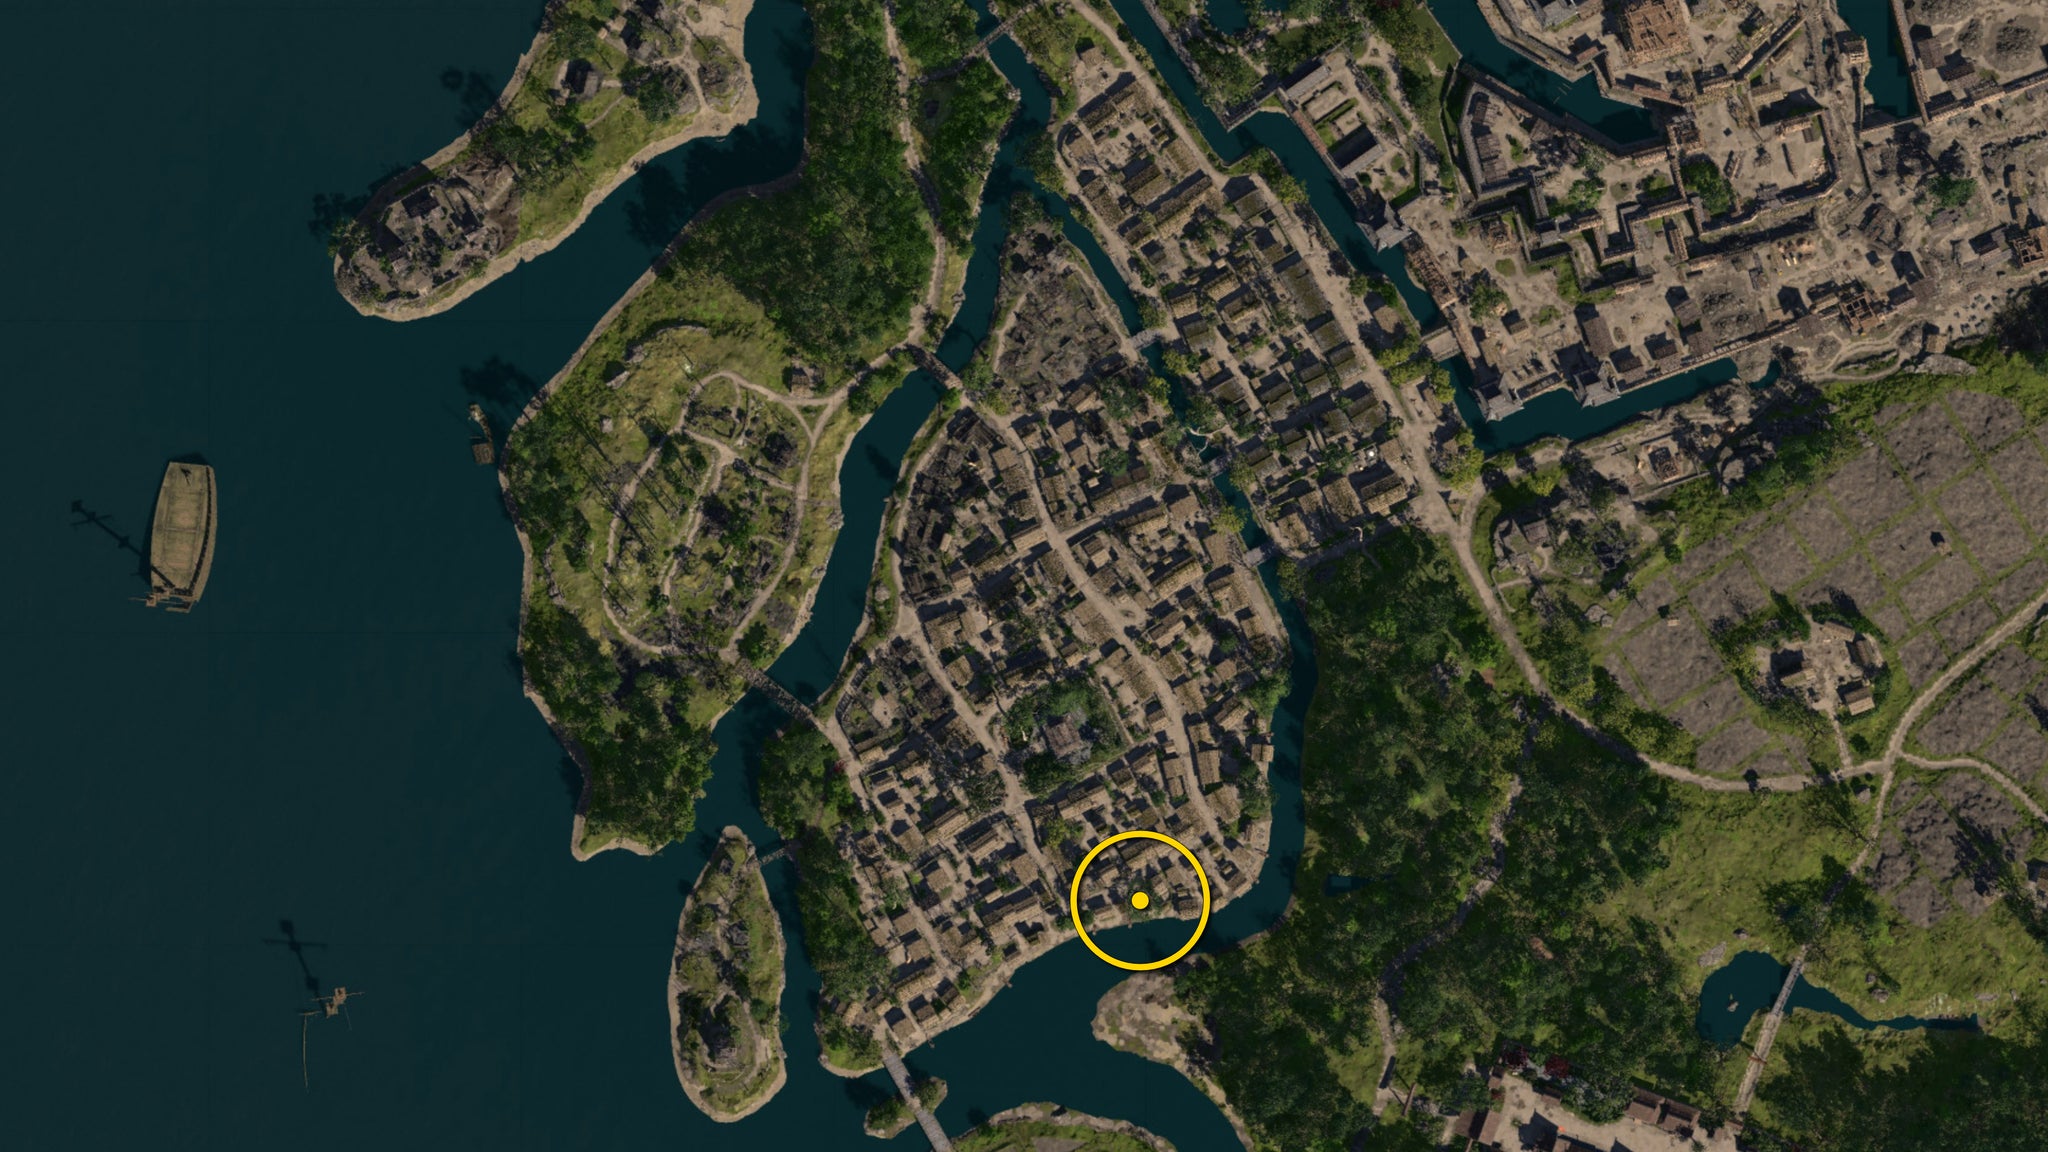
Here’s where to find the final Orange Butterfly. |Image credit:Rock Paper Shotgun/Ubisoft
The Orange Origami Butterfly is found southeast of the Temple Of Osaka, right on the northern edge of the river next to a couple of small huts.
Spoiler warning: quest spoilers for The Butterfly Collector below!
The Butterfly Collector walkthrough
By collecting the three white Origami Butterflies with notes attached, Naoe realises that the Butterflies serve a malicious purpose: there’s a child kidnapping ring based in Osaka which communicates via these Butterflies. Their aim is to control the trade of sake in the city by killing the children of their competitors and forcing them out of business.
Collecting each of the three suspicious Butterflies out of the 10 will give you a new mini-quest to investigate the kidnappings. Each one will lead you to a kidnapped child, and a member of the “Butterfly Collectors” to assassinate.
Assassinate Richo
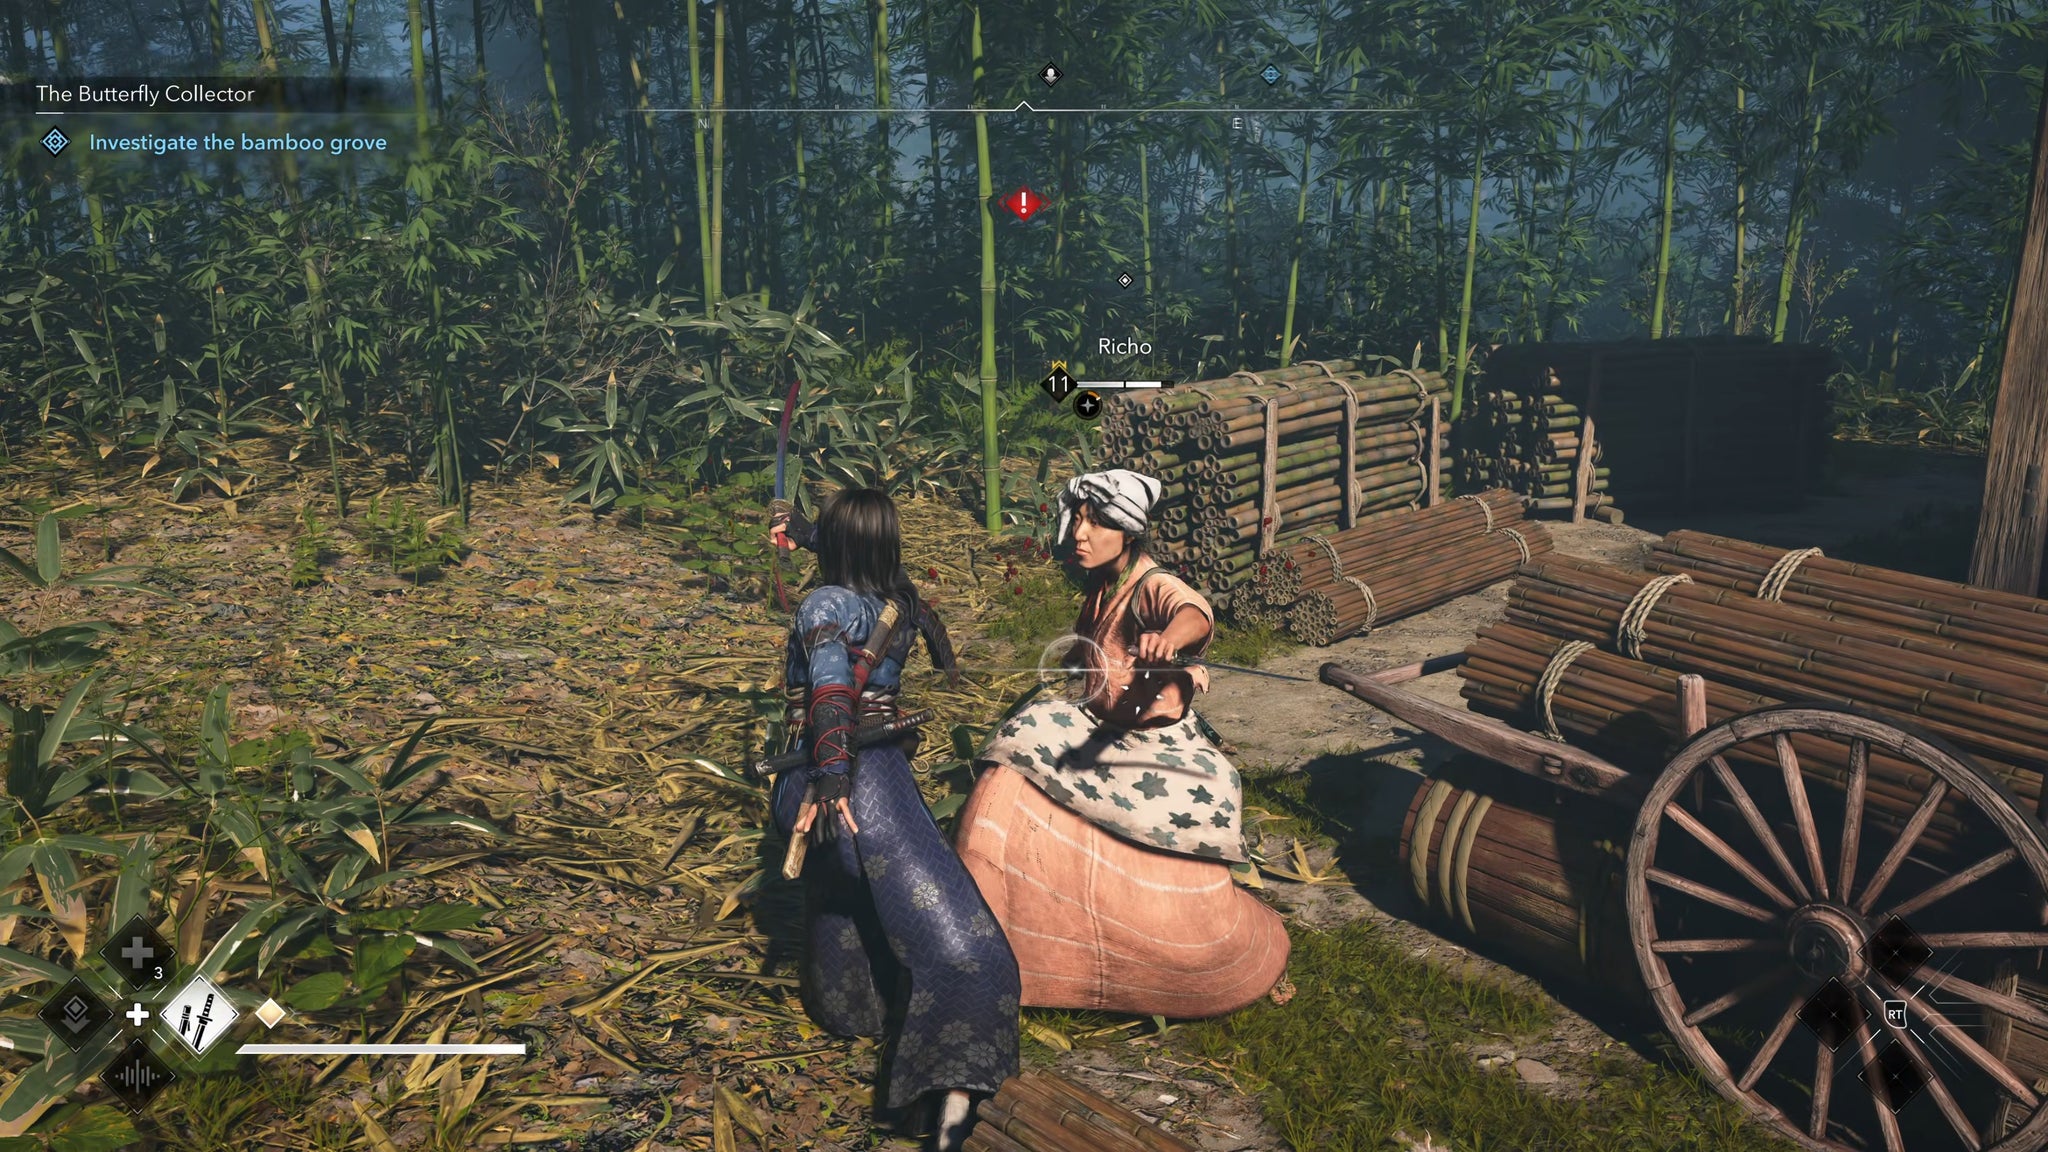
Image credit:Rock Paper Shotgun/Ubisoft
After collecting Richo’s Butterfly , you’ll receive a new mini-quest called “All Will be Well”, which requires you to investigate an area in the north of Osaka. As you approach the area, you’ll overhear a gardener say “Did you see that woman coming back and forth from the bamboo grove? It’s odd.” This is your clue to then seek out the bamboo grove north of the city.
The bamboo grove is on the northern edge of Osaka Castle; head to its centre, and you’ll find a cabin amid the bamboo. Richo is standing outside the cabin; if she sees you, she’ll attack you on sight. Kill her, then open the door to the cabin so you can speak with the kidnapped child.
Escort the girl back through the bamboo grove and to the outskirts of Osaka Castle, where she’ll be reunited with her mother. After that, continue onto your next target.
Assassinate Mucho
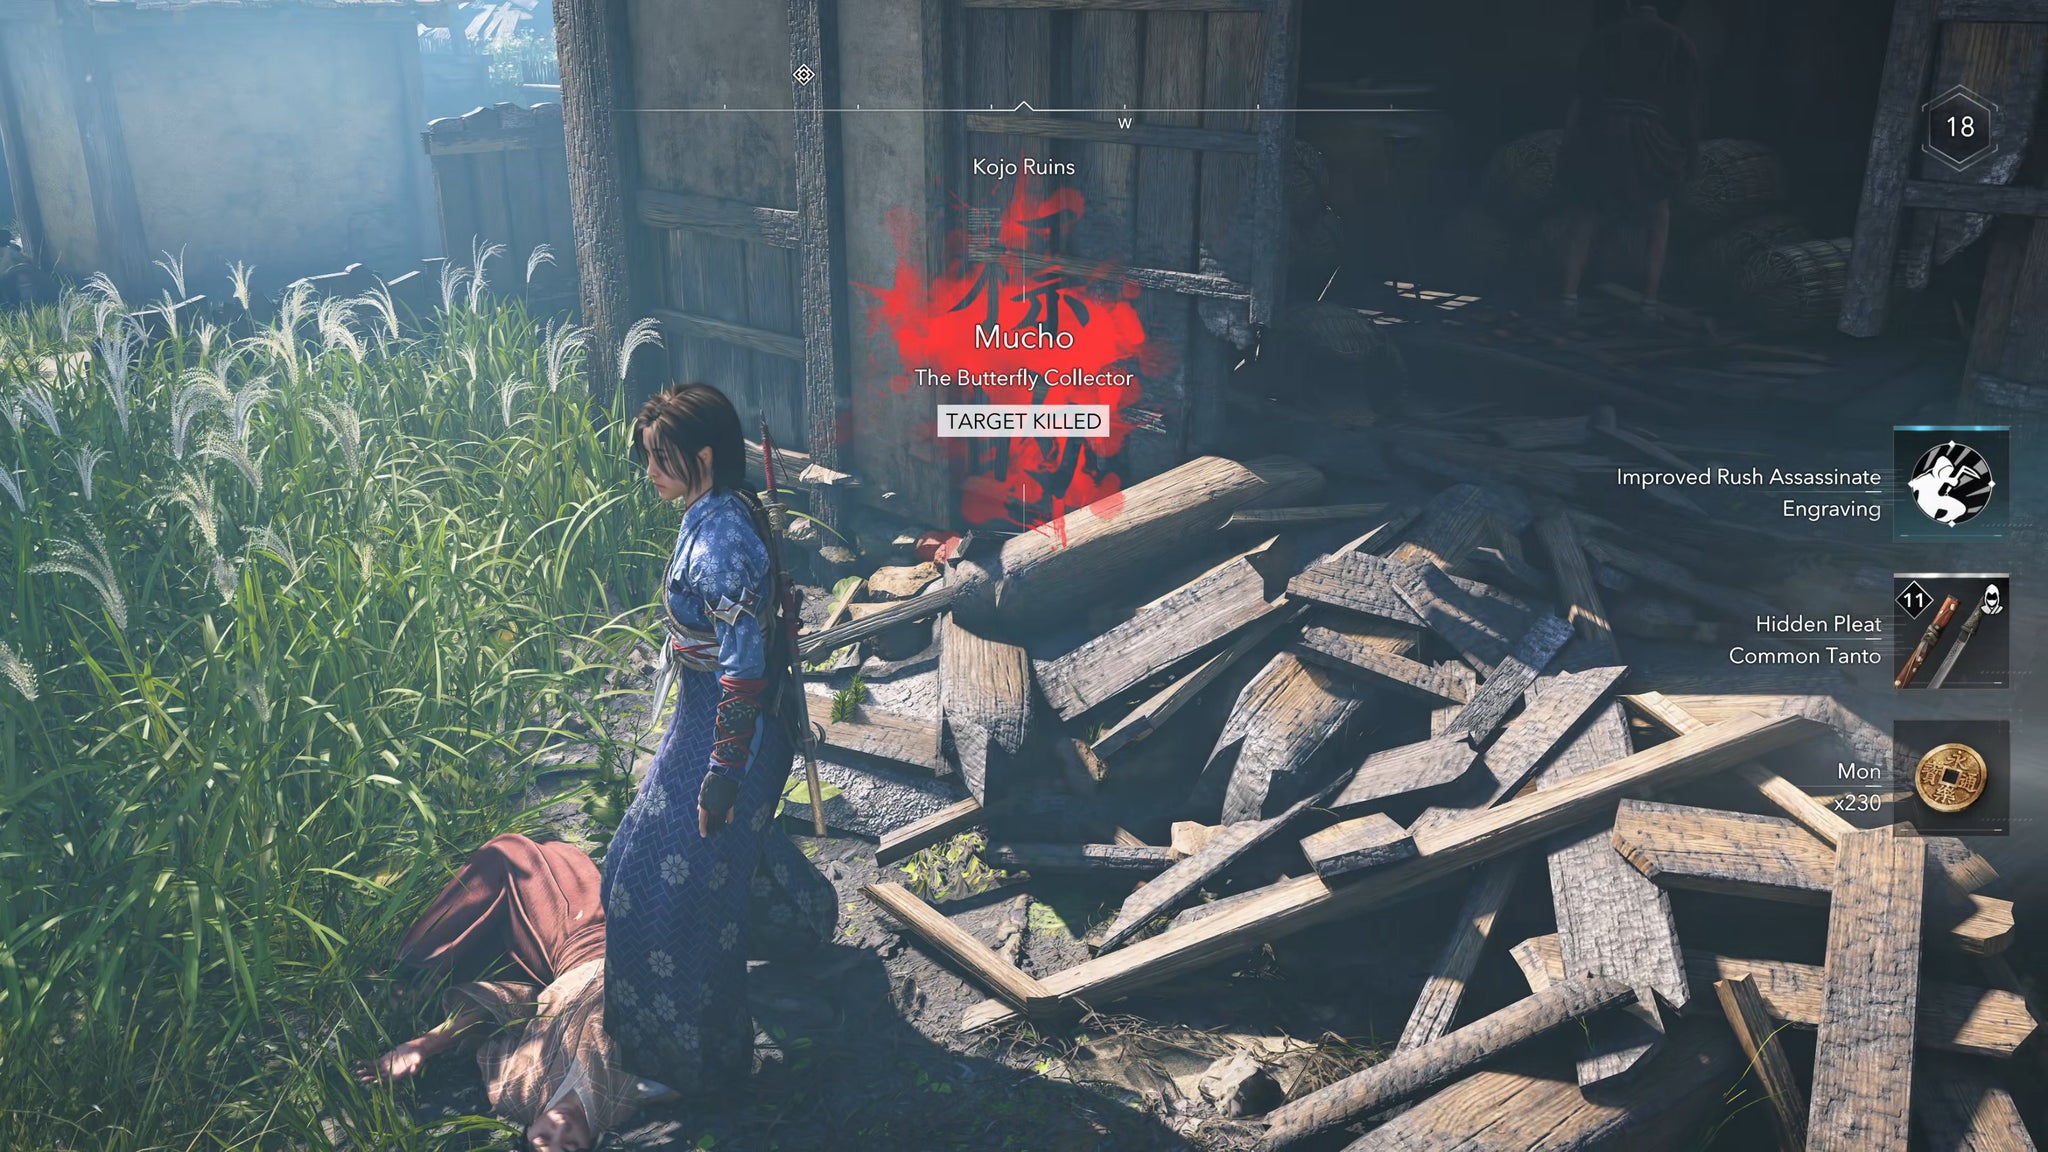
Image credit:Rock Paper Shotgun/Ubisoft
After collecting Mucho’s Butterfly , you’ll gain a new quest called “For the Sake of Sake” . Head across the west bridge towards Kojo Ruins, and you’ll find the child targeted for abduction. Mucho, the kidnapper, is there with the child - but as you approach, she’ll start to run.
You can either assassinate Mucho now as she runs, or speak to the child first to make sure he’s okay. If you choose the latter, then you can find Mucho not far away in Kojo Ruins, standing outside a wooden house. Kill her, then return to the child.
With Mucho dead, you can escort the child back into the city to find his father. Once the child is returned safely, you can proceed with the next step.
Assassinate Shucho
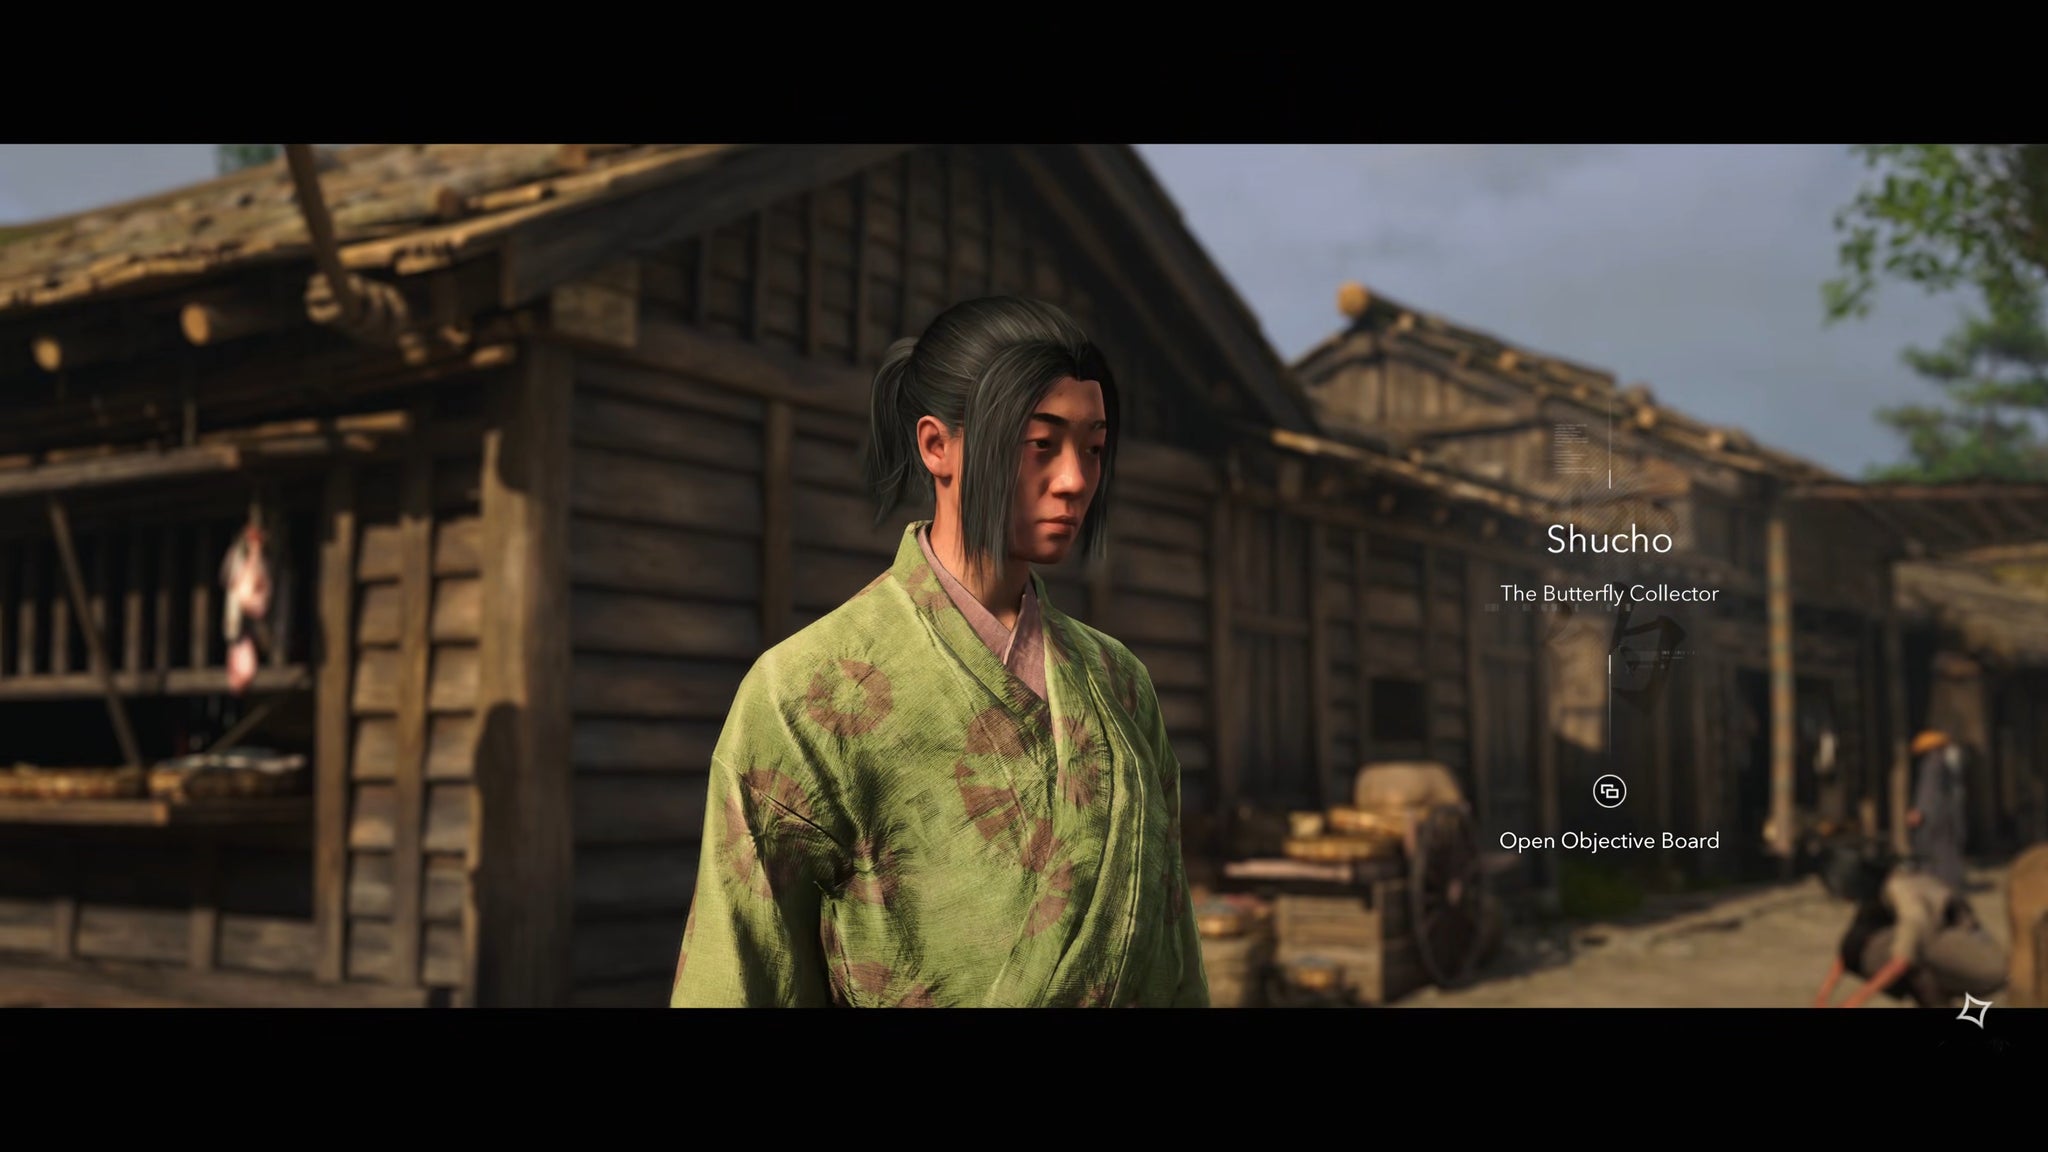
Image credit:Rock Paper Shotgun/Ubisoft
After collecting Shucho’s Butterfly , you’ll begin a new quest called “One That Got Away” , which tasks you with tracking down one of the child kidnapping victims who managed to escape. Head to the southwest corner of Osaka just before the southern bridge, and you’ll find the child next to the location of the Pink Butterfly .
Speak with the child, and she’ll tell you where to find Shucho very nearby. The child will run home by herself, so you don’t need to escort her. Head to the marked location and you’ll find Shucho standing out in the open by a fence, staring into the bushes looking for the child. Sneak up behind her and execute her.
Assassinate Kacho
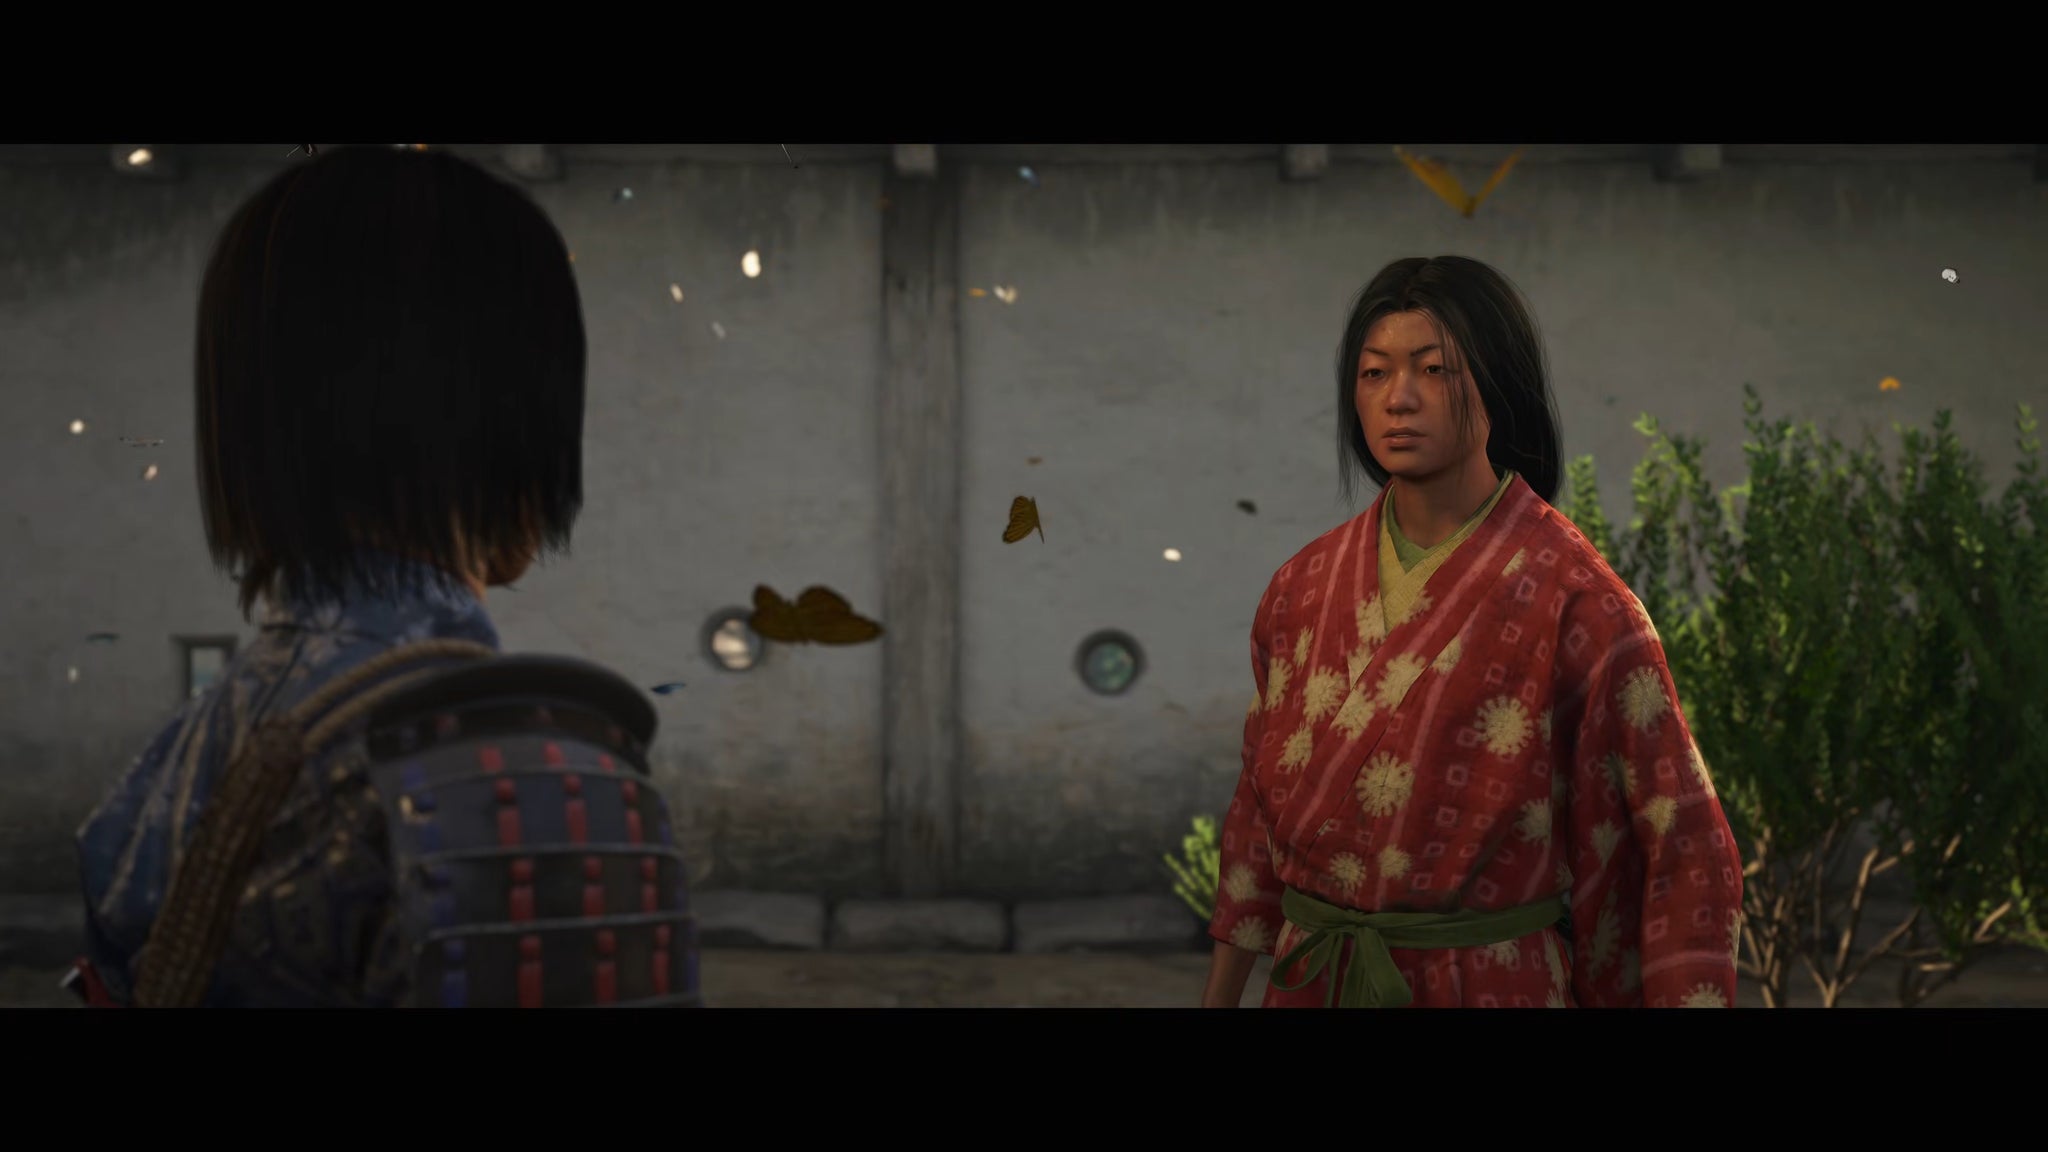
Image credit:Rock Paper Shotgun/Ubisoft
The leader of the kidnapping ring, Kacho, is next on your list. To find her, you must complete the three previous assassination quests (including escorting the children back home), and then follow the new quests: “Paper Trail” , and “Chrysalis” . Fear not - both these quests take mere seconds to complete.
The first quest, Paper Trail, involves speaking to a paper merchant at the marked location, who tells you that the woman buying all the paper for the Origami Butterflies is in Nishinomaru Garden.
The second quest, Chrysalis, simply involves heading to the small wooden cabin marked on your map, and reading the note on the floor to confirm Kacho’s hideout location.
Kacho can then be found in the outer layer of Osaka Castle, on the west side. You’ll know when you’ve found the right place; the air is filled with butterflies. After a brief cutscene, you can fight and kill Kacho and put an end to the kidnapping ring once and for all. Well, almost. As she dies, Kacho will reveal that the Gamemaker who set you off on this questline is also involved in the kidnapping ring.
Return to the Gamemaker
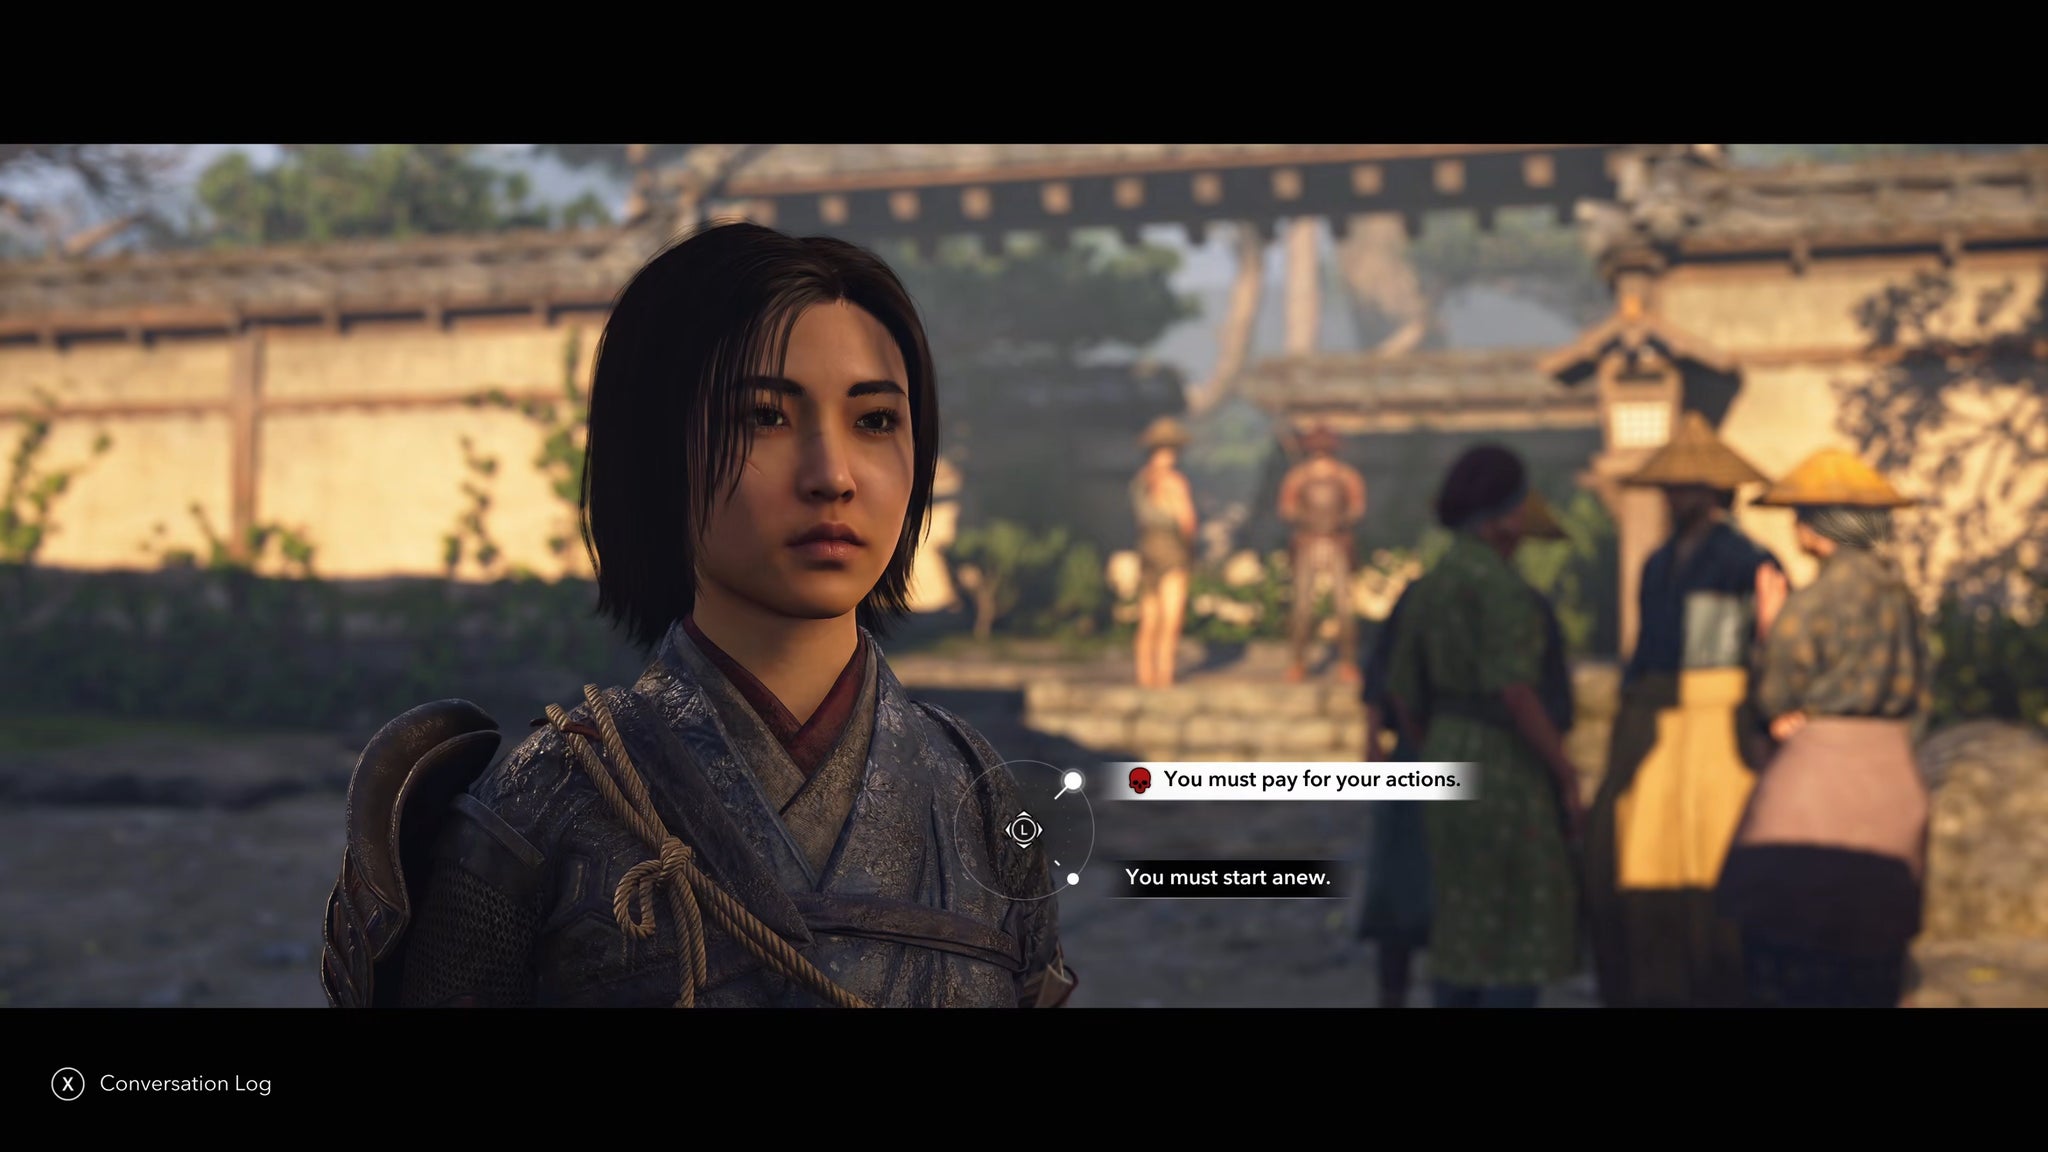
Image credit:Rock Paper Shotgun/Ubisoft
The final step in the Butterfly Collector questline is to return to the Gamemaker in Katano now that the Butterfly Collectors are all dead. Speak with the Gamemaker, and she’ll explain that she was trying to break free from Kacho and her kidnapping ring all her life, and created all the extra coloured Origami Butterflies (and created the game to track them down) precisely so that someone like Naoe could piece things together and put a stop to the kidnappings.
You have three dialogue choices in this conversation: the first allows you to pick between “What you did was wrong”, and “Kacho was to blame”. This is mere flavour, so it doesn’t matter which you choose. The second choice is to give the Gamemaker a new name: O-cho, Ageha, or Monshiro. Again, this has no consequences, so pick whichever you prefer.
The final choice is to kill or spare the Gamemaker . If you choose to kill her, you will need to chase her down and assassinate her as you did the others. If you spare her life, then the quest will simply end with her still alive. Either way, you gain the following quest rewards:
- Butterfly Of Benevolence (Rare Trinket)
- Butterfly Of Benevolence (Rare Amulet)
- Ebisu’s Gamble (Bow)
- 1 Mastery Point
- 5,000 XP
That wraps up this guide on tracking down all 10 Origami Butterfly locations and completing the Butterfly Collector questline in Osaka. But we’ve plenty more to offer on the subject of Assassin’s Creed Shadows: why not check out our primers on how to change seasons , how to upgrade weapons and armour , and how to find the fabled Cat Island ? You can also check out our guides on the best Naoe skills and best Yasuke skills .

Assassin’s Creed Shadows
PS5 , Xbox Series X/S , PC , Mac , Nintendo Switch 2
Rock Paper Shotgun is better when you sign in
Sign in and join us on our journey to discover strange and compelling PC games.

All 75 Arc Raiders Blueprints and where to get them
These areas have the highest chance of giving you Blueprints

Image credit:Rock Paper Shotgun/Embark Studios

Looking for more Arc Raiders Blueprints? It’s a special day when you find a Blueprint, as they’re among the most valuable items in Arc Raiders. If you find a Blueprint that you haven’t already found, then you must make sure you hold onto it at all costs, because Blueprints are the key to one of the most important and powerful systems of meta-progression in the game.
This guide aims to be the very best guide on Blueprints you can find, starting with a primer on what exactly they are and how they work in Arc Raiders, before delving into exactly where to get Blueprints and the very best farming spots for you to take in your search.
We’ll also go over how to get Blueprints from other unlikely activities, such as destroying Surveyors and completing specific quests. And you’ll also find the full list of all 75 Blueprints in Arc Raiders on this page (including the newest Blueprints added with the Cold Snap update , such as the Deadline Blueprint and Firework Box Blueprint), giving you all the information you need to expand your own crafting repertoire.
In this guide:
- What are Blueprints in Arc Raiders?
- Full Blueprint list: All crafting recipes
- Where to find Blueprints in Arc Raiders Blueprints obtained from quests Blueprints obtained from Trials Best Blueprint farming locations

What are Blueprints in Arc Raiders?
Blueprints in Arc Raiders are special items which, if you manage to extract with them, you can expend to permanently unlock a new crafting recipe in your Workshop. If you manage to extract from a raid with an Anvil Blueprint, for example, you can unlock the ability to craft your very own Anvil Pistol, as many times as you like (as long as you have the crafting materials).
To use a Blueprint, simply open your Inventory while in the lobby, then right-click on the Blueprint and click “Learn And Consume” . This will permanently unlock the recipe for that item in your Workshop. As of the Stella Montis update, there are allegedly 75 different Blueprints to unlock - although only 68 are confirmed to be in the game so far. You can see all the Blueprints you’ve found and unlocked by going to the Workshop menu, and hitting “R” to bring up the Blueprint screen.
It’s possible to find duplicates of past Blueprints you’ve already unlocked. If you find these, then you can either sell them, or - if you like to play with friends - you can take it into a match and gift it to your friend so they can unlock that recipe for themselves. Another option is to keep hold of them until the time comes to donate them to the Expedition.
Full Blueprint list: All crafting recipes
Below is the full list of all the Blueprints that are currently available to find in Arc Raiders, and the crafting recipe required for each item:
| Blueprint | Type | Recipe | Crafted At |
|---|---|---|---|
| Bettina | Weapon | 3x Advanced Mechanical Components 3x Heavy Gun Parts 3x Canister | Gunsmith 3 |
| Blue Light Stick | Quick Use | 3x Chemicals | Utility Station 1 |
| Aphelion | Weapon | 3x Magnetic Accelerator 3x Complex Gun Parts 1x Matriarch Reactor | Gunsmith 3 |
| Combat Mk. 3 (Flanking) | Augment | 2x Advanced Electrical Components 3x Processor | Gear Bench 3 |
| Combat Mk. 3 (Aggressive) | Augment | 2x Advanced Electrical Components 3x Processor | Gear Bench 3 |
| Complex Gun Parts | Material | 2x Light Gun Parts 2x Medium Gun Parts 2x Heavy Gun Parts | Refiner 3 |
| Fireworks Box | Quick Use | 1x Explosive Compound 3x Pop Trigger | Explosives Station 2 |
| Gas Mine | Mine | 4x Chemicals 2x Rubber Parts | Explosives Station 1 |
| Green Light Stick | Quick Use | 3x Chemicals | Utility Station 1 |
| Pulse Mine | Mine | 1x Crude Explosives 1x Wires | Explosives Station 1 |
| Seeker Grenade | Grenade | 1x Crude Explosives 2x ARC Alloy | Explosives Station 1 |
| Looting Mk. 3 (Survivor) | Augment | 2x Advanced Electrical Components 3x Processor | Gear Bench 3 |
| Angled Grip II | Mod | 2x Mechanical Components 3x Duct Tape | Gunsmith 2 |
| Angled Grip III | Mod | 2x Mod Components 5x Duct Tape | Gunsmith 3 |
| Hullcracker | Weapon | 1x Magnetic Accelerator 3x Heavy Gun Parts 1x Exodus Modules | Gunsmith 3 |
| Launcher Ammo | Ammo | 5x Metal Parts 1x Crude Explosives | Workbench 1 |
| Anvil | Weapon | 5x Mechanical Components 5x Simple Gun Parts | Gunsmith 2 |
| Anvil Splitter | Mod | 2x Mod Components 3x Processor | Gunsmith 3 |
| ??? | ??? | ??? | ??? |
| Barricade Kit | Quick Use | 1x Mechanical Components | Utility Station 2 |
| Blaze Grenade | Grenade | 1x Explosive Compound 2x Oil | Explosives Station 3 |
| Bobcat | Weapon | 3x Advanced Mechanical Components 3x Light Gun Parts | Gunsmith 3 |
| Osprey | Weapon | 2x Advanced Mechanical Components 3x Medium Gun Parts 7x Wires | Gunsmith 3 |
| Burletta | Weapon | 3x Mechanical Components 3x Simple Gun Parts | Gunsmith 1 |
| Compensator II | Mod | 2x Mechanical Components 4x Wires | Gunsmith 2 |
| Compensator III | Mod | 2x Mod Components 8x Wires | Gunsmith 3 |
| Defibrillator | Quick Use | 9x Plastic Parts 1x Moss | Medical Lab 2 |
| ??? | ??? | ??? | ??? |
| Equalizer | Weapon | 3x Magnetic Accelerator 3x Complex Gun Parts 1x Queen Reactor | Gunsmith 3 |
| Extended Barrel | Mod | 2x Mod Components 8x Wires | Gunsmith 3 |
| Extended Light Mag II | Mod | 2x Mechanical Components 3x Steel Spring | Gunsmith 2 |
| Extended Light Mag III | Mod | 2x Mod Components 5x Steel Spring | Gunsmith 3 |
| Extended Medium Mag II | Mod | 2x Mechanical Components 3x Steel Spring | Gunsmith 2 |
| Extended Medium Mag III | Mod | 2x Mod Components 5x Steel Spring | Gunsmith 3 |
| Extended Shotgun Mag II | Mod | 2x Mechanical Components 3x Steel Spring | Gunsmith 2 |
| Extended Shotgun Mag III | Mod | 2x Mod Components 5x Steel Spring | Gunsmith 3 |
| Remote Raider Flare | Quick Use | 2x Chemicals 4x Rubber Parts | Utility Station 1 |
| Heavy Gun Parts | Material | 4x Simple Gun Parts | Refiner 2 |
| Venator | Weapon | 2x Advanced Mechanical Components 3x Medium Gun Parts 5x Magnet | Gunsmith 3 |
| Il Toro | Weapon | 5x Mechanical Components 6x Simple Gun Parts | Gunsmith 1 |
| Jolt Mine | Mine | 1x Electrical Components 1x Battery | Explosives Station 2 |
| Explosive Mine | Mine | 1x Explosive Compound 1x Sensors | Explosives Station 3 |
| Jupiter | Weapon | 3x Magnetic Accelerator 3x Complex Gun Parts 1x Queen Reactor | Gunsmith 3 |
| Light Gun Parts | Material | 4x Simple Gun Parts | Refiner 2 |
| Lightweight Stock | Mod | 2x Mod Components 5x Duct Tape | Gunsmith 3 |
| Lure Grenade | Grenade | 1x Speaker Component 1x Electrical Components | Utility Station 2 |
| Medium Gun Parts | Material | 4x Simple Gun Parts | Refiner 2 |
| Torrente | Weapon | 2x Advanced Mechanical Components 3x Medium Gun Parts 6x Steel Spring | Gunsmith 3 |
| Muzzle Brake II | Mod | 2x Mechanical Components 4x Wires | Gunsmith 2 |
| Muzzle Brake III | Mod | 2x Mod Components 8x Wires | Gunsmith 3 |
| Padded Stock | Mod | 2x Mod Components 5x Duct Tape | Gunsmith 3 |
| Shotgun Choke II | Mod | 2x Mechanical Components 4x Wires | Gunsmith 2 |
| Shotgun Choke III | Mod | 2x Mod Components 8x Wires | Gunsmith 3 |
| Shotgun Silencer | Mod | 2x Mod Components 8x Wires | Gunsmith 3 |
| Showstopper | Grenade | 1x Advanced Electrical Components 1x Voltage Converter | Explosives Station 3 |
| Silencer I | Mod | 2x Mechanical Components 4x Wires | Gunsmith 2 |
| Silencer II | Mod | 2x Mod Components 8x Wires | Gunsmith 3 |
| Snap Hook | Quick Use | 2x Power Rod 3x Rope 1x Exodus Modules | Utility Station 3 |
| Stable Stock II | Mod | 2x Mechanical Components 3x Duct Tape | Gunsmith 2 |
| Stable Stock III | Mod | 2x Mod Components 5x Duct Tape | Gunsmith 3 |
| Tagging Grenade | Grenade | 1x Electrical Components 1x Sensors | Utility Station 3 |
| Tempest | Weapon | 3x Advanced Mechanical Components 3x Medium Gun Parts 3x Canister | Gunsmith 3 |
| Trigger Nade | Grenade | 2x Crude Explosives 1x Processor | Explosives Station 2 |
| Vertical Grip II | Mod | 2x Mechanical Components 3x Duct Tape | Gunsmith 2 |
| Vertical Grip III | Mod | 2x Mod Components 5x Duct Tape | Gunsmith 3 |
| Vita Shot | Quick Use | 2x Antiseptic 1x Syringe | Medical Lab 3 |
| Vita Spray | Quick Use | 3x Antiseptic 1x Canister | Medical Lab 3 |
| Vulcano | Weapon | 1x Magnetic Accelerator 3x Heavy Gun Parts 1x Exodus Modules | Gunsmith 3 |
| Wolfpack | Grenade | 2x Explosive Compound 2x Sensors | Explosives Station 3 |
| Red Light Stick | Quick Use | 3x Chemicals | Utility Station 1 |
| Smoke Grenade | Grenade | 14x Chemicals 1x Canister | Utility Station 2 |
| Deadline | Mine | 3x Explosive Compound 2x ARC Circuitry | Explosives Station 3 |
| Trailblazer | Grenade | 1x Explosive Compound 1x Synthesized Fuel | Explosives Station 3 |
| Tactical Mk. 3 (Defensive) | Augment | 2x Advanced Electrical Components 3x Processor | Gear Bench 3 |
| Tactical Mk. 3 (Healing) | Augment | 2x Advanced Electrical Components 3x Processor | Gear Bench 3 |
| Yellow Light Stick | Quick Use | 3x Chemicals | Utility Station 1 |
Note: The missing Blueprints in this list likely have not actually been added to the game at the time of writing, because none of the playerbase has managed to find any of them. As they are added to the game, I will update this page with the most relevant information so you know exactly how to get all 75 Arc Raiders Blueprints.
Where to find Blueprints in Arc Raiders
Below is a list of all containers, modifiers, and events which maximise your chances of finding Blueprints:
- Certain quests reward you with specific Blueprints .
- Completing Trials has a high chance of offering Blueprints as rewards.
- Surveyors have a decent chance of dropping Blueprints on death.
- High loot value areas tend to have a greater chance of spawning Blueprints.
- Night Raids and Storms may increase rare Blueprint spawn chances in containers.
- Containers with higher numbers of items may have a higher tendency to spawn Blueprints. As a result, Blue Gate (which has many “large” containers containing multiple items) may give you a higher chance of spawning Blueprints.
- Raider containers (Raider Caches, Weapon Boxes, Medical Bags, Grenade Tubes) have increased Blueprint drop rates. As a result, the Uncovered Caches event gives you a high chance of finding Blueprints.
- Security Lockers have a higher than average chance of containing Blueprints.
- Certain Blueprints only seem to spawn under specific circumstances: Tempest Blueprint only spawns during Night Raid events. Vulcano Blueprint only spawns during Hidden Bunker events. Jupiter and Equaliser Blueprints only spawn during Harvester events.

Raider Caches, Weapon Boxes, and other raider-oriented container types have a good chance of offering Blueprints. |Image credit:Rock Paper Shotgun/Embark Studios
Blueprints have a very low chance of spawning in any container in Arc Raiders, around 1-2% on average. However, there is a higher chance of finding Blueprints in particular container types. Specifically, you can find more Blueprints in Raider containers and security lockers.
Beyond this, if you’re looking for Blueprints you should focus on regions of the map which are marked as having particularly high-value loot. Areas such as the Control Tower in Dam Battlegrounds, the Arrival and Departure Buildings in Spaceport, and Pilgrim’s Peak in Blue Gate all have a better-than-average chance of spawning Blueprints somewhere amongst all their containers. Night Raids and Electromagnetic Storm events also increase the drop chances of certain Blueprints .
In addition to these containers, you can often loot Blueprints from destroyed Surveyors - the largest of the rolling ball ARC. Surveyors are more commonly found on the later maps - Spaceport and Blue Gate - and if one spawns in your match, you’ll likely see it by the blue laser beam that it casts into the sky while “surveying”.
Surveyors are quite well-armoured and will very speedily run away from you once it notices you, but if you can take one down then make sure you loot all its parts for a chance of obtaining certain unusual Blueprints.
Blueprints obtained from quests
One way in which you can get Blueprints is by completing certain quests for the vendors in Speranza. Some quests will reward you with a specific item Blueprint upon completion, so as long as you work through all the quests in Arc Raiders, you are guaranteed those Blueprints.
Here is the full list of all Blueprints you can get from quest rewards:
- Trigger Nade Blueprint: Rewarded after completing “Sparks Fly”.
- Lure Grenade Blueprint: Rewarded after completing “Greasing Her Palms”.
- Burletta Blueprint: Rewarded after completing “Industrial Espionage”.
- Hullcracker Blueprint (and Launcher Ammo Blueprint): Rewarded after completing “The Major’s Footlocker”.
Alas, that’s only 4 Blueprints out of a total of 75 to unlock, so for the vast majority you will need to find them yourself during a raid. If you’re intent on farming Blueprints, then it’s best to equip yourself with cheap gear in case you lose it, but don’t use a free loadout because then you won’t get a safe pocket to stash any new Blueprint you find. No pain in Arc Raiders is sharper than failing to extract with a new Blueprint you’ve been after for a dozen hours already.

One of the best ways to get Blueprints is by hitting three stars on all five Trials every week. |Image credit:Rock Paper Shotgun/Embark Studios
Blueprints obtained from Trials
One of the very best ways to get Blueprints is as rewards for completing Trials in Arc Raiders. Trials are unlocked from Level 15 onwards, and allow you to earn rewards by focusing on certain tasks over the course of several raids. For example, one Trial might task you with dealing damage to Hornets, while another might challenge you to loot Supply Drops.
Trials refresh on a weekly basis, with a new week bringing five new Trials. Each Trial can offer up to three rewards after passing certain score milestones, and it’s possible to receive very high level loot from these reward crates - including Blueprints. So if you want to unlock as many Blueprints as possible, you should make a point of completing as many Trials as possible each week.
Best Blueprint farming locations
The very best way to get Blueprints is to frequent specific areas of the maps which combine high-tier loot pools with the right types of containers to search. Here are my recommendations for where to find Blueprints on every map, so you can always keep the search going for new crafting recipes to unlock.

Image credit:Rock Paper Shotgun/Embark Studios
Dam Battlegrounds
The best places to farm Blueprints on Dam Battlegrounds are the Control Tower, Power Generation Complex, Ruby Residence, and Pale Apartments . The first two regions, despite only being marked on the map as mid-tier loot, contain a phenomenal number of containers to loot. The Control Tower can also contain a couple of high-tier Security Lockers - though of course, you’ll need to have unlocked the Security Breach skill at the end of the Survival tree.
There’s also a lot of reporting amongst the playerbase that the Residential areas in the top-left of the map - Pale Apartments and Ruby Residence - give you a comparatively strong chance of finding Blueprints. Considering their size, there’s a high density of containers to loot in both locations, and they also have the benefit of being fairly out of the way. So you’re more likely to have all the containers to yourself.
Buried City
The best Blueprint farming locations on Buried City are the Santa Maria Houses, Grandioso Apartments, Town Hall, and the various buildings of the New District . Grandioso Apartments has a lower number of containers than the rest, but a high chance of spawning weapon cases - which have good Blueprint drop rates. The others are high-tier loot areas, with plenty of lootable containers - including Security Lockers.
Spaceport
The best places to find Blueprints on Spaceport are the Arrival and Departure Buildings, as well as Control Tower A6 and the Launch Towers . All these areas are labelled as high-value loot regions, and many of them are also very handily connected to one another by the Spaceport wall, which you can use to quickly run from one area to the next. At the tops of most of these buildings you’ll find at least one Security Locker, so this is an excellent farming route for players looking to find Blueprints.
The downside to looting Blueprints on Spaceport is that all these areas are hotly contested, particularly in Duos and Squads. You’ll need to be very focused and fast in order to complete the full farming route.

Image credit:Rock Paper Shotgun/Embark Studios
Blue Gate
Blue Gate tends to have a good chance of dropping Blueprints, potentially because it generally has a high number of containers which can hold lots of items; so there’s a higher chance of a Blueprint spawning in each container. In my experience, the best Blueprint farming spots on Blue Gate are Pilgrim’s Peak, Raider’s Refuge, the Ancient Fort, and the Underground Complex beneath the Warehouse .
All of these areas contain a wealth of containers to loot. Raider’s Refuge has less to loot, but the majority of the containers in and around the Refuge are raider containers, which have a high chance of containing Blueprints - particularly during major events.
Stella Montis
On the whole, Stella Montis seems to have a very low drop rate for Blueprints (though a high chance of dropping other high-tier loot). If you do want to try farming Blueprints on this map, the best places to find Blueprints in Stella Montis are Medical Research, Assembly Workshop, and the Business Center . These areas have the highest density of containers to loot on the map.
In addition to this, the Western Tunnel has a few different Security Lockers to loot, so while there’s very little to loot elsewhere in this area of the map, it’s worth hitting those Security Lockers if you spawn there at the start of a match.
That wraps up this primer on how to get all the Blueprints in Arc Raiders as quickly as possible. With the Expedition system constantly resetting a large number of players’ Blueprints, it’s more important than ever to have the most up-to-date information on where to find all these Blueprints.
While you’re here, be sure to check out our Arc Raiders best guns tier list , as well as our primers on the best skills to unlock and all the different Field Depot locations on every map.


ARC Raiders
PS5 , Xbox Series X/S , PC
Rock Paper Shotgun is better when you sign in
Sign in and join us on our journey to discover strange and compelling PC games.
