All new Elden Ring DLC Spirit Ashes and where to find them
Here are all 20 new Spirit Ashes in Shadow Of The Erdtree, and exactly how to get them
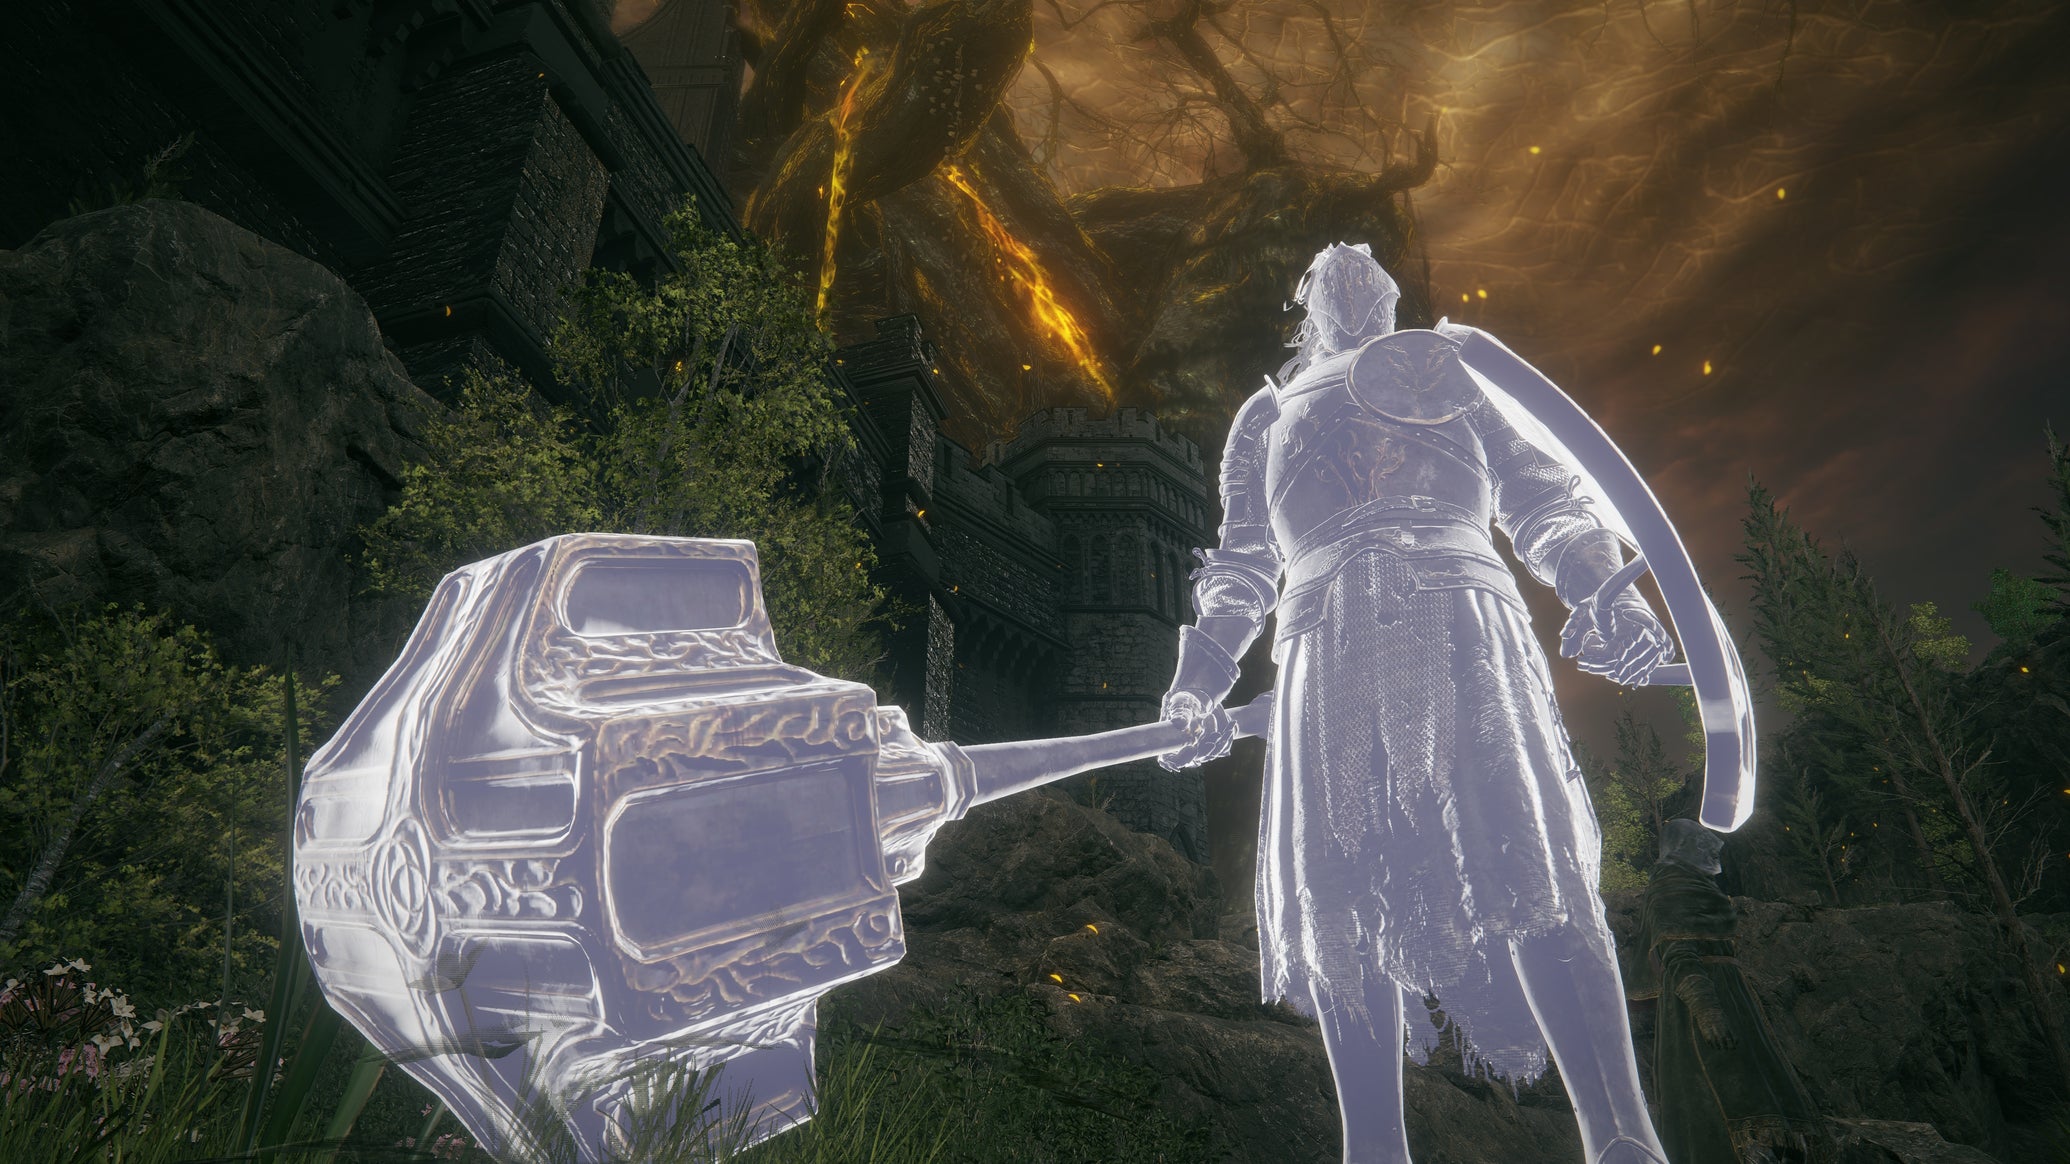
Image credit:Rock Paper Shotgun/Bandai Namco

Looking for all of the Spirit Ashes in Shadow Of The Erdtree? Elden Ring ’s DLC, Shadow Of The Erdtree , is chock-full of discoveries. Whether you’re on a mission to take down all of the bosses, trying to uncover each new weapon to add to your arsenal, or looking to meet new characters and follow their questlines, there’s plenty to keep you busy for an extra 30-40 hours. If you’re looking to find all of the new Spirit Ashes in the DLC, we’re here to help you out with this guide.
There are 20 Spirit Ashes in total to find in Shadow Of The Erdtree. Similar to the main game, each one has a different method for obtaining them, whether that be conquering certain bosses or finding them in specific areas. What’s different in comparison to the main game, though, is that Spirit Ashes can be leveled up with an upgrade called Revered Spirit Ash in the Realm of Shadow. This new resource can be used at Sites of Grace and buffs the attack and defense of all your Spirit Ashes, which is helpful given how tough some of the enemies are. Revered Spirit Ash can be found scattered throughout the land and its effects only apply in the Realm of Shadow, but it is worth keeping an eye out for as you collect more Spirit Ashes on your journey.
In this guide, we’ve gathered together information on all 20 Spirit Ashes so you can know where they’re located and how to get them. This includes whether or not they’re stuck behind a boss you’ll need to defeat. If you want to know a little more about any of the bosses listed here, make sure to check out our Elden Ring Shadow Of The Erdtree boss locations guide for some tips on how to approach battle with them.
Demi-Human Swordsman Yosh Spirit Ashes
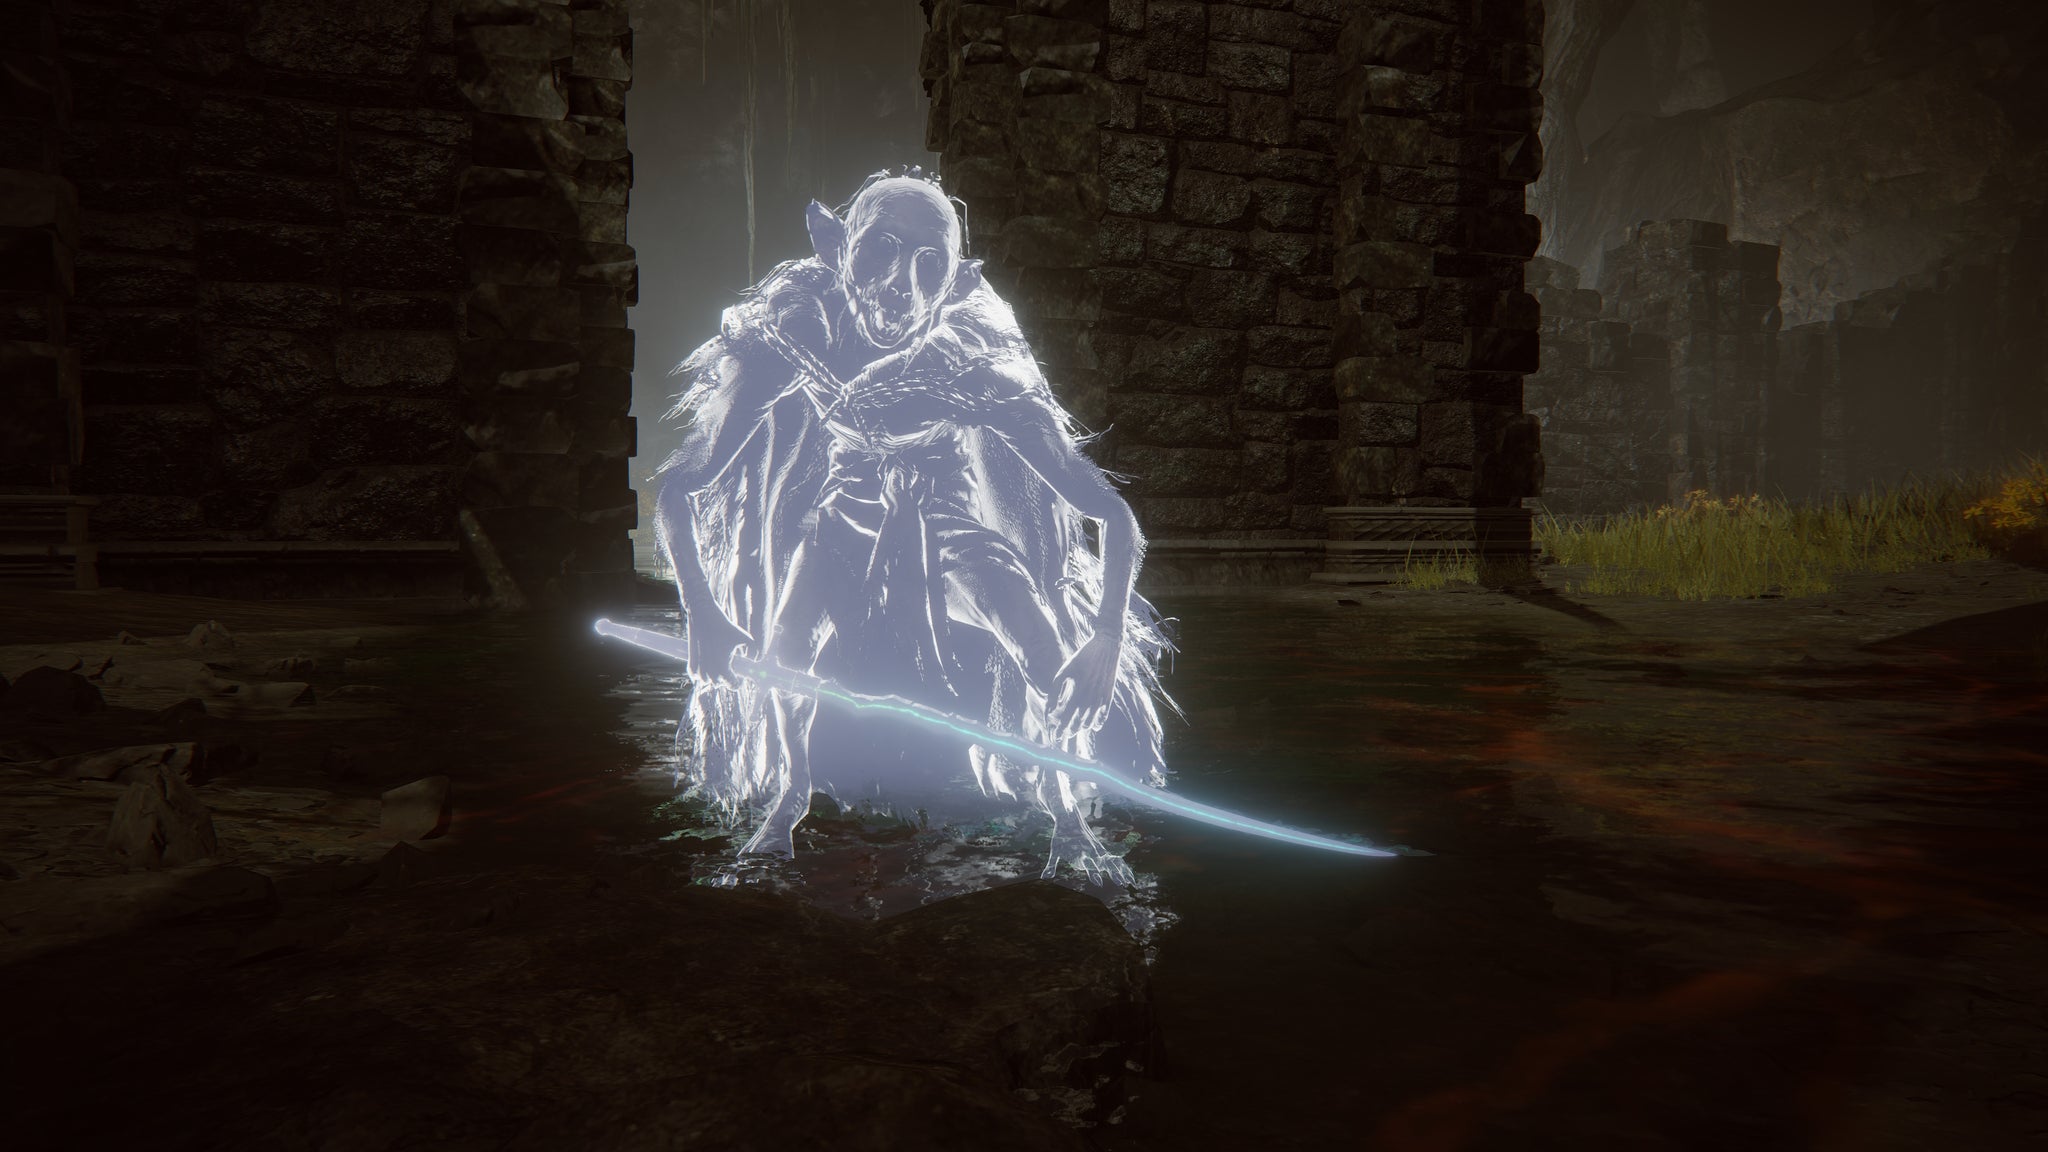
Demi-Human Swordsman Yosh Spirit Ash | FP Cost: 129 |Image credit:Rock Paper Shotgun/Bandai Namco
Demi-Human Swordsman Yosh is a very skilled swordsman that moves swiftly around enemies. If you’re looking for an agile summon that whips around a boss like Yoda, the Demi-Human Swordsman Yosh Spirit Ash can provide you with helpful backup.
How to get Demi-Human Swordsman Yosh Spirit Ashes
The Demi-Human Swordsman Yosh Spirit Ashes can be obtained at the end of Belurat Gaol after beating Demi-Human Swordmaster Onze.
Gravebird Spirit Ashes
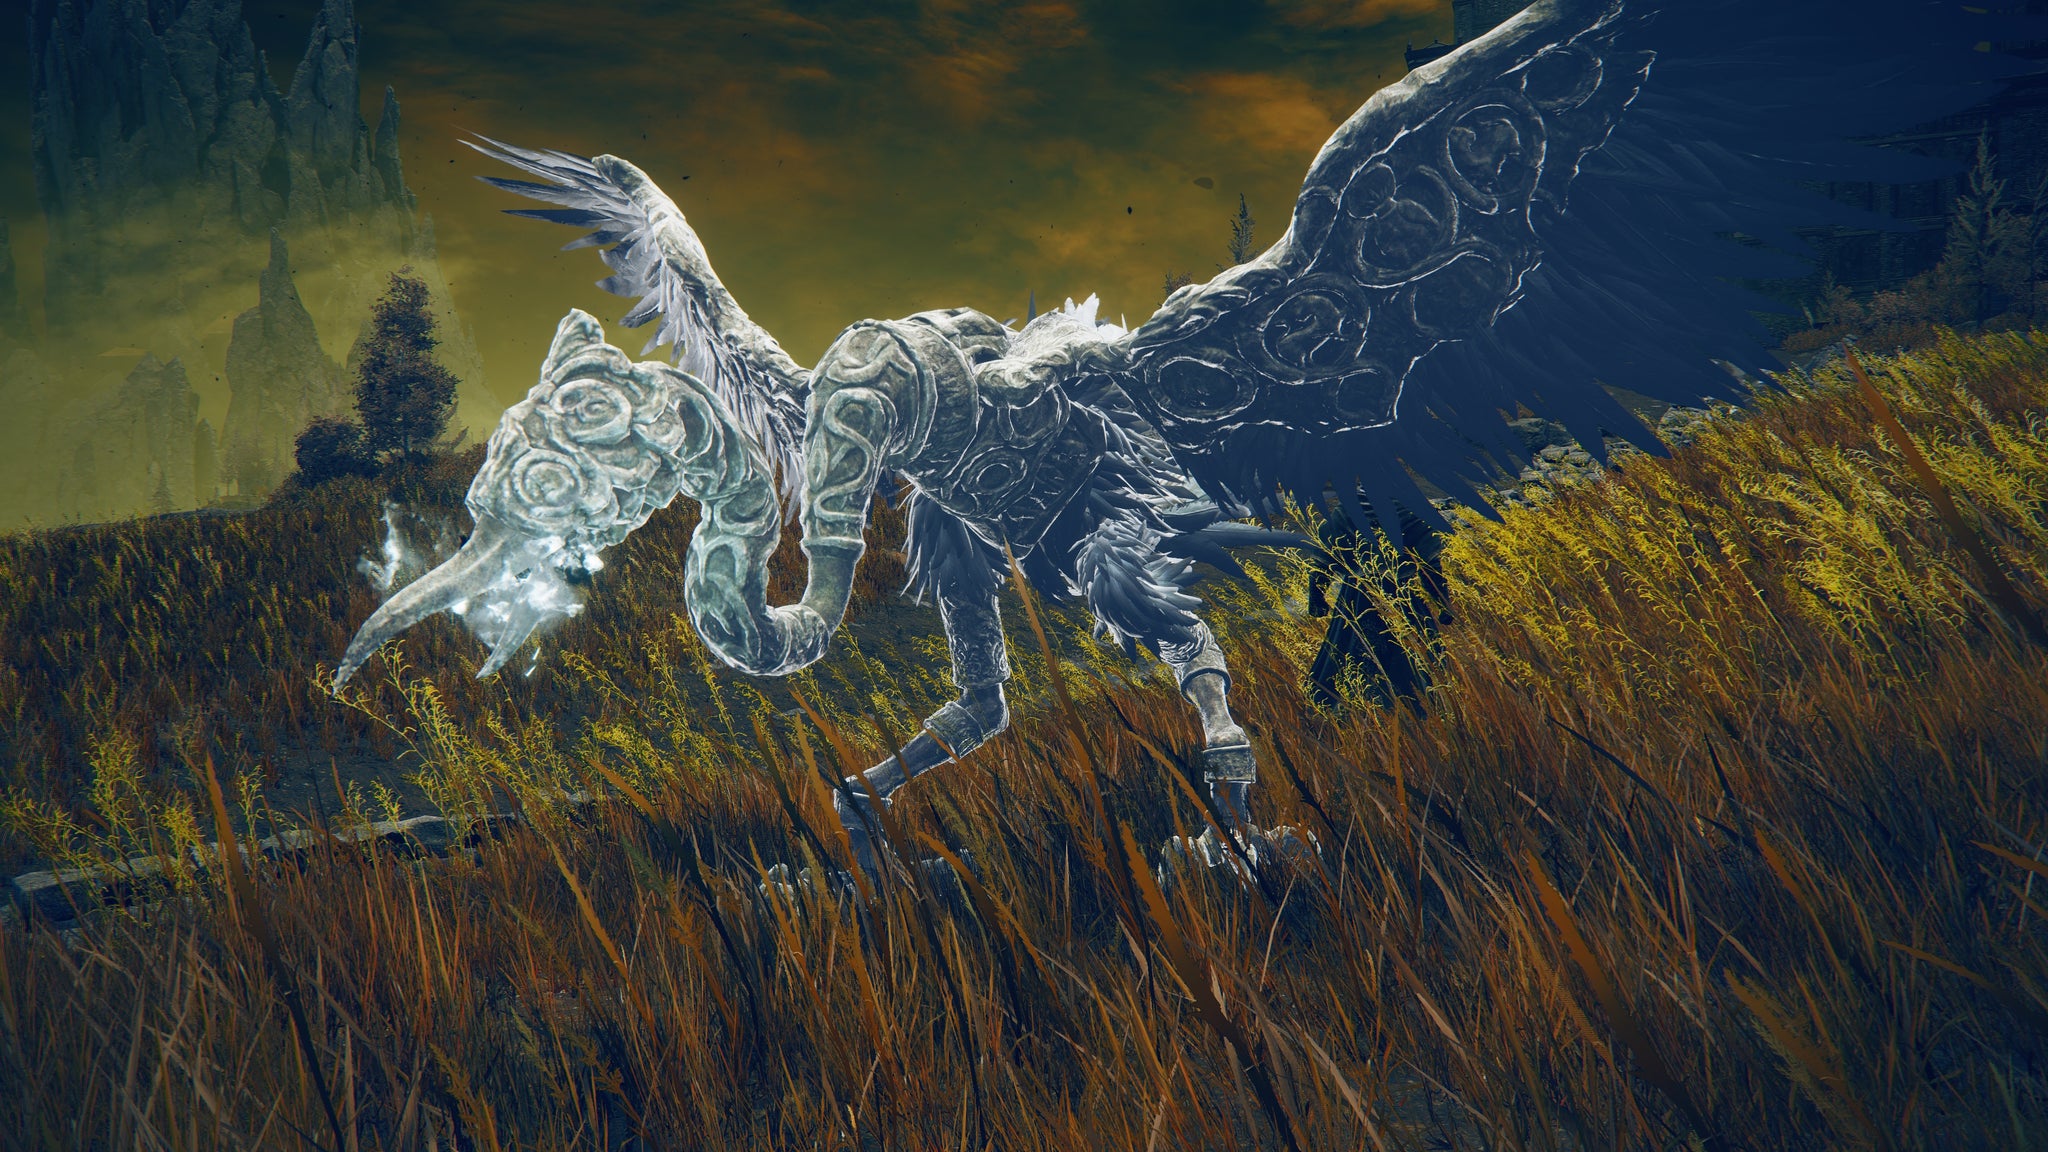
Gravebird Spirit Ash | FP Cost: 65 |Image credit:Rock Paper Shotgun/Bandai Namco
The Gravebird Spirit Ash, much like the enemies out in the Realm of Shadow, can fly around and claw at enemies when summoned. It can also breathe out ghostflame to deal damage. However, it can be knocked out of the sky quite easily when its attempting to fly, so it’s more of an ideal pick for smaller enemies rather than bosses.
How to get Gravebird Spirit Ashes
The Gravebird Spirit Ashes are located in Charo’s Hidden Grave . You’ll find them on top of a cliff right behind a Furnace Golem . Use the Spiritspring to reach it.
Bloodfiend Hexer’s Spirit Ashes
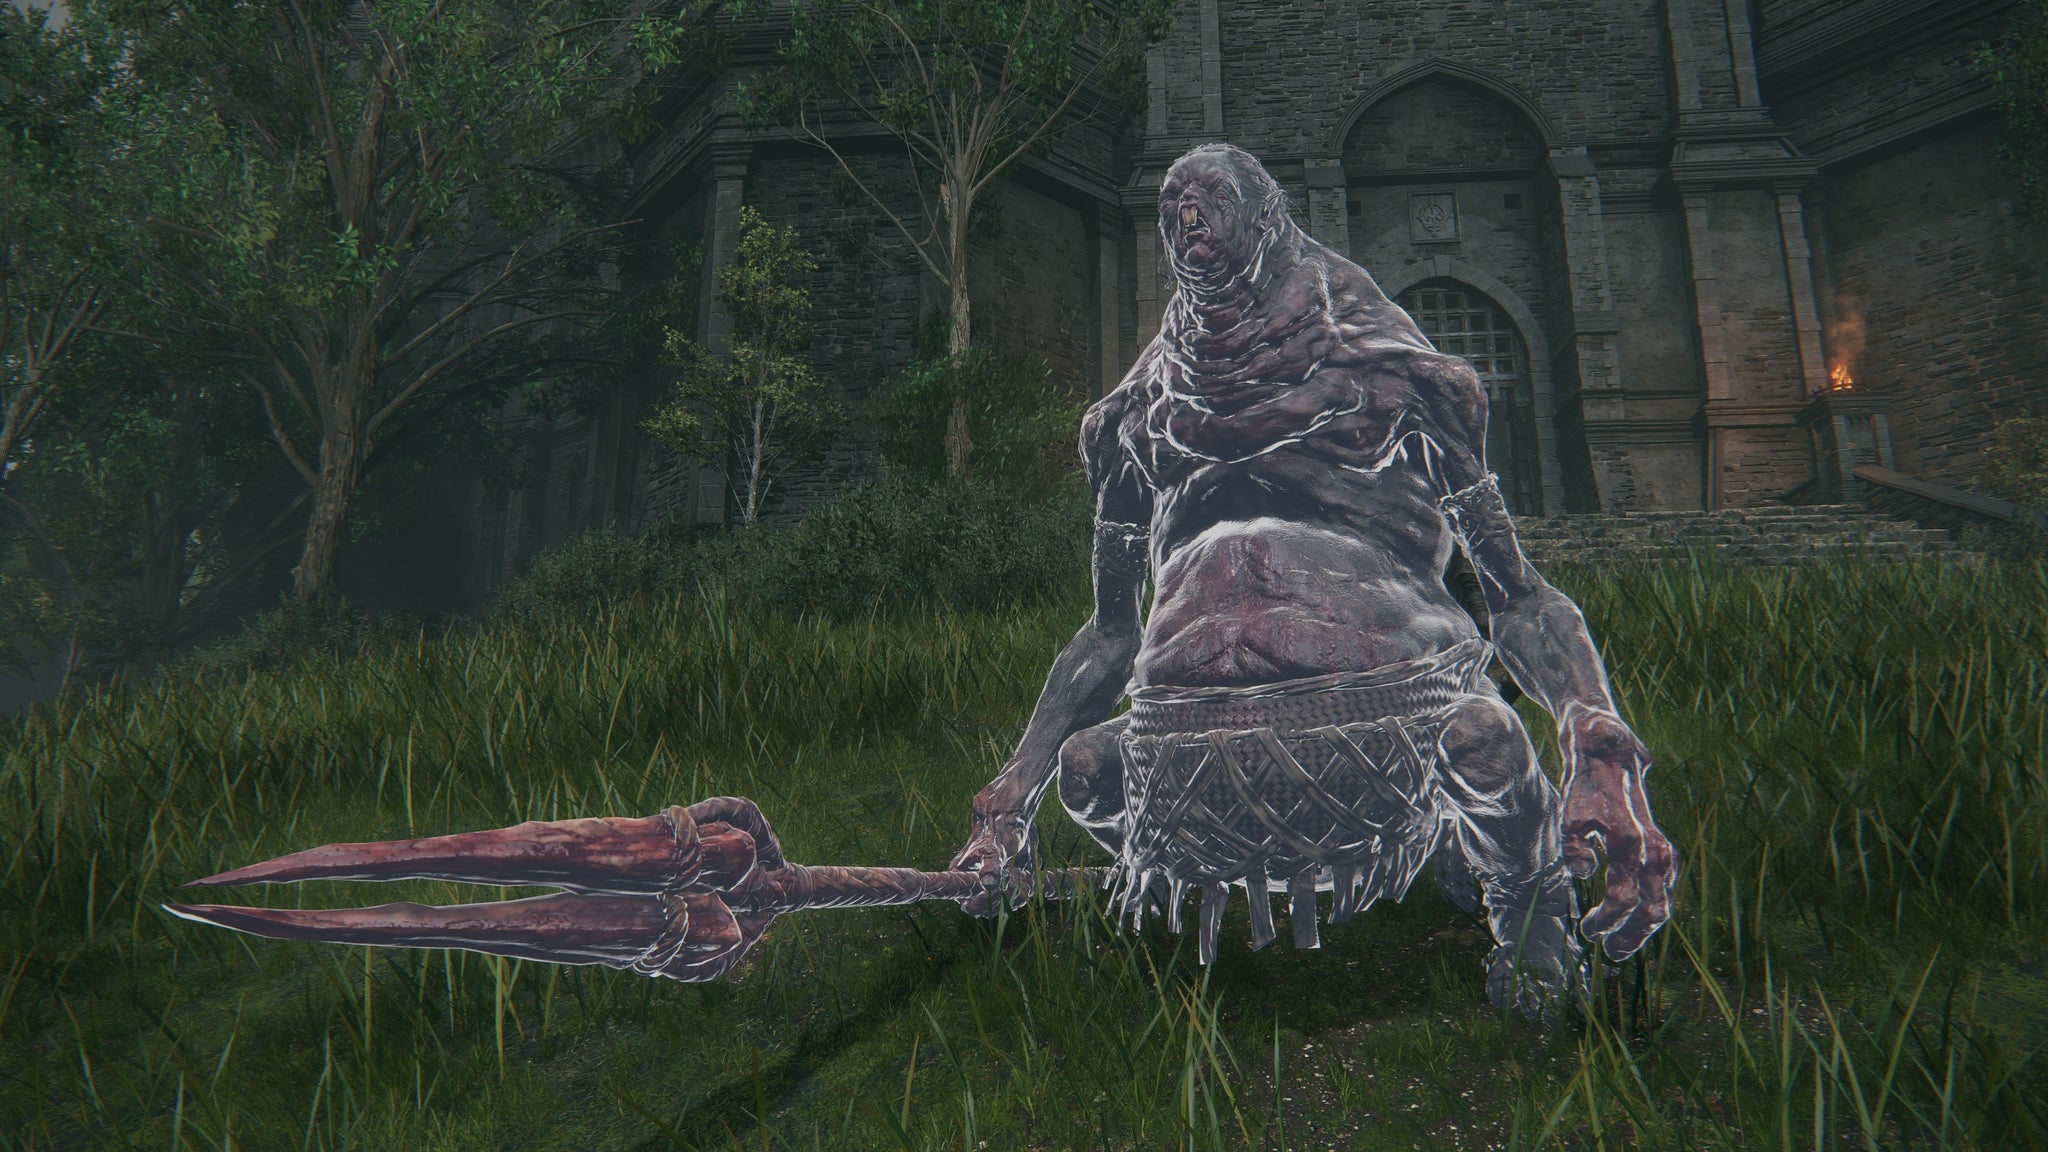
Bloodfiend Hexer’s Spirit Ash | HP Cost: 500 |Image credit:Rock Paper Shotgun/Bandai Namco
The Bloodfiend Hexer’s Spirit Ash wields a giant spear that it uses to conduct bloodboon rituals and cast bloodflame hexes. Because of these attacks, this summon is a great fit if you have a bleed build. It’s worth keeping in mind, though, that it’s a summon built to be a caster rather than in the middle of the fight, so fits better as support.
How to get Bloodfiend Hexer’s Spirit Ashes
You can get the Bloodfiend Hexer’s Spirit Ashes by defeating the Chief Bloodfiend at the end of the Rivermouth Cave.
Messmer Soldier Spirit Ashes
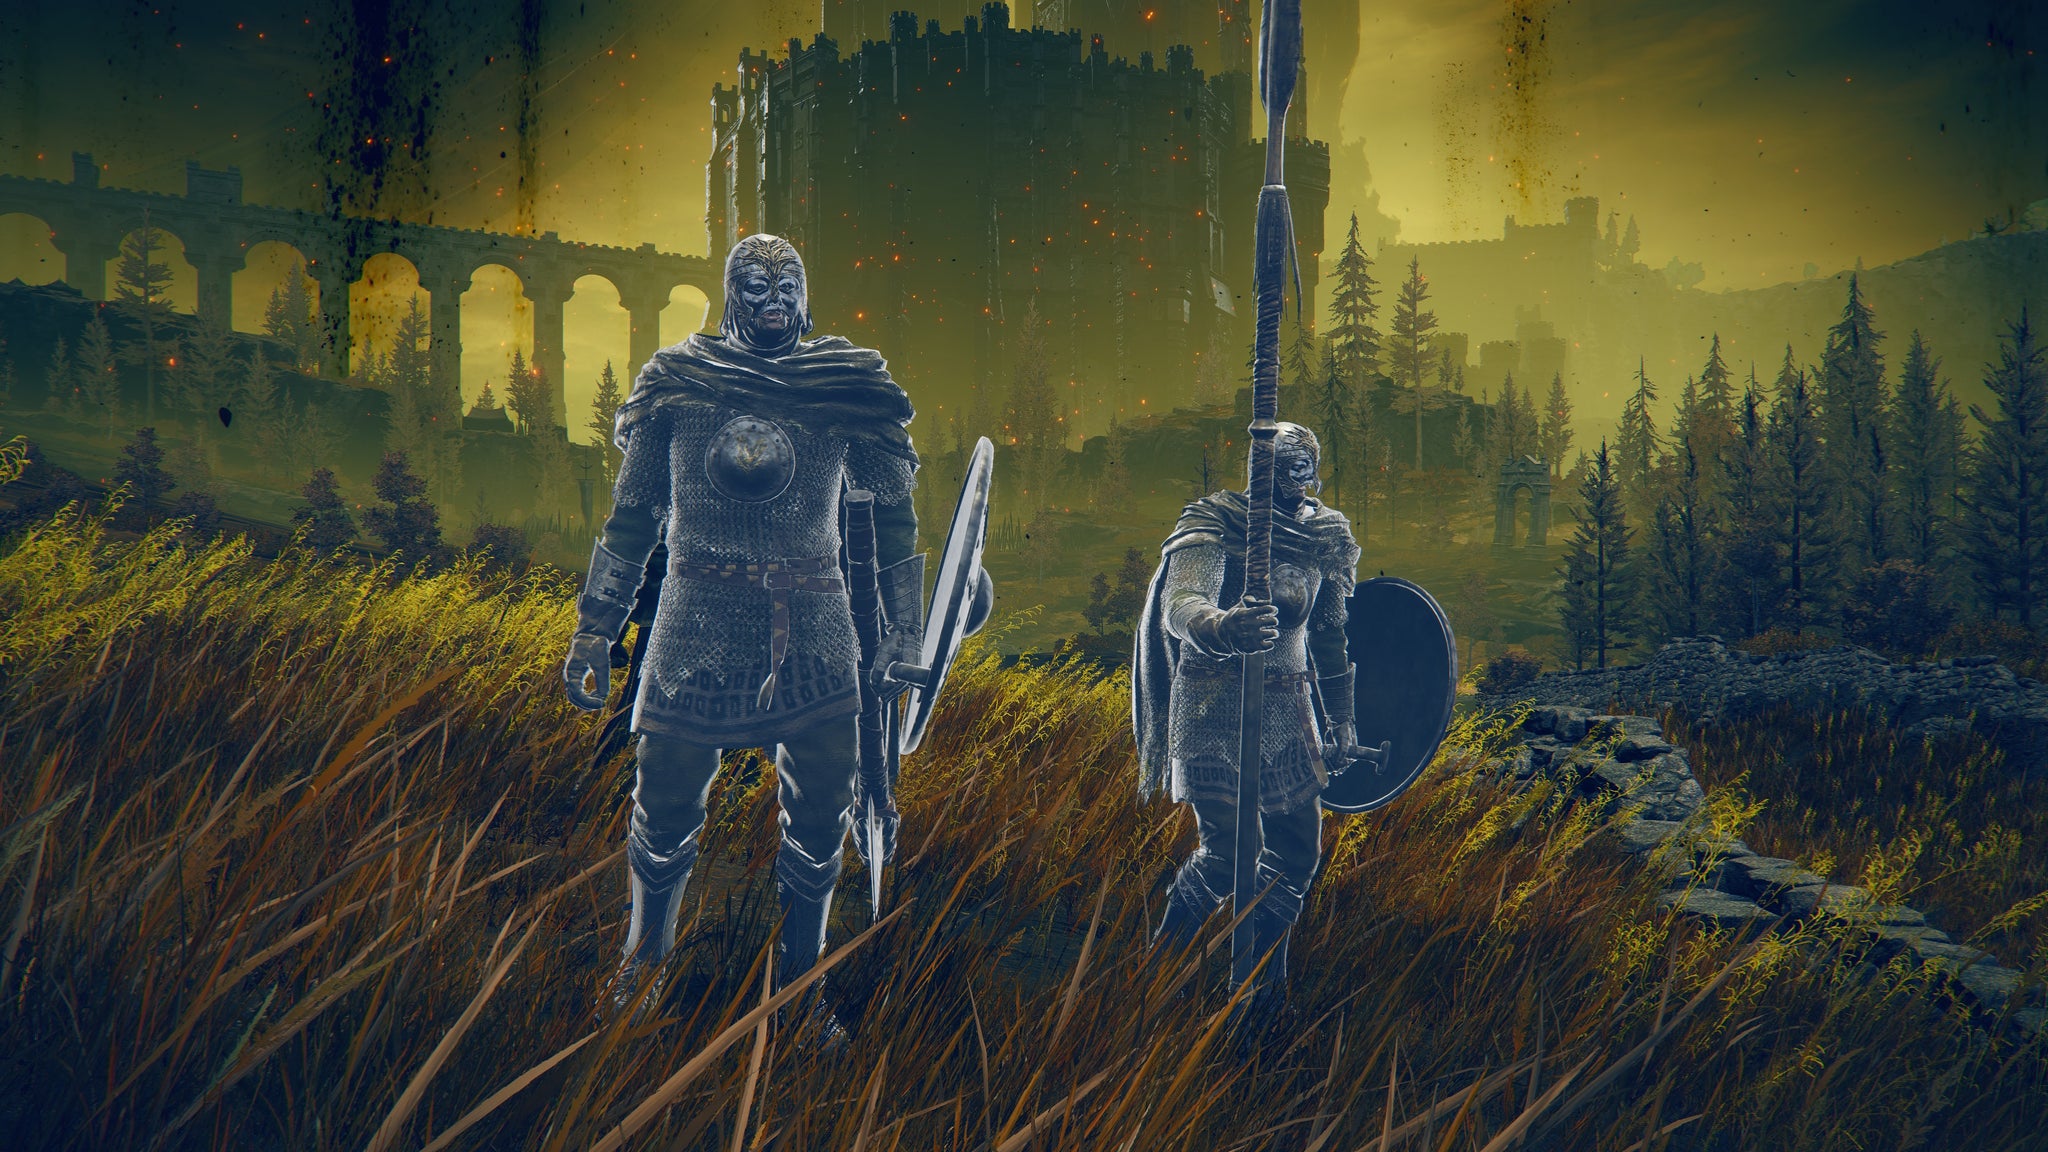
Messmer Soldier Spirit Ash | FP Cost: 72 |Image credit:Rock Paper Shotgun/Bandai Namco
The Messmer Soldier Spirit Ashes summon a soldier with an axe and one with a spear. They have an aggressive attack style with a high stagger potential that makes them great for ganging up on enemies. If you’re looking for some reliable summons to knock around your enemies, the Messmer Soldier Spirit Ashes are a great pick.
How to get Messmer Soldier Spirit Ashes
From the Fort Reprimand Site of Grace , head to a ledge overlooking the main courtyard. Jump down and through a hole in the floor, but be wary of the Omenkiller below. Head left in this room and back outside where you’ll find the Messmer Soldier Spirit Ashes on a gravestone.
Curseblade Meera Spirit Ashes
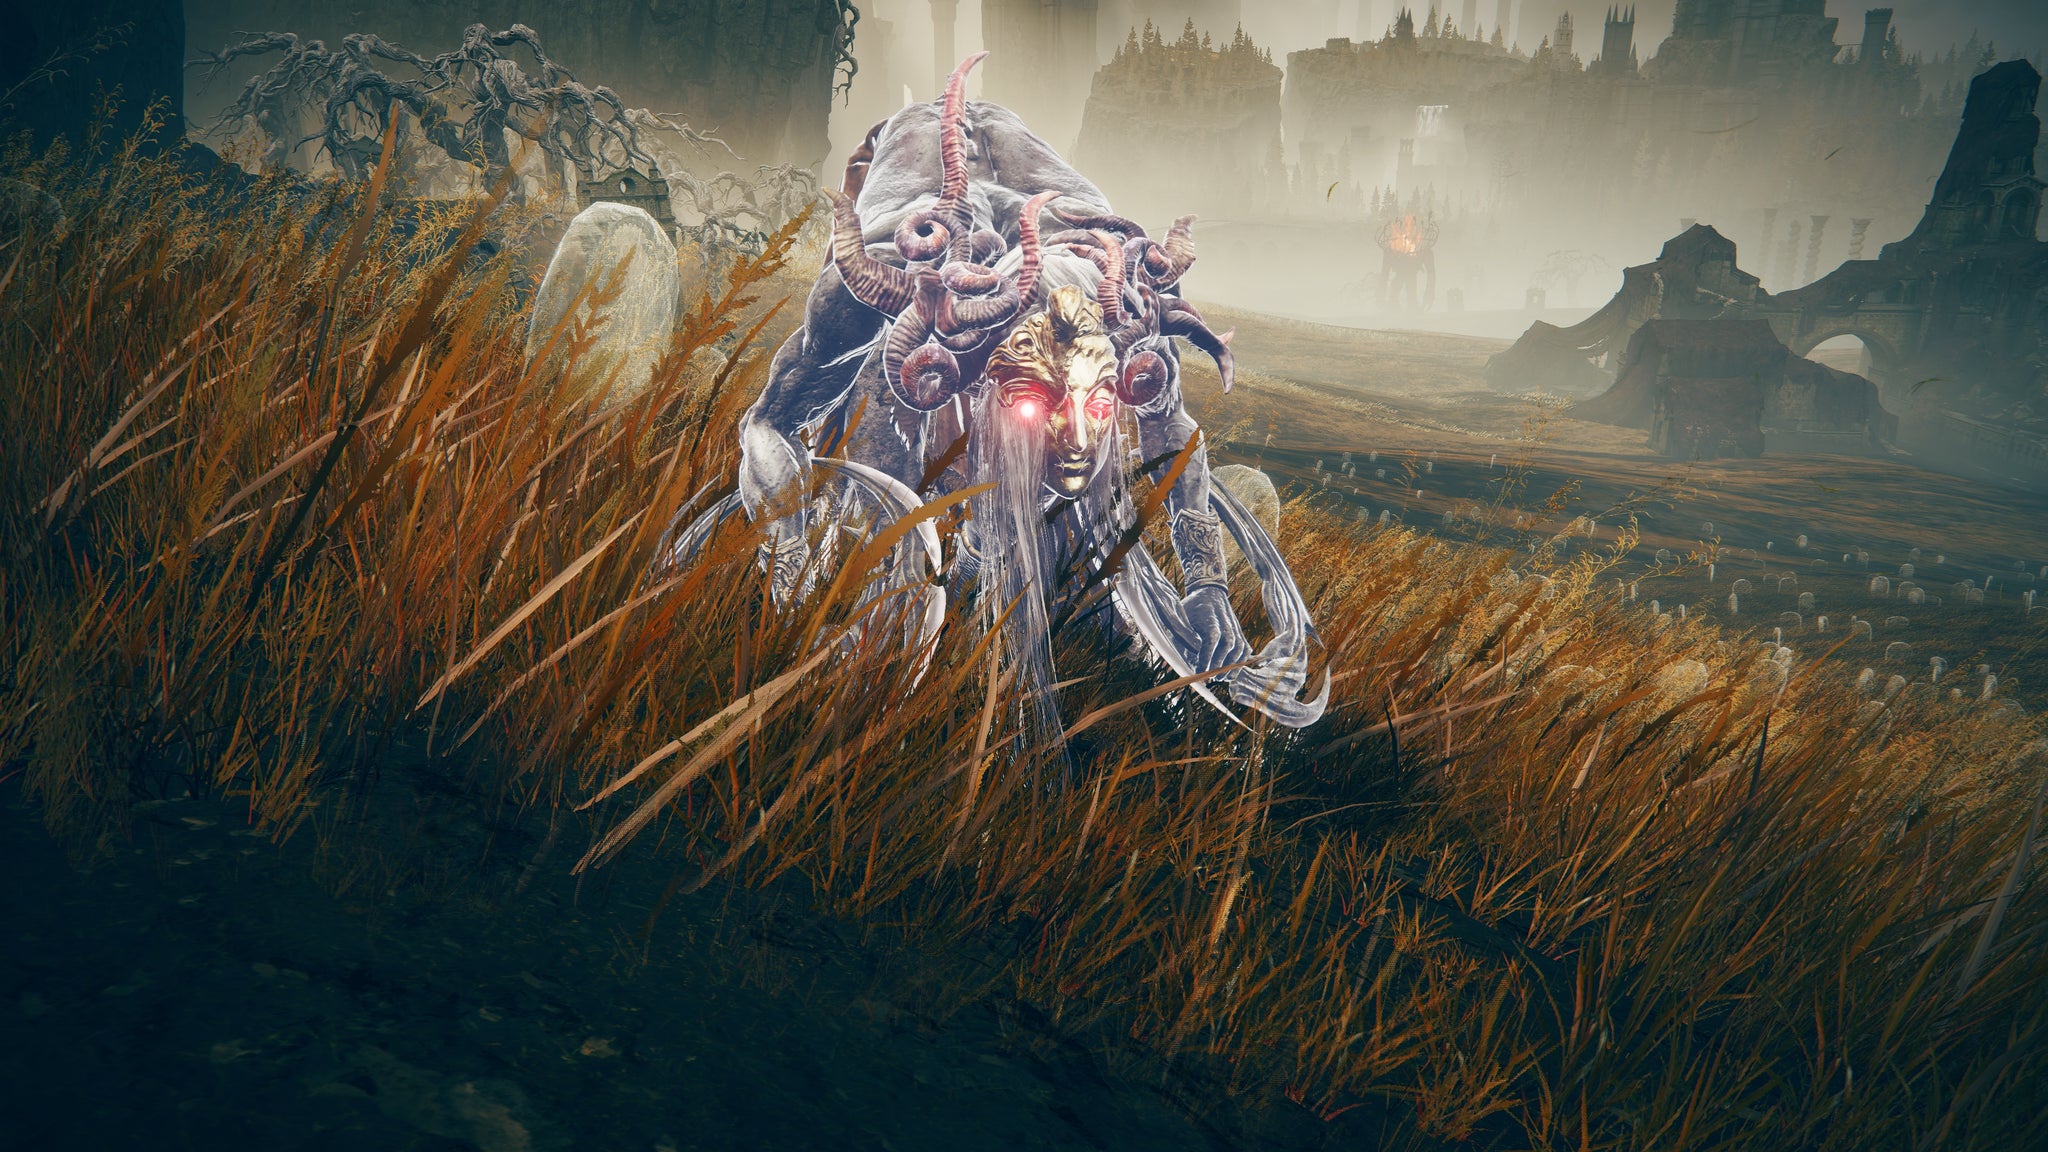
Curseblade Meera Spirit Ash | FP Cost: 91 |Image credit:Rock Paper Shotgun/Bandai Namco
Curseblade Meera’s Spirit Ash wields two circular blades that she spins around to slice and dice enemies. She’s another very aggressive summon that works well against both smaller enemies and the bosses thanks to her fast pace.
How to get Curseblade Meera Spirit Ashes
The Curseblade Meera Spirit Ashes can be found in Bonny Gaol, which can be reached from the hole in Moorth Ruins. You must defeat Curseblade Labirith at the end of the Gaol to get it.
Man-Fly Spirit Ashes
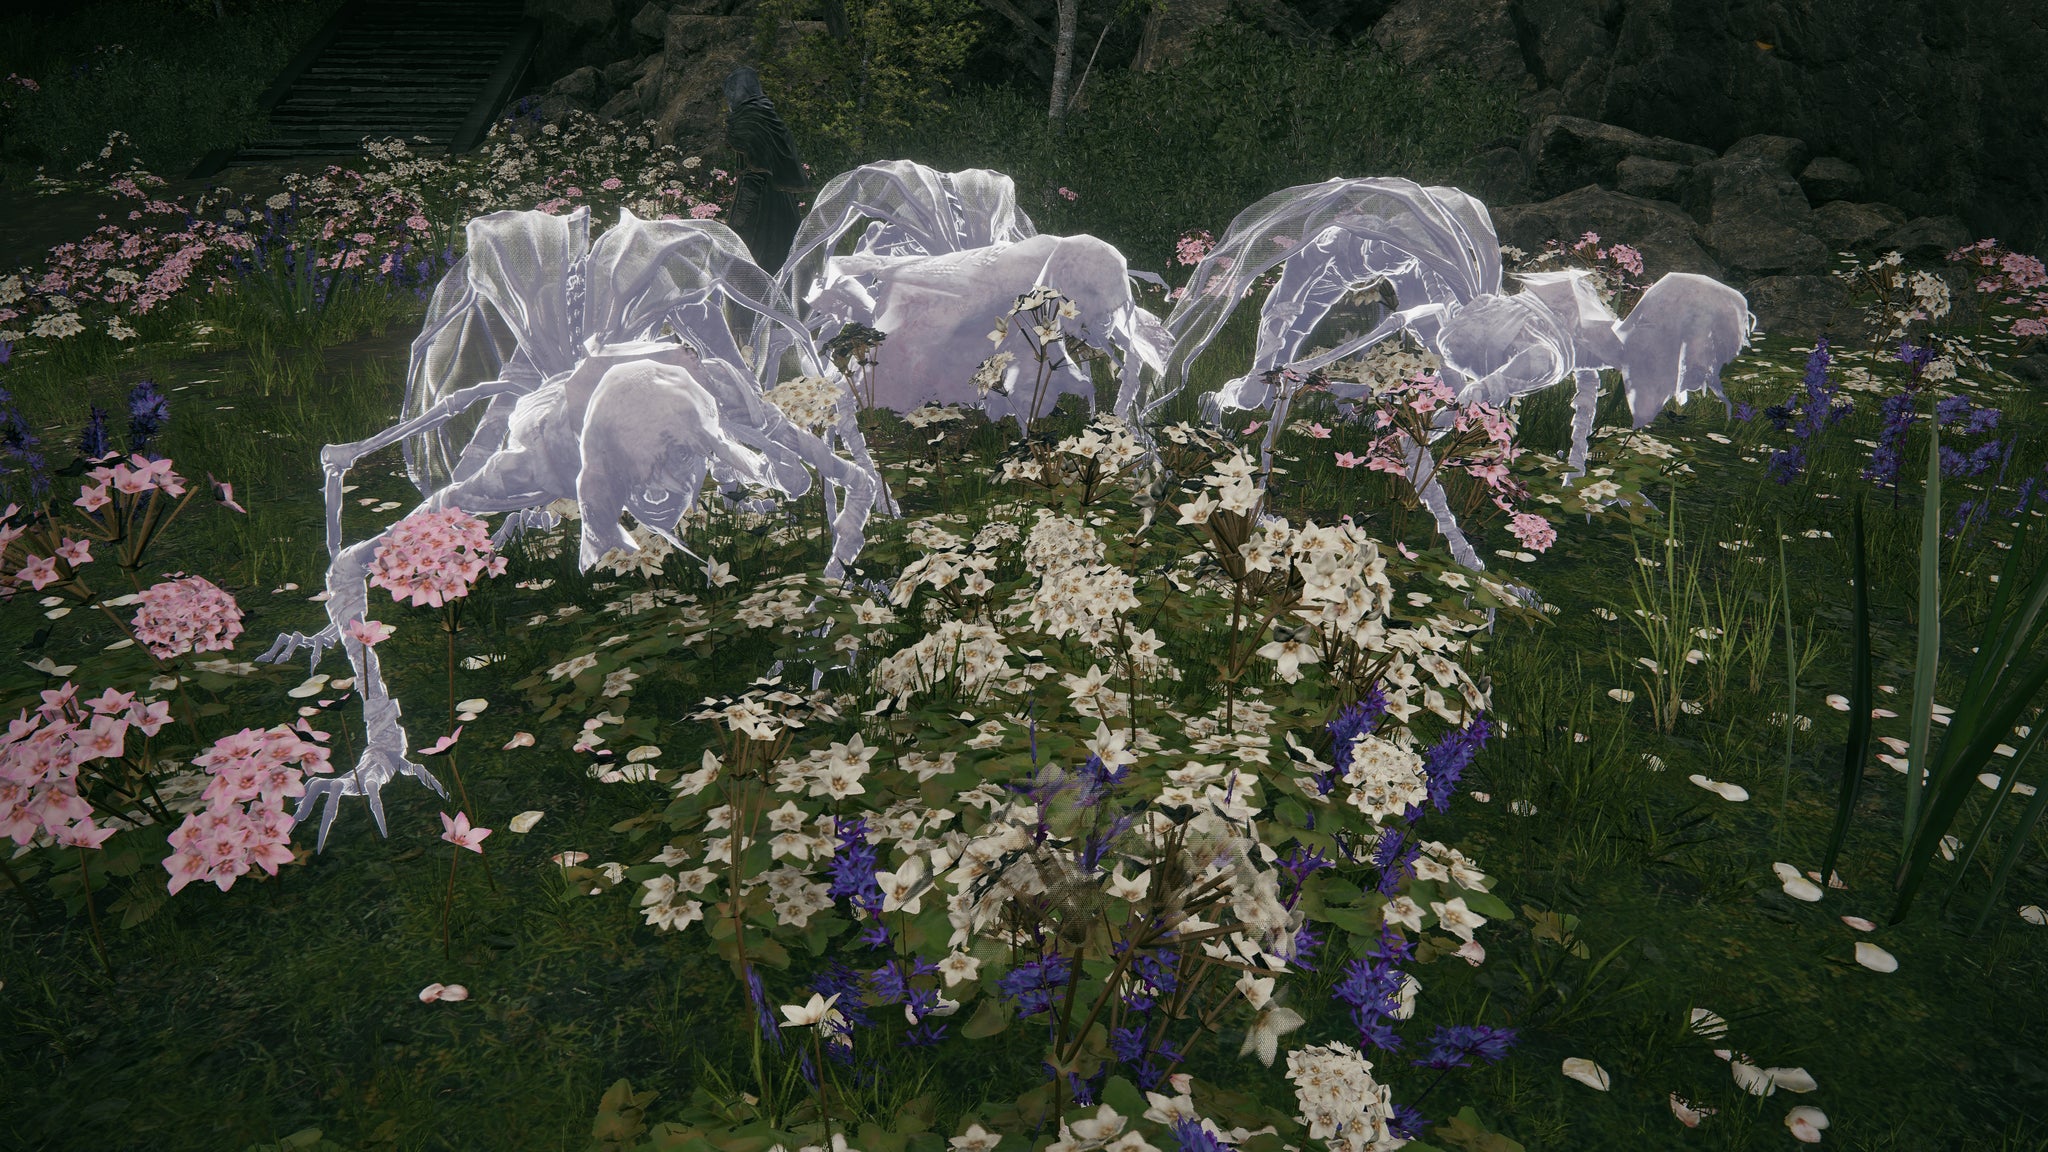
Man-Fly Spirit Ash | FP Cost: 28 |Image credit:Rock Paper Shotgun/Bandai Namco
The Man-Fly Ashes appear as a group of three - one attacks from afar with poison while the other two go in for melee attacks. They’re not particularly strong, but they’re a good pick if you just want to take an enemy’s focus away from you and use them as bait.
How to get Man-Fly Spirit Ashes
The Man-Fly Spirit Ashes can be found in the Village of Flies surrounded by man-fly enemies. To reach the Village of Flies, head to the Main Gate Plaza Site of Grace and out the door on the right. Head up to the area with the burning boats and turn right. You’ll find a ladder on the left you can take down.
Careful in this next area to not fall in the water! Stick to the wall and make your way to the right underneath the waterfall. Take this next ladder down and turn right into a room with a painting. If you hit the right wall, a passage will appear. Head through there and follow the water to a coffin, then get inside.
This will take you down to the Castle Watering Hole Site of Grace. From here, head south following the water until you reach the Recluses’ River Downstream Site of Grace. Head towards the edge of the cliff and start making your way down to reach the Village of Flies.
When you reach a spot with a Curseblade enemy, take a right to keep going up the hill. This will take you to the Village. You’ll find the ashes by curving around to your right up the hill.
Bigmouth Imp Spirit Ashes
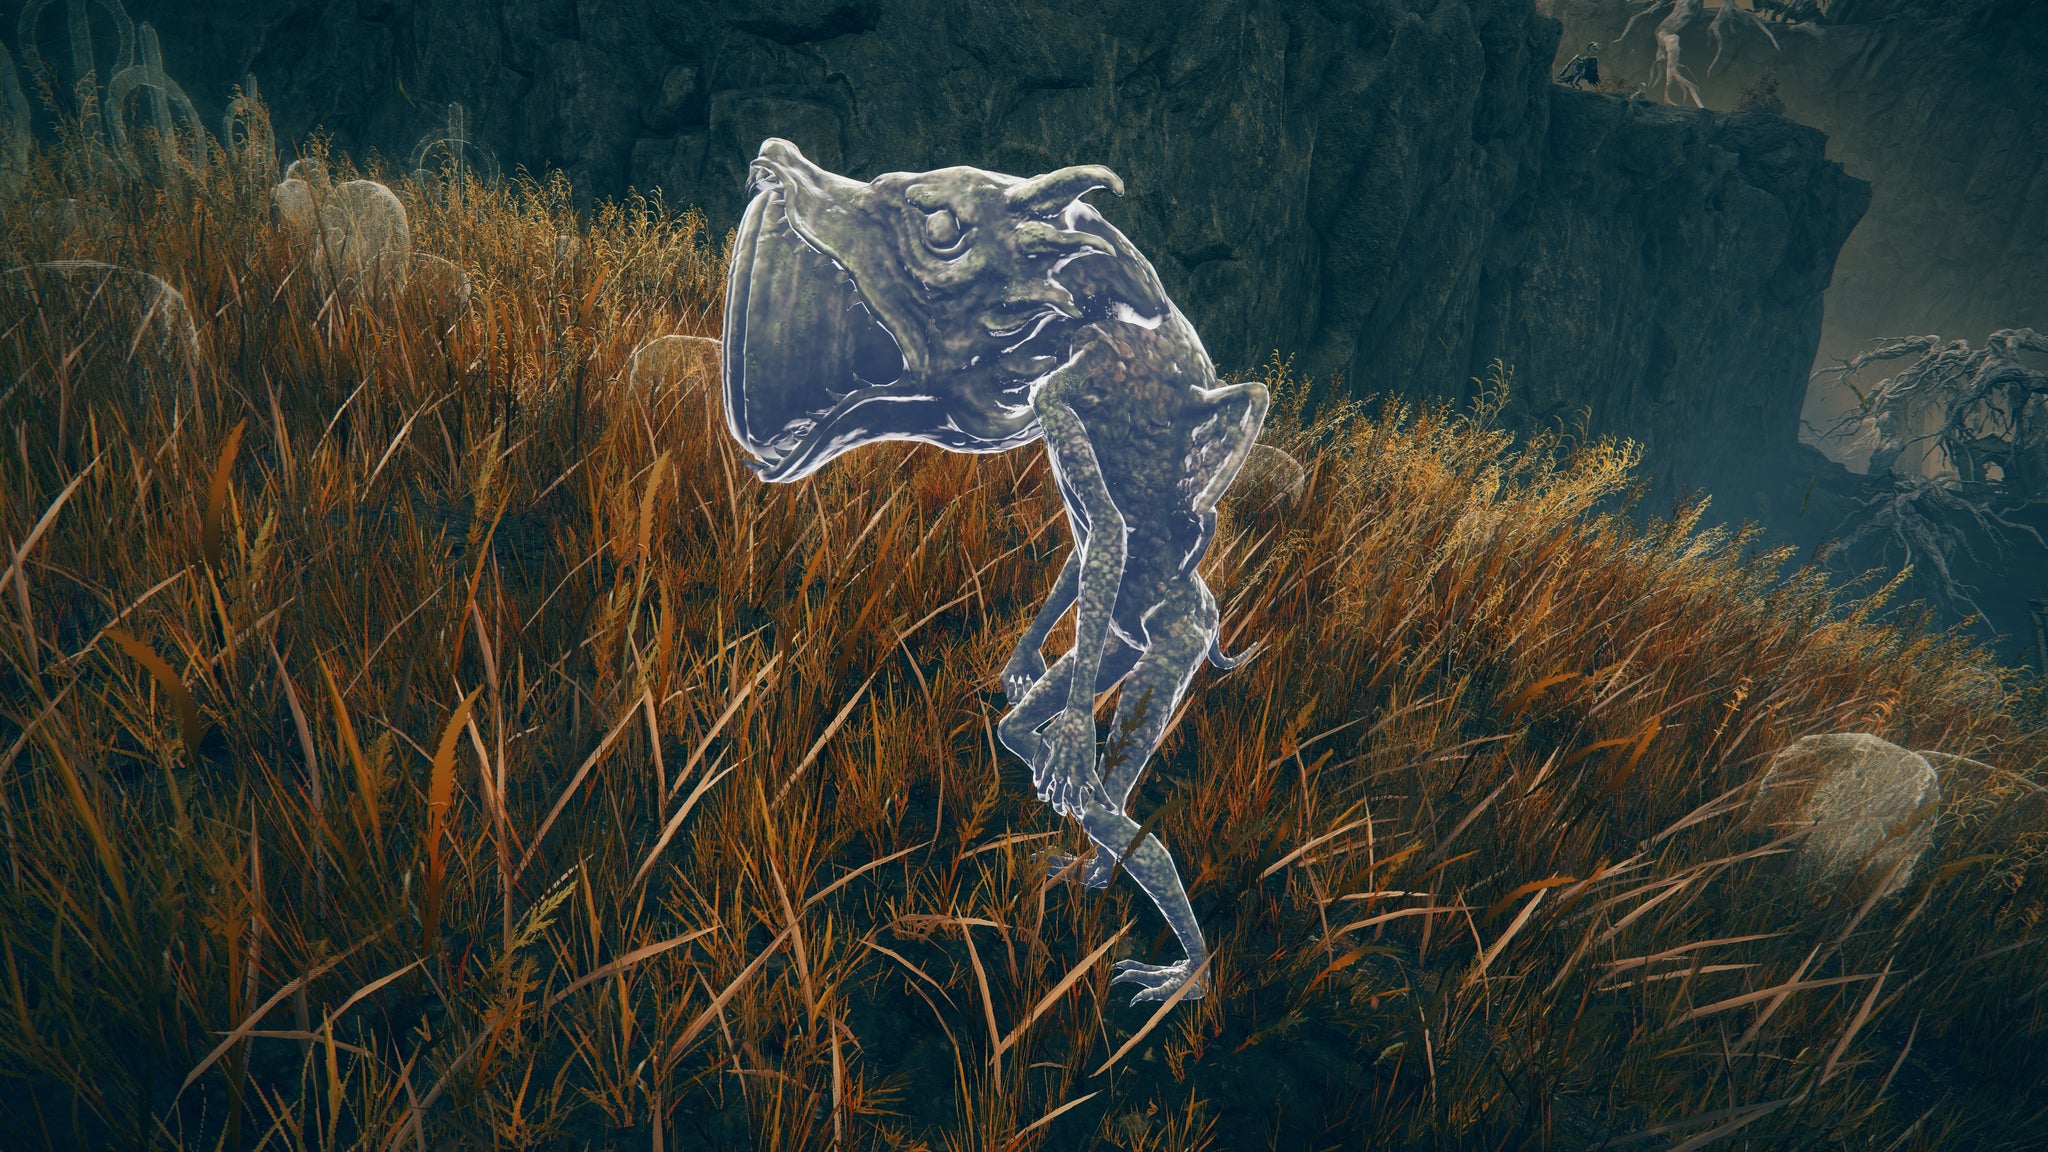
Bigmouth Imp Spirit Ash | FP Cost: 60 |Image credit:Rock Paper Shotgun/Bandai Namco
The Bigmouth Imp Spirit Ash offers up helpful ranged attacks thanks to its big ol’ cannon mouth. Because of this, it’s not an ideal pick for more aggressive one-on-one fights, but it can be helpful as a range-based summon.
How to get Bigmouth Imp Spirit Ashes
The Bigmouth Imp Spirit Ashes can be found in the Darklight Catacombs in the room with the large Bigmouth Imp. You’ll need to pull a lever in a separate room off of the main area to reach the area where the chest holding it is.
Swordhand of Night Jolán Spirit Ashes
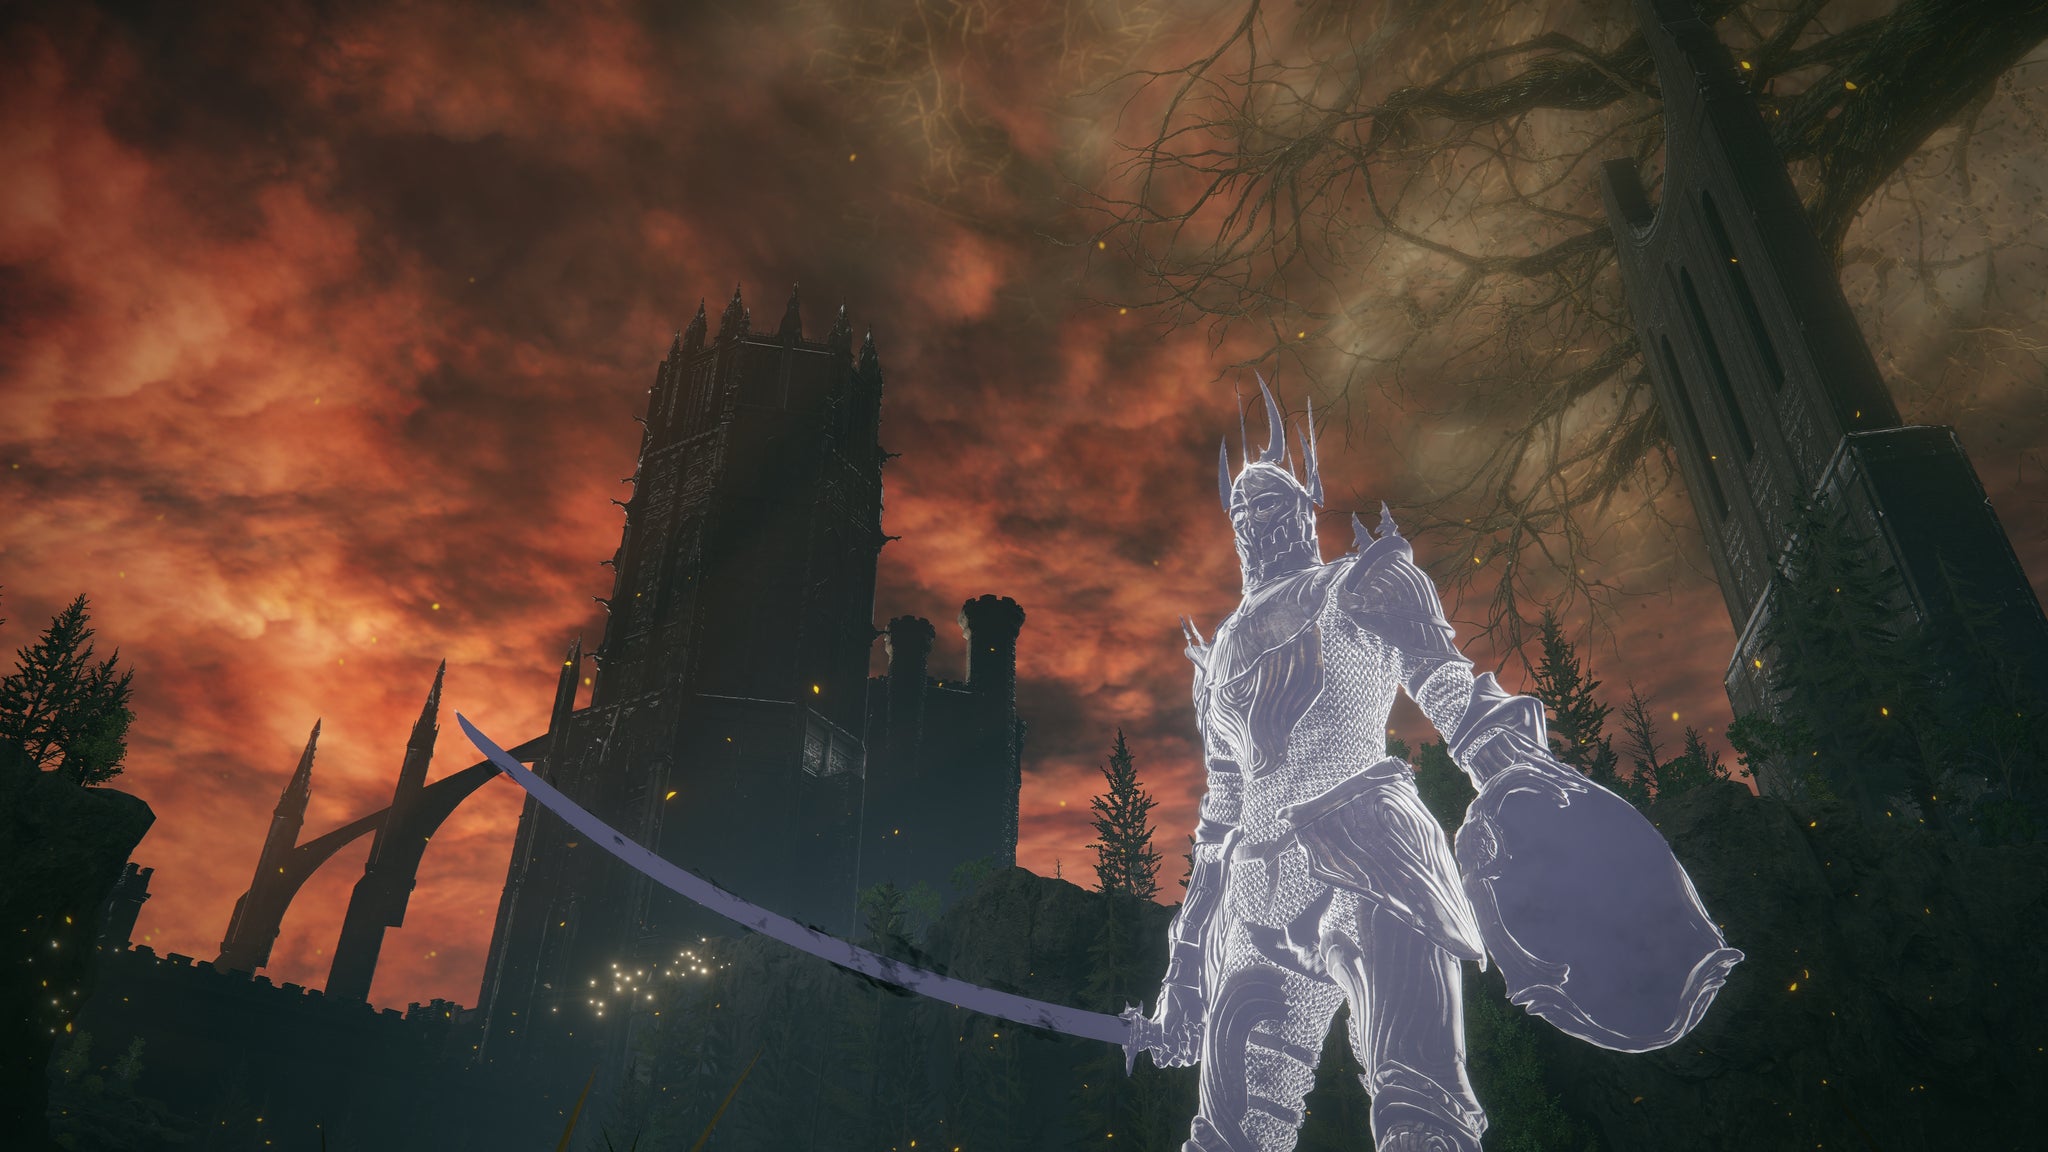
Swordhand Of Night Jolán Spirit Ash | FP Cost: 86 |Image credit:Rock Paper Shotgun/Bandai Namco
The Swordhand Of Night Jolán Spirit Ash is another very aggressive summon that’s great for getting up in the face of your enemies. She wields a katana called the Sword of Night and can actually be upgraded later on into an even more powerful summon , which we’ll get to later.
How to get Swordhand of Night Jolán Spirit Ashes
In the Cathedral of Manus Metyr , after completing Count Ymir’s questline , approach Jolán and use the Iris of Grace on her to get her Spirit Ash.
Black Knight Commander Andreas Spirit Ashes

Black Knight Commander Andreas Spirit Ash | FP Cost: 111 |Image credit:Rock Paper Shotgun/Bandai Namco
The Black Knight Commander Andreas Spirit Ash is a great summon to tank your enemies. Wielding a hammer and holding a massive shield, this summon is a fantastic choice for dealing some heavy hits, staggering enemies, and he even deals holy damage.
How to get Black Knight Commander Andreas Spirit Ashes
The Black Knight Commander Andreas Spirit Ashes are in the Fog Rift Catacombs, which are found by following the path northwest from the Castle Front Site of Grace. Once inside, jump on top of the spike trap and ride it up. Follow the path up here to a room guarded by Messmer Soldiers and a Black Knight.
From the area outside of the room where the Black Knight was, head right under the archways to jump on another spike trap that’ll lead you up to a new area. Follow the path to a coffin that holds the ashes.
Divine Bird Warrior Ornis Spirit Ashes
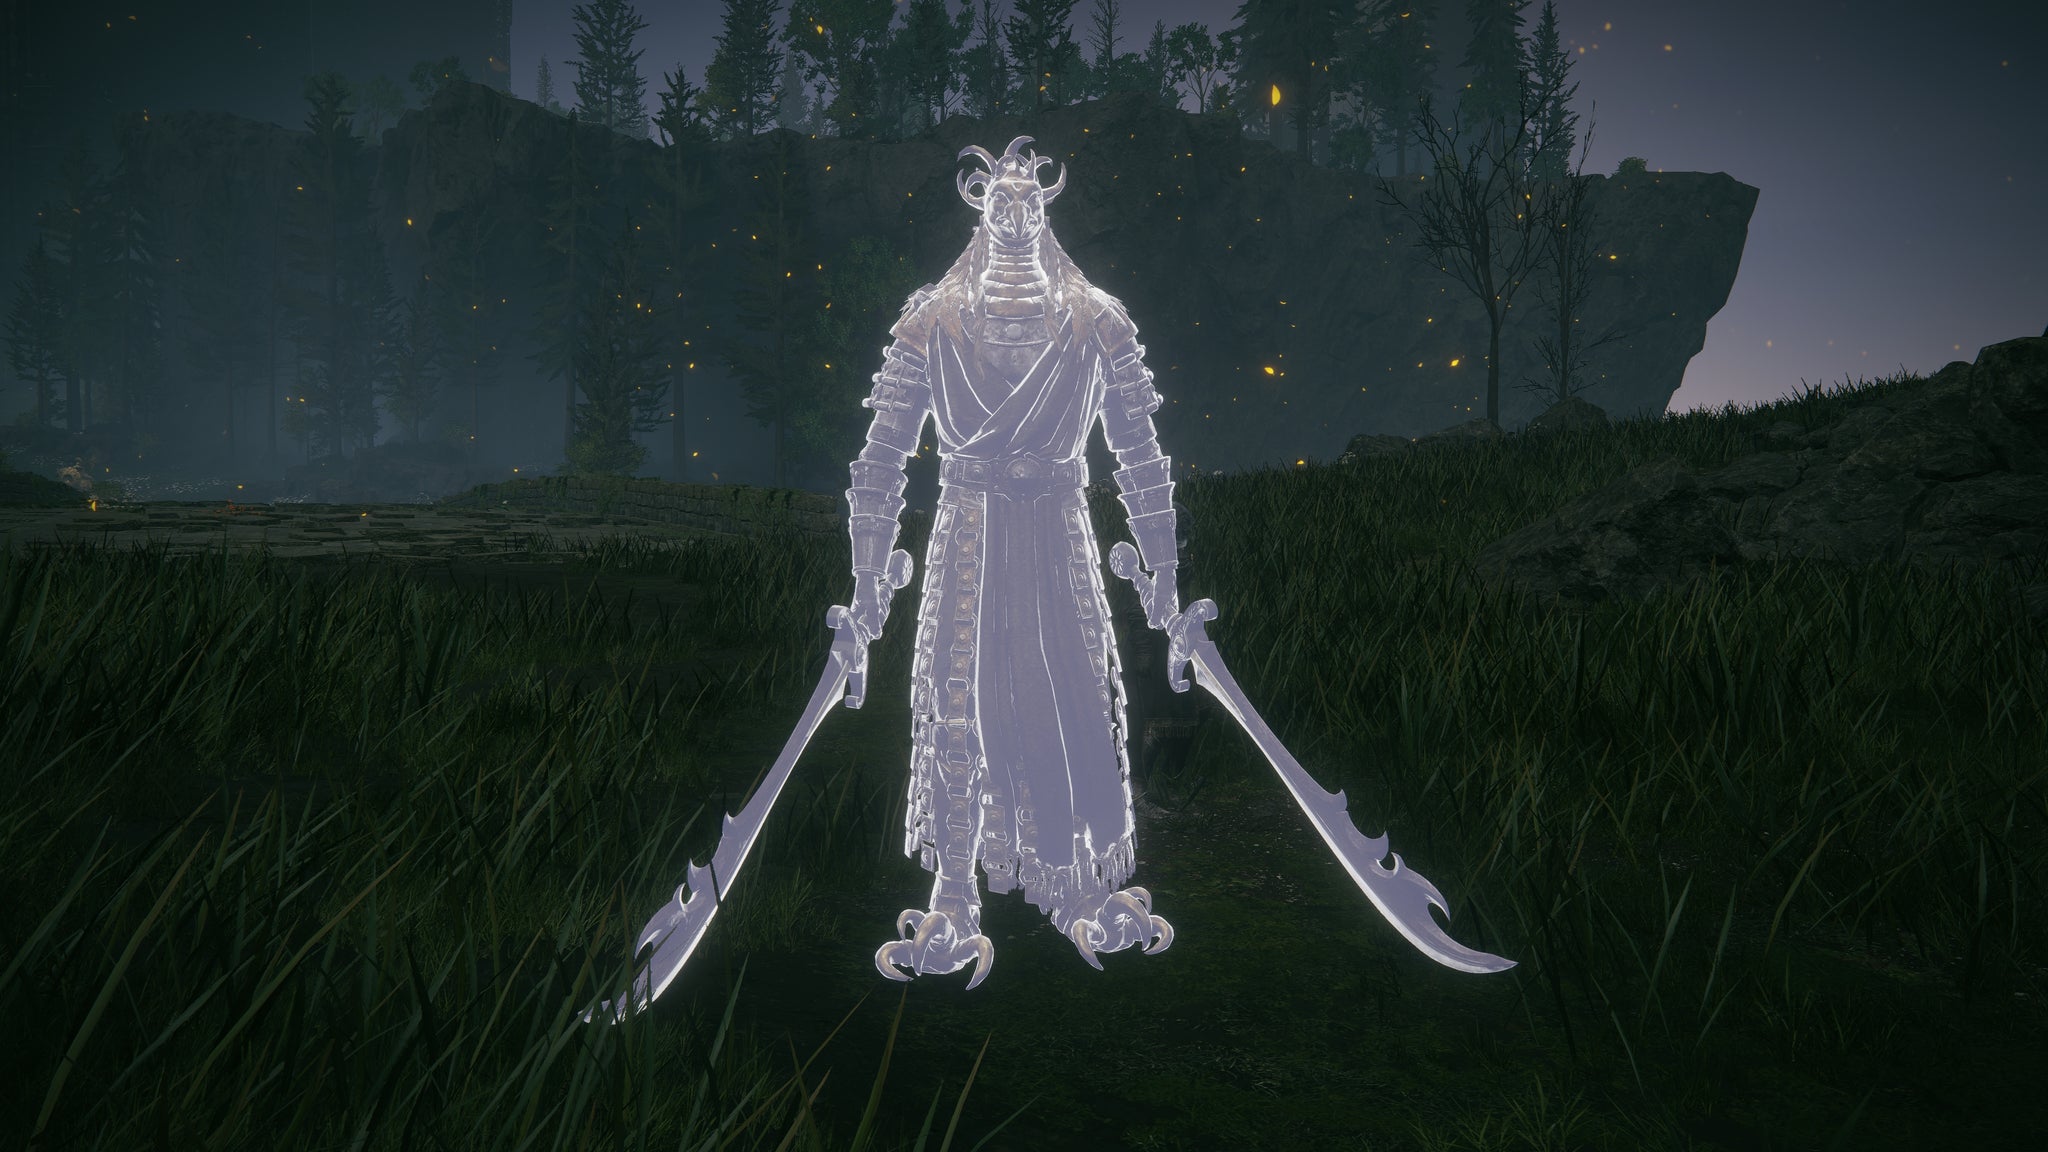
Divine Bird Warrior Ornis Spirit Ash | FP Cost: 131 |Image credit:Rock Paper Shotgun/Bandai Namco
The Divine Bird Warrior Ornis Spirit Ash is another aggressive summon that works well in one-on-one encounters. Wielding two very large swords for melee attacks, it also has a ranged holy attack that it casts as it flies into the air.
How to get Divine Bird Warrior Ornis Spirit Ashes
The Divine Bird Warrior Ornis Spirit Ashes are found in a chest near the Temple Town Ruins Site of Grace. You’ll need to ride up in the Spiritspring on the right near the Site of Grace and into a little cave entrance. Follow this path to a ruined building that has the chest inside.
Black Knight Captain Huw Spirit Ashes
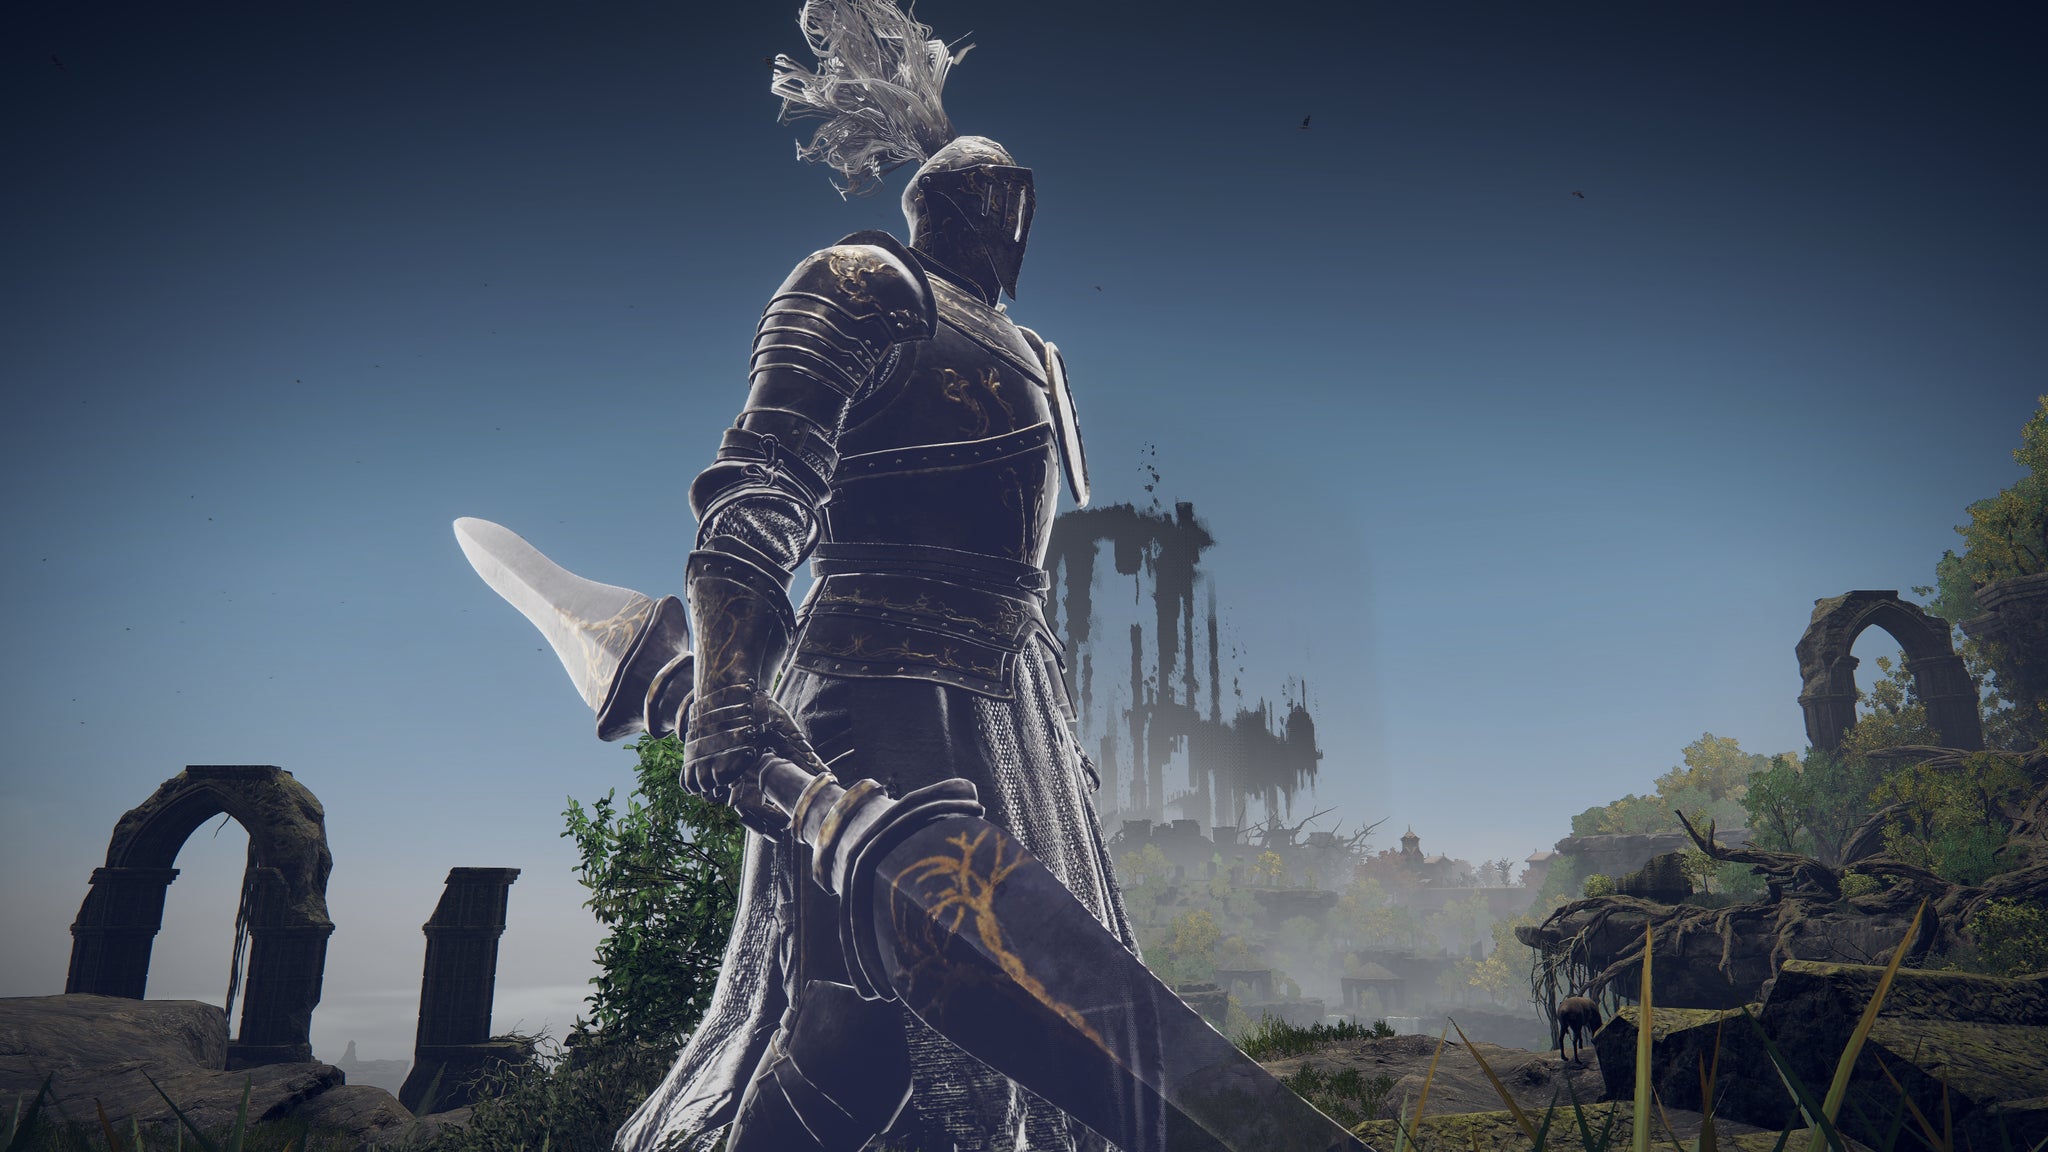
Black Knight Captain Huw Spirit Ash | FP Cost: 105 |Image credit:Rock Paper Shotgun/Bandai Namco
The Black Knight Captain Huw Spirit Ash is another very tanky summon on this list, wielding a twinblade. He also has the ability to cast the Crucible Wings, allowing him to fly around any enemy attacks.
How to get Black Knight Captain Huw Spirit Ashes
The Black Knight Captain Huw Spirit Ashes are found in the Scorpion River Catacombs, which can be reached by following the path north of Moorth Ruins in the small lake.
Continue on this path until you reach Rauh Base. From here, head west past the two golems then head north for a bit, then turn west where you’ll see some flying scorpion enemies.
Beyond them you’ll find the Scorpion River Catacombs. Once inside, you’ll have to maneuver through the room with two spike traps to reach an altar guarded by a Black Knight. The ash is behind him.
Inquisitor Spirit Ashes
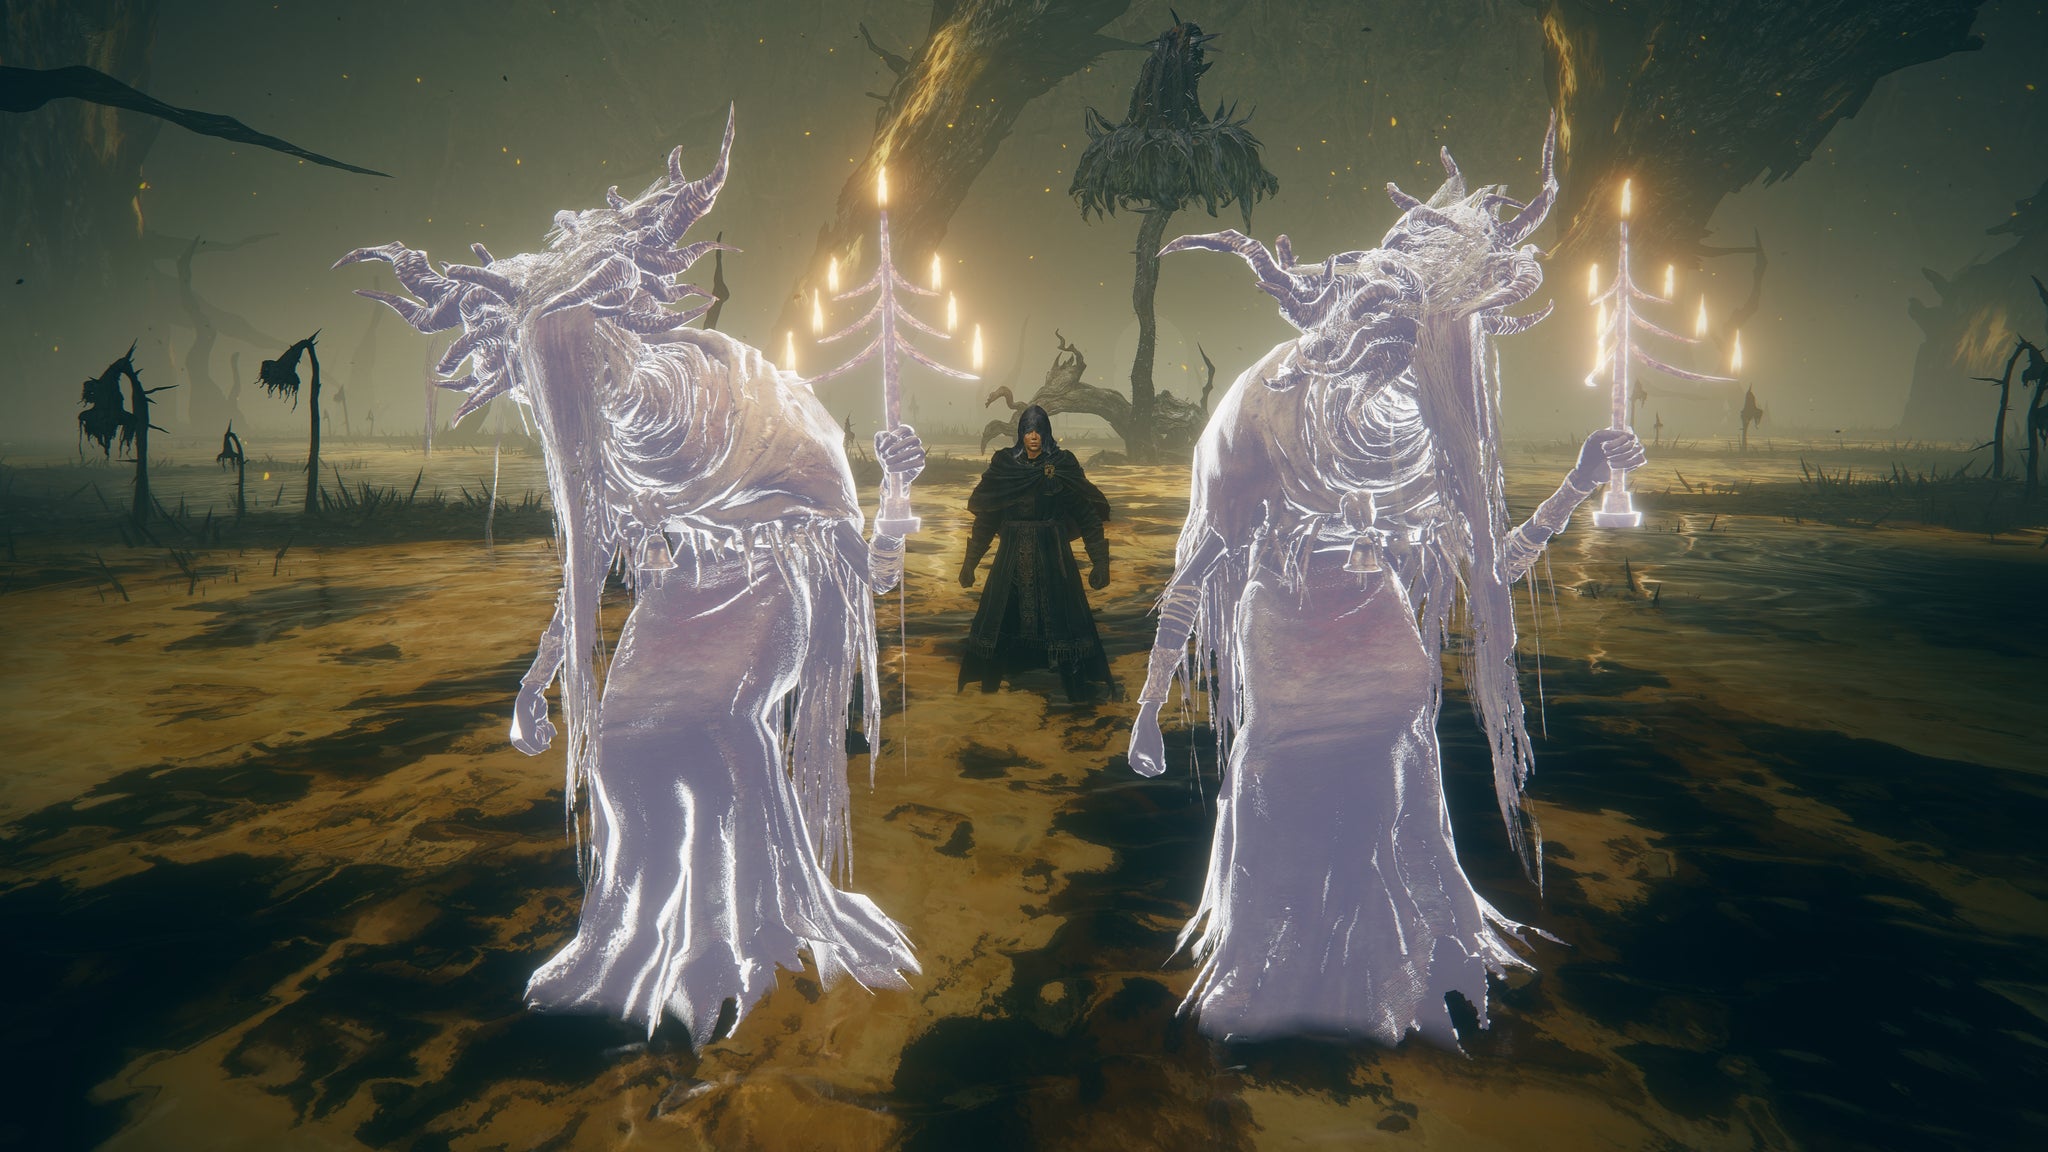
Inquisitor Spirit Ash | FP Cost: 67 |Image credit:Rock Paper Shotgun/Bandai Namco
The Inquisitor Ashes summon two Inquisitors that each hold candlesticks with different abilities. One of the Inquisitors can heal while the other can boost her attack power. While they’re not like the more tanky or aggressive summons on this list, they can be used as enemy distractions much like the Man-Fly Ashes.
How to get Inquisitor Spirit Ashes
This Spirit Ash is found in Enir-Ilim. It can be found just before the Spiral Rise Site of Grace beneath the second to last enemy casting spells from the top of the staircase.
From where that enemy was, if you’re coming up the stairs, turn right to find another set of stairs you can head down. You’ll find it in a room on a corpse.
Horned Warrior Spirit Ashes
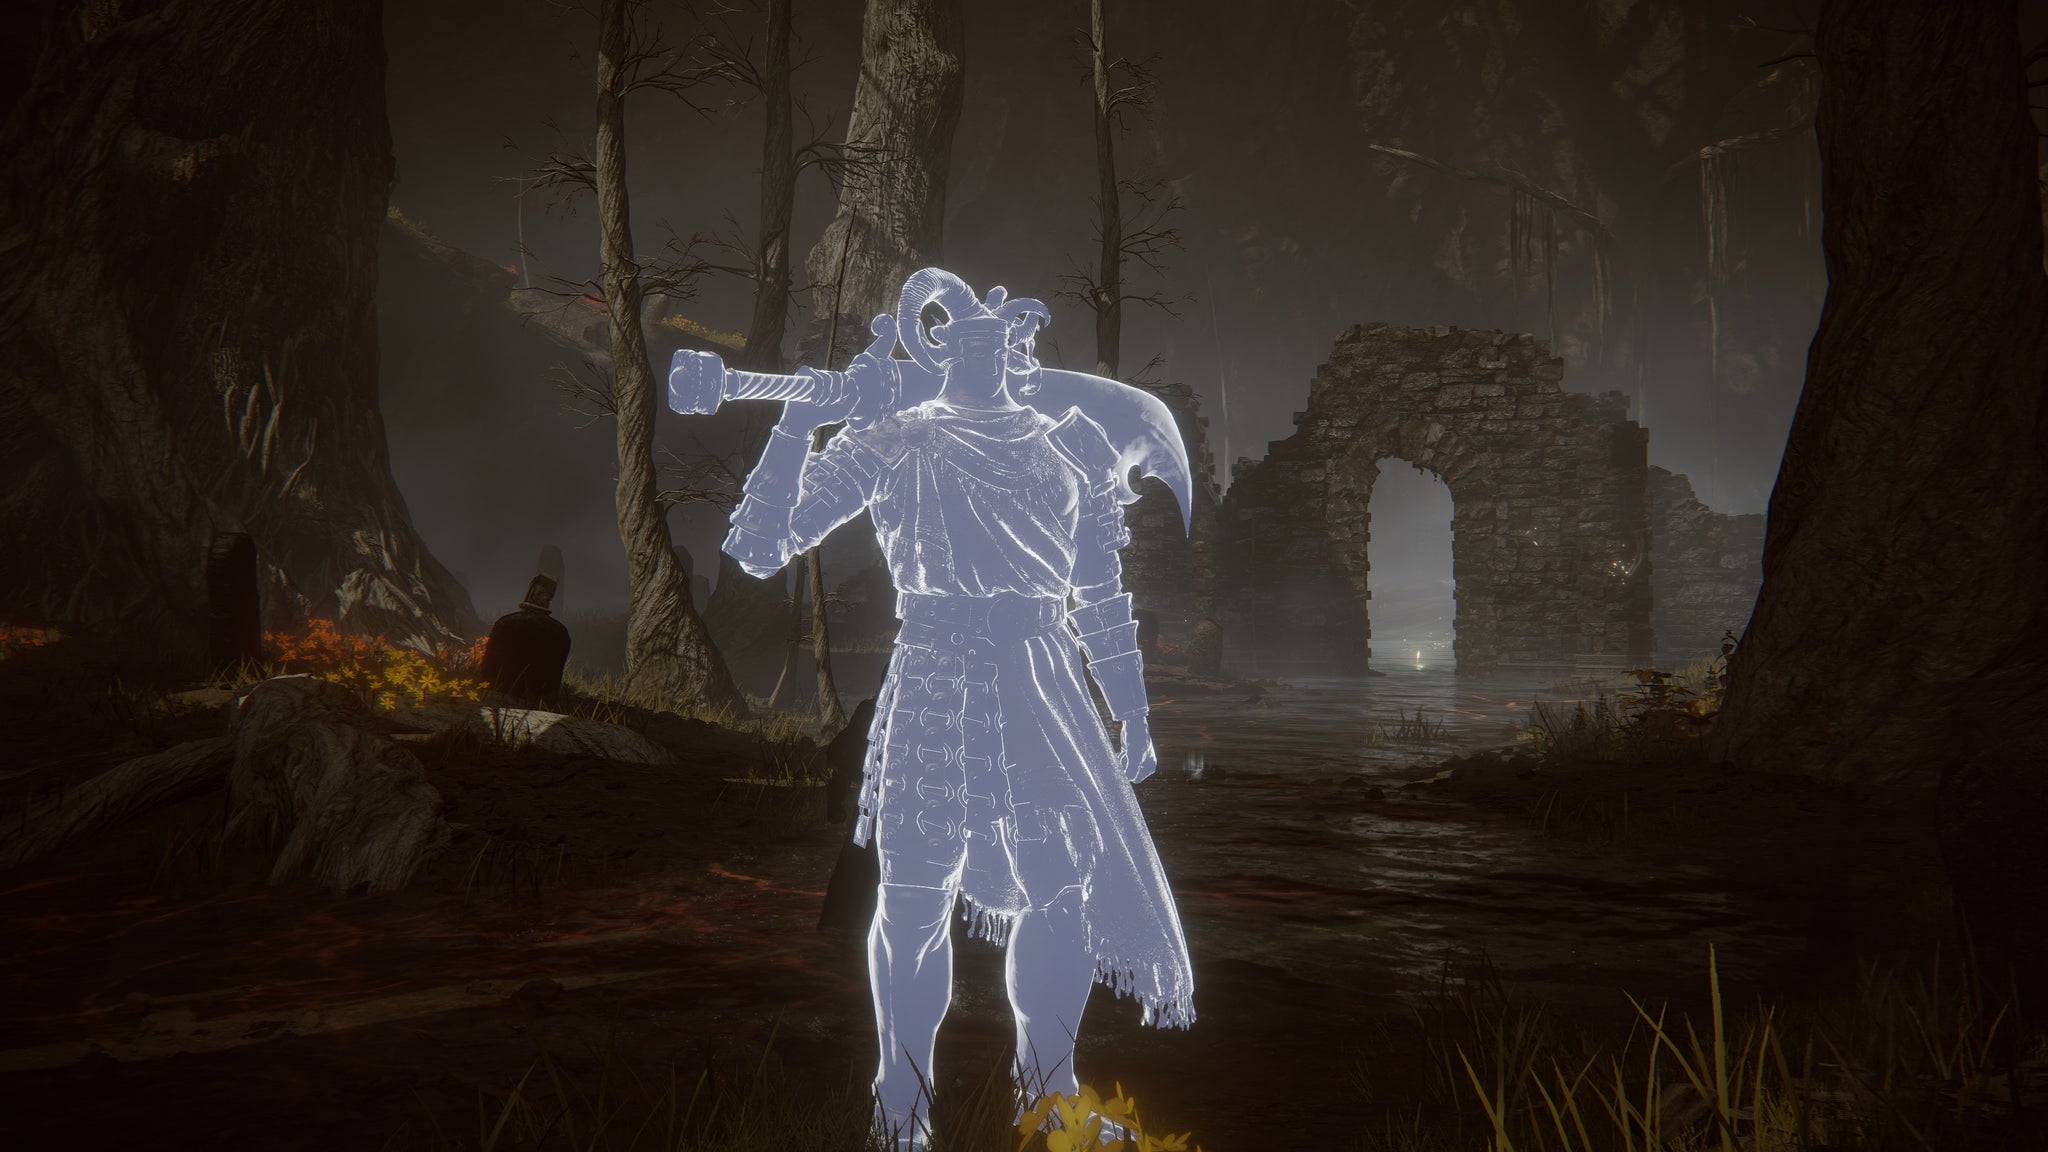
Horned Warrior Spirit Ash | FP Cost: 101 |Image credit:Rock Paper Shotgun/Bandai Namco
The Horned Warrior Ash is a strong fighter wielding a giant curved greatsword. On top of dealing some heavy attacks, it can also cast a special attack when it smacks the ground, causing horns to pierce up through it.
How to get Horned Warrior Spirit Ashes
The Horned Warrior Spirit Ashes can be found in Enir-Ilim. From the Spiral Rise Site of Grace, climb the stairs all the way up to the rooftops.
Follow them around to the right, past the bird enemies, until you reach another staircase. Jump off to the right to the staircase below and into the room. There will be three corpses with items and one will have the Spirit Ash.
Spider Scorpion Spirit Ashes
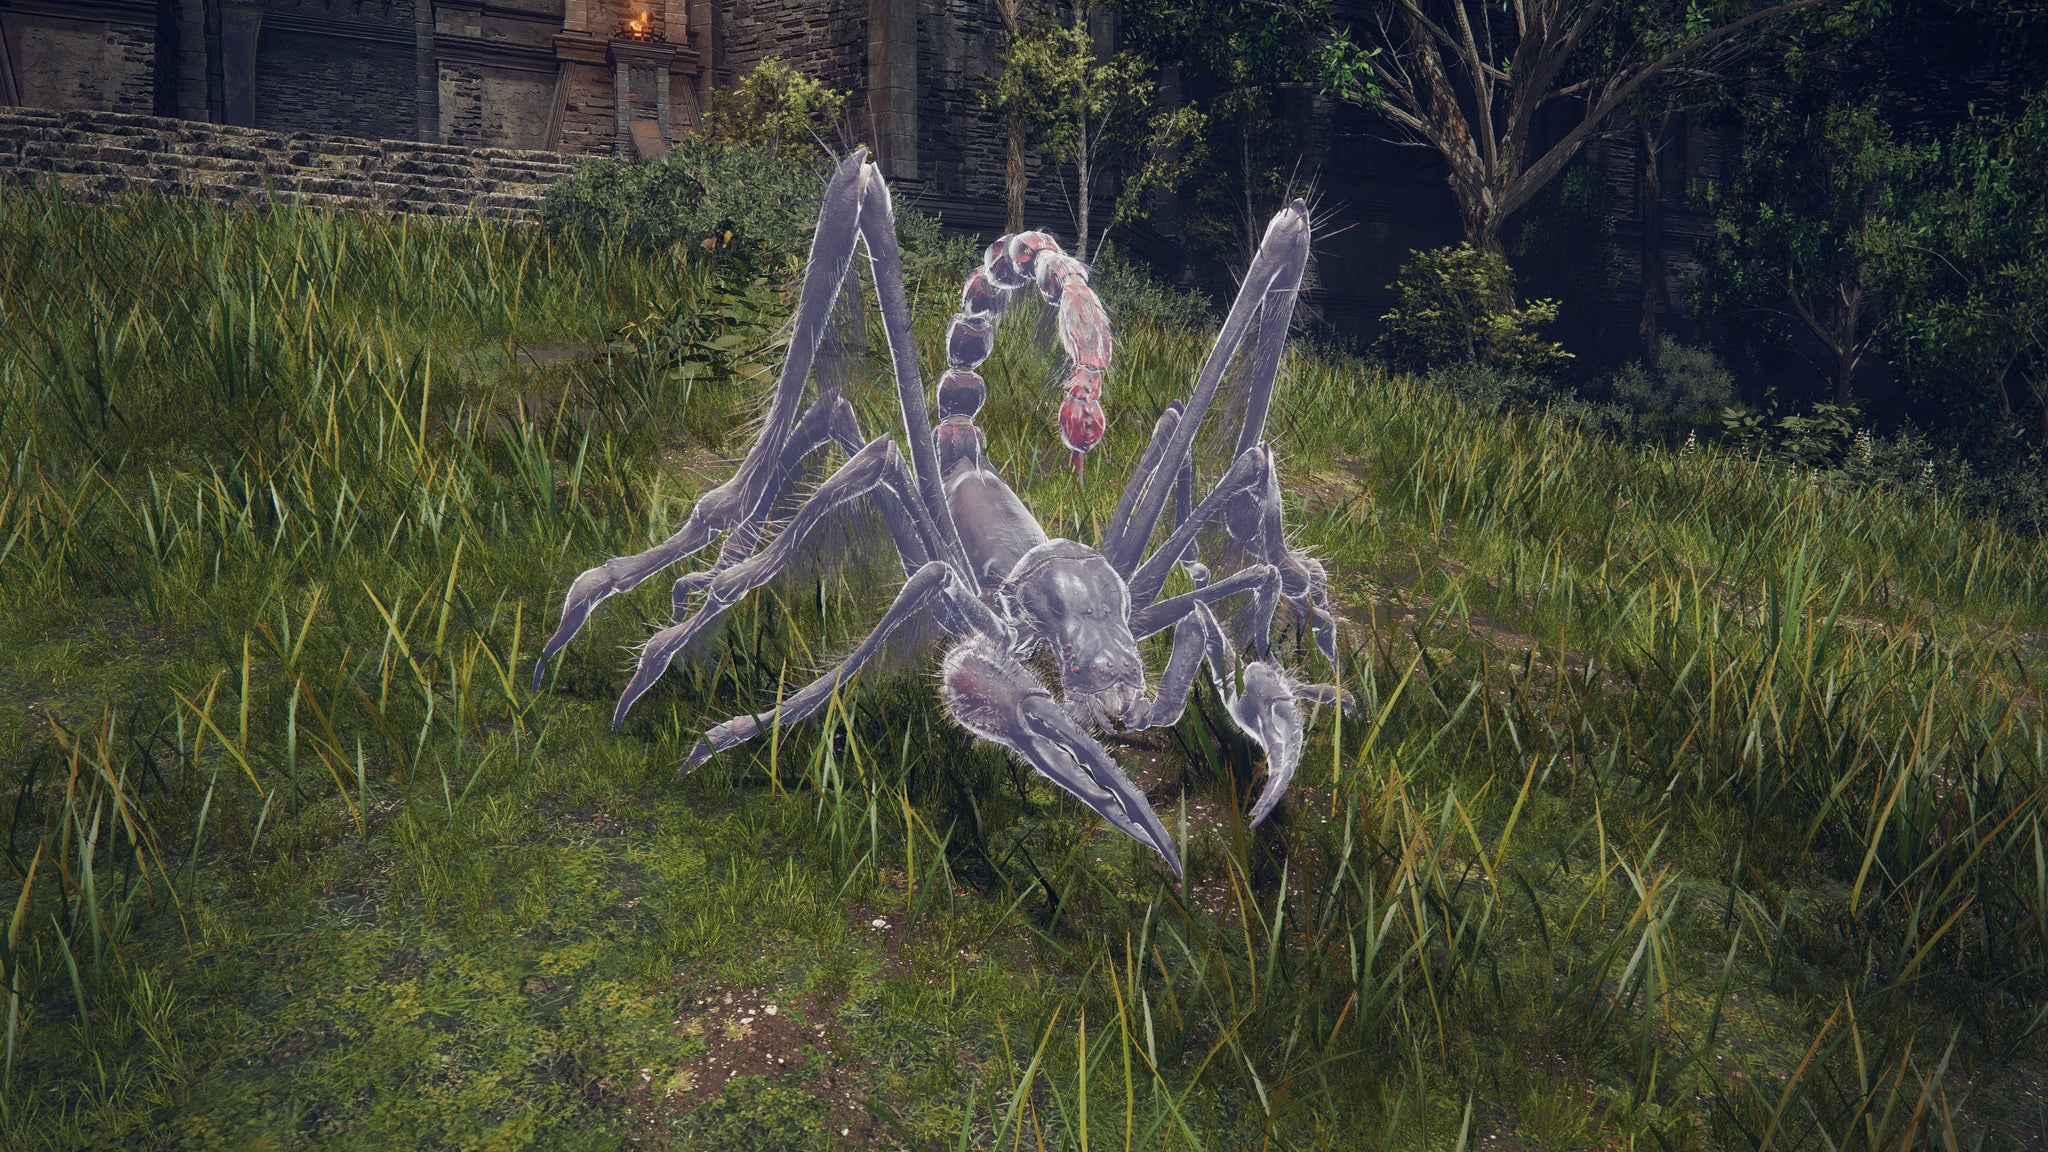
Spider Scorpion Spirit Ash | FP Cost: 31 |Image credit:Rock Paper Shotgun/Bandai Namco
The Spider Scorpion Ashes summon a Spider Scorpion that uses its poisonous tail and pincers to attack enemies. Unfortunately, it doesn’t do a lot of damage and takes quite a bit on its own, so it’s better used as a distraction rather than a fighter.
How to get Spider Scorpion Spirit Ashes
The Spider Scorpion Spirit Ashes can be found in the Ancient Ruins of Rauh. From the Viaduct Minor Tower Site of Grace, head right to make your way into the ruins.
Once inside, follow the path on the right to reach the double doors, then open them. Head down and go left, following the path down some more stairs.
In this next room, head southeast to reach a small square hole in the wall. Head through, and move straight ahead into the next area, then take a left between the two pillars. Take a left again and then follow this path around to the right into a room with a hanging spider scorpion. The Spirit Ash is beneath it.
Taylew the Golem Smith Spirit Ashes
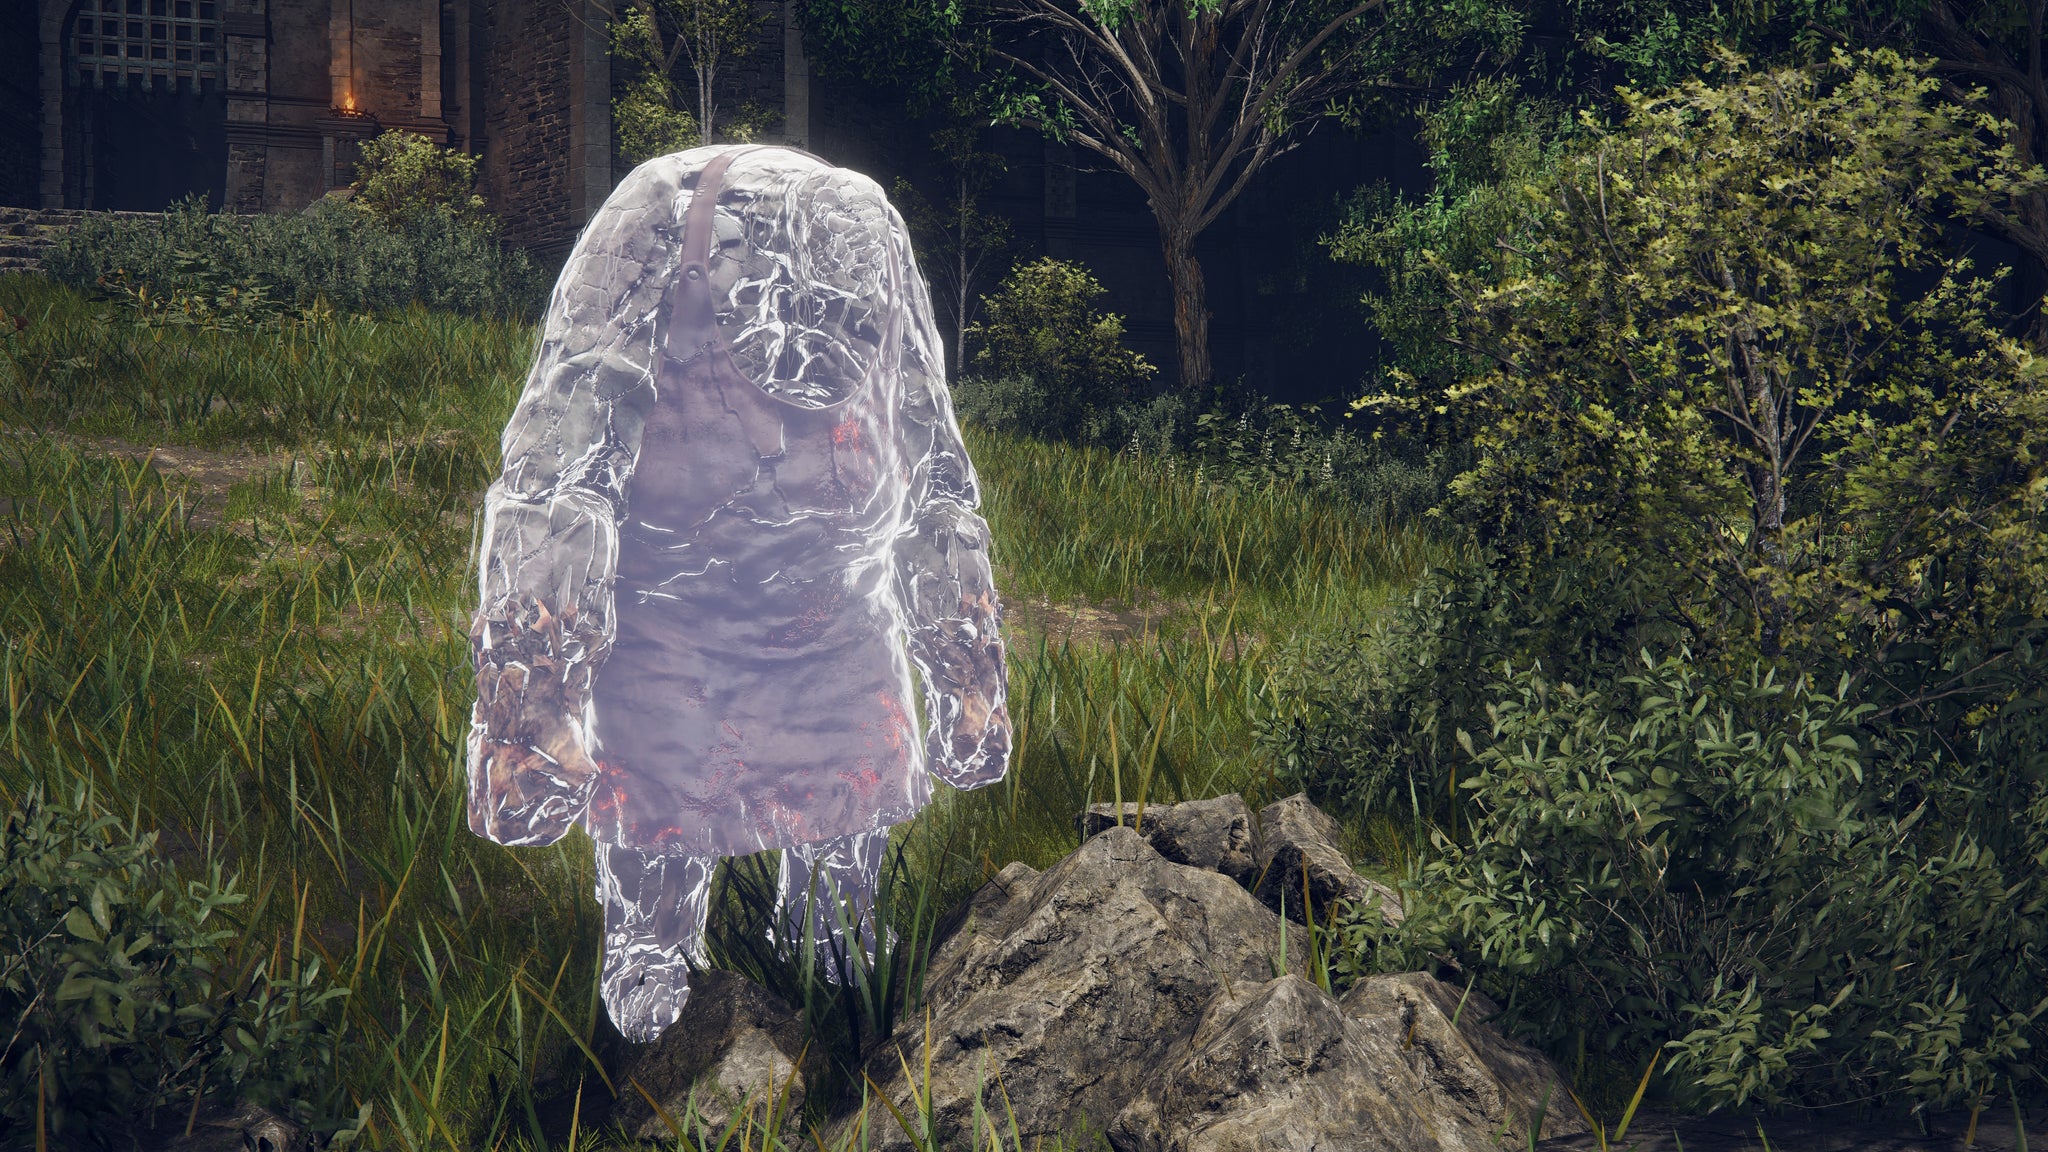
Taylew The Golem Smith Spirit Ash | FP Cost: 138 |Image credit:Rock Paper Shotgun/Bandai Namco
Taylew The Golem Smith’s Spirit Ash is very tanky. He has some heavy melee attacks when he smacks enemies, but he can also fire off his own fists as projectiles. He’s an excellent choice for both standard enemies and boss fights.
How to get Taylew the Golem Smith Spirit Ashes
You’ll get Taylew the Golem Smith’s Spirit Ashes after interacting with the furnace in Taylew’s Ruined Forge.
Fire Knight Hilde Spirit Ashes
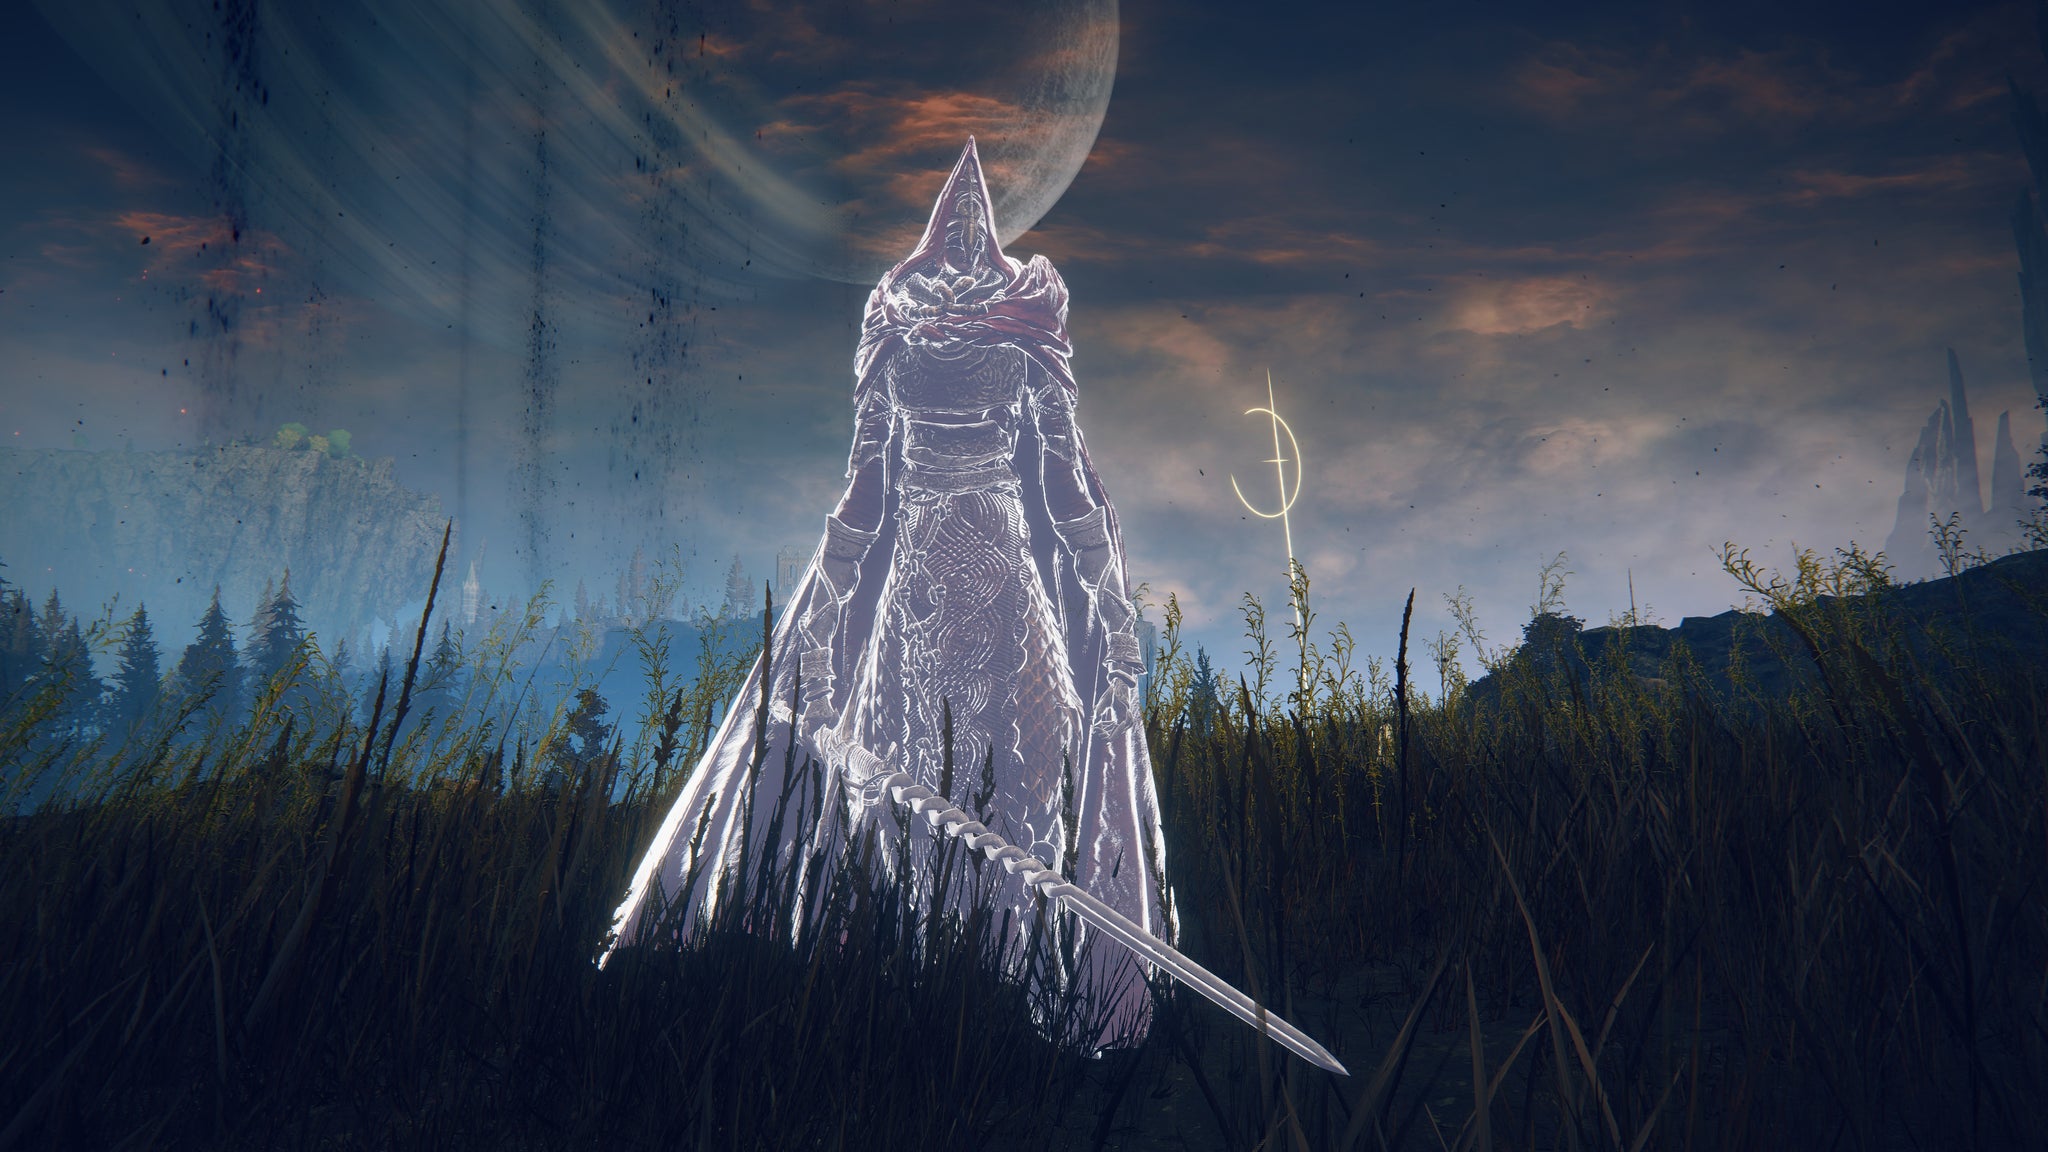
Fire Knight Hilde Spirit Ash | FP Cost: 116 |Image credit:Rock Paper Shotgun/Bandai Namco
Fire Knight Hilde’s Spirit Ash wields a greatsword and can cast fire incantations. It’s a nice pairing for dealing damage, but Fire Knight Hilde is also a good pick if you’re looking for a summon to help you stagger enemies in battle.
How to get Fire Knight Hilde Spirit Ashes
Fire Knight Hilde’s Spirit Ashes can be looted from Shadow Keep. From the Storehouse, Loft Site of Grace, take the lift up and follow the beams at the top around to a ladder. Climb up and keep following the beams around to the right, then jump down onto a large gear.
From here, leap to the next set of beams and move right to reach another ladder. At the top, turn right and right again, then left to reach another lift.
Instead of going inside, though, just hit the button so it goes down and wait for the lift next to it to come up. Hit that button as well, then come out and jump on the roof of the first lift to reach the ash.
Fire Knight Queelign Spirit Ashes
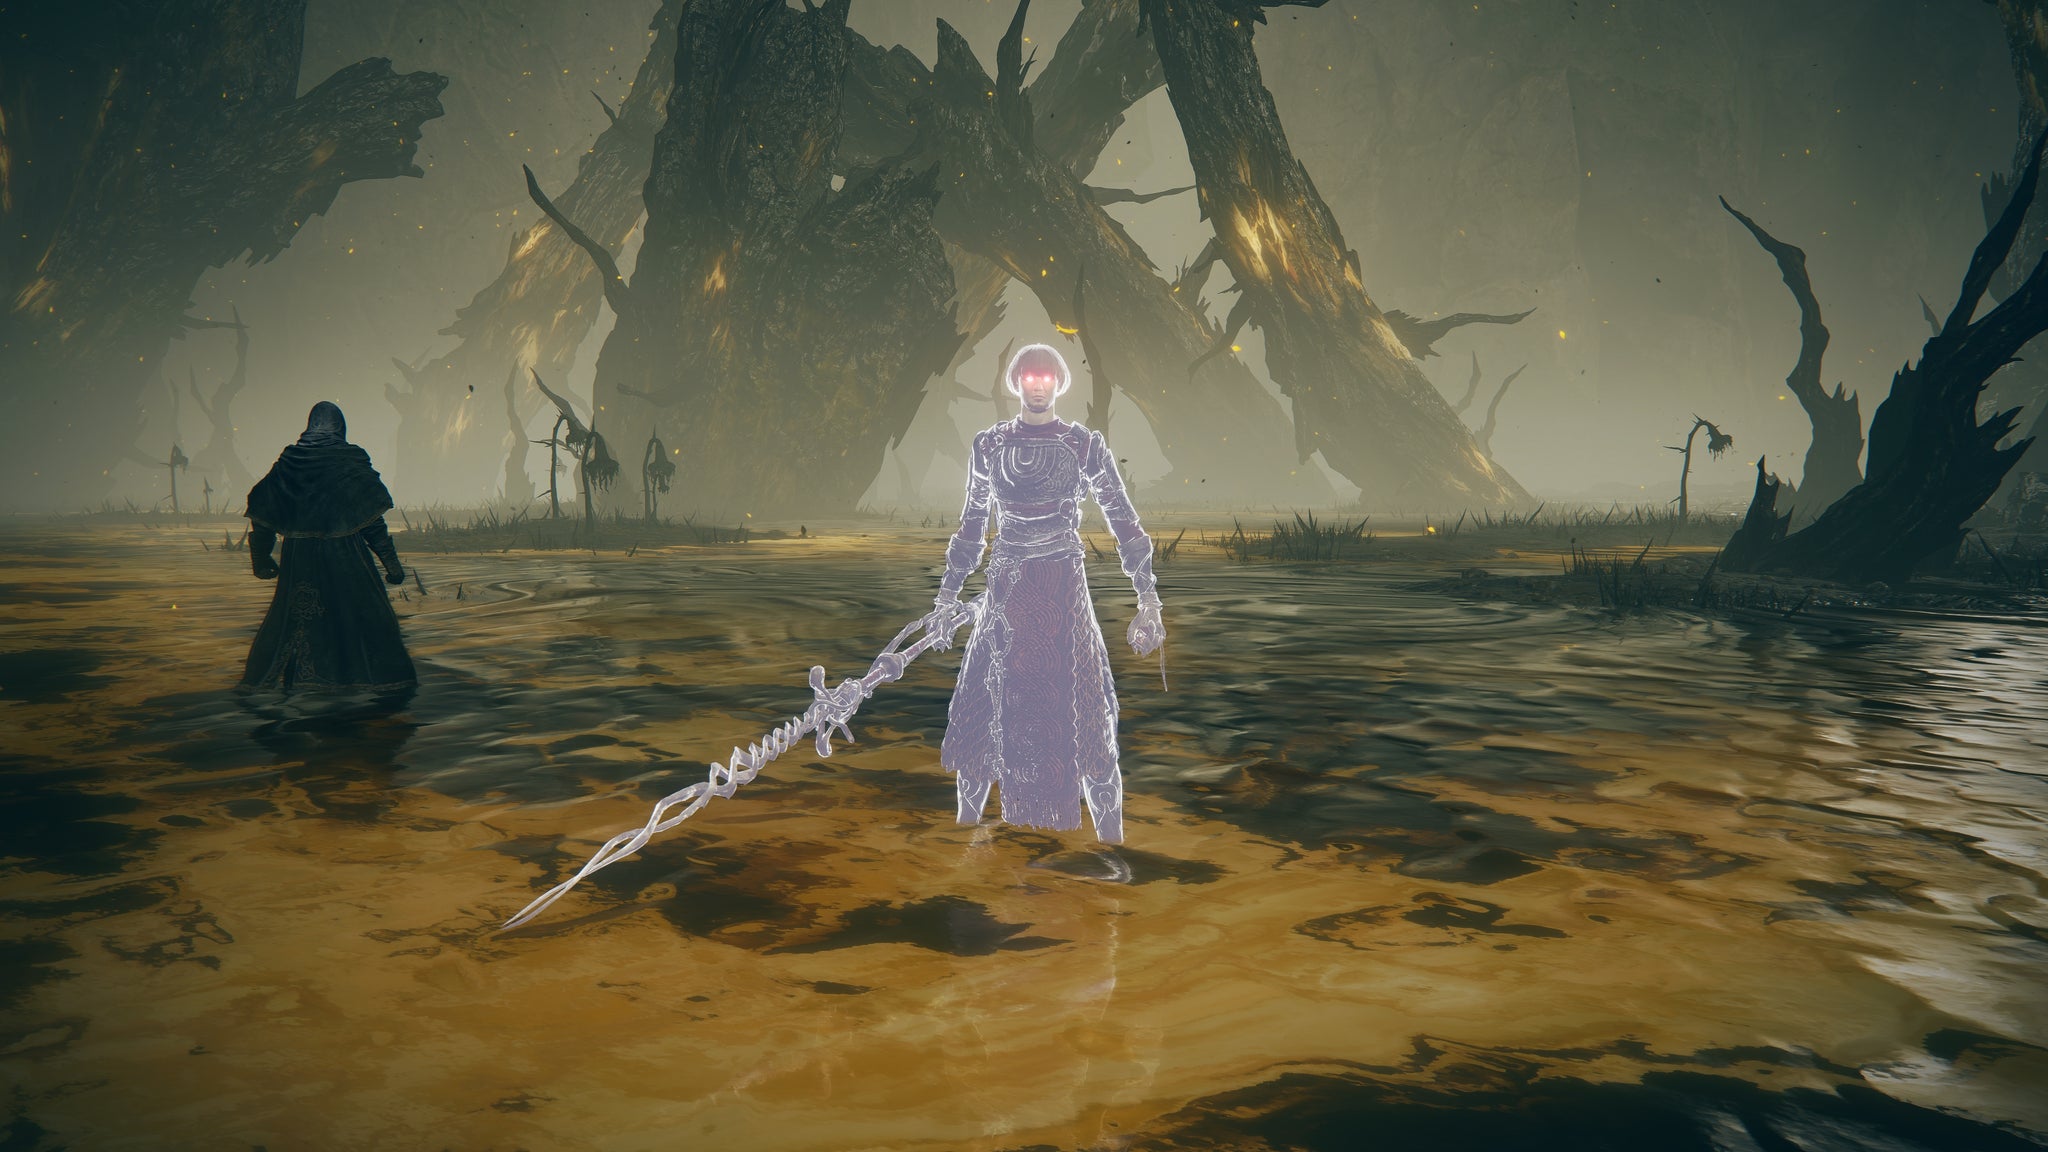
Fire Knight Queelign Spirit Ash | FP Cost: 123 |Image credit:Rock Paper Shotgun/Bandai Namco
Fire Knight Queelign ’s Spirit Ash is aggressive, attacking enemies in sight the moment he’s summoned. He wields a spear-like greatsword and performs fire spells in battle as well. Unlike the tankier enemies on this list, though, he can’t take the brunt of the damage but is still a good pick for fighting alongside you.
How to get Fire Knight Queelign Spirit Ashes
The Fire Knight Queelign Spirit Ashes can be obtained at the end of Fire Knight Queelign’s questline. From the Church District Entrance Site of Grace, follow the rooftops ahead of you until you reach a Fire Knight. From where they were, take a left to continue onto another rooftop, then left again onto a beam.
Follow this up to another rooftop with a hole in it. Drop in and onto the beams below. Move over to a crumbled floor with a hole in the middle and take a left, then drop down to the floor ahead to reach the door on the left.
You’ll need the Prayer Room Key to open it. Once you do, you’ll find Fire Knight Queelign curled up on the floor. Interact with him and give him the Iris of Grace to get his ash.
Fingercreeper Spirit Ashes
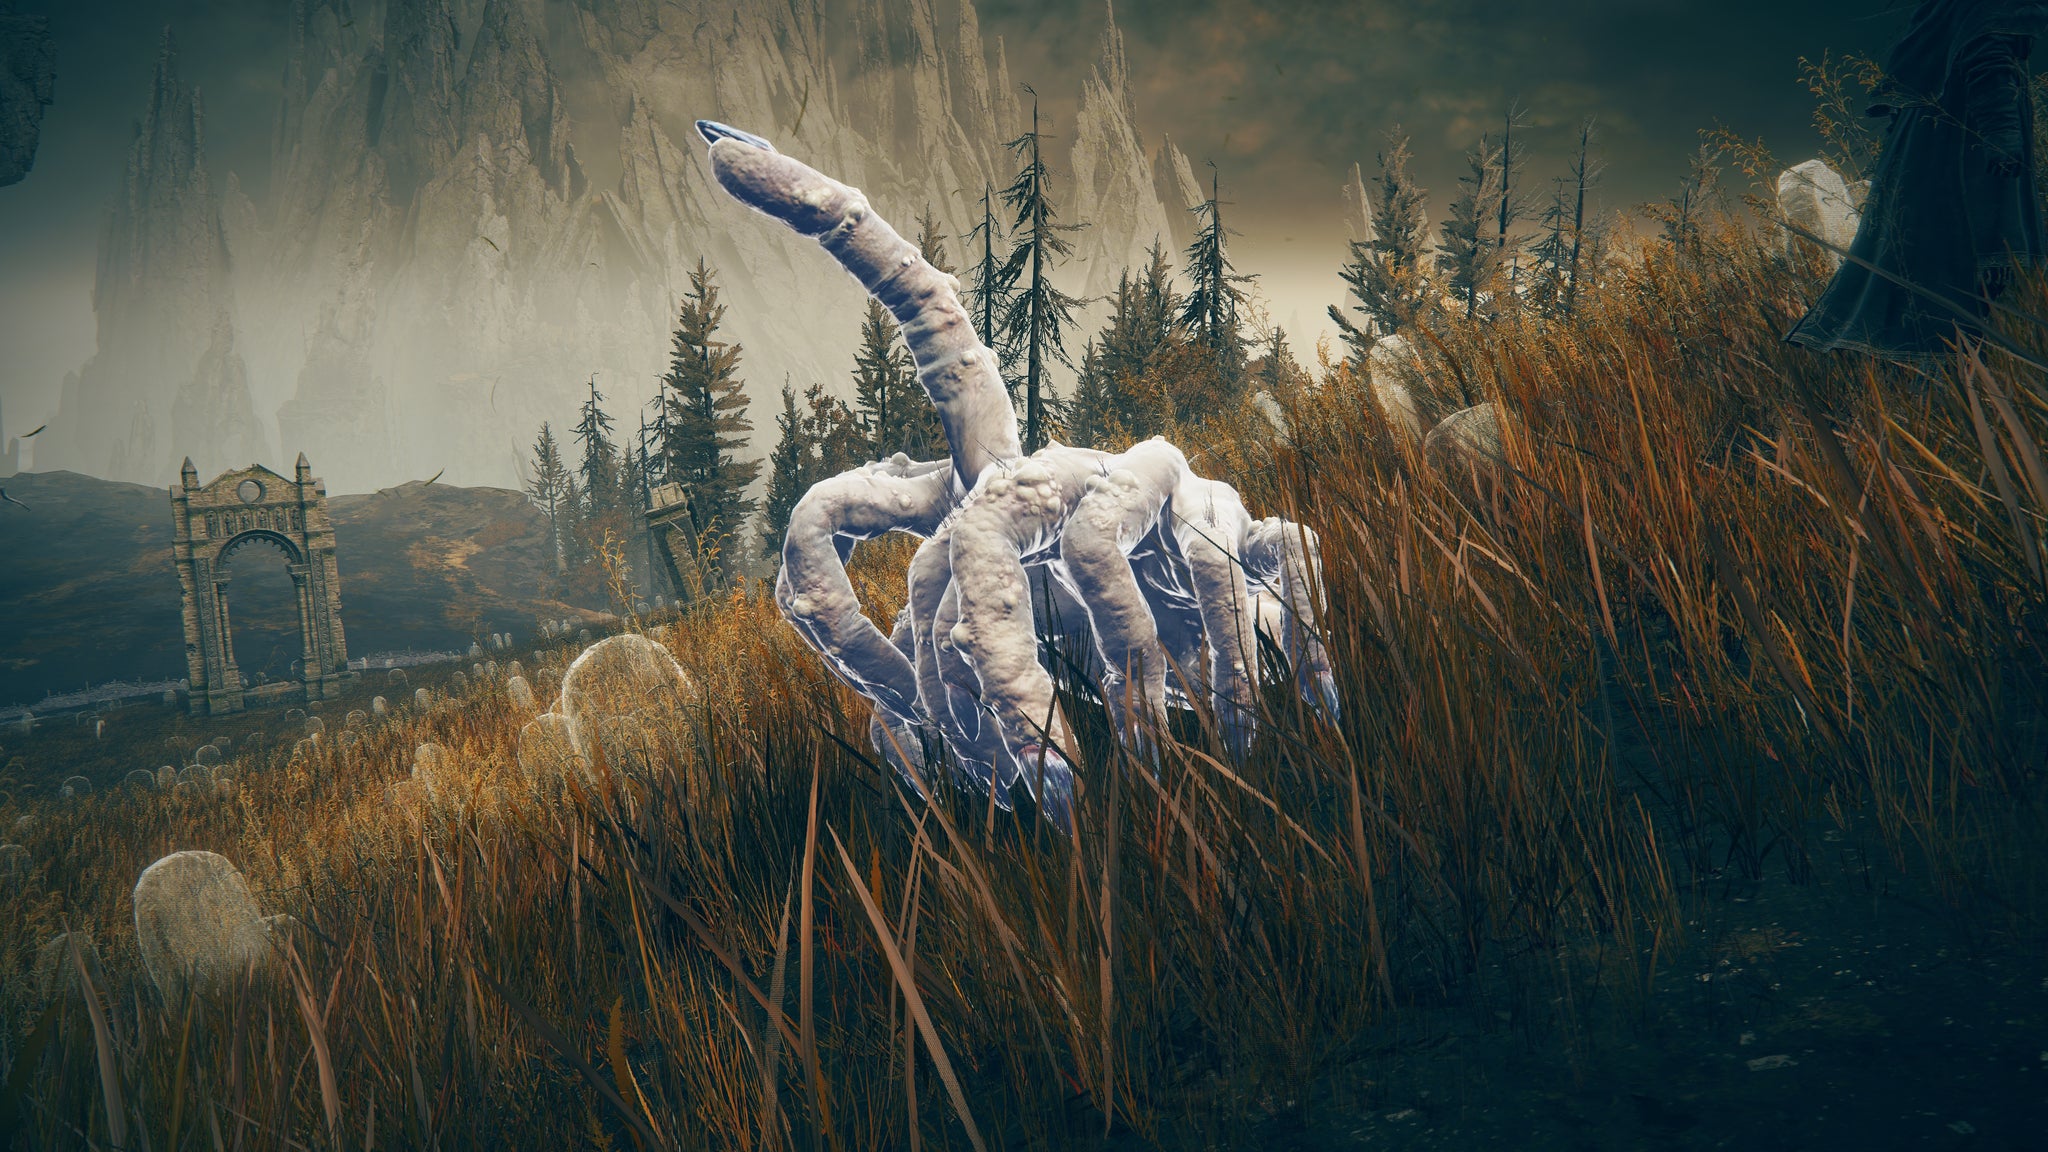
Fingercreeper Spirit Ash | FP Cost: 55 |Image credit:Rock Paper Shotgun/Bandai Namco
The Fingercreeper Ashes have a healing AOE ability, but unfortunately, they’re not built to last long in combat. They have some minor melee attacks that they’ll perform, but are mainly just there as support. If you’re looking for a summon that can give you a bit of extra healing in a fight, the Fingercreeper Ashes can assist.
How to get Fingercreeper Spirit Ashes
The Fingercreeper Spirit Ashes can be found in the Finger Ruins of Dheo. East of the Fingerstone Hill Site of Grace, you’ll find a hole in the ground surrounded by smaller Fingercreeper enemies. Drop in and you’ll find the ashes, but beware of the massive Fingercreeper enemy that drops from the ceiling.
Jolán and Anna Spirit Ashes
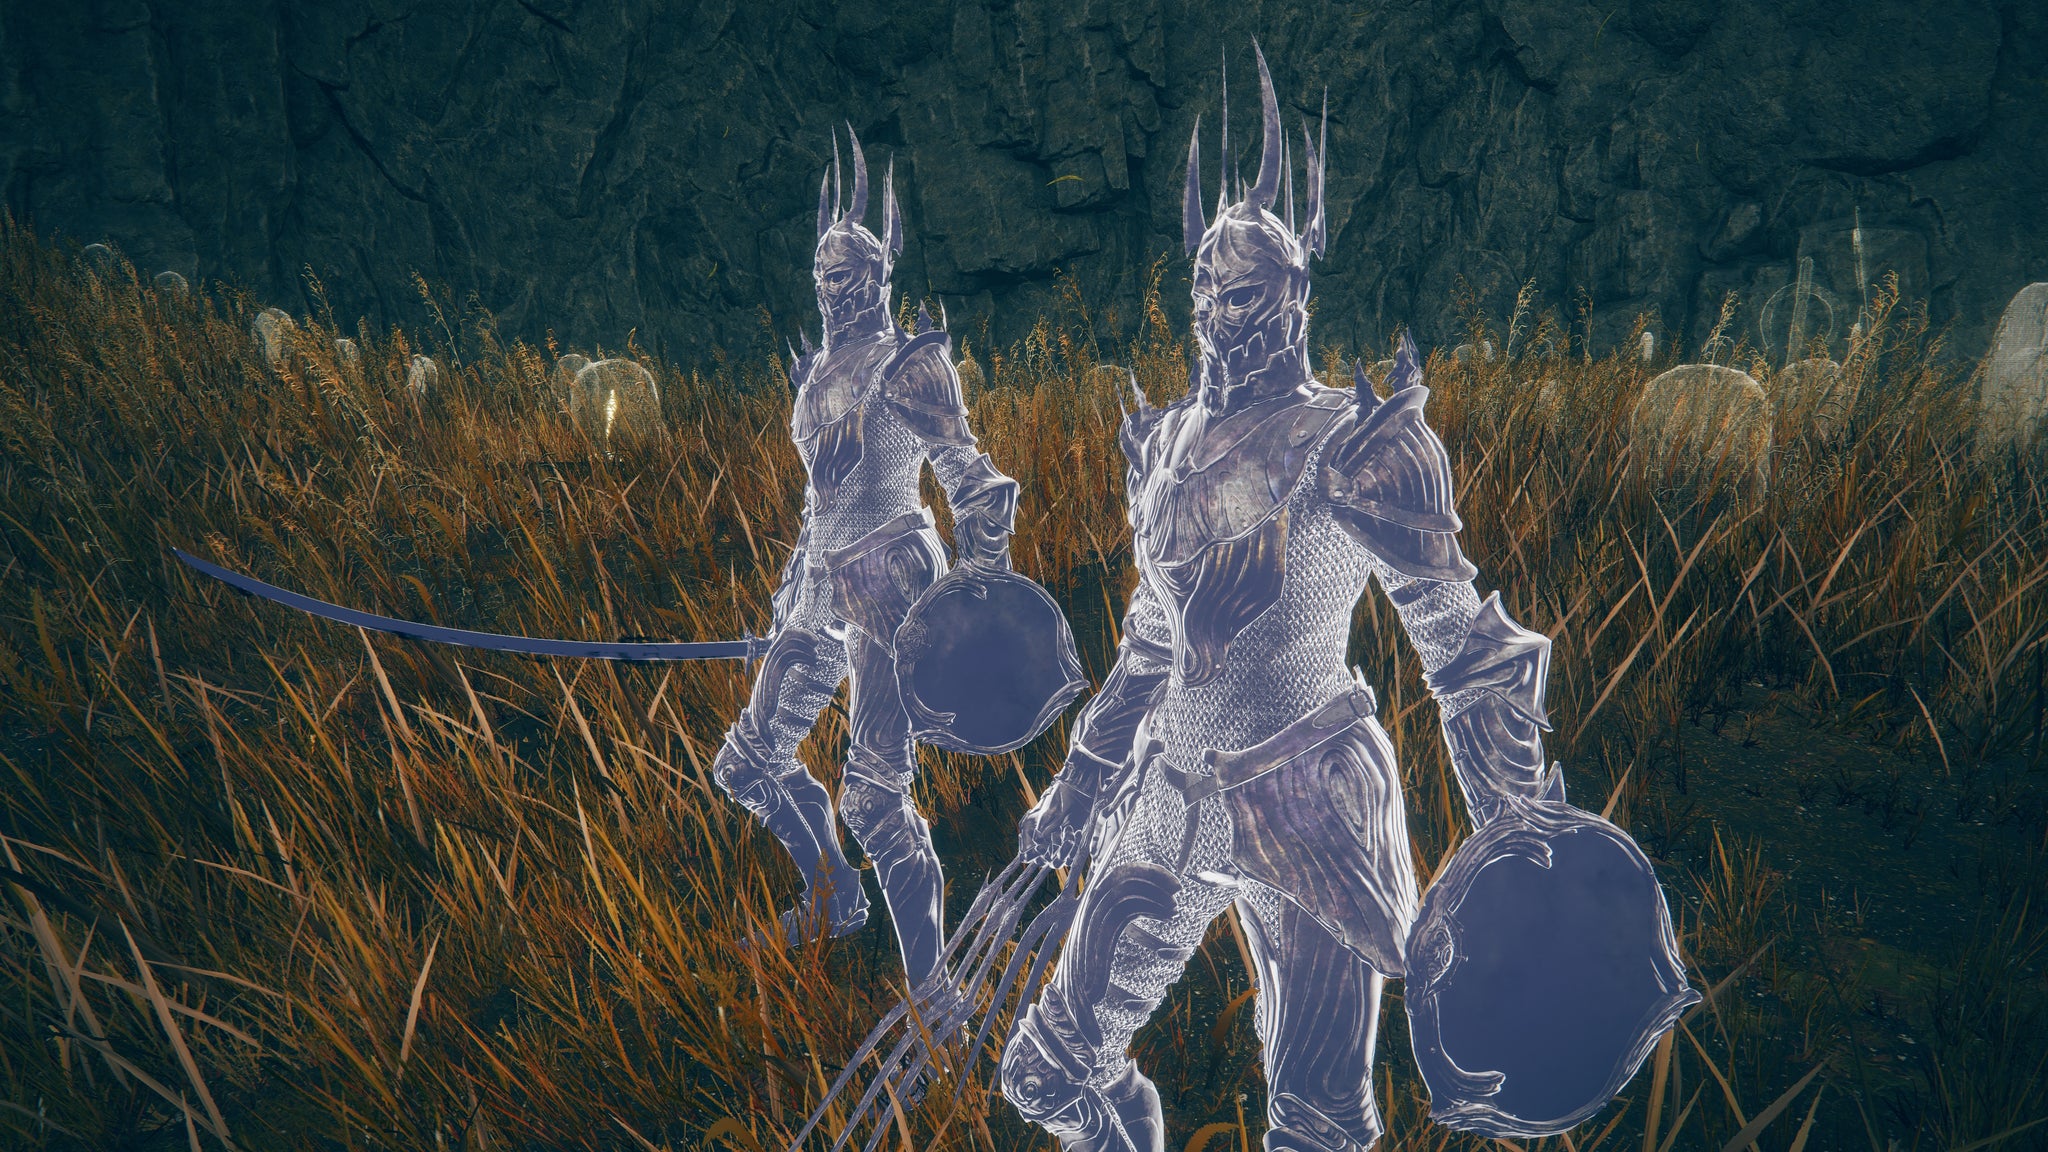
Jolán And Anna Spirit Ash | FP Cost: 144 |Image credit:Rock Paper Shotgun/Bandai Namco
The Jolán And Anna Spirit Ash is what you get when you merge together the Swordhand of Night Jolán Spirit Ash with Anna’s puppet. Together, they’re an incredible duo, complete with Jolán’s katana and Anna’s claws. They’re aggressive in battle and both deal bleed damage, making them an excellent pairing with a bleed build.
How to get Jolán and Anna Spirit Ashes
You can only get this ash if you have the Swordhand of Night Jolán Spirit Ash. With it, make your way to Shaman Village in the Hinterland and take a path at the back down the cliff to reach the secret top part of Rabbath’s Rise.
There, you’ll find Anna’s puppet. Interact with it - with the Swordhand of Night Jolán Spirit Ash equipped - and you’ll get a prompt asking if you want to combine the two. Say yes, and you’ll have the Jolán and Anna Spirit Ash.
Ancient Dragon Florissax Spirit Ashes
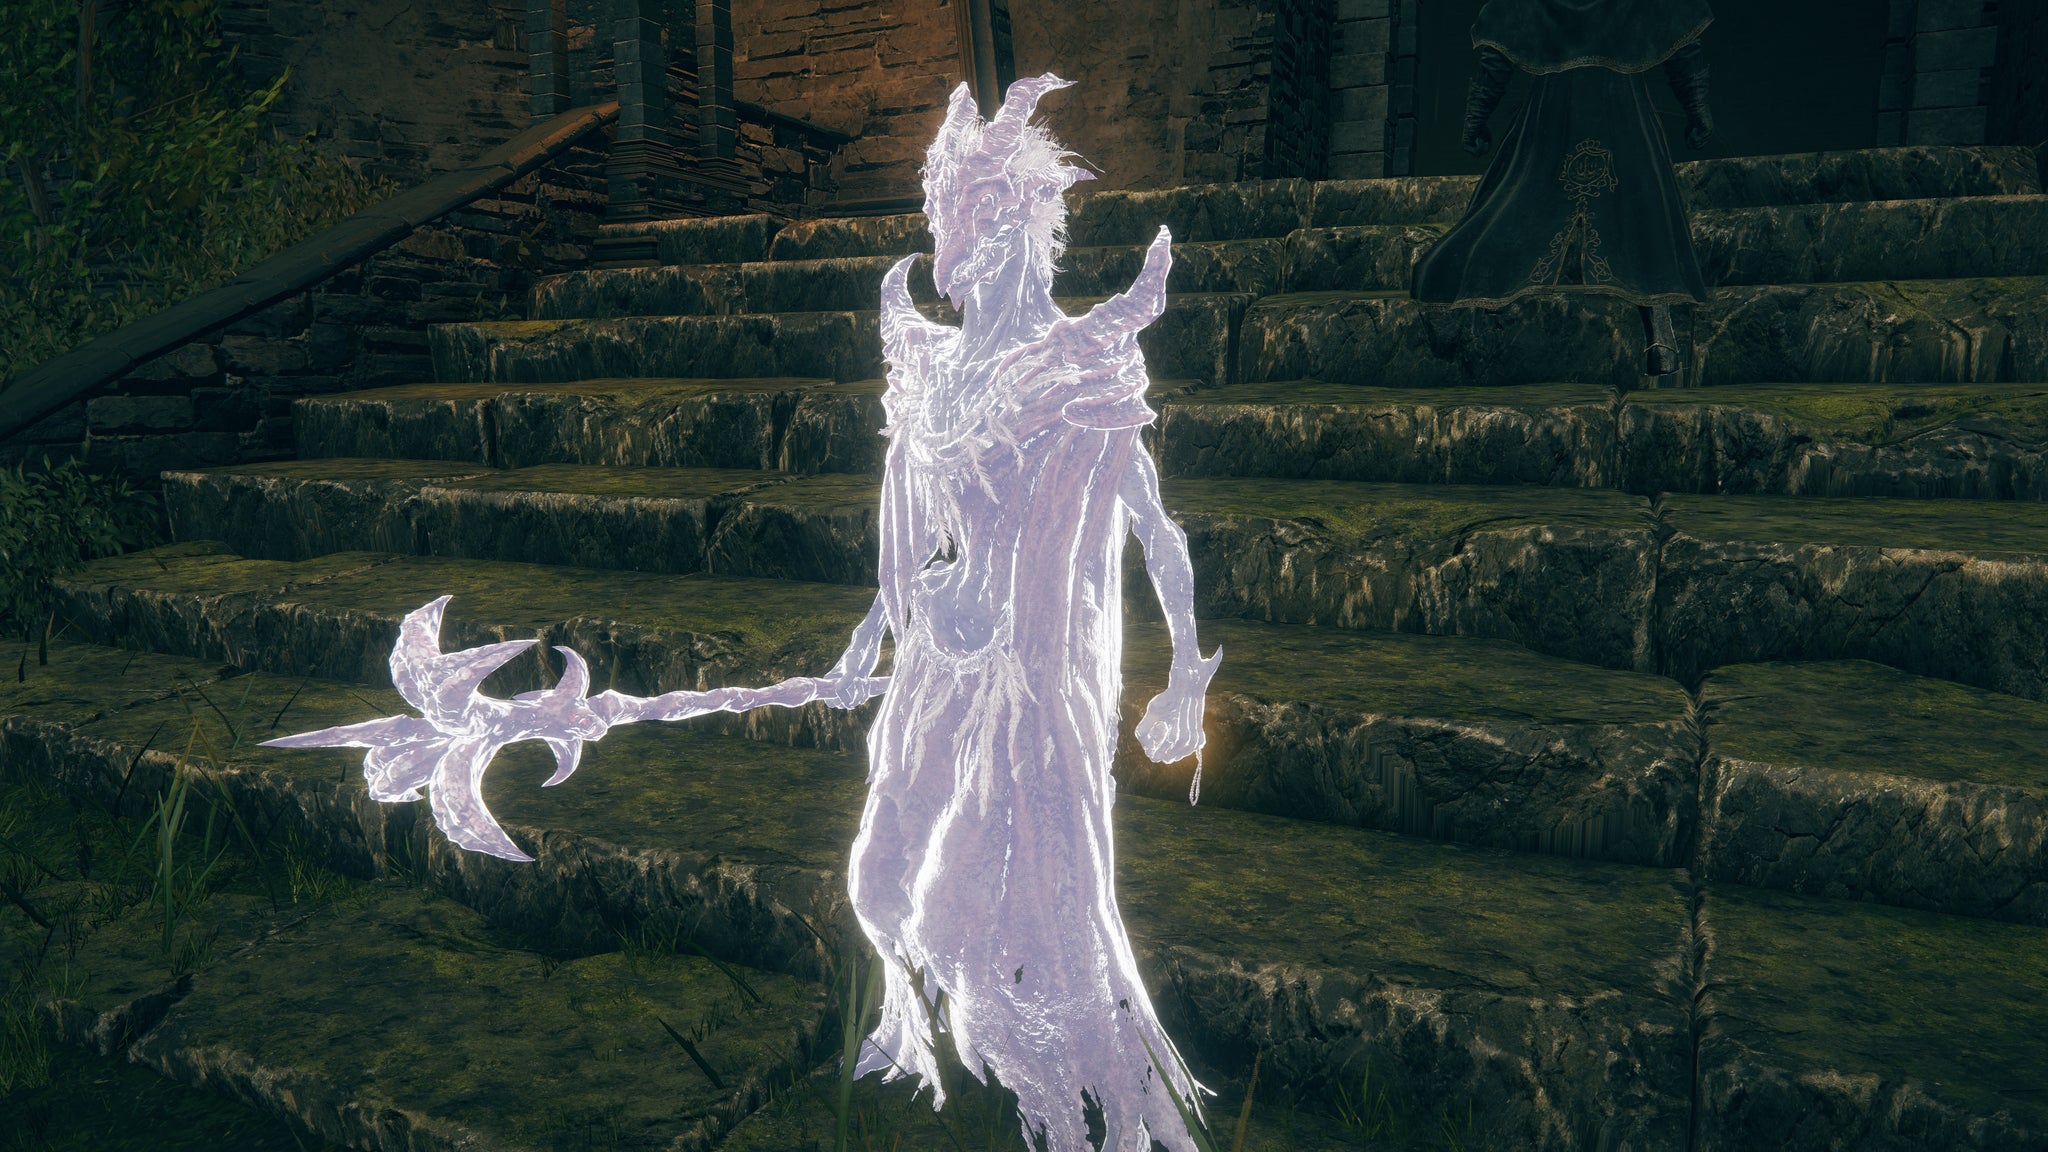
Ancient Dragon Florissax Spirit Ash | FP Cost: 90 |Image credit:Rock Paper Shotgun/Bandai Namco
Ancient Dragon Florissax’s Spirit Ash wields the Flowerstone Gavel to deal damage and she has a spell she uses that increases all damage negation for both you and her. She’s a helpful summon to have around in encounters with both smaller enemies and bosses, just make sure to back her up in battle as her health can get down quite easily.
How to get Ancient Dragon Florissax Spirit Ashes
In order to get this Spirit Ash, you’ll need to have advanced Thiollier’s questline to the point of him giving you his Concoction and have begun both the Dragon Communion Priestess’ and Igon’s questlines.
Before fighting Bayle, give Thiollier’s Concoction to the Priestess at night time. Do that and she’ll collapse to the ground. Rest at a Site of Grace (you may have to do this a few times) and then visit her again when she’s standing up. Exhaust her dialogue and she’ll explain that she wants to be left alone.
At this point, go finish out Igon’s questline so that you can summon him for help in the boss fight against Bayle. Return to the Priestess afterward and once again exhaust her dialogue. Confess to putting her to sleep, then continue talking with her and she’ll ask you to be her Lord. When the option appears, take her with you and she’ll transform into the Spirit Ash.
Hopefully, with this list, you’ll be able to find your next favorite Spirit Ash summon to bring into battle. Curious what other bosses await you in the Realm of Shadow? Check out our guide on Elden Ring’s Shadow Of The Erdtree boss locations . We also have guides on the best weapons in Elden Ring , best builds in Elden Ring , and so much more, so you can feel as prepared as possible to take on the DLC.


Elden Ring
PS4 , PS5 , Xbox One , Xbox Series X/S , PC
Rock Paper Shotgun is better when you sign in
Sign in and join us on our journey to discover strange and compelling PC games.

All 75 Arc Raiders Blueprints and where to get them
These areas have the highest chance of giving you Blueprints

Image credit:Rock Paper Shotgun/Embark Studios

Looking for more Arc Raiders Blueprints? It’s a special day when you find a Blueprint, as they’re among the most valuable items in Arc Raiders. If you find a Blueprint that you haven’t already found, then you must make sure you hold onto it at all costs, because Blueprints are the key to one of the most important and powerful systems of meta-progression in the game.
This guide aims to be the very best guide on Blueprints you can find, starting with a primer on what exactly they are and how they work in Arc Raiders, before delving into exactly where to get Blueprints and the very best farming spots for you to take in your search.
We’ll also go over how to get Blueprints from other unlikely activities, such as destroying Surveyors and completing specific quests. And you’ll also find the full list of all 75 Blueprints in Arc Raiders on this page (including the newest Blueprints added with the Cold Snap update , such as the Deadline Blueprint and Firework Box Blueprint), giving you all the information you need to expand your own crafting repertoire.
In this guide:
- What are Blueprints in Arc Raiders?
- Full Blueprint list: All crafting recipes
- Where to find Blueprints in Arc Raiders Blueprints obtained from quests Blueprints obtained from Trials Best Blueprint farming locations

What are Blueprints in Arc Raiders?
Blueprints in Arc Raiders are special items which, if you manage to extract with them, you can expend to permanently unlock a new crafting recipe in your Workshop. If you manage to extract from a raid with an Anvil Blueprint, for example, you can unlock the ability to craft your very own Anvil Pistol, as many times as you like (as long as you have the crafting materials).
To use a Blueprint, simply open your Inventory while in the lobby, then right-click on the Blueprint and click “Learn And Consume” . This will permanently unlock the recipe for that item in your Workshop. As of the Stella Montis update, there are allegedly 75 different Blueprints to unlock - although only 68 are confirmed to be in the game so far. You can see all the Blueprints you’ve found and unlocked by going to the Workshop menu, and hitting “R” to bring up the Blueprint screen.
It’s possible to find duplicates of past Blueprints you’ve already unlocked. If you find these, then you can either sell them, or - if you like to play with friends - you can take it into a match and gift it to your friend so they can unlock that recipe for themselves. Another option is to keep hold of them until the time comes to donate them to the Expedition.
Full Blueprint list: All crafting recipes
Below is the full list of all the Blueprints that are currently available to find in Arc Raiders, and the crafting recipe required for each item:
| Blueprint | Type | Recipe | Crafted At |
|---|---|---|---|
| Bettina | Weapon | 3x Advanced Mechanical Components 3x Heavy Gun Parts 3x Canister | Gunsmith 3 |
| Blue Light Stick | Quick Use | 3x Chemicals | Utility Station 1 |
| Aphelion | Weapon | 3x Magnetic Accelerator 3x Complex Gun Parts 1x Matriarch Reactor | Gunsmith 3 |
| Combat Mk. 3 (Flanking) | Augment | 2x Advanced Electrical Components 3x Processor | Gear Bench 3 |
| Combat Mk. 3 (Aggressive) | Augment | 2x Advanced Electrical Components 3x Processor | Gear Bench 3 |
| Complex Gun Parts | Material | 2x Light Gun Parts 2x Medium Gun Parts 2x Heavy Gun Parts | Refiner 3 |
| Fireworks Box | Quick Use | 1x Explosive Compound 3x Pop Trigger | Explosives Station 2 |
| Gas Mine | Mine | 4x Chemicals 2x Rubber Parts | Explosives Station 1 |
| Green Light Stick | Quick Use | 3x Chemicals | Utility Station 1 |
| Pulse Mine | Mine | 1x Crude Explosives 1x Wires | Explosives Station 1 |
| Seeker Grenade | Grenade | 1x Crude Explosives 2x ARC Alloy | Explosives Station 1 |
| Looting Mk. 3 (Survivor) | Augment | 2x Advanced Electrical Components 3x Processor | Gear Bench 3 |
| Angled Grip II | Mod | 2x Mechanical Components 3x Duct Tape | Gunsmith 2 |
| Angled Grip III | Mod | 2x Mod Components 5x Duct Tape | Gunsmith 3 |
| Hullcracker | Weapon | 1x Magnetic Accelerator 3x Heavy Gun Parts 1x Exodus Modules | Gunsmith 3 |
| Launcher Ammo | Ammo | 5x Metal Parts 1x Crude Explosives | Workbench 1 |
| Anvil | Weapon | 5x Mechanical Components 5x Simple Gun Parts | Gunsmith 2 |
| Anvil Splitter | Mod | 2x Mod Components 3x Processor | Gunsmith 3 |
| ??? | ??? | ??? | ??? |
| Barricade Kit | Quick Use | 1x Mechanical Components | Utility Station 2 |
| Blaze Grenade | Grenade | 1x Explosive Compound 2x Oil | Explosives Station 3 |
| Bobcat | Weapon | 3x Advanced Mechanical Components 3x Light Gun Parts | Gunsmith 3 |
| Osprey | Weapon | 2x Advanced Mechanical Components 3x Medium Gun Parts 7x Wires | Gunsmith 3 |
| Burletta | Weapon | 3x Mechanical Components 3x Simple Gun Parts | Gunsmith 1 |
| Compensator II | Mod | 2x Mechanical Components 4x Wires | Gunsmith 2 |
| Compensator III | Mod | 2x Mod Components 8x Wires | Gunsmith 3 |
| Defibrillator | Quick Use | 9x Plastic Parts 1x Moss | Medical Lab 2 |
| ??? | ??? | ??? | ??? |
| Equalizer | Weapon | 3x Magnetic Accelerator 3x Complex Gun Parts 1x Queen Reactor | Gunsmith 3 |
| Extended Barrel | Mod | 2x Mod Components 8x Wires | Gunsmith 3 |
| Extended Light Mag II | Mod | 2x Mechanical Components 3x Steel Spring | Gunsmith 2 |
| Extended Light Mag III | Mod | 2x Mod Components 5x Steel Spring | Gunsmith 3 |
| Extended Medium Mag II | Mod | 2x Mechanical Components 3x Steel Spring | Gunsmith 2 |
| Extended Medium Mag III | Mod | 2x Mod Components 5x Steel Spring | Gunsmith 3 |
| Extended Shotgun Mag II | Mod | 2x Mechanical Components 3x Steel Spring | Gunsmith 2 |
| Extended Shotgun Mag III | Mod | 2x Mod Components 5x Steel Spring | Gunsmith 3 |
| Remote Raider Flare | Quick Use | 2x Chemicals 4x Rubber Parts | Utility Station 1 |
| Heavy Gun Parts | Material | 4x Simple Gun Parts | Refiner 2 |
| Venator | Weapon | 2x Advanced Mechanical Components 3x Medium Gun Parts 5x Magnet | Gunsmith 3 |
| Il Toro | Weapon | 5x Mechanical Components 6x Simple Gun Parts | Gunsmith 1 |
| Jolt Mine | Mine | 1x Electrical Components 1x Battery | Explosives Station 2 |
| Explosive Mine | Mine | 1x Explosive Compound 1x Sensors | Explosives Station 3 |
| Jupiter | Weapon | 3x Magnetic Accelerator 3x Complex Gun Parts 1x Queen Reactor | Gunsmith 3 |
| Light Gun Parts | Material | 4x Simple Gun Parts | Refiner 2 |
| Lightweight Stock | Mod | 2x Mod Components 5x Duct Tape | Gunsmith 3 |
| Lure Grenade | Grenade | 1x Speaker Component 1x Electrical Components | Utility Station 2 |
| Medium Gun Parts | Material | 4x Simple Gun Parts | Refiner 2 |
| Torrente | Weapon | 2x Advanced Mechanical Components 3x Medium Gun Parts 6x Steel Spring | Gunsmith 3 |
| Muzzle Brake II | Mod | 2x Mechanical Components 4x Wires | Gunsmith 2 |
| Muzzle Brake III | Mod | 2x Mod Components 8x Wires | Gunsmith 3 |
| Padded Stock | Mod | 2x Mod Components 5x Duct Tape | Gunsmith 3 |
| Shotgun Choke II | Mod | 2x Mechanical Components 4x Wires | Gunsmith 2 |
| Shotgun Choke III | Mod | 2x Mod Components 8x Wires | Gunsmith 3 |
| Shotgun Silencer | Mod | 2x Mod Components 8x Wires | Gunsmith 3 |
| Showstopper | Grenade | 1x Advanced Electrical Components 1x Voltage Converter | Explosives Station 3 |
| Silencer I | Mod | 2x Mechanical Components 4x Wires | Gunsmith 2 |
| Silencer II | Mod | 2x Mod Components 8x Wires | Gunsmith 3 |
| Snap Hook | Quick Use | 2x Power Rod 3x Rope 1x Exodus Modules | Utility Station 3 |
| Stable Stock II | Mod | 2x Mechanical Components 3x Duct Tape | Gunsmith 2 |
| Stable Stock III | Mod | 2x Mod Components 5x Duct Tape | Gunsmith 3 |
| Tagging Grenade | Grenade | 1x Electrical Components 1x Sensors | Utility Station 3 |
| Tempest | Weapon | 3x Advanced Mechanical Components 3x Medium Gun Parts 3x Canister | Gunsmith 3 |
| Trigger Nade | Grenade | 2x Crude Explosives 1x Processor | Explosives Station 2 |
| Vertical Grip II | Mod | 2x Mechanical Components 3x Duct Tape | Gunsmith 2 |
| Vertical Grip III | Mod | 2x Mod Components 5x Duct Tape | Gunsmith 3 |
| Vita Shot | Quick Use | 2x Antiseptic 1x Syringe | Medical Lab 3 |
| Vita Spray | Quick Use | 3x Antiseptic 1x Canister | Medical Lab 3 |
| Vulcano | Weapon | 1x Magnetic Accelerator 3x Heavy Gun Parts 1x Exodus Modules | Gunsmith 3 |
| Wolfpack | Grenade | 2x Explosive Compound 2x Sensors | Explosives Station 3 |
| Red Light Stick | Quick Use | 3x Chemicals | Utility Station 1 |
| Smoke Grenade | Grenade | 14x Chemicals 1x Canister | Utility Station 2 |
| Deadline | Mine | 3x Explosive Compound 2x ARC Circuitry | Explosives Station 3 |
| Trailblazer | Grenade | 1x Explosive Compound 1x Synthesized Fuel | Explosives Station 3 |
| Tactical Mk. 3 (Defensive) | Augment | 2x Advanced Electrical Components 3x Processor | Gear Bench 3 |
| Tactical Mk. 3 (Healing) | Augment | 2x Advanced Electrical Components 3x Processor | Gear Bench 3 |
| Yellow Light Stick | Quick Use | 3x Chemicals | Utility Station 1 |
Note: The missing Blueprints in this list likely have not actually been added to the game at the time of writing, because none of the playerbase has managed to find any of them. As they are added to the game, I will update this page with the most relevant information so you know exactly how to get all 75 Arc Raiders Blueprints.
Where to find Blueprints in Arc Raiders
Below is a list of all containers, modifiers, and events which maximise your chances of finding Blueprints:
- Certain quests reward you with specific Blueprints .
- Completing Trials has a high chance of offering Blueprints as rewards.
- Surveyors have a decent chance of dropping Blueprints on death.
- High loot value areas tend to have a greater chance of spawning Blueprints.
- Night Raids and Storms may increase rare Blueprint spawn chances in containers.
- Containers with higher numbers of items may have a higher tendency to spawn Blueprints. As a result, Blue Gate (which has many “large” containers containing multiple items) may give you a higher chance of spawning Blueprints.
- Raider containers (Raider Caches, Weapon Boxes, Medical Bags, Grenade Tubes) have increased Blueprint drop rates. As a result, the Uncovered Caches event gives you a high chance of finding Blueprints.
- Security Lockers have a higher than average chance of containing Blueprints.
- Certain Blueprints only seem to spawn under specific circumstances: Tempest Blueprint only spawns during Night Raid events. Vulcano Blueprint only spawns during Hidden Bunker events. Jupiter and Equaliser Blueprints only spawn during Harvester events.

Raider Caches, Weapon Boxes, and other raider-oriented container types have a good chance of offering Blueprints. |Image credit:Rock Paper Shotgun/Embark Studios
Blueprints have a very low chance of spawning in any container in Arc Raiders, around 1-2% on average. However, there is a higher chance of finding Blueprints in particular container types. Specifically, you can find more Blueprints in Raider containers and security lockers.
Beyond this, if you’re looking for Blueprints you should focus on regions of the map which are marked as having particularly high-value loot. Areas such as the Control Tower in Dam Battlegrounds, the Arrival and Departure Buildings in Spaceport, and Pilgrim’s Peak in Blue Gate all have a better-than-average chance of spawning Blueprints somewhere amongst all their containers. Night Raids and Electromagnetic Storm events also increase the drop chances of certain Blueprints .
In addition to these containers, you can often loot Blueprints from destroyed Surveyors - the largest of the rolling ball ARC. Surveyors are more commonly found on the later maps - Spaceport and Blue Gate - and if one spawns in your match, you’ll likely see it by the blue laser beam that it casts into the sky while “surveying”.
Surveyors are quite well-armoured and will very speedily run away from you once it notices you, but if you can take one down then make sure you loot all its parts for a chance of obtaining certain unusual Blueprints.
Blueprints obtained from quests
One way in which you can get Blueprints is by completing certain quests for the vendors in Speranza. Some quests will reward you with a specific item Blueprint upon completion, so as long as you work through all the quests in Arc Raiders, you are guaranteed those Blueprints.
Here is the full list of all Blueprints you can get from quest rewards:
- Trigger Nade Blueprint: Rewarded after completing “Sparks Fly”.
- Lure Grenade Blueprint: Rewarded after completing “Greasing Her Palms”.
- Burletta Blueprint: Rewarded after completing “Industrial Espionage”.
- Hullcracker Blueprint (and Launcher Ammo Blueprint): Rewarded after completing “The Major’s Footlocker”.
Alas, that’s only 4 Blueprints out of a total of 75 to unlock, so for the vast majority you will need to find them yourself during a raid. If you’re intent on farming Blueprints, then it’s best to equip yourself with cheap gear in case you lose it, but don’t use a free loadout because then you won’t get a safe pocket to stash any new Blueprint you find. No pain in Arc Raiders is sharper than failing to extract with a new Blueprint you’ve been after for a dozen hours already.

One of the best ways to get Blueprints is by hitting three stars on all five Trials every week. |Image credit:Rock Paper Shotgun/Embark Studios
Blueprints obtained from Trials
One of the very best ways to get Blueprints is as rewards for completing Trials in Arc Raiders. Trials are unlocked from Level 15 onwards, and allow you to earn rewards by focusing on certain tasks over the course of several raids. For example, one Trial might task you with dealing damage to Hornets, while another might challenge you to loot Supply Drops.
Trials refresh on a weekly basis, with a new week bringing five new Trials. Each Trial can offer up to three rewards after passing certain score milestones, and it’s possible to receive very high level loot from these reward crates - including Blueprints. So if you want to unlock as many Blueprints as possible, you should make a point of completing as many Trials as possible each week.
Best Blueprint farming locations
The very best way to get Blueprints is to frequent specific areas of the maps which combine high-tier loot pools with the right types of containers to search. Here are my recommendations for where to find Blueprints on every map, so you can always keep the search going for new crafting recipes to unlock.

Image credit:Rock Paper Shotgun/Embark Studios
Dam Battlegrounds
The best places to farm Blueprints on Dam Battlegrounds are the Control Tower, Power Generation Complex, Ruby Residence, and Pale Apartments . The first two regions, despite only being marked on the map as mid-tier loot, contain a phenomenal number of containers to loot. The Control Tower can also contain a couple of high-tier Security Lockers - though of course, you’ll need to have unlocked the Security Breach skill at the end of the Survival tree.
There’s also a lot of reporting amongst the playerbase that the Residential areas in the top-left of the map - Pale Apartments and Ruby Residence - give you a comparatively strong chance of finding Blueprints. Considering their size, there’s a high density of containers to loot in both locations, and they also have the benefit of being fairly out of the way. So you’re more likely to have all the containers to yourself.
Buried City
The best Blueprint farming locations on Buried City are the Santa Maria Houses, Grandioso Apartments, Town Hall, and the various buildings of the New District . Grandioso Apartments has a lower number of containers than the rest, but a high chance of spawning weapon cases - which have good Blueprint drop rates. The others are high-tier loot areas, with plenty of lootable containers - including Security Lockers.
Spaceport
The best places to find Blueprints on Spaceport are the Arrival and Departure Buildings, as well as Control Tower A6 and the Launch Towers . All these areas are labelled as high-value loot regions, and many of them are also very handily connected to one another by the Spaceport wall, which you can use to quickly run from one area to the next. At the tops of most of these buildings you’ll find at least one Security Locker, so this is an excellent farming route for players looking to find Blueprints.
The downside to looting Blueprints on Spaceport is that all these areas are hotly contested, particularly in Duos and Squads. You’ll need to be very focused and fast in order to complete the full farming route.

Image credit:Rock Paper Shotgun/Embark Studios
Blue Gate
Blue Gate tends to have a good chance of dropping Blueprints, potentially because it generally has a high number of containers which can hold lots of items; so there’s a higher chance of a Blueprint spawning in each container. In my experience, the best Blueprint farming spots on Blue Gate are Pilgrim’s Peak, Raider’s Refuge, the Ancient Fort, and the Underground Complex beneath the Warehouse .
All of these areas contain a wealth of containers to loot. Raider’s Refuge has less to loot, but the majority of the containers in and around the Refuge are raider containers, which have a high chance of containing Blueprints - particularly during major events.
Stella Montis
On the whole, Stella Montis seems to have a very low drop rate for Blueprints (though a high chance of dropping other high-tier loot). If you do want to try farming Blueprints on this map, the best places to find Blueprints in Stella Montis are Medical Research, Assembly Workshop, and the Business Center . These areas have the highest density of containers to loot on the map.
In addition to this, the Western Tunnel has a few different Security Lockers to loot, so while there’s very little to loot elsewhere in this area of the map, it’s worth hitting those Security Lockers if you spawn there at the start of a match.
That wraps up this primer on how to get all the Blueprints in Arc Raiders as quickly as possible. With the Expedition system constantly resetting a large number of players’ Blueprints, it’s more important than ever to have the most up-to-date information on where to find all these Blueprints.
While you’re here, be sure to check out our Arc Raiders best guns tier list , as well as our primers on the best skills to unlock and all the different Field Depot locations on every map.


ARC Raiders
PS5 , Xbox Series X/S , PC
Rock Paper Shotgun is better when you sign in
Sign in and join us on our journey to discover strange and compelling PC games.
