All monsters in Monster Hunter Wilds and their weaknesses
How many monsters are in Monster Hunter Wilds?

Image credit:Rock Paper Shotgun/Capcom

Exactly how many monsters are in Monster Hunter Wilds? Monsters, of course, form the backbone of Monster Hunter Wilds , and in addition to a number of familiar faces from previous games (some reaching as far back as the very first generation of Monster Hunter games), there’s a very respectable number of inventive new enemies to face in the Forbidden Lands.
In the guide below, we’ll reveal exactly how many monsters there are in Monster Hunter Wilds, and then go through the full list of all monsters in the game - including the Mizutsune, the latest monster added with Title Update 1. We’ll also point out which of the large monsters are considered Apex predators of their region; all possible variants such as Tempered , Arch-Tempered , and Frenzied monsters; and we’ll even discuss any upcoming monsters to be added in post-release content updates.

How many monsters are in Monster Hunter Wilds?
There are currently 48 monsters in Monster Hunter Wilds, with 30 large monsters and 18 small monsters . There are also 66 Endemic Life species, and 20 Aquatic Life species, though these are not considered “monsters”.
Below is the full list of all 30 large monsters in Monster Hunter Wilds, along with their regions, weaknesses, and when you first encounter them.
Full Monster Hunter Wilds monster list
| Monster | Region | Weakness | First Seen |
|---|---|---|---|
| Chatacabra | Plains | Thunder | Chapter 1-1 |
| Quematrice | Plains, Wyveria | Water | Chapter 1-2 |
| Lala Barina | Forest, Wyveria | Fire | Chapter 1-3 |
| Congalala | Forest, Wyveria | Fire | Chapter 1-3 |
| Balahara | Plains | Thunder | Chapter 1-4 |
| Doshaguma | Plains, Forest, Wyveria | Fire | Chapter 1-4 |
| Uth Duna | Forest | Thunder | Chapter 1-5 |
| Rompopolo | Basin | Water | Chapter 2-1 |
| Rey Dau | Plains | Ice | Chapter 2-2 |
| Nerscylla | Basin, Cliffs, Wyveria | Fire/Thunder | Chapter 2-3 |
| Hirabami | Cliffs, Wyveria | Fire | Chapter 2-3 |
| Ajarakan | Basin, Wyveria | Water | Chapter 2-4 |
| Nu Udra | Basin | Water | Chapter 2-4 |
| Guardian Doshaguma | Wyveria | Dragon | Chapter 3-1 |
| Guardian Rathalos | Wyveria | Dragon | Chapter 3-1 |
| Jin Dahaad | Cliffs | Fire | Chapter 3-2 |
| Guardian Ebony Odogaron | Wyveria | Water | Chapter 3-3 |
| Xu Wu | Wyveria | Ice | Chapter 3-3 |
| Guardian Arkveld | Wyveria | Dragon | Chapter 3-1 |
| Zoh Shia | Wyveria | Dragon | Chapter 3-5 |
| Yian Kut-Ku | Forest, Cliffs | Ice | Chapter 4-1 |
| Gypceros | All except Forest | Fire | Chapter 4-1 |
| Rathian | Plains, Forest, Basin | Dragon | Chapter 4-1 |
| Rathalos | Forest, Basin, Wyveria | Dragon | Chapter 4-1 |
| Gravios | Basin, Wyveria | Water | Chapter 4-1 |
| Blangonga | Cliffs | Fire | Chapter 4-1 |
| Guardian Fulgur Anjanath | Wyveria | Water/Ice | Chapter 4-3 |
| Gore Magala | Cliffs | Fire | Chapter 5-2 |
| Arkveld | All Regions | Dragon | Chapter 6-1 |
| Mizutsune | All Regions | Thunder/Dragon | Extra Mission 1 |
In addition to the above list, there are plenty of small monsters too. Here’s the full list of all 18 small monsters:
- Bulaqchi (Plains)
- Baunos (Plains)
- Ceratonoth (Plains)
- Dalthydon (Plains, Forest)
- Talioth (Plains)
- Gajios (Plains, Forest)
- Piragill (Forest)
- Vespoid (Forest, Basin, Cliffs, Wyveria)
- Conga (Forest)
- Harpios (Forest, Basin)
- Kranodath (Basin)
- Gelidron (Basin)
- Nerscylla Hatchling (Cliffs)
- Comaqchi (Cliffs)
- Blango (Cliffs)
- Porkeplume (Cliffs, Wyveria)
- Rafma (Cliffs, Wyveria)
- Guardian Seikret (Wyveria)
Below we’ll introduce all 30 large monsters in MH Wilds in the order you’ll first encounter them in the main story.
Chatacabra

Image credit:Rock Paper Shotgun/Capcom
- Species: Amphibian
- Region: Windward Plains
- Base HP: 4,000
- Weak To: Thunder, Poison, Paralysis, Stun
Chatacabra is the first large monster you’ll properly hunt in Monster Hunter Wilds. Located in the Windward Plains, it’s a big ol’ toad with a number of slow and telegraphed attacks to get you used to combat. The Chatacabra is easily the weakest large monster in the game, so you’ll soon move beyond it to larger prey.
Quematrice

Image credit:Rock Paper Shotgun/Capcom
- Species: Brute Wyvern
- Region: Windward Plains, Ruins Of Wyveria
- Base HP: 4,000
- Weak To: Water, Poison, Paralysis
While most monsters are most dangerous at the front, the Quematrice’s “problem end” is its backside. This angry fire-aligned Windward Plains chicken has two primary attacks - a little peck, and a great whallopping sweep of its fire-emitting tail. Spend a couple of minutes learning the timings though, and you’ll find the Quematrice doesn’t have much more to offer beyond the Chatacabra. If you get stuck though we have a guide on how to beat Quematrice .
Lala Barina
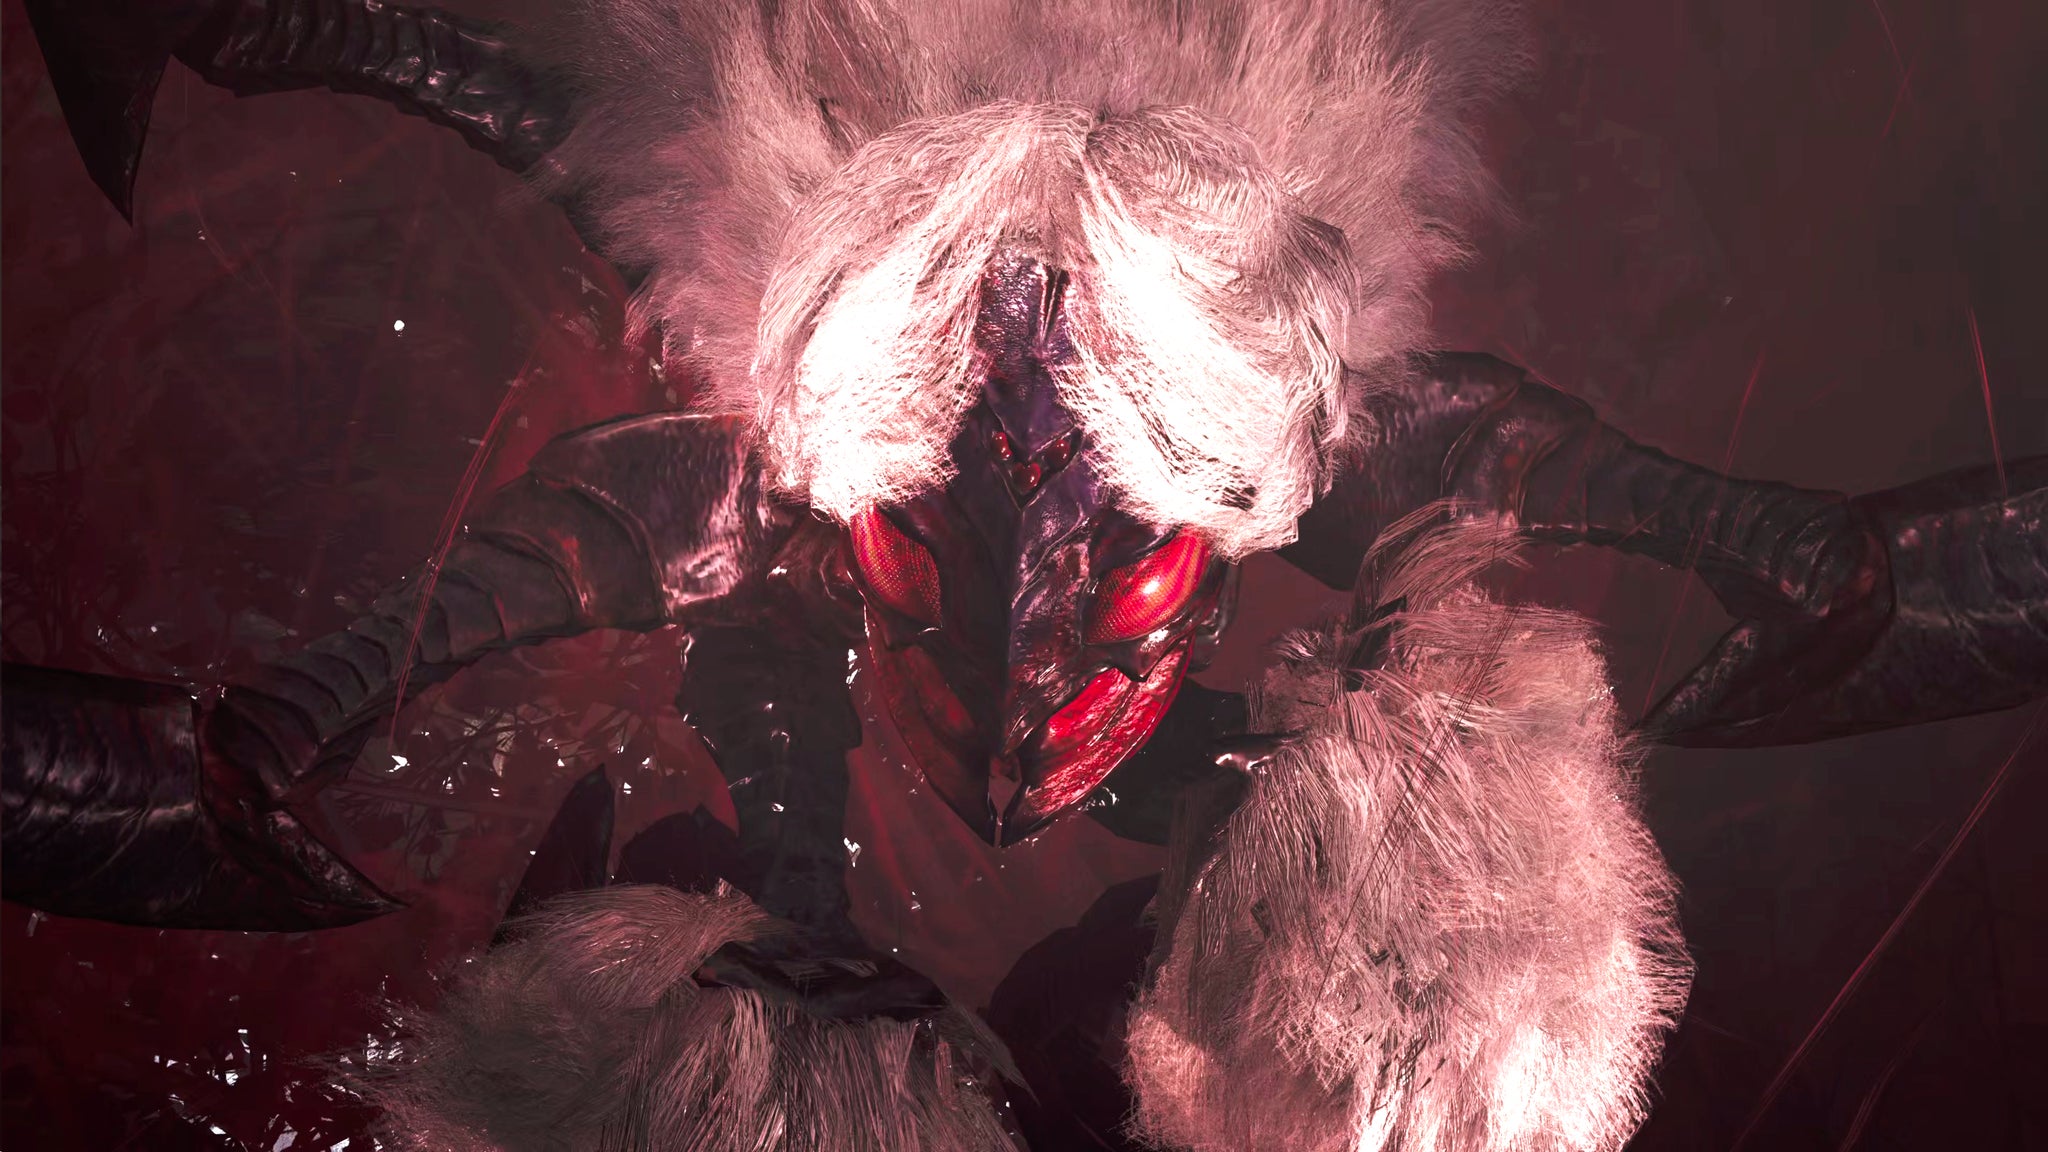
Image credit:Rock Paper Shotgun/Capcom
- Species: Temnoceran
- Region: Scarlet Forest, Ruins Of Wyveria
- Base HP: 4,000
- Weak To: Fire, Stun
The spider-like Lala Barina lives deep in the Scarlet Forest, and the name of its game is paralysis. It loves to dance about, shooting out clouds of florets which float through the air and paralyse what they touch. The Lala Barina can be tricky to pin down, especially in its nest where its Hatchlings can distract you. Fortunately, its health pool isn’t massive. If you’re struggling to defeat the horrifying boss, check out our guide on how to beat Lala Barina .
Congalala

Image credit:Rock Paper Shotgun/Capcom
- Species: Fanged Beast
- Region: Scarlet Forest, Ruins Of Wyveria
- Base HP: 5,000
- Weak To: Fire, Ice
The pink-furred giant ape known as Congalala likes to stink up the Scarlet Forest and anyone in it. It can expel clouds of stench from both ends, and if you’re caught in the clouds, it’ll temporarily stop you from using consumables and other items. It’s small but aggressive, and often surrounded by its even smaller kin, the Conga. Struggling with the fight? Here’s how to beat Congalala .
Balahara
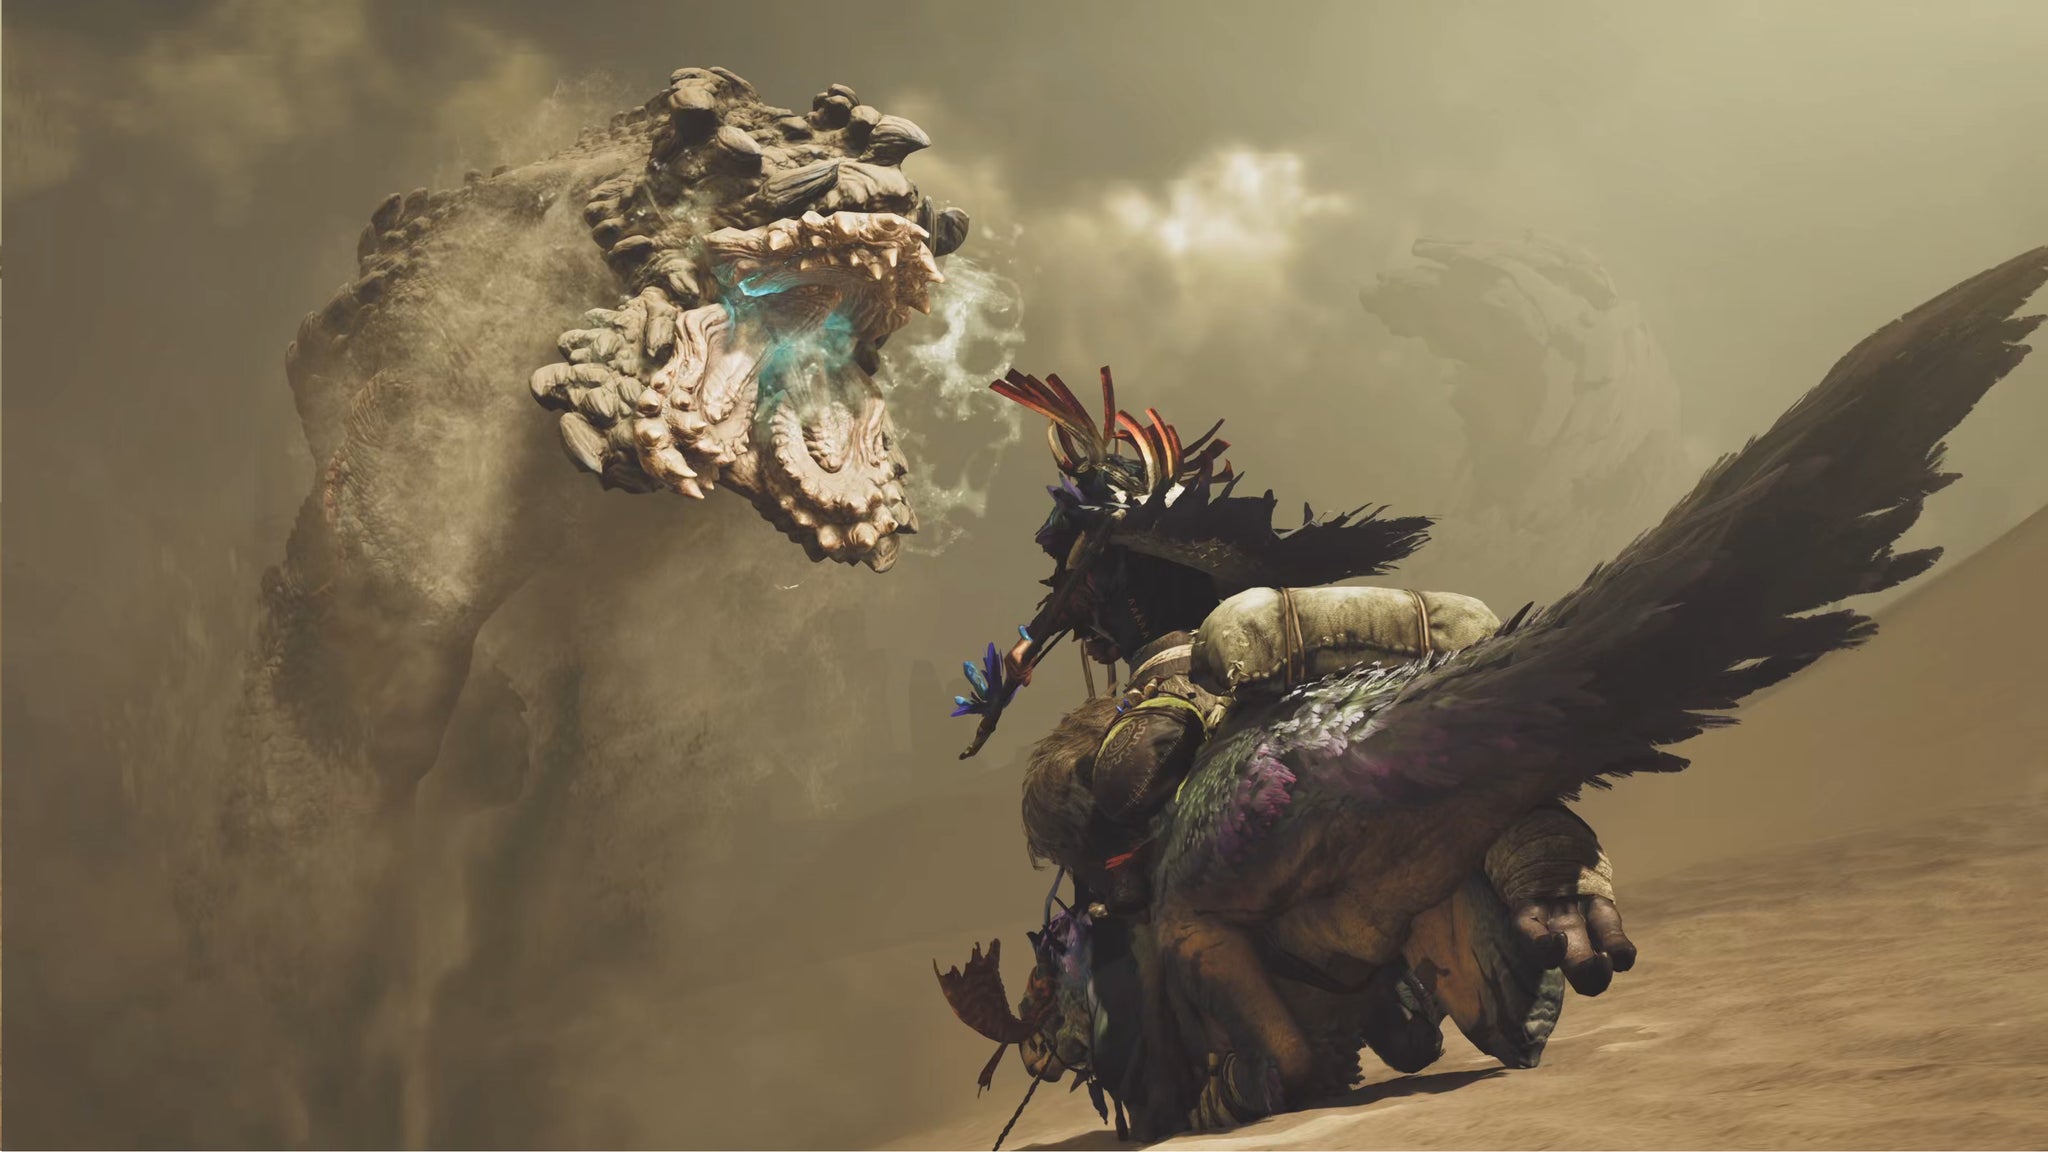
Image credit:Rock Paper Shotgun/Capcom
- Species: Leviathan
- Region: Windward Plains
- Base HP: 4,400
- Weak To: Thunder, Paralysis
Balahara are the first large monsters you see with your own hunter’s eyes in Monster Hunter Wilds; they’re the giant sand-dwelling snakes that you see chasing the girl in the Windward Plains before facing the Chatacabra. These creatures have an annoying tendency to burrow, but you can often force them above ground with a Screamer Pod or Sonic Bomb.
Doshaguma
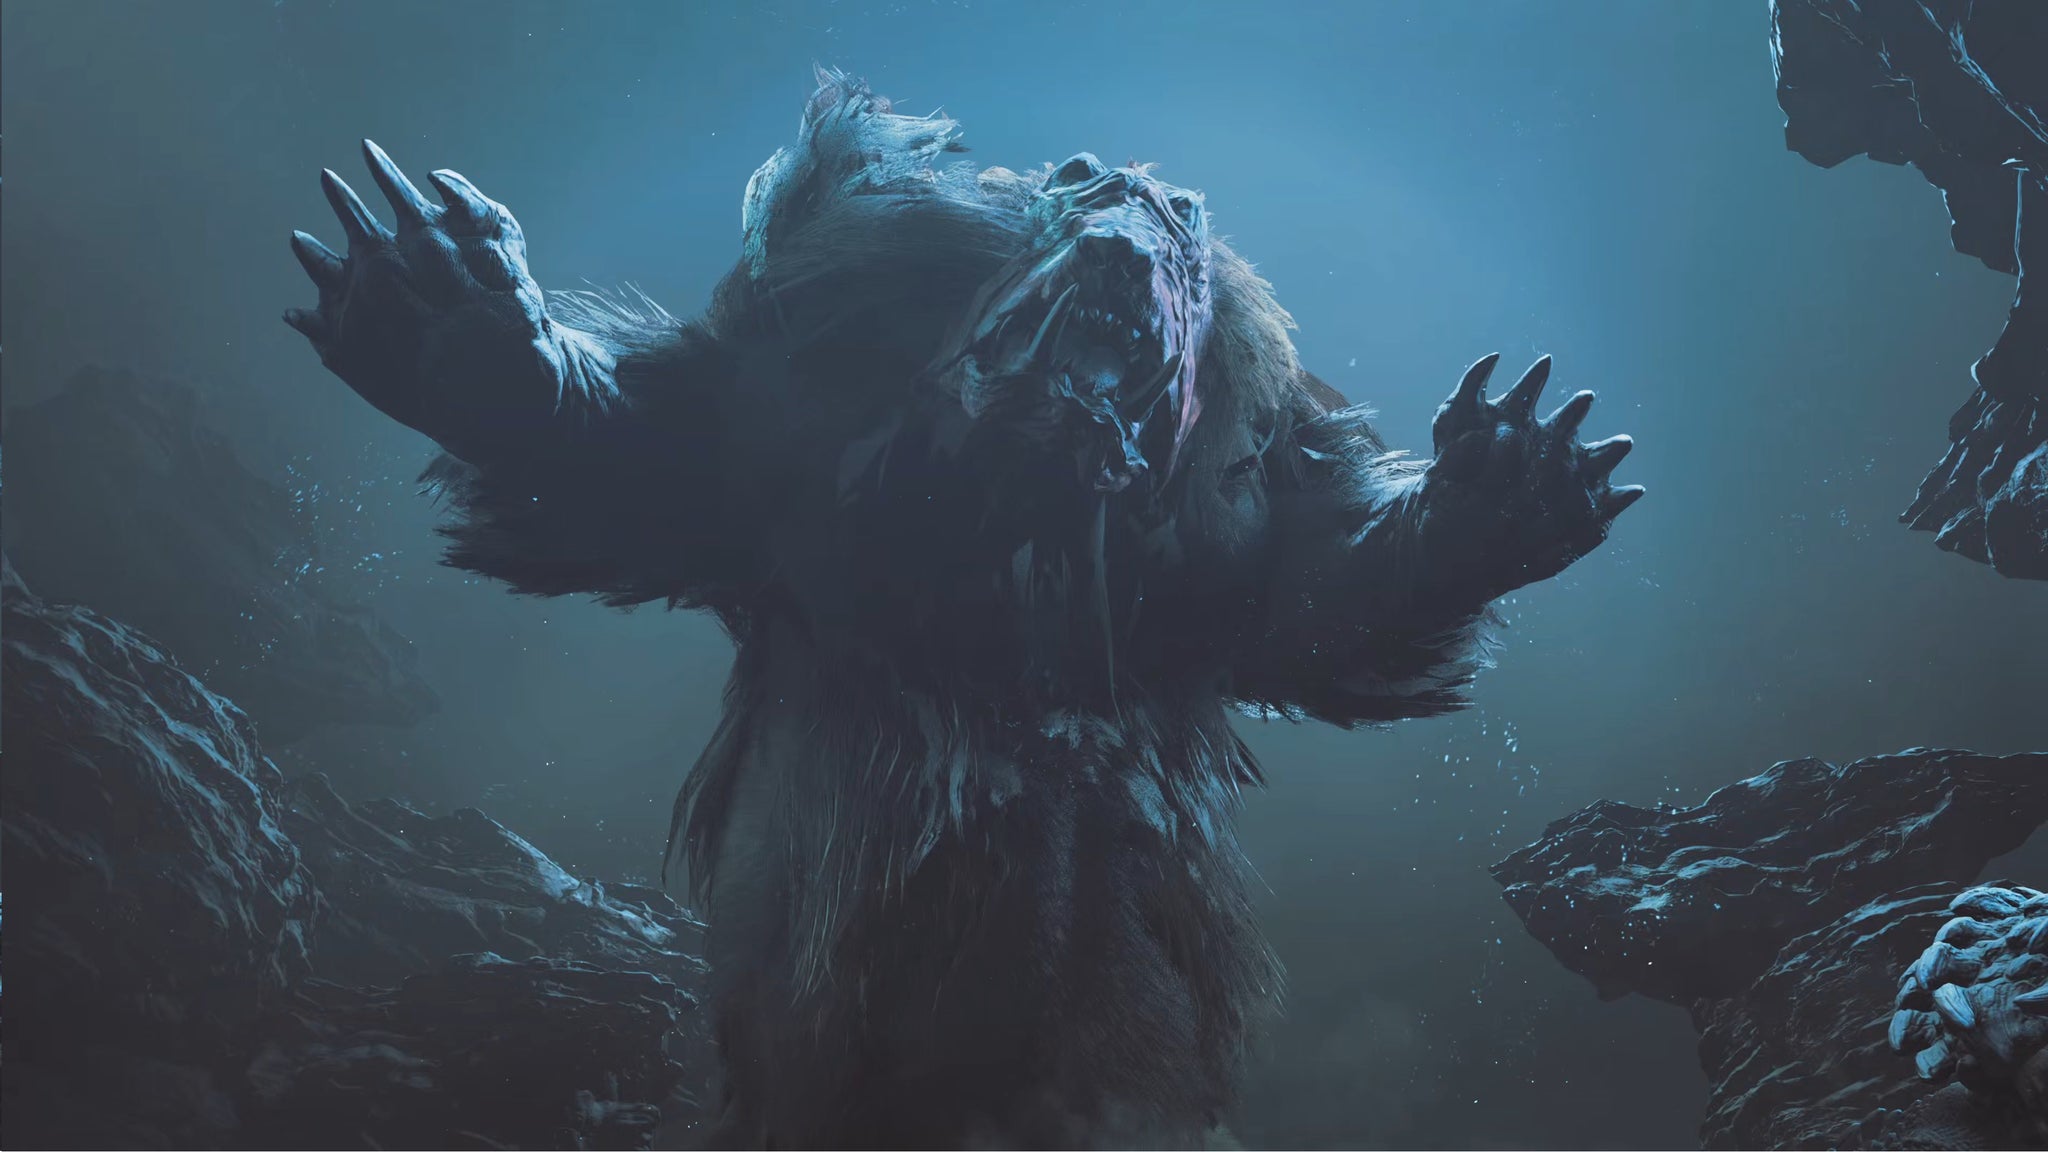
Image credit:Rock Paper Shotgun/Capcom
- Species: Fanged Beast
- Region: Windward Plains, Scarlet Forest, Ruins Of Wyveria
- Base HP: 4,800
- Weak To: Fire, Thunder
The Doshaguma is a large furred monster often found in packs, led by an Alpha Doshaguma which is bigger and stronger than the rest. Some very strong bite and swipe attacks make it a dangerous creature to underestimate, although if you focus its belly, it can get injured quite easily.
Uth Duna
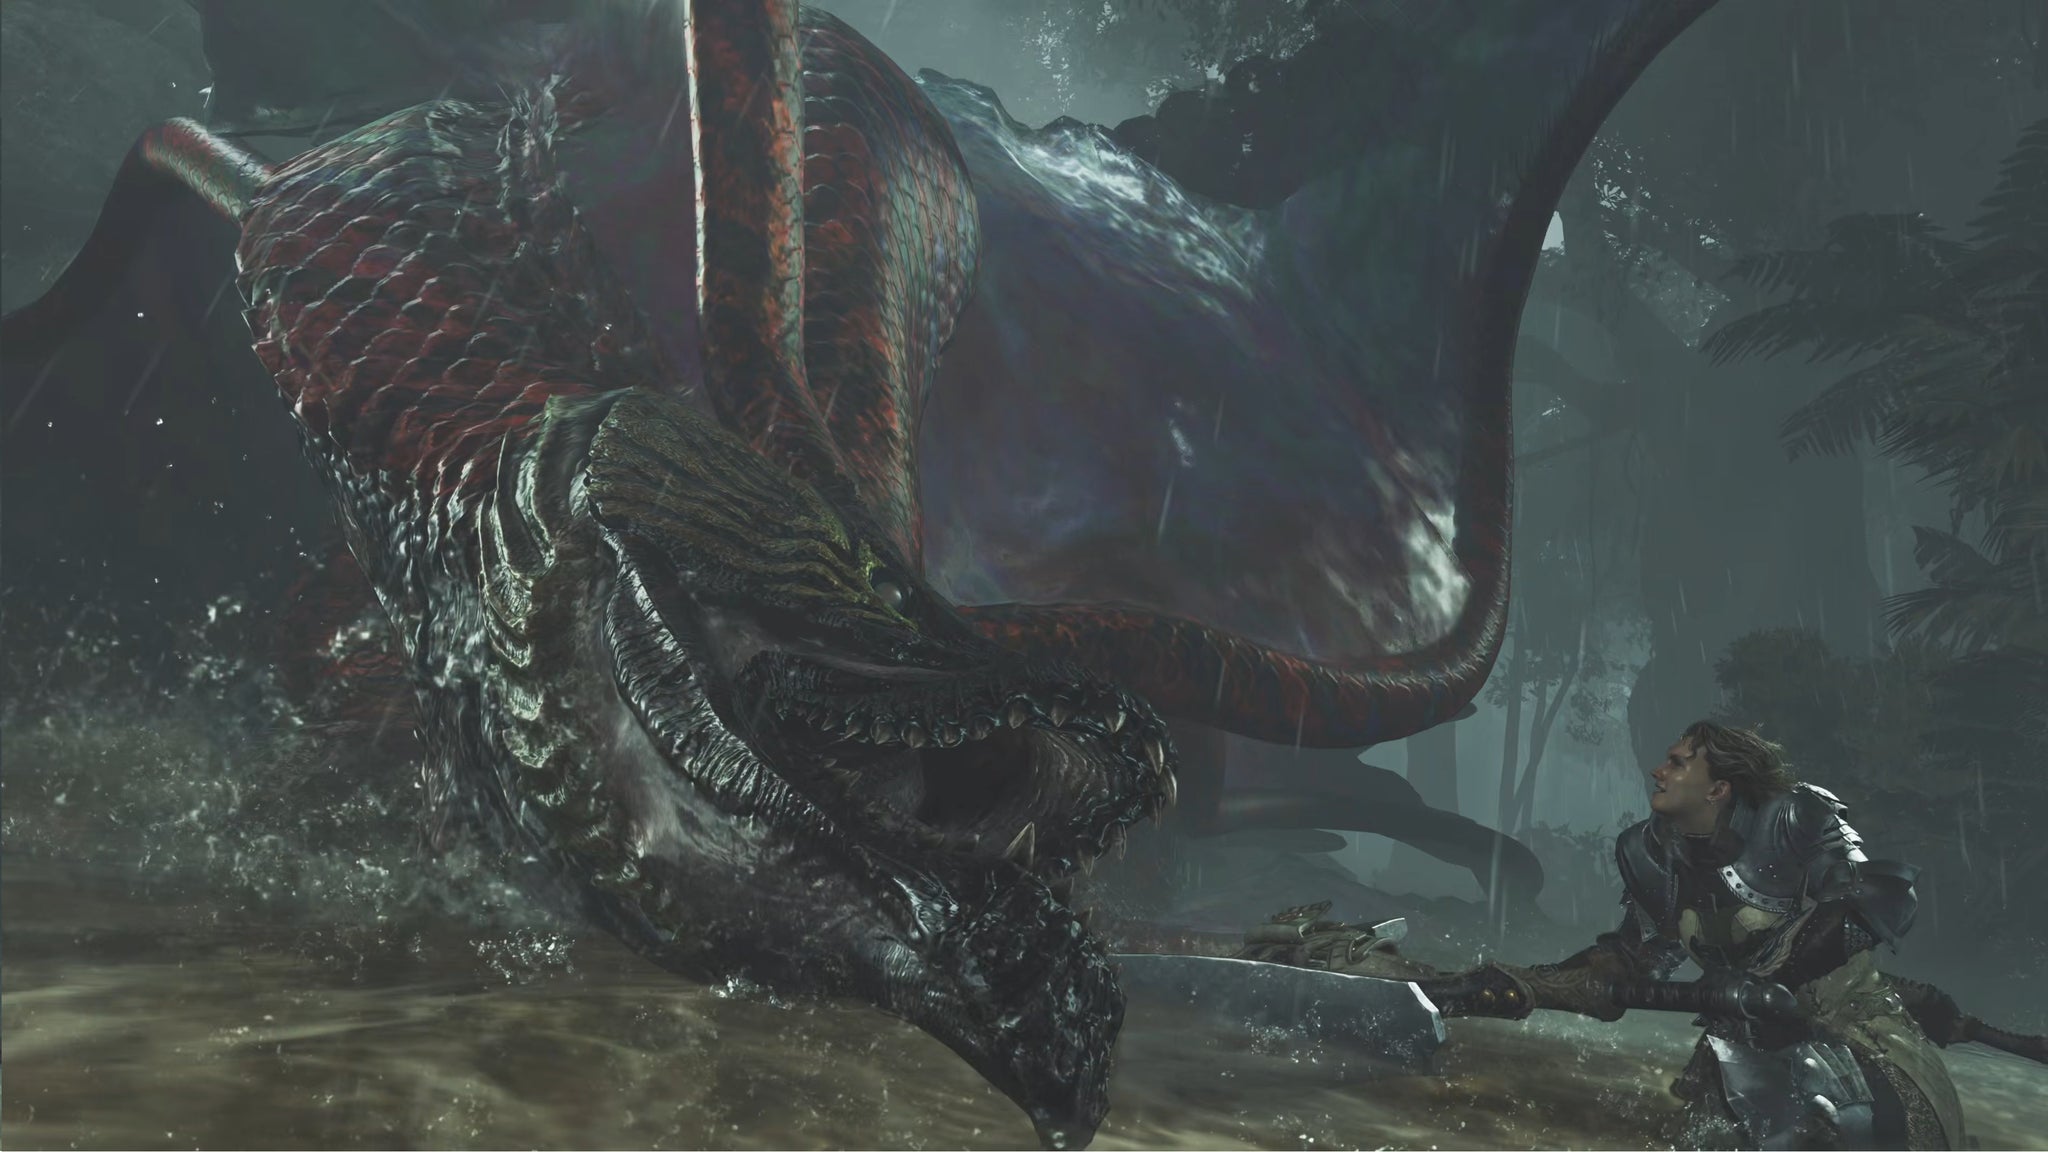
Image credit:Rock Paper Shotgun/Capcom
- Species: Leviathan (Apex)
- Region: Scarlet Forest
- Base HP: 5,500
- Weak To: Thunder
Uth Duna is the first truly fearsome monster you’ll encounter in Monster Hunter Wilds. The Apex predator of the Scarlet Forest (yes, you encounter this one before the Plains Apex), Uth Duna mostly lives in the water but often comes out to play during Inclemency. It has lots of health, and when angered it generates veil-like protective fins around itself which absorb a lot of damage.
Rompopolo
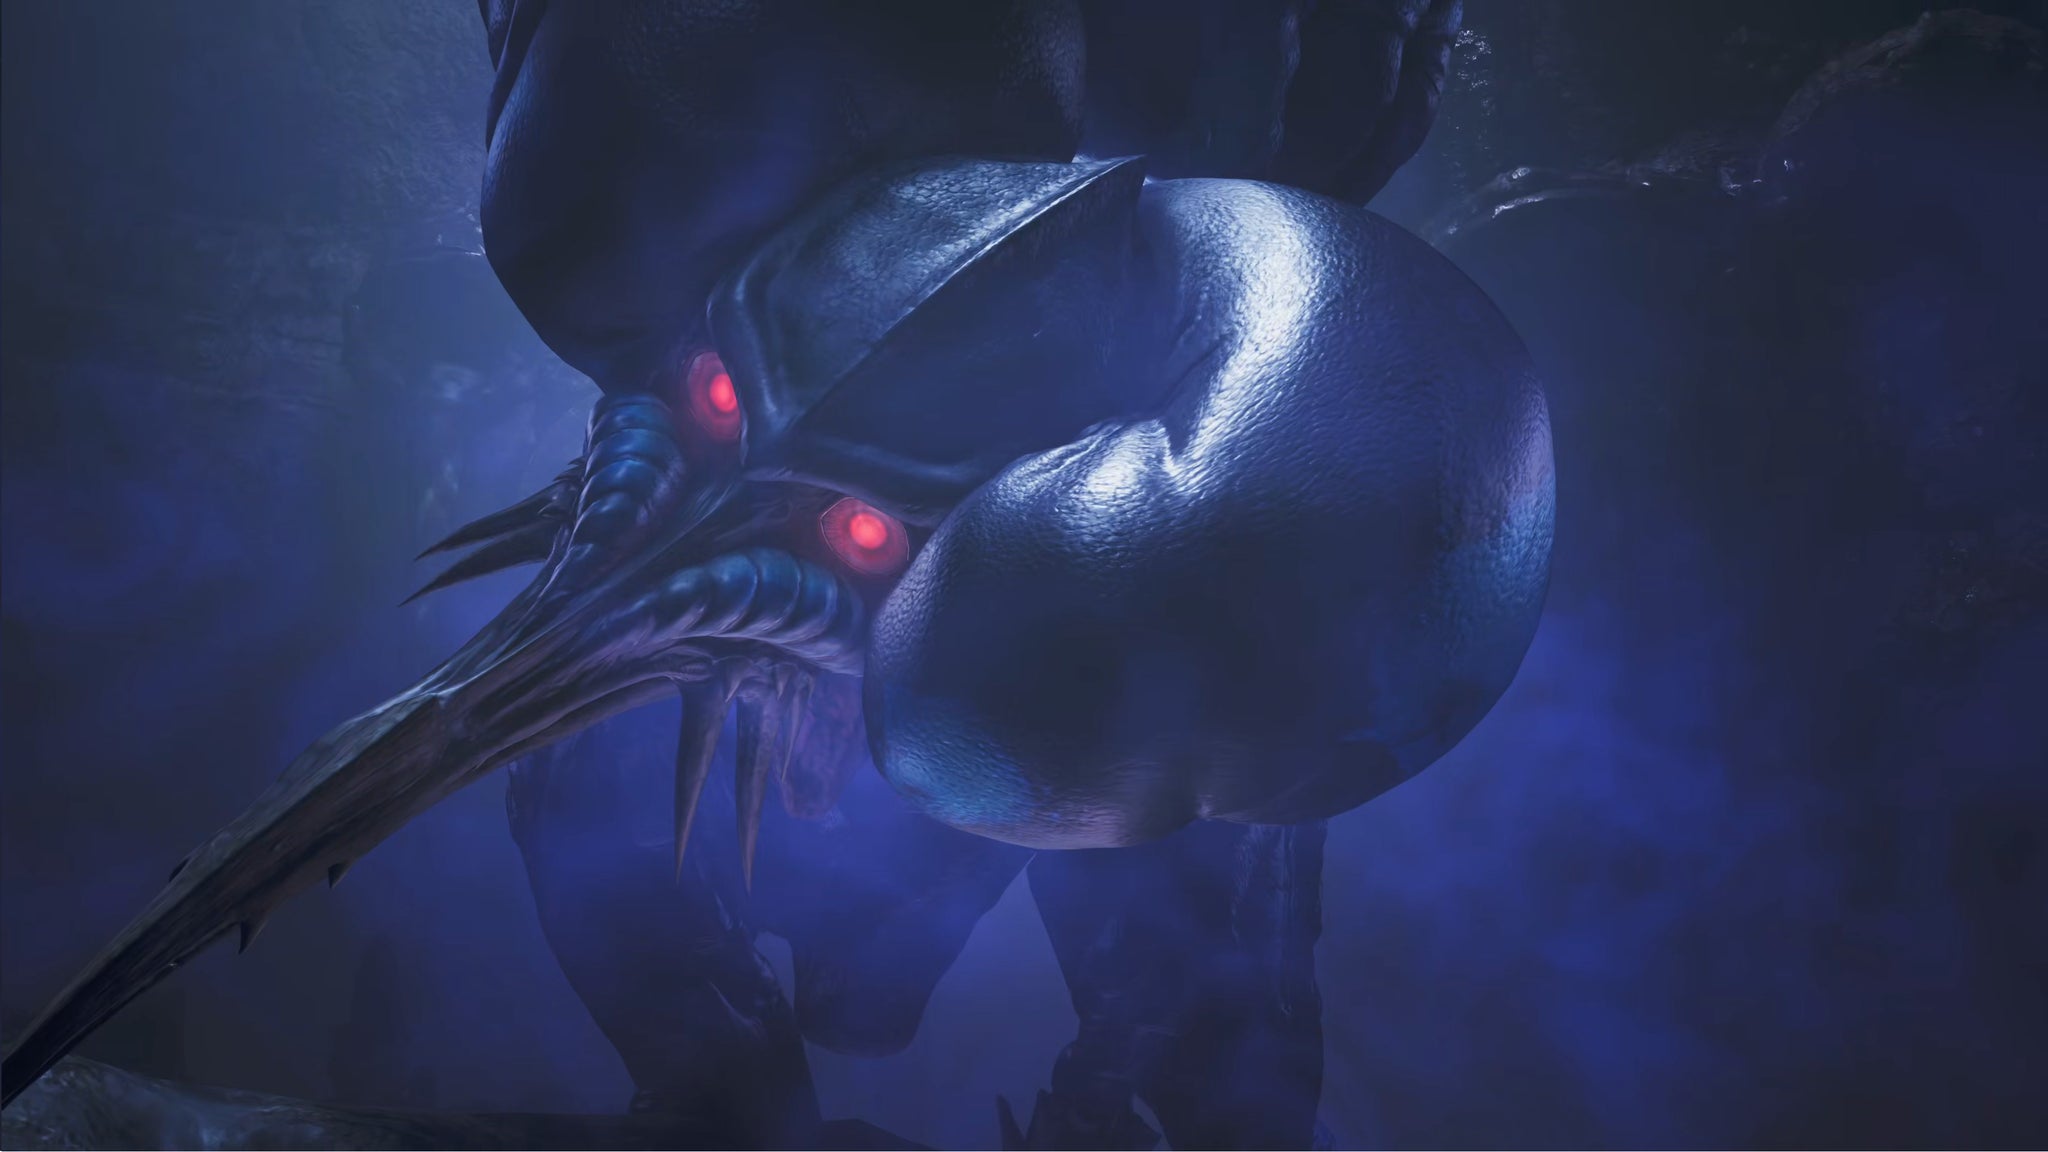
Image credit:Rock Paper Shotgun/Capcom
- Species: Brute Wyvern
- Region: Oilwell Basin
- Base HP: 4,500
- Weak To: Water
The unpleasant-looking Rompopolo acts a bit like a Quematrice that spews poison instead of flames. It stores up poison gas in the various balloon-like sacs along its body, and expels them from its tail. If you see it injecting its tail into the ground, expect a geyser of poison smog to hit you from beneath at any moment.
Rey Dau

Image credit:Rock Paper Shotgun/Capcom
- Species: Flying Wyvern (Apex)
- Region: Windward Plains
- Base HP: 5,000
- Weak To: Water, Ice
Rey Dau is the lightning-infused Apex predator of the Windward Plains, and the second Apex you’ll encounter in your playthrough. This great monster’s strength should be evident from who you see it tangling with at first meeting; it’s like an oversized Rathalos with beam attacks that can pretty much one-shot you if you’re not careful.
Nerscylla

Image credit:Rock Paper Shotgun/Capcom
- Species: Temnoceran
- Region: Oilwell Basin, Iceshard Cliffs, Ruins Of Wyveria
- Base HP: 4,400
- Weak To: Fire, Thunder, Paralysis
The Nerscylla is another giant spider (oh joy), this one cropping up in both the Oilwell Basin and the Iceshard Cliffs beyond. It’s the monster with the greatest number of ailments to inflict upon you, capable of webbing, poisoning, and sleeping you with its attacks. Watch out for those charge attacks, too.
Hirabami
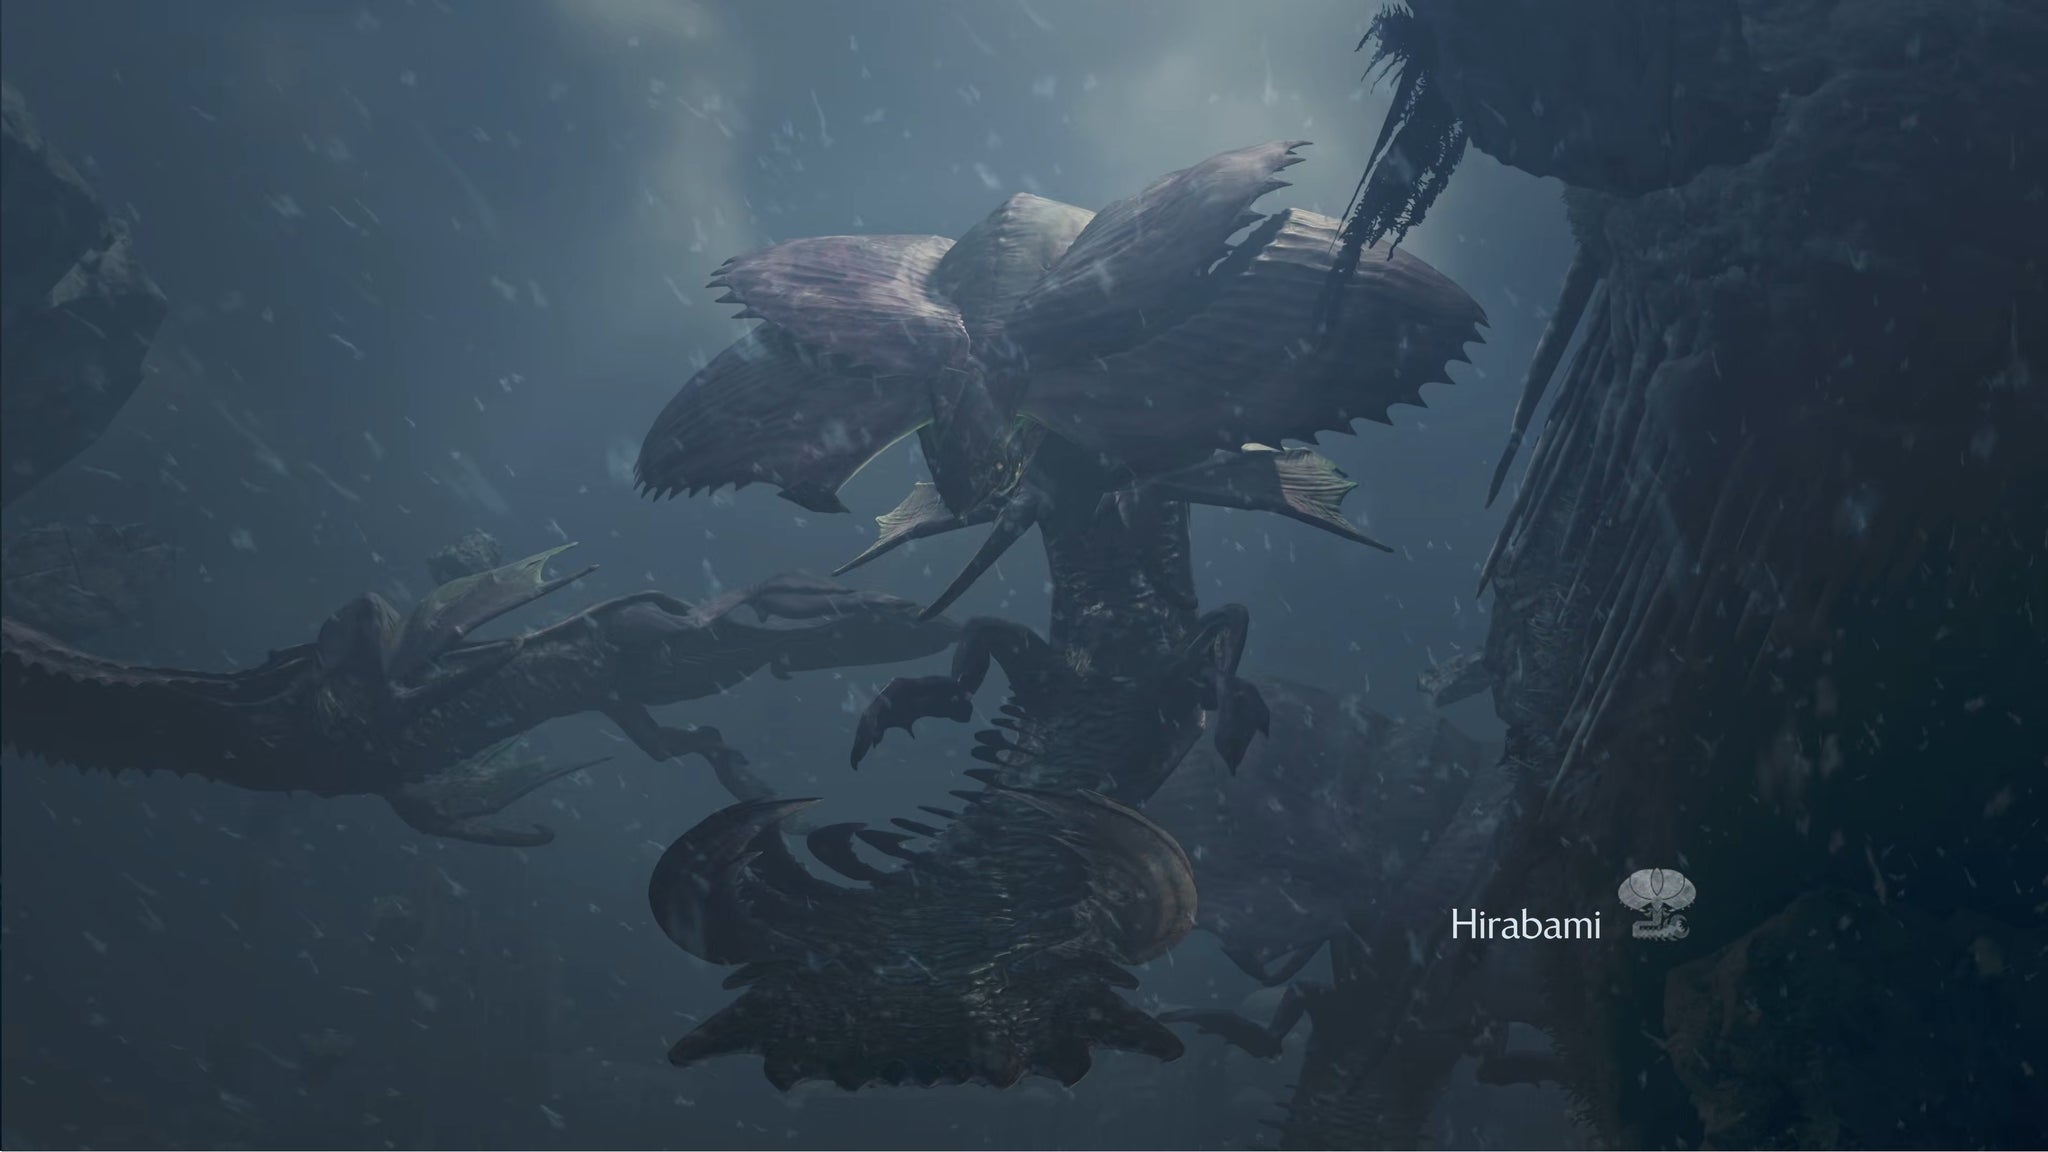
Image credit:Rock Paper Shotgun/Capcom
- Species: Leviathan
- Region: Iceshard Cliffs, Ruins Of Wyveria
- Base HP: 4,500
- Weak To: Fire, Thunder, Poison, Sleep
Hirabami are often seen in groups, so bring Dung Pods to separate them. These large flyers live in the Iceshard Cliffs, and attack primarily with their large spiked tail. The tricky part is persuading them to the ground; attack on horseback or use Flash Pods to bring them to the ground, then attack their neck to disable their flying capabilities.
Ajarakan

Image credit:Rock Paper Shotgun/Capcom
- Species: Fanged Beast
- Region: Oilwell Basin, Ruins Of Wyveria
- Base HP: 5,200
- Weak To: Water, Ice
The aggressive Ajarakan of the Oilwell Basin is a jack-of-all-trades. With a big brutish shell on its back, large limbs for swiping, and a strong tail, they make use of lots of fire and blast attacks and an aura of heat that requires a Cool Drink to tolerate. Come prepared with the Water element!
Nu Udra
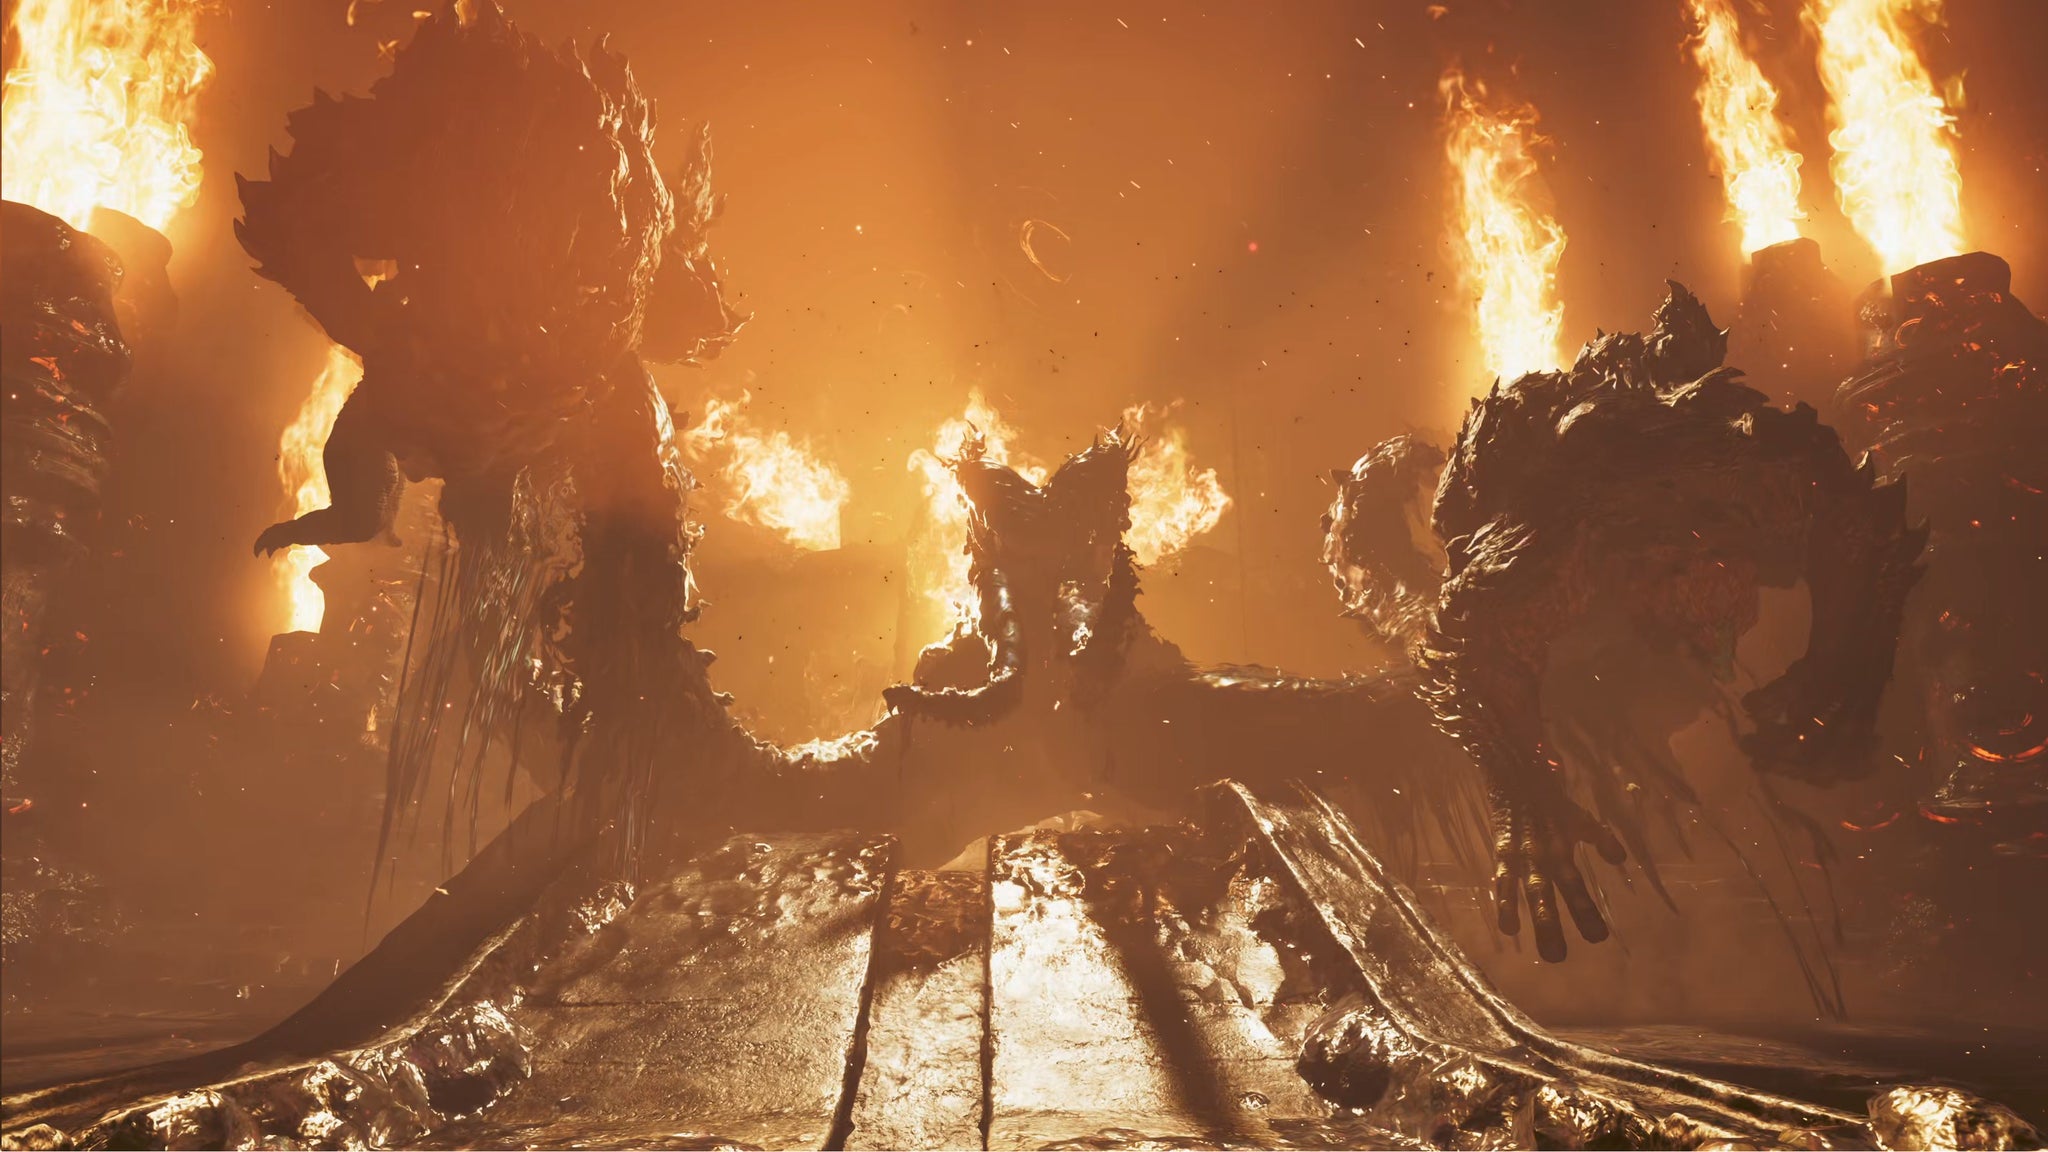
Image credit:Rock Paper Shotgun/Capcom
- Species: Cephalopod (Apex)
- Region: Oilwell Basin
- Base HP: 5,250
- Weak To: Water
Nu Udra, the Apex predator of the Oilwell Basin, is a roiling black kraken-like monster that lives in the deepest, most lava-filled areas of the Basin. Also known as The Black Flame , its many tentacles are used for large sweeps and long-ranged pokes, though they can also be lopped off over time. When angered it can set itself aflame, so make sure you’ve got Watermoss ready to cool it off.
Guardian Doshaguma

Image credit:Rock Paper Shotgun/Capcom
- Species: Construct
- Region: Ruins Of Wyveria
- Base HP: 5,800
- Weak To: Fire, Ice, Dragon
The Guardian Doshaguma is a constructed variant of the Doshaguma that lives within Wyveria. It’s white-furred, tougher than the average Doshaguma, and capable of harnessing Guardian energy to create large explosions around itself, making head-first attacks risky. Its front half is weak to fire, and its back half, strangely, is weak to ice.
Guardian Rathalos

Image credit:Rock Paper Shotgun/Capcom
- Species: Construct
- Region: Ruins Of Wyveria
- Base HP: 5,000
- Weak To: Dragon, Thunder
The Guardian Rathalos is another constructed monster found exclusively within Wyveria, this one mimicking the familiar airborne fire-breathing attacks of the Rathalos. But as a Guardian, it can also create white energy blasts just like the Guardian Doshaguma. The Dragon element is strong against this one, but you likely won’t have access to it for your first meeting.
Jin Dahaad

Image credit:Rock Paper Shotgun/Capcom
- Species: Leviathan (Apex)
- Region: Iceshard Cliffs
- Base HP: 7,400
- Weak To: Fire
The fearsome and gigantic Jin Dahaad is the Apex predator of the Iceshard Cliffs, and probably the toughest monster in the game at this point. It has a couple of one-shot attacks that you’ll need to pull down ice blocks from the ceiling and hide behind them to avoid. This is a long fight; take out the ridges on its tail, head, and back to weaken its frost attacks. To help you best prepare, we’ve got a guide on how to beat Jin Dahaad that will come in handy.
Guardian Ebony Odogaron
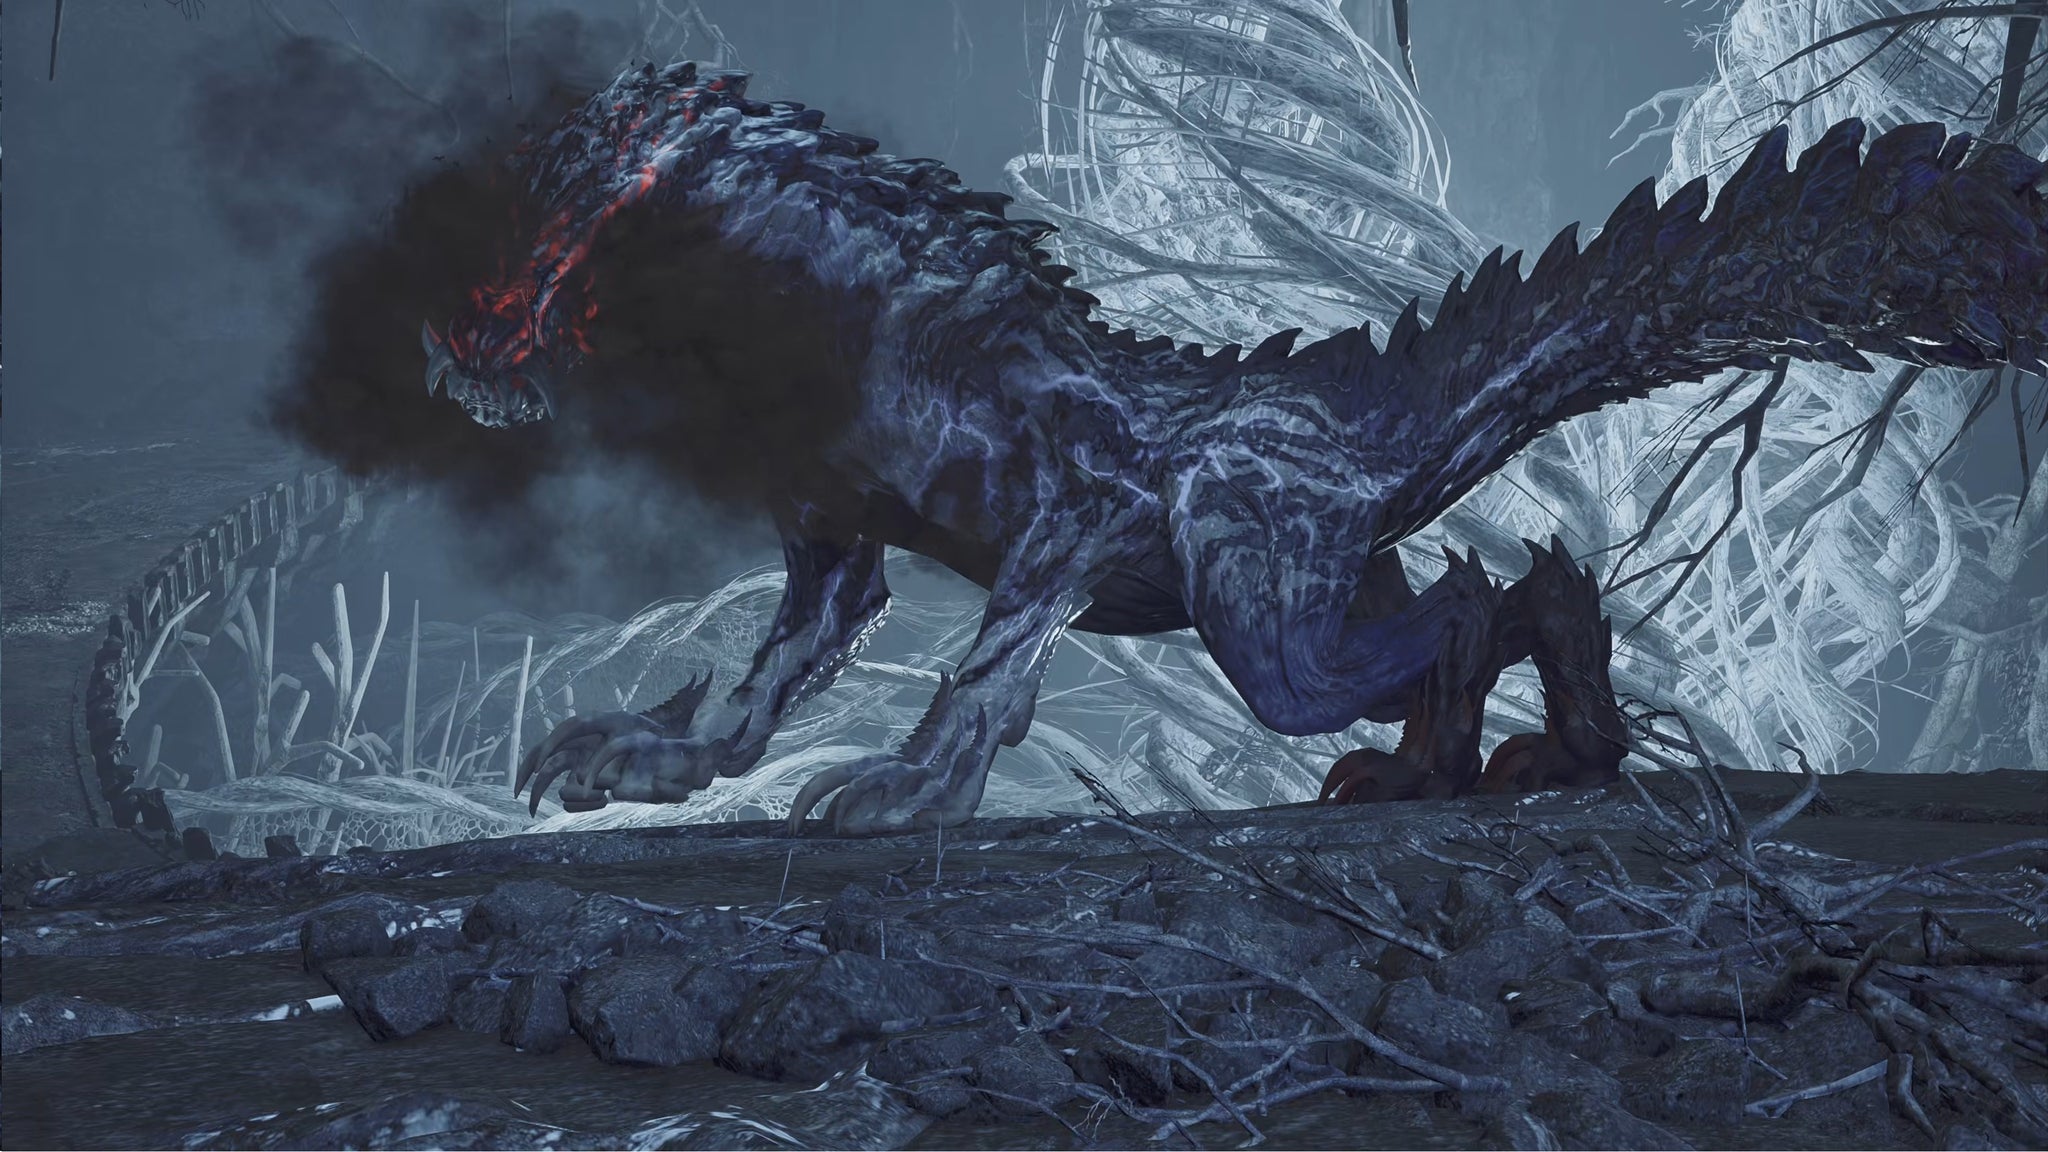
Image credit:Rock Paper Shotgun/Capcom
- Species: Construct
- Region: Ruins Of Wyveria
- Base HP: 5,000
- Weak To: Water, Paralysis
Another construct of Wyveria, the Guardian Ebony Odogaron is small, lithe, and speedy, with a dangerous tail and claws. Its blast attacks set off the white crystals its attacks leave behind, making it very important that you keep your distance at certain moments. After Jin Dahaad though, this Guardian makes for quite a tame fight.
Xu Wu
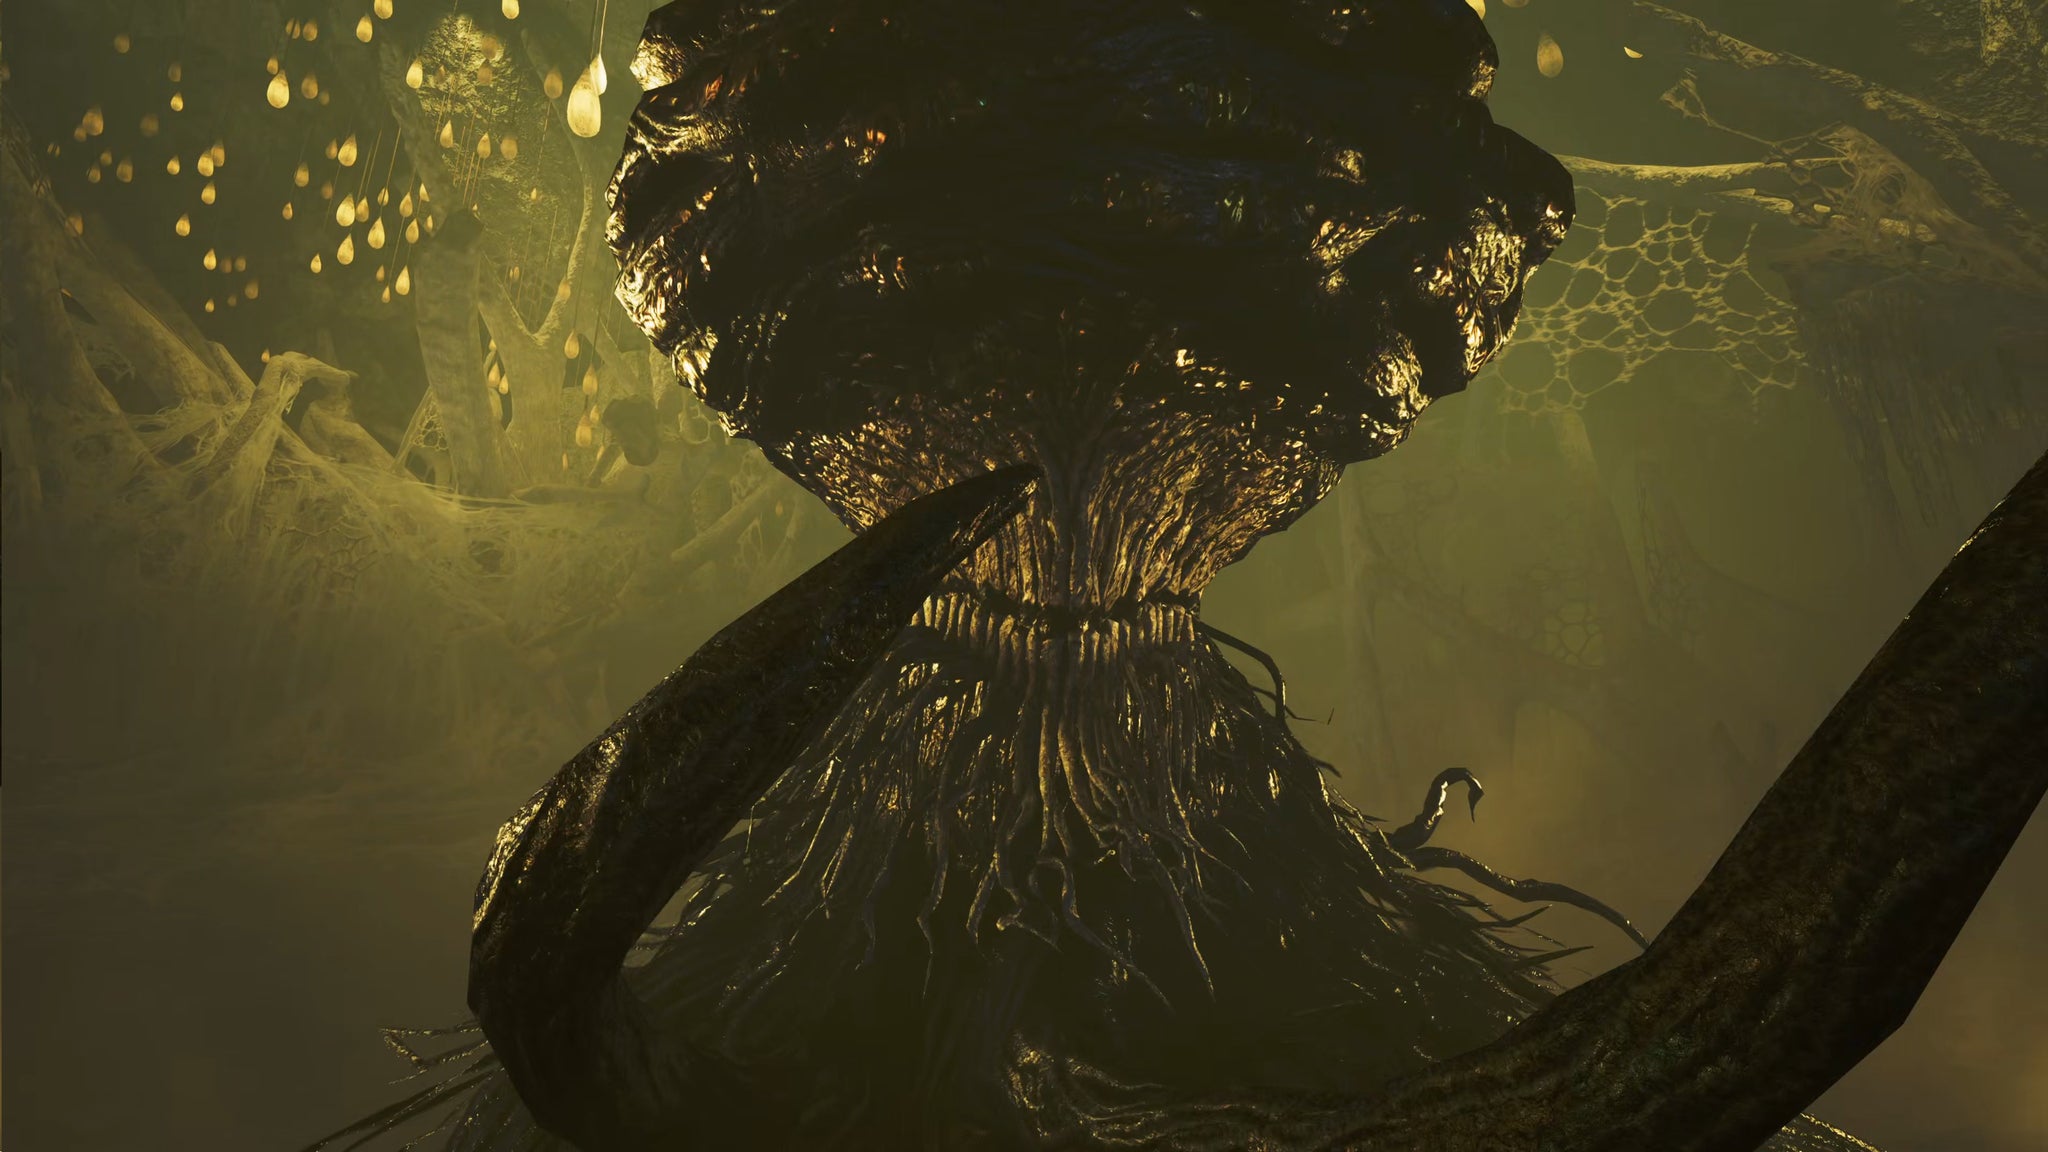
Image credit:Rock Paper Shotgun/Capcom
- Species: Cephalopod
- Region: Ruins Of Wyveria
- Base HP: 4,500
- Weak To: Ice, Poison
The eldritch-looking Xu Wu feeds on Guardians in Wyveria. It’s a bit like a smaller, more agile version of Nu Udra, but instead of setting itself aflame, Xu Wu likes to hurl golden spears at you when angered. It hates Ice and Poison, so use those status ailments against it as much as possible.
Guardian Arkveld

Image credit:Rock Paper Shotgun/Capcom
- Species: Construct
- Region: Ruins Of Wyveria
- Base HP: 5,200
- Weak To: Dragon
The big bad of Monster Hunter Wilds, Guardian Arkveld (also known as The White Wraith ) is another construct, but this one is completely out of control, capable of using its long chain-like appendages to siphon the energy from other monsters. These chains give it a very long reach, and its swift movements and high damage make this a challenging fight. Attack the chains with physical damage to break them over time.
Zoh Shia
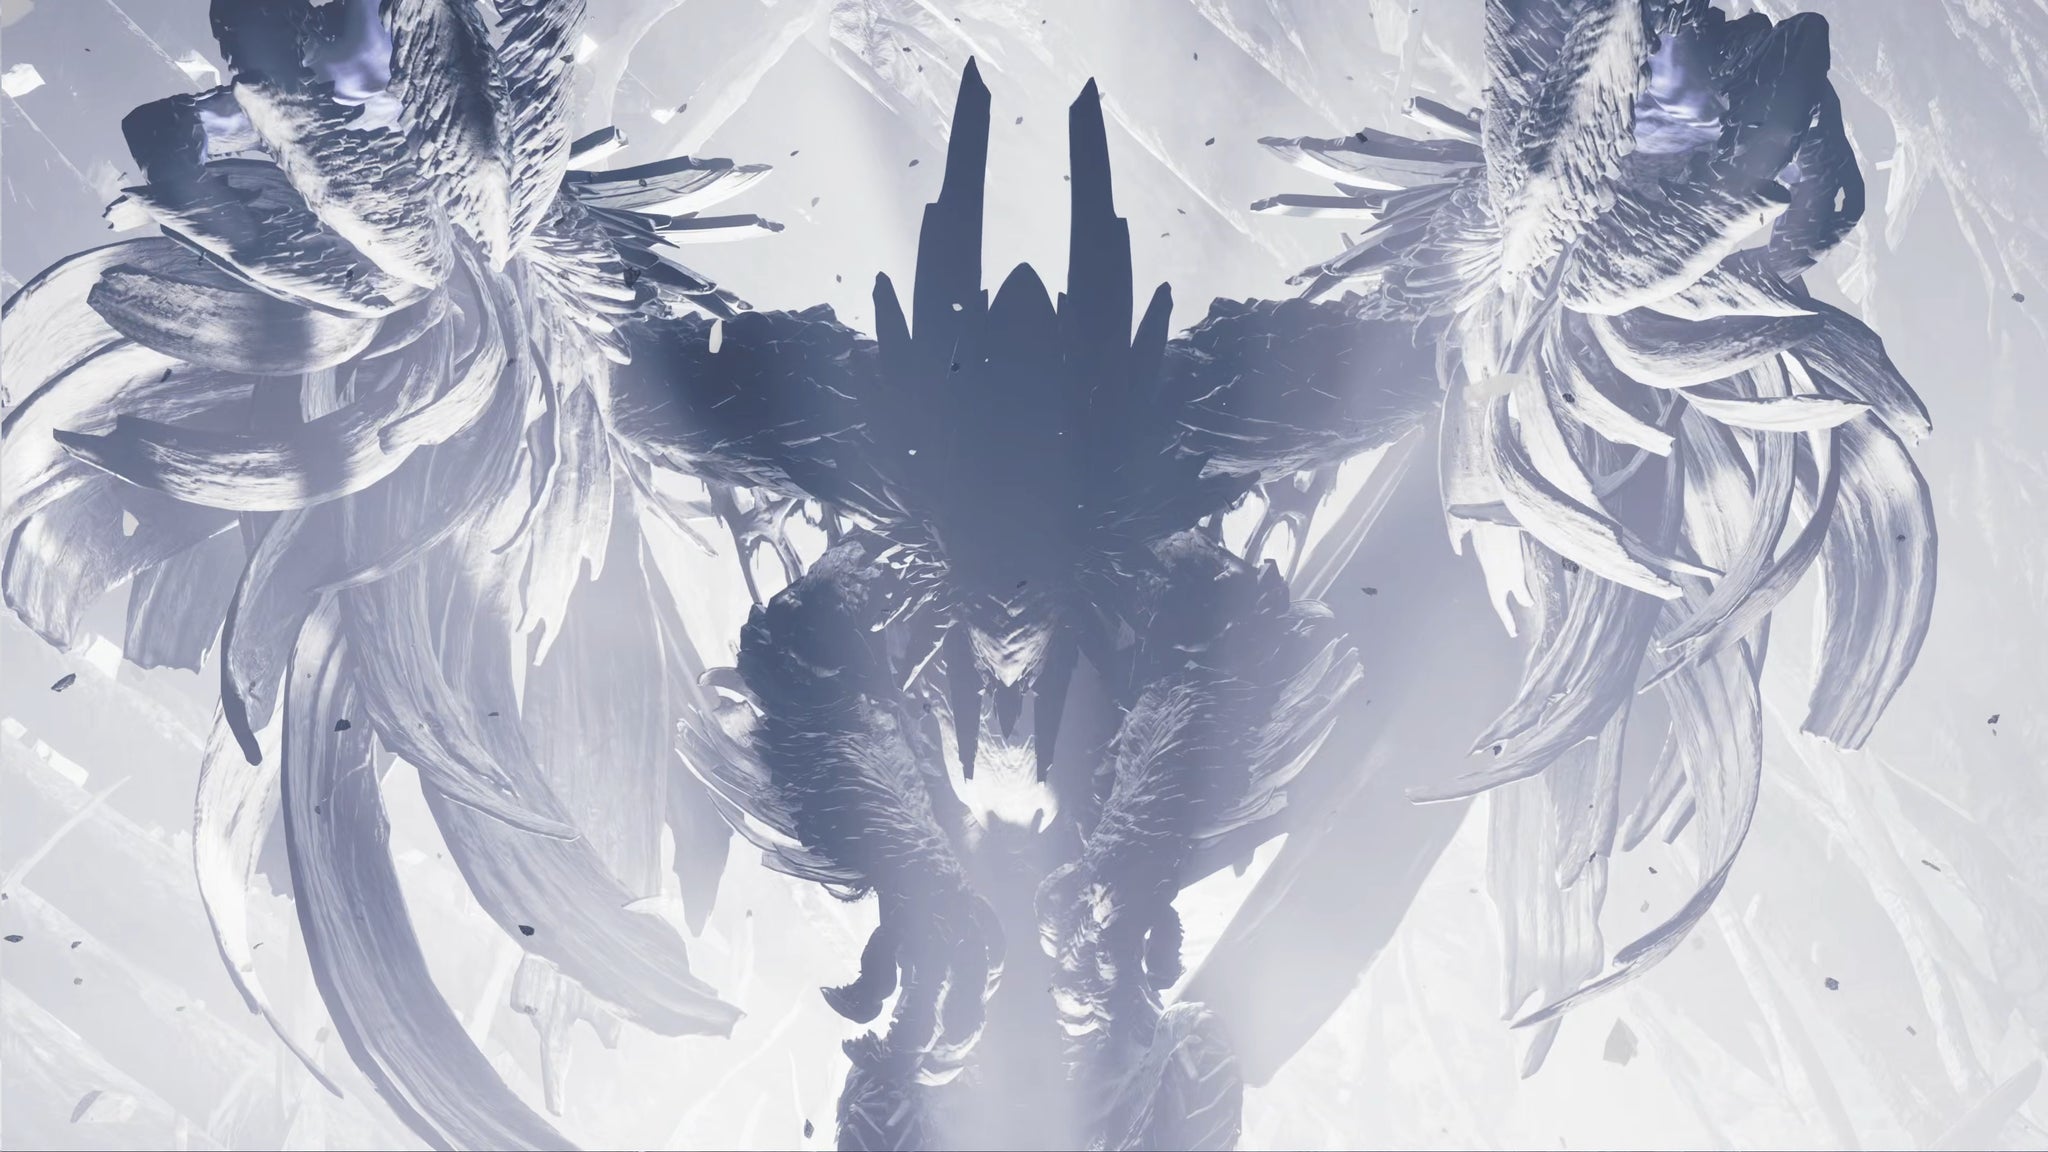
Image credit:Rock Paper Shotgun/Capcom
- Species: Construct
- Region: Ruins Of Wyveria
- Base HP: 9,000
- Weak To: Dragon
Zoh Shia is the last boss you’ll face before the credits roll, but don’t worry - there’s plenty more to discover after this point, which considerably extends how long it takes to beat Monster Hunter Wilds . This massive monster has a huge health pool, and begins the fight covered in ice, before shedding the ice and using fire attacks; then finally, utilising large area-of-effect thunder attacks. As of Title Update 1, you can also fight Zoh Shia as many times as you like, just like every other monster; you just need to reach Chapter 6-2: An Unexpected Summons first.
Yian Kut-Ku

Image credit:Rock Paper Shotgun/Capcom
- Species: Bird Wyvern
- Region: Scarlet Forest, Iceshard Cliffs
- Base HP: 3,800
- Weak To: Water, Ice, Thunder
The Yian Kut-Ku, and every monster after this point, only appears once you defeat Zoh Shia and begin Chapter 4 of the main story. This oversized fire-breathing chicken will be familiar to players who grew up with the early Monster Hunter games. Watch out for those slow tail swipes and unexpected charge attacks, and make sure you understand how to capture monsters for the first time you see one.
Gypceros

- Species: Bird Wyvern
- Region: Windward Plains, Oilwell Basin, Iceshard Cliffs, Ruins Of Wyveria
- Base HP: 4,200
- Weak To: Fire, Ice
The Gypceros is like a Yian Kut-Ku, but a bit more troublesome thanks to the two tricks up its sleeve; poison attacks, and the ability to create a blinding flash with its (breakable) head crest. They appear everywhere except the Scarlet Forest once you’ve hit Chapter 4.
Rathian
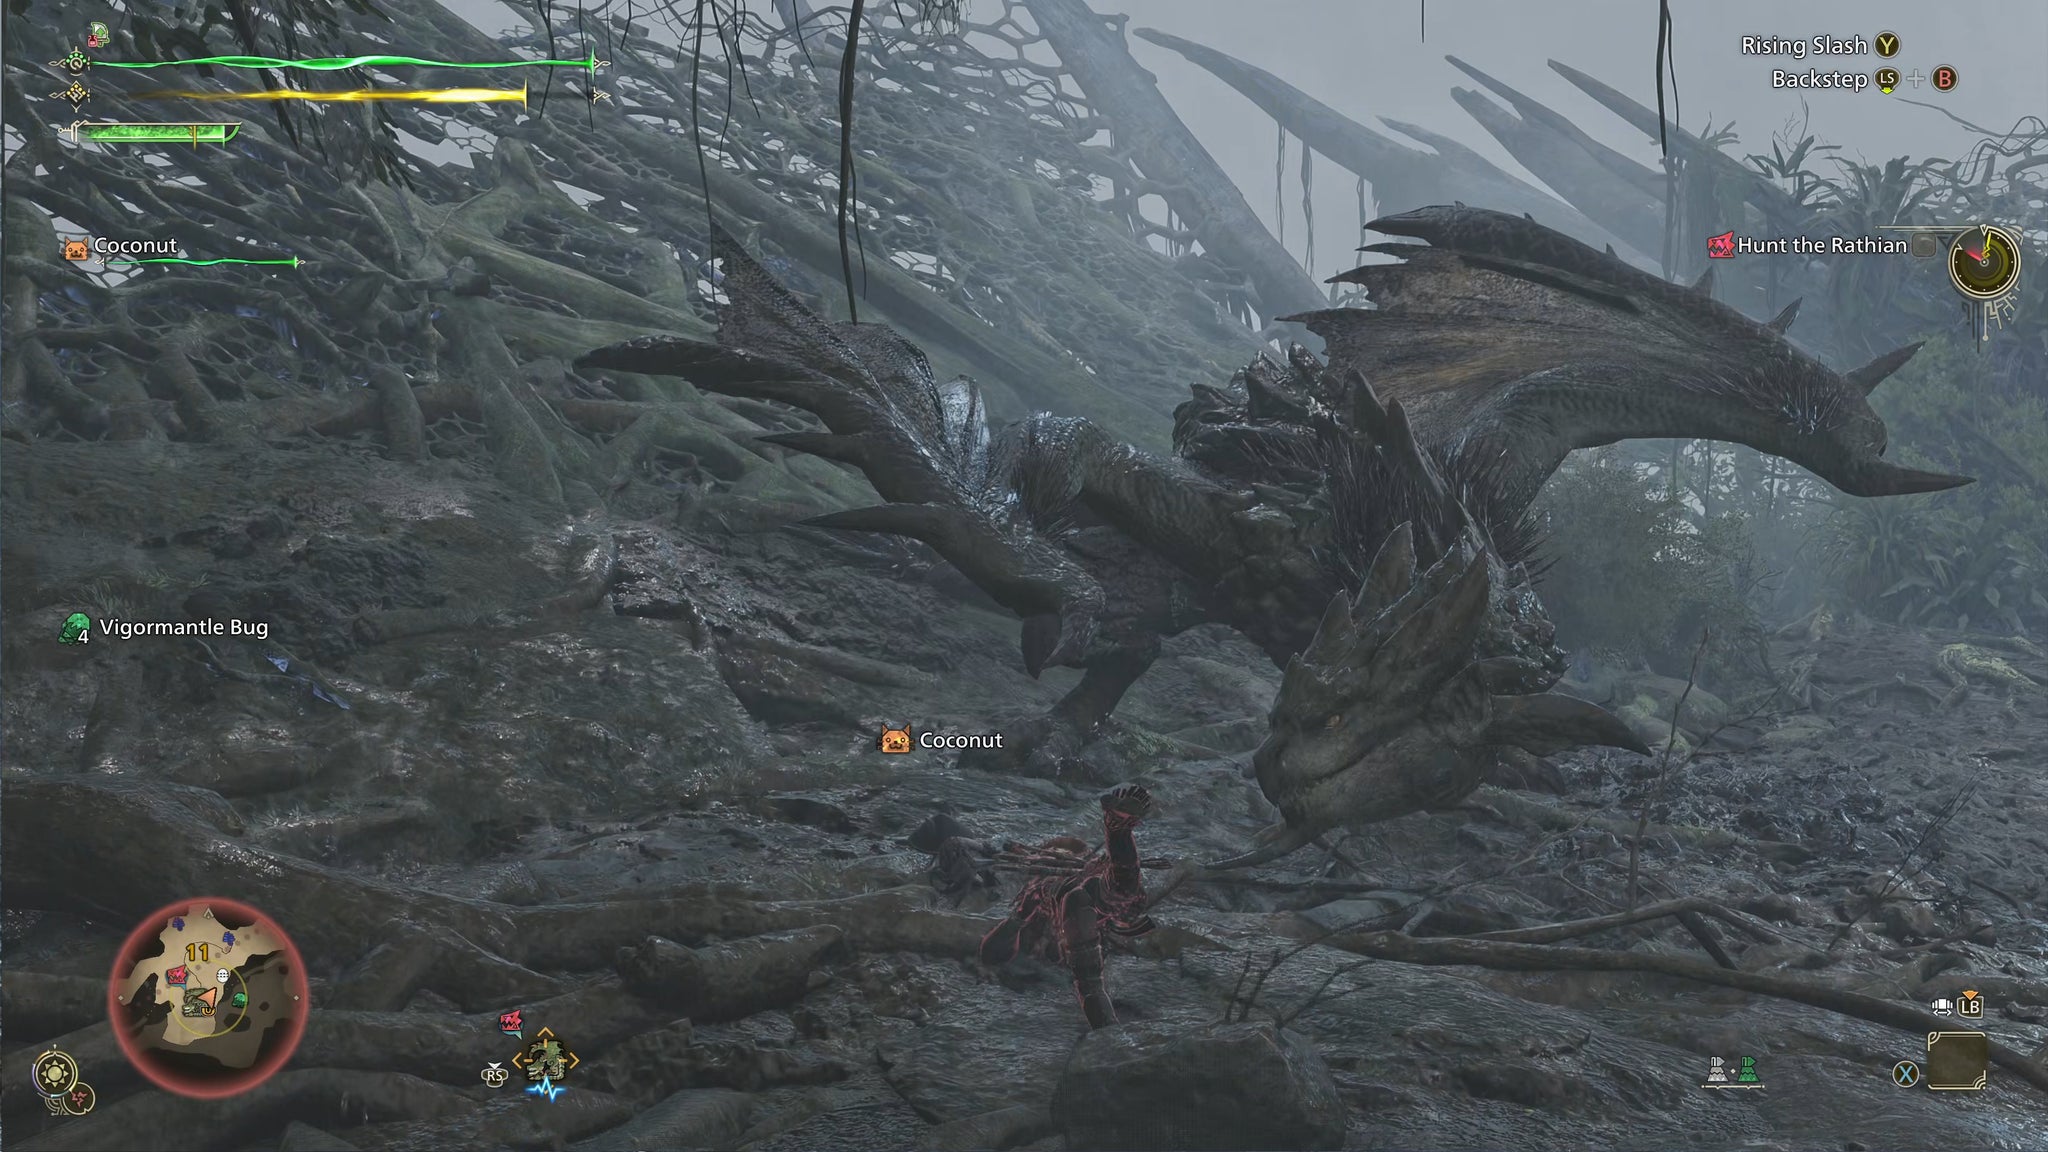
Image credit:Rock Paper Shotgun/Capcom
- Species: Flying Wyvern
- Region: Windward Plains, Scarlet Forest, Oilwell Basin
- Base HP: 4,500
- Weak To: Dragon, Thunder
The old familiar Rathian is back in Monster Hunter Wilds. The female counterpart to the posterchild Rathalos, the Rathian is a fast and aggressive monster that loves to inflict powerful swipes with its poison tail while in the air.
Rathalos

Image credit:Rock Paper Shotgun/Capcom
- Species: Flying Wyvern
- Region: Scarlet Forest, Oilwell Basin, Ruins Of Wyveria
- Base HP: 4,500
- Weak To: Dragon, Thunder
The iconic Rathalos can be found in most regions after Chapter 4 begins, and despite being about as vanilla a large monster as you can get, it’s no pushover. Rathalos loves to use airborne fire attacks, making it tough to pin down and target with your strongest attacks. Use Flash Bombs and Traps to lock it down.
Gravios

Image credit:Rock Paper Shotgun/Capcom
- Species: Flying Wyvern
- Region: Oilwell Basin, Ruins Of Wyveria
- Base HP: 5,500
- Weak To: Water, Dragon
Another familiar face, the giant armoured Gravios likes to skulk around the lower reaches of the Oilwell Basin. Its blast attacks are devastating, and its armour is nearly impenetrable - but keep hitting it and eventually you’ll expose a vulnerable interior. High sharpness and the water element will get you through this fight.
Blangonga

Image credit:Rock Paper Shotgun/Capcom
- Species: Fanged Beast
- Region: Iceshard Cliffs
- Base HP: 4,500
- Weak To: Fire
The Blangonga of the Iceshard Cliffs is small, aggressive, and predisposed to some very annoying backwards kicks. Aside from this, it’s an easy fight as long as you bring lots of fire, and clear out its miniature kin, the Blangos, as soon as they appear.
Guardian Fulgur Anjanath
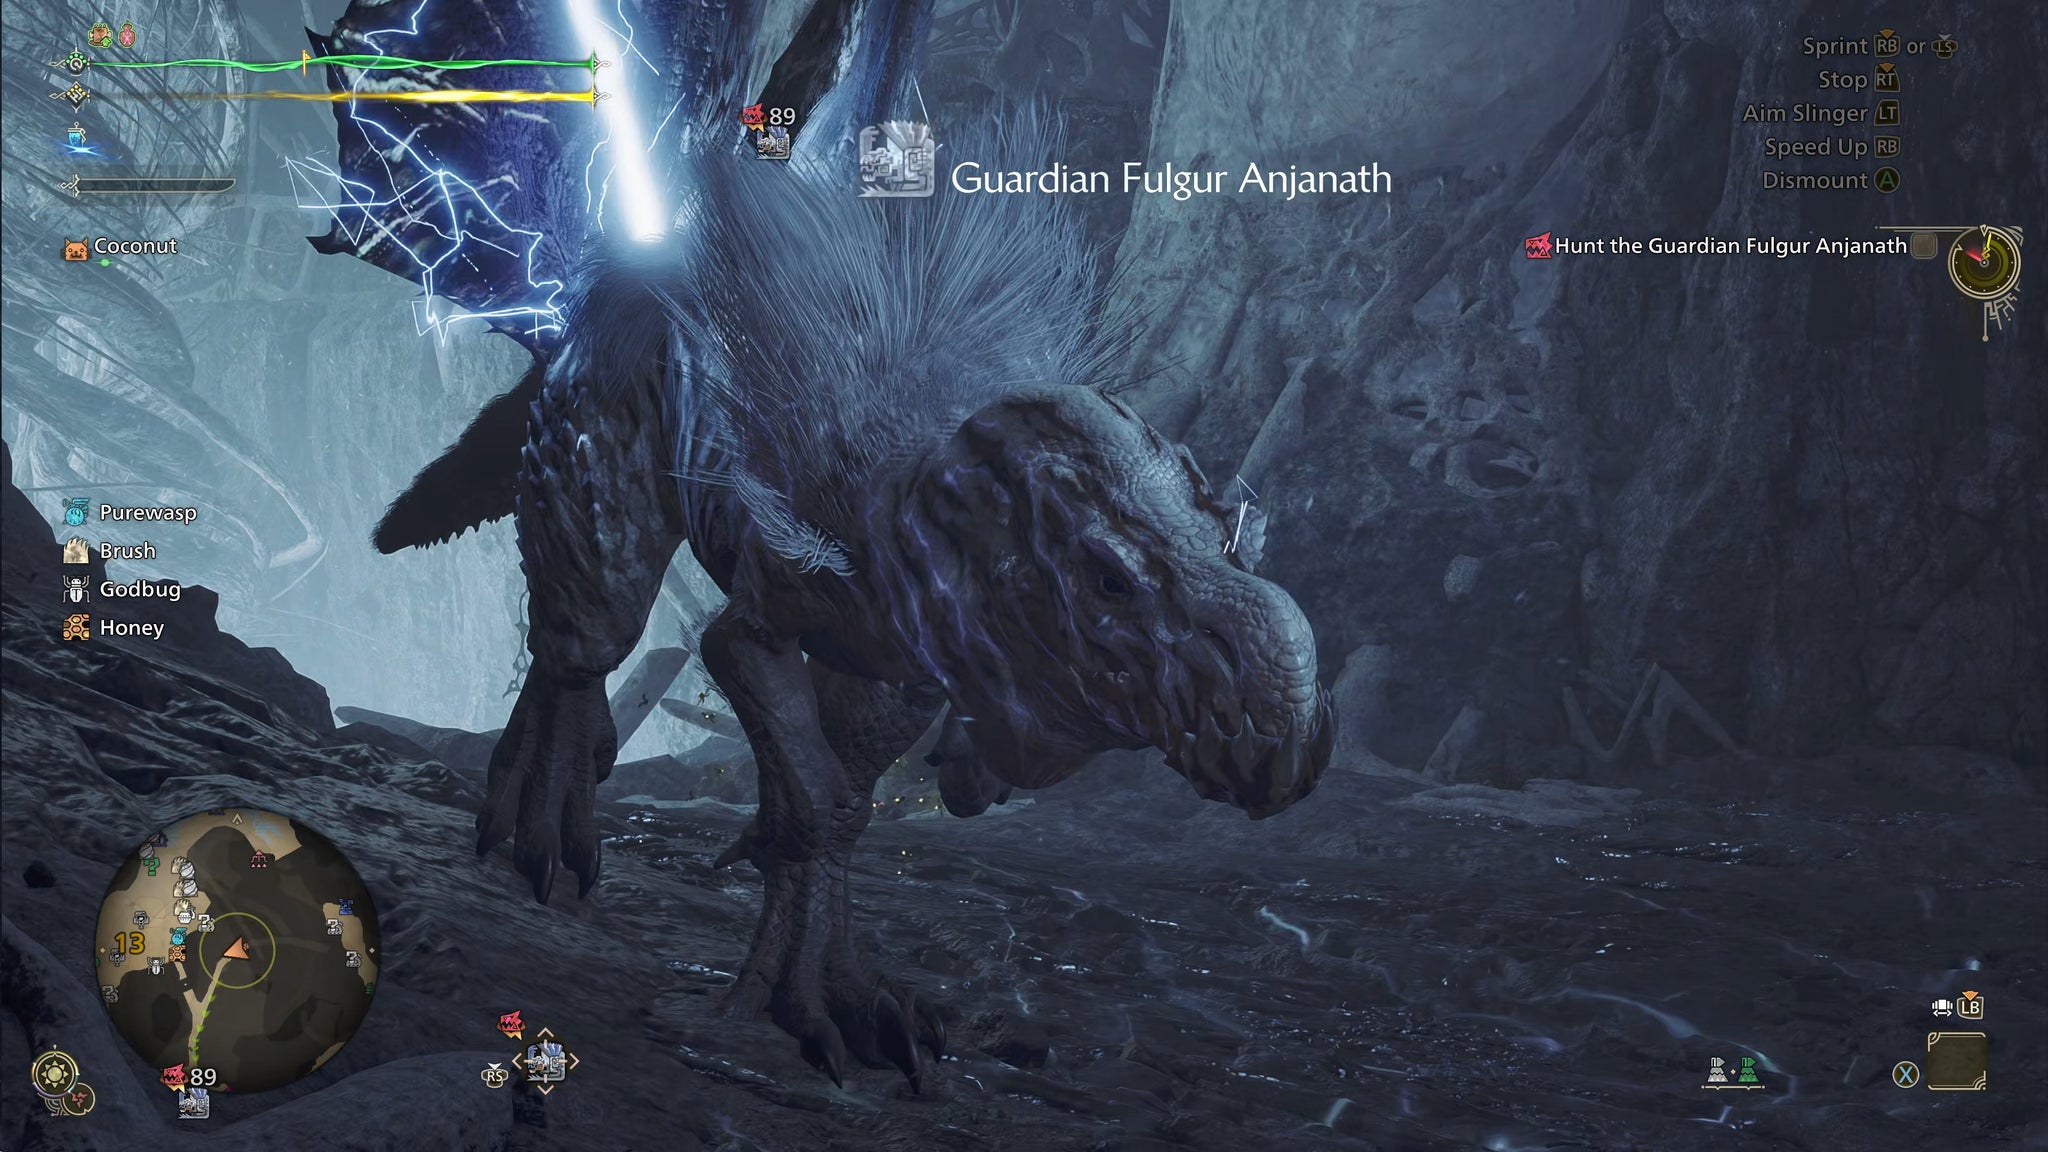
Image credit:Rock Paper Shotgun/Capcom
- Species: Construct
- Region: Ruins Of Wyveria
- Base HP: 5,000
- Weak To: Water, Ice, Dragon
The last Guardian you’ll encounter in the Ruins Of Wyveria is the Guardian Fulgur Anjanath, a fast-moving T-Rex-esque monster with lots of lightning attacks, and the ever-present Guardian energy blasts. Aim for the head with water or ice and it’ll go down without too much trouble.
Gore Magala

Image credit:Rock Paper Shotgun/Capcom
- Species: Demi Elder
- Region: Iceshard Cliffs
- Base HP: 5,100
- Weak To: Fire, Dragon
Gore Magala, shadowy enigmas first introduced in Monster Hunter 4, are back in Wilds as the source of the Frenzy Virus infecting the ecosystem. The Gore Magala is very agile for its size, and many of its attacks will inflict Frenzy upon you, forcing you to stay aggressive to counteract it. It’s not an easy fight, but fire or the dragon element will help cut down the time spent fighting this abomination.
Arkveld
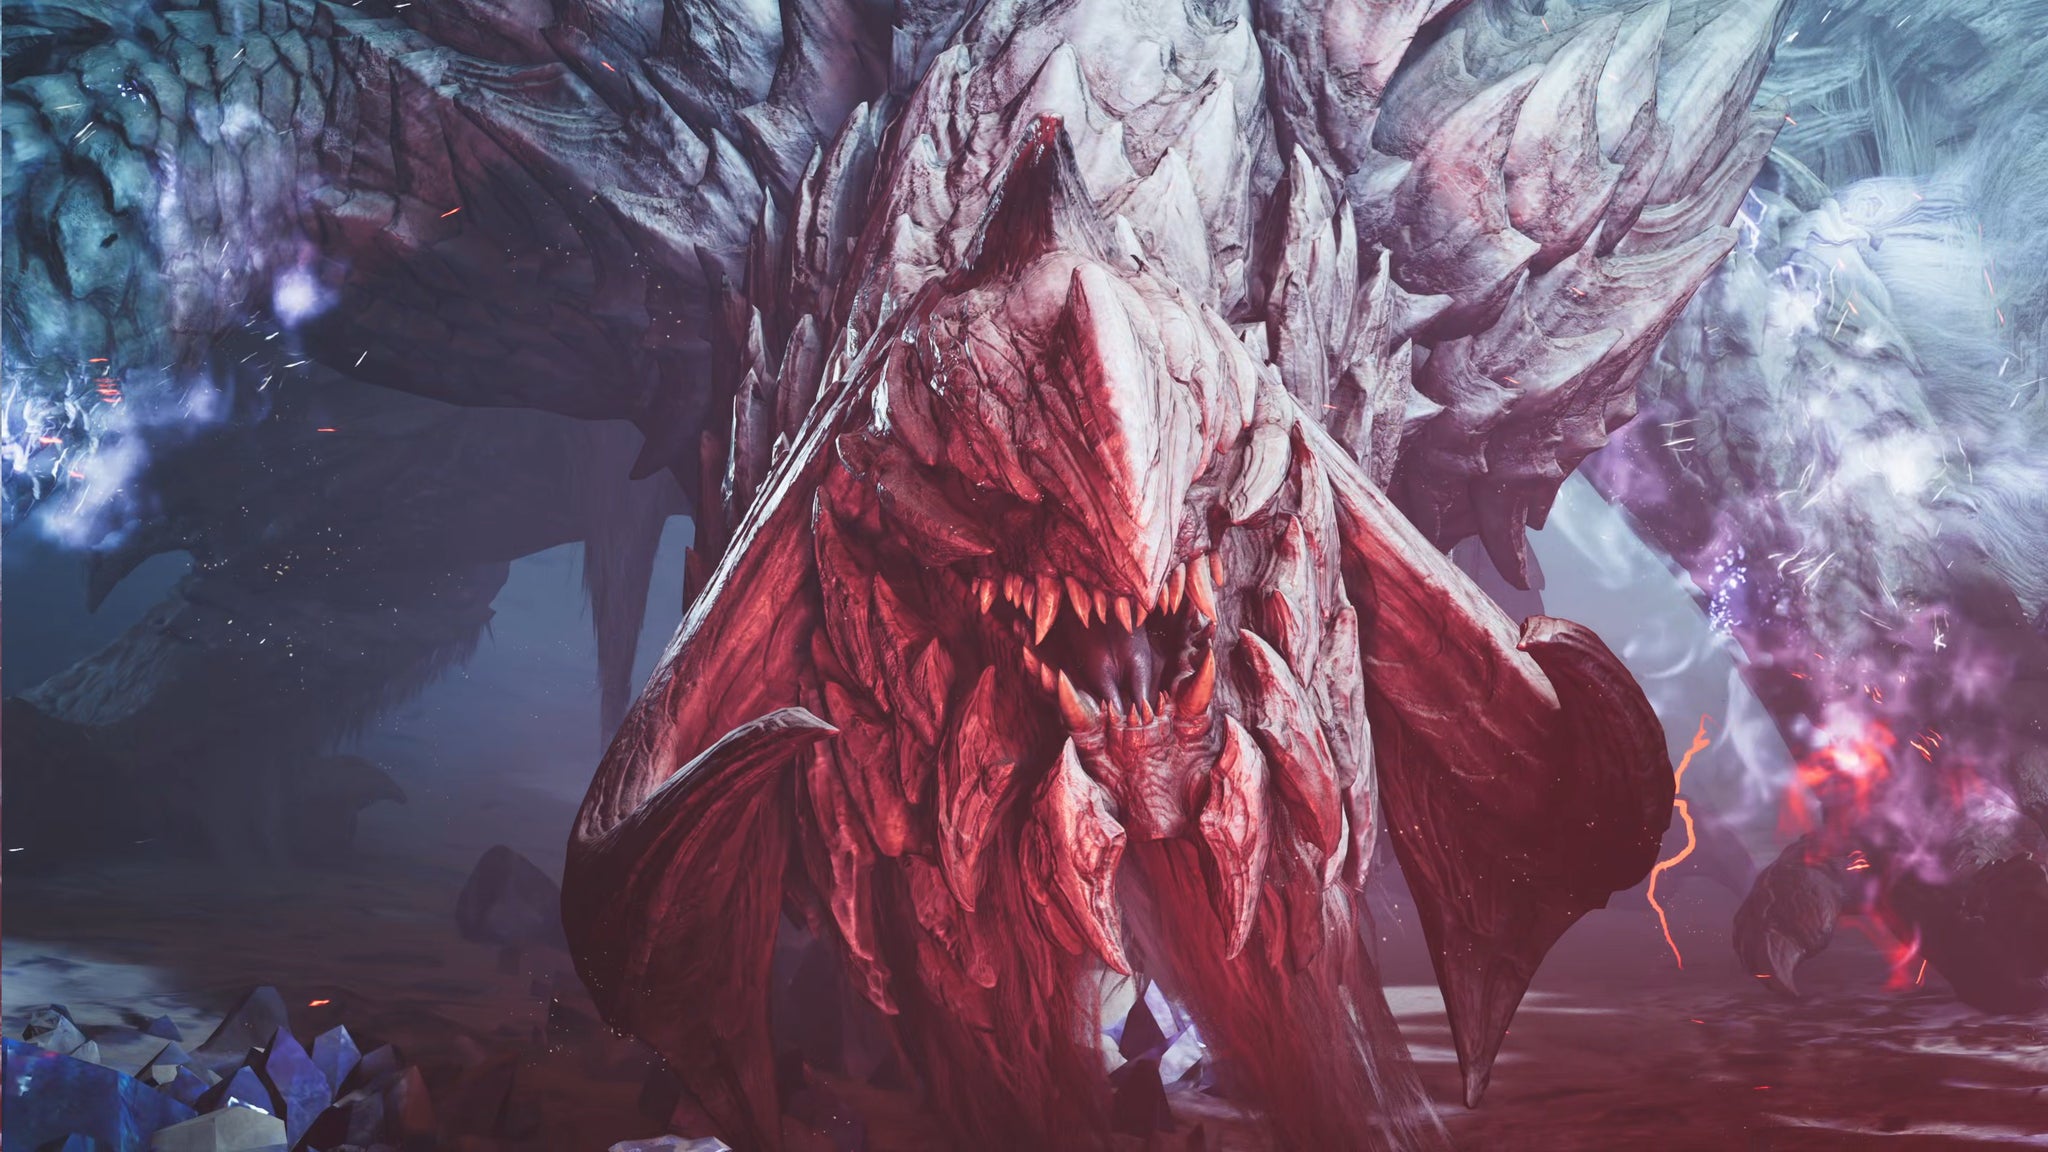
Image credit:Rock Paper Shotgun/Capcom
- Species: Flying Wyvern
- Region: All Regions
- Base HP: 5,200
- Weak To: Dragon
The final fight of the main story is against Arkveld - not Guardian Arkveld, but the true creature, which has found a way to un-extinct itself, for reasons. This fight is very similar to the previous Guardian Arkveld fight, those deadly chainblades being the most dangerous part of the encounter. Focus them until they’re broken, and it will make the rest of the fight much easier. If you need any extra help, check out our guide on how to beat Arkveld .
Mizutsune

Image credit:Capcom
- Species: Leviathan
- Region: Scarlet Forest, Ruins Of Wyveria
- Base HP: 5,500
- Weak To: Thunder, Dragon
Newly introduced in Title Update 1 is Mizutsune - a colourful water-based Leviathan previously seen in Generations and Rise. It’s a gracefully snake-like, bubble-blowing menace which uses a unique status effect known as Bubbleblight. This nasty effect makes you slide around, severely messing up your movement and making it harder to dodge Mizutsune’s attacks. You’ll first meet Mizutsune in Extra Mission 1: The Whispering Forest and Spirit In The Moonlight; this questline becomes available to you after you reach HR21+.
Upcoming monsters in Monster Hunter Wilds
Lagiacrus (?)

Image credit:Rock Paper Shotgun/Capcom
This is not yet confirmed, but fans are speculating that the next monster to be added after Mizutsune is the Lagiacrus, because the icon teasing the new monster looks suspiciously similar to this monster from MH3 and Generations. If true, we’ll be seeing another Thunder-based leviathan added to Wilds soon with the addition of this fearsome aquatic predator.
All monster variants explained
Nearly every monster in Monster Hunter Wilds can appear in two variants: Frenzied, and Tempered. Both these variants will only start to appear in the world once you’ve completed Chapter 3 of the main story . A few monsters can also appear in other variants, such as Arch-Tempered, Guardian, or Alpha. Here’s the rundown of all the different monster variants.
Tempered Monsters
Tempered monsters are more powerful variants of monsters which have survived for a long while and grown stronger thanks to the countless battles they’ve fought and won. These variants have considerably more health than their regular counterparts, and deal more damage with their attacks. Defeating Tempered monsters in quests is also the only way you can gain certain unique materials such as Hunter Symbols and Artian Materials .
Every large monster in the game can appear as a Tempered variant, except for Zoh Shia, which is only fought once as part of the main story.
Arch-Tempered Monsters
A step above Tempered Monsters, Arch-Tempered Monster variants were first added in Title Update 1. Currently there is only one monster which can appear in the Arch-Tempered variant: Rey Dau. Just like in Monster Hunter World and Rise, Arch-Tempered monsters feature the same improvements to health and damage as Tempered monsters - but even more so. These monsters are meant to be the greatest challenge in the game.
Frenzied Monsters
Frenzied monsters have been infected with the Frenzy virus which stems from the monster Gore Magala (and therefore, Gore Magala is one of the only monsters for whom you’ll never encounter a “Frenzied” version). If a monster is Frenzied, they’ll be more immediately aggressive, and more reluctant to escape to another area when damaged. They will also build up a Frenzy status effect on you with their attacks, which increases your damage taken. You can remove the Frenzy status effect and reduce its buildup by attacking repeatedly.
Guardians
Guardians are another variant of monster introduced in Monster Hunter Wilds, but these are different enough to be classed as their own species rather than a regular variant. You’ll encounter Guardians in the Ruins Of Wyveria, the final region of the game, which you’ll begin to explore in Chapter 3. These constructs act much the same as the monsters they’re modelled after, but some of their attacks are infused with explosive blasts of Guardian energy.
The Guardian monsters in Monster Hunter Wilds are:
- Guardian Doshaguma
- Guardian Rathalos
- Guardian Ebony Odogaron
- Guardian Arkveld
- Guardian Fulgur Anjanath
Alpha Monsters
There are several species of large monster which tend to move around in packs, including the Doshaguma, Hirabami, and Yian Kut-Ku. However, so far, only one species is capable of appearing in a large “Alpha” variant: the Alpha Doshaguma . Much like Tempered monsters, the Alpha deals more damage and has significantly more health. It’s also physically larger than its regular kin.
Apex Monsters
Apex Monsters aren’t a variant, they’re just a way of classifying a small handful of monster species as more dangerous and powerful than the rest. Certain monsters in Monster Hunter Wilds are known as Apex Monsters, which means they’re at the very top of the food chain in their region. There’s a single Apex Monster for each region in the game, and they only appear in the ecosystem occasionally.
here’s the full list of all Apex Monsters and where they reign supreme:
- Rey Dau : Apex Monster of the Windward Plains
- Uth Duna : Apex Monster of the Scarlet Forest
- Nu Udra : Apex Monster of the Oilwell Basin
- Jin Dahaad : Apex Monster of the Iceshard Cliffs
It’s also likely fair to say that Arkveld is the de facto Apex predator of Wyveria (and of the whole game, really). But Arkveld differs from the others because it can appear in any region, and the game doesn’t specifically label it as an Apex, so it doesn’t count towards your achievement of hunting Apex monsters.
That wraps up our guide to the entire Monster Hunter Wilds monster list. To properly prepare yourself for all the upcoming fights against these monsters, check out our guides on all the Monster Hunter Wilds weapons and our best weapons tier list , as well as the best starter weapons and best solo weapons . And if you want step-by-step guidance, look no further than our Monster Hunter Wilds walkthrough .


Monster Hunter Wilds
Video Game
Rock Paper Shotgun is better when you sign in
Sign in and join us on our journey to discover strange and compelling PC games.

All 75 Arc Raiders Blueprints and where to get them
These areas have the highest chance of giving you Blueprints

Image credit:Rock Paper Shotgun/Embark Studios

Looking for more Arc Raiders Blueprints? It’s a special day when you find a Blueprint, as they’re among the most valuable items in Arc Raiders. If you find a Blueprint that you haven’t already found, then you must make sure you hold onto it at all costs, because Blueprints are the key to one of the most important and powerful systems of meta-progression in the game.
This guide aims to be the very best guide on Blueprints you can find, starting with a primer on what exactly they are and how they work in Arc Raiders, before delving into exactly where to get Blueprints and the very best farming spots for you to take in your search.
We’ll also go over how to get Blueprints from other unlikely activities, such as destroying Surveyors and completing specific quests. And you’ll also find the full list of all 75 Blueprints in Arc Raiders on this page (including the newest Blueprints added with the Cold Snap update , such as the Deadline Blueprint and Firework Box Blueprint), giving you all the information you need to expand your own crafting repertoire.
In this guide:
- What are Blueprints in Arc Raiders?
- Full Blueprint list: All crafting recipes
- Where to find Blueprints in Arc Raiders Blueprints obtained from quests Blueprints obtained from Trials Best Blueprint farming locations

What are Blueprints in Arc Raiders?
Blueprints in Arc Raiders are special items which, if you manage to extract with them, you can expend to permanently unlock a new crafting recipe in your Workshop. If you manage to extract from a raid with an Anvil Blueprint, for example, you can unlock the ability to craft your very own Anvil Pistol, as many times as you like (as long as you have the crafting materials).
To use a Blueprint, simply open your Inventory while in the lobby, then right-click on the Blueprint and click “Learn And Consume” . This will permanently unlock the recipe for that item in your Workshop. As of the Stella Montis update, there are allegedly 75 different Blueprints to unlock - although only 68 are confirmed to be in the game so far. You can see all the Blueprints you’ve found and unlocked by going to the Workshop menu, and hitting “R” to bring up the Blueprint screen.
It’s possible to find duplicates of past Blueprints you’ve already unlocked. If you find these, then you can either sell them, or - if you like to play with friends - you can take it into a match and gift it to your friend so they can unlock that recipe for themselves. Another option is to keep hold of them until the time comes to donate them to the Expedition.
Full Blueprint list: All crafting recipes
Below is the full list of all the Blueprints that are currently available to find in Arc Raiders, and the crafting recipe required for each item:
| Blueprint | Type | Recipe | Crafted At |
|---|---|---|---|
| Bettina | Weapon | 3x Advanced Mechanical Components 3x Heavy Gun Parts 3x Canister | Gunsmith 3 |
| Blue Light Stick | Quick Use | 3x Chemicals | Utility Station 1 |
| Aphelion | Weapon | 3x Magnetic Accelerator 3x Complex Gun Parts 1x Matriarch Reactor | Gunsmith 3 |
| Combat Mk. 3 (Flanking) | Augment | 2x Advanced Electrical Components 3x Processor | Gear Bench 3 |
| Combat Mk. 3 (Aggressive) | Augment | 2x Advanced Electrical Components 3x Processor | Gear Bench 3 |
| Complex Gun Parts | Material | 2x Light Gun Parts 2x Medium Gun Parts 2x Heavy Gun Parts | Refiner 3 |
| Fireworks Box | Quick Use | 1x Explosive Compound 3x Pop Trigger | Explosives Station 2 |
| Gas Mine | Mine | 4x Chemicals 2x Rubber Parts | Explosives Station 1 |
| Green Light Stick | Quick Use | 3x Chemicals | Utility Station 1 |
| Pulse Mine | Mine | 1x Crude Explosives 1x Wires | Explosives Station 1 |
| Seeker Grenade | Grenade | 1x Crude Explosives 2x ARC Alloy | Explosives Station 1 |
| Looting Mk. 3 (Survivor) | Augment | 2x Advanced Electrical Components 3x Processor | Gear Bench 3 |
| Angled Grip II | Mod | 2x Mechanical Components 3x Duct Tape | Gunsmith 2 |
| Angled Grip III | Mod | 2x Mod Components 5x Duct Tape | Gunsmith 3 |
| Hullcracker | Weapon | 1x Magnetic Accelerator 3x Heavy Gun Parts 1x Exodus Modules | Gunsmith 3 |
| Launcher Ammo | Ammo | 5x Metal Parts 1x Crude Explosives | Workbench 1 |
| Anvil | Weapon | 5x Mechanical Components 5x Simple Gun Parts | Gunsmith 2 |
| Anvil Splitter | Mod | 2x Mod Components 3x Processor | Gunsmith 3 |
| ??? | ??? | ??? | ??? |
| Barricade Kit | Quick Use | 1x Mechanical Components | Utility Station 2 |
| Blaze Grenade | Grenade | 1x Explosive Compound 2x Oil | Explosives Station 3 |
| Bobcat | Weapon | 3x Advanced Mechanical Components 3x Light Gun Parts | Gunsmith 3 |
| Osprey | Weapon | 2x Advanced Mechanical Components 3x Medium Gun Parts 7x Wires | Gunsmith 3 |
| Burletta | Weapon | 3x Mechanical Components 3x Simple Gun Parts | Gunsmith 1 |
| Compensator II | Mod | 2x Mechanical Components 4x Wires | Gunsmith 2 |
| Compensator III | Mod | 2x Mod Components 8x Wires | Gunsmith 3 |
| Defibrillator | Quick Use | 9x Plastic Parts 1x Moss | Medical Lab 2 |
| ??? | ??? | ??? | ??? |
| Equalizer | Weapon | 3x Magnetic Accelerator 3x Complex Gun Parts 1x Queen Reactor | Gunsmith 3 |
| Extended Barrel | Mod | 2x Mod Components 8x Wires | Gunsmith 3 |
| Extended Light Mag II | Mod | 2x Mechanical Components 3x Steel Spring | Gunsmith 2 |
| Extended Light Mag III | Mod | 2x Mod Components 5x Steel Spring | Gunsmith 3 |
| Extended Medium Mag II | Mod | 2x Mechanical Components 3x Steel Spring | Gunsmith 2 |
| Extended Medium Mag III | Mod | 2x Mod Components 5x Steel Spring | Gunsmith 3 |
| Extended Shotgun Mag II | Mod | 2x Mechanical Components 3x Steel Spring | Gunsmith 2 |
| Extended Shotgun Mag III | Mod | 2x Mod Components 5x Steel Spring | Gunsmith 3 |
| Remote Raider Flare | Quick Use | 2x Chemicals 4x Rubber Parts | Utility Station 1 |
| Heavy Gun Parts | Material | 4x Simple Gun Parts | Refiner 2 |
| Venator | Weapon | 2x Advanced Mechanical Components 3x Medium Gun Parts 5x Magnet | Gunsmith 3 |
| Il Toro | Weapon | 5x Mechanical Components 6x Simple Gun Parts | Gunsmith 1 |
| Jolt Mine | Mine | 1x Electrical Components 1x Battery | Explosives Station 2 |
| Explosive Mine | Mine | 1x Explosive Compound 1x Sensors | Explosives Station 3 |
| Jupiter | Weapon | 3x Magnetic Accelerator 3x Complex Gun Parts 1x Queen Reactor | Gunsmith 3 |
| Light Gun Parts | Material | 4x Simple Gun Parts | Refiner 2 |
| Lightweight Stock | Mod | 2x Mod Components 5x Duct Tape | Gunsmith 3 |
| Lure Grenade | Grenade | 1x Speaker Component 1x Electrical Components | Utility Station 2 |
| Medium Gun Parts | Material | 4x Simple Gun Parts | Refiner 2 |
| Torrente | Weapon | 2x Advanced Mechanical Components 3x Medium Gun Parts 6x Steel Spring | Gunsmith 3 |
| Muzzle Brake II | Mod | 2x Mechanical Components 4x Wires | Gunsmith 2 |
| Muzzle Brake III | Mod | 2x Mod Components 8x Wires | Gunsmith 3 |
| Padded Stock | Mod | 2x Mod Components 5x Duct Tape | Gunsmith 3 |
| Shotgun Choke II | Mod | 2x Mechanical Components 4x Wires | Gunsmith 2 |
| Shotgun Choke III | Mod | 2x Mod Components 8x Wires | Gunsmith 3 |
| Shotgun Silencer | Mod | 2x Mod Components 8x Wires | Gunsmith 3 |
| Showstopper | Grenade | 1x Advanced Electrical Components 1x Voltage Converter | Explosives Station 3 |
| Silencer I | Mod | 2x Mechanical Components 4x Wires | Gunsmith 2 |
| Silencer II | Mod | 2x Mod Components 8x Wires | Gunsmith 3 |
| Snap Hook | Quick Use | 2x Power Rod 3x Rope 1x Exodus Modules | Utility Station 3 |
| Stable Stock II | Mod | 2x Mechanical Components 3x Duct Tape | Gunsmith 2 |
| Stable Stock III | Mod | 2x Mod Components 5x Duct Tape | Gunsmith 3 |
| Tagging Grenade | Grenade | 1x Electrical Components 1x Sensors | Utility Station 3 |
| Tempest | Weapon | 3x Advanced Mechanical Components 3x Medium Gun Parts 3x Canister | Gunsmith 3 |
| Trigger Nade | Grenade | 2x Crude Explosives 1x Processor | Explosives Station 2 |
| Vertical Grip II | Mod | 2x Mechanical Components 3x Duct Tape | Gunsmith 2 |
| Vertical Grip III | Mod | 2x Mod Components 5x Duct Tape | Gunsmith 3 |
| Vita Shot | Quick Use | 2x Antiseptic 1x Syringe | Medical Lab 3 |
| Vita Spray | Quick Use | 3x Antiseptic 1x Canister | Medical Lab 3 |
| Vulcano | Weapon | 1x Magnetic Accelerator 3x Heavy Gun Parts 1x Exodus Modules | Gunsmith 3 |
| Wolfpack | Grenade | 2x Explosive Compound 2x Sensors | Explosives Station 3 |
| Red Light Stick | Quick Use | 3x Chemicals | Utility Station 1 |
| Smoke Grenade | Grenade | 14x Chemicals 1x Canister | Utility Station 2 |
| Deadline | Mine | 3x Explosive Compound 2x ARC Circuitry | Explosives Station 3 |
| Trailblazer | Grenade | 1x Explosive Compound 1x Synthesized Fuel | Explosives Station 3 |
| Tactical Mk. 3 (Defensive) | Augment | 2x Advanced Electrical Components 3x Processor | Gear Bench 3 |
| Tactical Mk. 3 (Healing) | Augment | 2x Advanced Electrical Components 3x Processor | Gear Bench 3 |
| Yellow Light Stick | Quick Use | 3x Chemicals | Utility Station 1 |
Note: The missing Blueprints in this list likely have not actually been added to the game at the time of writing, because none of the playerbase has managed to find any of them. As they are added to the game, I will update this page with the most relevant information so you know exactly how to get all 75 Arc Raiders Blueprints.
Where to find Blueprints in Arc Raiders
Below is a list of all containers, modifiers, and events which maximise your chances of finding Blueprints:
- Certain quests reward you with specific Blueprints .
- Completing Trials has a high chance of offering Blueprints as rewards.
- Surveyors have a decent chance of dropping Blueprints on death.
- High loot value areas tend to have a greater chance of spawning Blueprints.
- Night Raids and Storms may increase rare Blueprint spawn chances in containers.
- Containers with higher numbers of items may have a higher tendency to spawn Blueprints. As a result, Blue Gate (which has many “large” containers containing multiple items) may give you a higher chance of spawning Blueprints.
- Raider containers (Raider Caches, Weapon Boxes, Medical Bags, Grenade Tubes) have increased Blueprint drop rates. As a result, the Uncovered Caches event gives you a high chance of finding Blueprints.
- Security Lockers have a higher than average chance of containing Blueprints.
- Certain Blueprints only seem to spawn under specific circumstances: Tempest Blueprint only spawns during Night Raid events. Vulcano Blueprint only spawns during Hidden Bunker events. Jupiter and Equaliser Blueprints only spawn during Harvester events.

Raider Caches, Weapon Boxes, and other raider-oriented container types have a good chance of offering Blueprints. |Image credit:Rock Paper Shotgun/Embark Studios
Blueprints have a very low chance of spawning in any container in Arc Raiders, around 1-2% on average. However, there is a higher chance of finding Blueprints in particular container types. Specifically, you can find more Blueprints in Raider containers and security lockers.
Beyond this, if you’re looking for Blueprints you should focus on regions of the map which are marked as having particularly high-value loot. Areas such as the Control Tower in Dam Battlegrounds, the Arrival and Departure Buildings in Spaceport, and Pilgrim’s Peak in Blue Gate all have a better-than-average chance of spawning Blueprints somewhere amongst all their containers. Night Raids and Electromagnetic Storm events also increase the drop chances of certain Blueprints .
In addition to these containers, you can often loot Blueprints from destroyed Surveyors - the largest of the rolling ball ARC. Surveyors are more commonly found on the later maps - Spaceport and Blue Gate - and if one spawns in your match, you’ll likely see it by the blue laser beam that it casts into the sky while “surveying”.
Surveyors are quite well-armoured and will very speedily run away from you once it notices you, but if you can take one down then make sure you loot all its parts for a chance of obtaining certain unusual Blueprints.
Blueprints obtained from quests
One way in which you can get Blueprints is by completing certain quests for the vendors in Speranza. Some quests will reward you with a specific item Blueprint upon completion, so as long as you work through all the quests in Arc Raiders, you are guaranteed those Blueprints.
Here is the full list of all Blueprints you can get from quest rewards:
- Trigger Nade Blueprint: Rewarded after completing “Sparks Fly”.
- Lure Grenade Blueprint: Rewarded after completing “Greasing Her Palms”.
- Burletta Blueprint: Rewarded after completing “Industrial Espionage”.
- Hullcracker Blueprint (and Launcher Ammo Blueprint): Rewarded after completing “The Major’s Footlocker”.
Alas, that’s only 4 Blueprints out of a total of 75 to unlock, so for the vast majority you will need to find them yourself during a raid. If you’re intent on farming Blueprints, then it’s best to equip yourself with cheap gear in case you lose it, but don’t use a free loadout because then you won’t get a safe pocket to stash any new Blueprint you find. No pain in Arc Raiders is sharper than failing to extract with a new Blueprint you’ve been after for a dozen hours already.

One of the best ways to get Blueprints is by hitting three stars on all five Trials every week. |Image credit:Rock Paper Shotgun/Embark Studios
Blueprints obtained from Trials
One of the very best ways to get Blueprints is as rewards for completing Trials in Arc Raiders. Trials are unlocked from Level 15 onwards, and allow you to earn rewards by focusing on certain tasks over the course of several raids. For example, one Trial might task you with dealing damage to Hornets, while another might challenge you to loot Supply Drops.
Trials refresh on a weekly basis, with a new week bringing five new Trials. Each Trial can offer up to three rewards after passing certain score milestones, and it’s possible to receive very high level loot from these reward crates - including Blueprints. So if you want to unlock as many Blueprints as possible, you should make a point of completing as many Trials as possible each week.
Best Blueprint farming locations
The very best way to get Blueprints is to frequent specific areas of the maps which combine high-tier loot pools with the right types of containers to search. Here are my recommendations for where to find Blueprints on every map, so you can always keep the search going for new crafting recipes to unlock.

Image credit:Rock Paper Shotgun/Embark Studios
Dam Battlegrounds
The best places to farm Blueprints on Dam Battlegrounds are the Control Tower, Power Generation Complex, Ruby Residence, and Pale Apartments . The first two regions, despite only being marked on the map as mid-tier loot, contain a phenomenal number of containers to loot. The Control Tower can also contain a couple of high-tier Security Lockers - though of course, you’ll need to have unlocked the Security Breach skill at the end of the Survival tree.
There’s also a lot of reporting amongst the playerbase that the Residential areas in the top-left of the map - Pale Apartments and Ruby Residence - give you a comparatively strong chance of finding Blueprints. Considering their size, there’s a high density of containers to loot in both locations, and they also have the benefit of being fairly out of the way. So you’re more likely to have all the containers to yourself.
Buried City
The best Blueprint farming locations on Buried City are the Santa Maria Houses, Grandioso Apartments, Town Hall, and the various buildings of the New District . Grandioso Apartments has a lower number of containers than the rest, but a high chance of spawning weapon cases - which have good Blueprint drop rates. The others are high-tier loot areas, with plenty of lootable containers - including Security Lockers.
Spaceport
The best places to find Blueprints on Spaceport are the Arrival and Departure Buildings, as well as Control Tower A6 and the Launch Towers . All these areas are labelled as high-value loot regions, and many of them are also very handily connected to one another by the Spaceport wall, which you can use to quickly run from one area to the next. At the tops of most of these buildings you’ll find at least one Security Locker, so this is an excellent farming route for players looking to find Blueprints.
The downside to looting Blueprints on Spaceport is that all these areas are hotly contested, particularly in Duos and Squads. You’ll need to be very focused and fast in order to complete the full farming route.

Image credit:Rock Paper Shotgun/Embark Studios
Blue Gate
Blue Gate tends to have a good chance of dropping Blueprints, potentially because it generally has a high number of containers which can hold lots of items; so there’s a higher chance of a Blueprint spawning in each container. In my experience, the best Blueprint farming spots on Blue Gate are Pilgrim’s Peak, Raider’s Refuge, the Ancient Fort, and the Underground Complex beneath the Warehouse .
All of these areas contain a wealth of containers to loot. Raider’s Refuge has less to loot, but the majority of the containers in and around the Refuge are raider containers, which have a high chance of containing Blueprints - particularly during major events.
Stella Montis
On the whole, Stella Montis seems to have a very low drop rate for Blueprints (though a high chance of dropping other high-tier loot). If you do want to try farming Blueprints on this map, the best places to find Blueprints in Stella Montis are Medical Research, Assembly Workshop, and the Business Center . These areas have the highest density of containers to loot on the map.
In addition to this, the Western Tunnel has a few different Security Lockers to loot, so while there’s very little to loot elsewhere in this area of the map, it’s worth hitting those Security Lockers if you spawn there at the start of a match.
That wraps up this primer on how to get all the Blueprints in Arc Raiders as quickly as possible. With the Expedition system constantly resetting a large number of players’ Blueprints, it’s more important than ever to have the most up-to-date information on where to find all these Blueprints.
While you’re here, be sure to check out our Arc Raiders best guns tier list , as well as our primers on the best skills to unlock and all the different Field Depot locations on every map.


ARC Raiders
PS5 , Xbox Series X/S , PC
Rock Paper Shotgun is better when you sign in
Sign in and join us on our journey to discover strange and compelling PC games.
