All Black Myth: Wukong Chapter 4 bosses and where to find them
All 18 boss locations in Chapter 4 of Black Myth: Wukong
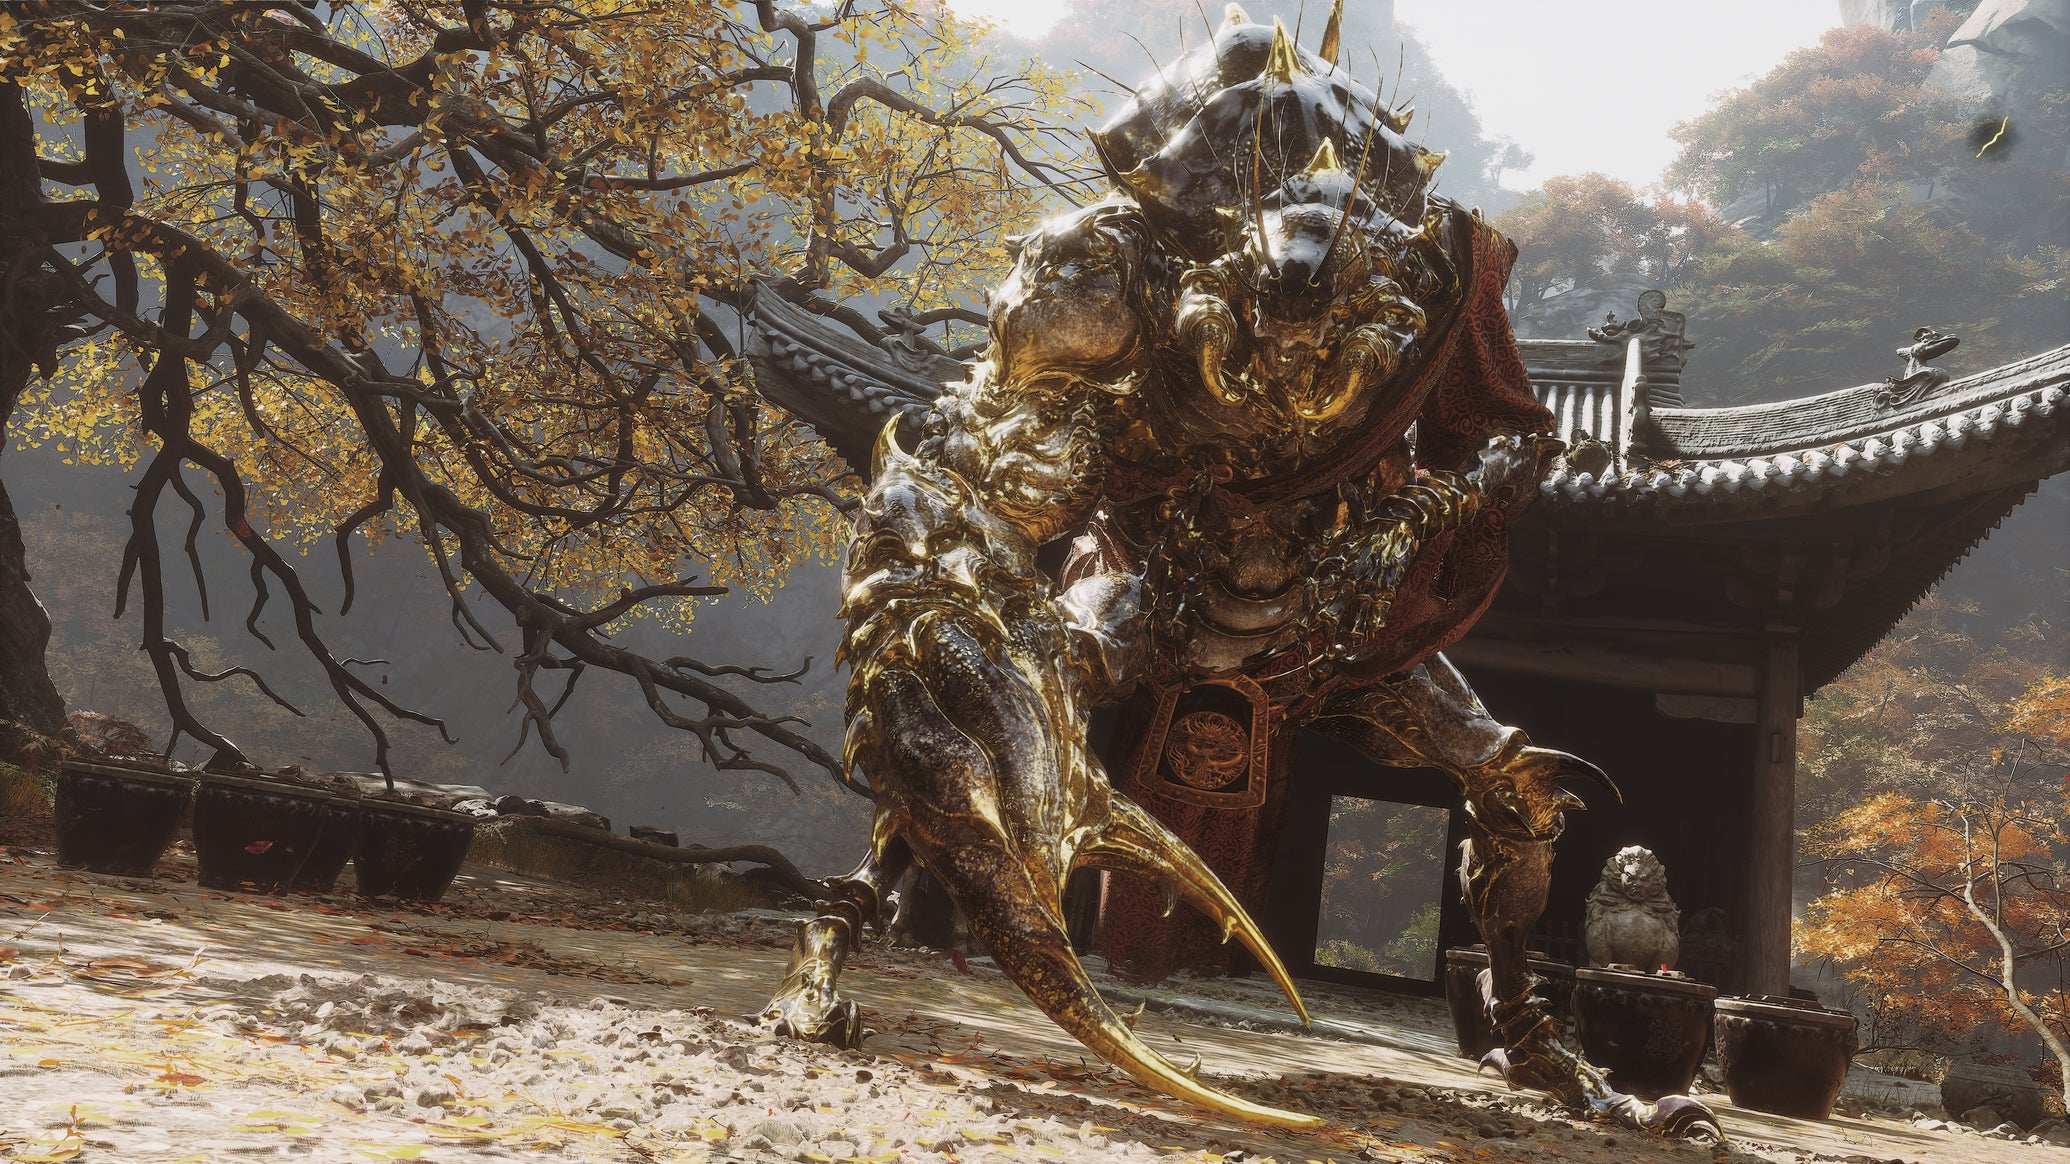
Image credit:Rock Paper Shotgun/Game Science

Looking for all the Chapter 4 boss locations in Black Myth: Wukong? Chapter 4 has a few very challenging bosses to keep you on your toes as you enter the latter half of Black Myth Wukong ’s story. But as always, finding them is no easy task. Many of the Black Myth: Wukong boss locations are hidden behind secret areas or are otherwise extremely easy to miss.
Below, we’ll walk you through the locations of all 18 bosses in Chapter 4 of Black Myth: Wukong, ranging from the starting Yaoguai Chiefs of The Second Sister and the Elder Amourworm all the way up to the secret bosses in Purple Cloud Mountain.
Skip to a different Chapter here! Chapter 1 bosses Chapter 2 bosses Chapter 3 bosses Chapter 4 bosses (you’re here!) Chapter 5 bosses Chapter 6 bosses
All Chapter 4 bosses in Black Myth: Wukong
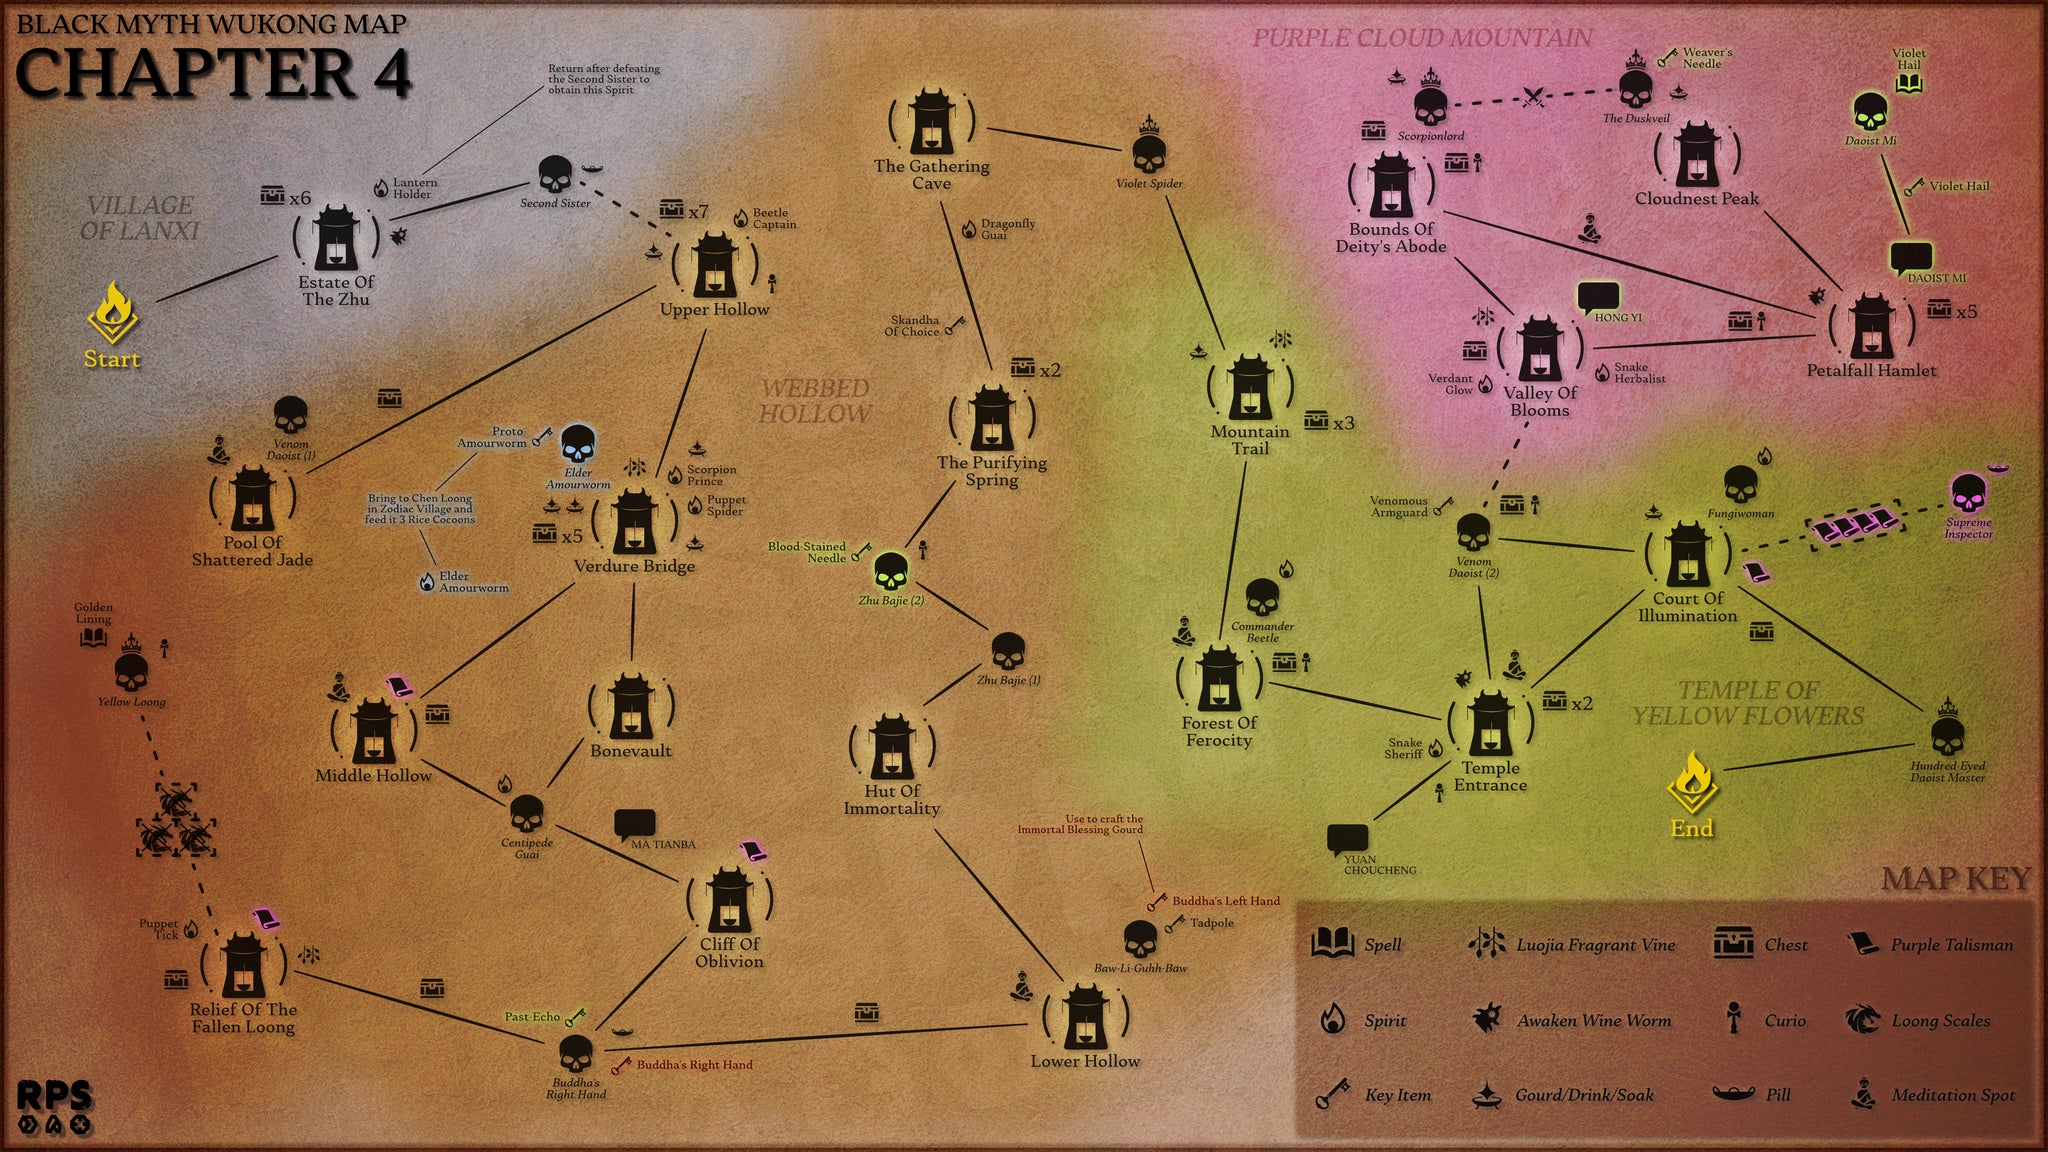
Ensure you don’t miss a thing in the Webbed Hollow with our comprehensive and handmadeChapter 4 map! |Image credit:Rock Paper Shotgun
There are 18 boss encounters in Chapter 4 of Black Myth: Wukong. Of them, 5 are Yaoguai Kings (very tough ones, too). You’ll need to fully explore every nook and cranny of the Webbed Hollow in order to track down the locations of bosses like the Yellow Loong , the Supreme Inspector , and the Duskveil .
Here is the full list of all Chapter 4 boss locations in Black Myth: Wukong:
| No. | Boss Name | Type | Location |
|---|---|---|---|
| 1 | The Second Sister | Yaoguai Chief | Village of Lanxi / Estate of the Zhu |
| 2 | Elder Amourworm | Yaoguai Chief | Webbed Hollow / The Verdure Bridge |
| 3 | Venom Daoist 1 | Character | Webbed Hollow / Pool Of Shattered Jade |
| 4 | Centipede Guai | Yaoguai Chief | Webbed Hollow / Middle Hollow |
| 5 | Buddha’s Right Hand | Yaoguai Chief | Webbed Hollow / Cliff Of Oblivion |
| 6 | Yellow Loong | Yaoguai King | Webbed Hollow / Relief Of The Fallen Loong |
| 7 | Baw-Li-Guhh-Baw | Yaoguai Chief | Webbed Hollow / Lower Hollow |
| 8 | Zhu Bajie 1 | Character | Webbed Hollow / Hut Of Immortality |
| 9 | Zhu Bajie 2 | Character | Webbed Hollow / Hut Of Immortality |
| 10 | Violet Spider | Yaoguai King | Webbed Hollow / The Gathering Cave |
| 11 | Commander Beetle | Yaoguai Chief | Temple Of The Yellow Flower / Forest Of Ferocity |
| 12 | Supreme Inspector | Not In Journal | Temple Of The Yellow Flower / Court Of Illumination |
| 13 | Hundred-Eyed Daoist Master | Yaoguai King | Temple Of The Yellow Flower / Court Of Illumination |
| 14 | Fungiwoman | Yaoguai Chief | Temple Of The Yellow Flower / Court Of Illumination |
| 15 | Venom Daoist 2 | Character | Temple Of The Yellow Flower / Court Of Illumination |
| 16 | Scorpionlord | Yaoguai King | Secret: Purple Cloud Mountain / Bounds Of Deity’s Abode |
| 17 | Daoist Mi | Yaoguai Chief | Secret: Purple Cloud Mountain / Petalfall Hamlet |
| 18 | The Duskveil | Yaoguai King | Secret: Purple Cloud Mountain / Cloudnest Peak |
Keep reading for full details on how to track down all 18 bosses in Chapter 4, and how best to defeat each boss once you’ve found them.
1. The Second Sister
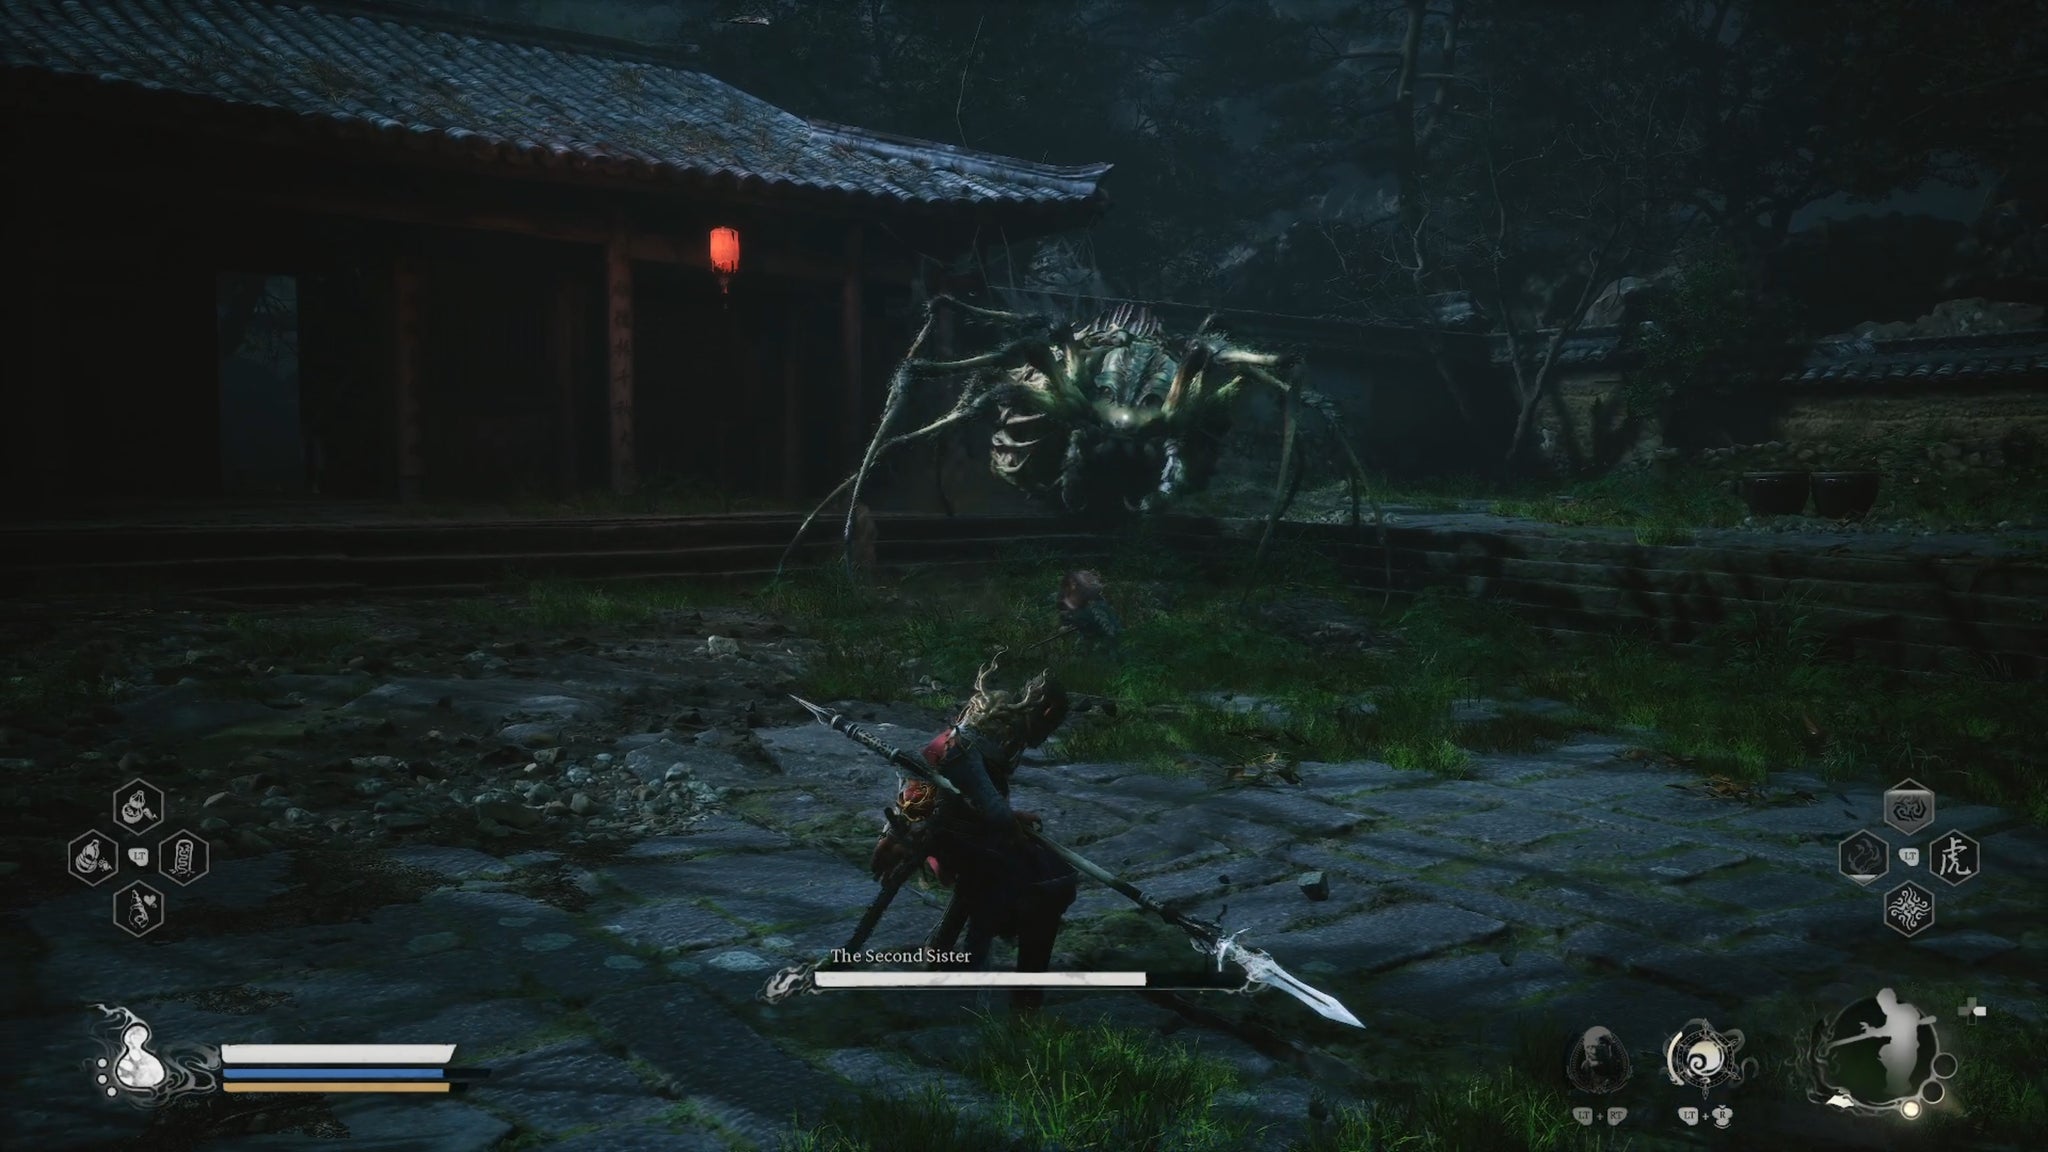
Image credit:Rock Paper Shotgun/Game Science
The Second Sister is a Yaoguai Chief and the first boss you’ll encounter in Chapter 4. She can be found inside the courtyard right next to the “Estate Of The Zhu” Keeper’s Shrine - you can’t miss her.
Arachnophobes may not like this fight, but it’s not actually too bad. You have the help of Zhu Bajie, for one thing. And it’s fairly easy to damage and stagger the Second Sister into submission. She’s far from being one of the troublesome bosses of Chapter 4.
2. Elder Amourworm
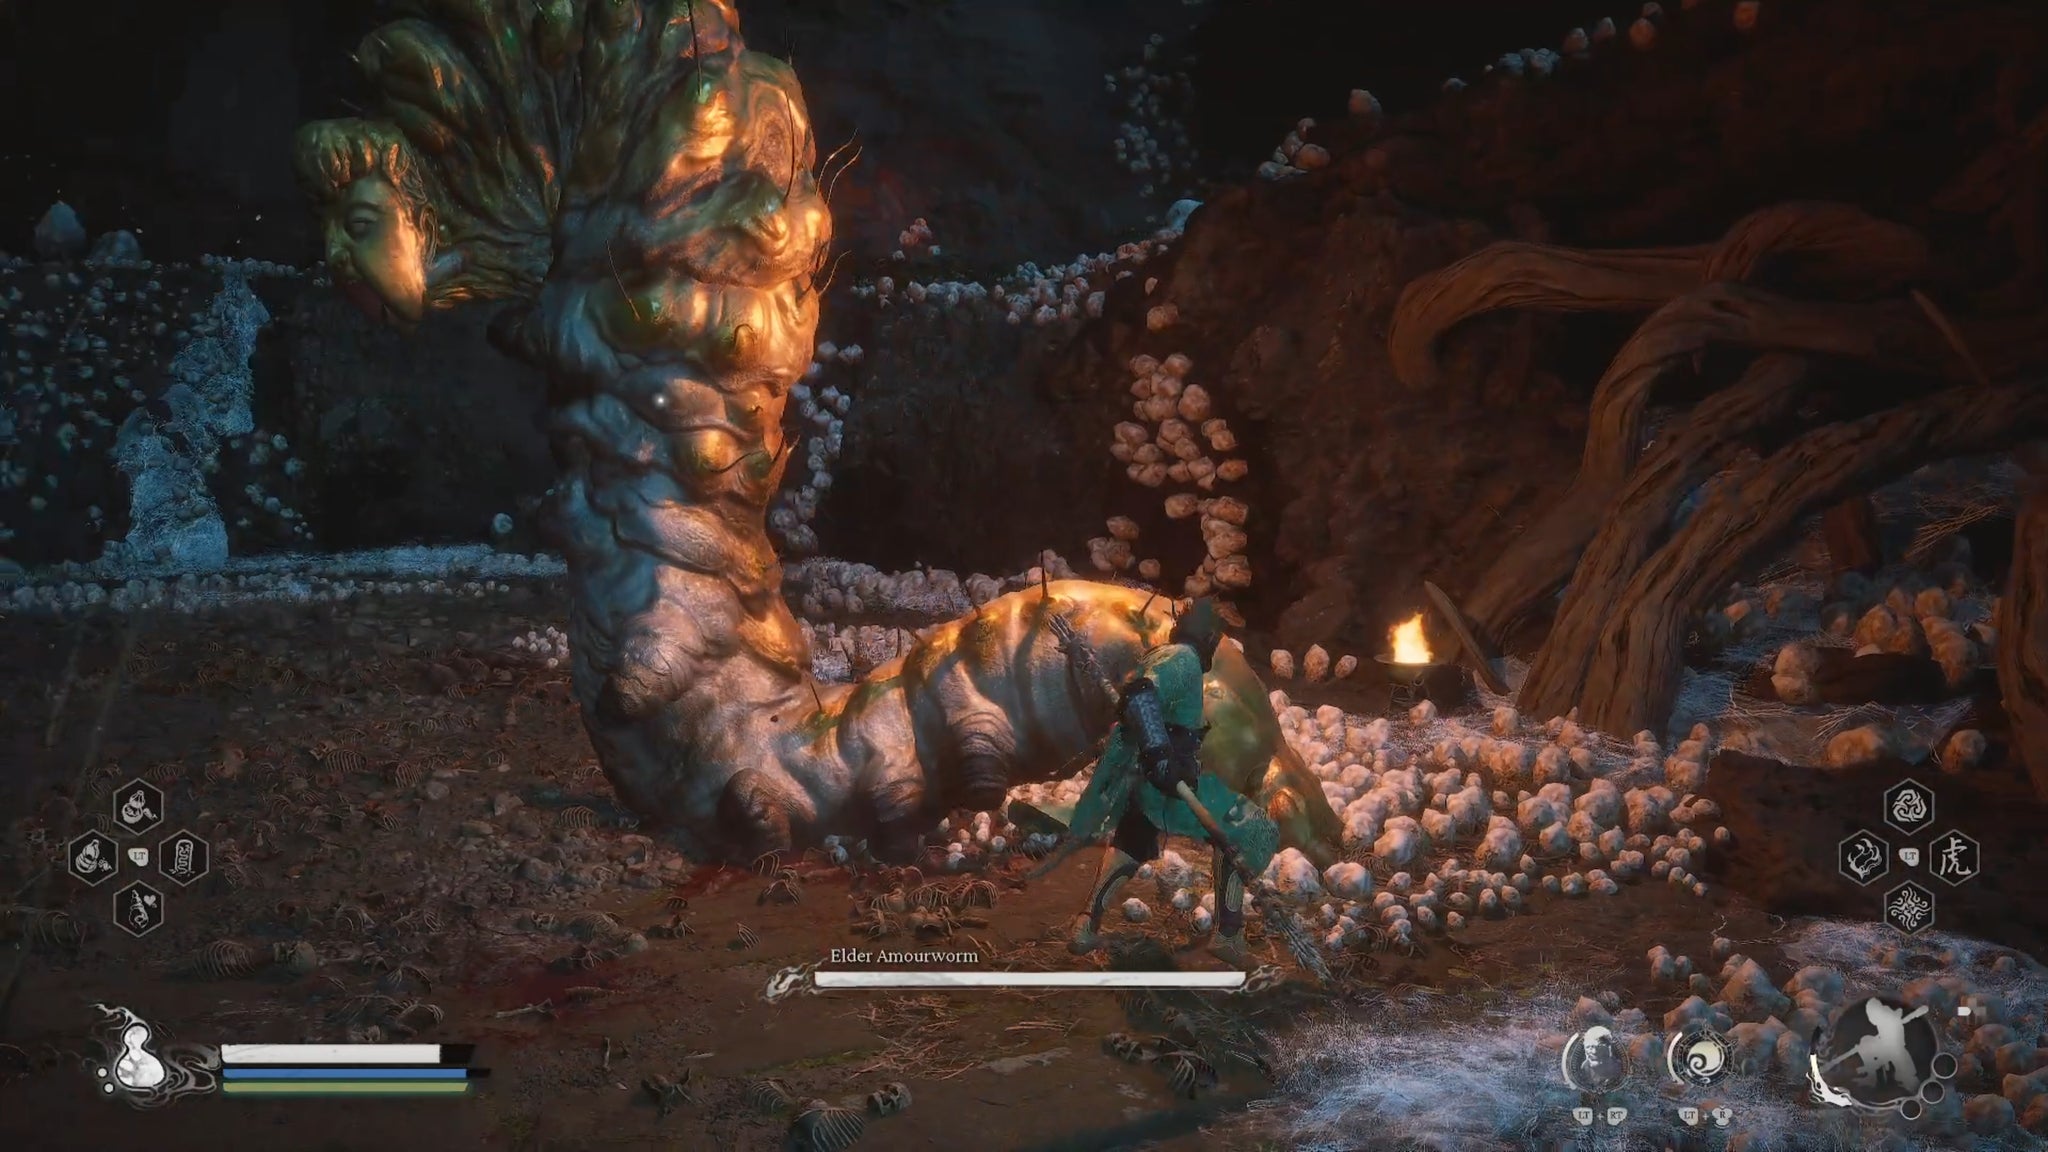
Image credit:Rock Paper Shotgun/Game Science
The Elder Amourworm is tucked into a corner of the Verdure Bridge area of the Webbed Hollow. After you jump down the big hole in the Zhu Estate, you’ll need to progress down the main path and drop down a series of wooden platforms to reach the “Verdure Bridge” Shrine. From there, cross the bridge and take the left path. Straight ahead you’ll see a doorway where the two heads were shouting “Big day!” in a cutscene before being dispatched. Beyond them is a room filled with chests, and just beyond that you’ll find a small drop into the Elder Amourworm arena.
The Elder Amourworm is much like any other Amourworm you may already have encountered - just bigger and stronger. It telegraphs its attacks pretty clearly, and so is easy to dodge. Kill it, and you’ll receive the Proto-Amourworm item, which you can use back at Zodiac Village to eventually get the Elder Amourworm Spirit.
3. Venom Daoist (first encounter)
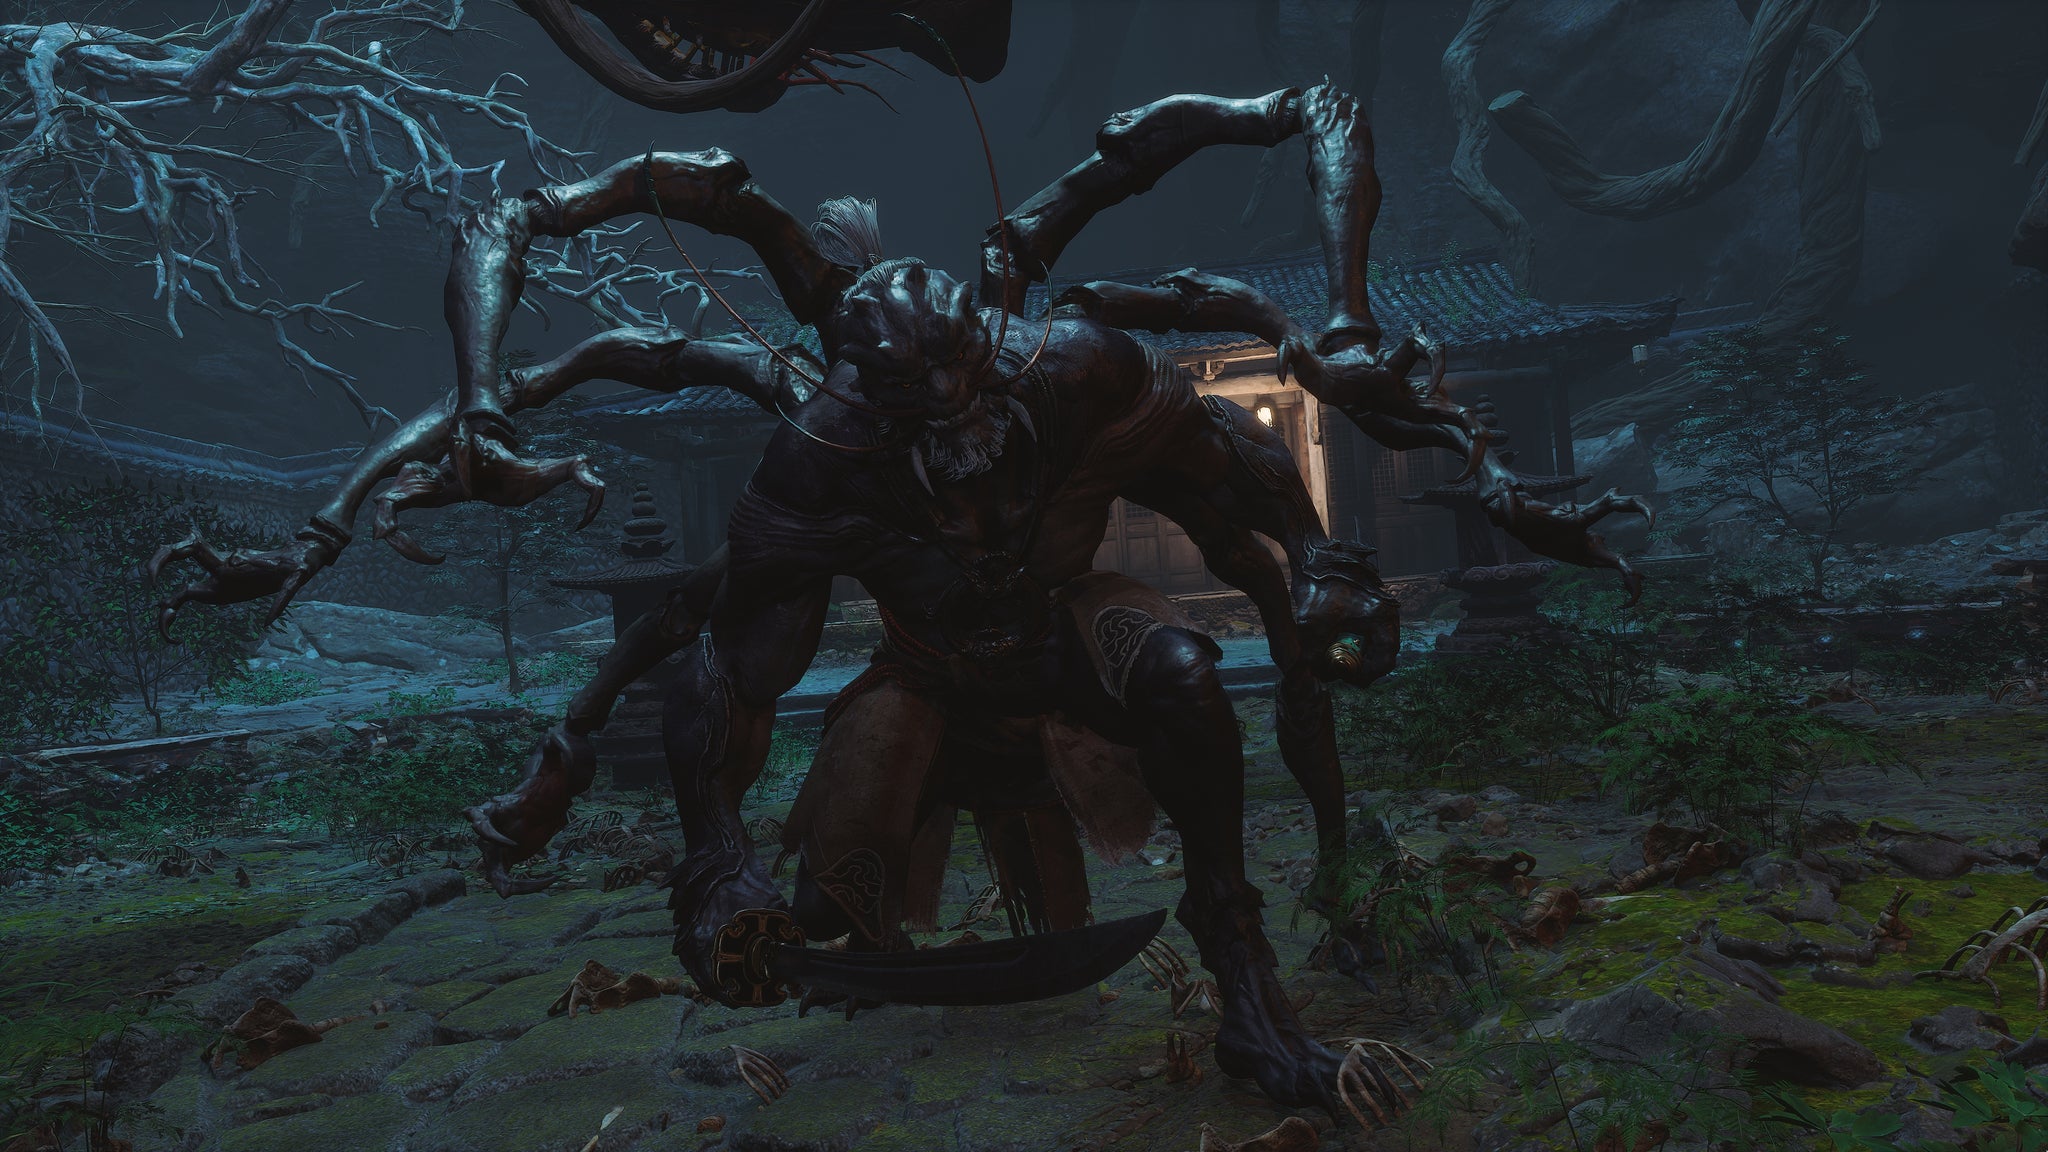
Image credit:Rock Paper Shotgun/Game Science
The Venom Daoist is a boss you fight twice in Chapter 4, and he actually holds the key to unlocking an entire secret area at the end of the Chapter, so it’s important not to miss him. The first time you’ll meet the Venom Daoist is in the Pool Of Shattered Jade, which can be reached just before you head down the wooden platforms to reach the “Verdure Bridge” Shrine. Head right instead and you’ll find the “Pool Of Shattered Jade” Shrine, and the Venom Daoist is a short way beyond there.
When you first see the Venom Daoist, he’s trapped in a particularly large “Odd Cocoon “. Destroy it to begin a cutscene and then the fight itself. The Venom Daoist is quite agile and likes to flip around, but he’s a bit of a glass cannon. Either Rock Solid or Cloud Step work great to disrupt his attacks, as does (of course) Immobilize. Defeat him, and he’ll run away to fight another day.
4. Centipede Guai

Image credit:Rock Paper Shotgun/Game Science
The Centipede Guai is a great hulking bug that has its own giant skeleton-encrusted arena to itself. You can drop into this giant arena either from the “Middle Hollow” or the “Bonevault” Shrines, so finding it won’t be a problem. Approach the large pile of skulls in the centre of the arena to begin the fight.
Focus the back legs with your biggest attacks, and keep circling around to avoid its front-focused slams and other attacks. The Centipede Guai is another fairly low-level Yaoguai Chief who is easily staggered and has plenty of downtime between attack combos where you can deal lots of damage, so this fight shouldn’t pose much of an issue for a well-trained monkey such as yourself.
5. Buddha’s Right Hand

Image credit:Rock Paper Shotgun/Game Science
The Buddha’s Right Hand is a curious boss found just beyond the “Cliff Of Oblivion” Shrine in the Webbed Hollow. You can get there by following the path beyond the Centipede Guai arena, up past all the Skeletal Snakes and Amourworms. Past the Shrine is a corridor where you can interact with the giant hand to begin the fight.
Immobilize is your best friend here. Freeze the Buddha’s Right Hand in place after one of its wall-smacking attacks, and you can deal plenty of damage right then and there. At half-health, it’ll reveal its true (horrific) form, and cover the ground in a sticky poisonous tar. This is when I like to pop my Transformation Spell and use it to wade through the poison to continue dealing damage. All in all, an intriguing but not particularly challenging fight.
6. Yellow Loong
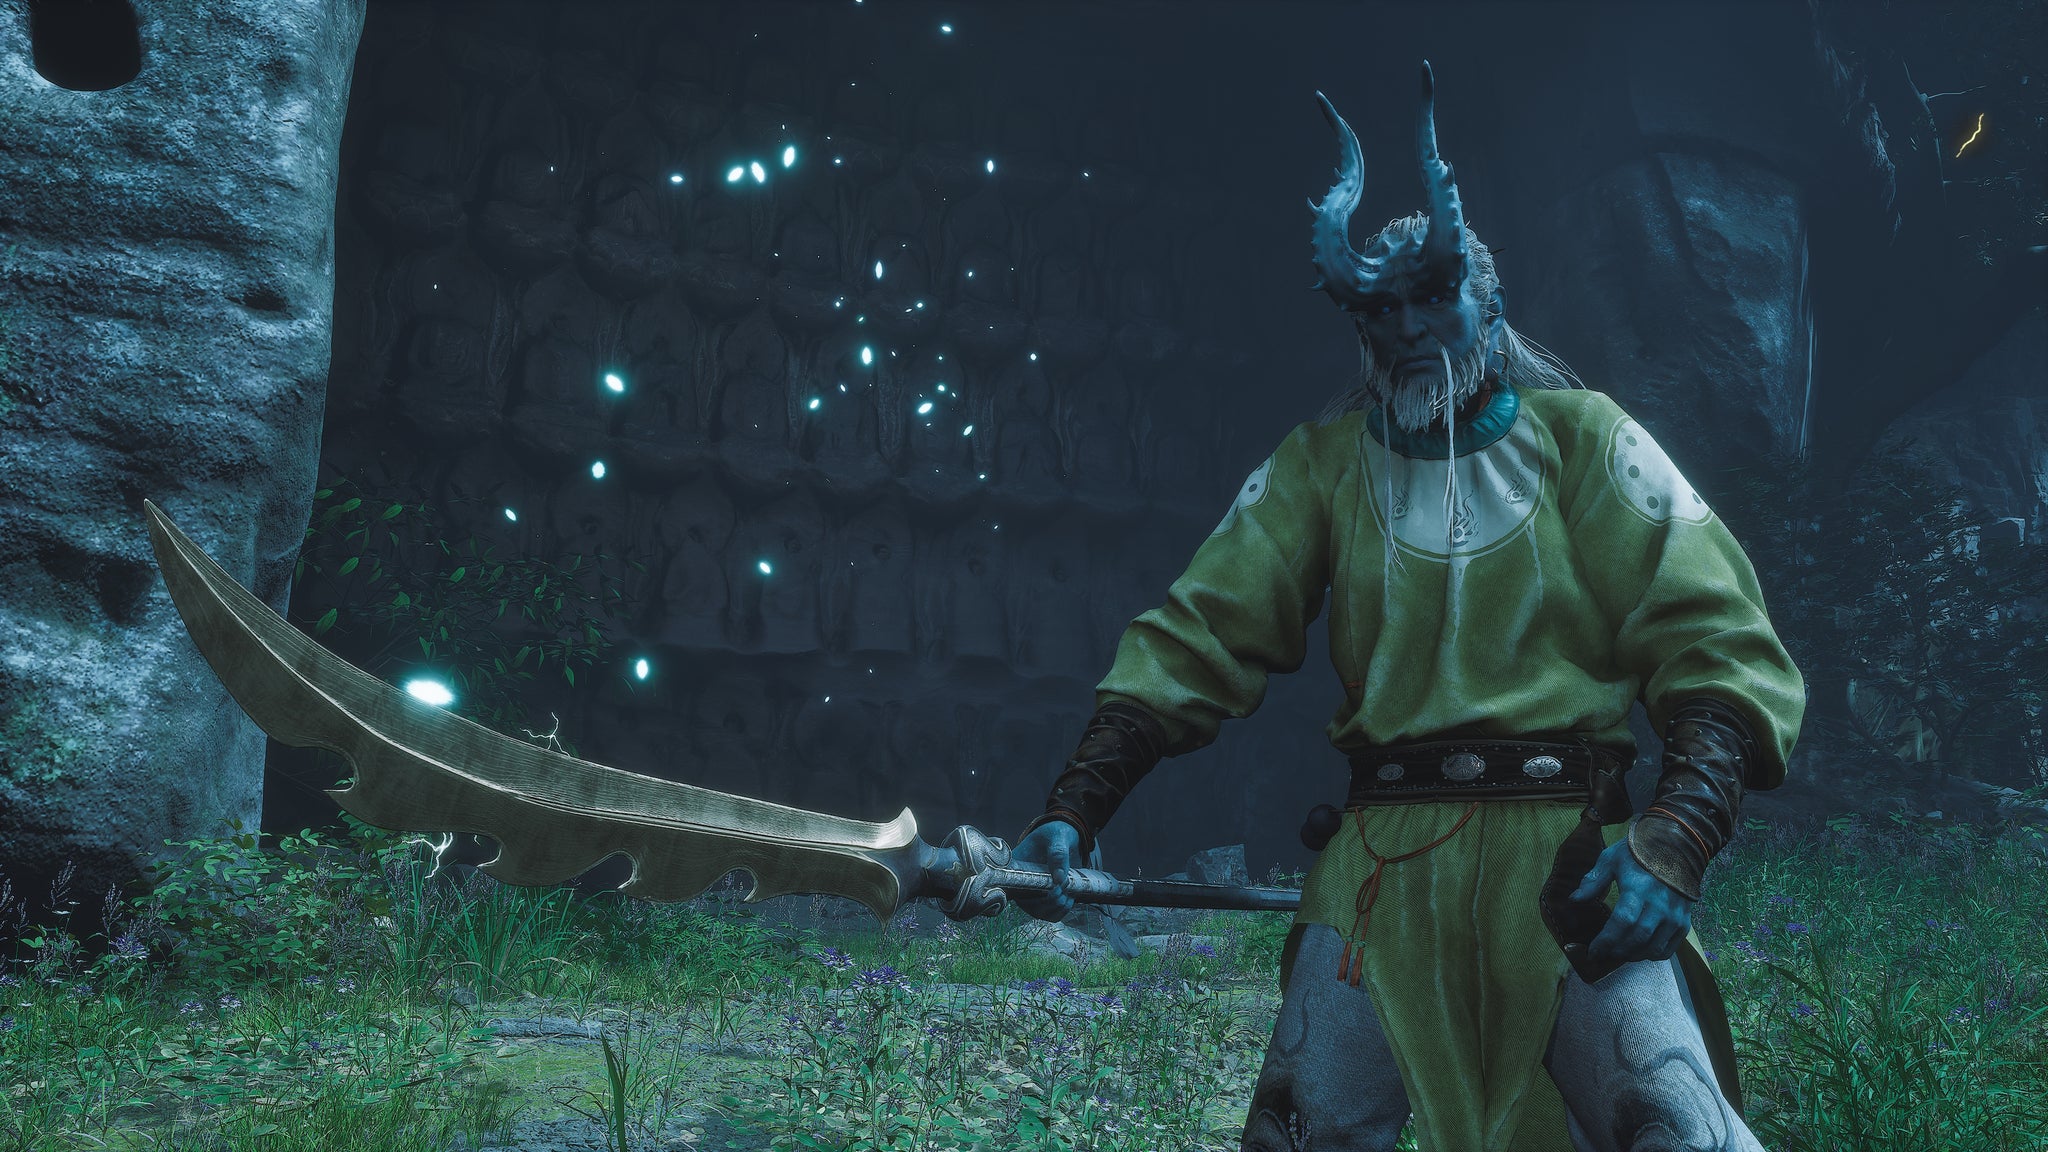
Image credit:Rock Paper Shotgun/Game Science
Now, the Yellow Loong - this is a tough boss. It’s also highly secret, and requires you to have used Chapter 2’s Loong Scale item to unlock and defeat all the previous Loong bosses in each of the previous Chapters. After that, you can find the Yellow Loong in the Relief Of The Fallen Loong area.
To get to this boss, start from the “Cliff Of Oblivion” Shrine where you fought the Buddha’s Right Hand ; then pass over the bridge made from the Hand’s corpse and drop down to the lower level. Follow this path until you see a wooden platform on your left, opposite the main path. Drop down this platform, and you’ll be at the start of a long bridge.


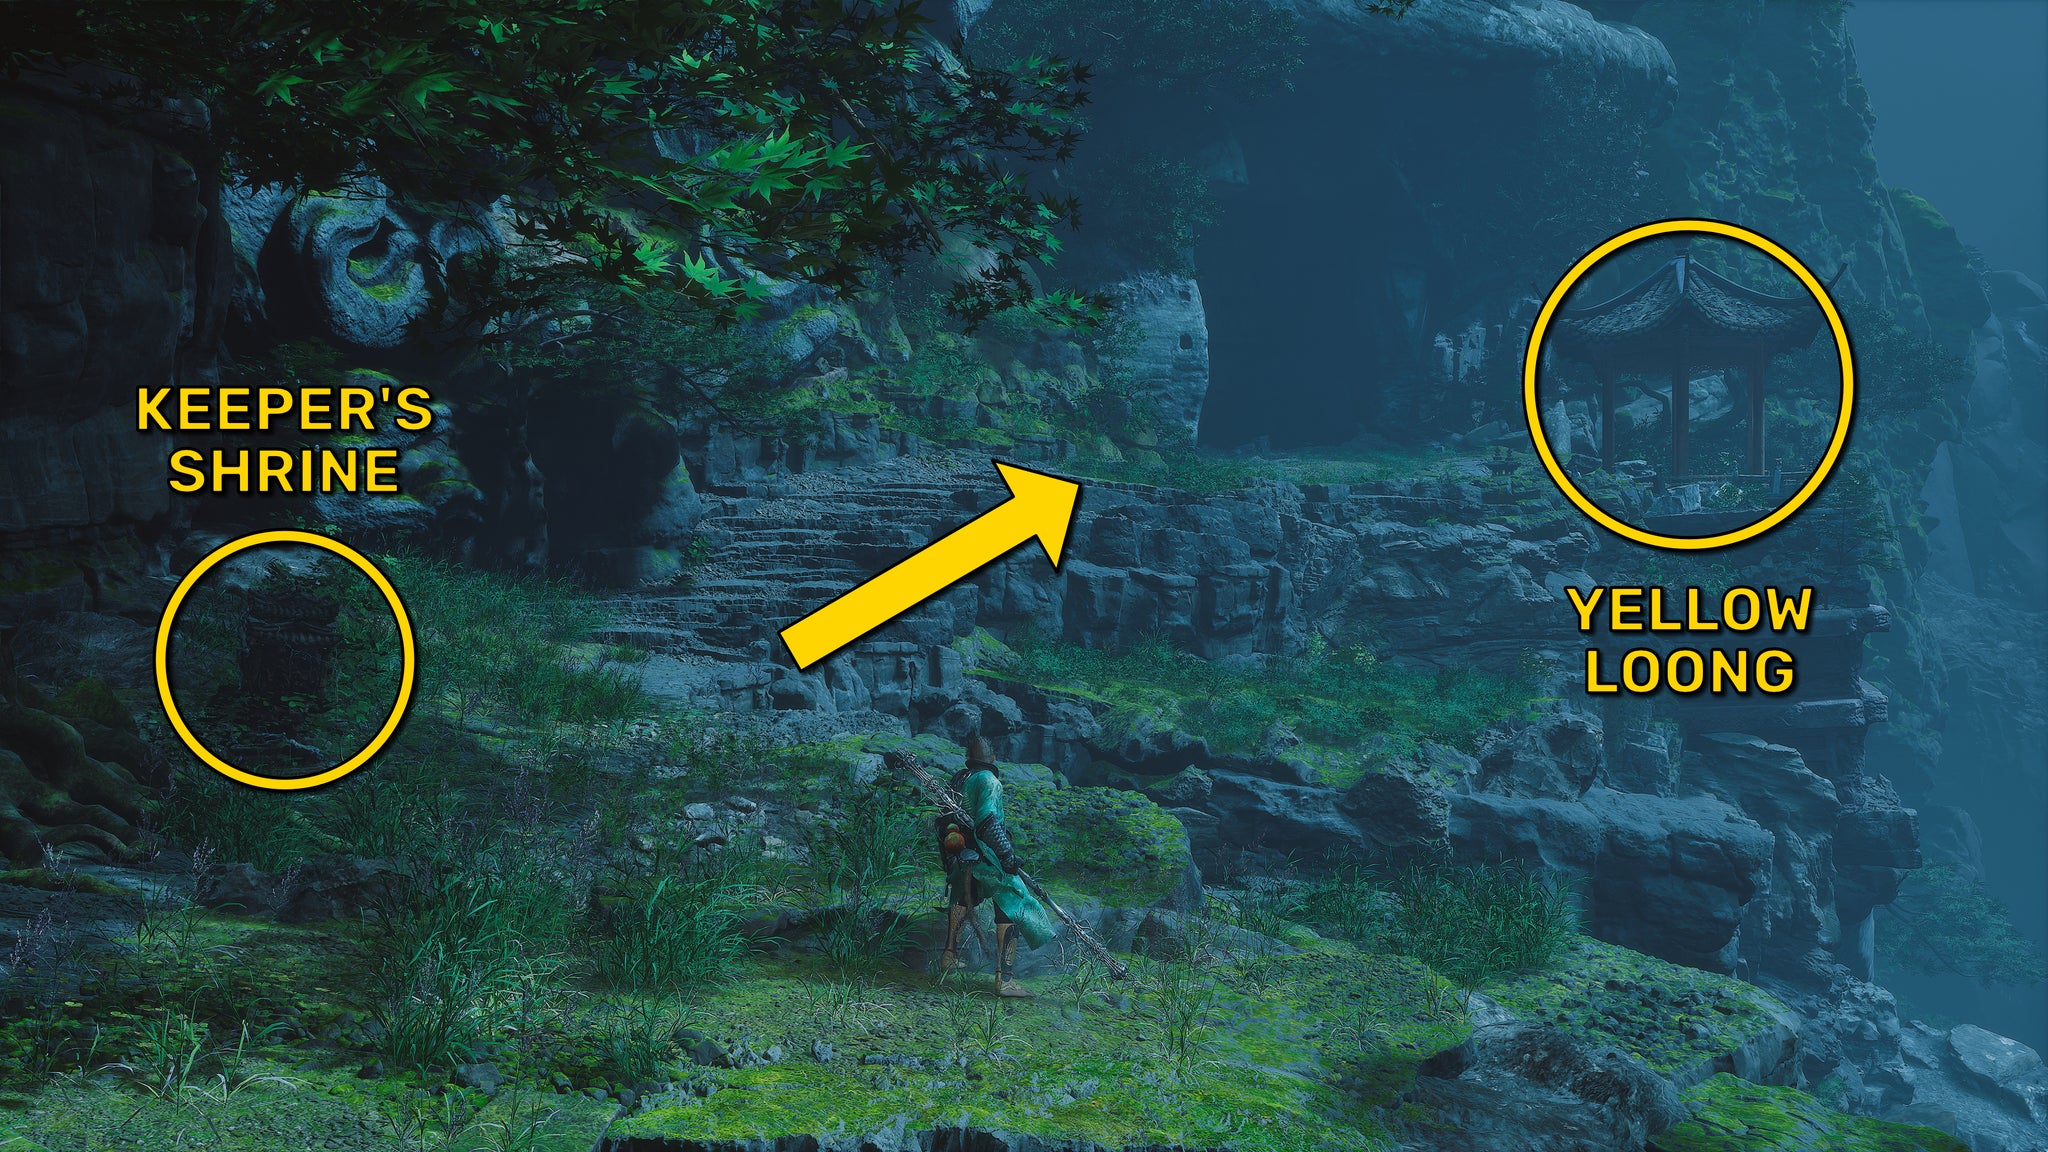
Once you cross this bridge, you’ll have to bypass a series of Clawed Cocoons on a narrow bridge. I highly recommend you use Cloud Step to just dash past these Clawed Cocoons, because even while targeting them with any attack you’ve a good chance of falling off the edge to your death. Proceed down this path and you’ll emerge in a foresty area where the “Relief Of The Fallen Loong” Shrine can be found. Just beyond it, near the pavilion, is the dangerous Yellow Loong.
One of the most powerful bosses of Chapter 4, the Yellow Loong hits like a truck and can kill you extremely quickly if you don’t learn his attack patterns. Immobilize works well on him, and I’ve found the Yin Tiger’s Ebon Flow Transformation is pretty good at staggering him to keep up the relentless pressure you need to outlast him in battle. I also prefer Rock Solid to Cloud Step against the Yellow Loong, because it can be very useful to disrupt his long sweeping combos at pivotal moments. You get a host of rewards for defeating this boss, including the Golden Carp curio and a number of unique materials for crafting powerful weapons and armour.
7. Baw-Li-Guhh-Baw

Image credit:Rock Paper Shotgun/Game Science
Back on the main path, you can encounter Chapter 4’s toad boss, Baw-Li-Guhh-Baw, in the Lower Hollow area. Backtrack through the Clawed Cocoons next to the “Lower Hollow” Shrine, then squeeze through the gap on your left. Take the next left, and you’ll arrive on a walkway overlooking the “Lower Hollow” Shrine. Keep going up this path and you will enter a flooded cave area where Baw-Li-Guhh-Baw is waiting for you.
By this point, you should be more than ready to deal with another big frog. This one is admittedly more disturbing than most, with a big hand-tongue that can grab hold of you, and the ability to surround itself with poisonous spew. But none of this can compete with your power at this point in the game. Get with the times, Baw-Li-Guhh-Baw.
8. Zhu Bajie (first encounter)
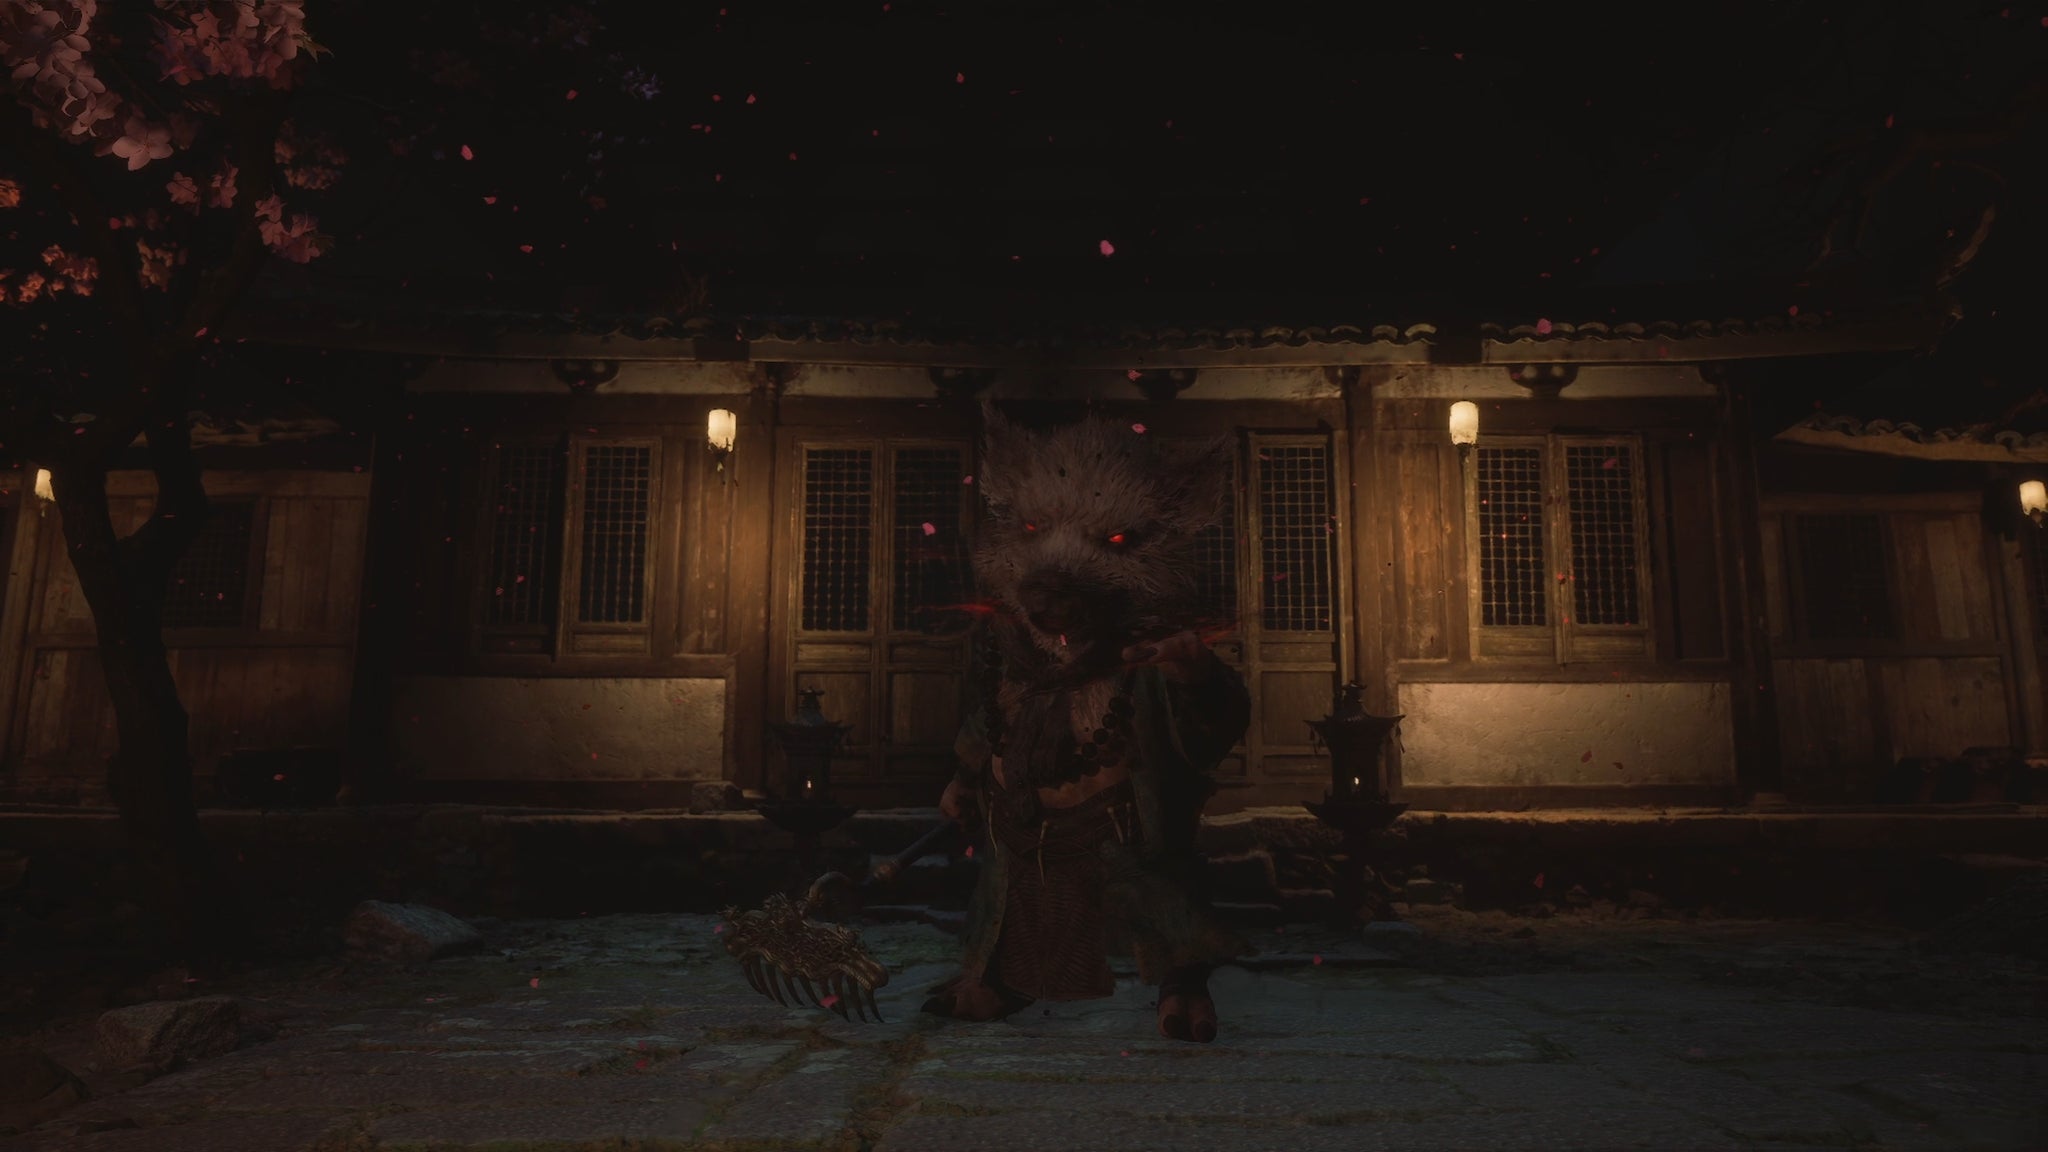
Image credit:Rock Paper Shotgun/Game Science
Follow the main path from the Lower Hollow, and you’ll soon reach the “Hut Of Immortality” Shrine. Just beyond this is the hut itself, and as you approach the door you’ll trigger a fight with a mind-addled Zhu Bajie, your dear friend for the past Chapter-and-a-half. This is a mandatory story boss, so there’s no missing this one.
Don’t worry, your dear friend is a pushover. Immobilize, A Flock Of Many, Wandering Wight headbutt, and he’s down to half-health before you know it. Credit to him, he does have some tricky and long combos, but keep up the aggression and he won’t have much time to make use of them. At least, not in this encounter…
9. Zhu Bajie (second encounter)
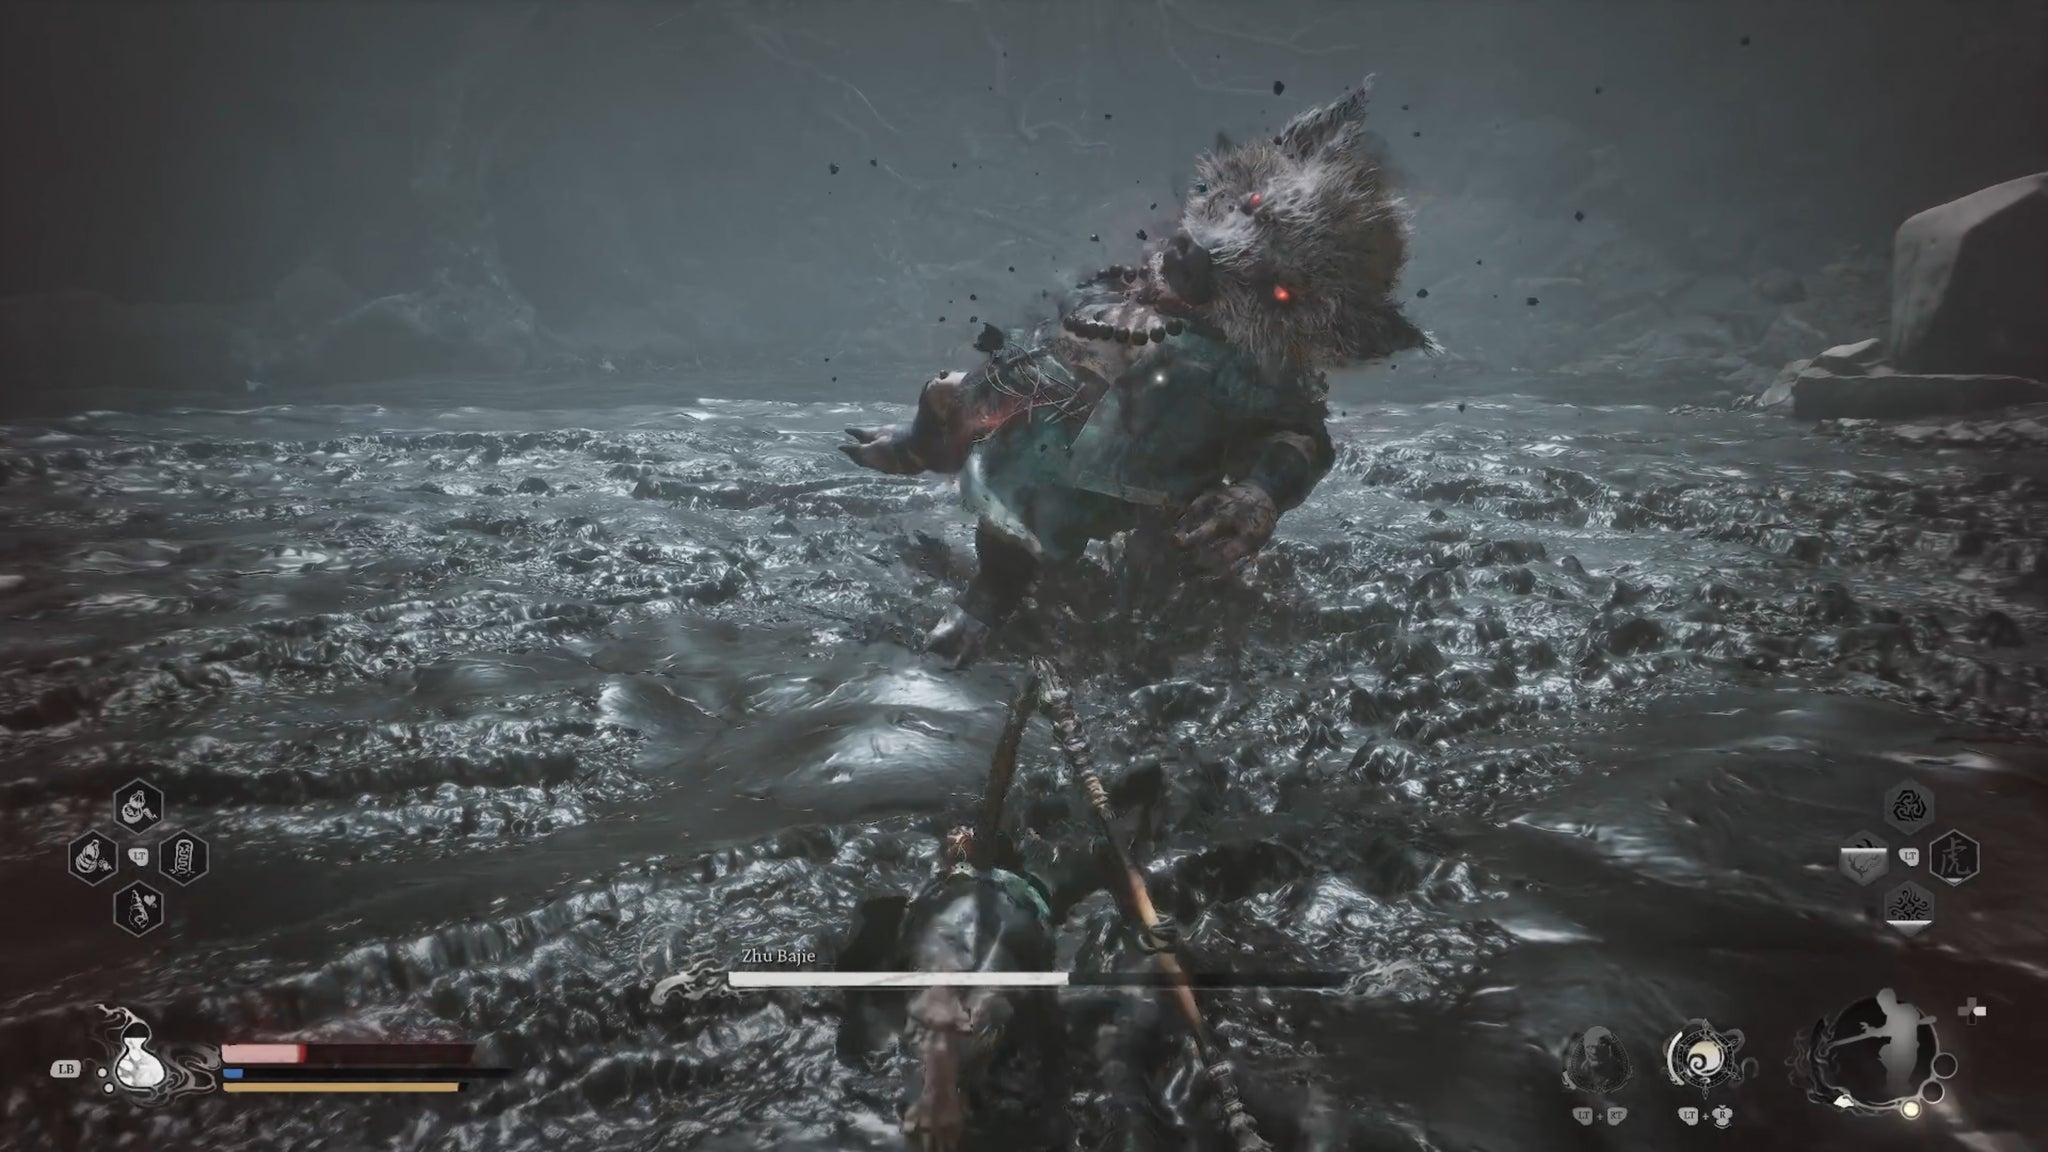
Image credit:Rock Paper Shotgun/Game Science
Your second encounter with Zhu Bajie occurs only a couple of minutes after the first, in a newly opened area back the way you entered from the Hut Of Immortality. Follow this path into a new, larger, very muddy arena where you’ll face Zhu Bajie once again.
The first phase of this fight is much the same as the previous encounter, albeit made slightly more difficult by the sticky tar environment all around you. At half-health, however, Zhu Bajie will transform into a giant black boar, and relentlessly charge at you with attacks that will take off a decent chunk of health each time. It’s a good idea to keep some of your mana reserves held back ready for this second phase, because the ability to Immobilize or Transform at this point will make the fight much easier.
10. Violet Spider

Image credit:Rock Paper Shotgun/Game Science
The final fight of the Webbed Hollow region is against the Violet Spider, ancient mother of the Second Sister and her siblings. The path here is fairly straightforward - it’s a linear jaunt from the second Zhu Bajie arena to first the “Purifying Spring” and then the “The Gathering Cave” Shrines. A lengthy cutscene will ensue as you enter the arena, after which you’ll fight another giant spider, this one considerably tougher than the one at the beginning of Chapter 4.
The Violet Spider has an annoying habit of gooping you up with webbing, making it harder to dodge her attacks. All the usual tricks will still work on her, however. For a Yaoguai King (or Queen), she’s not actually that difficult as long as you get her main attack’s timings down. I’d advise keeping some Antimiasma Powders on your quick item slots to combat her poison though, just to be safe.
11. Commander Beetle

Image credit:Rock Paper Shotgun/Game Science
Once you’ve defeated the Violet Spider, you’ll be able to make your way out of the Webbed Hollow at last, and into the Temple Of Yellow Flowers region. The first boss in this area is a Yaoguai Chief called the Commander Beetle. This boss is located along the main path a short walk beyond the “Forest Of Ferocity” Shrine. Go up the ornate stone walkway, and at the top you’ll find a group of Daoists training outside a temple. Behind them is the Commander Beetle.
Your first order of business should be dispatching the Daoist minions as quickly as possible so you can concentrate on the Commander Beetle himself. A Flock Of Many is very useful here for avoiding too much attention on you at once. After that, you shouldn’t have much trouble against the Commander Beetle. He likes to hold out his sword to block front-facing attacks, but you can easily just bait his attack and counter off it to secure the victory, using as many or as few spells as you’d like.
12. Supreme Inspector

Image credit:Rock Paper Shotgun/Game Science
While not a full-fledged boss fight, this encounter is an interesting one which a lot of players may easily miss. The Supreme Inspector is a secret boss who is summoned to attack you the moment you obtain the fourth purple glowing Talisman. Don’t know what I’m talking about? There are four purple Talismans on stone monuments scattered throughout Chapter 4, and you can interact with each one to take the Talisman. The four Talismans are in the following locations:
- “The Verdure Bridge” - up past the village in the lower section of this area.
- “Cliff Of Oblivion” - in the pool next to the Shrine.
- “Relief Of The Fallen Loong” - opposite Yellow Loong from the Shrine, at the end of the cave area.
- “Court Of Illumination” - take the left path (from facing the Hundred-Eyed Daoist Master arena).
If you retrieve all four Talismans before starting the final boss fight of Chapter 4 (against the Hundred-Eyed Daoist Master), then when you take the final Talisman in the Court Of Illumination a cutscene will trigger, prompting a fight against a new foe - the Supreme Inspector.
Fortunately (or sadly), this fight lasts barely any time at all before a scripted cutscene shows you getting “saved” (as if we needed saving!) by another character from the Divine Court. The upshot is that you’ll unlock a nice little Stamina-increasing Celestial Nonary Pill for your troubles tracking down those four Talismans.
13. Hundred-Eyed Daoist Master
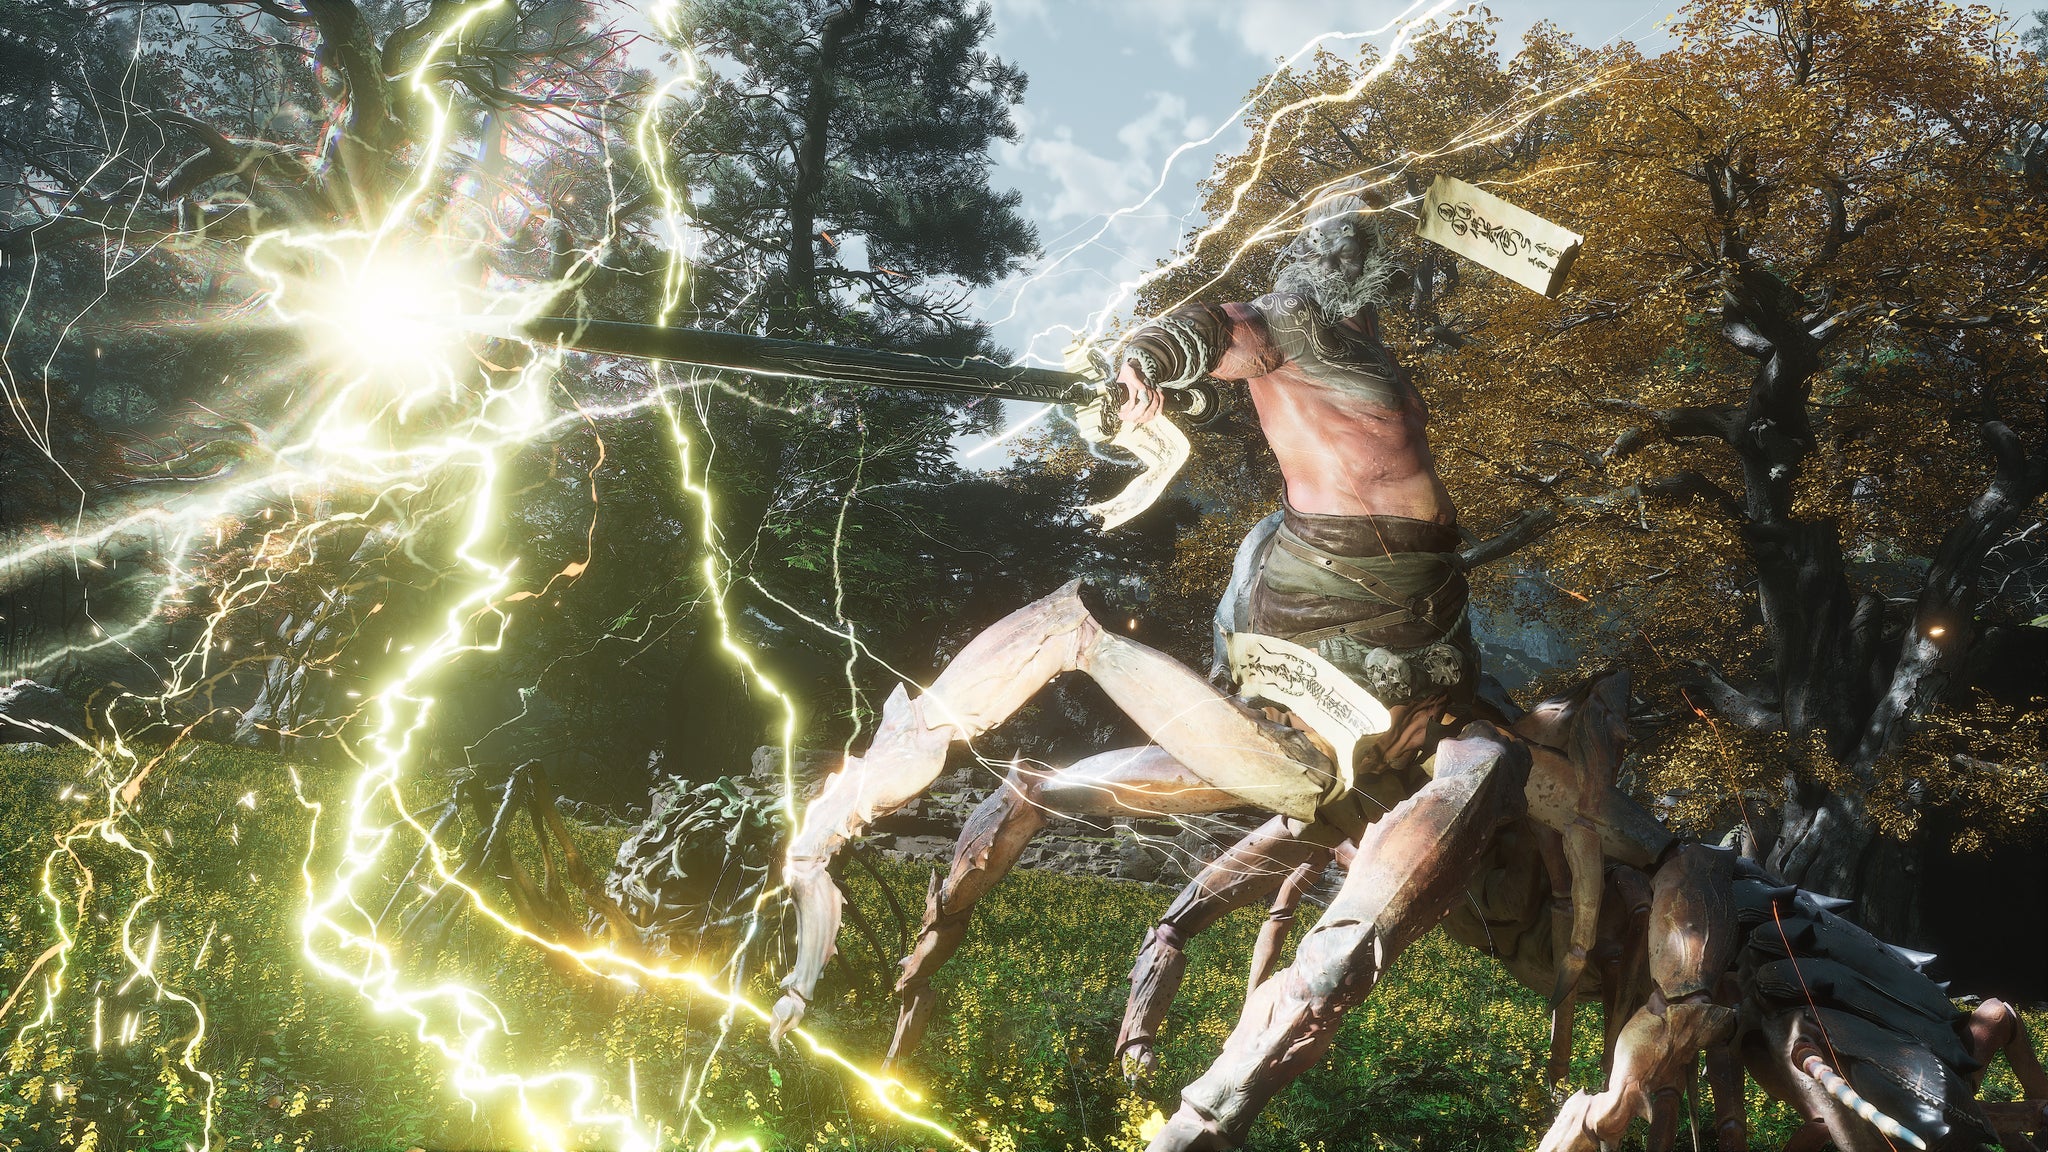
Image credit:Rock Paper Shotgun/Game Science
The true final boss of Chapter 4 is against the Hundred-Eyed Daoist Master, and he’s a powerful Yaoguai King indeed with a couple of very nasty tricks. You can find him directly in front of the “Court Of Illumination” Shrine at the end of the Temple Of Yellow Flowers region. The first time you face him, after a cutscene you’ll be able to fight him with the help of the Sisters (all giant spiders - sorry again, arachnophobes). If you die, then subsequent attempts will be just a 1v1 against him, but he’ll start at slightly lower health to compensate.
Both Lightning and Poison attacks are a challenge you’ll have to face in this fight, although Lightning is the more dangerous so we’d advise popping Shock-Quelling Powders in your quick item slots. The first phase isn’t too tricky, but you should hold back the bulk of your mana for the second phase, which is when things get crazy. Your maximum Stamina is halved, and the Daoist Master’s sweeping Lightning attacks can decimate your health in no time at all. Thankfully, if you hold your nerve, many of his most dangerous-looking charge-up attacks can just be dodged straight through, making this fight easier than it might have been.
14. Fungiwoman
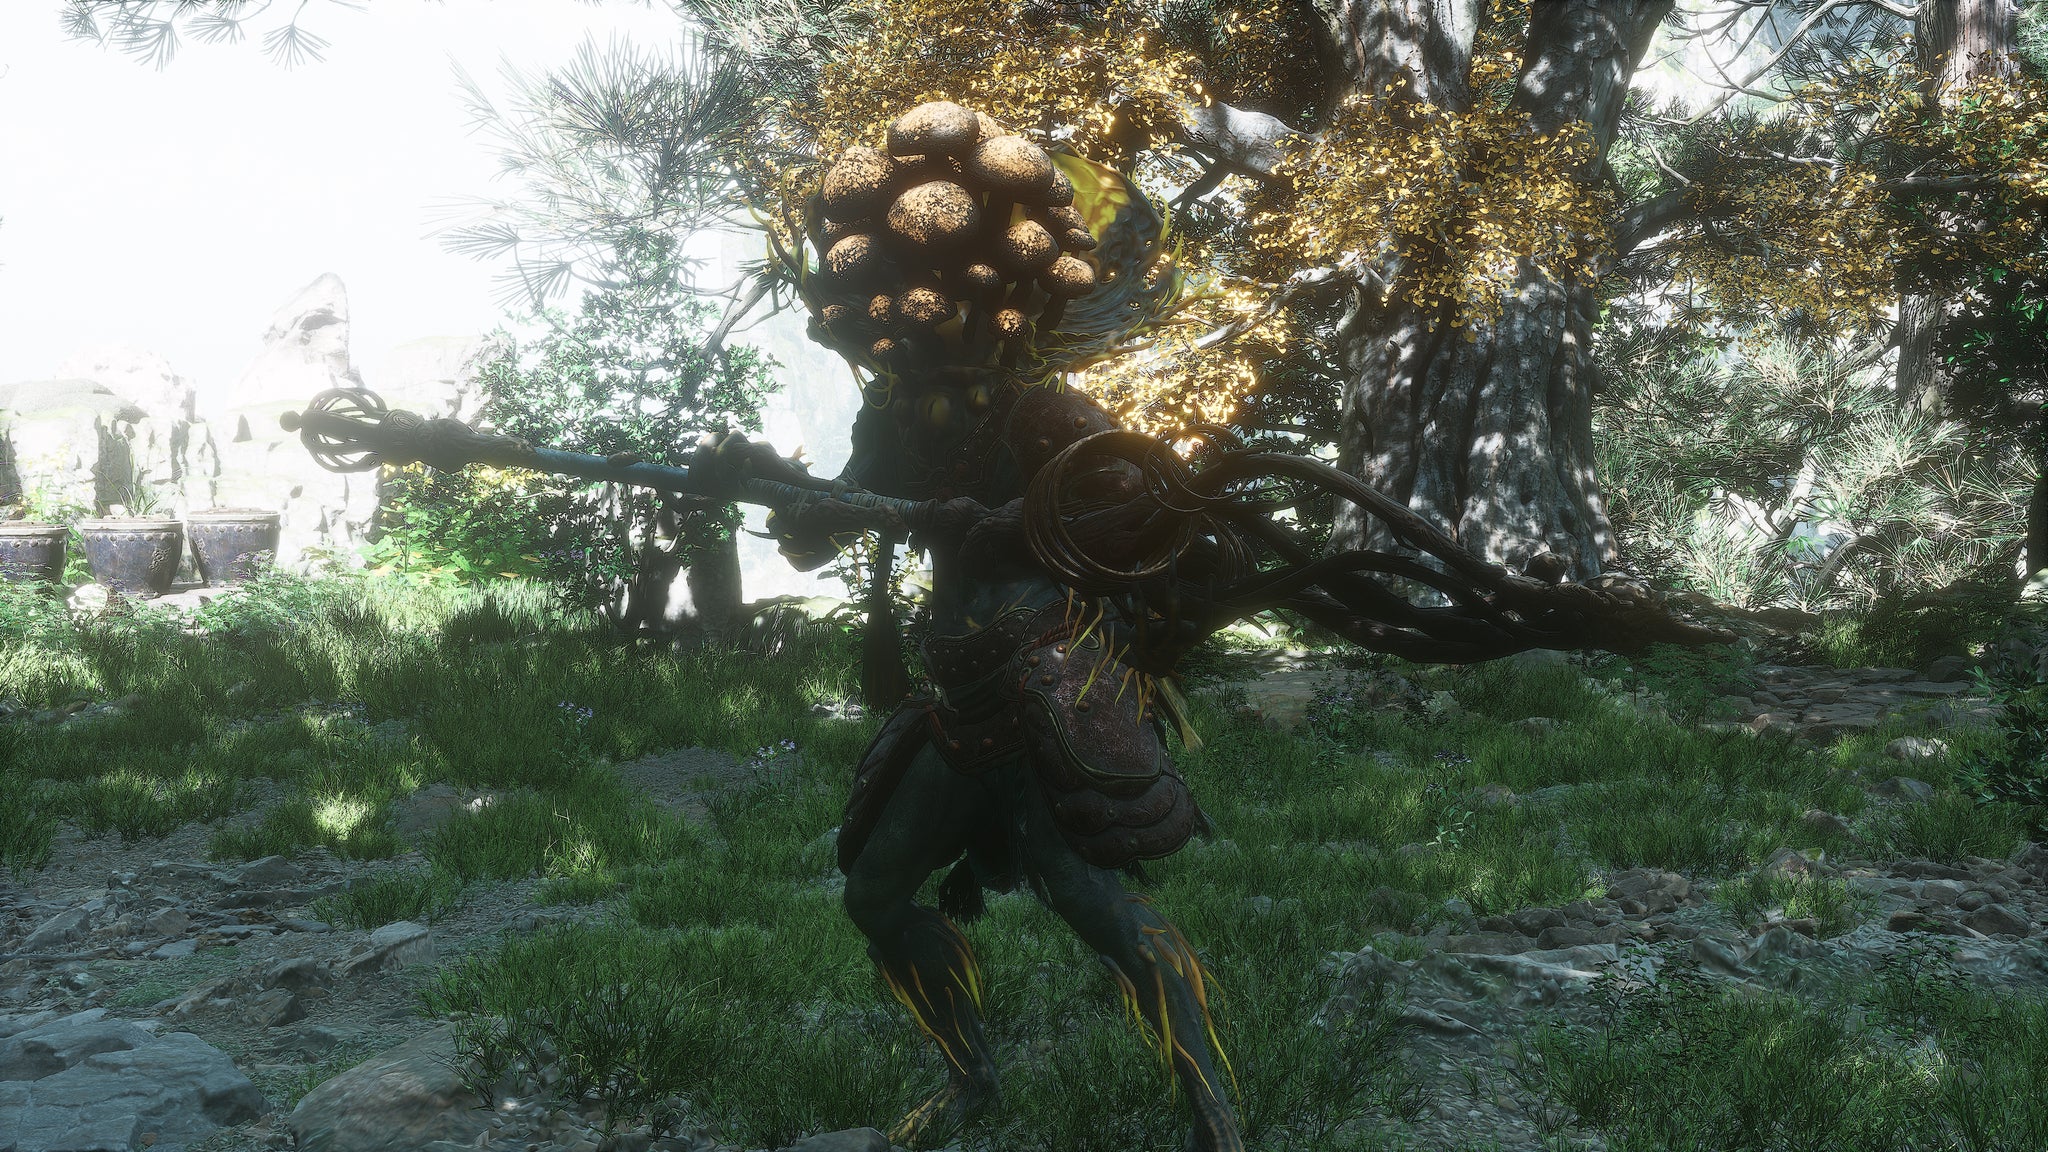
Image credit:Rock Paper Shotgun/Game Science
Ah, but there’s more! The unassuming Fungiwoman can be quite literally plucked from the ground (much like last Chapter’s Old Ginseng Guai ), in the opposite direction from the “Court Of Illumination” Shrine once you reach the fork in the road. Turn right instead of left at that key point, and follow the main path to the end where you’ll find a plant that can be taken from the ground near a large spherical boulder. That “plant” is actually the Fungiwoman.
Another glass cannon, the Fungiwoman can dish out a surprising amount of damage if you let her, so it’s best to keep her locked down with Spells rather than underestimate her. Immobilize and A Flock Of Many should do the trick nicely. Just watch out for her spin attack.
15. Venom Daoist (second encounter)

Image credit:Rock Paper Shotgun/Game Science
Finally, we arrive at the second Venom Daoist encounter. You can find the Venom Daoist again by heading down the same right-hand path that leads to the Fungiwoman , but then head down the steep hill to the left once you’re up the steps instead of continuing straight along the path. At the bottom of the slope is a small cave where you’ll meet the Venom Daoist again.
This fight has two phases. The first is pretty much a carbon-copy of the first encounter with the Venom Daoist, and he’s very easy to bully. In the second phase, he loses his extra arms, and (somehow) becomes more powerful as a result, with a new moveset. The most dangerous thing he does in this phase is zip around the arena very quickly with a fast charge attack that you must be ready to dodge at a moment’s notice. Otherwise, you can still make the fight fairly easy with a barrage of Spells and Thrust attacks (or any other type of Heavy Attack, to be honest).
16. Scorpionlord

Image credit:Rock Paper Shotgun/Game Science
My pick for the most challenging boss in Chapter 4 is the Scorpionlord, an optional boss found inside the secret Purple Cloud Mountain region. To unlock this region, you must beat the Venom Daoist (the second time), and interact with the tapestry on the wall in his arena.
After that, progress through the region until you reach the “Bounds Of Deity’s Abode” Shrine. Up the steps, the legendary Scorpionlord is lounging on the roof of a building. Break one of the pots of alcohol on the ground to trigger probably the toughest fight so far in the game.
The Scorpionlord is frighteningly aggressive, and deals stupid amounts of damage with his poisonous tail attacks. There’s really no clever way around this fight; you’re going to have to study his attack patterns so you can understand how to dodge them properly. Many of his attacks are too strong for Rock Solid, so I recommend Cloud Step as an easy way to zip to safety. The other spells in your repertoire aren’t terribly useful, but I’d still avoid Spell Binder, because it’s very nice to have Cloud Step at your beck and call. It’s a very tough fight which may take several attempts, but at the end of it you get a bunch of reward items, including one of my favourite Gourds in the game.
17. Daoist Mi

Image credit:Rock Paper Shotgun/Game Science
Daoist Mi is a character you encounter a short way into the Purple Cloud Mountain region. This masked flutist wants you to retrieve an Amourworm egg from one of his madness-tainted former comrades in the village. Not far at all from where Daoist Mi is found, you can fight and defeat several Daoist enemies, one of whom drops the Violet Hail item which you can return to Daoist Mi.
Of course, turns out he was an evil power-hungry maniac, and now wants to kill you. The first phase of this fight is trivially easy, only slightly more challenging than fighting a regular Daoist enemy (with a fair bit more health, admittedly). Defeat him once, and he’ll consume the Violet Hail to transform himself into an Amourworm-esque creature with a moveset much more akin to the Worm Practitioner enemies you’ll have encountered throughout Chapter 4. Again, not much of a threat to you, Destined One.
18. The Duskveil

Image credit:Rock Paper Shotgun/Game Science
The final boss of Purple Cloud Mountain is The Duskveil, a creature located just beyond the “Cloudnest Peak” Shrine, at the very end of the region. You can reach it easily by following the main path through the hamlet, where you first found Daoist Mi .
The Duskveil is a powerful Yaoguai King who may not appear terribly threatening at first glance, but that’s because the power is in its second phase. The first phase takes a while simply because he has a lot of health, but (other than an annoying four-stage charge attack) there’s little to worry about here. In the second phase though, The Duskveil blots out the sky and gains a weapon whose projectile attacks can kill you pretty much in one hit if you’re not careful.
Try to save most of your Mana for this second phase, because you’ll need it. Keep it occupied as much as possible with your Spells while you charge up powerful attacks on its legs. And if you see it breathe red smoke, that’s your cue to back off, because it’s about to fire red projectiles with its weapon which you need distance in order to dodge. It’s all worth the effort though, because at the end of this fight you gain your third Vessel, which is basically Yondu’s magic arrow from Guardians Of The Galaxy. Pretty cool stuff!
That wraps up our guide on all the Chapter 4 boss locations! If you’re having trouble dealing with any of the above bosses, be sure to check out our guide on the best skills to unlock first in Black Myth: Wukong.


Black Myth: Wukong
PS5 , PC
Rock Paper Shotgun is better when you sign in
Sign in and join us on our journey to discover strange and compelling PC games.

All 75 Arc Raiders Blueprints and where to get them
These areas have the highest chance of giving you Blueprints

Image credit:Rock Paper Shotgun/Embark Studios

Looking for more Arc Raiders Blueprints? It’s a special day when you find a Blueprint, as they’re among the most valuable items in Arc Raiders. If you find a Blueprint that you haven’t already found, then you must make sure you hold onto it at all costs, because Blueprints are the key to one of the most important and powerful systems of meta-progression in the game.
This guide aims to be the very best guide on Blueprints you can find, starting with a primer on what exactly they are and how they work in Arc Raiders, before delving into exactly where to get Blueprints and the very best farming spots for you to take in your search.
We’ll also go over how to get Blueprints from other unlikely activities, such as destroying Surveyors and completing specific quests. And you’ll also find the full list of all 75 Blueprints in Arc Raiders on this page (including the newest Blueprints added with the Cold Snap update , such as the Deadline Blueprint and Firework Box Blueprint), giving you all the information you need to expand your own crafting repertoire.
In this guide:
- What are Blueprints in Arc Raiders?
- Full Blueprint list: All crafting recipes
- Where to find Blueprints in Arc Raiders Blueprints obtained from quests Blueprints obtained from Trials Best Blueprint farming locations

What are Blueprints in Arc Raiders?
Blueprints in Arc Raiders are special items which, if you manage to extract with them, you can expend to permanently unlock a new crafting recipe in your Workshop. If you manage to extract from a raid with an Anvil Blueprint, for example, you can unlock the ability to craft your very own Anvil Pistol, as many times as you like (as long as you have the crafting materials).
To use a Blueprint, simply open your Inventory while in the lobby, then right-click on the Blueprint and click “Learn And Consume” . This will permanently unlock the recipe for that item in your Workshop. As of the Stella Montis update, there are allegedly 75 different Blueprints to unlock - although only 68 are confirmed to be in the game so far. You can see all the Blueprints you’ve found and unlocked by going to the Workshop menu, and hitting “R” to bring up the Blueprint screen.
It’s possible to find duplicates of past Blueprints you’ve already unlocked. If you find these, then you can either sell them, or - if you like to play with friends - you can take it into a match and gift it to your friend so they can unlock that recipe for themselves. Another option is to keep hold of them until the time comes to donate them to the Expedition.
Full Blueprint list: All crafting recipes
Below is the full list of all the Blueprints that are currently available to find in Arc Raiders, and the crafting recipe required for each item:
| Blueprint | Type | Recipe | Crafted At |
|---|---|---|---|
| Bettina | Weapon | 3x Advanced Mechanical Components 3x Heavy Gun Parts 3x Canister | Gunsmith 3 |
| Blue Light Stick | Quick Use | 3x Chemicals | Utility Station 1 |
| Aphelion | Weapon | 3x Magnetic Accelerator 3x Complex Gun Parts 1x Matriarch Reactor | Gunsmith 3 |
| Combat Mk. 3 (Flanking) | Augment | 2x Advanced Electrical Components 3x Processor | Gear Bench 3 |
| Combat Mk. 3 (Aggressive) | Augment | 2x Advanced Electrical Components 3x Processor | Gear Bench 3 |
| Complex Gun Parts | Material | 2x Light Gun Parts 2x Medium Gun Parts 2x Heavy Gun Parts | Refiner 3 |
| Fireworks Box | Quick Use | 1x Explosive Compound 3x Pop Trigger | Explosives Station 2 |
| Gas Mine | Mine | 4x Chemicals 2x Rubber Parts | Explosives Station 1 |
| Green Light Stick | Quick Use | 3x Chemicals | Utility Station 1 |
| Pulse Mine | Mine | 1x Crude Explosives 1x Wires | Explosives Station 1 |
| Seeker Grenade | Grenade | 1x Crude Explosives 2x ARC Alloy | Explosives Station 1 |
| Looting Mk. 3 (Survivor) | Augment | 2x Advanced Electrical Components 3x Processor | Gear Bench 3 |
| Angled Grip II | Mod | 2x Mechanical Components 3x Duct Tape | Gunsmith 2 |
| Angled Grip III | Mod | 2x Mod Components 5x Duct Tape | Gunsmith 3 |
| Hullcracker | Weapon | 1x Magnetic Accelerator 3x Heavy Gun Parts 1x Exodus Modules | Gunsmith 3 |
| Launcher Ammo | Ammo | 5x Metal Parts 1x Crude Explosives | Workbench 1 |
| Anvil | Weapon | 5x Mechanical Components 5x Simple Gun Parts | Gunsmith 2 |
| Anvil Splitter | Mod | 2x Mod Components 3x Processor | Gunsmith 3 |
| ??? | ??? | ??? | ??? |
| Barricade Kit | Quick Use | 1x Mechanical Components | Utility Station 2 |
| Blaze Grenade | Grenade | 1x Explosive Compound 2x Oil | Explosives Station 3 |
| Bobcat | Weapon | 3x Advanced Mechanical Components 3x Light Gun Parts | Gunsmith 3 |
| Osprey | Weapon | 2x Advanced Mechanical Components 3x Medium Gun Parts 7x Wires | Gunsmith 3 |
| Burletta | Weapon | 3x Mechanical Components 3x Simple Gun Parts | Gunsmith 1 |
| Compensator II | Mod | 2x Mechanical Components 4x Wires | Gunsmith 2 |
| Compensator III | Mod | 2x Mod Components 8x Wires | Gunsmith 3 |
| Defibrillator | Quick Use | 9x Plastic Parts 1x Moss | Medical Lab 2 |
| ??? | ??? | ??? | ??? |
| Equalizer | Weapon | 3x Magnetic Accelerator 3x Complex Gun Parts 1x Queen Reactor | Gunsmith 3 |
| Extended Barrel | Mod | 2x Mod Components 8x Wires | Gunsmith 3 |
| Extended Light Mag II | Mod | 2x Mechanical Components 3x Steel Spring | Gunsmith 2 |
| Extended Light Mag III | Mod | 2x Mod Components 5x Steel Spring | Gunsmith 3 |
| Extended Medium Mag II | Mod | 2x Mechanical Components 3x Steel Spring | Gunsmith 2 |
| Extended Medium Mag III | Mod | 2x Mod Components 5x Steel Spring | Gunsmith 3 |
| Extended Shotgun Mag II | Mod | 2x Mechanical Components 3x Steel Spring | Gunsmith 2 |
| Extended Shotgun Mag III | Mod | 2x Mod Components 5x Steel Spring | Gunsmith 3 |
| Remote Raider Flare | Quick Use | 2x Chemicals 4x Rubber Parts | Utility Station 1 |
| Heavy Gun Parts | Material | 4x Simple Gun Parts | Refiner 2 |
| Venator | Weapon | 2x Advanced Mechanical Components 3x Medium Gun Parts 5x Magnet | Gunsmith 3 |
| Il Toro | Weapon | 5x Mechanical Components 6x Simple Gun Parts | Gunsmith 1 |
| Jolt Mine | Mine | 1x Electrical Components 1x Battery | Explosives Station 2 |
| Explosive Mine | Mine | 1x Explosive Compound 1x Sensors | Explosives Station 3 |
| Jupiter | Weapon | 3x Magnetic Accelerator 3x Complex Gun Parts 1x Queen Reactor | Gunsmith 3 |
| Light Gun Parts | Material | 4x Simple Gun Parts | Refiner 2 |
| Lightweight Stock | Mod | 2x Mod Components 5x Duct Tape | Gunsmith 3 |
| Lure Grenade | Grenade | 1x Speaker Component 1x Electrical Components | Utility Station 2 |
| Medium Gun Parts | Material | 4x Simple Gun Parts | Refiner 2 |
| Torrente | Weapon | 2x Advanced Mechanical Components 3x Medium Gun Parts 6x Steel Spring | Gunsmith 3 |
| Muzzle Brake II | Mod | 2x Mechanical Components 4x Wires | Gunsmith 2 |
| Muzzle Brake III | Mod | 2x Mod Components 8x Wires | Gunsmith 3 |
| Padded Stock | Mod | 2x Mod Components 5x Duct Tape | Gunsmith 3 |
| Shotgun Choke II | Mod | 2x Mechanical Components 4x Wires | Gunsmith 2 |
| Shotgun Choke III | Mod | 2x Mod Components 8x Wires | Gunsmith 3 |
| Shotgun Silencer | Mod | 2x Mod Components 8x Wires | Gunsmith 3 |
| Showstopper | Grenade | 1x Advanced Electrical Components 1x Voltage Converter | Explosives Station 3 |
| Silencer I | Mod | 2x Mechanical Components 4x Wires | Gunsmith 2 |
| Silencer II | Mod | 2x Mod Components 8x Wires | Gunsmith 3 |
| Snap Hook | Quick Use | 2x Power Rod 3x Rope 1x Exodus Modules | Utility Station 3 |
| Stable Stock II | Mod | 2x Mechanical Components 3x Duct Tape | Gunsmith 2 |
| Stable Stock III | Mod | 2x Mod Components 5x Duct Tape | Gunsmith 3 |
| Tagging Grenade | Grenade | 1x Electrical Components 1x Sensors | Utility Station 3 |
| Tempest | Weapon | 3x Advanced Mechanical Components 3x Medium Gun Parts 3x Canister | Gunsmith 3 |
| Trigger Nade | Grenade | 2x Crude Explosives 1x Processor | Explosives Station 2 |
| Vertical Grip II | Mod | 2x Mechanical Components 3x Duct Tape | Gunsmith 2 |
| Vertical Grip III | Mod | 2x Mod Components 5x Duct Tape | Gunsmith 3 |
| Vita Shot | Quick Use | 2x Antiseptic 1x Syringe | Medical Lab 3 |
| Vita Spray | Quick Use | 3x Antiseptic 1x Canister | Medical Lab 3 |
| Vulcano | Weapon | 1x Magnetic Accelerator 3x Heavy Gun Parts 1x Exodus Modules | Gunsmith 3 |
| Wolfpack | Grenade | 2x Explosive Compound 2x Sensors | Explosives Station 3 |
| Red Light Stick | Quick Use | 3x Chemicals | Utility Station 1 |
| Smoke Grenade | Grenade | 14x Chemicals 1x Canister | Utility Station 2 |
| Deadline | Mine | 3x Explosive Compound 2x ARC Circuitry | Explosives Station 3 |
| Trailblazer | Grenade | 1x Explosive Compound 1x Synthesized Fuel | Explosives Station 3 |
| Tactical Mk. 3 (Defensive) | Augment | 2x Advanced Electrical Components 3x Processor | Gear Bench 3 |
| Tactical Mk. 3 (Healing) | Augment | 2x Advanced Electrical Components 3x Processor | Gear Bench 3 |
| Yellow Light Stick | Quick Use | 3x Chemicals | Utility Station 1 |
Note: The missing Blueprints in this list likely have not actually been added to the game at the time of writing, because none of the playerbase has managed to find any of them. As they are added to the game, I will update this page with the most relevant information so you know exactly how to get all 75 Arc Raiders Blueprints.
Where to find Blueprints in Arc Raiders
Below is a list of all containers, modifiers, and events which maximise your chances of finding Blueprints:
- Certain quests reward you with specific Blueprints .
- Completing Trials has a high chance of offering Blueprints as rewards.
- Surveyors have a decent chance of dropping Blueprints on death.
- High loot value areas tend to have a greater chance of spawning Blueprints.
- Night Raids and Storms may increase rare Blueprint spawn chances in containers.
- Containers with higher numbers of items may have a higher tendency to spawn Blueprints. As a result, Blue Gate (which has many “large” containers containing multiple items) may give you a higher chance of spawning Blueprints.
- Raider containers (Raider Caches, Weapon Boxes, Medical Bags, Grenade Tubes) have increased Blueprint drop rates. As a result, the Uncovered Caches event gives you a high chance of finding Blueprints.
- Security Lockers have a higher than average chance of containing Blueprints.
- Certain Blueprints only seem to spawn under specific circumstances: Tempest Blueprint only spawns during Night Raid events. Vulcano Blueprint only spawns during Hidden Bunker events. Jupiter and Equaliser Blueprints only spawn during Harvester events.

Raider Caches, Weapon Boxes, and other raider-oriented container types have a good chance of offering Blueprints. |Image credit:Rock Paper Shotgun/Embark Studios
Blueprints have a very low chance of spawning in any container in Arc Raiders, around 1-2% on average. However, there is a higher chance of finding Blueprints in particular container types. Specifically, you can find more Blueprints in Raider containers and security lockers.
Beyond this, if you’re looking for Blueprints you should focus on regions of the map which are marked as having particularly high-value loot. Areas such as the Control Tower in Dam Battlegrounds, the Arrival and Departure Buildings in Spaceport, and Pilgrim’s Peak in Blue Gate all have a better-than-average chance of spawning Blueprints somewhere amongst all their containers. Night Raids and Electromagnetic Storm events also increase the drop chances of certain Blueprints .
In addition to these containers, you can often loot Blueprints from destroyed Surveyors - the largest of the rolling ball ARC. Surveyors are more commonly found on the later maps - Spaceport and Blue Gate - and if one spawns in your match, you’ll likely see it by the blue laser beam that it casts into the sky while “surveying”.
Surveyors are quite well-armoured and will very speedily run away from you once it notices you, but if you can take one down then make sure you loot all its parts for a chance of obtaining certain unusual Blueprints.
Blueprints obtained from quests
One way in which you can get Blueprints is by completing certain quests for the vendors in Speranza. Some quests will reward you with a specific item Blueprint upon completion, so as long as you work through all the quests in Arc Raiders, you are guaranteed those Blueprints.
Here is the full list of all Blueprints you can get from quest rewards:
- Trigger Nade Blueprint: Rewarded after completing “Sparks Fly”.
- Lure Grenade Blueprint: Rewarded after completing “Greasing Her Palms”.
- Burletta Blueprint: Rewarded after completing “Industrial Espionage”.
- Hullcracker Blueprint (and Launcher Ammo Blueprint): Rewarded after completing “The Major’s Footlocker”.
Alas, that’s only 4 Blueprints out of a total of 75 to unlock, so for the vast majority you will need to find them yourself during a raid. If you’re intent on farming Blueprints, then it’s best to equip yourself with cheap gear in case you lose it, but don’t use a free loadout because then you won’t get a safe pocket to stash any new Blueprint you find. No pain in Arc Raiders is sharper than failing to extract with a new Blueprint you’ve been after for a dozen hours already.

One of the best ways to get Blueprints is by hitting three stars on all five Trials every week. |Image credit:Rock Paper Shotgun/Embark Studios
Blueprints obtained from Trials
One of the very best ways to get Blueprints is as rewards for completing Trials in Arc Raiders. Trials are unlocked from Level 15 onwards, and allow you to earn rewards by focusing on certain tasks over the course of several raids. For example, one Trial might task you with dealing damage to Hornets, while another might challenge you to loot Supply Drops.
Trials refresh on a weekly basis, with a new week bringing five new Trials. Each Trial can offer up to three rewards after passing certain score milestones, and it’s possible to receive very high level loot from these reward crates - including Blueprints. So if you want to unlock as many Blueprints as possible, you should make a point of completing as many Trials as possible each week.
Best Blueprint farming locations
The very best way to get Blueprints is to frequent specific areas of the maps which combine high-tier loot pools with the right types of containers to search. Here are my recommendations for where to find Blueprints on every map, so you can always keep the search going for new crafting recipes to unlock.

Image credit:Rock Paper Shotgun/Embark Studios
Dam Battlegrounds
The best places to farm Blueprints on Dam Battlegrounds are the Control Tower, Power Generation Complex, Ruby Residence, and Pale Apartments . The first two regions, despite only being marked on the map as mid-tier loot, contain a phenomenal number of containers to loot. The Control Tower can also contain a couple of high-tier Security Lockers - though of course, you’ll need to have unlocked the Security Breach skill at the end of the Survival tree.
There’s also a lot of reporting amongst the playerbase that the Residential areas in the top-left of the map - Pale Apartments and Ruby Residence - give you a comparatively strong chance of finding Blueprints. Considering their size, there’s a high density of containers to loot in both locations, and they also have the benefit of being fairly out of the way. So you’re more likely to have all the containers to yourself.
Buried City
The best Blueprint farming locations on Buried City are the Santa Maria Houses, Grandioso Apartments, Town Hall, and the various buildings of the New District . Grandioso Apartments has a lower number of containers than the rest, but a high chance of spawning weapon cases - which have good Blueprint drop rates. The others are high-tier loot areas, with plenty of lootable containers - including Security Lockers.
Spaceport
The best places to find Blueprints on Spaceport are the Arrival and Departure Buildings, as well as Control Tower A6 and the Launch Towers . All these areas are labelled as high-value loot regions, and many of them are also very handily connected to one another by the Spaceport wall, which you can use to quickly run from one area to the next. At the tops of most of these buildings you’ll find at least one Security Locker, so this is an excellent farming route for players looking to find Blueprints.
The downside to looting Blueprints on Spaceport is that all these areas are hotly contested, particularly in Duos and Squads. You’ll need to be very focused and fast in order to complete the full farming route.

Image credit:Rock Paper Shotgun/Embark Studios
Blue Gate
Blue Gate tends to have a good chance of dropping Blueprints, potentially because it generally has a high number of containers which can hold lots of items; so there’s a higher chance of a Blueprint spawning in each container. In my experience, the best Blueprint farming spots on Blue Gate are Pilgrim’s Peak, Raider’s Refuge, the Ancient Fort, and the Underground Complex beneath the Warehouse .
All of these areas contain a wealth of containers to loot. Raider’s Refuge has less to loot, but the majority of the containers in and around the Refuge are raider containers, which have a high chance of containing Blueprints - particularly during major events.
Stella Montis
On the whole, Stella Montis seems to have a very low drop rate for Blueprints (though a high chance of dropping other high-tier loot). If you do want to try farming Blueprints on this map, the best places to find Blueprints in Stella Montis are Medical Research, Assembly Workshop, and the Business Center . These areas have the highest density of containers to loot on the map.
In addition to this, the Western Tunnel has a few different Security Lockers to loot, so while there’s very little to loot elsewhere in this area of the map, it’s worth hitting those Security Lockers if you spawn there at the start of a match.
That wraps up this primer on how to get all the Blueprints in Arc Raiders as quickly as possible. With the Expedition system constantly resetting a large number of players’ Blueprints, it’s more important than ever to have the most up-to-date information on where to find all these Blueprints.
While you’re here, be sure to check out our Arc Raiders best guns tier list , as well as our primers on the best skills to unlock and all the different Field Depot locations on every map.


ARC Raiders
PS5 , Xbox Series X/S , PC
Rock Paper Shotgun is better when you sign in
Sign in and join us on our journey to discover strange and compelling PC games.
