All 24 Wuchang Fallen Feathers bosses in order
Find and beat all of Wuchang Fallen Feathers’ bosses with this guide
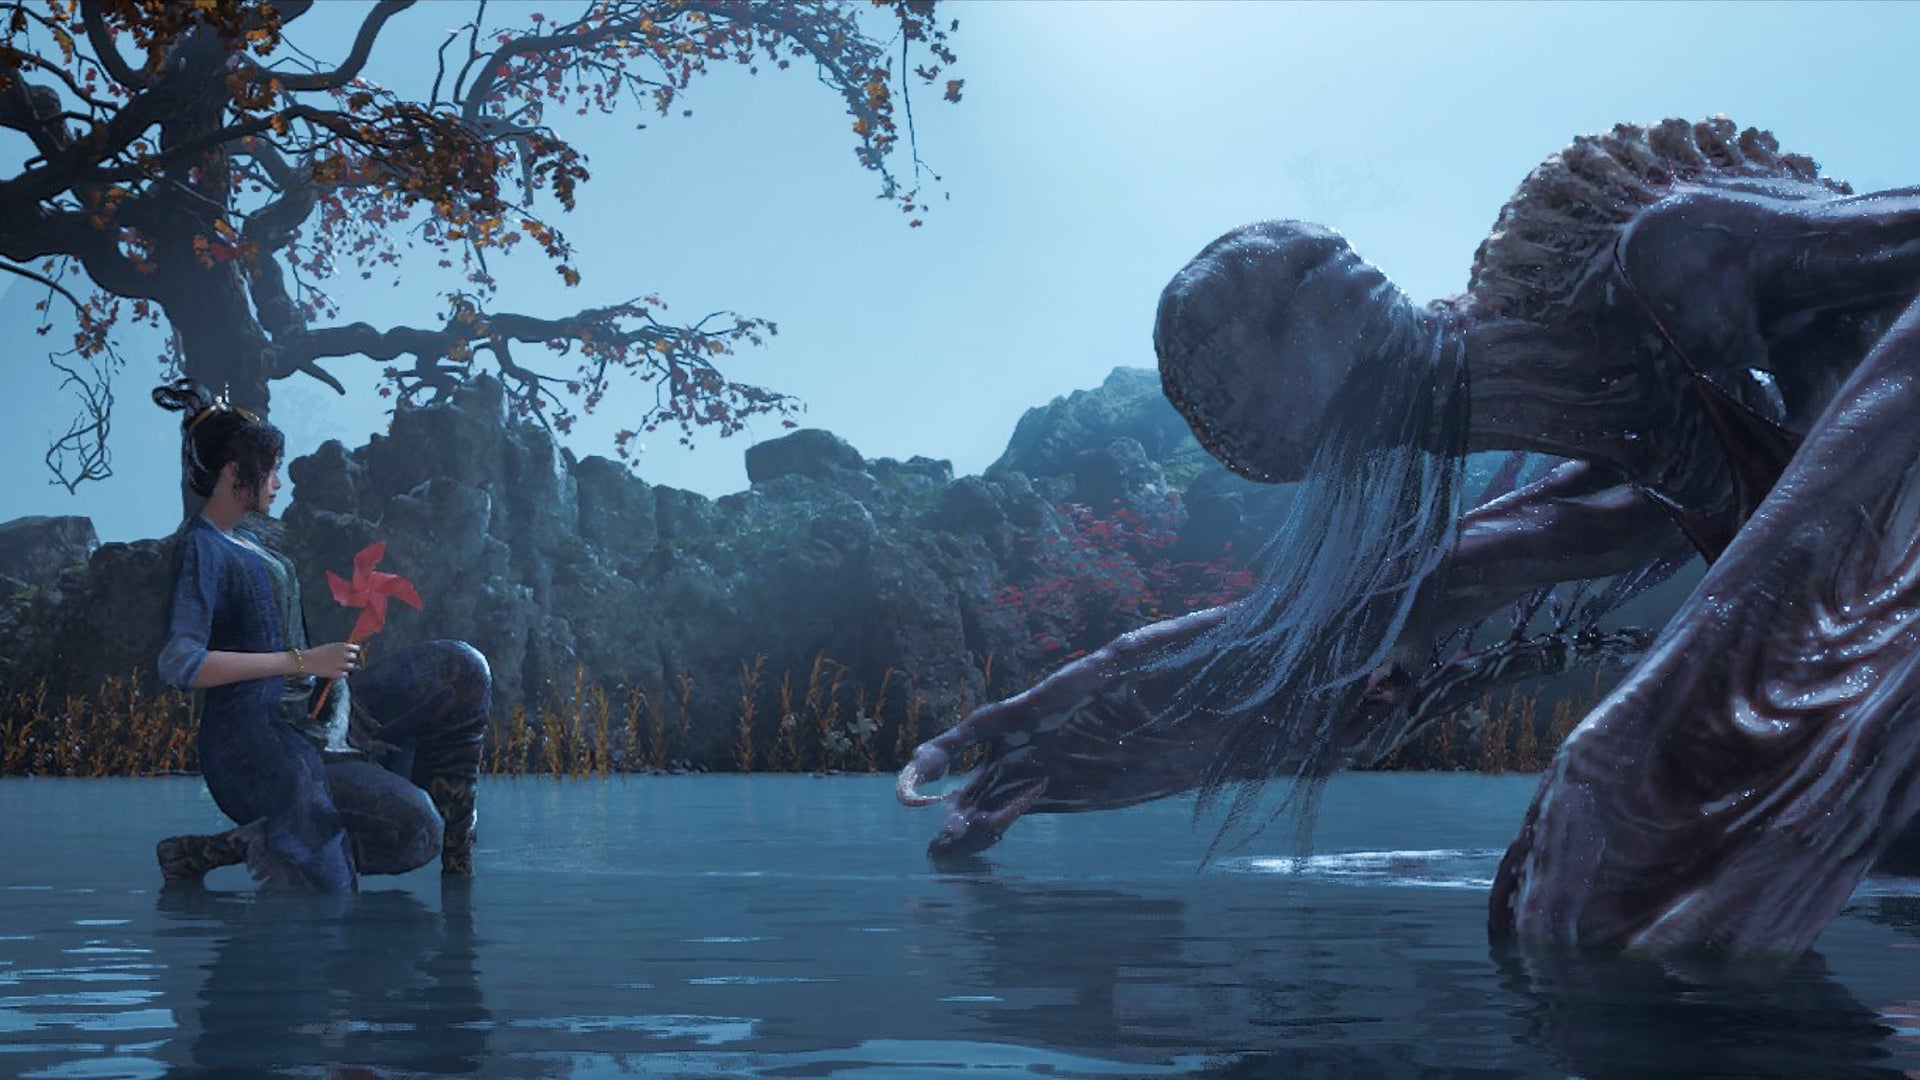
Image credit:Rock Paper Shotgun/505 Games

Want a full list of all of Wuchang Fallen Feather’s bosses in order? Wuchang Fallen Feathers features a breathtaking trip across the ancient Chinese kingdom of Shu, which is in the throes of a deadly plague known as the Feathering. As the titular Wuchang traverses this tormented landscape, she’ll come face to face with a wide variety of opponents large and small, and just like the hero of any good Soulslike , she will fall, rise again, and ultimately persevere until she puts these enemies into the dirt.
Featuring 24 bosses across many environments - including several optional bosses who are tied into specific NPC questlines and the game’s multiple endings - Wuchang Fallen Feathers is a long journey. This guide will provide a full list of all Wuchang Fallen Feathers mandatory and optional bosses , giving you a quick rundown of the order to fight them in, their locations, and how to defeat them.

All 24 Wuchang Fallen Feathers bosses
The table below lists all 24 Wuchang Fallen Feathers bosses in our recommended order. Click on the name of the boss to read detailed strategies on how to beat them, as well as the nearest Shrine and their location.
Bosses are organised into two types, as revealed by the seal that appears after you defeat them. Key bosses necessary to advance the story are known as Shield of Causality , and non-key bosses are known as Sankhara Wuchang . Sometimes, non-key bosses also display the Quelling Madness seal.
| No. | Boss | Boss Type |
|---|---|---|
| 1 | Bai Kru | Quelling Madness (non-key boss) |
| 2 | Tang Palace Maid | Sankhara Wuchang (non-key boss) |
| 3 | Master Raider - Man-eating Dhutanga | Shield of Causality (key boss) |
| 4 | Feathered Priest - Lu Bingzhang | Sankhara Wuchang (non-key boss) |
| 5 | Gluttonous Monstrosity - Lu Hongliu | Sankhara Wuchang (non-key boss) |
| 6 | Blightweaver - Great Centipede | Shield of Causality (key boss) |
| 7 | Reborn Treant - Soulwood | Shield of Causality (key boss) |
| 8 | Tang Palace Maid 2 | Sankhara Wuchang (non-key boss) |
| 9 | Commander Honglan | Shield of Causality (key boss) |
| 10 | General of the North - Ai Nengqi | Sankhara Wuchang (non-key boss) |
| 11 | Ming General - Liu Cheng’en | Shield of Causality (key boss) |
| 12 | Mistress of the Night - Huang Yan | Shield of Causality (key boss) |
| 13 | Perfect Bride - Fang Ling | Shield of Causality (key boss) |
| 14 | South General - Liu Wenxiu | Sankhara Wuchang (non-key boss) |
| 15 | Bo Sorcerer | Sankhara Wuchang (non-key boss) |
| 16 | Fierce Tiger - Sovereign Zhang Xianzhong | Shield of Causality (key boss) |
| 17 | Monstrous Toddler - Bai Kru | Quelling Madness (non-key boss) |
| 18 | Nightmare Demon | Quelling Madness (non-key boss) |
| 19 | Vermilion Feathers - Honglan | Quelling Madness (non-key boss) |
| 20 | Bo Magus | Quelling Madness (non-key boss) |
| 21 | Dragon Emperor - Zhu Youjian | Shield of Causality (key boss) |
| 22 | Eternal Glory - Zhao Yun | Quelling Madness (non-key boss) |
| 23 | Demon of Obsession | Quelling Madness (non-key boss) |
| 24 | Feathery Ambition - Xuanyangzi | Shield of Causality (key boss) |
1. Bai Kru

Bai Kru serves as a menacing preview of things to come. |Image credit:Rock Paper Shotgun/505 Games
- Boss Type: Quelling Madness (non-key boss)
- Nearest Shrine: Worship’s Rise - Reverent Temple
- Route from Shrine: Head down the steps from the Reverent Temple and speak with the Boatman by the fire. He’ll send you into a dreamlike realm where you will encounter Bai Kru. You have only one chance to defeat the boss.
Bai Kru is your typical “you’re unlikely to beat this guy as a beginner” Soulslike boss. The fight provides a good chance to practice Wuchang Fallen Feathers’ dodging mechanic, also known as Shimmer. Beating Bai Kru is tough but doable if you’re skilled at dodging sweeping arm strikes as well as their water-spitting attack. If you die, you’ll respawn at the Reverent Temple Shrine, and the Boatman will be gone.
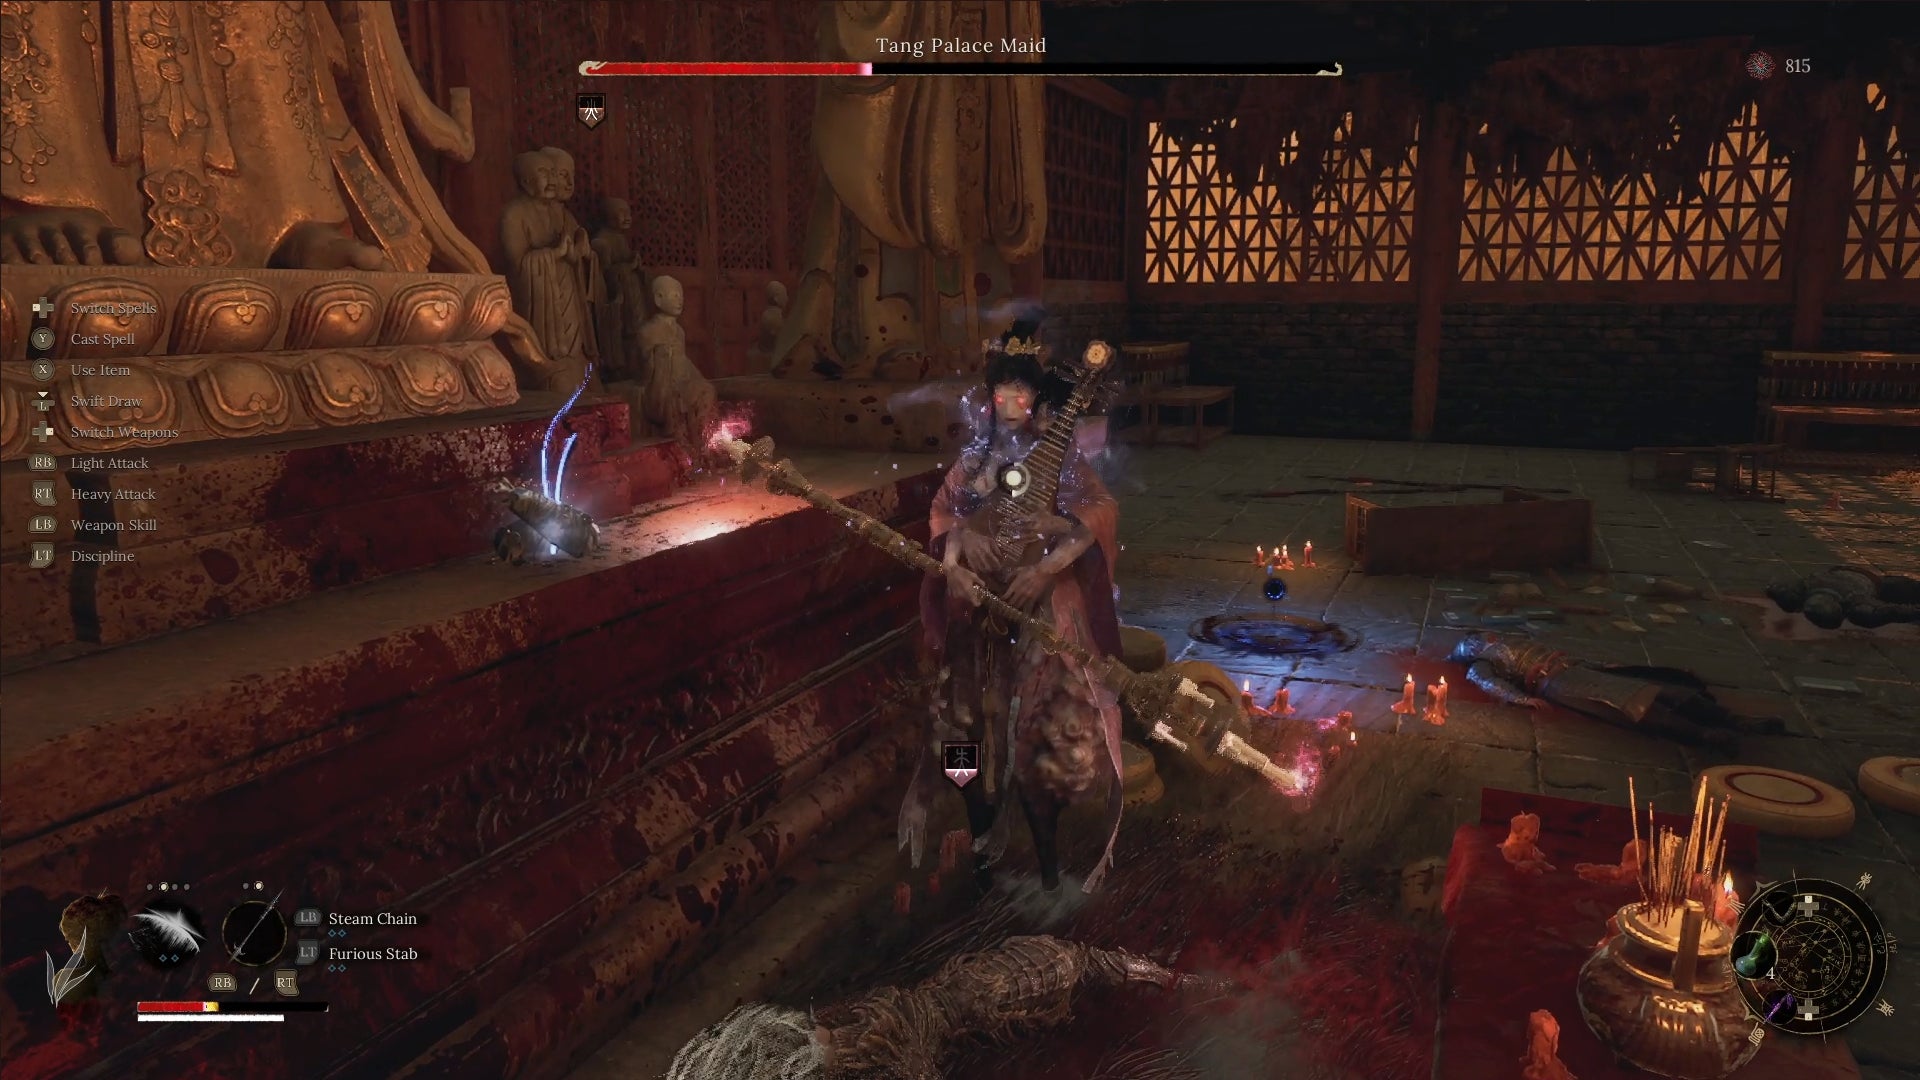
2. Tang Palace Maid
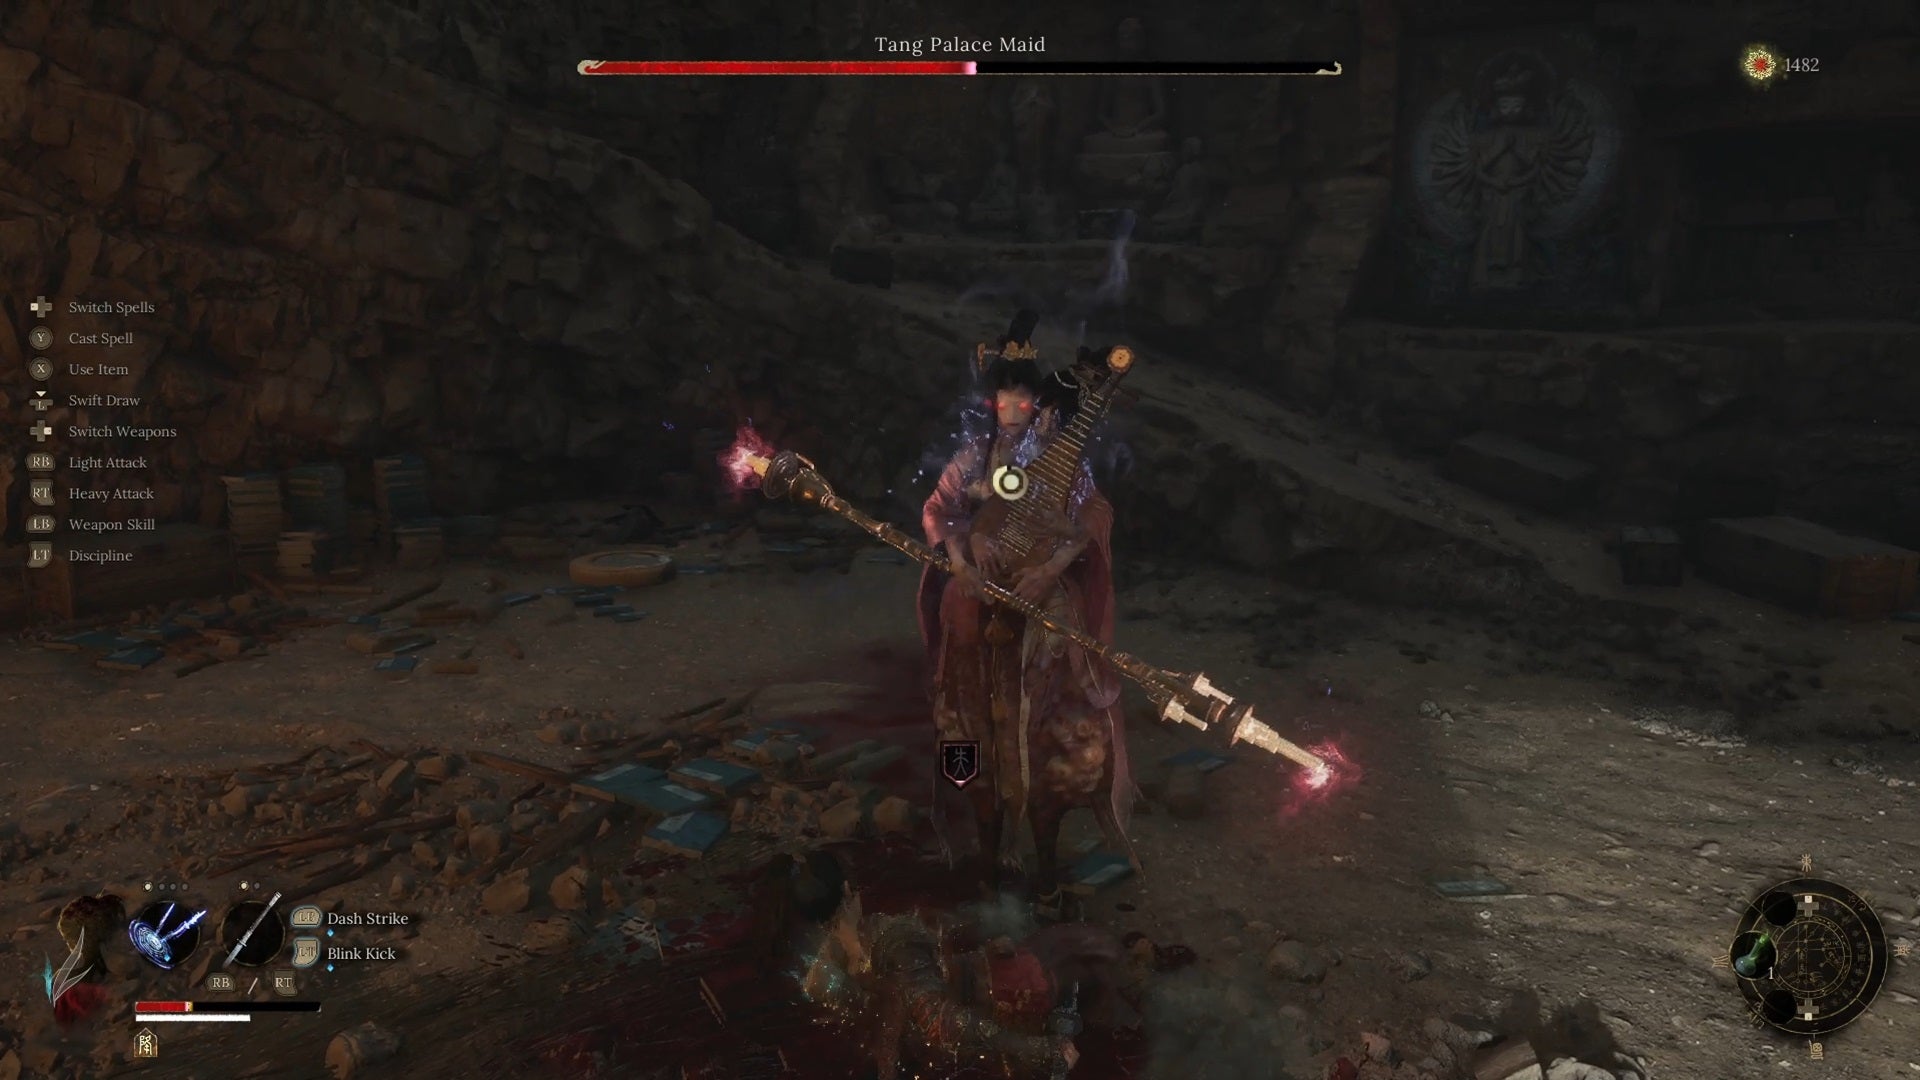
That little circle on the Tang Palace Maid represents her current Obliterate status - keep attacking to fill it and stagger her. |Image credit:Rock Paper Shotgun/505 Games
- Boss Type: Sankhara Wuchang (non-key boss)
- Nearest Shrine: Worship’s Rise - Buddha Cliffs
- Route from Shrine: Go up the platforms from the Buddha Cliffs shrine and through the cave. There are a few changes in elevation here; eventually you’ll come to a platform that overlooks an area on your left where the Tang Palace Maid is wandering about.
The Tang Palace Maid serves as a mini-tutorial on how to build a boss’ Obliterate value. Circle around her and use a charged heavy attack to leave her vulnerable to a good Obliterate strike - you can also drop down on her from above with a light attack for the same effect. Watch out for her staff, as well as an attack where she sucks your blood if you get too close. It’s also perfectly viable to blast her from afar with the Vorpal Blade spell, which you’ll get shortly before this fight.
3. Master Raider - Man-eating Dhutanga

Dhutanga is the first true boss. Dodge his fiery attacks and you’ll have a better understanding of the game’s ropes. |Image credit:Rock Paper Shotgun/505 Games
- Boss Type: Shield of Causality (key boss)
- Nearest Shrine: Worship’s Rise - Lightzen Temple
- Route from Shrine: Go up the stairs and through the courtyard before circling around the building to the clearing on the other side.
Dhutanga serves as the first actual boss of Wuchang Fallen Feathers, and acts as another reminder of the dodge/Shimmer mechanic, as well as a tutorial of how to do extra damage if you consume stacks of Skyborn Might.
Practice makes perfect with Dhutanga - learn the pattern of his sweeping combos and his foot smash, and if you’re having trouble, dash backwards and blast him with Vorpal Blade repeatedly. Once his health is down by half, he’ll strengthen his attacks with fire and release an AoE eruption that will kill you if your HP is low.
4. Feathered Priest - Lu Bingzhang
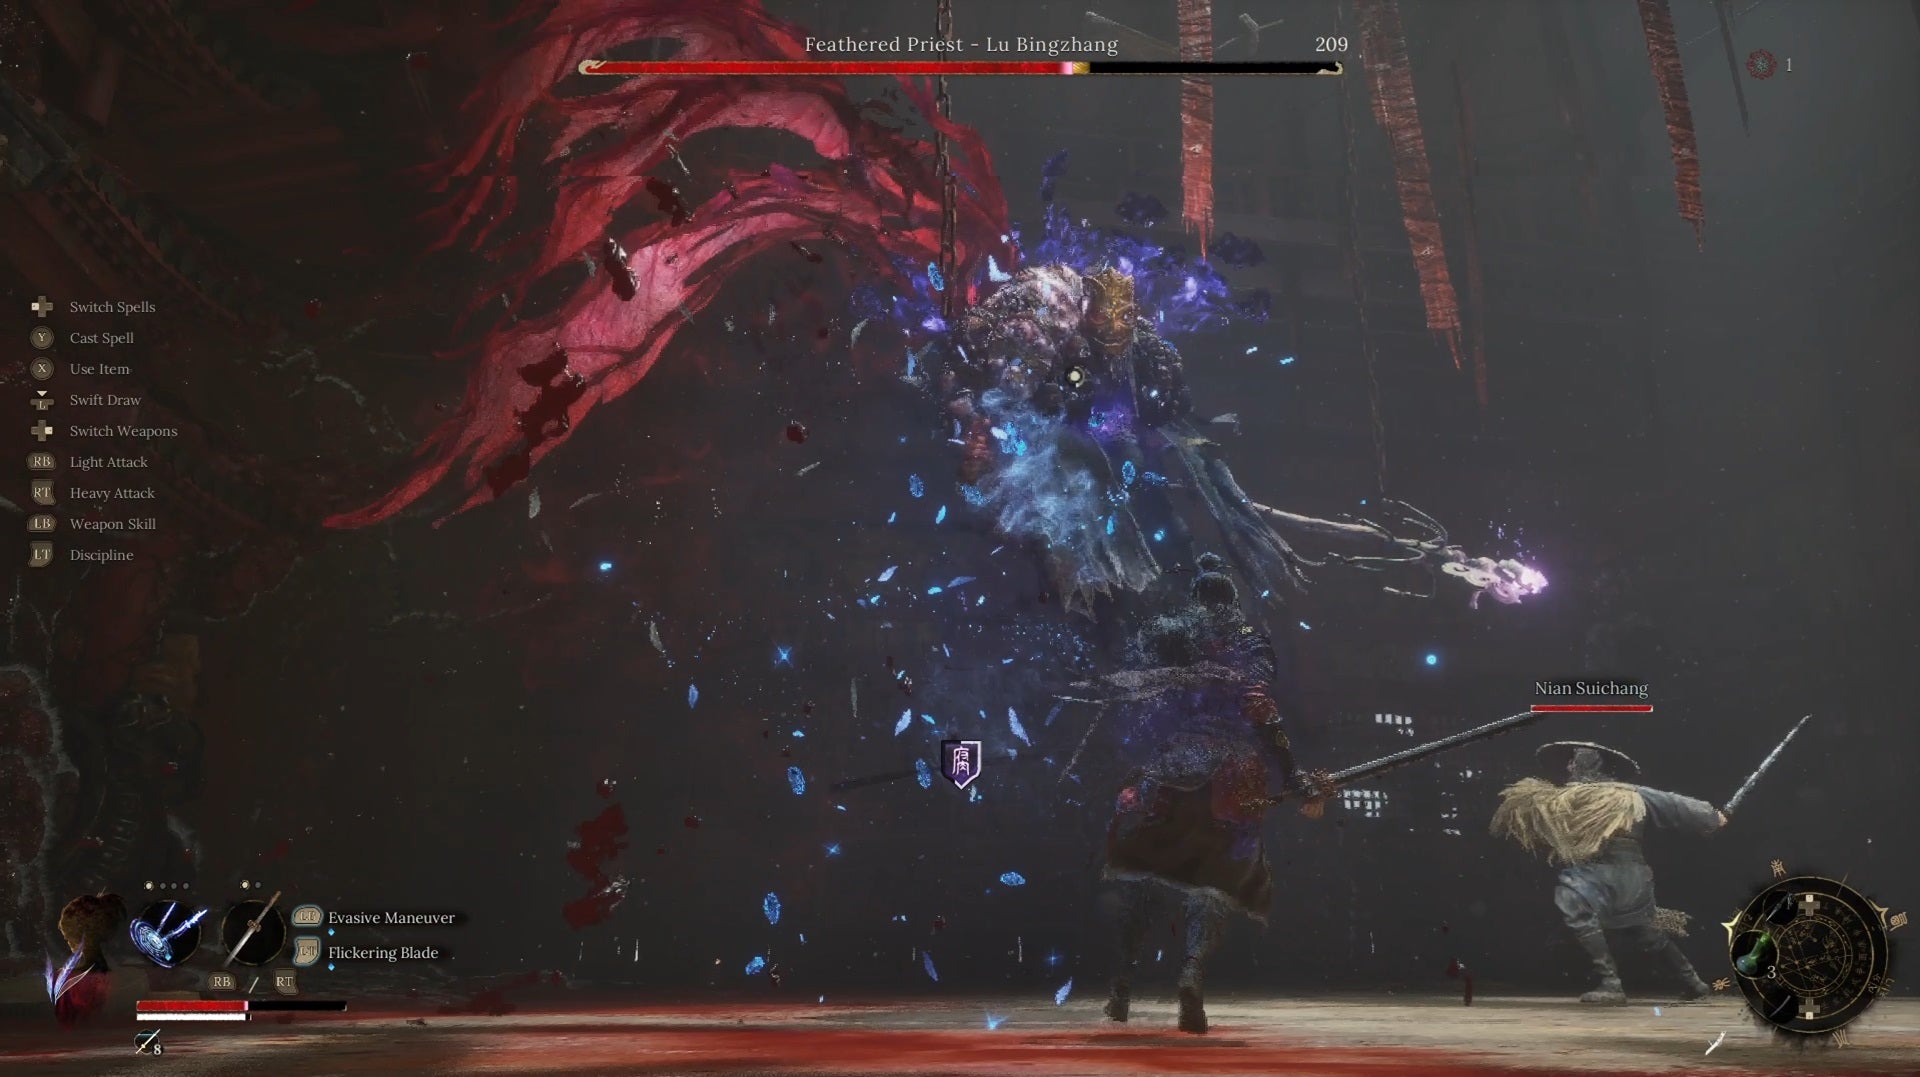
Don’t battle Lu Bingzhang’s Corruption alone; take this chance to bring Nian Suichang along! |Image credit:Rock Paper Shotgun/505 Games
- Boss Type: Sankhara Wuchang (non-key boss)
- Nearest Shrine: Worship’s Rise - Shu Sanctum
- Route from Shrine: Go to the uppermost floor of the Shu Sanctum and enter the ominous door on your right.
Lu Bingzhang is the evil uncle in the attic, a victim of the Feathering who will unleash attacks from above and introduce you to Corruption, a condition that causes heavy damage over time if you let it built up completely. Dodge the purple Corruption blobs that he tosses around, as well as his red projectiles, which deal Feathering damage.
Any armor with good Corruption and Feathering mitigation wll be valuable here, and if you’re having trouble, you can call Nian Suichang to your side - as long as you’ve spoken to him early and gotten the Bone Whistle, the item you need to summon NPCs !
5. Gluttonous Monstrosity - Lu Hongliu
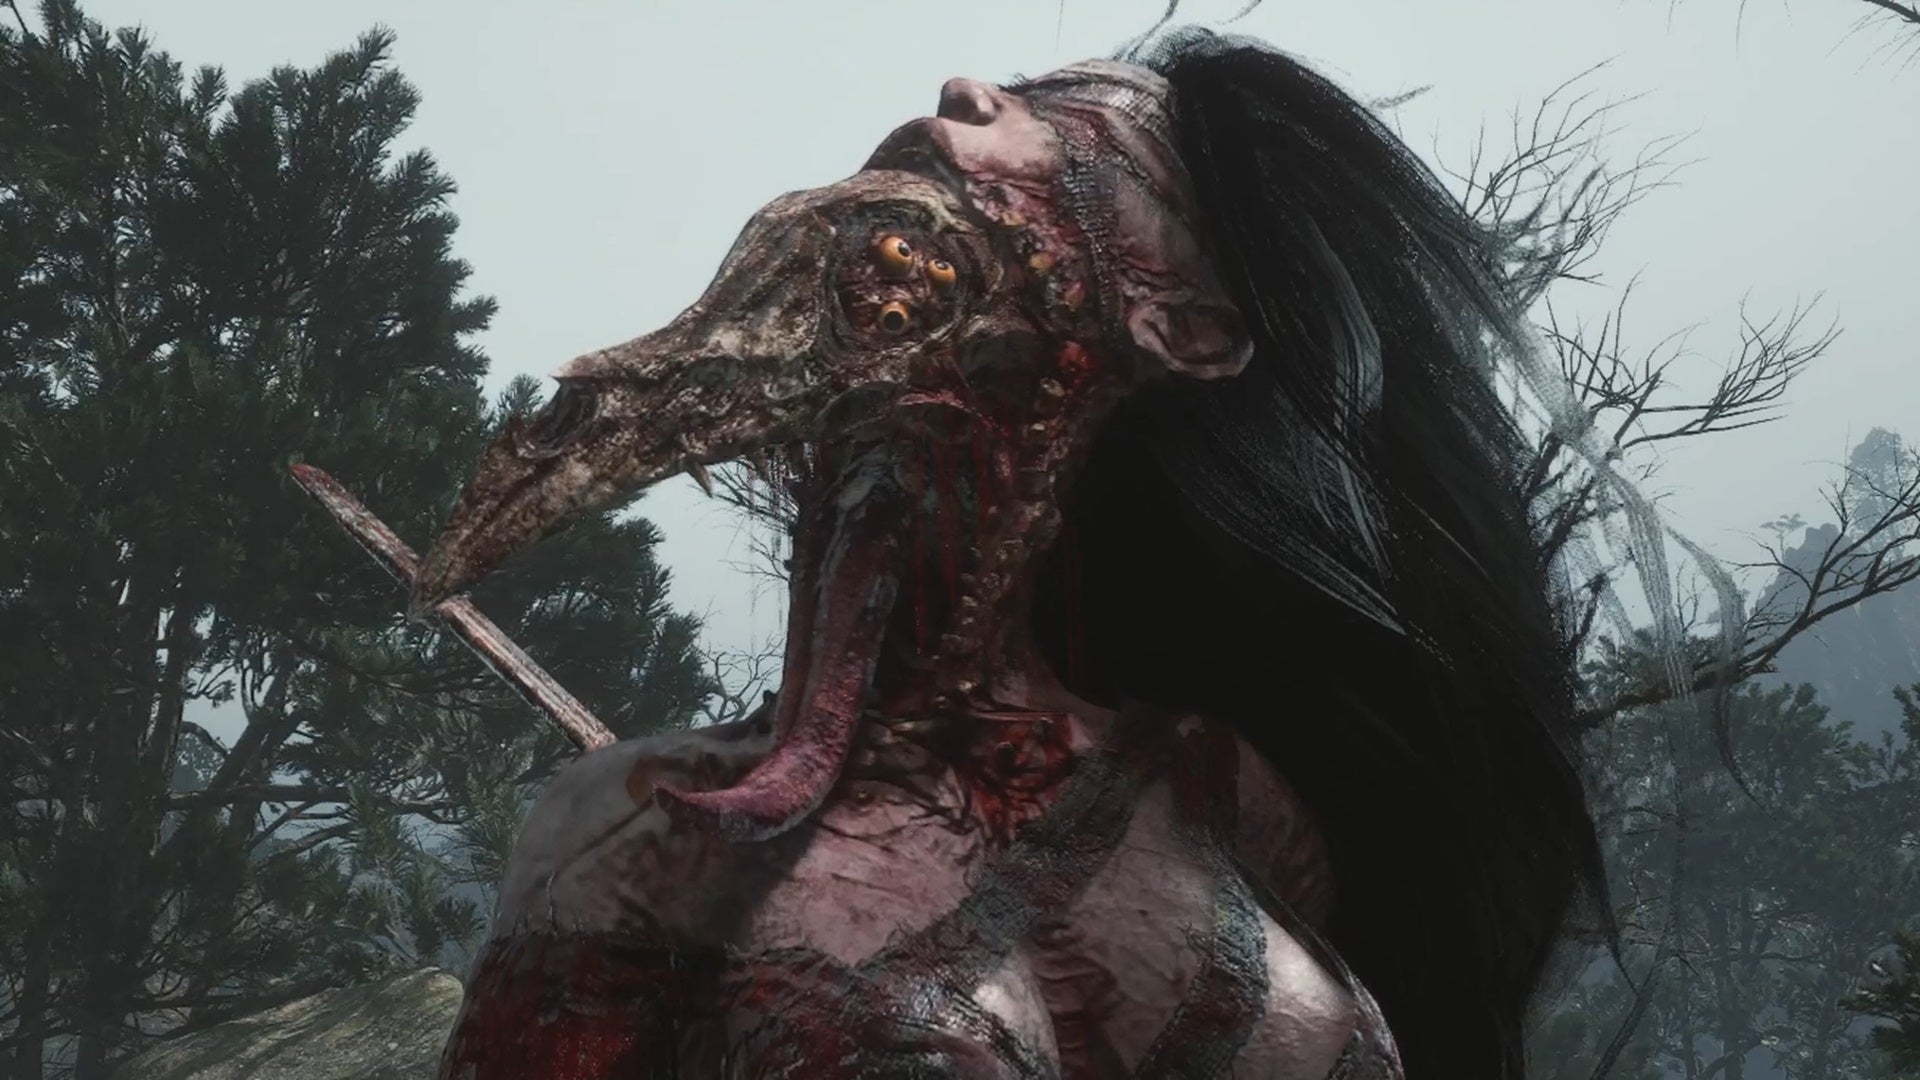
An easily missable monstrosity, if you aren’t carefully exploring the villages by Shu Sanctum. |Image credit:Rock Paper Shotgun/505 Games
- Boss Type: Sankhara Wuchang (non-key boss)
- Nearest Shrine: Worship’s Rise - Shu Sanctum
- Route from Shrine: Finding Lu Hongliu requires a thorough search of the villages near Shu Sanctum. (Along the way, you may unlock the Worship’s Rise - Annalum Shrine.) If you keep seeking higher ground, you’ll eventually reach a fork in the road that overlooks the Shu Sanctum’s roof. The leftmost path leads to a series of blood-soaked stairs which open into a temple courtyard housing Lu Hongliu. However, it’s worth going down the middle path first, as Wuchang will encounter a tree that she can knock over and use as a makeshift bridge, providing a handy shortcut back to the Shu Sanctum.
An entirely missable but very cool (and gruesome) boss, Lu Hongliu will test your mettle with a large health bar and some erratic movements that may prove tricky if you’re primarily using a heavier and slower weapon, like an Axe or Spear.
My recommendation is to go with something more agile like the Longsword or One-Handed Sword, and be sure to Temper your weapon with the Bone Needle - Flame and attack when Lu Hongliu kneels on the ground to vomit blood. This will build up her Burn value. At 50% health, Lu Hongliu unleashes a scream that temporarily stuns you before shooting blood every which way. Strafe around her while this is happening and stab at her from the rear.
6. Blightweaver - Great Centipede

Stay out of range of those pincers at all costs. |Image credit:Rock Paper Shotgun/505 Games
- Boss Type: Shield of Causality (key boss)
- Nearest Shrine: Worship’s Rise - Bandit Cave
- Route from Shrine: From the Bandit Cave Shrine, turn around and you’ll see an interactable, hunched-over corpse. (A message about feeling invincible appears if you interact with it.) Go past the corpse and follow the wooden slope downwards, then immediately turn right to enter the boss chamber.
This big ol’ bug hits you with pincer attacks that cause Burn and tail strikes that inflict Corruption. Both attacks are faily avoidable, especially if you’re wearing the right armor, and you can fight fire with fire by also inflicting Burn.
At half health the Blightweaver will switch things up by creating a blue sigil that blasts laser beams across the arena. Dodging these is easy - just hop backwards - but then it’ll burrow underground and track your movements before breaking free in a lava explosion. Pay close attention and dodge as soon as you see a lava marker on the ground beneath you. If you’re having trouble, keep an ear out - the Blightweaver makes two noticeable burrowing sounds (indicating that its following you) before erupting free. It’ll repeat this burrowing strategy four times before fully emerging from the earth.
7. Reborn Treant - Soulwood
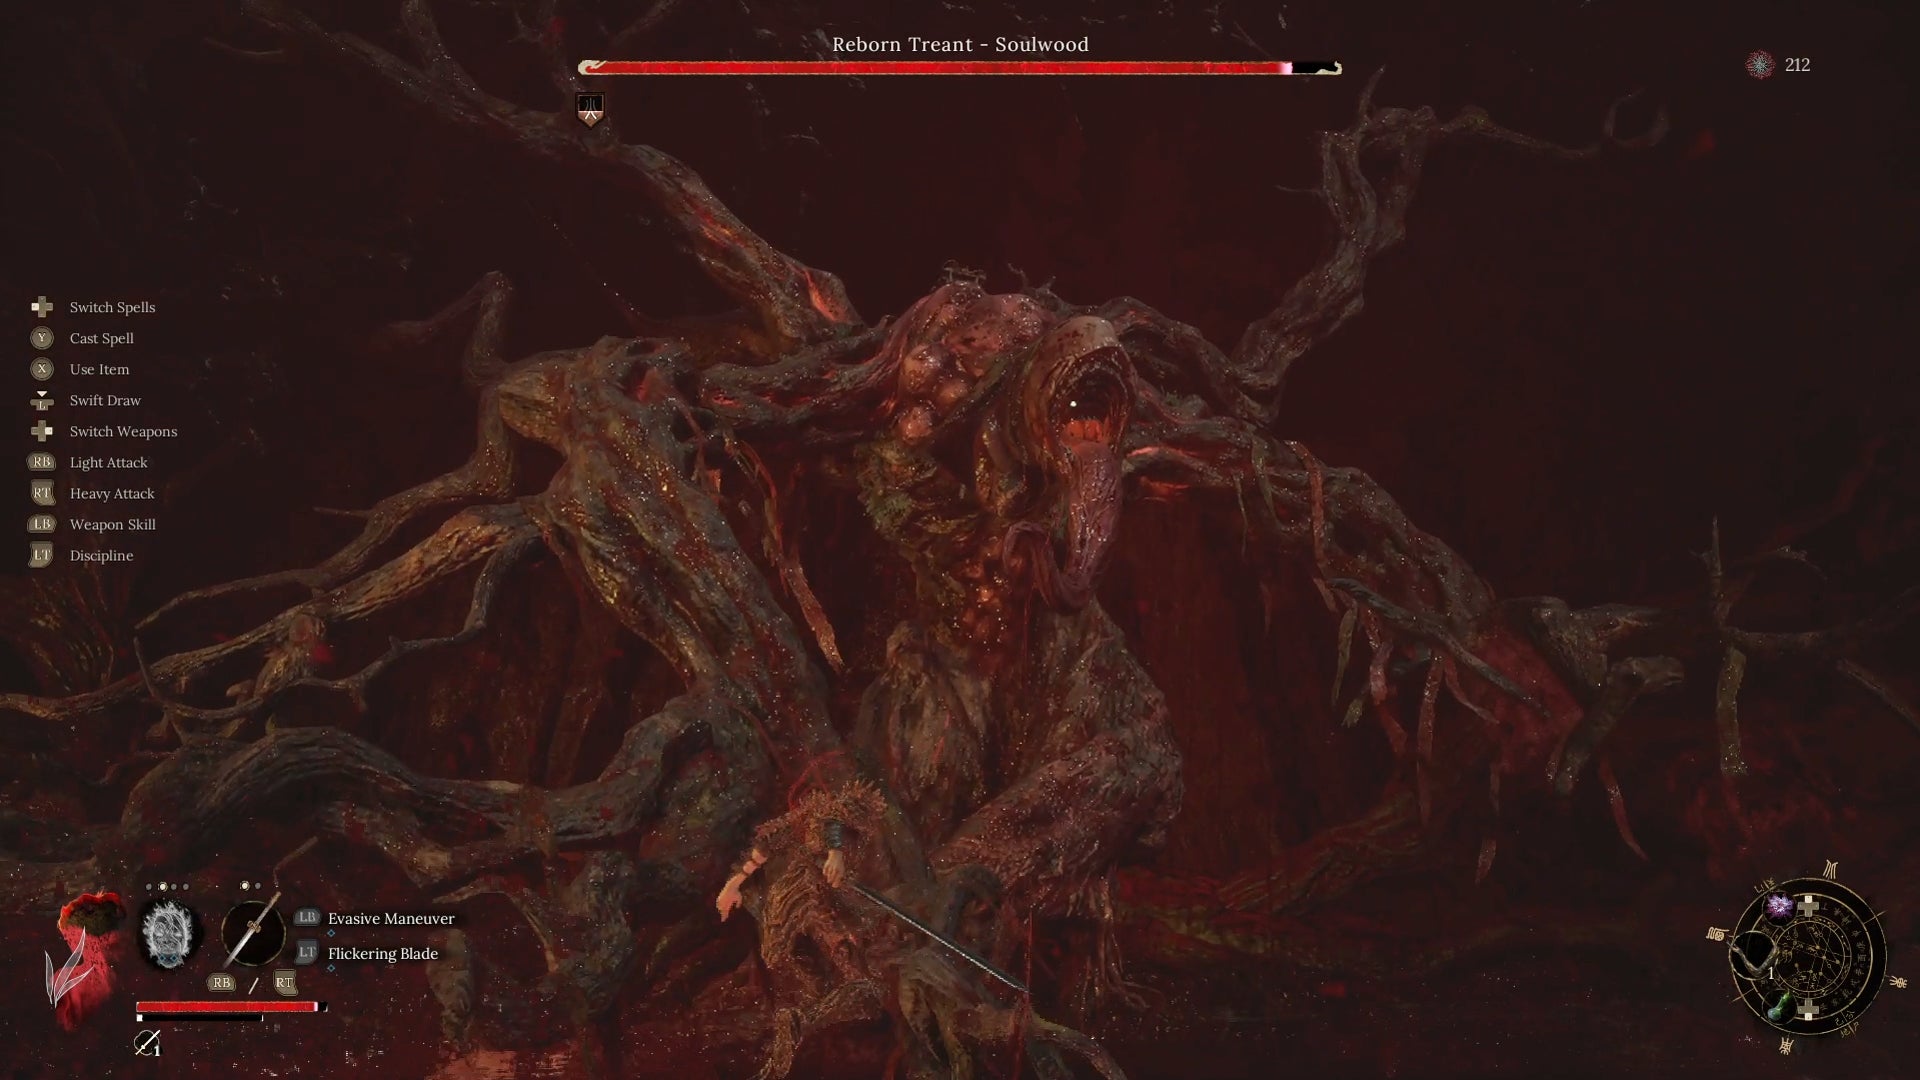
With the power of an old fashioned forest fire, this gross treant goes down relatively fast. |Image credit:Rock Paper Shotgun/505 Games
- Boss Type: Shield of Causality (key boss)
- Nearest Shrine: Worship’s Rise - Doomwillow Beach
- Route from Shrine: Thoroughly explore this decrepit beach area - you’ll reach the Lu Mansion Shrine and eventually come to an area dubbed the Corpse Pits, which technically leads right to Soulwood. Before advancing into the boss arena, double back and go up a ladder - you’ll emerge on an higher series of platforms. Atop this elevated area is a makeshift pillar of wood that you can kick down, forming a shortcut that leads back to the Doomwillow Beach Shrine.
This hefty tree boss stays latched in place and isn’t hard to beat if you’ve got a magic build, or even just a few Fire Pots at your disposal. You can hit Soulwood with the Infernal Flame or Burning Flames spells for good damage, or use the Bone Needle - Flame to temper your weapon with fire if you dare approach for melee.
Soulwood will occasionally try to suck you into its grasp, and it’ll fill the arena with minor enemies and tree roots. None of these are hard to avoid, and Skyborn Might regularly appears on the battlefield whenever Soulwood shoots blood onto the ground. Collect these and keep up your fire-based onslaught to end the fight sooner rather than later.
8. Tang Palace Maid 2
She’s back and ready to suck blood once again. Obliterate her! |Image credit:Rock Paper Shotgun/505 Games
- Boss Type: Sankhara Wuchang (non-key boss)
- Nearest Shrine: Worship’s Rise - Palace Hill
- Route from Shrine: There is an annoying lack of Shrines between the Corpse Pits and Palace Hill, making exploration of the maze-like Tang Palace Temple maddening, as death will send you back miles. (If you thoroughly explore the Tang Palace complex, you’ll find a shortcut that leads back to the Shu Sanctum.) To quickly find the Palace Hill Shrine, the easiest way is to explore the complex until you find a glowing red door that you can activate. Choose the ‘Feathered Transcendance’ option to be teleported into a building elsewhere in the complex that contains the Tang Palace Maid. Luckily, she won’t appear until you exit and re-enter. If you leave, veer left, go up the ladder, and let your compass lead you to the Shrine, which is close by.
It’s another Tang Palace Maid! This one is faster and deadlier than the first, but the same lessons about avoiding her blood sucking grab and building her Obliterate meter still apply. If you’ve got a hefty weapon like an Axe, poise breaking her is easy if you keep hammering away with light attacks. If you’re using spells, smash her with Vorpal Blade from afar and practice your dodges when she zooms in with her staff.
9. Commander Honglan

They should really call her Commander Wall, because many players are going to find themselves stuck against Honglan for a long time. |Image credit:Rock Paper Shotgun/505 Games
- Boss Type: Shield of Causality (key boss)
- Nearest Shrine: Worship’s Rise - Palace Hill
- Route from Shrine: To find Commander Honglan, follow the advice listed above for running into the Tang Palace Maid 2 and locating the Palace Hill Shrine. There will be an NPC named the Plain Warrioress near the Shrine, along with a small altar where you need to place a Buddha Statue. If you go down the steps from the Palace Hill Shrine, cross the bridge and veer right, you can find the Buddha Statue by a maid’s corpse. Place it on the altar and it will drain the pond in the centre of the Tang courtyard. Drop down into the now-empty pond to fight Honglan. (After defeating her, you can access an additional Shrine called Lotus Pond if you ever return to this area.)
Get ready to dodge as soon as this fight begins, and then get used to dying. This lady’s no joke, and we’ve written an entire separate guide on how to beat Commander Honglan .
In short, I personally defeated Honglan with a dodging strategy that involved equipping the Centipede Armor (which offers good protection against slashing and stabbing damage), maxing out my Agility and Magic, and using the One-Handed Sword Astral Blade, which boosts spell damage nicely. I never attacked Honglan directly and instead chose to dodge, building up my Skyborn Might until I could cast Burning Flames against her repeatedly, which always did reliable damage.
Other players who prefer a more direct approach can equip a Longsword or Dual Blades. Use the Longsword’s counter to deflect Honglan’s attacks and then follow up with your own strike. The Dual Blades, meanwhile, offer the ability to parry, and if you’re good at blocking attacks and aren’t afraid of getting up close and personal, you might prefer this method. However you choose to beat Honglan, be sure to give yourself a hearty congratulations when the fight is over, because she’s a tremendous difficulty spike.
10. General of the North - Ai Nengqi
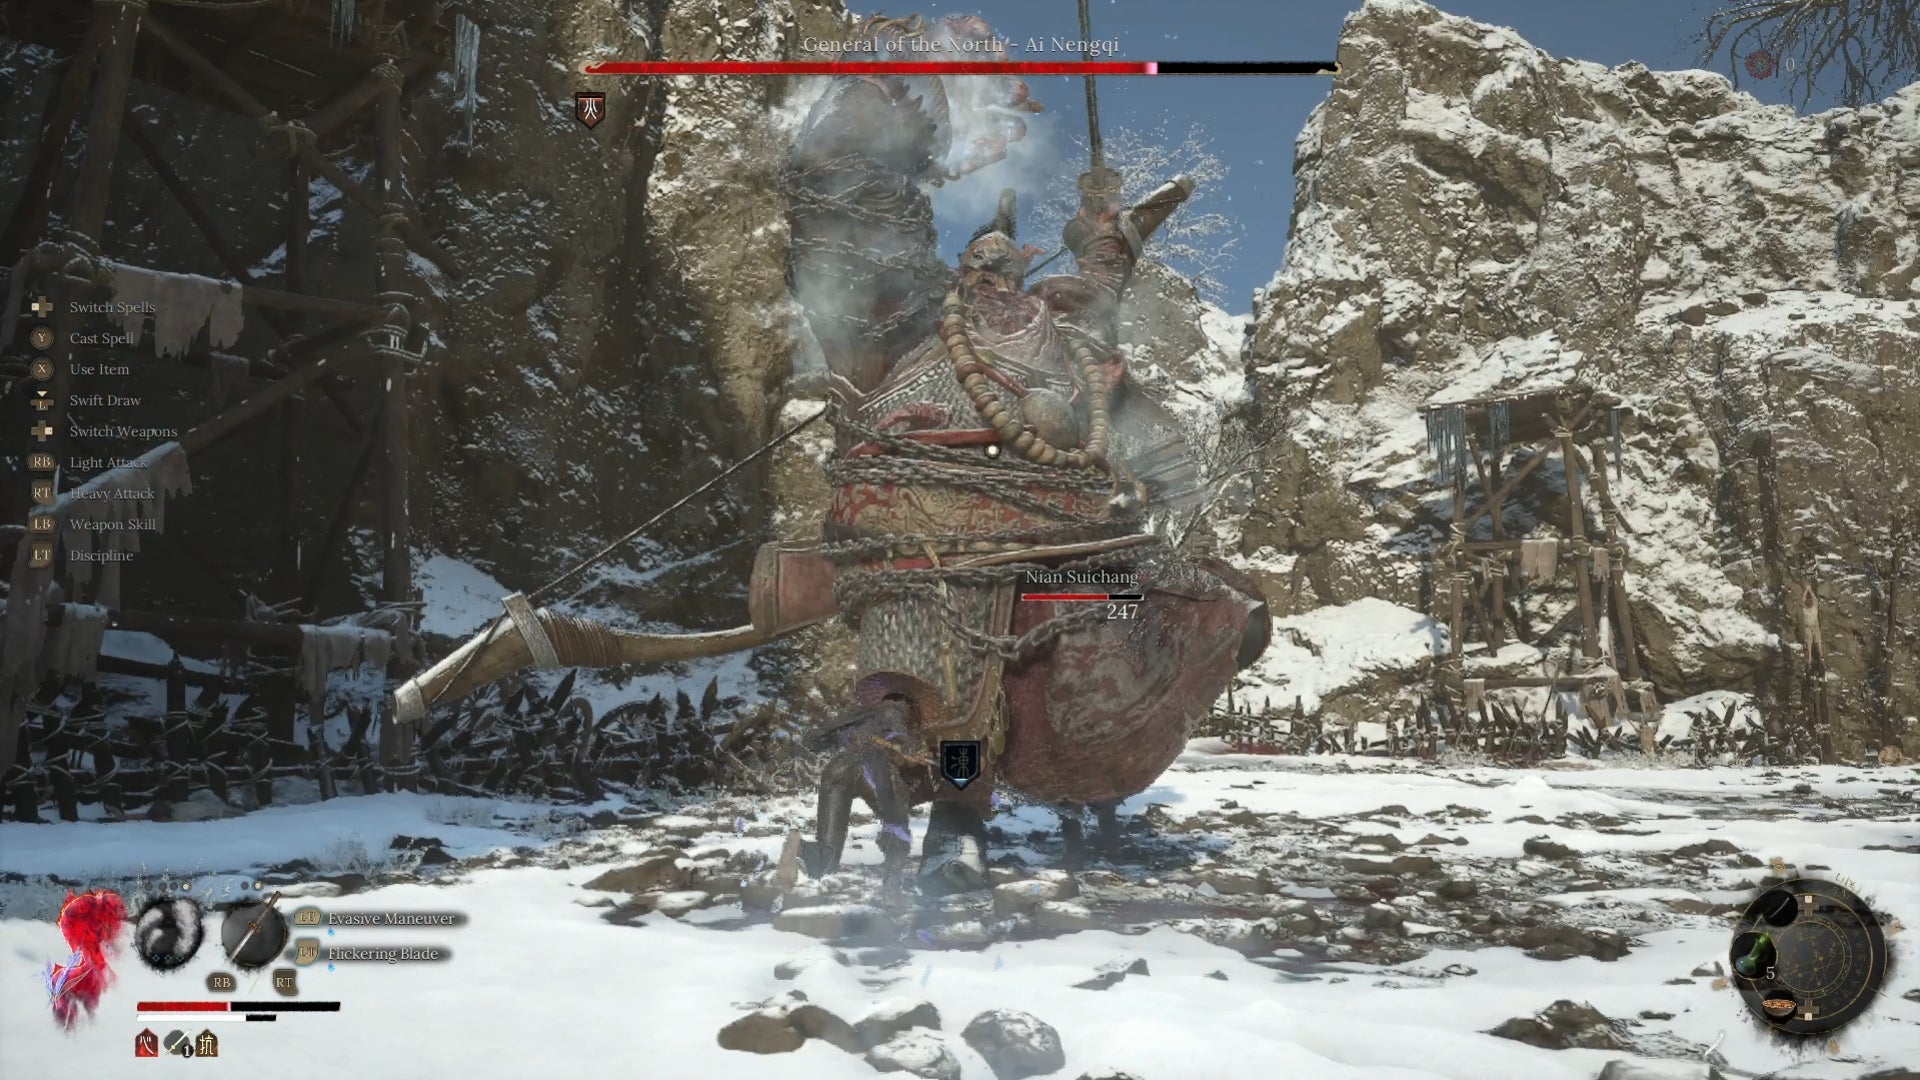
This hulk of a general has locked himself up in an arena and is going mad. No wonder the rebels aren’t doing so great. |Image credit:Rock Paper Shotgun/505 Games
- Boss Type: Sankhara Wuchang (non-key boss)
- Nearest Shrine: Cloudspire - Rebel Camp
- Route from Shrine: The General’s hiding in a large arena connected with the Rebel Camp, which is packed with strong foes and cannons. To get to the camep, you’ll need to thoroughly investigate the paths that connect it with Cloudspire Outskirts - this stretch of the game is extremely interconneted, so all of the pathways may take some time to traverse. Once you find the Rebel Camp Shrine, defeat the hefty rebel nearby to get the Rebel Camp Key. When you’ve got the key, turn left from the Shrine and go down the slope until you spot a large wooden door. Use the key on the door to enter the General’s boss arena.
If you’ve been progressing Nian Suichang’s questline up to this point. you can tag your wandering friend into this fight, and he’ll prove his worth by drawing Ai Nengqi’s attention. The General of the North certainly looks intimidating, but aside from some big fire, ice and lighting-charged attacks, he isn’t as terrible as he seems.The big guy unleashes flaming sword strikes, icicle attacks that target the nearest assailant, and every now and again he’ll shoot either a single lightning arrow or a diagonal cone of three at you, causing a brief AoE explosion if they hit.
Best way to take this guy out is to stay close and dodge everything he chucks at you while piling on the aggression. If you’re a spellcaster, keep your distance, let Nian Suichang soak up the damage, and pile on with your best magics like Burning Flames when you have enough Skyborn Might from dodging his icles and arrows. If you’re having trouble with his elemental attacks, utilise consumables such as Flameward Pill, Kong Wine, or Stormward Pill.
11. Ming General - Liu Cheng’en
Liu Cheng’en will regularly berate you throughout the fight, asking why you’re using your skills for rebellion. It’s because I’m awesome, you dynastic goon! |Image credit:Rock Paper Shotgun/505 Games
- Boss Type: Shield of Causality (key boss)
- Nearest Shrine: Cloudspire - Cloudspire Outskirts
- Route from Shrine: By lighting the bonfires on all three towers in Cloudspire Outskirts, the drawbridge that leads to Liu Cheng’en and Cloudspire Palace will be lowered. During your tower lighting expedition, you’re highly likely to also open the wooden door adjacent to the Cloudspire Outskirts Shrine. This leads up a slope into a blizzard-filled stretch of battleground - veer right here and you’ll find the drawbridge, and Liu Cheng’en’s arena is on the other side. (As is the case with the entire Cloudspire Outskirts/Rebel Camp area, watch out for the landmines in the snow.)
Liu Cheng’en is similar to Commander Honglan in that he hits extremely hard with his spear and demands careful dodging. He’ll also build up Frostbite with every two hits he lands, so it’s a good plan to have Spicy Soup or Kong Wine at your disposal. Aside from Forstbite, he alternates between three jumps in the air with his spear, a series of short thrusts that get ever closer to you, and shielding himself in a temporary snowstorm once a third of his health is down. He eventually tosses daggers and uses a shortsword as well.
Once you nail down the pattern of dodging, Liu Cheng’en is annoying but doable. An Axe with the Bone Needle - Leech skill node works well in this fight, both for dealing major damage and stealing health from Liu Cheng’en. Dodge all three of his initial jumps and then execute a charged heavy attack followed by quick attacks. Alternately, go with a One-Handed Sword build using Darkfrost’s Edge, which has the generous Evasive Maneuver weapon skill, letting you evade most attacks with a generous 5-second auto-dodge buff as long as you’ve spent Skyborn Might.
12. Mistress of the Night - Huang Yan

Huang Yan’s magic is confusing at first. Never attack from the front, lest Corruption murder you instantly. |Image credit:Rock Paper Shotgun/505 Games
- Boss Type: Shield of Causality (key boss)
- Nearest Shrine: Cloudspire - Snowfall Palace
- Route from Shrine: Explore the righthand side of the courtyard. There’s one door here, and if you interact with it a voice will tell you that visitors for the wedding need to keep going right. Do so - past the enemy you’ll find a lift mechanism that’ll take you down into the Treasure Trove of the palace. Head to the large door to face Huang Yan.
Huang Yan is perhaps the most magical-based opponent you’ve faced thus far. She’ll alternate between hitting you with Frostbite and Corruption, so wear armor that has a high resistance to both. Absolutely avoid attacking her from the front , as one of her Corruption attacks will explore purple energy balls outwards and insta-kill you just about every time it hits.
Melee builds should thus always strafe around Huang Yan and slice her from behind to build up her Obliterate meter. Spellcasters should rely on Fire spells like Infernal Flames to light her up. Generally, Huang Yan has an opening after she lifts her leg and launches herself at you for a series of four kicks. Dodge each of them, then retaliate. Once her health gets down to 50%, she’ll periodically transform into a huge artic fox and lunge at you. Shimmer each time this occurs and continue your assault, as her attacks get a bit faster but otherwise don’t change much.
13. Perfect Bride - Fang Ling

This isn’t even her final form! |Image credit:Rock Paper Shotgun/505 Games
- Boss Type: Shield of Causality (key boss)
- Nearest Shrine: Cloudspire - Shaft Entrance
- Route from Shrine: The Shaft Entrance might technically be the closest Shrine, but you’ve got to activate the lift mechanism shortcut by proceeding through the Bride’s Boudoir area (which is inconveniently full of strong enemies). Eventually you’ll emerge outside and see the Storyteller. Next to him is the lift switch that you can push to get back to the Shaft Entrance Shrine. Be sure to activate this lift before you cross the bridge in front of the Storyteller, as it will collapse and take you into the boss arena.
Fang Ling starts the fight by soaring up in the air and shooting red orbs at you. Then she lands and starts ambushing with her sword - her strikes will inflict Poise Break fast , so dodge like crazy, or wear armor with good Poise Break mitigation, like the Ming General set. Occasionally she’ll get the tentacle on her back to shoot more orbs or a beam of energy that moves towards you - this is a slow attack with a fair bit of buildup, thankfully.
Once you deplete her health bar, the tentacle consumes her, and she transforms into Chimera - Fang Ling. There’s a roar attack that can stagger you, blasts of magical energy, and a charge across the boss arena, all of which are troublesome. But I actually found the Chimera a bit easier than Fang Ling’s original form.
My recommendation throughout both stages of the fight is to match Fang Ling’s aggression with your own. Fire attacks work well, so I used Infernal Flames along with the Astral Blade One-Handed Sword for elevated spell damage. Divine Ward was my other spell, which I popped to reduce damage whenever possible. I also invested in the Bone Needle - Leech node in the Impetus Repository to recover health whenever I attacked. The Dracolich Pendant, which prevents beast roars from making you flinch, and the Fiend-Felling Pendant, which boosts damage against big enemies, make the second stage against the Chimera much more doable.
14. South General - Liu Wenxiu
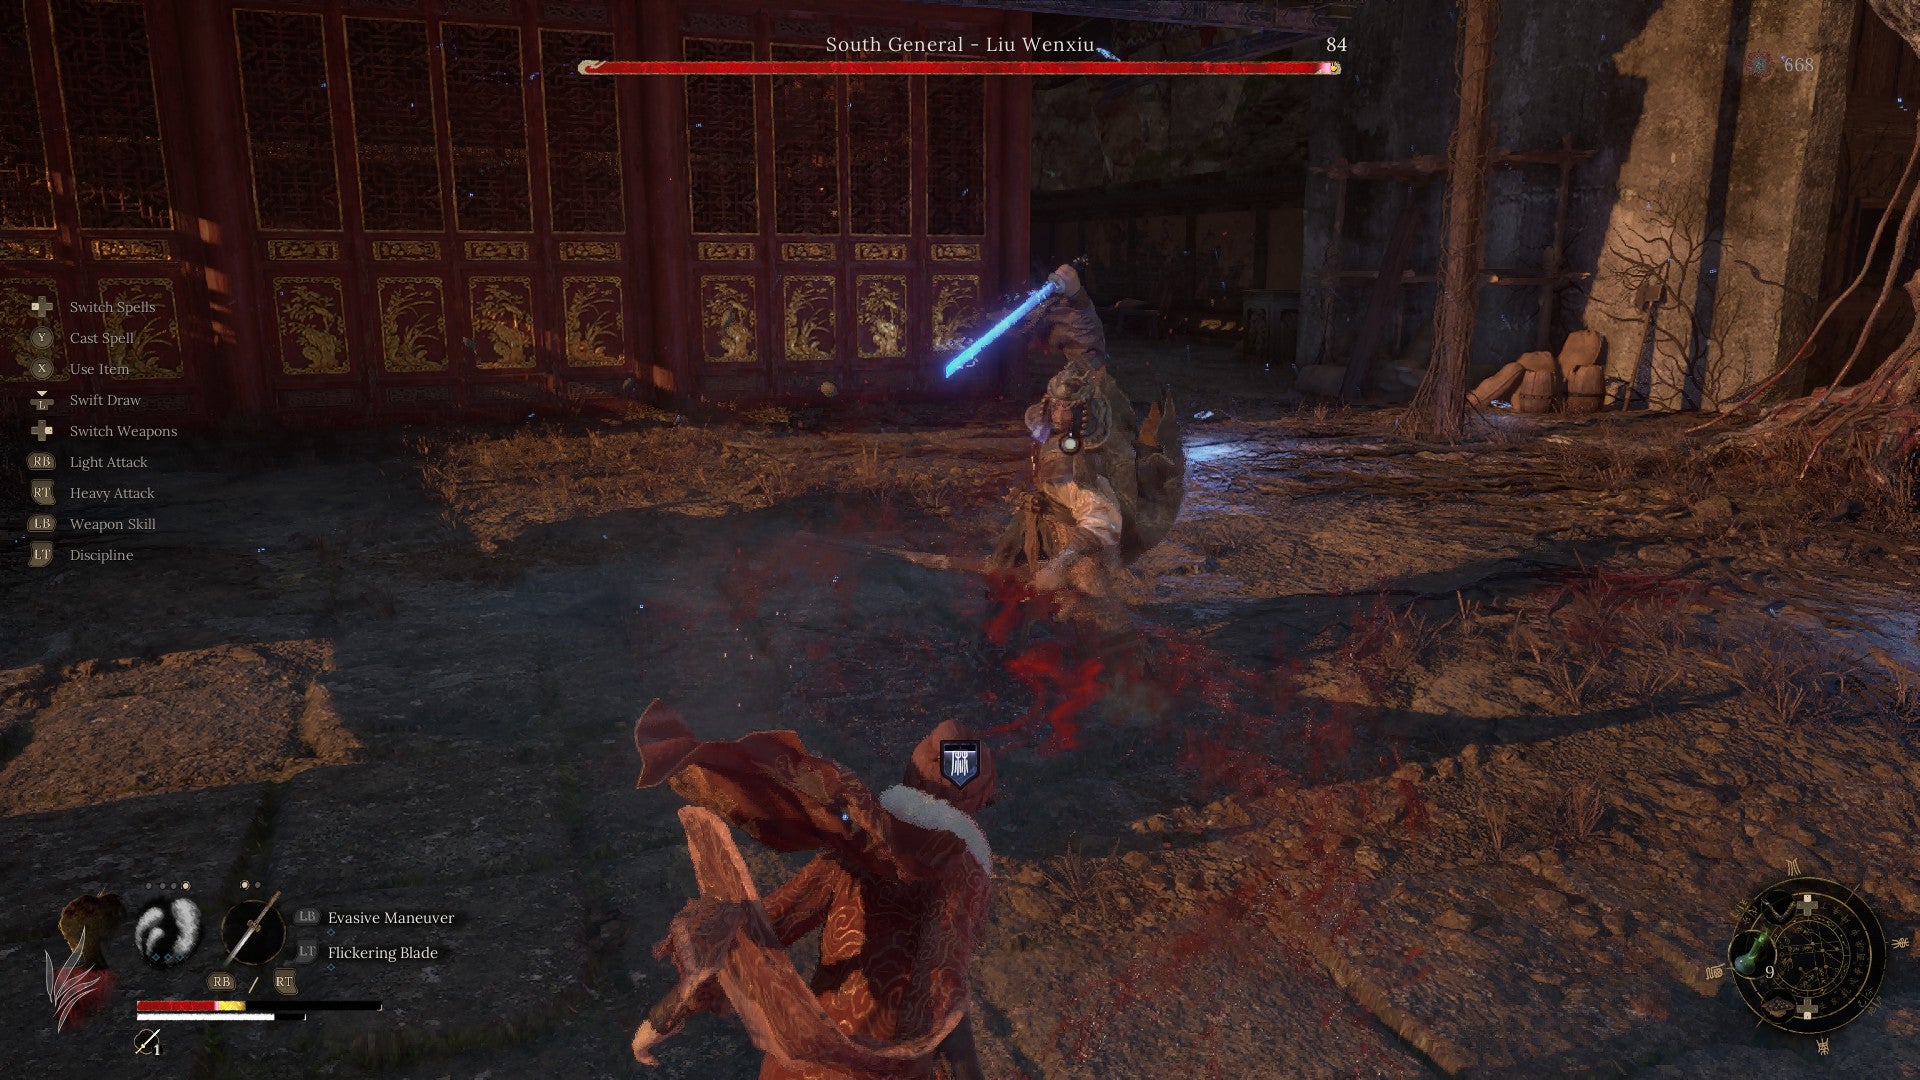
As long as you dodge those lightning bolts, this guy’s toast. |Image credit:Rock Paper Shotgun/505 Games
- Boss Type: Sankhara Wuchang (non-key boss)
- Nearest Shrine: Mt. Zhenwu - Zhenwu Antechamber
- Route from Shrine: The Zhenwu Antechamber Shrine is the closest Shrine if you release the ladder shortcut that leads to its second floor. (Zhenwu Temple is an extremely tough area to traverse with lots of painful enemies - my best advice is to take your time and explore slowly, unlocking as many shortcuts and ladders as you can to make the inevitable return trips easier.) Once you’re out on the roof of the Shrine building, it’s just a dash across the courtyard, avoiding the rebel and bird enemies who are too busy fighting each other. Go to the door to the far north and Liu Wenxiu lies beyond.
Liu Wenxiu’s a lightning guy who shoots bolts across the arena and can inflict Paralysis with his sword. But after the arduous trek that is the Zhenwu Temple complex, he’s really not that hard. Spam him with light attacks until you can Obliterate him or dodge out of his lightning bolts and retaliate with either fire or ice. Echo of Liu Cheng’en works pretty well for knocking him off his feet. All in all, a relatively simple boss - a small favour considering that the temple around him is so bloody frustrating.
15. Bo Sorcerer
She’s lovely, graceful, and tough as nails. |Image credit:Rock Paper Shotgun/505 Games
- Boss Type: Sankhara Wuchang (non-key boss)
- Nearest Shrine: Mt. Zhenwu - Avian Dwelling
- Route from Shrine: After fully exploring the Avian Marsh area, you should find two trees that you can kick down, both of which serve as shortcuts which lead back to the Mt. Zhenwu - Avian Dwelling Shrine. To get to Bo Sorcerer’s hideout, face the Shrine and then take the right tree shortcut, which leads to a cave and then the boss arena. (If you encounter two guys kneeling in fear and muttering about monsters, you’ve taken the wrong one.)
Bo Sorcerer is tricky, and if you’re following this list, she’s probably the hardest boss since Commander Honglan. Which means that she’s worthy of her own guide, so take a look at our best tips on how to beat Bo Sorcerer !
In summary, Bo Sorcerer forces you to become proficient in distinguishing the audio cues and visual tells that go along with most bosses in this game. For instance, she has a move where she launches herself into the air, proclaims “Heaven’s stars” and then blasts four orange energy waves down at you. Three of these energy waves are vertical slashes and the fourth is always a horizontal slash. Learn the pattern for dodging each of them, and you’ll generate a huge stack of Skyborn Might. Bo Sorcerer then ends this attack by launching herself at the last place you were standing, and if you always manage to dodge at the right instant, she becomes wide open for a backstab or a spell attack.
The fight, once you’ve got her cues memorised, becomes a delicate dance that’s actually pretty fun, at least when you aren’t banging your gamepad in frustration. Here’s another tip - as long as you’ve been completing the White-Robed Elder’s questline , you can summon him to help you with this battle. However, you should probably wait until the second half of the fight, because while he draws aggro well, he goes down quickly. You don’t want to be left soloing Bo Sorcerer without a proper understanding of her moveset, which is impossible to obtain if you call White-Robed Elder to your rescue immediately.
16. Fierce Tiger - Sovereign Zhang Xianzhong
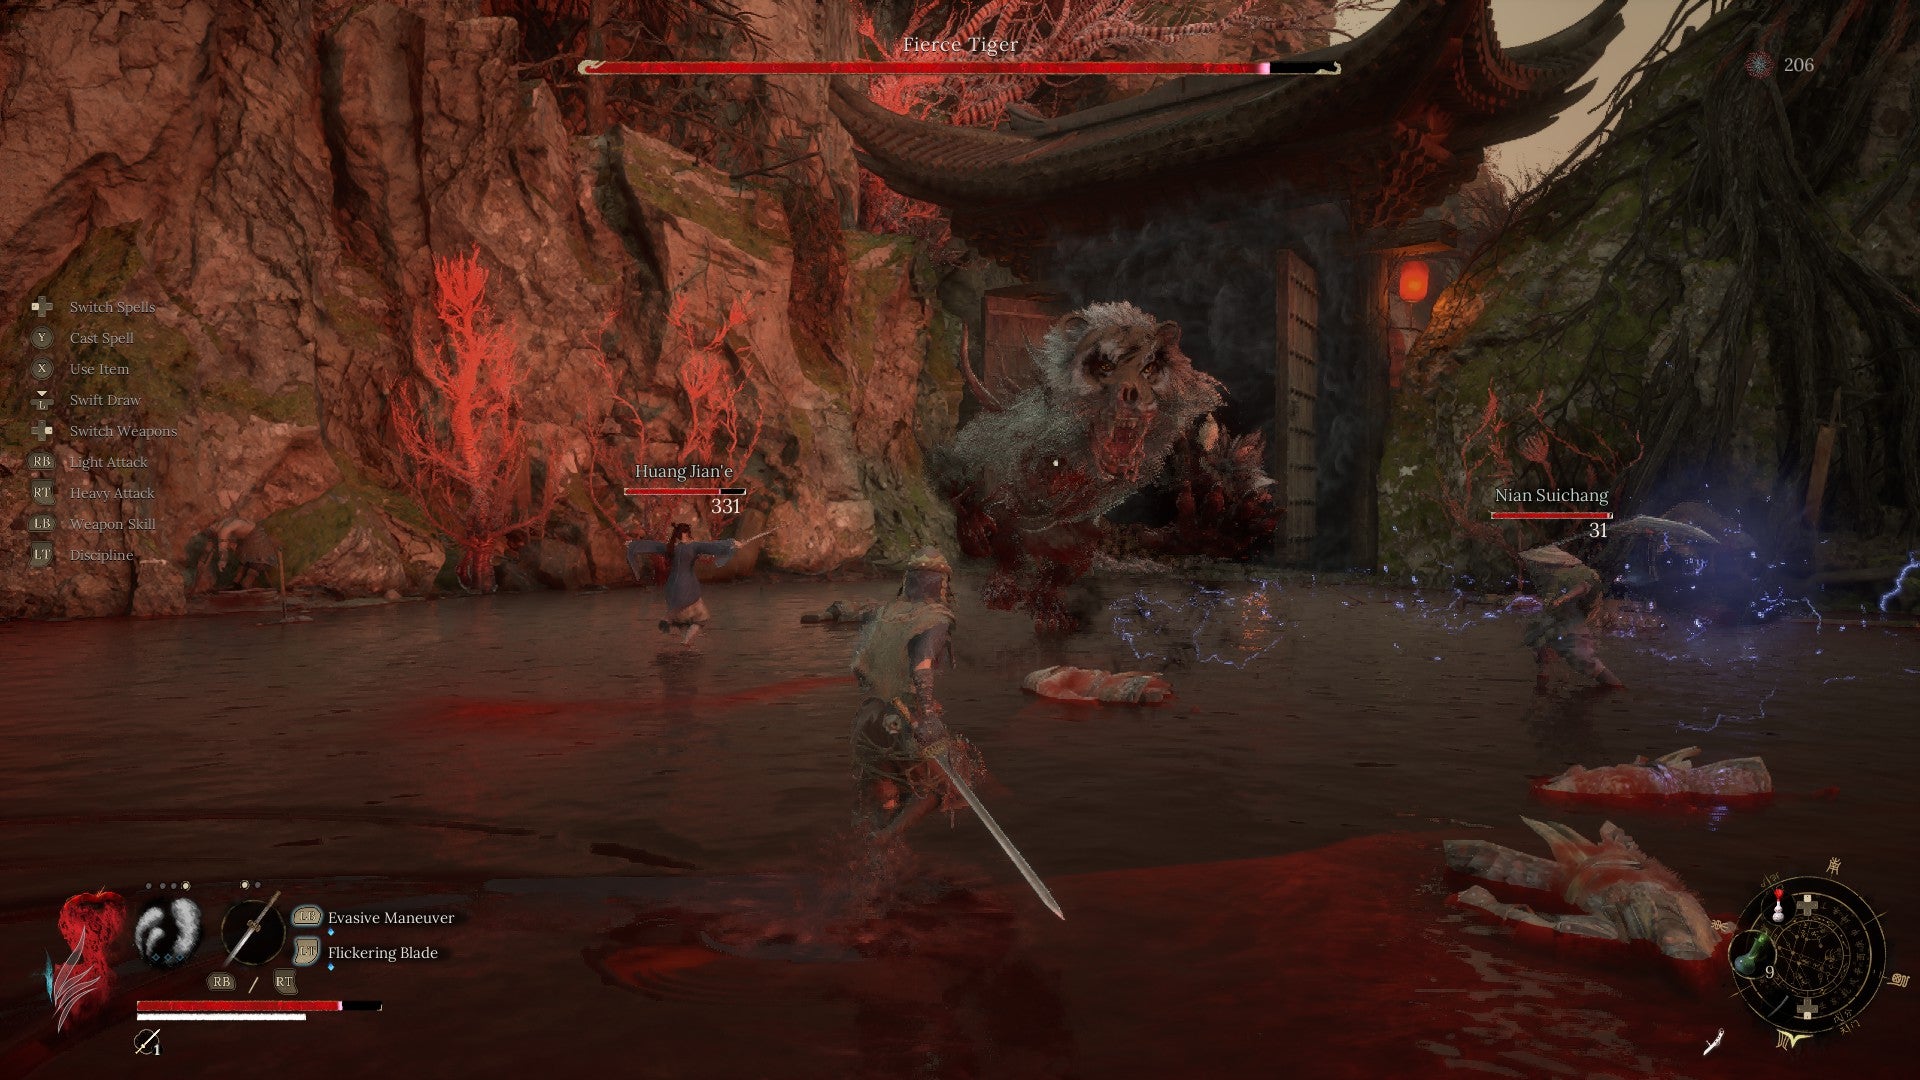
This is a painful fight, though if you’ve got Nian Suiching and Huang Jian’e (who fires a laser!) it’s not nearly as bad. |Image credit:Rock Paper Shotgun/505 Games
- Boss Type: Shield of Causality (key boss)
- Nearest Shrine: Mt. Zhenwu - Altar Gate
- Route from Shrine: Fierce Tiger’s battlefield is right next to the Shrine. A nice convenience, considering how many recent bosses have had their Shrines a fair trek or slow lift ride away.
This is another boss that serves as a wall for players, and so we’ve got a full guide detailing how to beat Fierce Tiger . In short, know that he has two phases, as befitting an undead sovereign stuck atop the corpse of a rotting cat. You can also tag in two companions during this battle - Nian Suiching and Huang Jian’e . You need to have completed the questlines of both thus far to bring them into the combat, and their presence makes the fight immeasurably easier - though Fierce Tiger is still a mighty opponent.
Fighting Fierce Tiger is reminiscent of battling a dragon in Elden Ring - two or three hits in a row can kill you, but if you stay close (ideally along his sides and legs) you’re in a good place to dodge his huge strikes. Dodging this close also lets you sneak behind him for backstabs or quick spell blasts. All that tiger fur is weak to fire, so unleash whatever fire attacks you’ve got, whether that’s via Tempering or a spell like Burning Flames. Fierce Tiger will summon lightning bolts and homing balls across the arena when he isn’t trying to run you down, so wear your best set of armor that can mitigate this. Also, wear the Dracolich Pendant and the Fiend-Felling Pendant to avoid flinching from roars and to inflict heavier damage.
In the second stage of the fight, Zhang Xianzhong’s corpse comes alive, and Fierce Tiger switches things up and begins gallivanting across the arena while firing more lightning homing balls at you. If you can survive the first stage of the fight solo, this is a great time to summon Nian Suiching and Huang Jian’e. If not, keep dodging and applying pressure with fire when you can.
17. Monstrous Toddler - Bai Kru
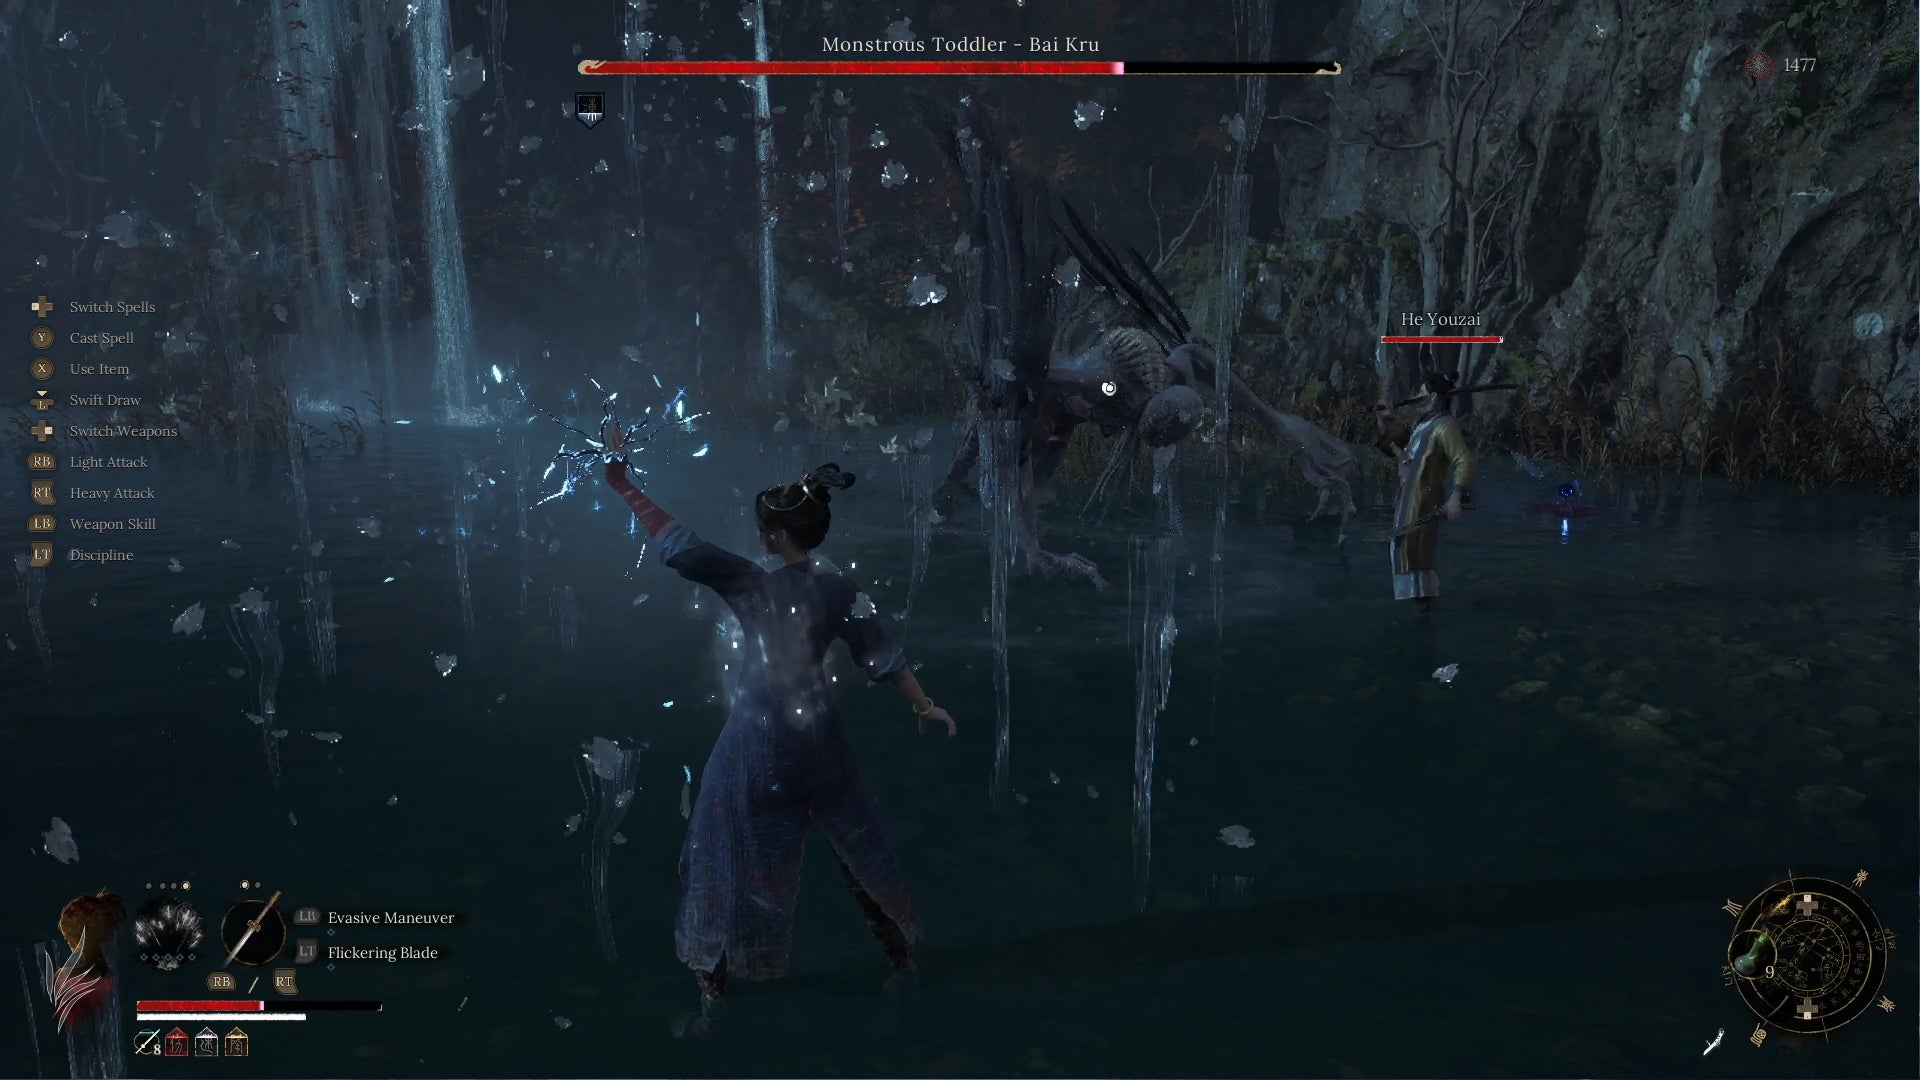
Summon icicles and any other cold attacks you’ve got to send Bai Kru back to his cradle. |Image credit:Rock Paper Shotgun/505 Games
- Boss Type: Quelling Madness (non-key boss)
- Nearest Shrine: Mt. Zhenwu - Bai Mansion
- Route from Shrine: From the Bai Mansion Shrine next to He Youzai, just run down the path until you meet the Plain Warrioress. The boss arena is next to her.
Bai Kru returns, and the fact that he shows up in Wuchang’s family home and is labeled “Monstrous Toddler” hints at a painful connection between him and our heroine. That said, while he probably stomped you way back when you first met him, this real incarnation of Bai Kru is much easier than the tough bosses we’ve been facing lately.
This fight’s an important part of He Youzai’s questline , so summon Wuchang’s buddy immediately before digging into Bai Kru with whatever weapon you’ve got. He seems very tanky at first until you realise that Frostbite is his major weakness. Echo of the Bo Sorcerer, the icicle blast spell that you should have from beating Bo Sorcerer if you’ve been following this list, is very effective and will slice away huge chunks of his health with ease. If you don’t have it, you’ll have to chip away with other ice attacks.
18. Nightmare Demon

Nightmare Demon’s not much harder than your typical Inner Demon. |Image credit:Rock Paper Shotgun/505 Games
- Boss Type: Quelling Madness (non-key boss)
- Nearest Shrine: Worship’s Rise in Ruins - Shu Sanctum
- Route from Shrine: Nightmare Demon’s arena is up the steps where you previously fought Liu Hongliu ages ago. From the Shu Sanctum Shrine, go up the stairs and exit; move towards the enemies with the pitchforks and guns and you’ll see the steps on your right.
This is basically an elevated fight against the same Inner Demon that’s summoned when your Madness overtakes you . She’s fast and hits painfully, but if you pile on the aggression and parry, you can stagger her without much pain. For some reason you can’t get an Obliterate attack on Nightmare Demon even if you break her poise, but you should still take advantage of the stagger to unleash a heavy attack or three. Not too difficult, and mostly a preview of the tougher Demon of Obsession that will raise her head later.
19. Vermilion Feathers - Honglan
<img loading=“lazy” src=“https://assetsio.gnwcdn.com/vermilion-feathers-honglan.jpg?width=2048&height=2048&fit=bounds&quality=85&format=jpg&auto=webp" onerror=“this.onerror=null;this.src=‘https://blogger.googleusercontent.com/img/a/AVvXsEhe7F7TRXHtjiKvHb5vS7DmnxvpHiDyoYyYvm1nHB3Qp2_w3BnM6A2eq4v7FYxCC9bfZt3a9vIMtAYEKUiaDQbHMg-ViyGmRIj39MLp0bGFfgfYw1Dc9q_H-T0wiTm3l0Uq42dETrN9eC8aGJ9_IORZsxST1AcLR7np1koOfcc7tnHa4S8Mwz_xD9d0=s16000';" alt=“Vermilion Feathers - Honglan stands above a dead Wuchang in Wuchang Fallen Feathers, whispering “Yu Xia, wait for me…” - 22”>
Honglan returns and this version of her is for absolute sickos. |Image credit:Rock Paper Shotgun/505 Games
- Boss Type: Quelling Madness (non-key boss)
- Nearest Shrine: Worship’s Rise in Ruins - Palace Pass
- Route from Shrine: From the Shrine, take the left path along the slope and across the red Feather bridge until you see a current of air that leads to a safe downwards drop into Doomwillow Beach. Honglan 2.0 lies beneath.
Sigh, here she is again. Honglan’s been mutated by the Feathering, and now she has a giant wing that she’ll use to swat you with great prejudice. We’ve got a full guide on how to beat Vermilion Feathers - Honglan , but rest assured that while she’ll make you scream, at least she’s an optional boss instead of a mandatory one.
If you’re looking for a quick strategy, know that Vermilion Feathers - Honglan always begins by levitating in the air and summoning a bunch of red feathers to strike you from above. Dodge behind her and hit her with a charged up heavy attack for an immediate Obliterate. Any skill that lets you expend a Skyborn Might for an instant heavy strike will come in handy here, and you can keep recycling this tactic throughout the fight.
As you backstab her, pour on the damage with a Burn build. I was rocking the Demon Pendant, which ups a weapon’s Fire damage, and I took the Impetus Repository Fiery Embers node, which increases the Burn buildup of spells. I used Sheng - Burning Might, Fa - Burning Ignition, and Ta - Blazing Burn for my Benedictions. You’ll still need to time your attacks and dodge like a monster, but this build combined with the Bone Needle - Flame will cause Burn to accumulate fast . Once her health is down 50%, she’ll sprout bigger wings (jump back and heal for a brief breather that will also keep you from getting hit by her red aura), but if you keep piling on the fire and the backstabs you can win this fight quickly - in less than two minutes, by my count.
20. Bo Magus
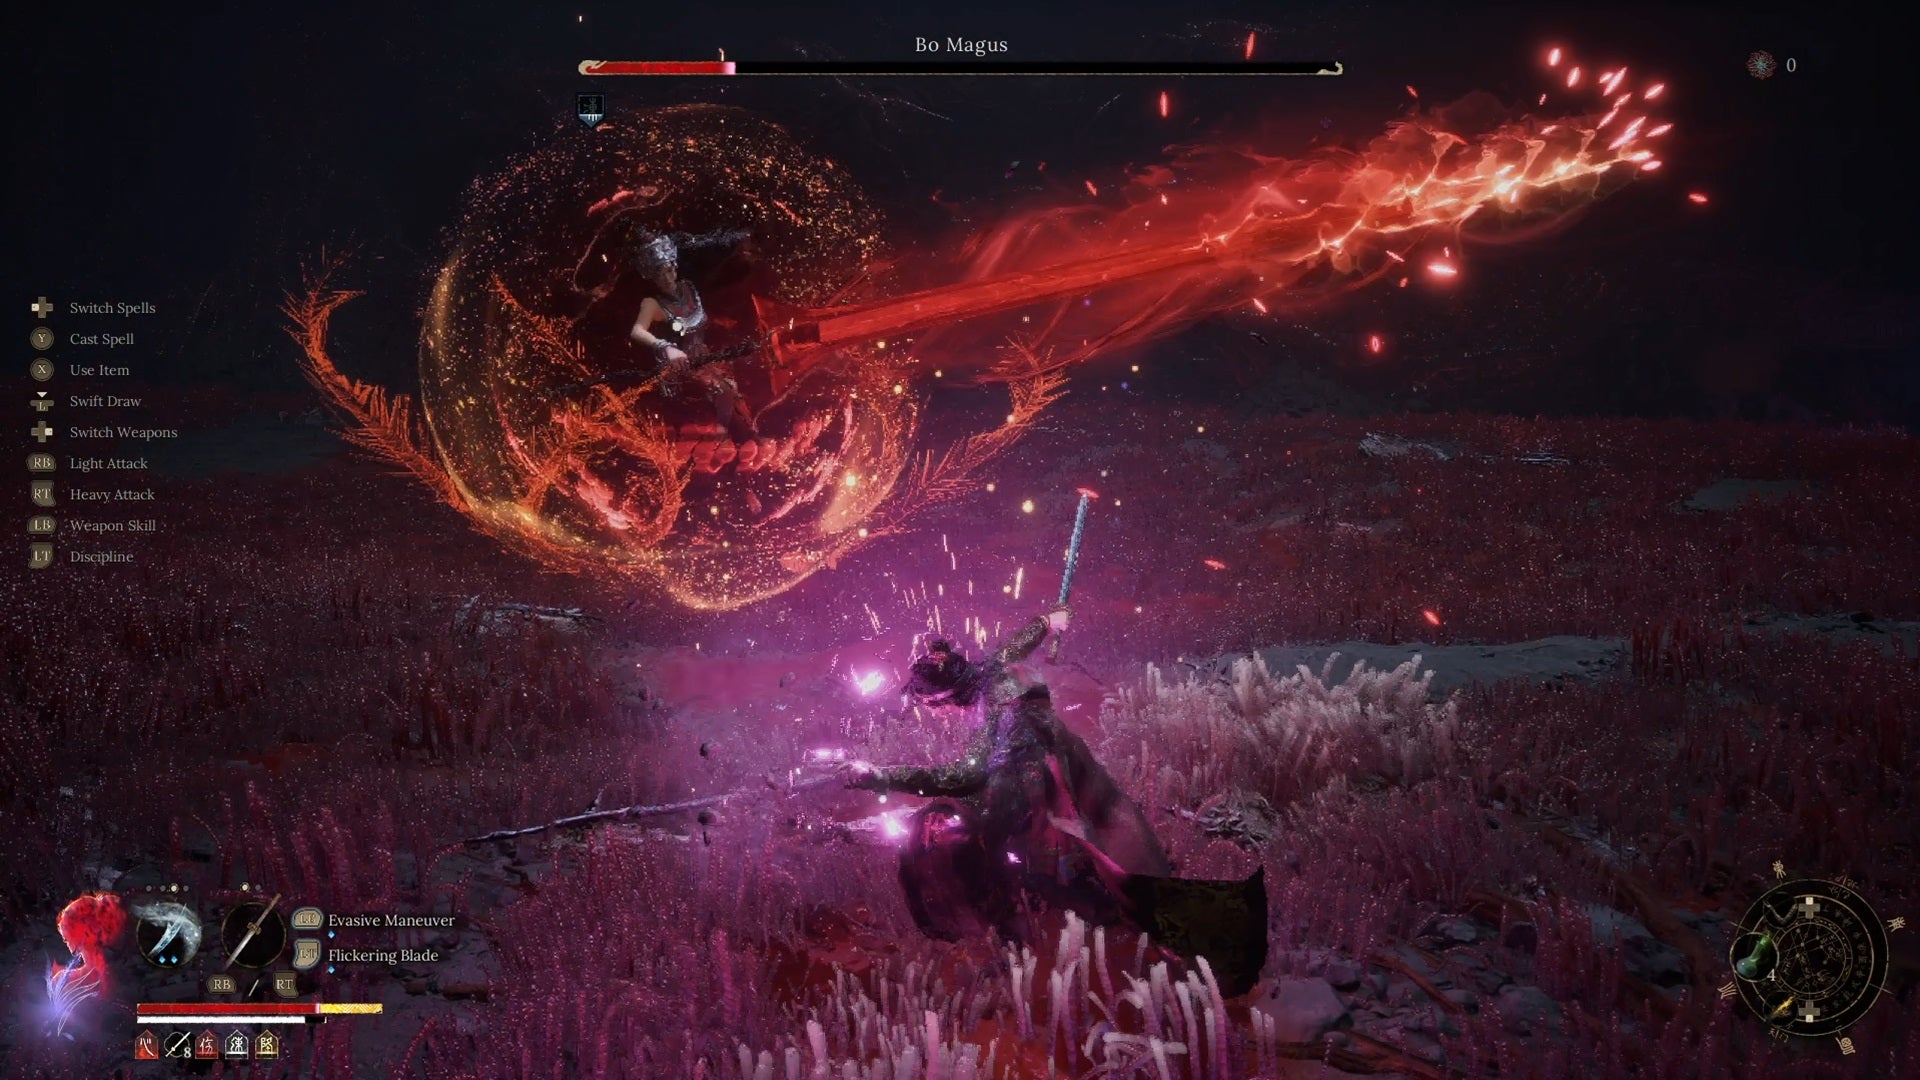
Bo Magus has many irritating tricks, including this shield (which takes ten or so hits to break) and a big Feathering sword. |Image credit:Rock Paper Shotgun/505 Games
- Boss Type: Quelling Madness (non-key boss)
- Nearest Shrine: Worship’s Rise in Ruins - Palace Entrance
- Route from Shrine: Take a left and go through the cave. Once inside, you can veer right and slide all the way down the ladder to reach a small room that leads to Bo Magus’ battlefield. You’ll hear her voice ominously taunting you as you touch down.
Bo Magus can actually serve as the final boss of the game if you’re aiming to get the secret ending, Successor of the Bo . All in all, she’s a troublesome combatant who teleports all over the arena, summons fire giants to slap at you, and shoots off Feathering attacks with great regularity. The best way to interrupt all of her nonsense is to pile on light and heavy attacks to build her Obliterate meter.
I relied on Echo of Liu Cheng’en during this fight, as it’s great for knocking her to the ground, especially if you can get her sequestered into a corner of the room where she can’t get away from you. To stay healed while I attacked, I Tempered my weapon with the Bone-Needle Leech to siphon off health with each strike.
Once a third of her health is down, Bo Magus rises into the air and manifests a glowing magical sword. Wait until the sword has fully formed, then start dodging as it falls into the ground and makes shockwaves. Keeping popping that Shimmer multiple times in a row to generate a whole stack of Skyborn Might, then continue with the attack onslaught. Be aware that Bo Magus’ final trick is to form a shield around herself when her health is lower than 50%, and this shield takes approximately ten or so hits to smash.
21. Dragon Emperor - Zhu Youjian
This baddie exudes end-of-game energy. But with the build below, he dies wonderfully fast! |Image credit:Rock Paper Shotgun/505 Games
- Boss Type: Shield of Causality (key boss)
- Nearest Shrine: Worship’s Rise in Ruins - Burning Cavern
- Route from Shrine: Run past the mobs in Burning Cavern and go down the short staircase to see the Plain Warrioress, who appears wounded. (If you’re having trouble avoiding the enemies, cut through the Corruption-infested pools.) The Dragon Emperor’s room just lies beyond.
Dragon Emperor feels a little like a final boss, and he’s certainly a tough fella. He has two forms - the first is a squid-faced four-legged entity simply dubbed The Reborn, and the second is a bipedal giant who appears to be holding a glowing d20. The Reborn is easier, since he’s the same as Fierce Tiger and other big bosses - stick to his sides and back, slash away, and wear the Dracolich Pendant and the Fiend-Felling Pendant. The second form is much more difficult, thanks to a screen-filling Spirit Bomb-esque attack and a leech move that pulls health from you.
But thankfully, you can end this battle in moments with a very particular magic build. You’ll need the Lotus Soulflame spell (found on a corpse near the Mt. Zhenwu - Battlefield Pass Shrine), the Shadow Stone Needle - Magic (found after defeating your manifested Inner Demon in Cloudspire Outskirts), and the Wei - Area Damage Benediction (purchased from Wu Gang after you give him the Oil Lamp). It also helps if you bump your Magic skill up as high as possible in the Impetus Repository - shoot for a stat of 80 or above.
With these items in tow, all you need to do is Temper your weapon and dodge every now and again to build Skyborn Might. Once Lotus Soulflame is ready, cast it for INTENSE damage. I’m not kidding - even if you’re missing one of the pieces of the build I’ve listed above, Lotus Soulflame will pulverise Dragon Emperor’s health bar. I only had to use the spell twice in each phase of the battle and it was over. Obviously, you still need to watch out for Dragon Emperor’s Spirit Bomb, and the Echo of the Bo Magus spell might come in handy for shielding you from impact. But this build largely turns Dragon Emperor into a piece of cake. Thank goodness!
22. Eternal Glory - Zhao Yun
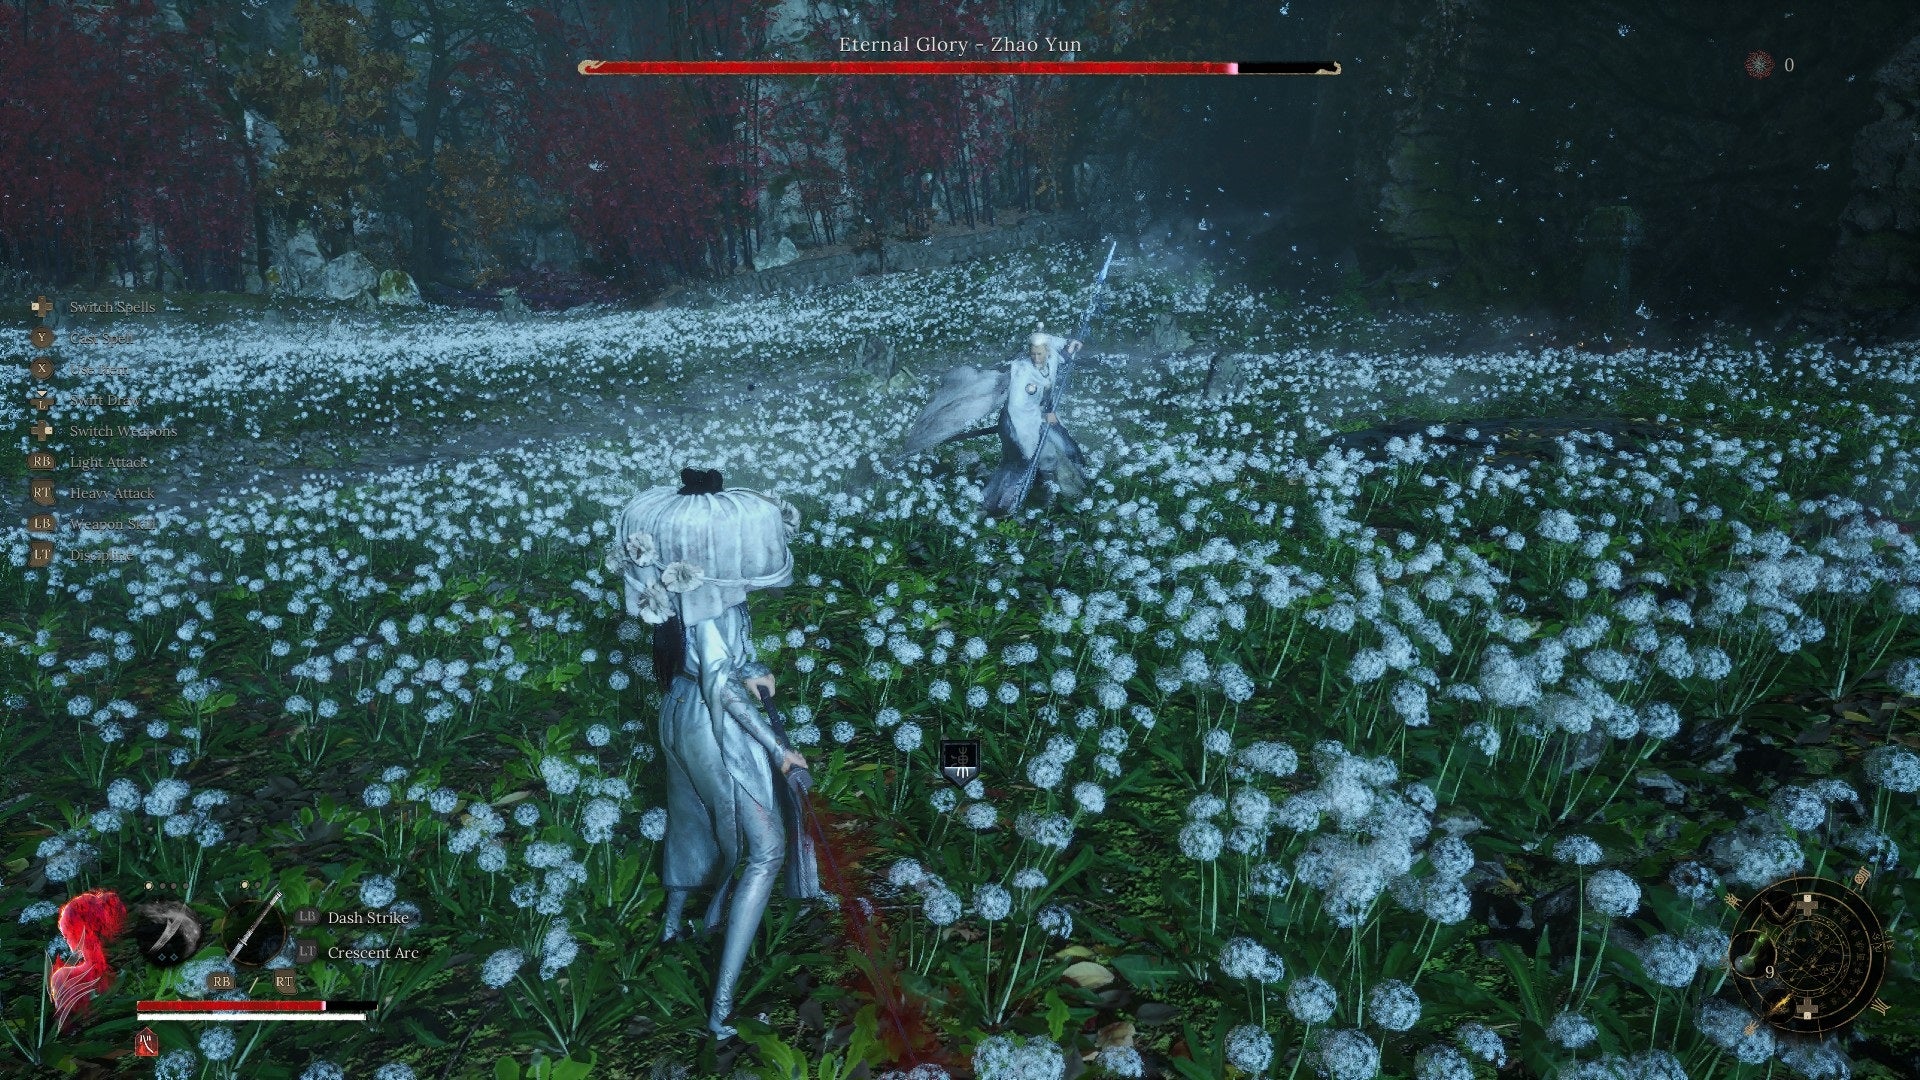
Watch Zhao Yun’s body language in the fight. Do NOT attack him in this stance, as he’ll immediately counter. This is actually the same Aerial Bulwark skill that you have with the Spear. |Image credit:Rock Paper Shotgun/505 Games
- Boss Type: Quelling Madness (non-key boss)
- Nearest Shrine: Mt. Zhenwu - Avian Dwelling
- Route from Shrine: You’ll only be able to fight Zhao Yun afer you’ve unlocked the fifth and final region of the game, Bo Capital, and you need to face him before you interact with the final Mystery Gate . Once you’ve done so, take the left fallen tree shortcut from the Avian Dwelling Shrine (the opposite of the one that leads to Bo Sorcerer) and keep going across the gnarled root bridge until you come to a field of white flowers.
The battle with Zhao Yun is the culmination of the White-Robed Elder’s questline , and a prerequisite to getting the game’s best ending . It’s also a make-you-cry affair full of the typical aggression you’ve come to expect from Wuchang Fallen Feathers bosses. For a full rundown on his tactics, take a peek at our guide on how to beat Zhao Yun .
I do not recommend using magic against this boss; the damage just isn’t big enough. An Axe with a Burn or Leech build (any Axe will do; I personally used the Scorn Greataxe) is much better. The Echo of the Bo Magus shield spell will also make the fight significantly easier. Dodge his incoming spear strikes (listen out for the unique sound that plays every time he’s about to jump in the air) then slash at him once he lands. Pop the Bo Magus shield as soon as you have enough Skyborn Might, and then rinse and repeat until you get an Obliterate. Don’t attack him once he falls down, as he has a nasty jump-up counter move.
If Axes aren’t your thing, you can also do this same strategy with a Longsword - you’ll just need to be more precise and focus on getting backstabs. The easiest times to do this are right after he lands on the ground after his jump, and immediately after he summons a trinity of icicles rings to erupt from the ground in an arc around him. It’s hard, and he’s one of the worst bosses in the entire game, but you can do it.
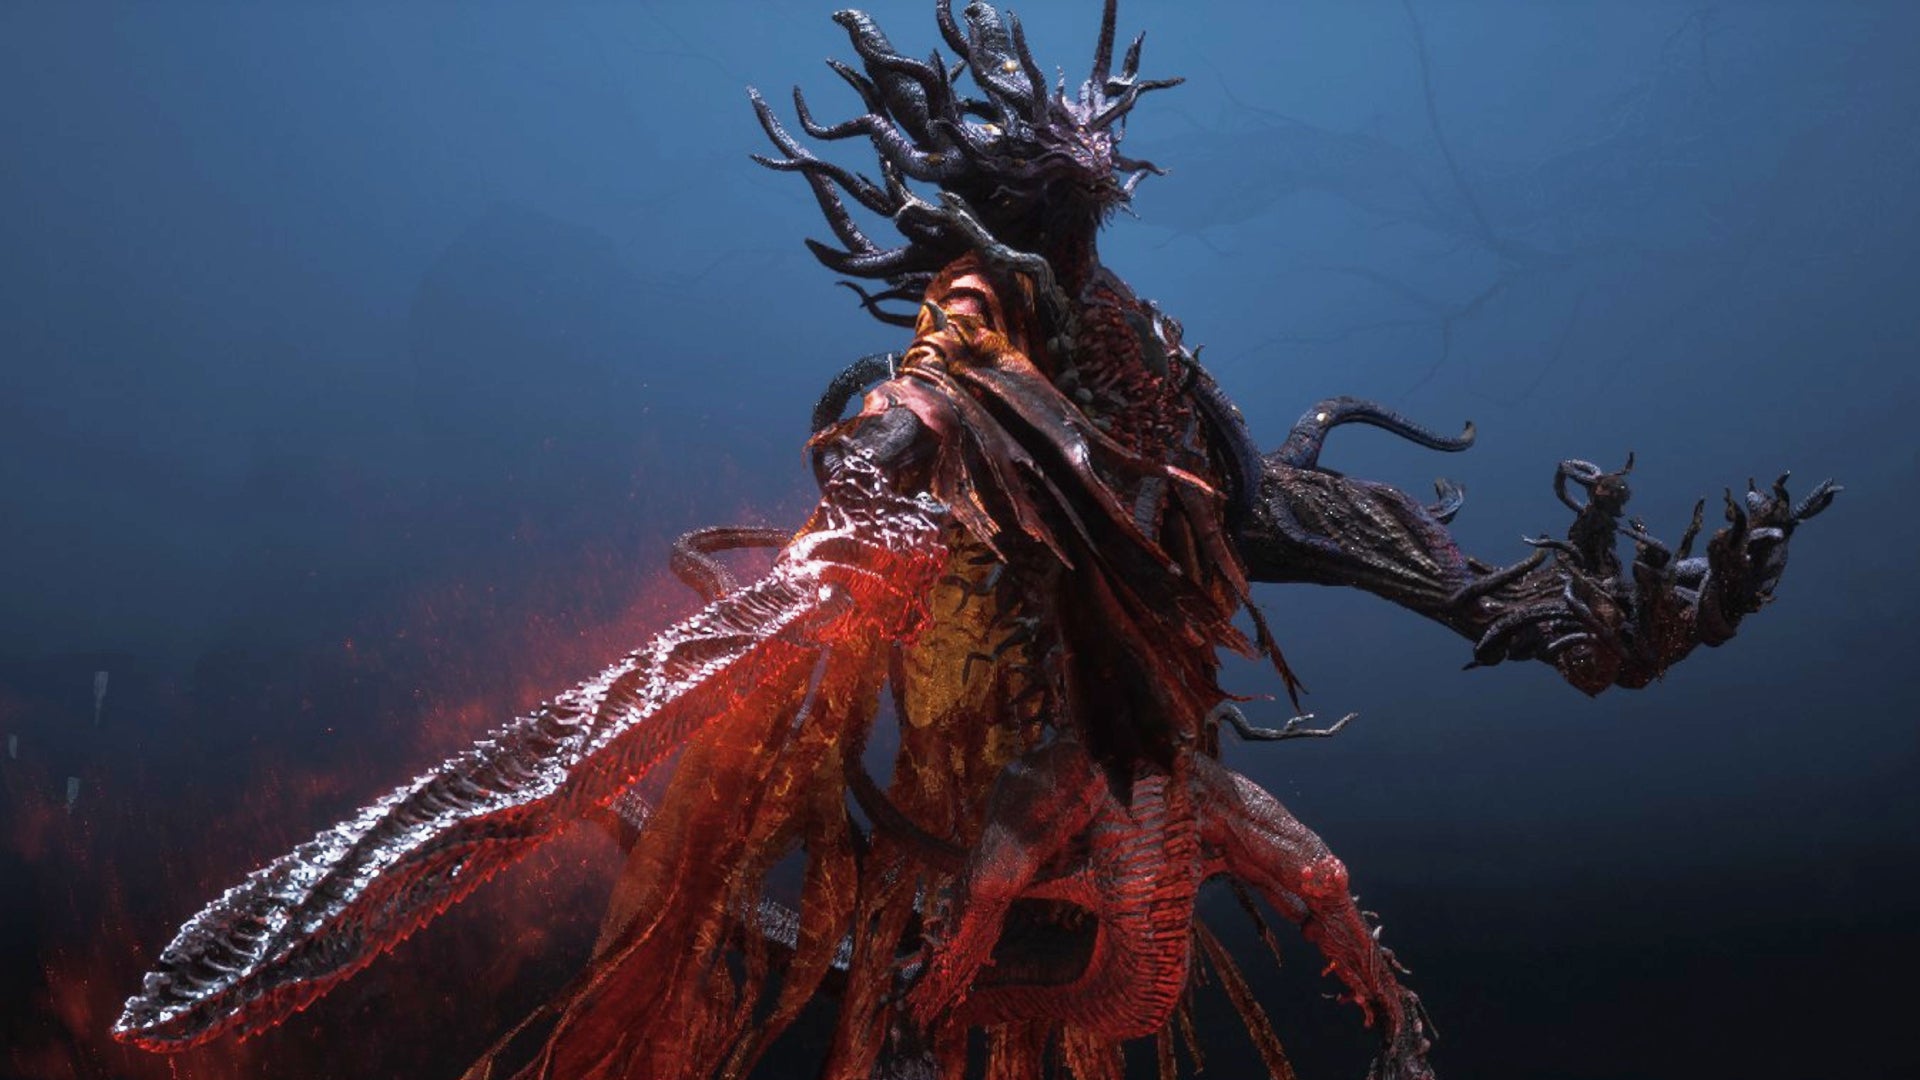
23. Demon of Obsession

Finally, a proper showdown with the representation of Wuchang’s inner turmoil. |Image credit:Rock Paper Shotgun/505 Games
- Boss Type: Quelling Madness (non-key boss)
- Nearest Shrine: Bo Capital - Depths of the Capital Shrine
- Route from Shrine: To the left of the Shrine is one of the final Mystery Gates of Wuchang Fallen Feathers. Choose the option “The wheel turns anew” (which is technically the incorrect answer, but the one to choose in this circumstance) to be transported to the secret Shrine Dwelling area. The Demon of Obsession will come at you as soon as you walk past the pillars, as long as you’ve finished the White-Robed Elder’s questline (While you’re at it, complete Fang Yao and He Youzai ’s quests too.)
This is the final time you’ll fight Wuchang’s Inner Demon, AKA the Plain Warrioress that you’ve been running into regularly. And she’s a pain in the butt, until you realise that this is a gimmick boss that can be subdued with the Echo of Zhao Yun. (And that’s why we recommend that you fight the old guy first!)
It’s ideal if you can boost your magic power via Tempering or the Impetus Repository, but even if you don’t want to respec, just equip Echo of Zhao Yun and wait until you have enough Skyborn Might to use it - which is still a fair challenge, as activating the spell takes bloody forever and doesn’t grant you any Alacrity. Nevertheless, it’ll shave away a solid portion of Demon of Obsession’s health each time and temporarily stun her. You can’t get a proper Obliterate on Demon of Obsession, but you can still slash away at her while she’s woozy. It took me about five usages of Echo of Zhao Yun to put her down for the count.
24. Feathery Ambition - Xuanyangzi

That’s quite a makeover you’ve given yourself, Xuanyangzi. |Image credit:Rock Paper Shotgun/505 Games
- Boss Type: Shield of Causality (key boss)
- Nearest Shrine: Bo Capital - Forbidden Land
- Route from Shrine: If you’ve made it this far, you know where the boss is. Walk up the pathway and get ready for the end.
Looks like that tricky Taoist was up to no good, eh? Xuanyangzi has gone full avian on us, mutated into something reprehensible, and now we’ve gotta kick his ass. Luckily…it’s pretty easy.
First, blow the Bone Whistle and summon the Storyteller to join you in this fight, because why not? Second, remember the somewhat broken Lotus Soulflame strategy I suggested for Dragon Emperor - Zhu Youjian ? It works just as well here. Perhaps better! Simply stand under Xuanyangzi’s legs as he fires his nasty spells and rants and raves. Wait until you have a full stack of Skyborn Might, and bang. Two hits from the Lotus Soulflame, and as long as you’ve followed the build I described above, he is DONE. Take that, you rat bastard of a geezer! And good riddance - unless of course you’re on your way towards the bad ending …
Good luck facing all of the fearsome foes above. If you’re having difficulties, why not check out our list of tips and tricks ? You can also familarise yourself with the Inner Demon and Madness mechanics of Wuchang Fallen Feathers, and we’ve also got a primer on how to use Red Mercury to level up. Last but not least, if you just want to look good while fighting these bosses, check our our guide on how to transmog your armor .
Wuchang: Fallen Feathers
PS5 , Xbox Series X/S , PC
Rock Paper Shotgun is better when you sign in
Sign in and join us on our journey to discover strange and compelling PC games.

All 75 Arc Raiders Blueprints and where to get them
These areas have the highest chance of giving you Blueprints

Image credit:Rock Paper Shotgun/Embark Studios

Looking for more Arc Raiders Blueprints? It’s a special day when you find a Blueprint, as they’re among the most valuable items in Arc Raiders. If you find a Blueprint that you haven’t already found, then you must make sure you hold onto it at all costs, because Blueprints are the key to one of the most important and powerful systems of meta-progression in the game.
This guide aims to be the very best guide on Blueprints you can find, starting with a primer on what exactly they are and how they work in Arc Raiders, before delving into exactly where to get Blueprints and the very best farming spots for you to take in your search.
We’ll also go over how to get Blueprints from other unlikely activities, such as destroying Surveyors and completing specific quests. And you’ll also find the full list of all 75 Blueprints in Arc Raiders on this page (including the newest Blueprints added with the Cold Snap update , such as the Deadline Blueprint and Firework Box Blueprint), giving you all the information you need to expand your own crafting repertoire.
In this guide:
- What are Blueprints in Arc Raiders?
- Full Blueprint list: All crafting recipes
- Where to find Blueprints in Arc Raiders Blueprints obtained from quests Blueprints obtained from Trials Best Blueprint farming locations

What are Blueprints in Arc Raiders?
Blueprints in Arc Raiders are special items which, if you manage to extract with them, you can expend to permanently unlock a new crafting recipe in your Workshop. If you manage to extract from a raid with an Anvil Blueprint, for example, you can unlock the ability to craft your very own Anvil Pistol, as many times as you like (as long as you have the crafting materials).
To use a Blueprint, simply open your Inventory while in the lobby, then right-click on the Blueprint and click “Learn And Consume” . This will permanently unlock the recipe for that item in your Workshop. As of the Stella Montis update, there are allegedly 75 different Blueprints to unlock - although only 68 are confirmed to be in the game so far. You can see all the Blueprints you’ve found and unlocked by going to the Workshop menu, and hitting “R” to bring up the Blueprint screen.
It’s possible to find duplicates of past Blueprints you’ve already unlocked. If you find these, then you can either sell them, or - if you like to play with friends - you can take it into a match and gift it to your friend so they can unlock that recipe for themselves. Another option is to keep hold of them until the time comes to donate them to the Expedition.
Full Blueprint list: All crafting recipes
Below is the full list of all the Blueprints that are currently available to find in Arc Raiders, and the crafting recipe required for each item:
| Blueprint | Type | Recipe | Crafted At |
|---|---|---|---|
| Bettina | Weapon | 3x Advanced Mechanical Components 3x Heavy Gun Parts 3x Canister | Gunsmith 3 |
| Blue Light Stick | Quick Use | 3x Chemicals | Utility Station 1 |
| Aphelion | Weapon | 3x Magnetic Accelerator 3x Complex Gun Parts 1x Matriarch Reactor | Gunsmith 3 |
| Combat Mk. 3 (Flanking) | Augment | 2x Advanced Electrical Components 3x Processor | Gear Bench 3 |
| Combat Mk. 3 (Aggressive) | Augment | 2x Advanced Electrical Components 3x Processor | Gear Bench 3 |
| Complex Gun Parts | Material | 2x Light Gun Parts 2x Medium Gun Parts 2x Heavy Gun Parts | Refiner 3 |
| Fireworks Box | Quick Use | 1x Explosive Compound 3x Pop Trigger | Explosives Station 2 |
| Gas Mine | Mine | 4x Chemicals 2x Rubber Parts | Explosives Station 1 |
| Green Light Stick | Quick Use | 3x Chemicals | Utility Station 1 |
| Pulse Mine | Mine | 1x Crude Explosives 1x Wires | Explosives Station 1 |
| Seeker Grenade | Grenade | 1x Crude Explosives 2x ARC Alloy | Explosives Station 1 |
| Looting Mk. 3 (Survivor) | Augment | 2x Advanced Electrical Components 3x Processor | Gear Bench 3 |
| Angled Grip II | Mod | 2x Mechanical Components 3x Duct Tape | Gunsmith 2 |
| Angled Grip III | Mod | 2x Mod Components 5x Duct Tape | Gunsmith 3 |
| Hullcracker | Weapon | 1x Magnetic Accelerator 3x Heavy Gun Parts 1x Exodus Modules | Gunsmith 3 |
| Launcher Ammo | Ammo | 5x Metal Parts 1x Crude Explosives | Workbench 1 |
| Anvil | Weapon | 5x Mechanical Components 5x Simple Gun Parts | Gunsmith 2 |
| Anvil Splitter | Mod | 2x Mod Components 3x Processor | Gunsmith 3 |
| ??? | ??? | ??? | ??? |
| Barricade Kit | Quick Use | 1x Mechanical Components | Utility Station 2 |
| Blaze Grenade | Grenade | 1x Explosive Compound 2x Oil | Explosives Station 3 |
| Bobcat | Weapon | 3x Advanced Mechanical Components 3x Light Gun Parts | Gunsmith 3 |
| Osprey | Weapon | 2x Advanced Mechanical Components 3x Medium Gun Parts 7x Wires | Gunsmith 3 |
| Burletta | Weapon | 3x Mechanical Components 3x Simple Gun Parts | Gunsmith 1 |
| Compensator II | Mod | 2x Mechanical Components 4x Wires | Gunsmith 2 |
| Compensator III | Mod | 2x Mod Components 8x Wires | Gunsmith 3 |
| Defibrillator | Quick Use | 9x Plastic Parts 1x Moss | Medical Lab 2 |
| ??? | ??? | ??? | ??? |
| Equalizer | Weapon | 3x Magnetic Accelerator 3x Complex Gun Parts 1x Queen Reactor | Gunsmith 3 |
| Extended Barrel | Mod | 2x Mod Components 8x Wires | Gunsmith 3 |
| Extended Light Mag II | Mod | 2x Mechanical Components 3x Steel Spring | Gunsmith 2 |
| Extended Light Mag III | Mod | 2x Mod Components 5x Steel Spring | Gunsmith 3 |
| Extended Medium Mag II | Mod | 2x Mechanical Components 3x Steel Spring | Gunsmith 2 |
| Extended Medium Mag III | Mod | 2x Mod Components 5x Steel Spring | Gunsmith 3 |
| Extended Shotgun Mag II | Mod | 2x Mechanical Components 3x Steel Spring | Gunsmith 2 |
| Extended Shotgun Mag III | Mod | 2x Mod Components 5x Steel Spring | Gunsmith 3 |
| Remote Raider Flare | Quick Use | 2x Chemicals 4x Rubber Parts | Utility Station 1 |
| Heavy Gun Parts | Material | 4x Simple Gun Parts | Refiner 2 |
| Venator | Weapon | 2x Advanced Mechanical Components 3x Medium Gun Parts 5x Magnet | Gunsmith 3 |
| Il Toro | Weapon | 5x Mechanical Components 6x Simple Gun Parts | Gunsmith 1 |
| Jolt Mine | Mine | 1x Electrical Components 1x Battery | Explosives Station 2 |
| Explosive Mine | Mine | 1x Explosive Compound 1x Sensors | Explosives Station 3 |
| Jupiter | Weapon | 3x Magnetic Accelerator 3x Complex Gun Parts 1x Queen Reactor | Gunsmith 3 |
| Light Gun Parts | Material | 4x Simple Gun Parts | Refiner 2 |
| Lightweight Stock | Mod | 2x Mod Components 5x Duct Tape | Gunsmith 3 |
| Lure Grenade | Grenade | 1x Speaker Component 1x Electrical Components | Utility Station 2 |
| Medium Gun Parts | Material | 4x Simple Gun Parts | Refiner 2 |
| Torrente | Weapon | 2x Advanced Mechanical Components 3x Medium Gun Parts 6x Steel Spring | Gunsmith 3 |
| Muzzle Brake II | Mod | 2x Mechanical Components 4x Wires | Gunsmith 2 |
| Muzzle Brake III | Mod | 2x Mod Components 8x Wires | Gunsmith 3 |
| Padded Stock | Mod | 2x Mod Components 5x Duct Tape | Gunsmith 3 |
| Shotgun Choke II | Mod | 2x Mechanical Components 4x Wires | Gunsmith 2 |
| Shotgun Choke III | Mod | 2x Mod Components 8x Wires | Gunsmith 3 |
| Shotgun Silencer | Mod | 2x Mod Components 8x Wires | Gunsmith 3 |
| Showstopper | Grenade | 1x Advanced Electrical Components 1x Voltage Converter | Explosives Station 3 |
| Silencer I | Mod | 2x Mechanical Components 4x Wires | Gunsmith 2 |
| Silencer II | Mod | 2x Mod Components 8x Wires | Gunsmith 3 |
| Snap Hook | Quick Use | 2x Power Rod 3x Rope 1x Exodus Modules | Utility Station 3 |
| Stable Stock II | Mod | 2x Mechanical Components 3x Duct Tape | Gunsmith 2 |
| Stable Stock III | Mod | 2x Mod Components 5x Duct Tape | Gunsmith 3 |
| Tagging Grenade | Grenade | 1x Electrical Components 1x Sensors | Utility Station 3 |
| Tempest | Weapon | 3x Advanced Mechanical Components 3x Medium Gun Parts 3x Canister | Gunsmith 3 |
| Trigger Nade | Grenade | 2x Crude Explosives 1x Processor | Explosives Station 2 |
| Vertical Grip II | Mod | 2x Mechanical Components 3x Duct Tape | Gunsmith 2 |
| Vertical Grip III | Mod | 2x Mod Components 5x Duct Tape | Gunsmith 3 |
| Vita Shot | Quick Use | 2x Antiseptic 1x Syringe | Medical Lab 3 |
| Vita Spray | Quick Use | 3x Antiseptic 1x Canister | Medical Lab 3 |
| Vulcano | Weapon | 1x Magnetic Accelerator 3x Heavy Gun Parts 1x Exodus Modules | Gunsmith 3 |
| Wolfpack | Grenade | 2x Explosive Compound 2x Sensors | Explosives Station 3 |
| Red Light Stick | Quick Use | 3x Chemicals | Utility Station 1 |
| Smoke Grenade | Grenade | 14x Chemicals 1x Canister | Utility Station 2 |
| Deadline | Mine | 3x Explosive Compound 2x ARC Circuitry | Explosives Station 3 |
| Trailblazer | Grenade | 1x Explosive Compound 1x Synthesized Fuel | Explosives Station 3 |
| Tactical Mk. 3 (Defensive) | Augment | 2x Advanced Electrical Components 3x Processor | Gear Bench 3 |
| Tactical Mk. 3 (Healing) | Augment | 2x Advanced Electrical Components 3x Processor | Gear Bench 3 |
| Yellow Light Stick | Quick Use | 3x Chemicals | Utility Station 1 |
Note: The missing Blueprints in this list likely have not actually been added to the game at the time of writing, because none of the playerbase has managed to find any of them. As they are added to the game, I will update this page with the most relevant information so you know exactly how to get all 75 Arc Raiders Blueprints.
Where to find Blueprints in Arc Raiders
Below is a list of all containers, modifiers, and events which maximise your chances of finding Blueprints:
- Certain quests reward you with specific Blueprints .
- Completing Trials has a high chance of offering Blueprints as rewards.
- Surveyors have a decent chance of dropping Blueprints on death.
- High loot value areas tend to have a greater chance of spawning Blueprints.
- Night Raids and Storms may increase rare Blueprint spawn chances in containers.
- Containers with higher numbers of items may have a higher tendency to spawn Blueprints. As a result, Blue Gate (which has many “large” containers containing multiple items) may give you a higher chance of spawning Blueprints.
- Raider containers (Raider Caches, Weapon Boxes, Medical Bags, Grenade Tubes) have increased Blueprint drop rates. As a result, the Uncovered Caches event gives you a high chance of finding Blueprints.
- Security Lockers have a higher than average chance of containing Blueprints.
- Certain Blueprints only seem to spawn under specific circumstances: Tempest Blueprint only spawns during Night Raid events. Vulcano Blueprint only spawns during Hidden Bunker events. Jupiter and Equaliser Blueprints only spawn during Harvester events.

Raider Caches, Weapon Boxes, and other raider-oriented container types have a good chance of offering Blueprints. |Image credit:Rock Paper Shotgun/Embark Studios
Blueprints have a very low chance of spawning in any container in Arc Raiders, around 1-2% on average. However, there is a higher chance of finding Blueprints in particular container types. Specifically, you can find more Blueprints in Raider containers and security lockers.
Beyond this, if you’re looking for Blueprints you should focus on regions of the map which are marked as having particularly high-value loot. Areas such as the Control Tower in Dam Battlegrounds, the Arrival and Departure Buildings in Spaceport, and Pilgrim’s Peak in Blue Gate all have a better-than-average chance of spawning Blueprints somewhere amongst all their containers. Night Raids and Electromagnetic Storm events also increase the drop chances of certain Blueprints .
In addition to these containers, you can often loot Blueprints from destroyed Surveyors - the largest of the rolling ball ARC. Surveyors are more commonly found on the later maps - Spaceport and Blue Gate - and if one spawns in your match, you’ll likely see it by the blue laser beam that it casts into the sky while “surveying”.
Surveyors are quite well-armoured and will very speedily run away from you once it notices you, but if you can take one down then make sure you loot all its parts for a chance of obtaining certain unusual Blueprints.
Blueprints obtained from quests
One way in which you can get Blueprints is by completing certain quests for the vendors in Speranza. Some quests will reward you with a specific item Blueprint upon completion, so as long as you work through all the quests in Arc Raiders, you are guaranteed those Blueprints.
Here is the full list of all Blueprints you can get from quest rewards:
- Trigger Nade Blueprint: Rewarded after completing “Sparks Fly”.
- Lure Grenade Blueprint: Rewarded after completing “Greasing Her Palms”.
- Burletta Blueprint: Rewarded after completing “Industrial Espionage”.
- Hullcracker Blueprint (and Launcher Ammo Blueprint): Rewarded after completing “The Major’s Footlocker”.
Alas, that’s only 4 Blueprints out of a total of 75 to unlock, so for the vast majority you will need to find them yourself during a raid. If you’re intent on farming Blueprints, then it’s best to equip yourself with cheap gear in case you lose it, but don’t use a free loadout because then you won’t get a safe pocket to stash any new Blueprint you find. No pain in Arc Raiders is sharper than failing to extract with a new Blueprint you’ve been after for a dozen hours already.

One of the best ways to get Blueprints is by hitting three stars on all five Trials every week. |Image credit:Rock Paper Shotgun/Embark Studios
Blueprints obtained from Trials
One of the very best ways to get Blueprints is as rewards for completing Trials in Arc Raiders. Trials are unlocked from Level 15 onwards, and allow you to earn rewards by focusing on certain tasks over the course of several raids. For example, one Trial might task you with dealing damage to Hornets, while another might challenge you to loot Supply Drops.
Trials refresh on a weekly basis, with a new week bringing five new Trials. Each Trial can offer up to three rewards after passing certain score milestones, and it’s possible to receive very high level loot from these reward crates - including Blueprints. So if you want to unlock as many Blueprints as possible, you should make a point of completing as many Trials as possible each week.
Best Blueprint farming locations
The very best way to get Blueprints is to frequent specific areas of the maps which combine high-tier loot pools with the right types of containers to search. Here are my recommendations for where to find Blueprints on every map, so you can always keep the search going for new crafting recipes to unlock.

Image credit:Rock Paper Shotgun/Embark Studios
Dam Battlegrounds
The best places to farm Blueprints on Dam Battlegrounds are the Control Tower, Power Generation Complex, Ruby Residence, and Pale Apartments . The first two regions, despite only being marked on the map as mid-tier loot, contain a phenomenal number of containers to loot. The Control Tower can also contain a couple of high-tier Security Lockers - though of course, you’ll need to have unlocked the Security Breach skill at the end of the Survival tree.
There’s also a lot of reporting amongst the playerbase that the Residential areas in the top-left of the map - Pale Apartments and Ruby Residence - give you a comparatively strong chance of finding Blueprints. Considering their size, there’s a high density of containers to loot in both locations, and they also have the benefit of being fairly out of the way. So you’re more likely to have all the containers to yourself.
Buried City
The best Blueprint farming locations on Buried City are the Santa Maria Houses, Grandioso Apartments, Town Hall, and the various buildings of the New District . Grandioso Apartments has a lower number of containers than the rest, but a high chance of spawning weapon cases - which have good Blueprint drop rates. The others are high-tier loot areas, with plenty of lootable containers - including Security Lockers.
Spaceport
The best places to find Blueprints on Spaceport are the Arrival and Departure Buildings, as well as Control Tower A6 and the Launch Towers . All these areas are labelled as high-value loot regions, and many of them are also very handily connected to one another by the Spaceport wall, which you can use to quickly run from one area to the next. At the tops of most of these buildings you’ll find at least one Security Locker, so this is an excellent farming route for players looking to find Blueprints.
The downside to looting Blueprints on Spaceport is that all these areas are hotly contested, particularly in Duos and Squads. You’ll need to be very focused and fast in order to complete the full farming route.

Image credit:Rock Paper Shotgun/Embark Studios
Blue Gate
Blue Gate tends to have a good chance of dropping Blueprints, potentially because it generally has a high number of containers which can hold lots of items; so there’s a higher chance of a Blueprint spawning in each container. In my experience, the best Blueprint farming spots on Blue Gate are Pilgrim’s Peak, Raider’s Refuge, the Ancient Fort, and the Underground Complex beneath the Warehouse .
All of these areas contain a wealth of containers to loot. Raider’s Refuge has less to loot, but the majority of the containers in and around the Refuge are raider containers, which have a high chance of containing Blueprints - particularly during major events.
Stella Montis
On the whole, Stella Montis seems to have a very low drop rate for Blueprints (though a high chance of dropping other high-tier loot). If you do want to try farming Blueprints on this map, the best places to find Blueprints in Stella Montis are Medical Research, Assembly Workshop, and the Business Center . These areas have the highest density of containers to loot on the map.
In addition to this, the Western Tunnel has a few different Security Lockers to loot, so while there’s very little to loot elsewhere in this area of the map, it’s worth hitting those Security Lockers if you spawn there at the start of a match.
That wraps up this primer on how to get all the Blueprints in Arc Raiders as quickly as possible. With the Expedition system constantly resetting a large number of players’ Blueprints, it’s more important than ever to have the most up-to-date information on where to find all these Blueprints.
While you’re here, be sure to check out our Arc Raiders best guns tier list , as well as our primers on the best skills to unlock and all the different Field Depot locations on every map.

ARC Raiders
PS5 , Xbox Series X/S , PC
Rock Paper Shotgun is better when you sign in
Sign in and join us on our journey to discover strange and compelling PC games.
