After three hours of Bloober’s Silent Hill 2, it’s unclear who is remaking who
Peeling apart the pieces of auld and nu-Hill
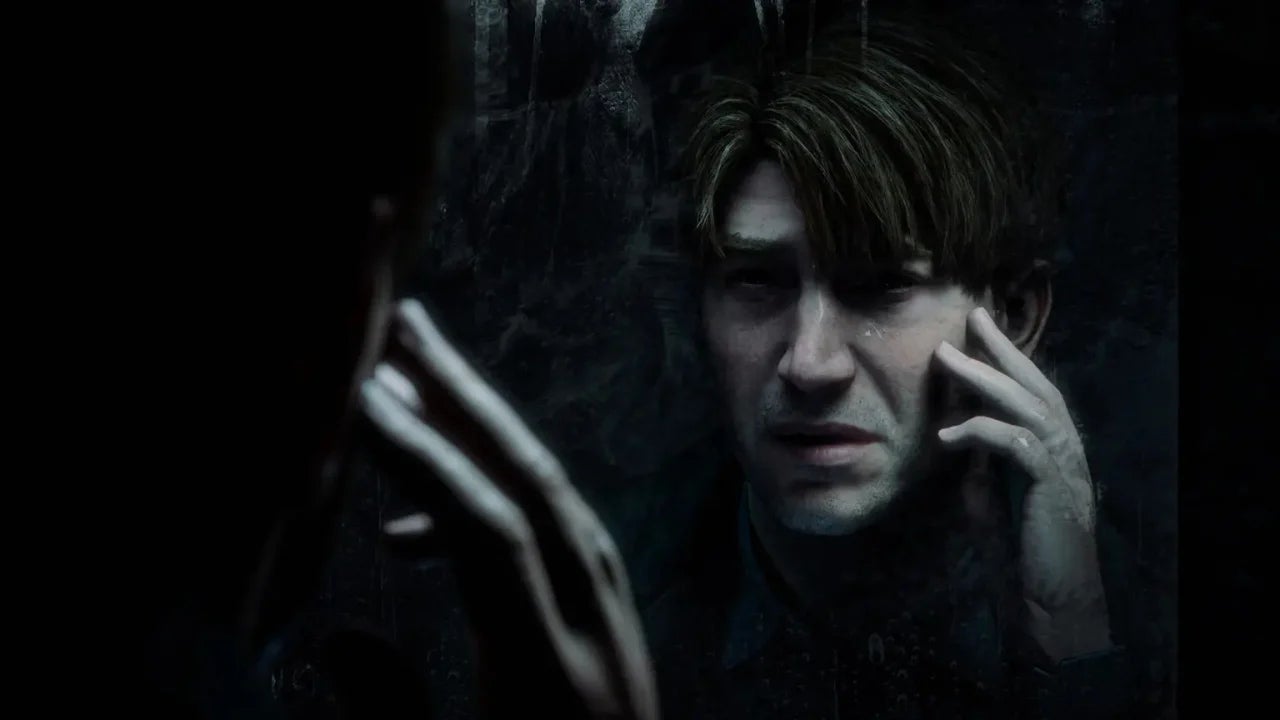
Image credit:Konami

Silent Hill has a messy, up-is-down relationship with time and history, so let’s go about this hands-on with the Silent Hill 2 Remake in a messy, up-is-down way. Developed well over two decades ago, the original Silent Hill 2 is the magnum opus of Polish horror stalwarts Bloober Team. Running on then-innovative “Unreal Engine 5” technology created by Jazz Jackrabbit publishers Epic MegaGames, it’s a wonderful abyss of a game that remains perfectly playable today, given a certain amount of tolerance for the quirks of the era.
It begins with your character, James Sunderland, descending from the road towards the eponymous Midwestern nowhere-town. Like many games of the period, Silent Hill 2 uses a third-person, over-the-shoulder manual camera, which allows you to glance fearfully up at the monstrous pine trees that fringe the path - each rising from a bulging tide of fog that menaces with the suggestion of approaching figures. There is moisture everywhere, gushing from drain pipes and dribbling down concrete barriers. As you amble into the murk, deathly chords and groaning, unmechanical motifs reverberate from somewhere deep underground.

The route winds organically through the forest towards a graveyard, where you meet a woman rummaging among the headstones. From there, you wander past a morose cornfield into a desolate farm, where a scarecrow watches from afar. A locked gate obliges a detour to a garage where, after hopping through a window advertised by dangling cloth ribbons, you find a key on a worktable below a pin-up girl poster. James has come to Silent Hill in search of his wife, from whom he has received a mysterious letter, years after her death. The winking postergirl is an obvious, cheeky allusion to this. It’s your first concrete indication that Silent Hill at large is a multitude of mirrors.
The manual third-person camera compliments the crushing grandeur of these spaces. There’s a grain elevator in the farm, and walking beneath it is like strolling under a guillotine. It makes your breath catch. But there are a few choices that sabotage the mood, marking Bloober’s game and its quaint Unreal middleware as products of bygone trends and expectations. There’s a spinning leaf effect in the woodlands which might have been pasted-on for the sake of a magazine screenshot caption. The flapping cloth on the garage window speaks to a contemporary enthusiasm for signposting traversal opportunities, the long-forgotten “yellow paint” trend, though Bloober use this navigational device very sparingly.
On the whole, Bloober’s Silent Hill 2 sometimes seems more… visually led than it should. There’s an innocent airiness and spaciousness to it, for all the shadows and grime, with puddles that grandly reflect the clouds and sumptuously imagined interiors that speak to an antiquated fixation with extravagant lighting effects and photorealistic fine-detailing for its own sake.
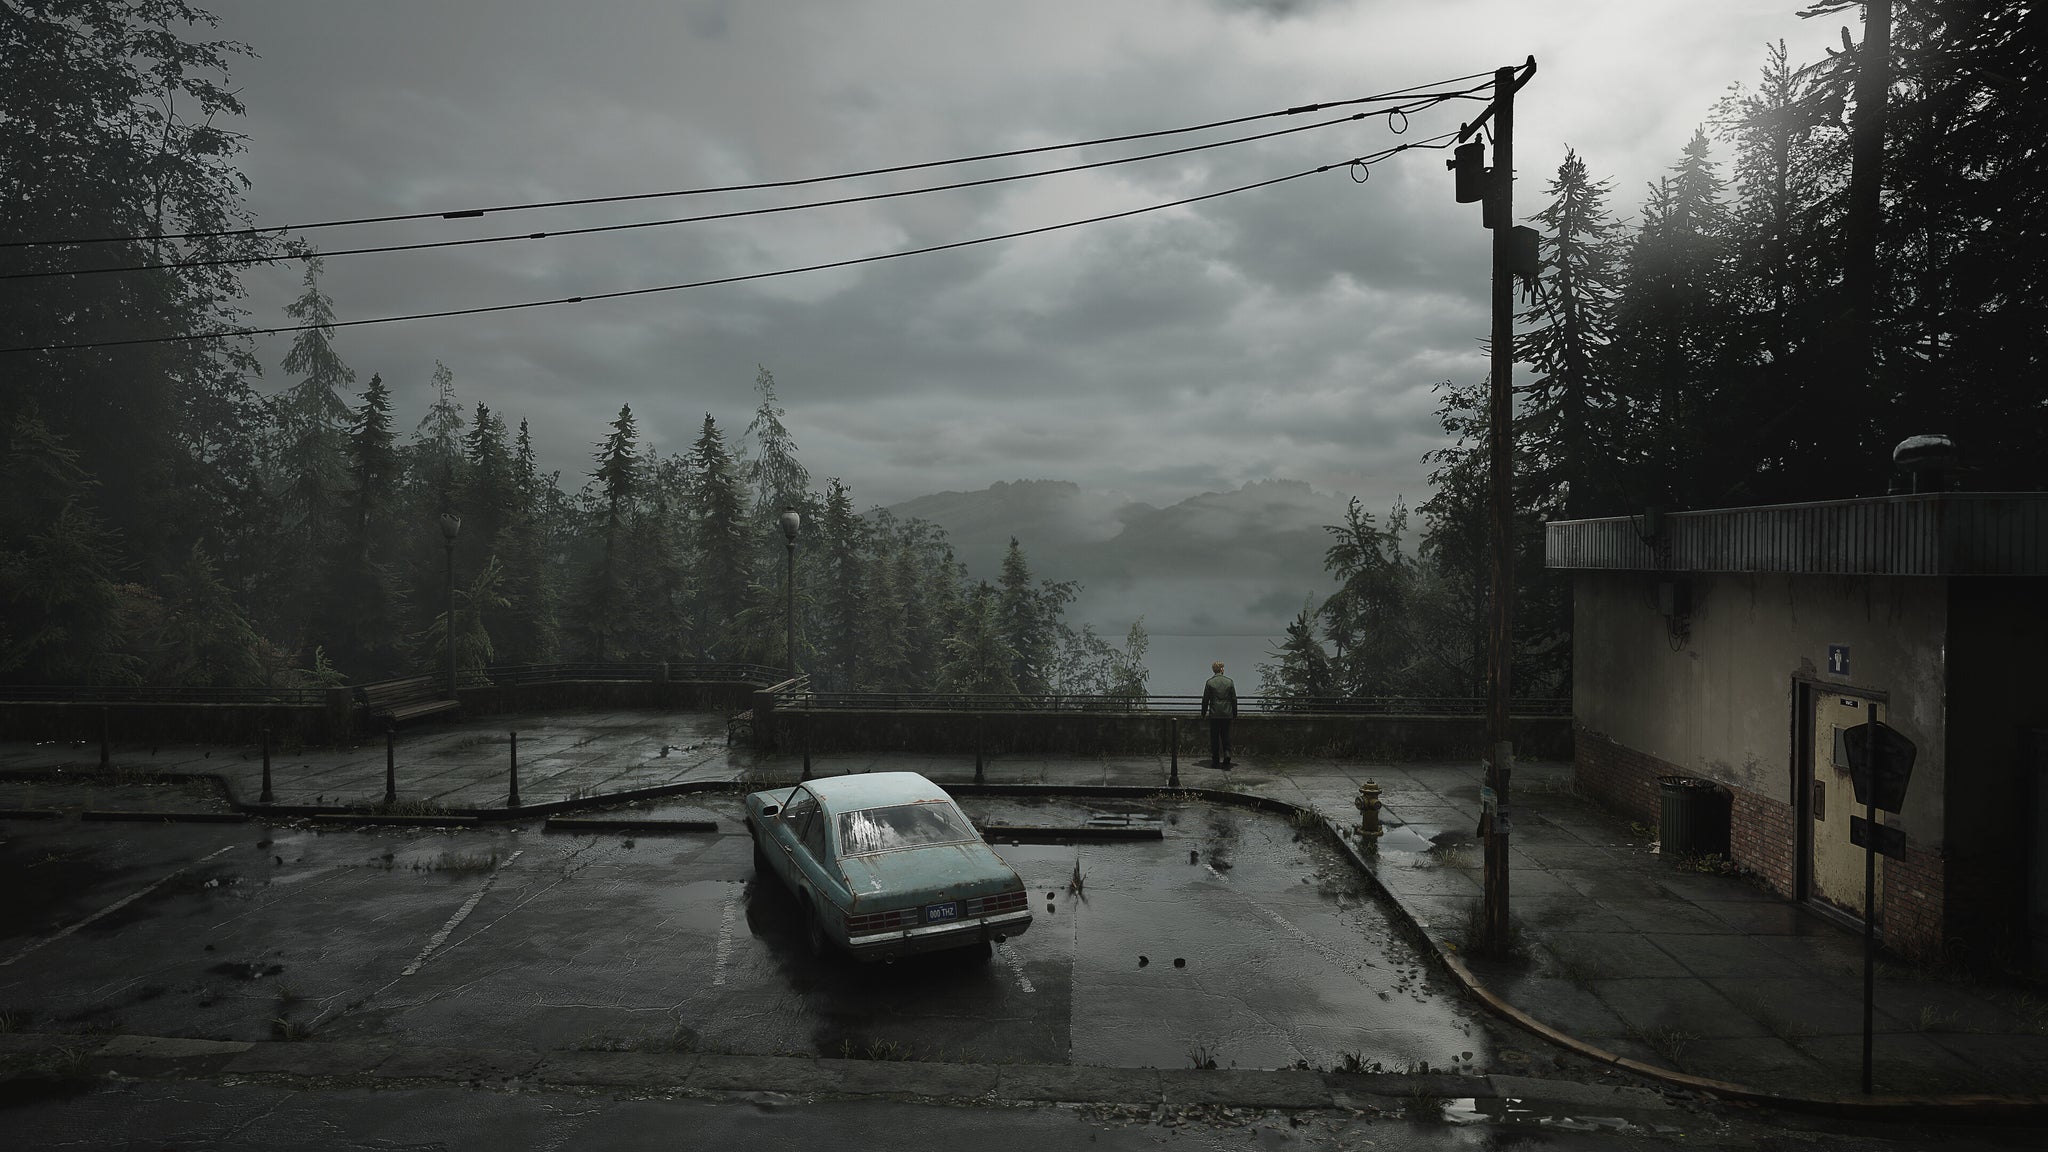
Image credit:Konami
There are pitch-black corridors to navigate, but the world seldom feels wholly obscure and mazelike, the way you sense it wishes to - the nearest it gets, in the first three hours, is during a visit to an apartment complex, which is spread across three floors’ worth of blocked routes and secrets. The manual camera also makes it easy to spot and avoid the game’s early monsters, the Lying Figures - tottering pus-bags sewn into effete straitjackets of purple flesh, some of them prone beneath parked cars. Subsequent, four-legged marionettes are harder to evade. You’ll often find them in blindspots, posing behind entrances, with another creature or spotlit object to distract you in the middle of the room.
These are fleeting criticisms. Even 20 years later, Bloober’s Silent Hill 2 remains an engrossing, accomplished work of horror which dips into a deeper well of torment than most peers, before or since. It’s an easy sell for a spooky night in. But you can see the potential for something more driven, disorienting and unforgiving. The forthcoming Silent Hill 2 Remake, created by Japanese developers Team Silent using bespoke lo-fi Konami technology, shaves back the layers of Bloober’s game to produce a new kind of claustrophobia.
Junking the over-the-shoulder camera, it gives you a landscape frayed to chunks that are explored using a blend of fixed and on-rails perspectives. The opening descent now begins with the view facing towards James, provocatively hiding the forest. The camera spins around soon after, but there is little to see. The forest has been gutted, simplified to pillars canting from fog that now pours toward you like ashen surf, as though trying to shove you away.
In place of the Bloober game’s archaic Unreal showiness, Team Silent offer up purposefully crude outlines and bruised pixelation representative of more recent trends in video game art direction and graphics . The sense of disorder now extends to your understanding of the software; the textures are scars in the simulation itself. With visual detail eliminated, the sound effects are also more pointed: you’ll hear shambling footsteps that radiate from nowhere, as though they’re coming from behind your eyes. It’s a striking revising and reducing of Bloober’s fable, although sometimes, I think, Team Silent’s erasures go too far. The detour into the garage with the poster has been removed to keep the focus on the descent, for example, at the cost of some useful foreshadowing.

In Team Silent’s hands, Silent Hill itself is lower, less dramatic, and more disconnected. You sense that there’s nothing behind the walls and windows save mist. Bloober’s original and more opulent version of the town synchs up interiors and exteriors, letting you freely break the glass and scour deserted shops and eateries for puzzle pieces and health drinks. By contrast, Team Silent’s urban geography is artfully butchered by loading transitions, almost out of spite towards the Bloober game’s expansiveness and fluidity.
It’s never handsome or authentic, just disjointed and spectral. It’s a fey jumble of corridors and clearings that are being eaten alive by the pixel grain. Both the interior spaces and the external layouts are less complicated than in Bloober’s game, with fewer puzzles and fewer moving parts, but they feel more elaborate because coherence is withheld by the tyrannical camera composition. The game doesn’t even let you look across the street: the camera points itself relentlessly at the gutter, and the result, again, is that sound comes to the fore. You can no longer scry the creatures under the cars, or observe their meandering routes in the distance. Instead, you must depend much more heavily on the warning crackle of James’s radio to escape detection.
And then there’s the combat. In both the old and new Silent Hill 2, it’s something to endure. James is a regular bloke out of water, amassing a small arsenal of improvised spiked bats and a couple of guns, for which you’ll seldom have enough ammunition. The point is never to overpower - and certainly never to farm foes for crafting materials or XP, as in other less well-preserved games of the period, like Diablo 4 - but Bloober try to cultivate a sense of growing mastery. Their comparatively rugged version of James is equipped with a lateral dodge and a quick-turn for deft evasion and fallback manoeuvres. The over-the-shoulder perspective allows for easy measuring of engagement distance, and there are discrete, context-sensitive animations that glamorise the bludgeoning and instil a sense of frenzy.
Team Silent’s game deletes these flourishes. Cramped camera perspectives coupled with disruptively “tanky” turntable movement puts greater pressure on the player, and there are no dramatic wind-ups and followthroughs to spike the endorphins. The Japanese studio also has less patience for stagy build-up or pedagogical due process. The first time you meet one of those Lying Figures in Bloober’s game, for example, it’s after a drawn-out flirtation of pursuing it between backyards, crawling into a garage, and recovering the aforesaid radio from a chair, only for the monster to burst through the wall behind you. If there’s a sense of mounting threat, there’s also a sense of being shown the ropes, with tooltips punctuating the dread. It’s a reminder that in Bloober’s heyday, even horror games were focus-tested to the extreme to minimise uncertainty: there was less trust in the player’s ability to find their way.
In Team Silent’s reworking, you merely follow the wobbling entity through the fog to a barricaded tunnelmouth, and the camera awkwardly captures the ensuing struggle from inside the tunnel. It feels unglamorous, indistinct, unvideogamey. I do admire Bloober’s approach to combat encounters for the line it treads between rewarding dexterity and making you feel overwhelmed, but here as elsewhere, it feels like Team Silent have cut to the heart of the ancient masterwork, and dragged forth an aesthetic of powerful negation it wasn’t quite able to realise with the techniques and technology of its time.
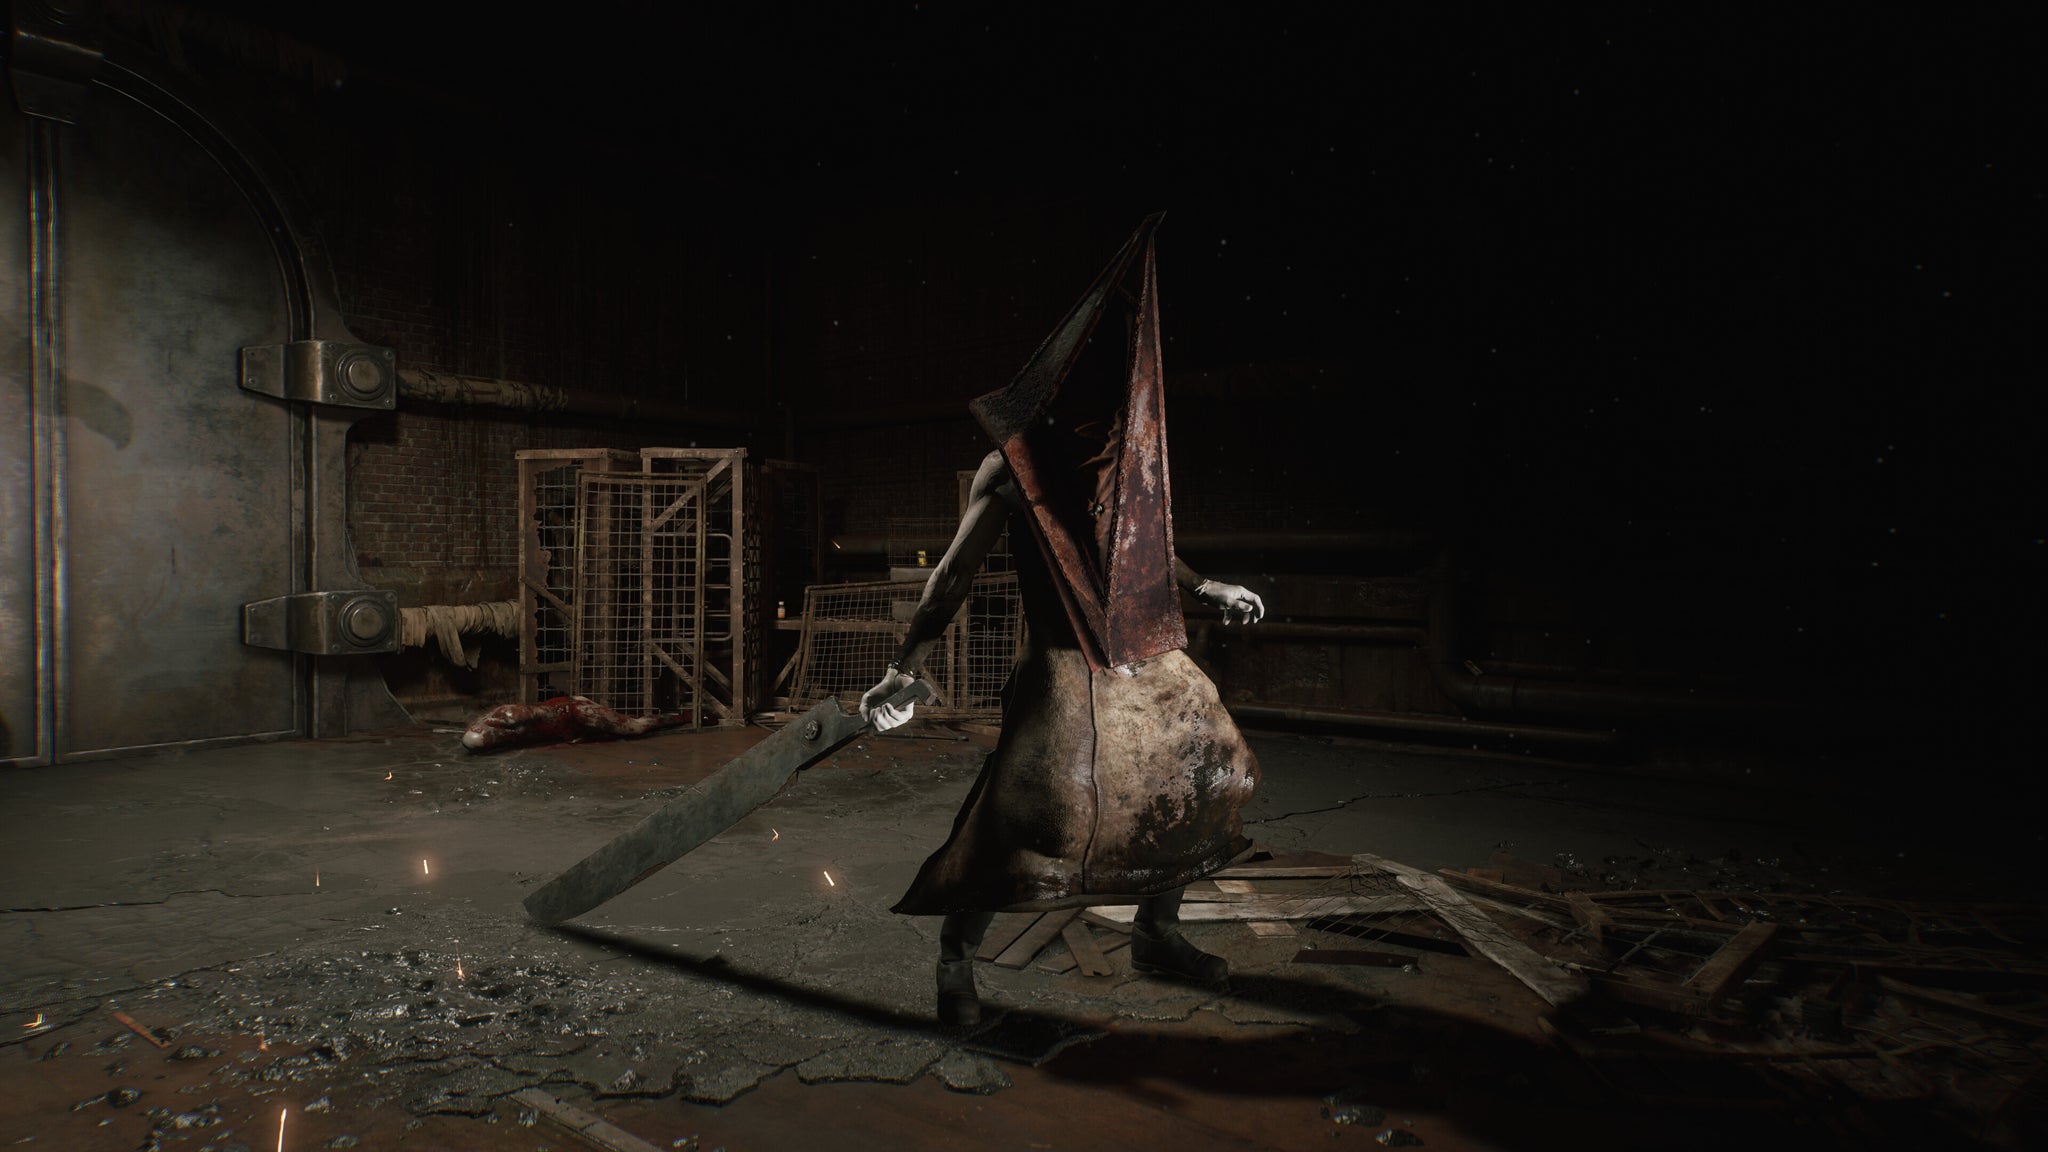
Image credit:Konami
I’m writing about the Silent Hill 2 Remake in this scrambled, back-to-front, obnoxious way partly to piss off whoever edits this (to be 100% clear, Team Silent are the creators of the original Silent Hill 2, which Bloober are remaking), and partly to make a point about remakes: that they tacitly or openly position the original game as an “obsolete” museum piece in need of replacement, dismissing the old artistic choices as primitive and incomplete, re-defining the old creative parameters as constraints that need to be lifted. It’s all in the service of the market’s cannibalistic mania for the new, its structural need to ceaselessly bury “the past”, often by directly obstructing non-commercial preservation efforts , and sell you Progress that starts to wither and fade the second you peel away the cellophane.
I think it’s a useful thought experiment to flip the poles and portray the Remake as the outmoded classic, in need of restoration, but it’s also thematically appropriate. Because Silent Hill knows a thing or two about burying the past. It knows that you can’t. The past is always present, however spurned. It’s entangled with the consciousness much as the town’s rusty, seeping Otherworld inhabits the geometry of its everyday self. The past’s “pastness”, its air of monstrous decay, is a product of the desire to deny it. James Sunderland, specifically, is so much in denial about his wife’s death that he has become a mobile singularity, his surroundings a scraping, shrieking distortion of what he refuses to see.
Silent Hill is happy to accommodate James’s delusions. Again, the town is a multitude of mirrors, a kaleidoscope of doppelgangers and projections, mashed into a thick pop-historical sediment of occult devices and abuses. It reconfigures to fit the tormented psyche of every fresh protagonist and every non-player resident, bringing their demons to life. As such, it’s incorrect to suggest that you ever visit Silent Hill “for the first time”: the point of going to Silent Hill is realising that you’re already there, trying to leave. To officially “remake” a Silent Hill game, therefore, is to fall prey to a basic bit of narrative irony, and inadvertently portray remaking video games as psychological repression carried out at industrial scale. Or possibly, it’s to embrace these things.

Image credit:Konami
Bloober have been living in Silent Hill for a while, putting down roots. From the unspoken multiple endings of Layers Of Fear to the cyberpunk apartment complex of Observer , they’ve deployed Silent Hillian devices to investigate their own heritage as Polish developers, negotiating their own present in a landscape of wounds and looming, anxious futures.
This isn’t to say that Bloober’s games have no being without Silent Hill: they are their own, substantial worlds, born of many inspirations. Nonetheless, Bloober making a Silent Hill game has the weight of inevitability. It’s as though you’d shuffled through a crawlspace in The Medium and emerged into the wavering light of Neely’s Bar. I think it’s fun and possibly helpful to characterise Bloober as one of the lost souls caught in Silent Hill’s web. What could they be in denial about? Definitely not the undying appeal of tank controls and fixed perspectives.
Framing Bloober this way also helps us see Silent Hill 2 and the Remake as simultaneous, not sequential, made up of distinct and equally intriguing approaches to an obstinately “timeless” setting where the economic death-drive embodied by Remaking can be turned back on itself, revealed for the demon it is, perhaps even punished. I’ve positioned the Remake as less captivating, here, and made some cheap alt-history jokes about wider industry developments like the yellow paint stuff, but I’ve really enjoyed the three hours I’ve spent with the Remake, not least for having the ghost of the original Silent Hill 2 in my head throughout.
There is so much to say about how the old and new games speak to each other - and this, for me, is the only thing that makes the remaking craze worthwhile. Come at it with the right mistrust toward the rhetoric of technological rebirth, and you get to see different generations of game-makers in dialogue, like stars at varying distances forming a flat constellation, excavating a shape from the darkness. I say “excavating a shape”, but in this case, of course, the stars are framing a hole. It’s gone now.

Silent Hill 2
PS2

Silent Hill 2 Remake
PS5 , PC
Rock Paper Shotgun is better when you sign in
Sign in and join us on our journey to discover strange and compelling PC games.

All 75 Arc Raiders Blueprints and where to get them
These areas have the highest chance of giving you Blueprints

Image credit:Rock Paper Shotgun/Embark Studios

Looking for more Arc Raiders Blueprints? It’s a special day when you find a Blueprint, as they’re among the most valuable items in Arc Raiders. If you find a Blueprint that you haven’t already found, then you must make sure you hold onto it at all costs, because Blueprints are the key to one of the most important and powerful systems of meta-progression in the game.
This guide aims to be the very best guide on Blueprints you can find, starting with a primer on what exactly they are and how they work in Arc Raiders, before delving into exactly where to get Blueprints and the very best farming spots for you to take in your search.
We’ll also go over how to get Blueprints from other unlikely activities, such as destroying Surveyors and completing specific quests. And you’ll also find the full list of all 75 Blueprints in Arc Raiders on this page (including the newest Blueprints added with the Cold Snap update , such as the Deadline Blueprint and Firework Box Blueprint), giving you all the information you need to expand your own crafting repertoire.
In this guide:
- What are Blueprints in Arc Raiders?
- Full Blueprint list: All crafting recipes
- Where to find Blueprints in Arc Raiders Blueprints obtained from quests Blueprints obtained from Trials Best Blueprint farming locations

What are Blueprints in Arc Raiders?
Blueprints in Arc Raiders are special items which, if you manage to extract with them, you can expend to permanently unlock a new crafting recipe in your Workshop. If you manage to extract from a raid with an Anvil Blueprint, for example, you can unlock the ability to craft your very own Anvil Pistol, as many times as you like (as long as you have the crafting materials).
To use a Blueprint, simply open your Inventory while in the lobby, then right-click on the Blueprint and click “Learn And Consume” . This will permanently unlock the recipe for that item in your Workshop. As of the Stella Montis update, there are allegedly 75 different Blueprints to unlock - although only 68 are confirmed to be in the game so far. You can see all the Blueprints you’ve found and unlocked by going to the Workshop menu, and hitting “R” to bring up the Blueprint screen.
It’s possible to find duplicates of past Blueprints you’ve already unlocked. If you find these, then you can either sell them, or - if you like to play with friends - you can take it into a match and gift it to your friend so they can unlock that recipe for themselves. Another option is to keep hold of them until the time comes to donate them to the Expedition.
Full Blueprint list: All crafting recipes
Below is the full list of all the Blueprints that are currently available to find in Arc Raiders, and the crafting recipe required for each item:
| Blueprint | Type | Recipe | Crafted At |
|---|---|---|---|
| Bettina | Weapon | 3x Advanced Mechanical Components 3x Heavy Gun Parts 3x Canister | Gunsmith 3 |
| Blue Light Stick | Quick Use | 3x Chemicals | Utility Station 1 |
| Aphelion | Weapon | 3x Magnetic Accelerator 3x Complex Gun Parts 1x Matriarch Reactor | Gunsmith 3 |
| Combat Mk. 3 (Flanking) | Augment | 2x Advanced Electrical Components 3x Processor | Gear Bench 3 |
| Combat Mk. 3 (Aggressive) | Augment | 2x Advanced Electrical Components 3x Processor | Gear Bench 3 |
| Complex Gun Parts | Material | 2x Light Gun Parts 2x Medium Gun Parts 2x Heavy Gun Parts | Refiner 3 |
| Fireworks Box | Quick Use | 1x Explosive Compound 3x Pop Trigger | Explosives Station 2 |
| Gas Mine | Mine | 4x Chemicals 2x Rubber Parts | Explosives Station 1 |
| Green Light Stick | Quick Use | 3x Chemicals | Utility Station 1 |
| Pulse Mine | Mine | 1x Crude Explosives 1x Wires | Explosives Station 1 |
| Seeker Grenade | Grenade | 1x Crude Explosives 2x ARC Alloy | Explosives Station 1 |
| Looting Mk. 3 (Survivor) | Augment | 2x Advanced Electrical Components 3x Processor | Gear Bench 3 |
| Angled Grip II | Mod | 2x Mechanical Components 3x Duct Tape | Gunsmith 2 |
| Angled Grip III | Mod | 2x Mod Components 5x Duct Tape | Gunsmith 3 |
| Hullcracker | Weapon | 1x Magnetic Accelerator 3x Heavy Gun Parts 1x Exodus Modules | Gunsmith 3 |
| Launcher Ammo | Ammo | 5x Metal Parts 1x Crude Explosives | Workbench 1 |
| Anvil | Weapon | 5x Mechanical Components 5x Simple Gun Parts | Gunsmith 2 |
| Anvil Splitter | Mod | 2x Mod Components 3x Processor | Gunsmith 3 |
| ??? | ??? | ??? | ??? |
| Barricade Kit | Quick Use | 1x Mechanical Components | Utility Station 2 |
| Blaze Grenade | Grenade | 1x Explosive Compound 2x Oil | Explosives Station 3 |
| Bobcat | Weapon | 3x Advanced Mechanical Components 3x Light Gun Parts | Gunsmith 3 |
| Osprey | Weapon | 2x Advanced Mechanical Components 3x Medium Gun Parts 7x Wires | Gunsmith 3 |
| Burletta | Weapon | 3x Mechanical Components 3x Simple Gun Parts | Gunsmith 1 |
| Compensator II | Mod | 2x Mechanical Components 4x Wires | Gunsmith 2 |
| Compensator III | Mod | 2x Mod Components 8x Wires | Gunsmith 3 |
| Defibrillator | Quick Use | 9x Plastic Parts 1x Moss | Medical Lab 2 |
| ??? | ??? | ??? | ??? |
| Equalizer | Weapon | 3x Magnetic Accelerator 3x Complex Gun Parts 1x Queen Reactor | Gunsmith 3 |
| Extended Barrel | Mod | 2x Mod Components 8x Wires | Gunsmith 3 |
| Extended Light Mag II | Mod | 2x Mechanical Components 3x Steel Spring | Gunsmith 2 |
| Extended Light Mag III | Mod | 2x Mod Components 5x Steel Spring | Gunsmith 3 |
| Extended Medium Mag II | Mod | 2x Mechanical Components 3x Steel Spring | Gunsmith 2 |
| Extended Medium Mag III | Mod | 2x Mod Components 5x Steel Spring | Gunsmith 3 |
| Extended Shotgun Mag II | Mod | 2x Mechanical Components 3x Steel Spring | Gunsmith 2 |
| Extended Shotgun Mag III | Mod | 2x Mod Components 5x Steel Spring | Gunsmith 3 |
| Remote Raider Flare | Quick Use | 2x Chemicals 4x Rubber Parts | Utility Station 1 |
| Heavy Gun Parts | Material | 4x Simple Gun Parts | Refiner 2 |
| Venator | Weapon | 2x Advanced Mechanical Components 3x Medium Gun Parts 5x Magnet | Gunsmith 3 |
| Il Toro | Weapon | 5x Mechanical Components 6x Simple Gun Parts | Gunsmith 1 |
| Jolt Mine | Mine | 1x Electrical Components 1x Battery | Explosives Station 2 |
| Explosive Mine | Mine | 1x Explosive Compound 1x Sensors | Explosives Station 3 |
| Jupiter | Weapon | 3x Magnetic Accelerator 3x Complex Gun Parts 1x Queen Reactor | Gunsmith 3 |
| Light Gun Parts | Material | 4x Simple Gun Parts | Refiner 2 |
| Lightweight Stock | Mod | 2x Mod Components 5x Duct Tape | Gunsmith 3 |
| Lure Grenade | Grenade | 1x Speaker Component 1x Electrical Components | Utility Station 2 |
| Medium Gun Parts | Material | 4x Simple Gun Parts | Refiner 2 |
| Torrente | Weapon | 2x Advanced Mechanical Components 3x Medium Gun Parts 6x Steel Spring | Gunsmith 3 |
| Muzzle Brake II | Mod | 2x Mechanical Components 4x Wires | Gunsmith 2 |
| Muzzle Brake III | Mod | 2x Mod Components 8x Wires | Gunsmith 3 |
| Padded Stock | Mod | 2x Mod Components 5x Duct Tape | Gunsmith 3 |
| Shotgun Choke II | Mod | 2x Mechanical Components 4x Wires | Gunsmith 2 |
| Shotgun Choke III | Mod | 2x Mod Components 8x Wires | Gunsmith 3 |
| Shotgun Silencer | Mod | 2x Mod Components 8x Wires | Gunsmith 3 |
| Showstopper | Grenade | 1x Advanced Electrical Components 1x Voltage Converter | Explosives Station 3 |
| Silencer I | Mod | 2x Mechanical Components 4x Wires | Gunsmith 2 |
| Silencer II | Mod | 2x Mod Components 8x Wires | Gunsmith 3 |
| Snap Hook | Quick Use | 2x Power Rod 3x Rope 1x Exodus Modules | Utility Station 3 |
| Stable Stock II | Mod | 2x Mechanical Components 3x Duct Tape | Gunsmith 2 |
| Stable Stock III | Mod | 2x Mod Components 5x Duct Tape | Gunsmith 3 |
| Tagging Grenade | Grenade | 1x Electrical Components 1x Sensors | Utility Station 3 |
| Tempest | Weapon | 3x Advanced Mechanical Components 3x Medium Gun Parts 3x Canister | Gunsmith 3 |
| Trigger Nade | Grenade | 2x Crude Explosives 1x Processor | Explosives Station 2 |
| Vertical Grip II | Mod | 2x Mechanical Components 3x Duct Tape | Gunsmith 2 |
| Vertical Grip III | Mod | 2x Mod Components 5x Duct Tape | Gunsmith 3 |
| Vita Shot | Quick Use | 2x Antiseptic 1x Syringe | Medical Lab 3 |
| Vita Spray | Quick Use | 3x Antiseptic 1x Canister | Medical Lab 3 |
| Vulcano | Weapon | 1x Magnetic Accelerator 3x Heavy Gun Parts 1x Exodus Modules | Gunsmith 3 |
| Wolfpack | Grenade | 2x Explosive Compound 2x Sensors | Explosives Station 3 |
| Red Light Stick | Quick Use | 3x Chemicals | Utility Station 1 |
| Smoke Grenade | Grenade | 14x Chemicals 1x Canister | Utility Station 2 |
| Deadline | Mine | 3x Explosive Compound 2x ARC Circuitry | Explosives Station 3 |
| Trailblazer | Grenade | 1x Explosive Compound 1x Synthesized Fuel | Explosives Station 3 |
| Tactical Mk. 3 (Defensive) | Augment | 2x Advanced Electrical Components 3x Processor | Gear Bench 3 |
| Tactical Mk. 3 (Healing) | Augment | 2x Advanced Electrical Components 3x Processor | Gear Bench 3 |
| Yellow Light Stick | Quick Use | 3x Chemicals | Utility Station 1 |
Note: The missing Blueprints in this list likely have not actually been added to the game at the time of writing, because none of the playerbase has managed to find any of them. As they are added to the game, I will update this page with the most relevant information so you know exactly how to get all 75 Arc Raiders Blueprints.
Where to find Blueprints in Arc Raiders
Below is a list of all containers, modifiers, and events which maximise your chances of finding Blueprints:
- Certain quests reward you with specific Blueprints .
- Completing Trials has a high chance of offering Blueprints as rewards.
- Surveyors have a decent chance of dropping Blueprints on death.
- High loot value areas tend to have a greater chance of spawning Blueprints.
- Night Raids and Storms may increase rare Blueprint spawn chances in containers.
- Containers with higher numbers of items may have a higher tendency to spawn Blueprints. As a result, Blue Gate (which has many “large” containers containing multiple items) may give you a higher chance of spawning Blueprints.
- Raider containers (Raider Caches, Weapon Boxes, Medical Bags, Grenade Tubes) have increased Blueprint drop rates. As a result, the Uncovered Caches event gives you a high chance of finding Blueprints.
- Security Lockers have a higher than average chance of containing Blueprints.
- Certain Blueprints only seem to spawn under specific circumstances: Tempest Blueprint only spawns during Night Raid events. Vulcano Blueprint only spawns during Hidden Bunker events. Jupiter and Equaliser Blueprints only spawn during Harvester events.

Raider Caches, Weapon Boxes, and other raider-oriented container types have a good chance of offering Blueprints. |Image credit:Rock Paper Shotgun/Embark Studios
Blueprints have a very low chance of spawning in any container in Arc Raiders, around 1-2% on average. However, there is a higher chance of finding Blueprints in particular container types. Specifically, you can find more Blueprints in Raider containers and security lockers.
Beyond this, if you’re looking for Blueprints you should focus on regions of the map which are marked as having particularly high-value loot. Areas such as the Control Tower in Dam Battlegrounds, the Arrival and Departure Buildings in Spaceport, and Pilgrim’s Peak in Blue Gate all have a better-than-average chance of spawning Blueprints somewhere amongst all their containers. Night Raids and Electromagnetic Storm events also increase the drop chances of certain Blueprints .
In addition to these containers, you can often loot Blueprints from destroyed Surveyors - the largest of the rolling ball ARC. Surveyors are more commonly found on the later maps - Spaceport and Blue Gate - and if one spawns in your match, you’ll likely see it by the blue laser beam that it casts into the sky while “surveying”.
Surveyors are quite well-armoured and will very speedily run away from you once it notices you, but if you can take one down then make sure you loot all its parts for a chance of obtaining certain unusual Blueprints.
Blueprints obtained from quests
One way in which you can get Blueprints is by completing certain quests for the vendors in Speranza. Some quests will reward you with a specific item Blueprint upon completion, so as long as you work through all the quests in Arc Raiders, you are guaranteed those Blueprints.
Here is the full list of all Blueprints you can get from quest rewards:
- Trigger Nade Blueprint: Rewarded after completing “Sparks Fly”.
- Lure Grenade Blueprint: Rewarded after completing “Greasing Her Palms”.
- Burletta Blueprint: Rewarded after completing “Industrial Espionage”.
- Hullcracker Blueprint (and Launcher Ammo Blueprint): Rewarded after completing “The Major’s Footlocker”.
Alas, that’s only 4 Blueprints out of a total of 75 to unlock, so for the vast majority you will need to find them yourself during a raid. If you’re intent on farming Blueprints, then it’s best to equip yourself with cheap gear in case you lose it, but don’t use a free loadout because then you won’t get a safe pocket to stash any new Blueprint you find. No pain in Arc Raiders is sharper than failing to extract with a new Blueprint you’ve been after for a dozen hours already.

One of the best ways to get Blueprints is by hitting three stars on all five Trials every week. |Image credit:Rock Paper Shotgun/Embark Studios
Blueprints obtained from Trials
One of the very best ways to get Blueprints is as rewards for completing Trials in Arc Raiders. Trials are unlocked from Level 15 onwards, and allow you to earn rewards by focusing on certain tasks over the course of several raids. For example, one Trial might task you with dealing damage to Hornets, while another might challenge you to loot Supply Drops.
Trials refresh on a weekly basis, with a new week bringing five new Trials. Each Trial can offer up to three rewards after passing certain score milestones, and it’s possible to receive very high level loot from these reward crates - including Blueprints. So if you want to unlock as many Blueprints as possible, you should make a point of completing as many Trials as possible each week.
Best Blueprint farming locations
The very best way to get Blueprints is to frequent specific areas of the maps which combine high-tier loot pools with the right types of containers to search. Here are my recommendations for where to find Blueprints on every map, so you can always keep the search going for new crafting recipes to unlock.

Image credit:Rock Paper Shotgun/Embark Studios
Dam Battlegrounds
The best places to farm Blueprints on Dam Battlegrounds are the Control Tower, Power Generation Complex, Ruby Residence, and Pale Apartments . The first two regions, despite only being marked on the map as mid-tier loot, contain a phenomenal number of containers to loot. The Control Tower can also contain a couple of high-tier Security Lockers - though of course, you’ll need to have unlocked the Security Breach skill at the end of the Survival tree.
There’s also a lot of reporting amongst the playerbase that the Residential areas in the top-left of the map - Pale Apartments and Ruby Residence - give you a comparatively strong chance of finding Blueprints. Considering their size, there’s a high density of containers to loot in both locations, and they also have the benefit of being fairly out of the way. So you’re more likely to have all the containers to yourself.
Buried City
The best Blueprint farming locations on Buried City are the Santa Maria Houses, Grandioso Apartments, Town Hall, and the various buildings of the New District . Grandioso Apartments has a lower number of containers than the rest, but a high chance of spawning weapon cases - which have good Blueprint drop rates. The others are high-tier loot areas, with plenty of lootable containers - including Security Lockers.
Spaceport
The best places to find Blueprints on Spaceport are the Arrival and Departure Buildings, as well as Control Tower A6 and the Launch Towers . All these areas are labelled as high-value loot regions, and many of them are also very handily connected to one another by the Spaceport wall, which you can use to quickly run from one area to the next. At the tops of most of these buildings you’ll find at least one Security Locker, so this is an excellent farming route for players looking to find Blueprints.
The downside to looting Blueprints on Spaceport is that all these areas are hotly contested, particularly in Duos and Squads. You’ll need to be very focused and fast in order to complete the full farming route.

Image credit:Rock Paper Shotgun/Embark Studios
Blue Gate
Blue Gate tends to have a good chance of dropping Blueprints, potentially because it generally has a high number of containers which can hold lots of items; so there’s a higher chance of a Blueprint spawning in each container. In my experience, the best Blueprint farming spots on Blue Gate are Pilgrim’s Peak, Raider’s Refuge, the Ancient Fort, and the Underground Complex beneath the Warehouse .
All of these areas contain a wealth of containers to loot. Raider’s Refuge has less to loot, but the majority of the containers in and around the Refuge are raider containers, which have a high chance of containing Blueprints - particularly during major events.
Stella Montis
On the whole, Stella Montis seems to have a very low drop rate for Blueprints (though a high chance of dropping other high-tier loot). If you do want to try farming Blueprints on this map, the best places to find Blueprints in Stella Montis are Medical Research, Assembly Workshop, and the Business Center . These areas have the highest density of containers to loot on the map.
In addition to this, the Western Tunnel has a few different Security Lockers to loot, so while there’s very little to loot elsewhere in this area of the map, it’s worth hitting those Security Lockers if you spawn there at the start of a match.
That wraps up this primer on how to get all the Blueprints in Arc Raiders as quickly as possible. With the Expedition system constantly resetting a large number of players’ Blueprints, it’s more important than ever to have the most up-to-date information on where to find all these Blueprints.
While you’re here, be sure to check out our Arc Raiders best guns tier list , as well as our primers on the best skills to unlock and all the different Field Depot locations on every map.

ARC Raiders
PS5 , Xbox Series X/S , PC
Rock Paper Shotgun is better when you sign in
Sign in and join us on our journey to discover strange and compelling PC games.
