99 Nights In The Forest: Beginner’s guide
A (definitely not cursed) survival guide to getting started in 99 Nights In The Forest

Image credit:Rock Paper Shotgun / Grandma’s Favourite Games

Just getting started in 99 Nights In The Forest? Your first few days cautiously roaming the sinister woods of this Roblox horror game can be daunting. You’re low on resources, starving, struggling to build your small fire… oh, and there’s also the deer monster who ominously stalks you from the shadows, peering out from behind trees. Yeah, he’s kinda unsettling too now you mention it…
Alas, you need fear no longer. I’ve spent more than a few nights sleeping beneath the stars in these here woods, and I’ve got… well… a frankly shameful collection of deer-jaw-shaped scars to prove it. So, if you’re looking for some pointers to make your trek through the woods more bearable, I’ve put together a survival guide full of tips to make your first expeditions run a little smoother.
Here are our top tips for 99 Nights In The Forest:
- Don’t slack on your campfire duties
- Always bring snacks
- Soup up that Crafting Bench
- Keep hold of Cultist Gems
- Know your boss strats
- Hunt for points of interest
- Network with the Pelt Hunter and the Fairy
- Keep an eye on the forecast
- Save the missing children
- Use bandages and med-kits sparingly
- Get yourself a formidable (and equally adorable) companion
1. Don’t slack on your campfire duties
The first thing you’ll do at the start of every run is build your campfire. Once it’s up and running though, your duty to tend the flickering flames is far from over.
From the moment it’s lit, that fire’s your lifeline, and will slowly begin to diminish unless you feed it logs, coal and delicious portions of straight gasoline. Why is this so important? Well, mainly because the bigger the fire, the more of the map you can explore, as it pushes back the impassable fog surrounding the forest’s perimeter. You’ll want to keep levelling it up so you can find new settlements to raid, biomes to explore and missing children to save.
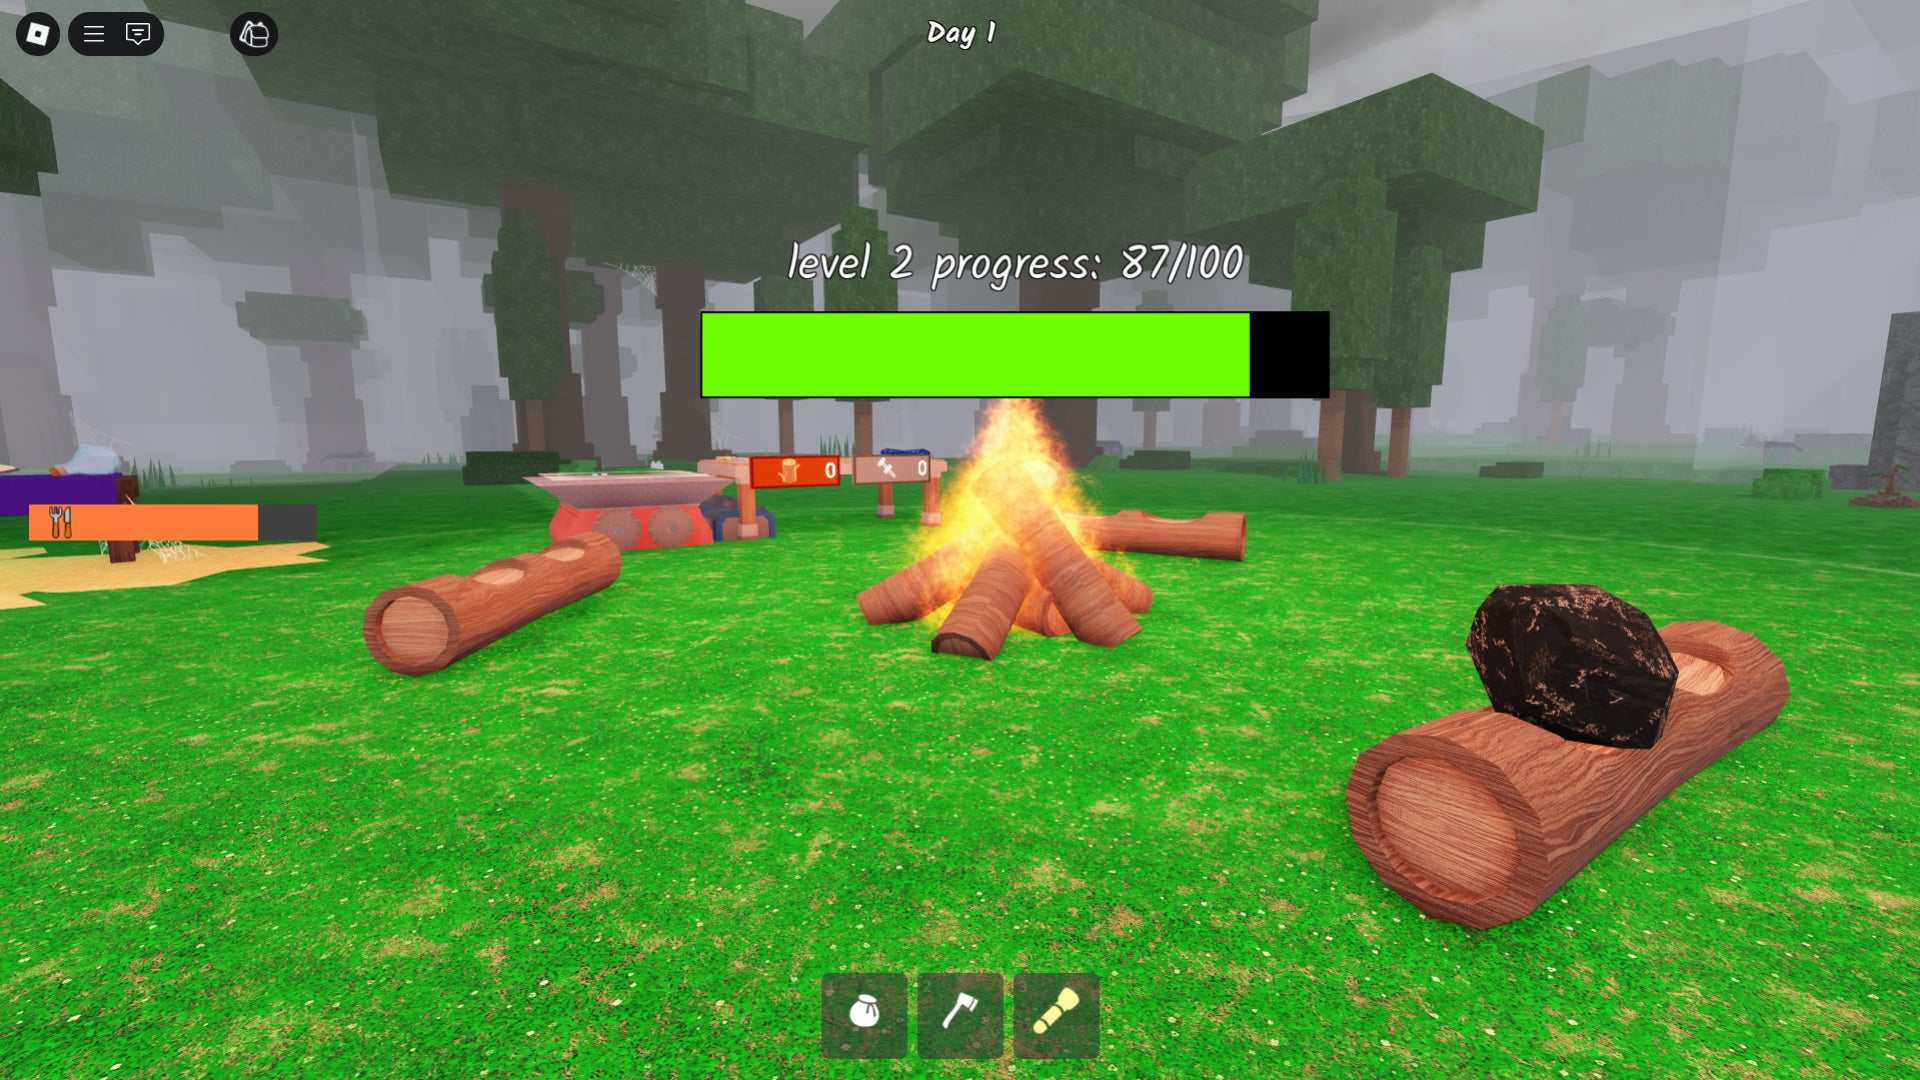
Image credit:Rock Paper Shotgun / Grandma’s Favourite Games
But far more imminently, if the fire dies, everything goes to pot. You’ll stop regenerating health, lose the campfire icon that guides you home while exploring, and the bosses that were skulking in the shadows will decide it’s the perfect moment to strike. So get yourself in the habit of bringing home fuel whenever you go on a scavenging trip.
2. Always bring snacks
As my dear mum always reminded me as I returned to the dark pit that was my uni halls: Don’t forget to eat! Wise words, and although I don’t think she meant for me to call on them while desperately fleeing an eldritchian deer monster, they’re strangely fitting here too.
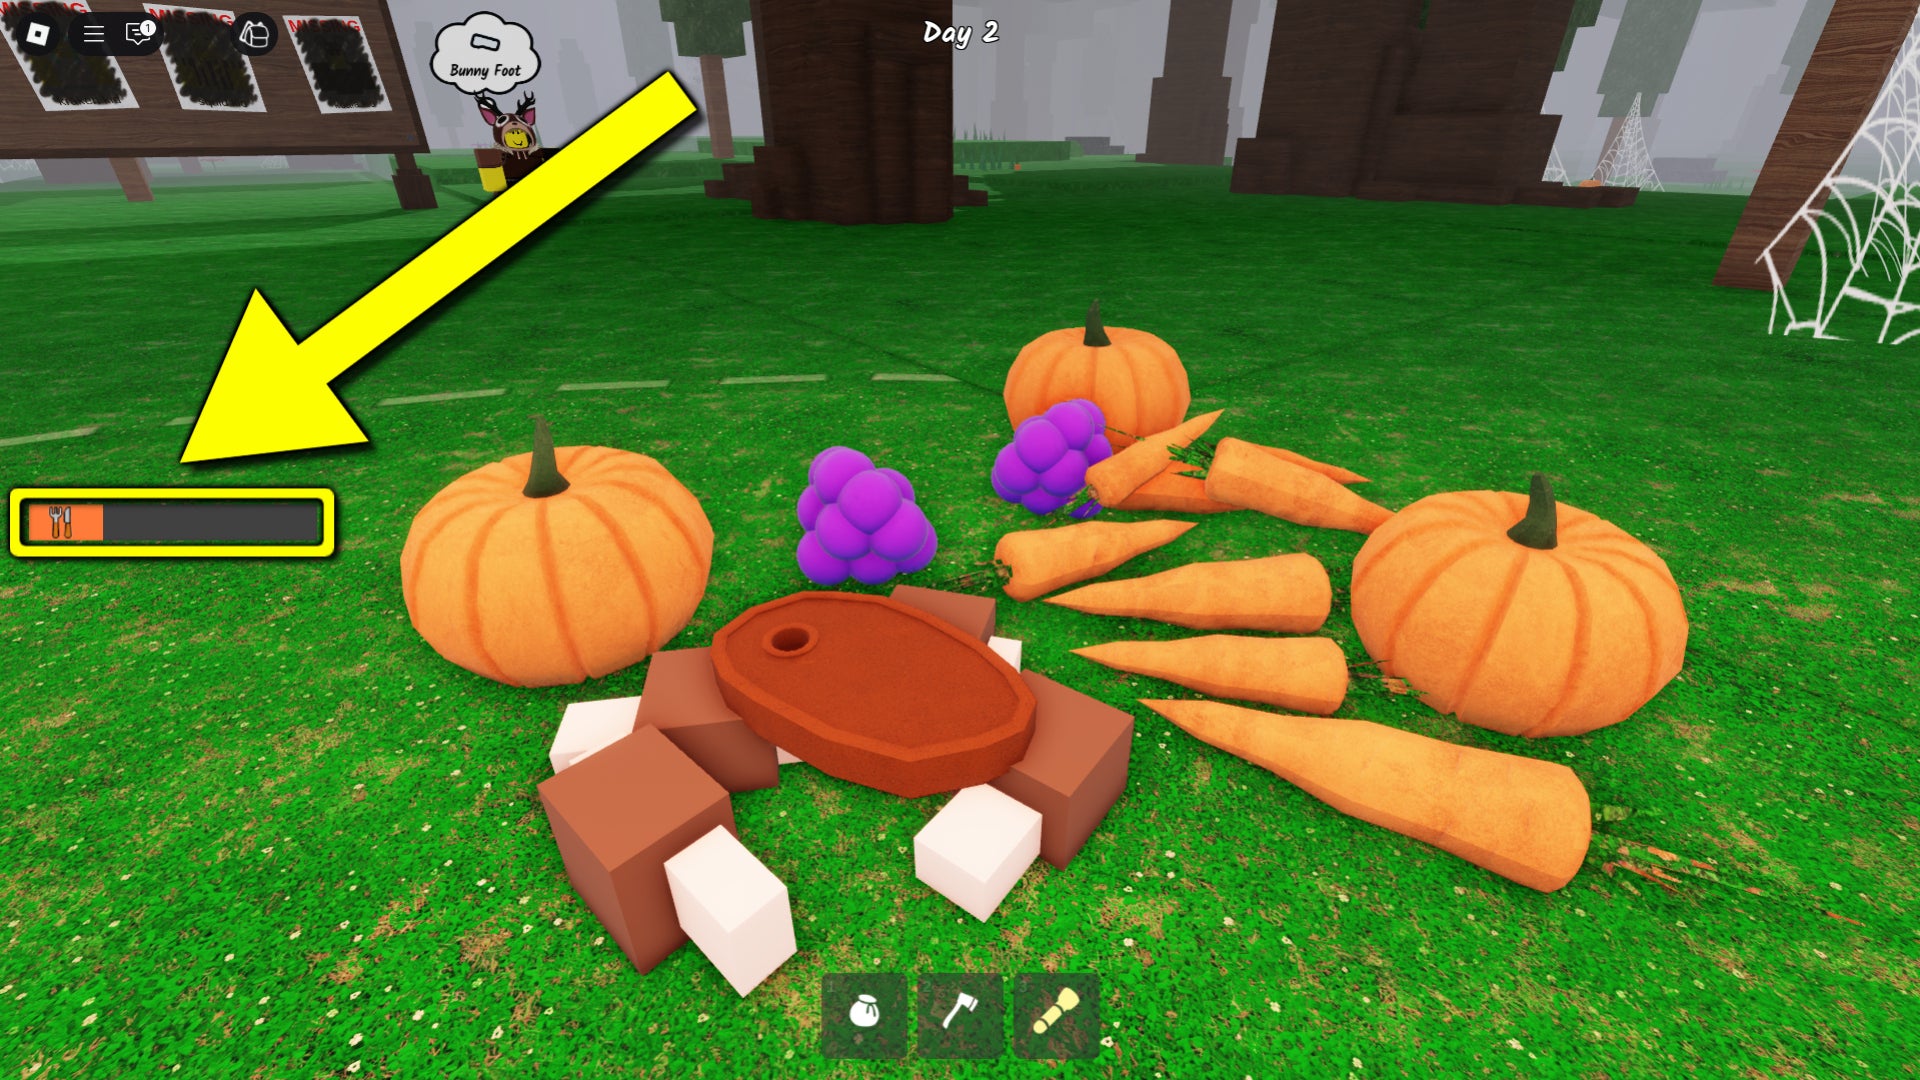
If you want to know how peckish you are, check this meter on the left. |Image credit:Rock Paper Shotgun / Grandma’s Favourite Games

Here’s an extra tip from Callum…
Take it from me, you’ll never find food items when it counts. Before going scavenging, hunt some wolves and load some cooked steaks into your sack. They’ll keep you full, so you can explore freely without needing to bolt home and stuff your face.
Surviving in this dense forest facilitates an endless list of jobs to manage, but you need to make sure your hunger meter is a top priority. If it fully empties, you’ll die of starvation, which is pretty counter-productive to the whole “surviving” thing. But hunger will consistently drain whenever you sprint, and in a game where every enemy is persistently looking to slurp down your spleen, you’ll be sprinting a lot . To keep it topped up, remember to continue cooking meat, catching fish, and snacking on plants and berries when you spot them. You can even take some time to stash pre-prepped meals by your campfire, so you never run dry on food items.
3. Soup up that Crafting Bench
Early into your expeditions, you’ll probably think the crafting menu is a bit lacklustre. That’s because you’ll want to upgrade your Crafting Bench constantly to access new tiers and get your hands on more advanced schematics.

Image credit:Rock Paper Shotgun / Grandma’s Favourite Games
While the initial tier mostly centres on bunny traps and the map (which, mini-tip for you, I suggest getting as early as possible), the options later range from teleporters and lightning rods to oil drills and ammo packs. There are some truly great items you can concoct if your Crafting Bench is capable, so feel free to bypass certain craftables you don’t need in favour of giving the bench some love.
4. Keep hold of Cultist Gems
To follow on from the tip above, there’s a special item you’ll come across during the cultist raids on your camp known as Cultist Gems. At first, they may seem like a mystery to you. They drop from the final enemy you defeat in the raid, and, if you’re overthinking things like me, you’ll reckon they must go in some ethereal dungeon you haven’t found yet.
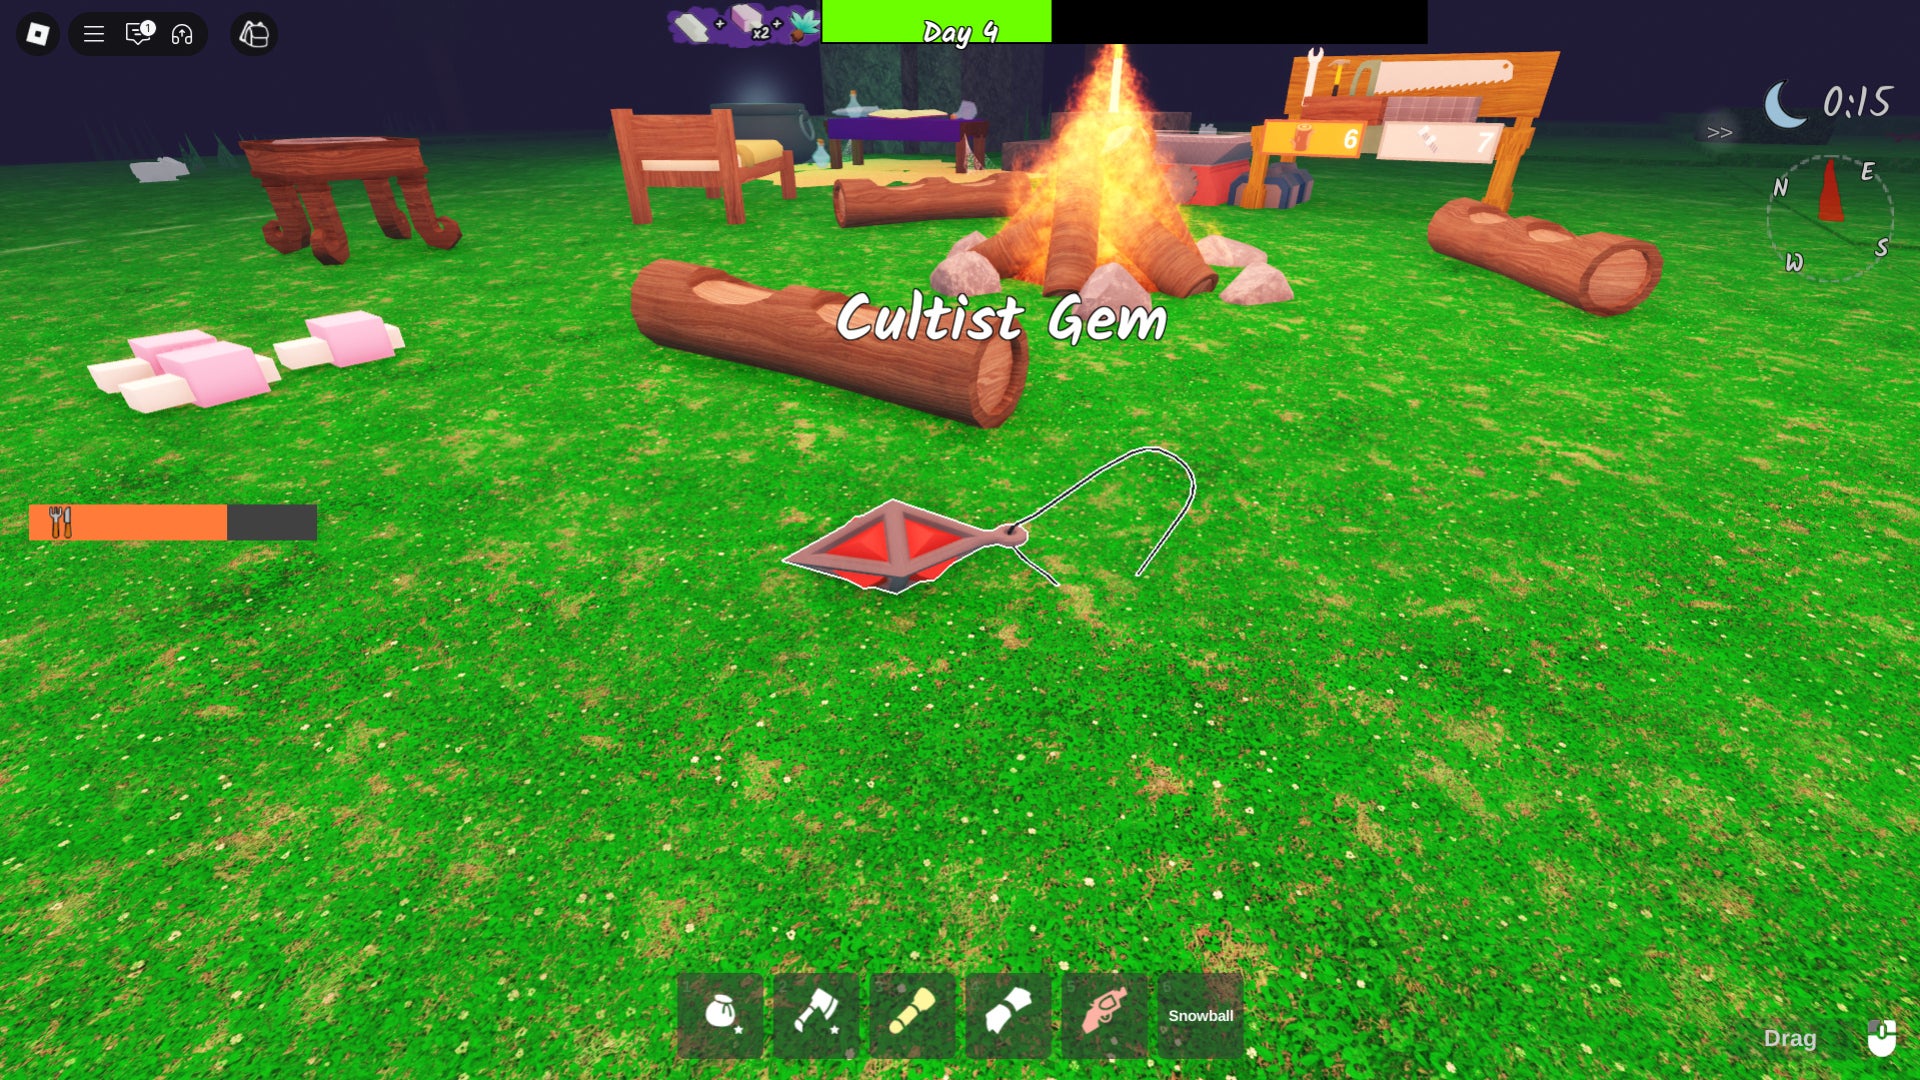
Image credit:Rock Paper Shotgun / Grandma’s Favourite Games
In truth, you already have everything you need to utilise these very valuable beauties. All you have to do is cram them straight into the Crafting Bench’s grinder. When ground up, these gems can be used to upgrade the Crafting Bench, so don’t waste time like I did. Crush those pretty gems and start upgrading.
5. Know your boss strats
He’s pretty hard to miss, but if you somehow haven’t spotted the ominous stalker following you around, you should probably know that 99 Nights In The Forest has a pretty severe deer monster problem. When you begin a run, you’ll be forced to tangle with this absolute menace every night, as he stalks you from afar and attacks when you least expect it.

Image credit:Rock Paper Shotgun / Grandma’s Favourite Games
But, as I’m sure you’ll be happy to know, you can get rid of this grazing gremlin. Whenever you enter a new biome in 99 Nights In The Forest, you’ll have the chance to trigger a switch-up in the main boss, meaning the Deer will leave you alone unless his cultists are attacking your base. The catch is he’ll tag in one of his other nightmarish woodland homies to keep you company. If you enter the snow biome, the Owl has a chance to take the reins. Meanwhile, if you take a jaunt through the volcano biome, the Ram can enter the fray instead.
Each boss has its own rules and patterns to learn, and you’ll want to have them all down so you can stay flexible. The Deer is arguably the least complicated of the three. If he shows up, he’ll approach quickly and attack. You can stop him in his tracks by flashing him with your torch or hightail it back to the campfire, where he’s unable to pass the threshold.

Image credit:Rock Paper Shotgun / Grandma’s Favourite Games
Meanwhile, the Owl will soar down from above, landing next to you and searching for prey. When it spawns, an icon of two eyes will appear. If you move, these eyes will gradually turn red, with the Owl closing in to attack once they’re full. To counter it, stop moving when the eyes appear, and eventually, it’ll fly away.
As for the Ram, it’ll charge you when you’re in its sights, bolting forward at extreme speed. To avoid it, you’ll want to veer left or right so you’re out of its path of destruction. In general, each boss has its own quirks that change how you explore at night, so be prepared to face each of them before you start exploring new biomes and potentially triggering a boss switch.
6. Hunt for points of interest
It’s all well and good living off nature’s finest resources, but if you’re going head-to-head with cultists, you’ll probably stand more of a chance aiming down the barrel of a revolver rather than a freshly picked carrot. In other words, you’ll need man-made resources, and you’ll find them by searching for points of interest around the map.
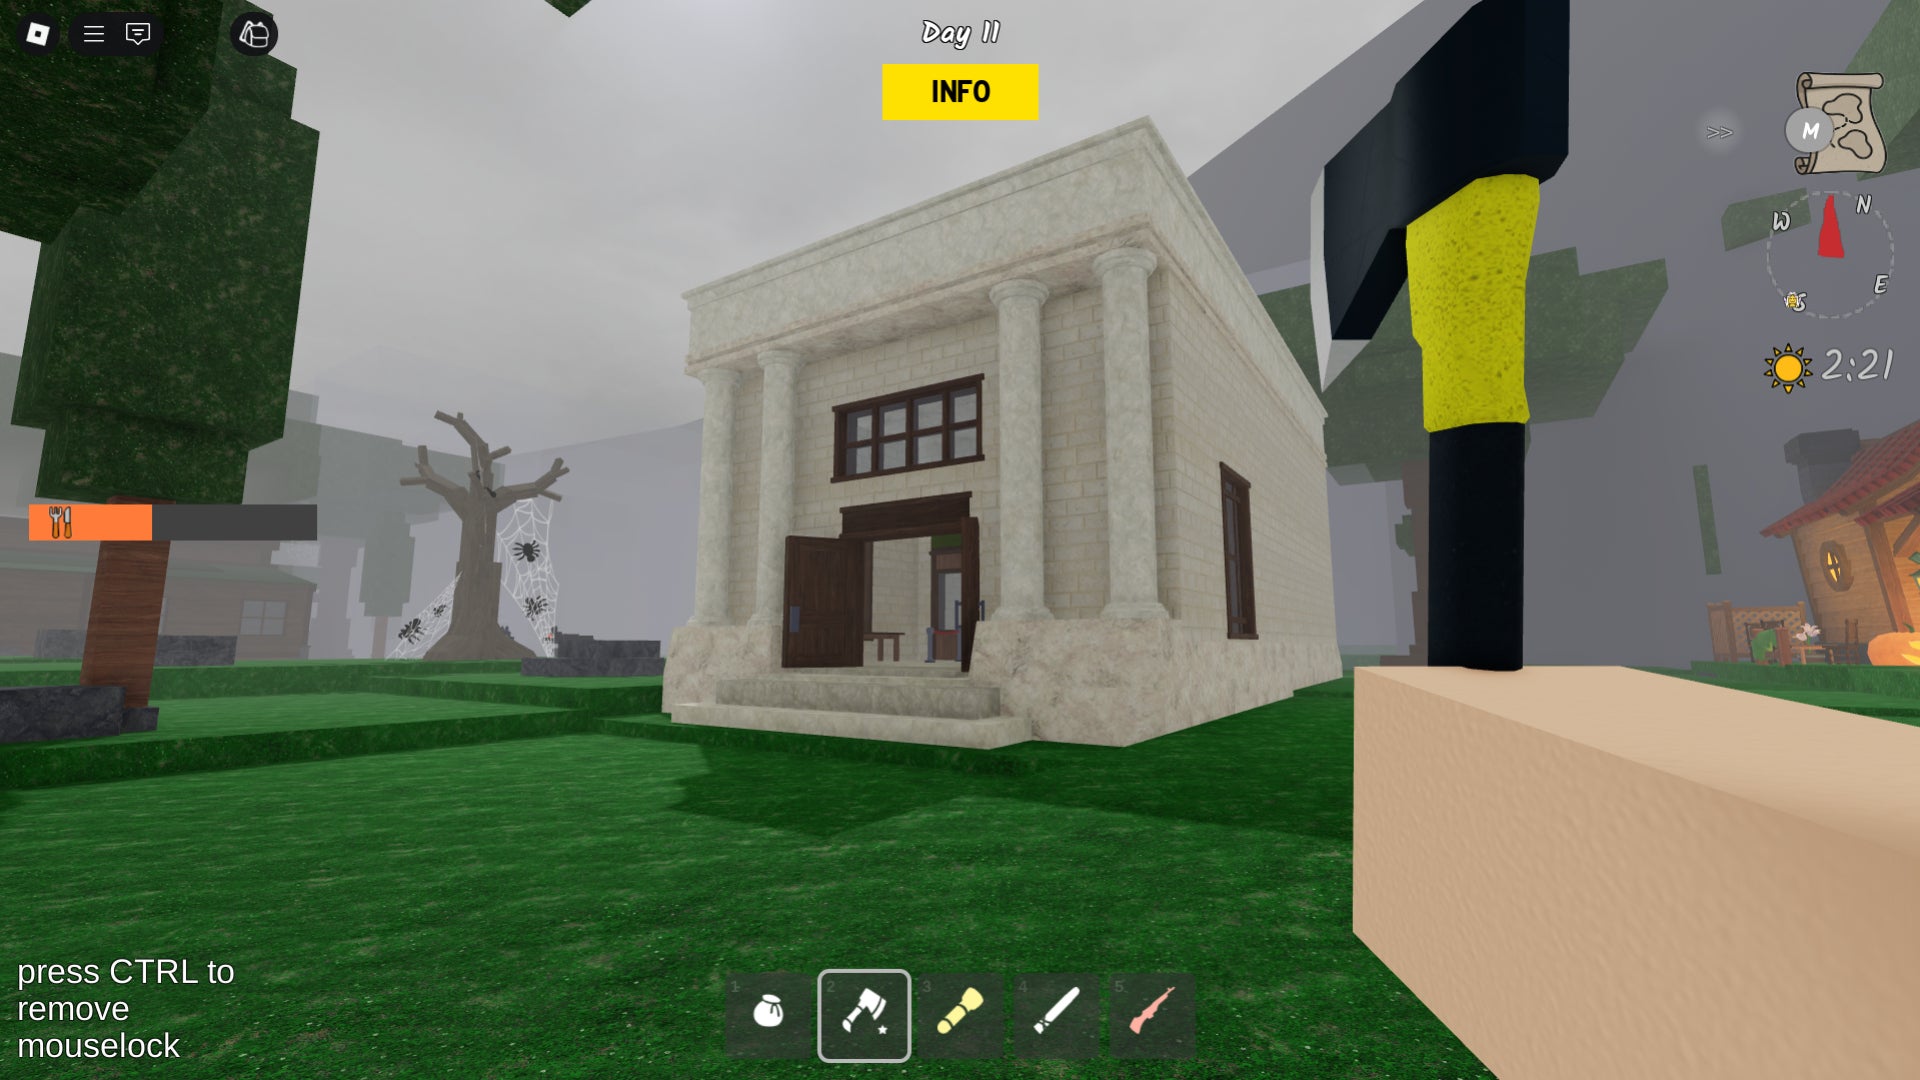
Image credit:Rock Paper Shotgun / Grandma’s Favourite Games
These points of interest usually vary in style, and become slightly more complex as you explore further beyond the campfire, but the goodies they contain tend to stay the same. Whether it’s an abandoned shack or an old bank, expect to find a mix of useful resources, such as fuel, junk and logs, as well as chests containing upgrades and key items. Chests are especially handy, as they tend to contain guns, ammo, improved axes, bigger sacks, and seeds. Early on, scouting and raiding them should be a key priority.
7. Network with the Pelt Trader and the Fairy
Although most of your fellow woodland inhabitants aren’t particularly welcoming, there are a few that you absolutely should get to know. To be more specific, I’m talking about the game’s four NPC traders.
They all have their uses, but the two you should butter up are the Pelt Trader, who occasionally appears at your camp to exchange rare animal loot for useful upgrades, and the Fairy, who sets up residence in her mushroom cottage close to your starting location. I have to wonder if building her home out of fungi was a particularly wise structural decision, but she seems to know what she’s doing. You can offer her flowers and, in exchange, she’ll plant seeds that grow into unique food items and ingredients.
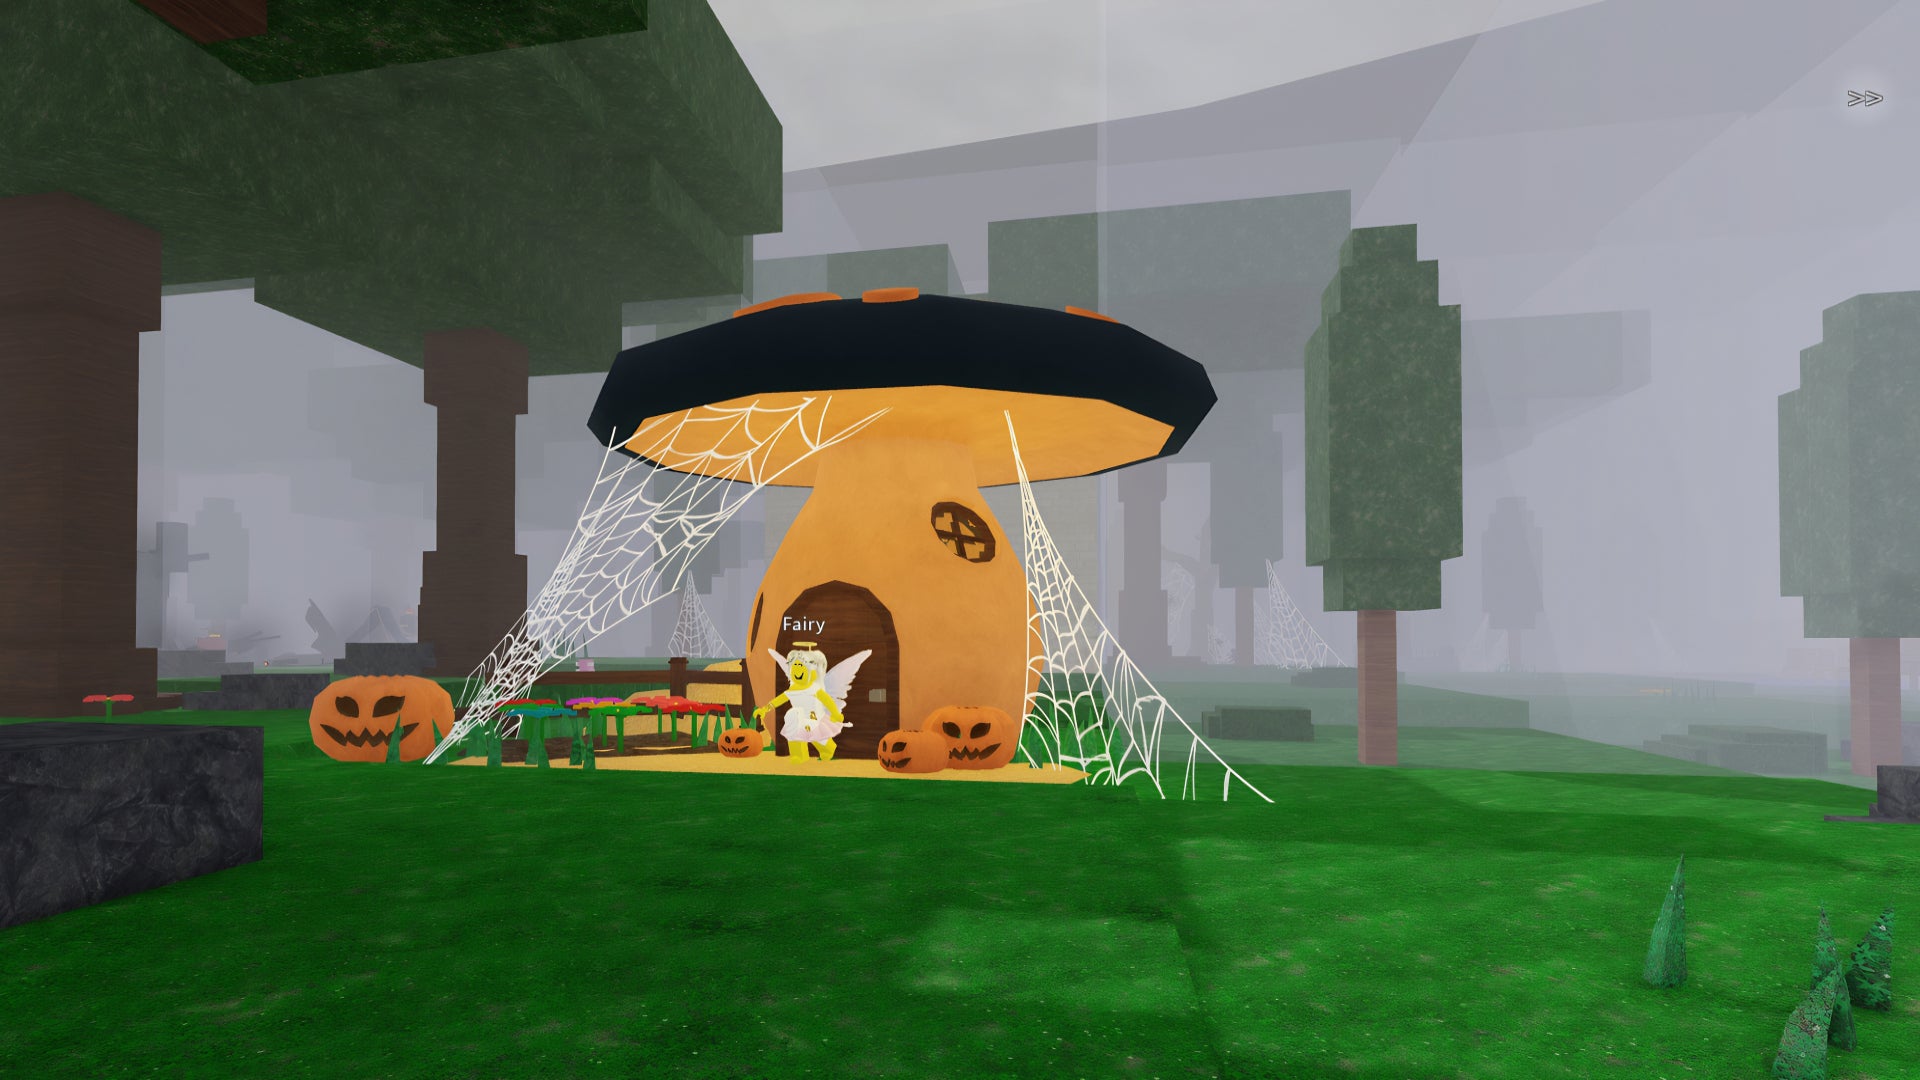
Image credit:Rock Paper Shotgun / Grandma’s Favourite Games
Make sure to really utilise both these guys. The Pelt Trader can beef you up with useful upgrades in the early game, giving you bigger sacks and stronger axes. Meanwhile, when food items start drying up, the Fairy’s seeds can make a huge difference, restocking the land with easy scran to munch between expeditions.
8. Keep an eye on the forecast
One of the sneakier threats you’ll face in 99 Nights In The Forest is the weather. While the skies will be clear most of the time, rain and thunder will occasionally cross the horizon, and that means you’re in for a rough day. Rain will cause the rate your campfire depletes to accelerate, and in a cruel twist of fate, also soaks any logs out in the open, meaning they can’t be used to fuel the flames. It’s wise to always have some coal or gasoline near the fire so you can top it up in case of a torrential downpour.

Image credit:Rock Paper Shotgun / Grandma’s Favourite Games
As for thunder, well, you know what they say about it. Where there’s thunder, there’s lightning, and that lightning really likes to strike while you’re hiding from big owl monsters. Lightning is a trickier beast to conquer unless you’re inside a building, but you can build a lightning rod when your Crafting Bench is level 3 that draws the ire of the skies. If lightning keeps ruining your day, make sure you have one back at camp.
9. Save the missing kids
Whenever you start a run, you’ll be reminded that finding the missing kids is useful for surviving all 99 nights, and that hint is not just trying to appeal to your conscience. Dino Kid, Kraken Kid, Squid Kid and Koala Kid may just sound like knock-off Crash Bandicoot villains, but they’re one of the most essential ways to cut corners and drum up your day count.
For every kid you find and bring back to camp, you’ll add to a multiplier that lets you skip forward a certain amount of days when a night ends. For example, if you were on day 3 when you saved your first child, the next day would be day five. And that multiplier increases for every child you find.

Look for the padlocks I’ve circled in the image on the left if you want to find and free the missing kids. |Image credit:Rock Paper Shotgun / Grandma’s Favourite Games
So, where do you find the missing kids? As you explore, you’ll spot locked dungeon doors guarded by wolves or bears wearing coloured collars. Killing these foes spawns a key, which you can use to open the dungeons and reveal one of the children in a cell below. From here, all you have to do is bring them back to your base and the multiplier will be added.
10. Use bandages and med-kits sparingly
While plundering settlements and points of interest, you’ll occasionally come across healing items like Bandages or Med-Kits. While these are great ways to save yourself in a pinch, if you’re playing online, you should try to save as many as possible.
Bandages and Med-Kits can be used to resurrect a fellow player when they’ve died, and when you reach the later portions of the game, that’ll be happening a lot. Luckily, you can go down as many times as you like. If another player has a healing item, they can save you. So make sure the stocks are there for emergencies only.

Image credit:Rock Paper Shotgun / Grandma’s Favourite Games
For another little tip here, keep an eye out for a large stone spire that’ll crop up when your fire’s around level 3 or 4. This is the Tools Workshop , and by repairing the giant anvil in its centre, you can craft rare items, including bandages.
11. Get yourself a formidable (and equally adorable) companion
As you adventure, look out for a block of prison cells assembled into an L-shape. Inside these cells, you’ll find the Taming Flute , which allows you to turn wild animals into pets. Find an animal you want to tame (sadly, the big, hungry deer man doesn’t count), aim at them, then click to begin the taming mini-game. When you complete the mini-game, the animal will tell you what it wants in exchange for eternal, undying servitude. It tends to be food, which is incredibly relatable.
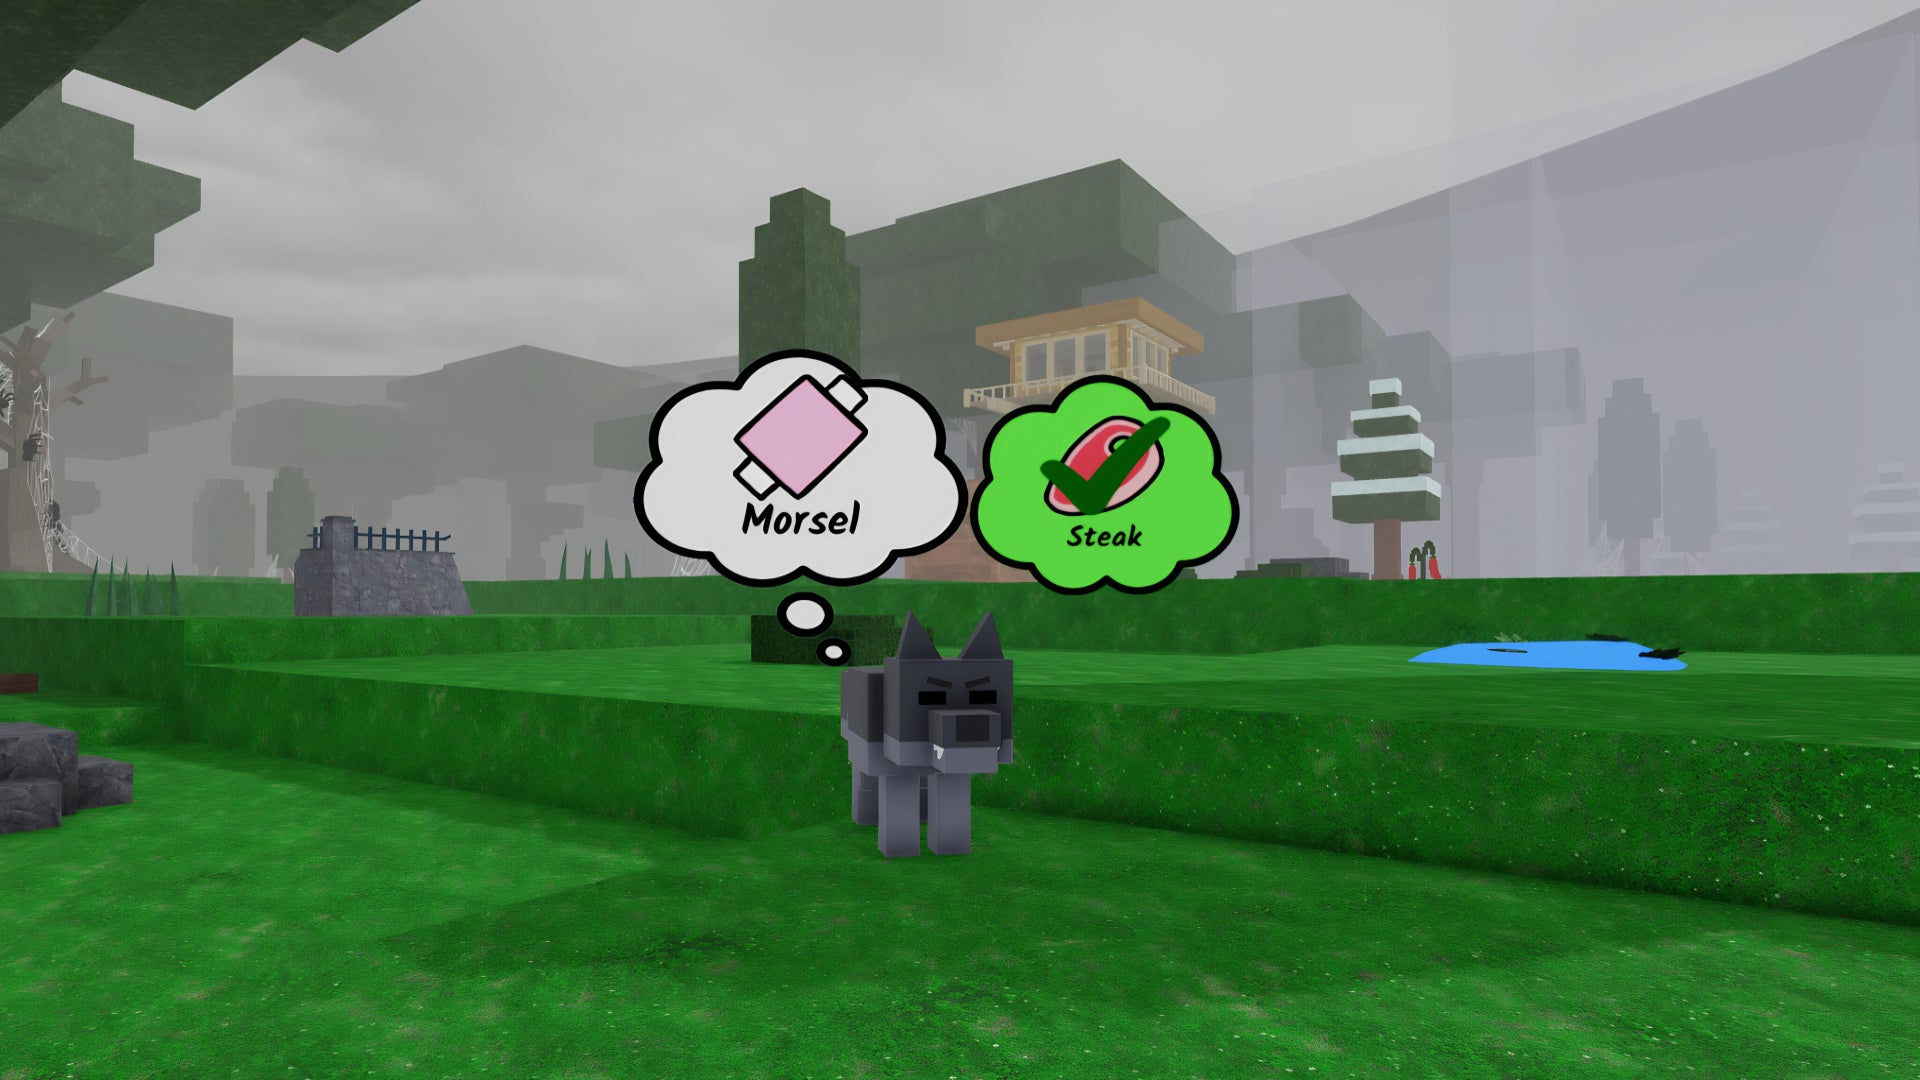
Image credit:Rock Paper Shotgun / Grandma’s Favourite Games
Complete the animal’s request and it’ll become a loyal follower, fighting alongside you as you explore. As for how to upgrade the Taming Flute, you can find a Skills Building somewhere in the map, which you can spot by looking out for a giant brick structure sporting a sign with a hammer and chisel beneath a yellow arrow pointing upwards. Head inside and you’ll come across a workbench where you can upgrade the flute.
And with that, you’re ready to take some new strategies into the forest. If you need some codes to buy a fresh class and bolster your attempts to survive, check out our 99 Nights In The Forest codes page . We’ve got all the latest codes, so you can grab some diamonds to stay suitably prepped to face the terrors that await. Otherwise, you can always check out our official Roblox page for other guides on the platform’s latest and greatest experiences.

99 Nights in the Forest
Android , iOS , PS4 , PS5 , Xbox One , Xbox Series X/S , PC , Mac
Rock Paper Shotgun is better when you sign in
Sign in and join us on our journey to discover strange and compelling PC games.

All 75 Arc Raiders Blueprints and where to get them
These areas have the highest chance of giving you Blueprints

Image credit:Rock Paper Shotgun/Embark Studios

Looking for more Arc Raiders Blueprints? It’s a special day when you find a Blueprint, as they’re among the most valuable items in Arc Raiders. If you find a Blueprint that you haven’t already found, then you must make sure you hold onto it at all costs, because Blueprints are the key to one of the most important and powerful systems of meta-progression in the game.
This guide aims to be the very best guide on Blueprints you can find, starting with a primer on what exactly they are and how they work in Arc Raiders, before delving into exactly where to get Blueprints and the very best farming spots for you to take in your search.
We’ll also go over how to get Blueprints from other unlikely activities, such as destroying Surveyors and completing specific quests. And you’ll also find the full list of all 75 Blueprints in Arc Raiders on this page (including the newest Blueprints added with the Cold Snap update , such as the Deadline Blueprint and Firework Box Blueprint), giving you all the information you need to expand your own crafting repertoire.
In this guide:
- What are Blueprints in Arc Raiders?
- Full Blueprint list: All crafting recipes
- Where to find Blueprints in Arc Raiders Blueprints obtained from quests Blueprints obtained from Trials Best Blueprint farming locations

What are Blueprints in Arc Raiders?
Blueprints in Arc Raiders are special items which, if you manage to extract with them, you can expend to permanently unlock a new crafting recipe in your Workshop. If you manage to extract from a raid with an Anvil Blueprint, for example, you can unlock the ability to craft your very own Anvil Pistol, as many times as you like (as long as you have the crafting materials).
To use a Blueprint, simply open your Inventory while in the lobby, then right-click on the Blueprint and click “Learn And Consume” . This will permanently unlock the recipe for that item in your Workshop. As of the Stella Montis update, there are allegedly 75 different Blueprints to unlock - although only 68 are confirmed to be in the game so far. You can see all the Blueprints you’ve found and unlocked by going to the Workshop menu, and hitting “R” to bring up the Blueprint screen.
It’s possible to find duplicates of past Blueprints you’ve already unlocked. If you find these, then you can either sell them, or - if you like to play with friends - you can take it into a match and gift it to your friend so they can unlock that recipe for themselves. Another option is to keep hold of them until the time comes to donate them to the Expedition.
Full Blueprint list: All crafting recipes
Below is the full list of all the Blueprints that are currently available to find in Arc Raiders, and the crafting recipe required for each item:
| Blueprint | Type | Recipe | Crafted At |
|---|---|---|---|
| Bettina | Weapon | 3x Advanced Mechanical Components 3x Heavy Gun Parts 3x Canister | Gunsmith 3 |
| Blue Light Stick | Quick Use | 3x Chemicals | Utility Station 1 |
| Aphelion | Weapon | 3x Magnetic Accelerator 3x Complex Gun Parts 1x Matriarch Reactor | Gunsmith 3 |
| Combat Mk. 3 (Flanking) | Augment | 2x Advanced Electrical Components 3x Processor | Gear Bench 3 |
| Combat Mk. 3 (Aggressive) | Augment | 2x Advanced Electrical Components 3x Processor | Gear Bench 3 |
| Complex Gun Parts | Material | 2x Light Gun Parts 2x Medium Gun Parts 2x Heavy Gun Parts | Refiner 3 |
| Fireworks Box | Quick Use | 1x Explosive Compound 3x Pop Trigger | Explosives Station 2 |
| Gas Mine | Mine | 4x Chemicals 2x Rubber Parts | Explosives Station 1 |
| Green Light Stick | Quick Use | 3x Chemicals | Utility Station 1 |
| Pulse Mine | Mine | 1x Crude Explosives 1x Wires | Explosives Station 1 |
| Seeker Grenade | Grenade | 1x Crude Explosives 2x ARC Alloy | Explosives Station 1 |
| Looting Mk. 3 (Survivor) | Augment | 2x Advanced Electrical Components 3x Processor | Gear Bench 3 |
| Angled Grip II | Mod | 2x Mechanical Components 3x Duct Tape | Gunsmith 2 |
| Angled Grip III | Mod | 2x Mod Components 5x Duct Tape | Gunsmith 3 |
| Hullcracker | Weapon | 1x Magnetic Accelerator 3x Heavy Gun Parts 1x Exodus Modules | Gunsmith 3 |
| Launcher Ammo | Ammo | 5x Metal Parts 1x Crude Explosives | Workbench 1 |
| Anvil | Weapon | 5x Mechanical Components 5x Simple Gun Parts | Gunsmith 2 |
| Anvil Splitter | Mod | 2x Mod Components 3x Processor | Gunsmith 3 |
| ??? | ??? | ??? | ??? |
| Barricade Kit | Quick Use | 1x Mechanical Components | Utility Station 2 |
| Blaze Grenade | Grenade | 1x Explosive Compound 2x Oil | Explosives Station 3 |
| Bobcat | Weapon | 3x Advanced Mechanical Components 3x Light Gun Parts | Gunsmith 3 |
| Osprey | Weapon | 2x Advanced Mechanical Components 3x Medium Gun Parts 7x Wires | Gunsmith 3 |
| Burletta | Weapon | 3x Mechanical Components 3x Simple Gun Parts | Gunsmith 1 |
| Compensator II | Mod | 2x Mechanical Components 4x Wires | Gunsmith 2 |
| Compensator III | Mod | 2x Mod Components 8x Wires | Gunsmith 3 |
| Defibrillator | Quick Use | 9x Plastic Parts 1x Moss | Medical Lab 2 |
| ??? | ??? | ??? | ??? |
| Equalizer | Weapon | 3x Magnetic Accelerator 3x Complex Gun Parts 1x Queen Reactor | Gunsmith 3 |
| Extended Barrel | Mod | 2x Mod Components 8x Wires | Gunsmith 3 |
| Extended Light Mag II | Mod | 2x Mechanical Components 3x Steel Spring | Gunsmith 2 |
| Extended Light Mag III | Mod | 2x Mod Components 5x Steel Spring | Gunsmith 3 |
| Extended Medium Mag II | Mod | 2x Mechanical Components 3x Steel Spring | Gunsmith 2 |
| Extended Medium Mag III | Mod | 2x Mod Components 5x Steel Spring | Gunsmith 3 |
| Extended Shotgun Mag II | Mod | 2x Mechanical Components 3x Steel Spring | Gunsmith 2 |
| Extended Shotgun Mag III | Mod | 2x Mod Components 5x Steel Spring | Gunsmith 3 |
| Remote Raider Flare | Quick Use | 2x Chemicals 4x Rubber Parts | Utility Station 1 |
| Heavy Gun Parts | Material | 4x Simple Gun Parts | Refiner 2 |
| Venator | Weapon | 2x Advanced Mechanical Components 3x Medium Gun Parts 5x Magnet | Gunsmith 3 |
| Il Toro | Weapon | 5x Mechanical Components 6x Simple Gun Parts | Gunsmith 1 |
| Jolt Mine | Mine | 1x Electrical Components 1x Battery | Explosives Station 2 |
| Explosive Mine | Mine | 1x Explosive Compound 1x Sensors | Explosives Station 3 |
| Jupiter | Weapon | 3x Magnetic Accelerator 3x Complex Gun Parts 1x Queen Reactor | Gunsmith 3 |
| Light Gun Parts | Material | 4x Simple Gun Parts | Refiner 2 |
| Lightweight Stock | Mod | 2x Mod Components 5x Duct Tape | Gunsmith 3 |
| Lure Grenade | Grenade | 1x Speaker Component 1x Electrical Components | Utility Station 2 |
| Medium Gun Parts | Material | 4x Simple Gun Parts | Refiner 2 |
| Torrente | Weapon | 2x Advanced Mechanical Components 3x Medium Gun Parts 6x Steel Spring | Gunsmith 3 |
| Muzzle Brake II | Mod | 2x Mechanical Components 4x Wires | Gunsmith 2 |
| Muzzle Brake III | Mod | 2x Mod Components 8x Wires | Gunsmith 3 |
| Padded Stock | Mod | 2x Mod Components 5x Duct Tape | Gunsmith 3 |
| Shotgun Choke II | Mod | 2x Mechanical Components 4x Wires | Gunsmith 2 |
| Shotgun Choke III | Mod | 2x Mod Components 8x Wires | Gunsmith 3 |
| Shotgun Silencer | Mod | 2x Mod Components 8x Wires | Gunsmith 3 |
| Showstopper | Grenade | 1x Advanced Electrical Components 1x Voltage Converter | Explosives Station 3 |
| Silencer I | Mod | 2x Mechanical Components 4x Wires | Gunsmith 2 |
| Silencer II | Mod | 2x Mod Components 8x Wires | Gunsmith 3 |
| Snap Hook | Quick Use | 2x Power Rod 3x Rope 1x Exodus Modules | Utility Station 3 |
| Stable Stock II | Mod | 2x Mechanical Components 3x Duct Tape | Gunsmith 2 |
| Stable Stock III | Mod | 2x Mod Components 5x Duct Tape | Gunsmith 3 |
| Tagging Grenade | Grenade | 1x Electrical Components 1x Sensors | Utility Station 3 |
| Tempest | Weapon | 3x Advanced Mechanical Components 3x Medium Gun Parts 3x Canister | Gunsmith 3 |
| Trigger Nade | Grenade | 2x Crude Explosives 1x Processor | Explosives Station 2 |
| Vertical Grip II | Mod | 2x Mechanical Components 3x Duct Tape | Gunsmith 2 |
| Vertical Grip III | Mod | 2x Mod Components 5x Duct Tape | Gunsmith 3 |
| Vita Shot | Quick Use | 2x Antiseptic 1x Syringe | Medical Lab 3 |
| Vita Spray | Quick Use | 3x Antiseptic 1x Canister | Medical Lab 3 |
| Vulcano | Weapon | 1x Magnetic Accelerator 3x Heavy Gun Parts 1x Exodus Modules | Gunsmith 3 |
| Wolfpack | Grenade | 2x Explosive Compound 2x Sensors | Explosives Station 3 |
| Red Light Stick | Quick Use | 3x Chemicals | Utility Station 1 |
| Smoke Grenade | Grenade | 14x Chemicals 1x Canister | Utility Station 2 |
| Deadline | Mine | 3x Explosive Compound 2x ARC Circuitry | Explosives Station 3 |
| Trailblazer | Grenade | 1x Explosive Compound 1x Synthesized Fuel | Explosives Station 3 |
| Tactical Mk. 3 (Defensive) | Augment | 2x Advanced Electrical Components 3x Processor | Gear Bench 3 |
| Tactical Mk. 3 (Healing) | Augment | 2x Advanced Electrical Components 3x Processor | Gear Bench 3 |
| Yellow Light Stick | Quick Use | 3x Chemicals | Utility Station 1 |
Note: The missing Blueprints in this list likely have not actually been added to the game at the time of writing, because none of the playerbase has managed to find any of them. As they are added to the game, I will update this page with the most relevant information so you know exactly how to get all 75 Arc Raiders Blueprints.
Where to find Blueprints in Arc Raiders
Below is a list of all containers, modifiers, and events which maximise your chances of finding Blueprints:
- Certain quests reward you with specific Blueprints .
- Completing Trials has a high chance of offering Blueprints as rewards.
- Surveyors have a decent chance of dropping Blueprints on death.
- High loot value areas tend to have a greater chance of spawning Blueprints.
- Night Raids and Storms may increase rare Blueprint spawn chances in containers.
- Containers with higher numbers of items may have a higher tendency to spawn Blueprints. As a result, Blue Gate (which has many “large” containers containing multiple items) may give you a higher chance of spawning Blueprints.
- Raider containers (Raider Caches, Weapon Boxes, Medical Bags, Grenade Tubes) have increased Blueprint drop rates. As a result, the Uncovered Caches event gives you a high chance of finding Blueprints.
- Security Lockers have a higher than average chance of containing Blueprints.
- Certain Blueprints only seem to spawn under specific circumstances: Tempest Blueprint only spawns during Night Raid events. Vulcano Blueprint only spawns during Hidden Bunker events. Jupiter and Equaliser Blueprints only spawn during Harvester events.

Raider Caches, Weapon Boxes, and other raider-oriented container types have a good chance of offering Blueprints. |Image credit:Rock Paper Shotgun/Embark Studios
Blueprints have a very low chance of spawning in any container in Arc Raiders, around 1-2% on average. However, there is a higher chance of finding Blueprints in particular container types. Specifically, you can find more Blueprints in Raider containers and security lockers.
Beyond this, if you’re looking for Blueprints you should focus on regions of the map which are marked as having particularly high-value loot. Areas such as the Control Tower in Dam Battlegrounds, the Arrival and Departure Buildings in Spaceport, and Pilgrim’s Peak in Blue Gate all have a better-than-average chance of spawning Blueprints somewhere amongst all their containers. Night Raids and Electromagnetic Storm events also increase the drop chances of certain Blueprints .
In addition to these containers, you can often loot Blueprints from destroyed Surveyors - the largest of the rolling ball ARC. Surveyors are more commonly found on the later maps - Spaceport and Blue Gate - and if one spawns in your match, you’ll likely see it by the blue laser beam that it casts into the sky while “surveying”.
Surveyors are quite well-armoured and will very speedily run away from you once it notices you, but if you can take one down then make sure you loot all its parts for a chance of obtaining certain unusual Blueprints.
Blueprints obtained from quests
One way in which you can get Blueprints is by completing certain quests for the vendors in Speranza. Some quests will reward you with a specific item Blueprint upon completion, so as long as you work through all the quests in Arc Raiders, you are guaranteed those Blueprints.
Here is the full list of all Blueprints you can get from quest rewards:
- Trigger Nade Blueprint: Rewarded after completing “Sparks Fly”.
- Lure Grenade Blueprint: Rewarded after completing “Greasing Her Palms”.
- Burletta Blueprint: Rewarded after completing “Industrial Espionage”.
- Hullcracker Blueprint (and Launcher Ammo Blueprint): Rewarded after completing “The Major’s Footlocker”.
Alas, that’s only 4 Blueprints out of a total of 75 to unlock, so for the vast majority you will need to find them yourself during a raid. If you’re intent on farming Blueprints, then it’s best to equip yourself with cheap gear in case you lose it, but don’t use a free loadout because then you won’t get a safe pocket to stash any new Blueprint you find. No pain in Arc Raiders is sharper than failing to extract with a new Blueprint you’ve been after for a dozen hours already.

One of the best ways to get Blueprints is by hitting three stars on all five Trials every week. |Image credit:Rock Paper Shotgun/Embark Studios
Blueprints obtained from Trials
One of the very best ways to get Blueprints is as rewards for completing Trials in Arc Raiders. Trials are unlocked from Level 15 onwards, and allow you to earn rewards by focusing on certain tasks over the course of several raids. For example, one Trial might task you with dealing damage to Hornets, while another might challenge you to loot Supply Drops.
Trials refresh on a weekly basis, with a new week bringing five new Trials. Each Trial can offer up to three rewards after passing certain score milestones, and it’s possible to receive very high level loot from these reward crates - including Blueprints. So if you want to unlock as many Blueprints as possible, you should make a point of completing as many Trials as possible each week.
Best Blueprint farming locations
The very best way to get Blueprints is to frequent specific areas of the maps which combine high-tier loot pools with the right types of containers to search. Here are my recommendations for where to find Blueprints on every map, so you can always keep the search going for new crafting recipes to unlock.

Image credit:Rock Paper Shotgun/Embark Studios
Dam Battlegrounds
The best places to farm Blueprints on Dam Battlegrounds are the Control Tower, Power Generation Complex, Ruby Residence, and Pale Apartments . The first two regions, despite only being marked on the map as mid-tier loot, contain a phenomenal number of containers to loot. The Control Tower can also contain a couple of high-tier Security Lockers - though of course, you’ll need to have unlocked the Security Breach skill at the end of the Survival tree.
There’s also a lot of reporting amongst the playerbase that the Residential areas in the top-left of the map - Pale Apartments and Ruby Residence - give you a comparatively strong chance of finding Blueprints. Considering their size, there’s a high density of containers to loot in both locations, and they also have the benefit of being fairly out of the way. So you’re more likely to have all the containers to yourself.
Buried City
The best Blueprint farming locations on Buried City are the Santa Maria Houses, Grandioso Apartments, Town Hall, and the various buildings of the New District . Grandioso Apartments has a lower number of containers than the rest, but a high chance of spawning weapon cases - which have good Blueprint drop rates. The others are high-tier loot areas, with plenty of lootable containers - including Security Lockers.
Spaceport
The best places to find Blueprints on Spaceport are the Arrival and Departure Buildings, as well as Control Tower A6 and the Launch Towers . All these areas are labelled as high-value loot regions, and many of them are also very handily connected to one another by the Spaceport wall, which you can use to quickly run from one area to the next. At the tops of most of these buildings you’ll find at least one Security Locker, so this is an excellent farming route for players looking to find Blueprints.
The downside to looting Blueprints on Spaceport is that all these areas are hotly contested, particularly in Duos and Squads. You’ll need to be very focused and fast in order to complete the full farming route.

Image credit:Rock Paper Shotgun/Embark Studios
Blue Gate
Blue Gate tends to have a good chance of dropping Blueprints, potentially because it generally has a high number of containers which can hold lots of items; so there’s a higher chance of a Blueprint spawning in each container. In my experience, the best Blueprint farming spots on Blue Gate are Pilgrim’s Peak, Raider’s Refuge, the Ancient Fort, and the Underground Complex beneath the Warehouse .
All of these areas contain a wealth of containers to loot. Raider’s Refuge has less to loot, but the majority of the containers in and around the Refuge are raider containers, which have a high chance of containing Blueprints - particularly during major events.
Stella Montis
On the whole, Stella Montis seems to have a very low drop rate for Blueprints (though a high chance of dropping other high-tier loot). If you do want to try farming Blueprints on this map, the best places to find Blueprints in Stella Montis are Medical Research, Assembly Workshop, and the Business Center . These areas have the highest density of containers to loot on the map.
In addition to this, the Western Tunnel has a few different Security Lockers to loot, so while there’s very little to loot elsewhere in this area of the map, it’s worth hitting those Security Lockers if you spawn there at the start of a match.
That wraps up this primer on how to get all the Blueprints in Arc Raiders as quickly as possible. With the Expedition system constantly resetting a large number of players’ Blueprints, it’s more important than ever to have the most up-to-date information on where to find all these Blueprints.
While you’re here, be sure to check out our Arc Raiders best guns tier list , as well as our primers on the best skills to unlock and all the different Field Depot locations on every map.

ARC Raiders
PS5 , Xbox Series X/S , PC
Rock Paper Shotgun is better when you sign in
Sign in and join us on our journey to discover strange and compelling PC games.
