7 Dos and 7 Don’ts in 7 Days To Die
A sorta review

Image credit:Rock Paper Shotgun / The Fun Pimps

You’re a long time undead. 7 Days To Die was shuffling along in early access for 11 years, until version 1.0 finally burst through the windows . In that time, many other survival games have sprouted, blossomed, and gently faded away. I first visited the burnt-out ruins of this zombie-infested world a decade ago and I returned to it this week to find a tree-puncher that, despite bearing the pockmarks of early access, retains much of what made it enjoyable back when the survival genre was still wearing its baby onesie. Instead of a review, I figured I’d scribble together a mini starter guide for new (or returning) players. Partly because the game is a proper time sink and it was taking me so long to get through everything. But mostly because I wanted to use that numberful headline. So, here you go: 7 dos and 7 don’ts in 7 Days To (7) Die.

Don’t expect a revolution in survival game tropes
If you’ve been gaming at all in the past decade, you know how this is going to go. Hunger meters, angry mobs, inexplicable crafting logic - it’s all there, partly because this game was among the first to embrace the traditions of the genre. Yes, a lot has been added to the zombiethon during its lifetime (graphical overhauls, skill trees, moddable weapons, trading outposts) but the moment-to-moment scavenging feels the same, and the heart of the game has not truly changed. That said, it’s a stout heart…
Do embrace the nomad’s life
The core fantasy is intact. You’re here to find a home, fortify it against bitey bois, survive there for as long as you can, then inevitably lose everything to a nightmarish horde before abandoning it and moving on to the next place. 7 Days makes zombies into a form of weather, translating the post-disaster itinerancy of TV shows like The Walking Dead (from camp to farm to prison to town) into something you can play alone or with buddies. None of that is new to the game, like I say. It had the exact same appeal in 2013. But you know what? It felt good back then to travel the roads, searching for a new place to rest your bones, and it feels even better today, for reasons I’ll go into shortly.

Image credit:Rock Paper Shotgun / The Fun Pimps
Don’t worry about death
When you croak it, you’re given the options to respawn either back at the last place you camped, or near your place of death. By default a death means losing some XP (used to invest in skills) but there’s a point at which even this bottoms out, and the penalty won’t apply. In some cases (depending on difficulty) death can be weirdly helpful, as it can completely clear whatever status ailments you have. It’s basically Minecraft rules, immortality with a little wrist slap. So unless you’re playing in permadeath mode, let go of your fear and get dangerous.
Do worry about water
And food too. Not because thirst and hunger will lead to the mild annoyance of death, but because these health conditions cause your stamina to regenerate at a slower rate. That means you get tired much quicker when stabbing zombos. This is plain annoying. Most of my deaths could have been avoided if I’d been fully watered when a crowd of rotfolk decided to descend upon me. Nothing hurts more than your pride when you’re too knackered and thirsty to even swing a baseball bat.
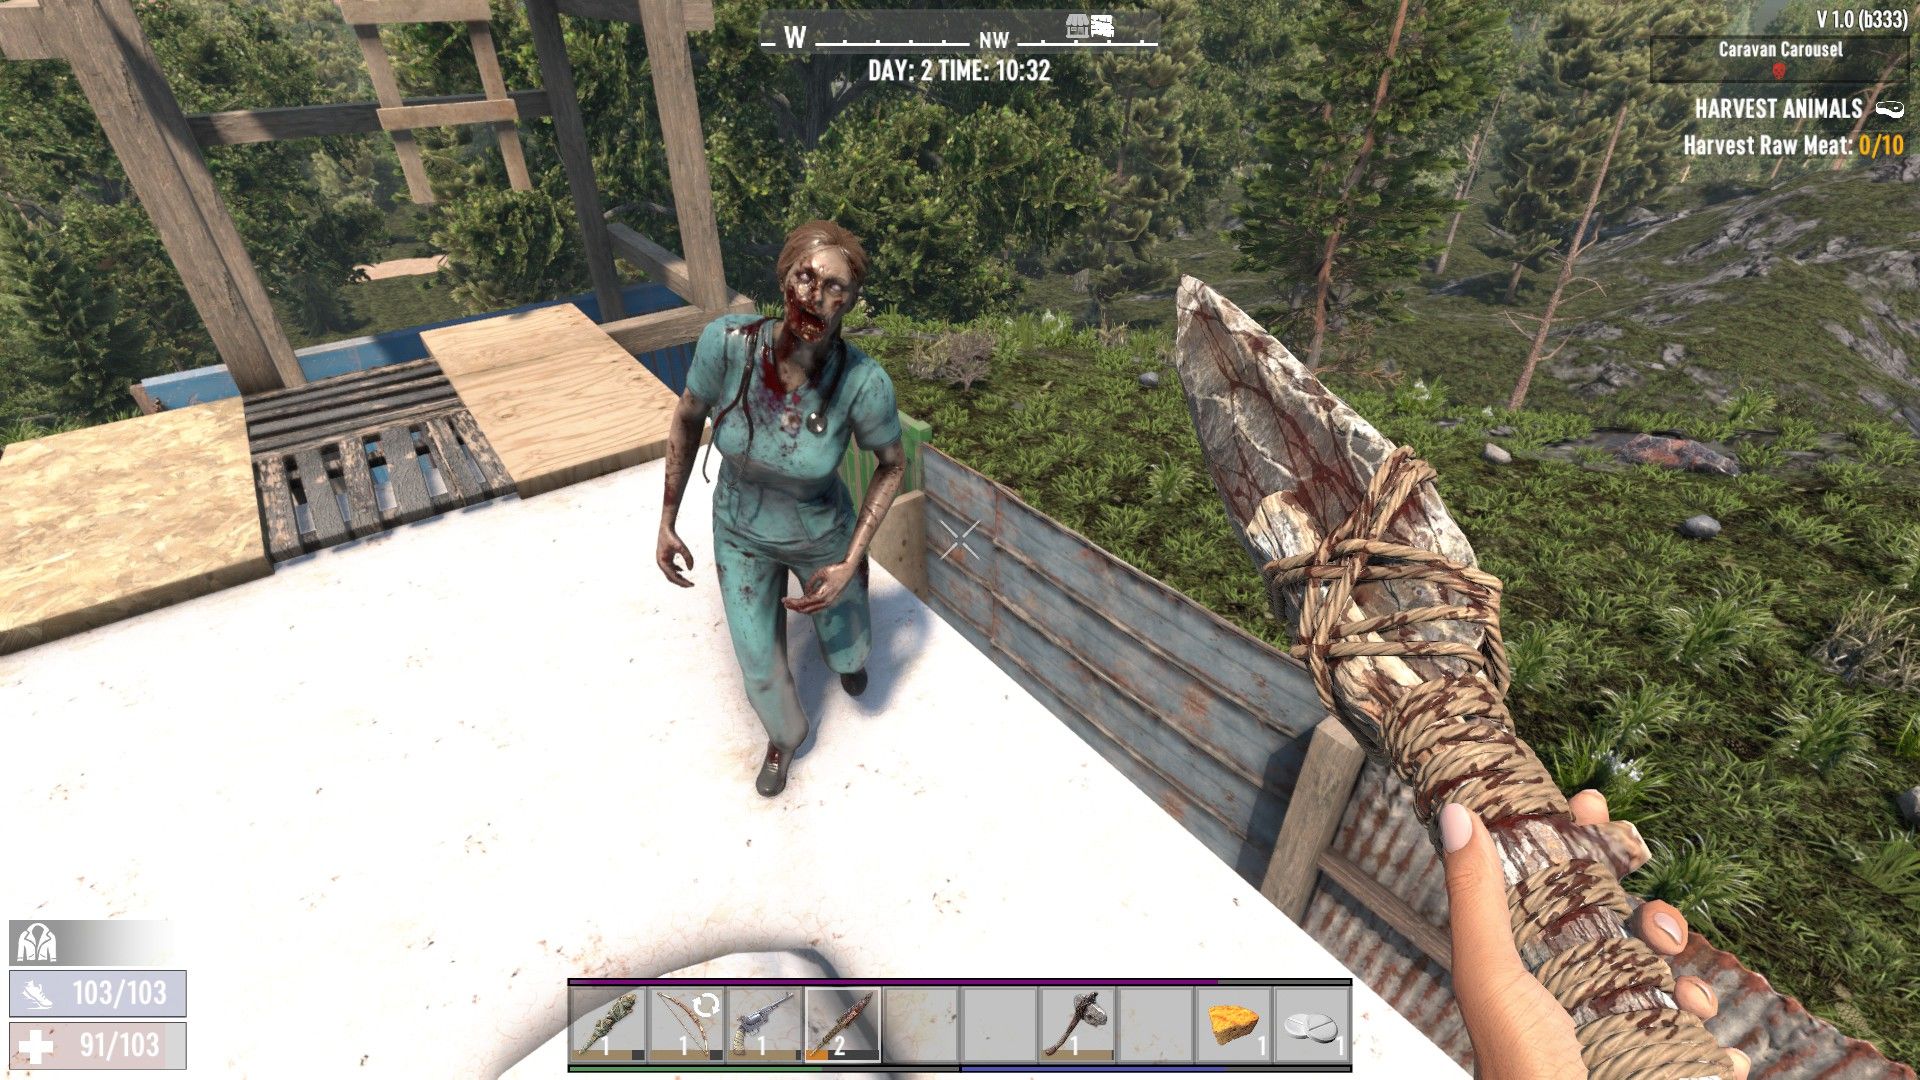
Image credit:Rock Paper Shotgun / The Fun Pimps
Don’t bust it down to easy too quickly
There is a tension in every survival game. The creative home-builder in you wants to faff around with the crafting systems and make yourself a grand hideout. Meanwhile, the game world wants to poke and prod at you with obstacles, and leave you slowly bleeding out. In 7 Days, that obstacle is not just hunger or infection but the constant random spawning of classic Romero corpsedorks. They do not want you to do stuff. A gnawing possibility arises: why not bust it down to the easiest preset difficulty setting? They will die faster, move slower, and you can build more, uninterrupted. Wait! Not yet. The tension is by design. Removing some frictional zombie teeth will make it seem the game is “respecting” your time (as I’ve mentioned it’s a real clock sucker). But if you do make it easier, know that some of that important tension will drain away in return. Which brings us to the next point.
Do play around with the difficulty options
7 Days is surprisingly generous when it comes to building out your own custom difficulty. You can double the rate at which you earn XP, for example, but crank up the speed of zombies. You can demand an airdrop of supplies every day and triple the amount of damage you do to building blocks, but then increase the damage zombies do to your fort’s walls as well. In some ways this many options can be overwhelming. You can always just go with a preset difficulty. But I found playing around has let me make a world that jabs at me in juuust the right ways. Everyone has a microscopically different expectation of what “difficulty” means in a survival game, with all its contracting meters and bodily hazards. (The human metabolism isn’t consistent from person to person in real life, why would an abstraction of our endless burger desire be universally accepted?) So go crazy. Fiddle with the options until you find some balance between harm and helpfulness that works for you.

Image credit:Rock Paper Shotgun / The Fun Pimps
Don’t hang out with traders
Traders were added to the game a few years after it initially appeared, and they’ve grown from simple salespeople into ravenous quest givers with large settlements all their own. Unfortunately, these freakishly resourceful folks completely eradicate the sensation of being alone against the odds in the wasteland. I shot the first trader I met in the head with a hastily crafted pistol, only to learn they are also invulnerable. They are holed up in their fortresses, overstocked with every good imaginable, yet eminently unrobbable. In a post-apocalyptic zombie game, it not only feels weird that such people exist, but equally bizarre that you cannot simply commit acts of grand banditry against them. My advice? After the tutorial, ignore them as much as possible. Snub these invincible jerks. Or, even better, mod them out of the game completely!
Do shop around for a good location
There’s a saying in chess: “look for a good move, then find a better one”. This too applies to moving home in 7 Days. It is like any good property development TV show. Find a battered fixer-upper with tons of potential, and make it your own. Ah, a farmhouse with an adjacent barn. Wouldn’t this look lovely with a moat, darling? Oh look, a cosy camp of caravans in the hills. Wouldn’t this be wonderful if we surrounded it with artisanal spikes and land mines? The only caveat, of course, is that your beautiful new home will then attract plenty of, ahem, “prospective buyers” who will destroy everything in sight. At which point, you move onto the next place. It’s a strange property ladder, yes. But one that is bursting with newly added building types since the game’s earliest days. Movie theatres, hotels, military outposts, high schools… Explore early and often to find the best place to settle down (easily defensible, close to a water source, unobstructed views of the surrounding landscape). Take your time. Here, home ownership is eminently achievable, with enough violence.
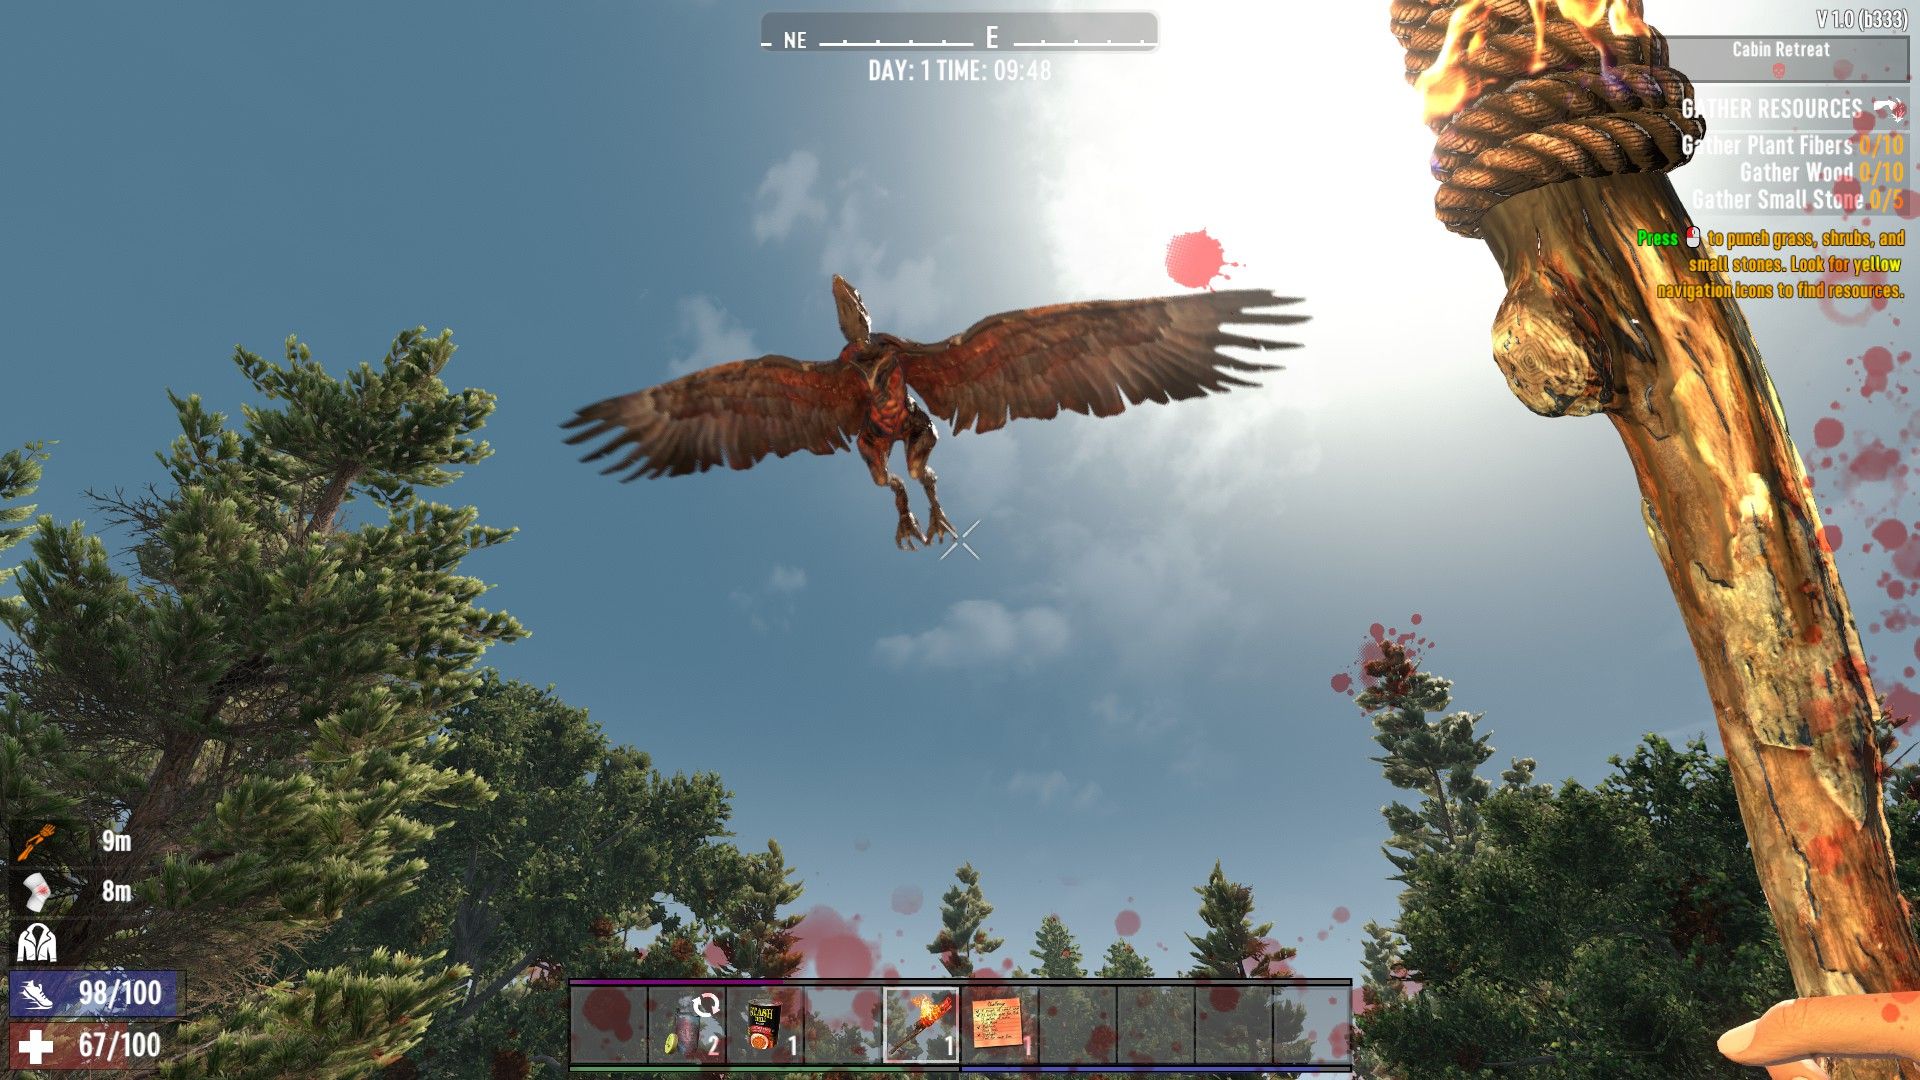
Image credit:Rock Paper Shotgun / The Fun Pimps
Don’t forget the blood moon
Game’s called 7 Days To Die for a reason. Every week a big horde will sweep through your locale on the night of a blood moon (you can also change this to every 14 days in the difficulty settings). The swarm is constant, a bumbling mass of decaying jackasses from dusk ’til dawn. Mostly, this is solved by stockpiling as much ammunition as possible, and building barricades that will give you the time to potshot every groaning cadaver with patient resolve. But reaching this level of preparedness isn’t easy. Which makes my next point a pill you’ll have to swallow.
Do follow the tutorial challenges
I know nobody wants to go to school during the apocalypse. But eleven years of early access have left a mark on the game’s tutorialising, which is a hodgepodge of UI text splashed in menus, alongside (genuinely useful) tooltips to read as your world loads. It’s not overly cohesive. But! The challenges tab gives you bite-sized crafting quests that will give you an idea of the web of items on offer. It’s a crafting game, after all, and that means even seemingly simple things demand a spaghetti of prerequisites. If you don’t want to learn another survival game’s opaque logic (bones make glue and glue makes duct tape) then I don’t know what you’re doing here. But if you’re determined to adapt to your cozy, zombie-spearing life, the tutorial challenges provide a curriculum that will improve your odds.

Image credit:Rock Paper Shotgun / The Fun Pimps
Don’t be afraid of a little dysentery
Unless you’re playing on some hardcore modes, the dangers of drinking “murky water” are not so bad. Every uncooked item and slurp of unboiled water carries with it a percentage chance to give you gut problems. And if you do get a case of the ol’ speedshits, it will be clearly denoted on-screen by a small symbol of a sad bum doing a poo. Wonderful. But you should know that ordinary thirst is a worse enemy. In other words, sip freely from the pool of water in that zombie-infested bathhouse. It’s the only source of hydration for miles around. Drink up, and ignore the gagging sound effects of your character as they struggle to keep it down. They’re fine.
Do watch out for traps
Despite being a game offering procedurally generated worlds, the developers have created many locations as pre-built “points of interest”. A nice surprise is that each farm, hardware store, apartment block, and hospital can have its jump scares and secrets, the designers revealing an enjoyment for undead pranks. There are monster closet moments, often literally, as zombies hide in wardrobes and toilet cubicles only to burst out while you’re rummaging through kitchen cabinets for canned food. There are floors that collapse from underneath you and snakes lurking in the garden grass. Not only that, but many places have hints of bespoke environmental storytelling. Half-dug graves, boarded up windows, a lonely noose hanging from the rafters. I didn’t expect touches like these in a rando-gen survival game, and they go a long way to building the atmosphere.

Image credit:Rock Paper Shotgun / The Fun Pimps
Don’t take mercy on a coyote thinking that, because it ran away after being clubbed once, it is only a sort of “misunderstood puppy” and not, in fact, an obnoxious little terrorist who will chew on your ankles in the middle of a tense fight with some zombies, getting you killed in the process, the wee bastard
These dogs do not deserve to go to heaven. There, I said it.
Do go looking for antibiotics if you’re infected
Not because you necessarily need them (at least, I didn’t - the quickest way for me to lose this status was to simply die and respawn). But because it all adds to the fantasy. 7 Days is at its best when you fully step into the role of a put-upon wasteland loser. This means making your own goals on the hoof, and what better way to start a classic zombie story than “I got infected and went looking for pills”. This applies to all the needs and wants of the game. The challenges will teach you how to play and give you a checklist of stuff to try. But in the end you will get more out of the survivalist rambler once you start carving your own path. Build a fort on a lake and panic when you discover zombies can swim. Spot a desert and decide to cross it in search of a new biome. Pump all your resources into a machine gun and save it for the ceaseless horde of the blood moon (then gulp with embarassment when you run out of ammo in the first 60 seconds of shooting). Past all the early access stretchmarks, 7 Days remains a game about finding freedom in a pressure cooker. Turn the heat up, and enjoy it.

7 Days To Die
PS4 , Xbox One , PC , Mac
Rock Paper Shotgun is better when you sign in
Sign in and join us on our journey to discover strange and compelling PC games.

All 75 Arc Raiders Blueprints and where to get them
These areas have the highest chance of giving you Blueprints

Image credit:Rock Paper Shotgun/Embark Studios

Looking for more Arc Raiders Blueprints? It’s a special day when you find a Blueprint, as they’re among the most valuable items in Arc Raiders. If you find a Blueprint that you haven’t already found, then you must make sure you hold onto it at all costs, because Blueprints are the key to one of the most important and powerful systems of meta-progression in the game.
This guide aims to be the very best guide on Blueprints you can find, starting with a primer on what exactly they are and how they work in Arc Raiders, before delving into exactly where to get Blueprints and the very best farming spots for you to take in your search.
We’ll also go over how to get Blueprints from other unlikely activities, such as destroying Surveyors and completing specific quests. And you’ll also find the full list of all 75 Blueprints in Arc Raiders on this page (including the newest Blueprints added with the Cold Snap update , such as the Deadline Blueprint and Firework Box Blueprint), giving you all the information you need to expand your own crafting repertoire.
In this guide:
- What are Blueprints in Arc Raiders?
- Full Blueprint list: All crafting recipes
- Where to find Blueprints in Arc Raiders Blueprints obtained from quests Blueprints obtained from Trials Best Blueprint farming locations

What are Blueprints in Arc Raiders?
Blueprints in Arc Raiders are special items which, if you manage to extract with them, you can expend to permanently unlock a new crafting recipe in your Workshop. If you manage to extract from a raid with an Anvil Blueprint, for example, you can unlock the ability to craft your very own Anvil Pistol, as many times as you like (as long as you have the crafting materials).
To use a Blueprint, simply open your Inventory while in the lobby, then right-click on the Blueprint and click “Learn And Consume” . This will permanently unlock the recipe for that item in your Workshop. As of the Stella Montis update, there are allegedly 75 different Blueprints to unlock - although only 68 are confirmed to be in the game so far. You can see all the Blueprints you’ve found and unlocked by going to the Workshop menu, and hitting “R” to bring up the Blueprint screen.
It’s possible to find duplicates of past Blueprints you’ve already unlocked. If you find these, then you can either sell them, or - if you like to play with friends - you can take it into a match and gift it to your friend so they can unlock that recipe for themselves. Another option is to keep hold of them until the time comes to donate them to the Expedition.
Full Blueprint list: All crafting recipes
Below is the full list of all the Blueprints that are currently available to find in Arc Raiders, and the crafting recipe required for each item:
| Blueprint | Type | Recipe | Crafted At |
|---|---|---|---|
| Bettina | Weapon | 3x Advanced Mechanical Components 3x Heavy Gun Parts 3x Canister | Gunsmith 3 |
| Blue Light Stick | Quick Use | 3x Chemicals | Utility Station 1 |
| Aphelion | Weapon | 3x Magnetic Accelerator 3x Complex Gun Parts 1x Matriarch Reactor | Gunsmith 3 |
| Combat Mk. 3 (Flanking) | Augment | 2x Advanced Electrical Components 3x Processor | Gear Bench 3 |
| Combat Mk. 3 (Aggressive) | Augment | 2x Advanced Electrical Components 3x Processor | Gear Bench 3 |
| Complex Gun Parts | Material | 2x Light Gun Parts 2x Medium Gun Parts 2x Heavy Gun Parts | Refiner 3 |
| Fireworks Box | Quick Use | 1x Explosive Compound 3x Pop Trigger | Explosives Station 2 |
| Gas Mine | Mine | 4x Chemicals 2x Rubber Parts | Explosives Station 1 |
| Green Light Stick | Quick Use | 3x Chemicals | Utility Station 1 |
| Pulse Mine | Mine | 1x Crude Explosives 1x Wires | Explosives Station 1 |
| Seeker Grenade | Grenade | 1x Crude Explosives 2x ARC Alloy | Explosives Station 1 |
| Looting Mk. 3 (Survivor) | Augment | 2x Advanced Electrical Components 3x Processor | Gear Bench 3 |
| Angled Grip II | Mod | 2x Mechanical Components 3x Duct Tape | Gunsmith 2 |
| Angled Grip III | Mod | 2x Mod Components 5x Duct Tape | Gunsmith 3 |
| Hullcracker | Weapon | 1x Magnetic Accelerator 3x Heavy Gun Parts 1x Exodus Modules | Gunsmith 3 |
| Launcher Ammo | Ammo | 5x Metal Parts 1x Crude Explosives | Workbench 1 |
| Anvil | Weapon | 5x Mechanical Components 5x Simple Gun Parts | Gunsmith 2 |
| Anvil Splitter | Mod | 2x Mod Components 3x Processor | Gunsmith 3 |
| ??? | ??? | ??? | ??? |
| Barricade Kit | Quick Use | 1x Mechanical Components | Utility Station 2 |
| Blaze Grenade | Grenade | 1x Explosive Compound 2x Oil | Explosives Station 3 |
| Bobcat | Weapon | 3x Advanced Mechanical Components 3x Light Gun Parts | Gunsmith 3 |
| Osprey | Weapon | 2x Advanced Mechanical Components 3x Medium Gun Parts 7x Wires | Gunsmith 3 |
| Burletta | Weapon | 3x Mechanical Components 3x Simple Gun Parts | Gunsmith 1 |
| Compensator II | Mod | 2x Mechanical Components 4x Wires | Gunsmith 2 |
| Compensator III | Mod | 2x Mod Components 8x Wires | Gunsmith 3 |
| Defibrillator | Quick Use | 9x Plastic Parts 1x Moss | Medical Lab 2 |
| ??? | ??? | ??? | ??? |
| Equalizer | Weapon | 3x Magnetic Accelerator 3x Complex Gun Parts 1x Queen Reactor | Gunsmith 3 |
| Extended Barrel | Mod | 2x Mod Components 8x Wires | Gunsmith 3 |
| Extended Light Mag II | Mod | 2x Mechanical Components 3x Steel Spring | Gunsmith 2 |
| Extended Light Mag III | Mod | 2x Mod Components 5x Steel Spring | Gunsmith 3 |
| Extended Medium Mag II | Mod | 2x Mechanical Components 3x Steel Spring | Gunsmith 2 |
| Extended Medium Mag III | Mod | 2x Mod Components 5x Steel Spring | Gunsmith 3 |
| Extended Shotgun Mag II | Mod | 2x Mechanical Components 3x Steel Spring | Gunsmith 2 |
| Extended Shotgun Mag III | Mod | 2x Mod Components 5x Steel Spring | Gunsmith 3 |
| Remote Raider Flare | Quick Use | 2x Chemicals 4x Rubber Parts | Utility Station 1 |
| Heavy Gun Parts | Material | 4x Simple Gun Parts | Refiner 2 |
| Venator | Weapon | 2x Advanced Mechanical Components 3x Medium Gun Parts 5x Magnet | Gunsmith 3 |
| Il Toro | Weapon | 5x Mechanical Components 6x Simple Gun Parts | Gunsmith 1 |
| Jolt Mine | Mine | 1x Electrical Components 1x Battery | Explosives Station 2 |
| Explosive Mine | Mine | 1x Explosive Compound 1x Sensors | Explosives Station 3 |
| Jupiter | Weapon | 3x Magnetic Accelerator 3x Complex Gun Parts 1x Queen Reactor | Gunsmith 3 |
| Light Gun Parts | Material | 4x Simple Gun Parts | Refiner 2 |
| Lightweight Stock | Mod | 2x Mod Components 5x Duct Tape | Gunsmith 3 |
| Lure Grenade | Grenade | 1x Speaker Component 1x Electrical Components | Utility Station 2 |
| Medium Gun Parts | Material | 4x Simple Gun Parts | Refiner 2 |
| Torrente | Weapon | 2x Advanced Mechanical Components 3x Medium Gun Parts 6x Steel Spring | Gunsmith 3 |
| Muzzle Brake II | Mod | 2x Mechanical Components 4x Wires | Gunsmith 2 |
| Muzzle Brake III | Mod | 2x Mod Components 8x Wires | Gunsmith 3 |
| Padded Stock | Mod | 2x Mod Components 5x Duct Tape | Gunsmith 3 |
| Shotgun Choke II | Mod | 2x Mechanical Components 4x Wires | Gunsmith 2 |
| Shotgun Choke III | Mod | 2x Mod Components 8x Wires | Gunsmith 3 |
| Shotgun Silencer | Mod | 2x Mod Components 8x Wires | Gunsmith 3 |
| Showstopper | Grenade | 1x Advanced Electrical Components 1x Voltage Converter | Explosives Station 3 |
| Silencer I | Mod | 2x Mechanical Components 4x Wires | Gunsmith 2 |
| Silencer II | Mod | 2x Mod Components 8x Wires | Gunsmith 3 |
| Snap Hook | Quick Use | 2x Power Rod 3x Rope 1x Exodus Modules | Utility Station 3 |
| Stable Stock II | Mod | 2x Mechanical Components 3x Duct Tape | Gunsmith 2 |
| Stable Stock III | Mod | 2x Mod Components 5x Duct Tape | Gunsmith 3 |
| Tagging Grenade | Grenade | 1x Electrical Components 1x Sensors | Utility Station 3 |
| Tempest | Weapon | 3x Advanced Mechanical Components 3x Medium Gun Parts 3x Canister | Gunsmith 3 |
| Trigger Nade | Grenade | 2x Crude Explosives 1x Processor | Explosives Station 2 |
| Vertical Grip II | Mod | 2x Mechanical Components 3x Duct Tape | Gunsmith 2 |
| Vertical Grip III | Mod | 2x Mod Components 5x Duct Tape | Gunsmith 3 |
| Vita Shot | Quick Use | 2x Antiseptic 1x Syringe | Medical Lab 3 |
| Vita Spray | Quick Use | 3x Antiseptic 1x Canister | Medical Lab 3 |
| Vulcano | Weapon | 1x Magnetic Accelerator 3x Heavy Gun Parts 1x Exodus Modules | Gunsmith 3 |
| Wolfpack | Grenade | 2x Explosive Compound 2x Sensors | Explosives Station 3 |
| Red Light Stick | Quick Use | 3x Chemicals | Utility Station 1 |
| Smoke Grenade | Grenade | 14x Chemicals 1x Canister | Utility Station 2 |
| Deadline | Mine | 3x Explosive Compound 2x ARC Circuitry | Explosives Station 3 |
| Trailblazer | Grenade | 1x Explosive Compound 1x Synthesized Fuel | Explosives Station 3 |
| Tactical Mk. 3 (Defensive) | Augment | 2x Advanced Electrical Components 3x Processor | Gear Bench 3 |
| Tactical Mk. 3 (Healing) | Augment | 2x Advanced Electrical Components 3x Processor | Gear Bench 3 |
| Yellow Light Stick | Quick Use | 3x Chemicals | Utility Station 1 |
Note: The missing Blueprints in this list likely have not actually been added to the game at the time of writing, because none of the playerbase has managed to find any of them. As they are added to the game, I will update this page with the most relevant information so you know exactly how to get all 75 Arc Raiders Blueprints.
Where to find Blueprints in Arc Raiders
Below is a list of all containers, modifiers, and events which maximise your chances of finding Blueprints:
- Certain quests reward you with specific Blueprints .
- Completing Trials has a high chance of offering Blueprints as rewards.
- Surveyors have a decent chance of dropping Blueprints on death.
- High loot value areas tend to have a greater chance of spawning Blueprints.
- Night Raids and Storms may increase rare Blueprint spawn chances in containers.
- Containers with higher numbers of items may have a higher tendency to spawn Blueprints. As a result, Blue Gate (which has many “large” containers containing multiple items) may give you a higher chance of spawning Blueprints.
- Raider containers (Raider Caches, Weapon Boxes, Medical Bags, Grenade Tubes) have increased Blueprint drop rates. As a result, the Uncovered Caches event gives you a high chance of finding Blueprints.
- Security Lockers have a higher than average chance of containing Blueprints.
- Certain Blueprints only seem to spawn under specific circumstances: Tempest Blueprint only spawns during Night Raid events. Vulcano Blueprint only spawns during Hidden Bunker events. Jupiter and Equaliser Blueprints only spawn during Harvester events.

Raider Caches, Weapon Boxes, and other raider-oriented container types have a good chance of offering Blueprints. |Image credit:Rock Paper Shotgun/Embark Studios
Blueprints have a very low chance of spawning in any container in Arc Raiders, around 1-2% on average. However, there is a higher chance of finding Blueprints in particular container types. Specifically, you can find more Blueprints in Raider containers and security lockers.
Beyond this, if you’re looking for Blueprints you should focus on regions of the map which are marked as having particularly high-value loot. Areas such as the Control Tower in Dam Battlegrounds, the Arrival and Departure Buildings in Spaceport, and Pilgrim’s Peak in Blue Gate all have a better-than-average chance of spawning Blueprints somewhere amongst all their containers. Night Raids and Electromagnetic Storm events also increase the drop chances of certain Blueprints .
In addition to these containers, you can often loot Blueprints from destroyed Surveyors - the largest of the rolling ball ARC. Surveyors are more commonly found on the later maps - Spaceport and Blue Gate - and if one spawns in your match, you’ll likely see it by the blue laser beam that it casts into the sky while “surveying”.
Surveyors are quite well-armoured and will very speedily run away from you once it notices you, but if you can take one down then make sure you loot all its parts for a chance of obtaining certain unusual Blueprints.
Blueprints obtained from quests
One way in which you can get Blueprints is by completing certain quests for the vendors in Speranza. Some quests will reward you with a specific item Blueprint upon completion, so as long as you work through all the quests in Arc Raiders, you are guaranteed those Blueprints.
Here is the full list of all Blueprints you can get from quest rewards:
- Trigger Nade Blueprint: Rewarded after completing “Sparks Fly”.
- Lure Grenade Blueprint: Rewarded after completing “Greasing Her Palms”.
- Burletta Blueprint: Rewarded after completing “Industrial Espionage”.
- Hullcracker Blueprint (and Launcher Ammo Blueprint): Rewarded after completing “The Major’s Footlocker”.
Alas, that’s only 4 Blueprints out of a total of 75 to unlock, so for the vast majority you will need to find them yourself during a raid. If you’re intent on farming Blueprints, then it’s best to equip yourself with cheap gear in case you lose it, but don’t use a free loadout because then you won’t get a safe pocket to stash any new Blueprint you find. No pain in Arc Raiders is sharper than failing to extract with a new Blueprint you’ve been after for a dozen hours already.

One of the best ways to get Blueprints is by hitting three stars on all five Trials every week. |Image credit:Rock Paper Shotgun/Embark Studios
Blueprints obtained from Trials
One of the very best ways to get Blueprints is as rewards for completing Trials in Arc Raiders. Trials are unlocked from Level 15 onwards, and allow you to earn rewards by focusing on certain tasks over the course of several raids. For example, one Trial might task you with dealing damage to Hornets, while another might challenge you to loot Supply Drops.
Trials refresh on a weekly basis, with a new week bringing five new Trials. Each Trial can offer up to three rewards after passing certain score milestones, and it’s possible to receive very high level loot from these reward crates - including Blueprints. So if you want to unlock as many Blueprints as possible, you should make a point of completing as many Trials as possible each week.
Best Blueprint farming locations
The very best way to get Blueprints is to frequent specific areas of the maps which combine high-tier loot pools with the right types of containers to search. Here are my recommendations for where to find Blueprints on every map, so you can always keep the search going for new crafting recipes to unlock.

Image credit:Rock Paper Shotgun/Embark Studios
Dam Battlegrounds
The best places to farm Blueprints on Dam Battlegrounds are the Control Tower, Power Generation Complex, Ruby Residence, and Pale Apartments . The first two regions, despite only being marked on the map as mid-tier loot, contain a phenomenal number of containers to loot. The Control Tower can also contain a couple of high-tier Security Lockers - though of course, you’ll need to have unlocked the Security Breach skill at the end of the Survival tree.
There’s also a lot of reporting amongst the playerbase that the Residential areas in the top-left of the map - Pale Apartments and Ruby Residence - give you a comparatively strong chance of finding Blueprints. Considering their size, there’s a high density of containers to loot in both locations, and they also have the benefit of being fairly out of the way. So you’re more likely to have all the containers to yourself.
Buried City
The best Blueprint farming locations on Buried City are the Santa Maria Houses, Grandioso Apartments, Town Hall, and the various buildings of the New District . Grandioso Apartments has a lower number of containers than the rest, but a high chance of spawning weapon cases - which have good Blueprint drop rates. The others are high-tier loot areas, with plenty of lootable containers - including Security Lockers.
Spaceport
The best places to find Blueprints on Spaceport are the Arrival and Departure Buildings, as well as Control Tower A6 and the Launch Towers . All these areas are labelled as high-value loot regions, and many of them are also very handily connected to one another by the Spaceport wall, which you can use to quickly run from one area to the next. At the tops of most of these buildings you’ll find at least one Security Locker, so this is an excellent farming route for players looking to find Blueprints.
The downside to looting Blueprints on Spaceport is that all these areas are hotly contested, particularly in Duos and Squads. You’ll need to be very focused and fast in order to complete the full farming route.

Image credit:Rock Paper Shotgun/Embark Studios
Blue Gate
Blue Gate tends to have a good chance of dropping Blueprints, potentially because it generally has a high number of containers which can hold lots of items; so there’s a higher chance of a Blueprint spawning in each container. In my experience, the best Blueprint farming spots on Blue Gate are Pilgrim’s Peak, Raider’s Refuge, the Ancient Fort, and the Underground Complex beneath the Warehouse .
All of these areas contain a wealth of containers to loot. Raider’s Refuge has less to loot, but the majority of the containers in and around the Refuge are raider containers, which have a high chance of containing Blueprints - particularly during major events.
Stella Montis
On the whole, Stella Montis seems to have a very low drop rate for Blueprints (though a high chance of dropping other high-tier loot). If you do want to try farming Blueprints on this map, the best places to find Blueprints in Stella Montis are Medical Research, Assembly Workshop, and the Business Center . These areas have the highest density of containers to loot on the map.
In addition to this, the Western Tunnel has a few different Security Lockers to loot, so while there’s very little to loot elsewhere in this area of the map, it’s worth hitting those Security Lockers if you spawn there at the start of a match.
That wraps up this primer on how to get all the Blueprints in Arc Raiders as quickly as possible. With the Expedition system constantly resetting a large number of players’ Blueprints, it’s more important than ever to have the most up-to-date information on where to find all these Blueprints.
While you’re here, be sure to check out our Arc Raiders best guns tier list , as well as our primers on the best skills to unlock and all the different Field Depot locations on every map.

ARC Raiders
PS5 , Xbox Series X/S , PC
Rock Paper Shotgun is better when you sign in
Sign in and join us on our journey to discover strange and compelling PC games.
