15 Enshrouded tips to get you started
These Enshrouded tips and tricks are vital for new players

Image credit:Keen Games

What are the best tips and tricks for players new to Enshrouded? Keen Games’ new open-world survival crafting RPG is a very impressive creation, with a massive and intricate map, great combat and exploration, phenomenal building, and much more to enjoy. But as with most large-scale survival crafting games, Enshrouded can get a little bit overwhelming for new players.
In this beginner’s guide , I’ve put together the ultimate list of useful Enshrouded tips and tricks that I wish I knew when I first began playing the game. Covering everything from magical combat to exploring ruins for secret passages, these tips will catapult your progression through the first few hours of Enshrouded , and far beyond.
1. Get the Glider and Grappling Hook ASAP
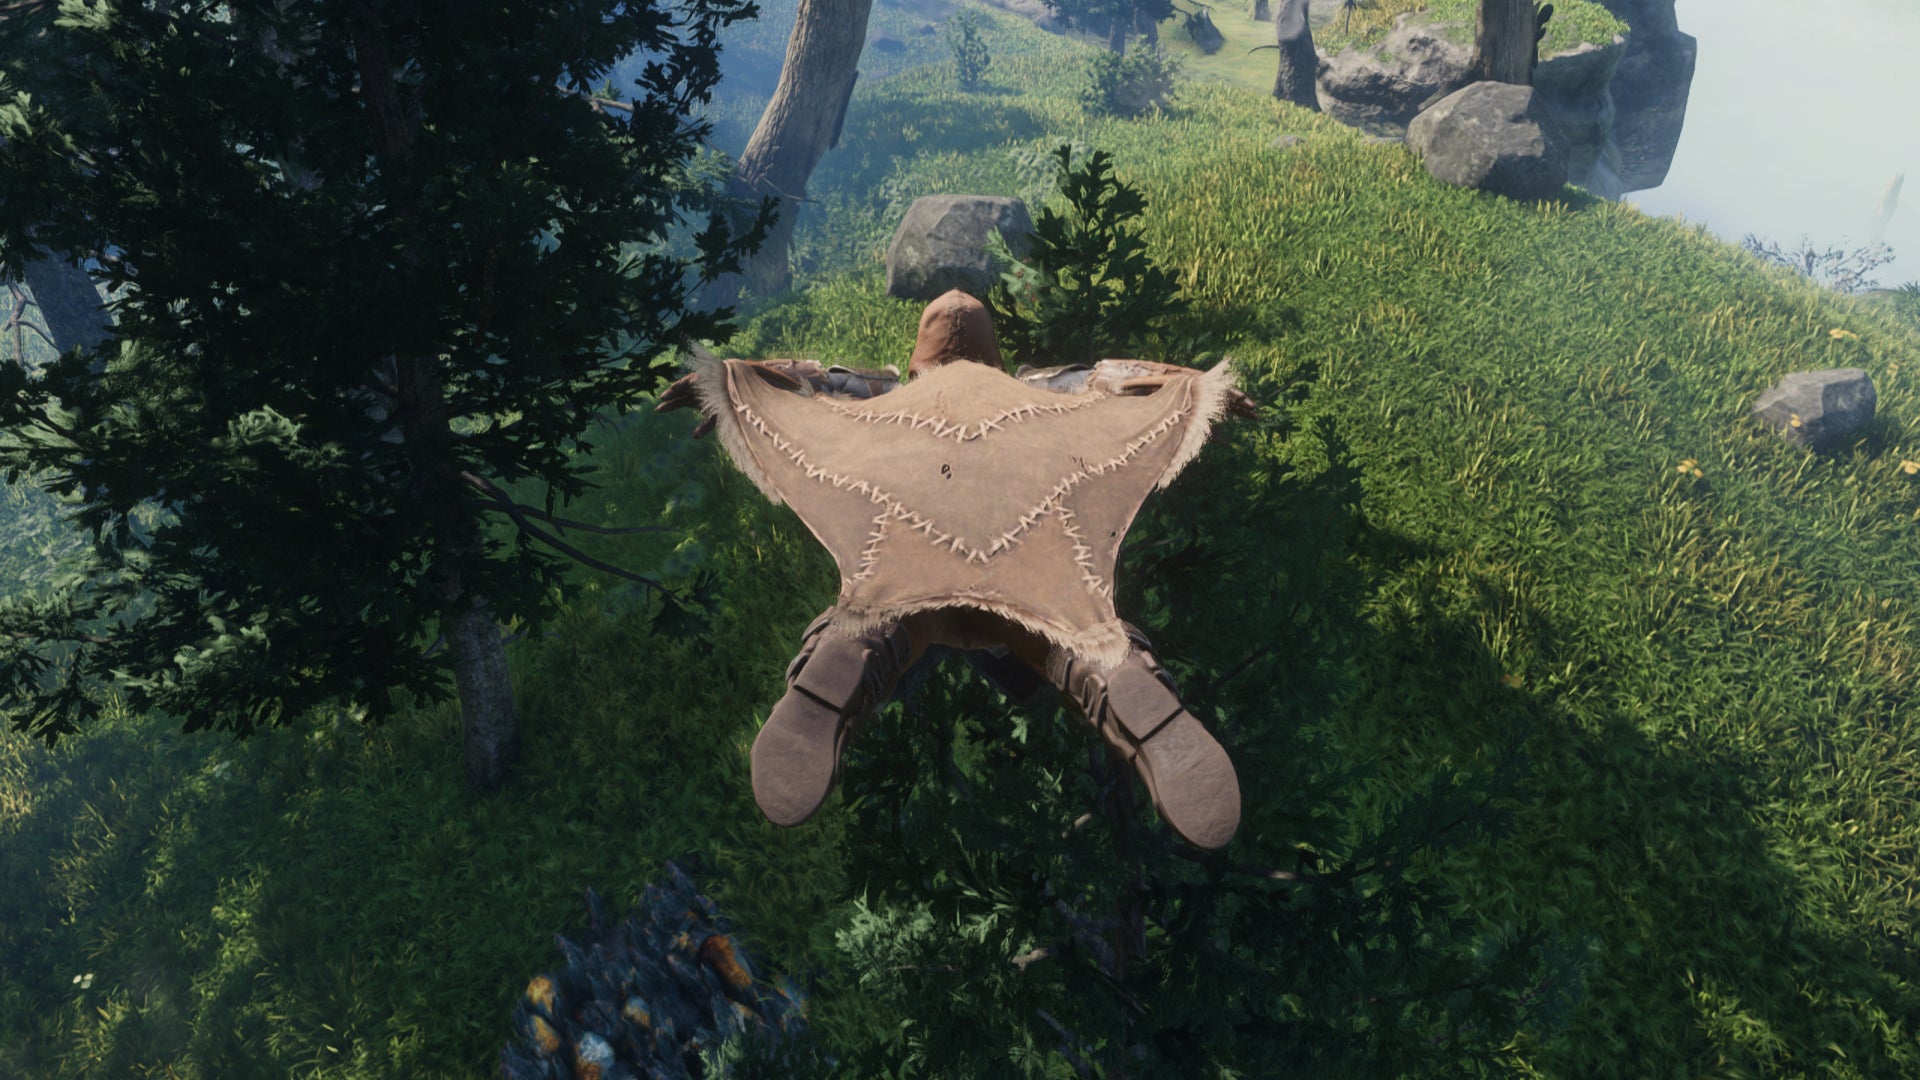
The Glider is an absolutely essential piece of equipment for Enshrouded players. |Image credit:Rock Paper Shotgun/Keen Games
There’s a huge amount to explore in Enshrouded, and your journeys into the unknown will go a lot more smoothly with the right traversal equipment. Two items in particular are essential for any new player to craft as soon as possible: the Grappling Hook , and the Glider .
With these items in hand, you can launch yourself up to previously out of reach locations, and soar across the landscape from great heights, covering large distances in seconds. There are no mounts or vehicles in Enshrouded, so these tools are your best bet for quickly moving about the map.
And best of all - neither of them take up space in your inventory! They equip straight to your character in the Character screen, just like Shields, so you don’t need to worry about them clogging up space in your Backpack.
As an aside - you can even craft your own grapple points for use in your base! Much better than ladders !
2. Prioritise the early quests

Quests will take you far and wide in Enshrouded, but it’s the early ones that are most important. |Image credit:Keen Games
Enshrouded may be an open-world survival crafting game at heart, but it also leans heavily into the RPG genre at times. Structure is offered to those who want it in the form of various types of quests offered by the different characters such as the Farmer or Carpenter (or the mystical Flame itself).
And while you can happily ignore them and go off on your own adventures, I’d strongly recommend you prioritise the early quests. These quests will ensure you unlock the five major NPCs early on, as well as giving you access to a plethora of important items, weapons, and equipment (including the Glider and Grappling Hook mentioned above!). So if you’re new to the game, please let the quests guide you for the first few hours. You’ll thank me later.
3. Rest and eat lots

Once you awaken the Farmer NPC, you can plant and farm lots of different foods. |Image credit:Rock Paper Shotgun/Keen Games
If you’ve played Valheim , you’ll be right at home with Enshrouded’s food and rest mechanics. For everyone else: please rest and eat plenty! It’s not just good advice for real life.
In Enshrouded, you can have up to three (later four) food status effects active at once, and many of them are very powerful. My go-to combination in the early game is to eat a Grilled Lean Steak for increased Health, drink some Water for increased Stamina, and keep a few berries on me in case I need to regenerate health over time and don’t want to waste a Bandage or Health Potion.
As for resting, that’s possibly even more important. You can rest next to your Flame Altar, or any area which fulfils the criteria of warmth and comfort listed in the top-left of your screen. Spend a short time there and you’ll fill up your “Well Rested” timer, which dramatically improves your maximum Stamina for the duration it is active. This is fantastic in every aspect of Enshrouded: exploring, gliding, fighting, building … You name it. So remember to rest and eat well.
4. Unlock these three skills first
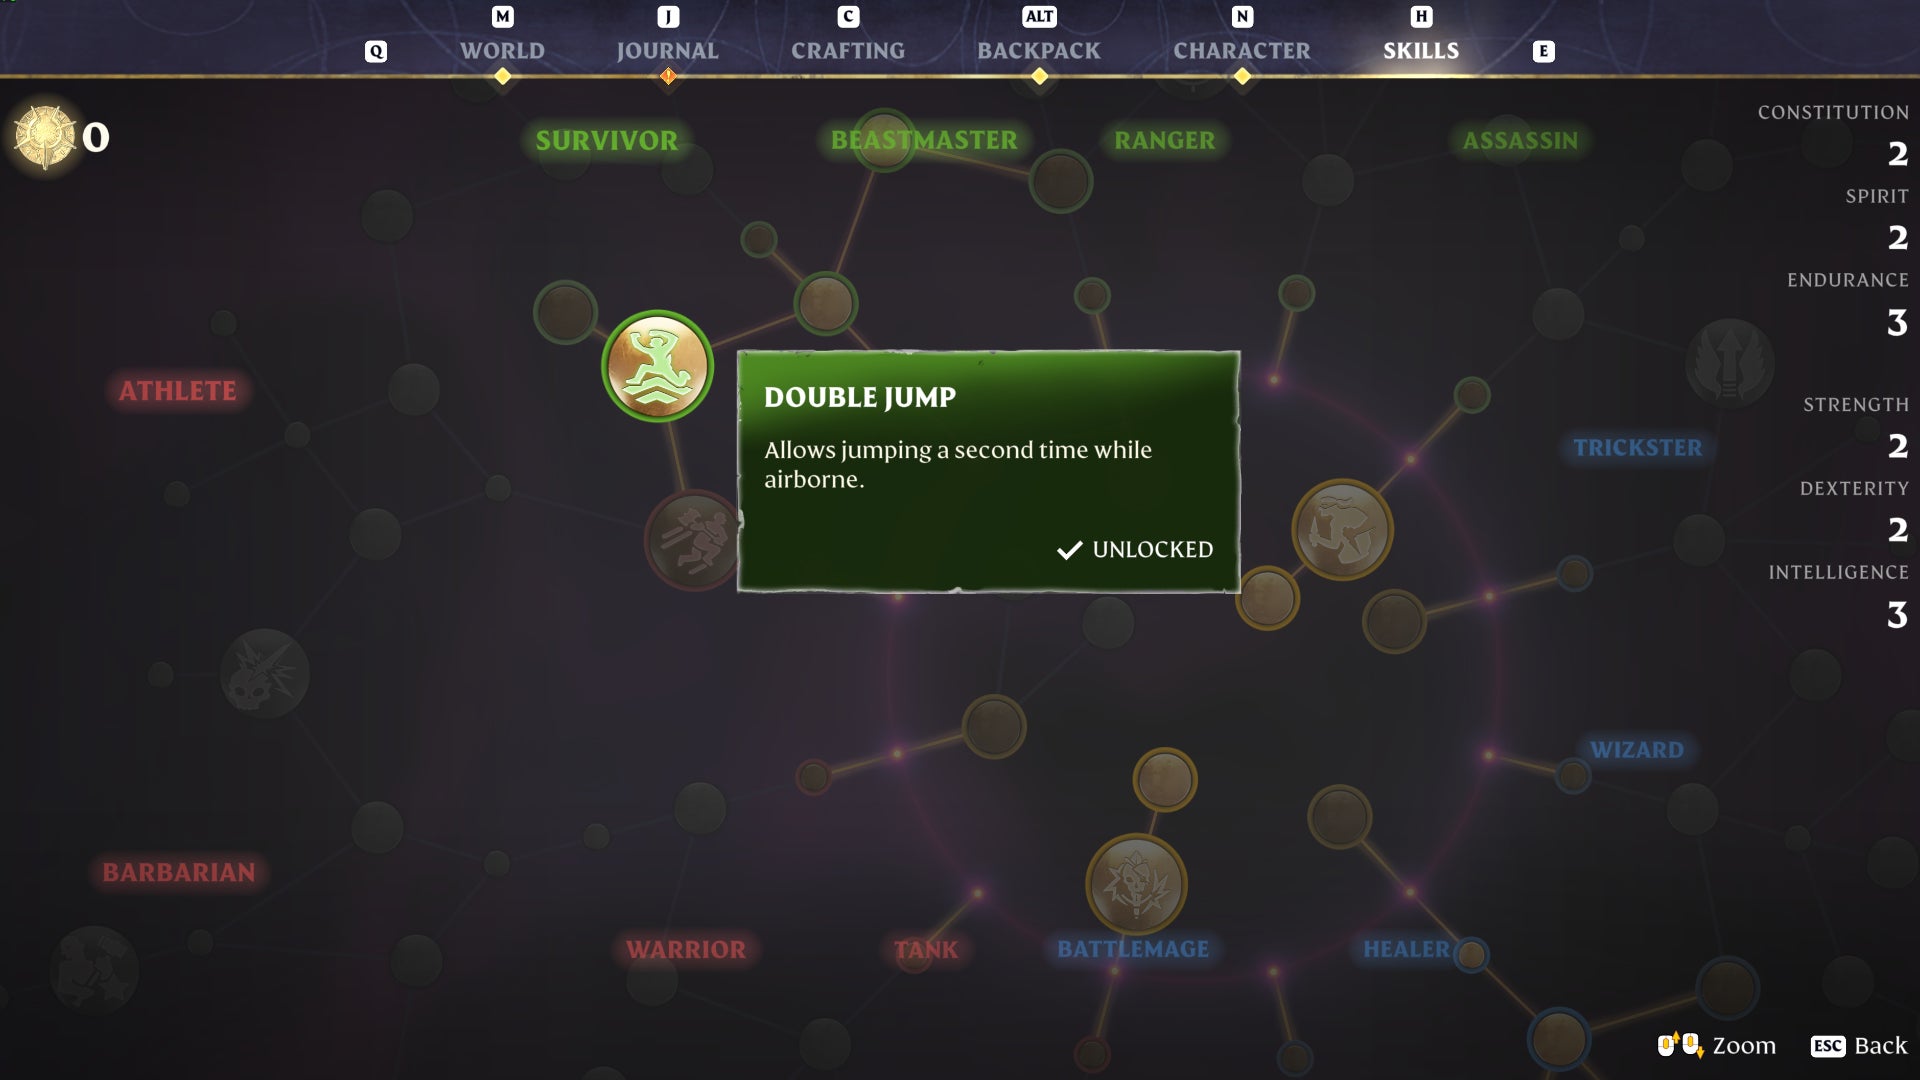
The Double Jump skill is a must-have skill for any player in Enshrouded. |Image credit:Rock Paper Shotgun/Keen Games
Enshrouded gives you access to progression via a skill tree (well, really a skill web), and anytime you level up or otherwise get a skill point, you can spend it to unlock new abilities and stat upgrades. But there are three skills that every player should prioritise unlocking first:
- Merciless Attack
- Sneak Attack
- Double Jump
These key skills transform your character’s basic capabilities both in and out of combat. Merciless and Sneak Attacks both deal massive damage and are pretty much essential for taking down the more challenging enemies at every stage of Enshrouded, and the Double Jump is just self-explanatory. Seriously, who here thinks prioritising Double Jump is a bad idea? Yeah, I didn’t think so. The amount of extra mobility it gives you (not to mention parkouring up to otherwise inaccessible areas) is insane.
5. Strengthen the Flame
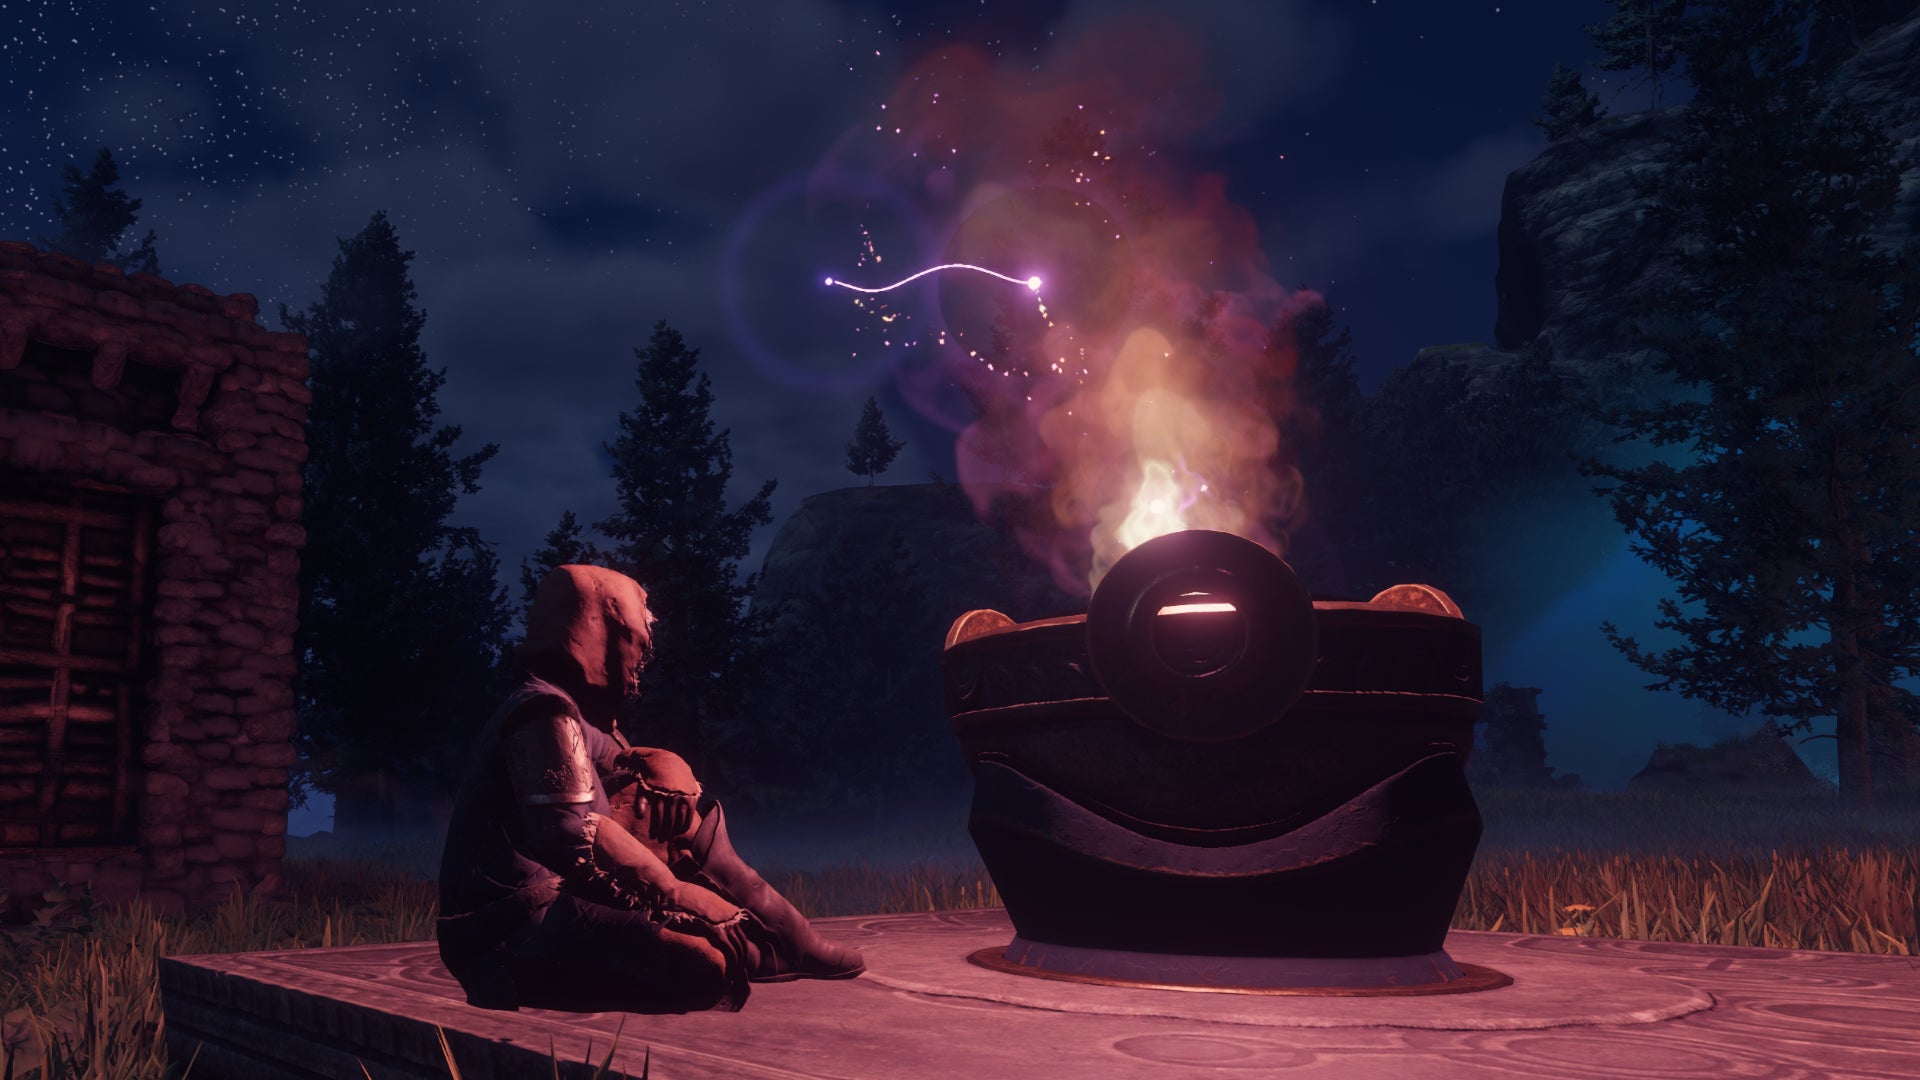
Your Flame Altar can be strengthened with the right ingredients, giving you a wealth of bonuses.
The very first thing the game askes you to construct is a Flame Altar. This central pedestal structure defines the area in which you can build, and acts as the beating heart of your home in Enshrouded. There are two ways you can upgrade the Flame Altar: you can choose the “Upgrade Altar” option, which costs Shroud Cores but expands your building area around the Flame Altar; and you can also choose the “Strengthen The Flame” option, which costs more resources of different kinds, but gives you a wealth of benefits like increased attributes, better protection against the Shroud , and - crucially - the ability to place down more Flame Altars elsewhere in the world.
6. Create lots of Flame Altars
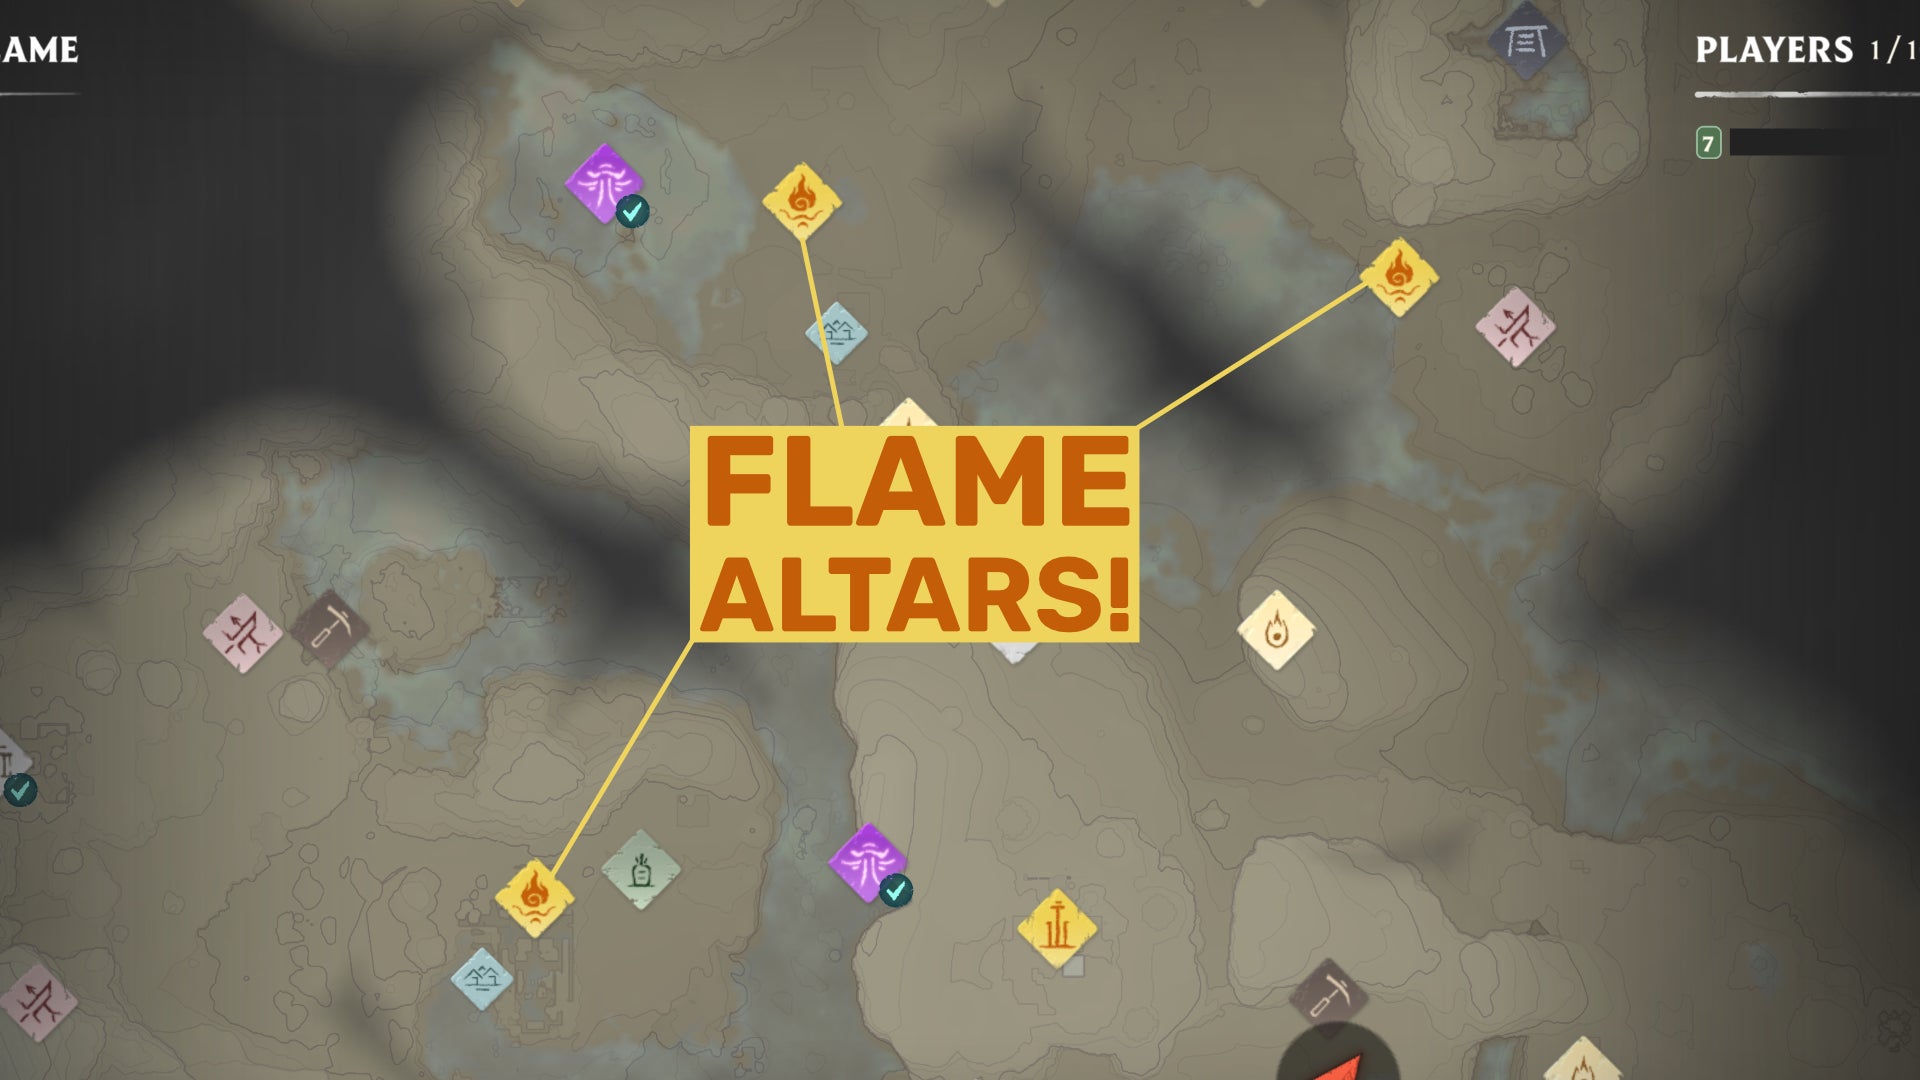
Multiple Flame Altars give you multiple fast travel and respawn points across the map. |Image credit:Rock Paper Shotgun/Keen Games
Flame Altars are your respawn and fast travel points in Enshrouded. Whenever you go on a journey far from your home base (and your spawn point ), it’s a very good idea to bring a prebuilt Flame Altar in your inventory with you, so that you can make a secondary spawn point nearer your destination. This is both so that you can respawn nearby if you happen to die, and so you can fast travel home (to, say, drop off materials), and then immediately fast travel back to your new Flame Altar so you don’t have to make the long journey again. If you forget to bring a second Flame Altar, don’t worry - it only costs 5 Stone, and there’s Stone all over the map, so it won’t be hard for you to craft a new Flame Altar whenever you need it.
As you Strengthen the Flame and unlock the ability to have more Flame Altars in existence at once, it’s a good idea to create various little forward bases which allow you to quickly fast travel between different areas of the map. It’s a massive help to any player, and will allow you to progress through the game much faster.
7. Make use of BOTH hotbars
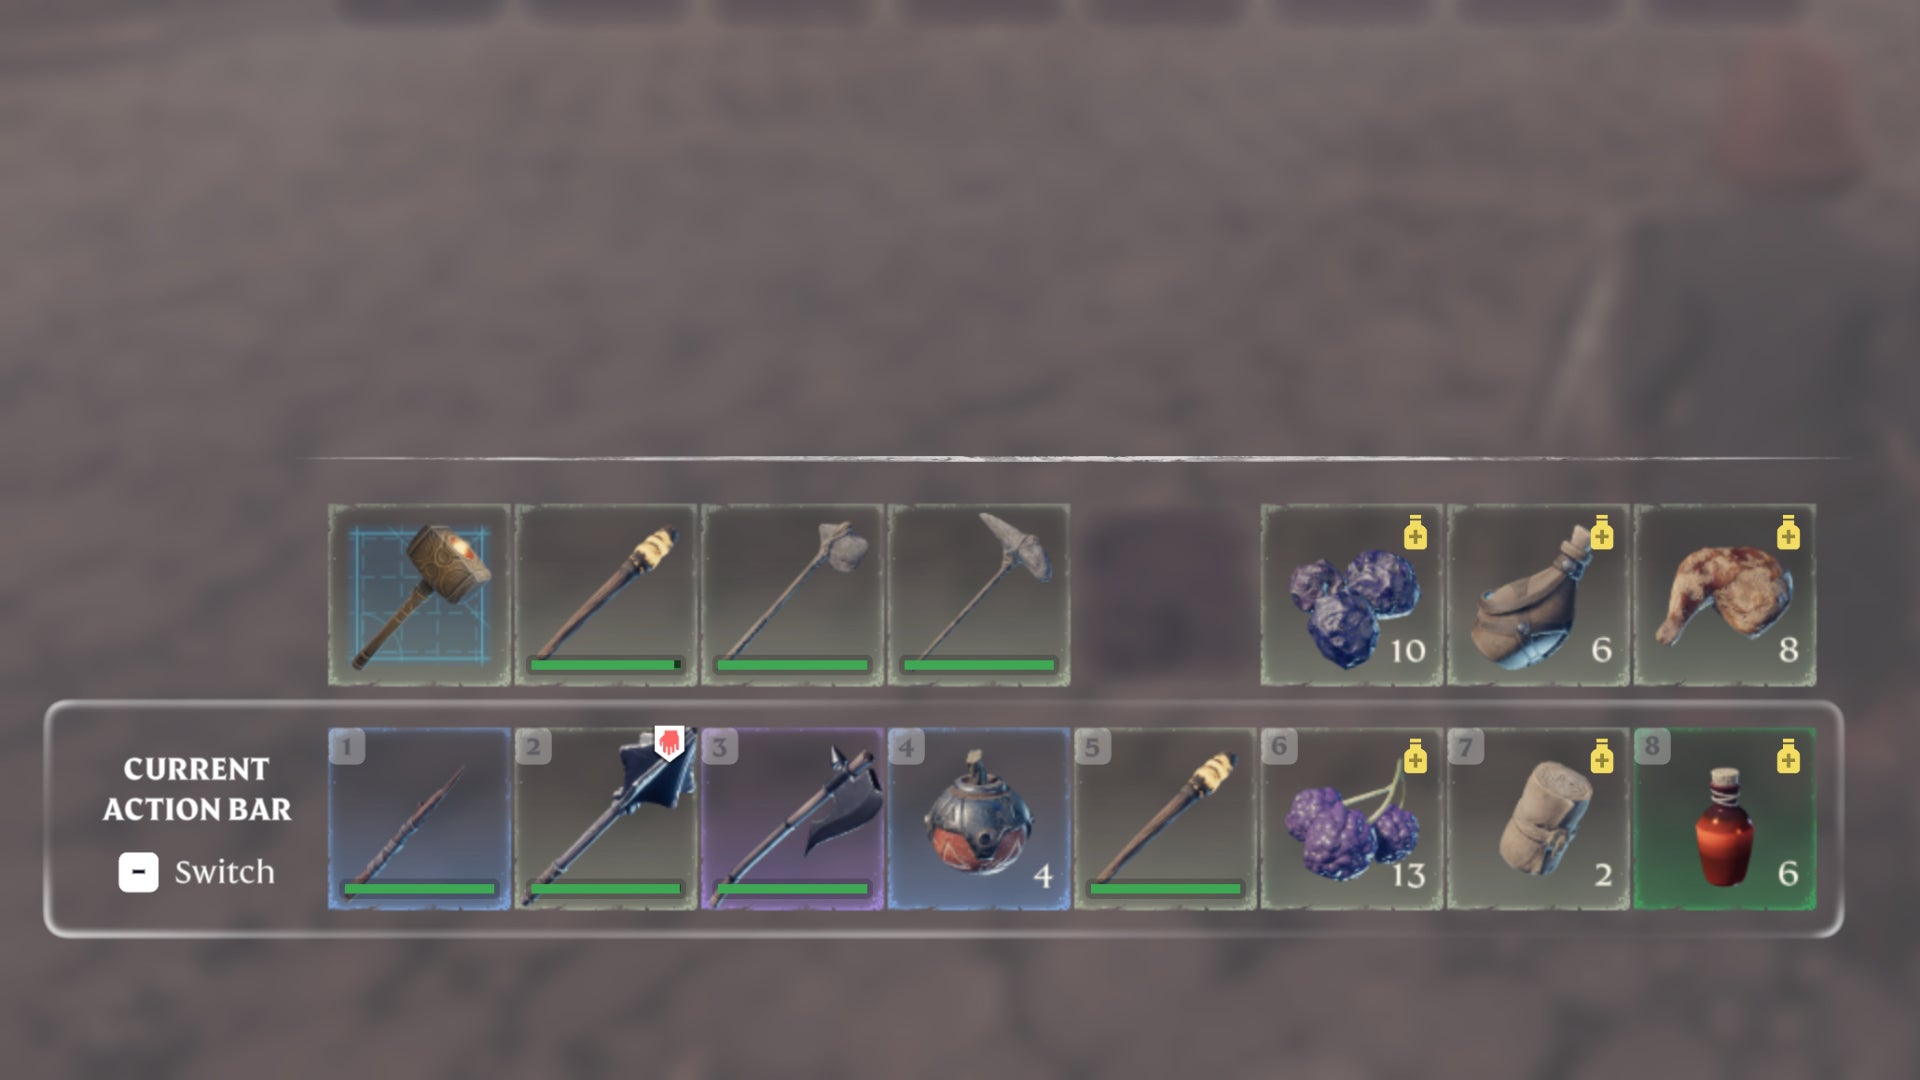
Switch between your two hotbars with ALT! |Image credit:Rock Paper Shotgun/Keen Games
One of the nicest quality of life features in Enshrouded is that the player has access to two hotbars. You can switch between these hotbars at any time by hitting ALT or RB + RIGHT THUMBSTICK CLICK . This is fantastic for two reasons. The first is that it expands your backpack size, allowing you to carry more items with you. And second, it allows you to organise your equipment and items more effectively so you can reach twice as many tools without going into your inventory.
I recommend setting up one hotbar for combat and healing, and the other hotbar for building and resource-gathering. So on my first hotbar I have my Sword, Wand, Staff, Bandages, and Healing Potions; and on the other I have my Construction Hammer, Felling Axe, Pickaxe, Rake, Torch… Anything I want quick access to outside of combat. It’s a useful system, it’s easy to learn, and it’s helped me out a lot.
8. Don’t neglect Magic!
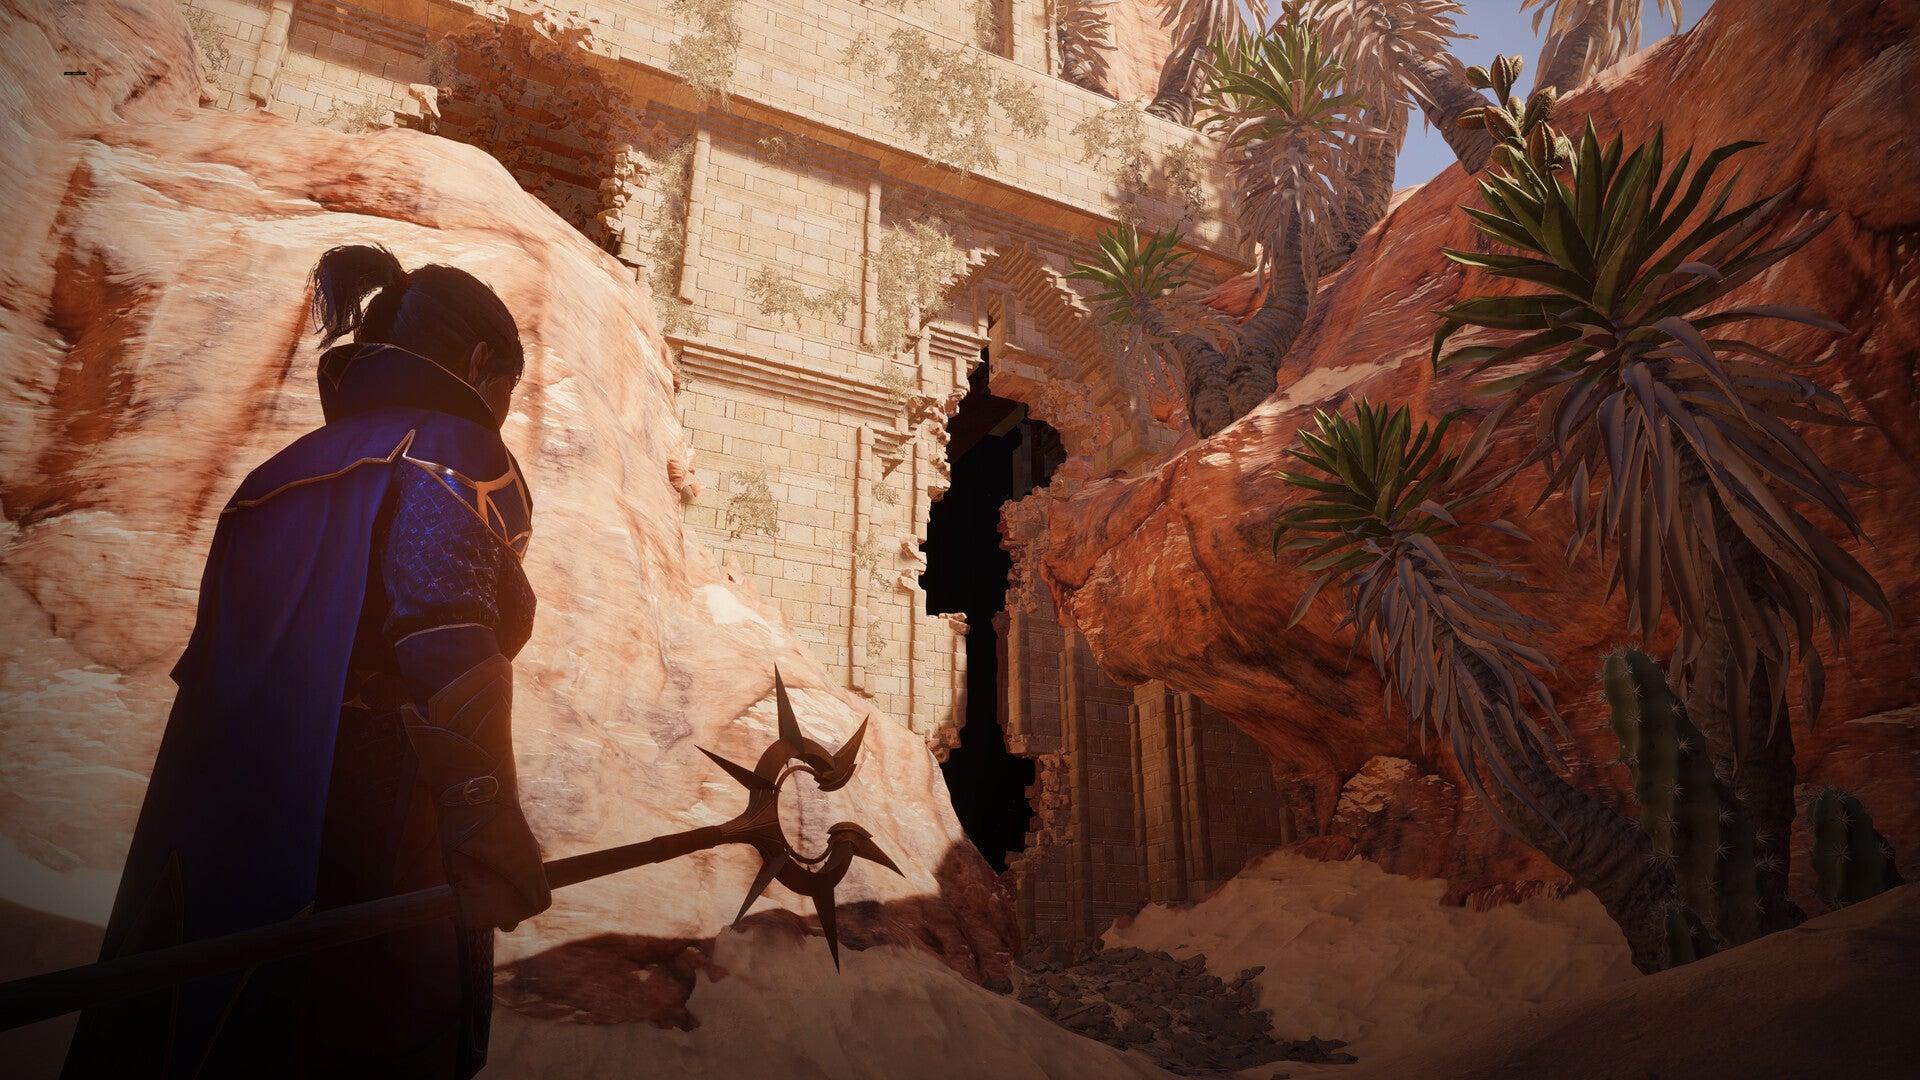
Staves, wands, and spells are very powerful in Enshrouded. |Image credit:Keen Games
If my earlier mention of Wands and Staves pricked up your ears, then you’re a sorcerer at heart, and you’ll get on well with Enshrouded’s magical attacks. There are two types of magical weapons in the game: Wands are less powerful and versatile, but they don’t require any ammunition to use, which makes them more reliable. Staves , meanwhile, give you access to a wider variety of more powerful spells like Fireballs and Healing Auras, but each spell is a finite resource that you keep in your inventory like ammo.
I strongly encourage you to play around with both weapon types, even if you’re traditionally not the sort to utilise magic in these games. The Staff in particular is an exceptionally powerful tool at your disposal, and once you unlock the Alchemist you’ll be able to craft more spells to use as ammo without any trouble.
9. Don’t dodge, block!
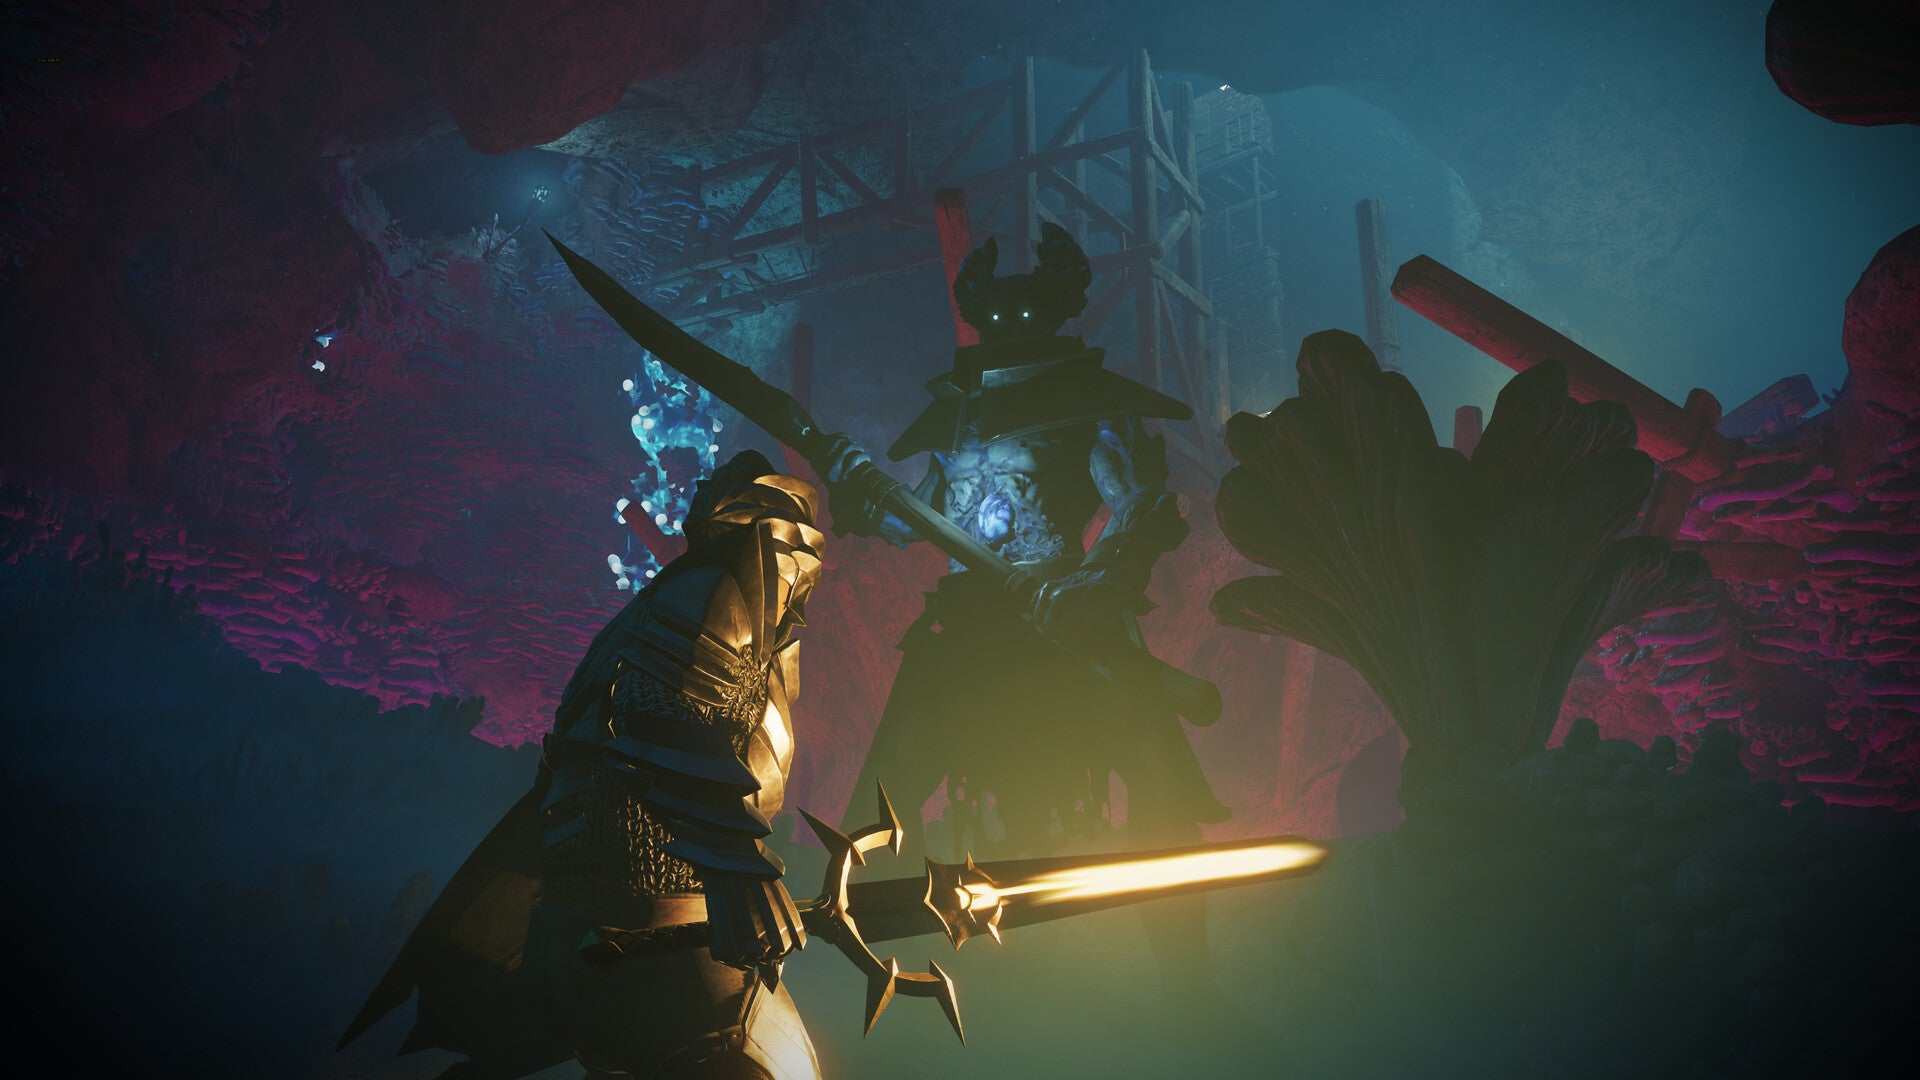
Parry enemies to stun them and open them up for a Merciless Attack. |Image credit:Keen Games
Okay, dodging is important too, I’ll admit. But if you’re having trouble with Enshrouded’s enemies, I’d highly recommend you slow down a little bit, and practice guarding with your weapon (or better yet, a sturdy shield). You’ll learn a lot about the enemy’s attack patterns, which will allow you to time your blocks just before each attack for a parry.
Parries will deal a tonne of stun damage to the enemy, and if their stun bar fills up, they’ll - you guessed it - be stunned, allowing you to perform a devastating Merciless Attack.
10. Shoot barrels for easy victories
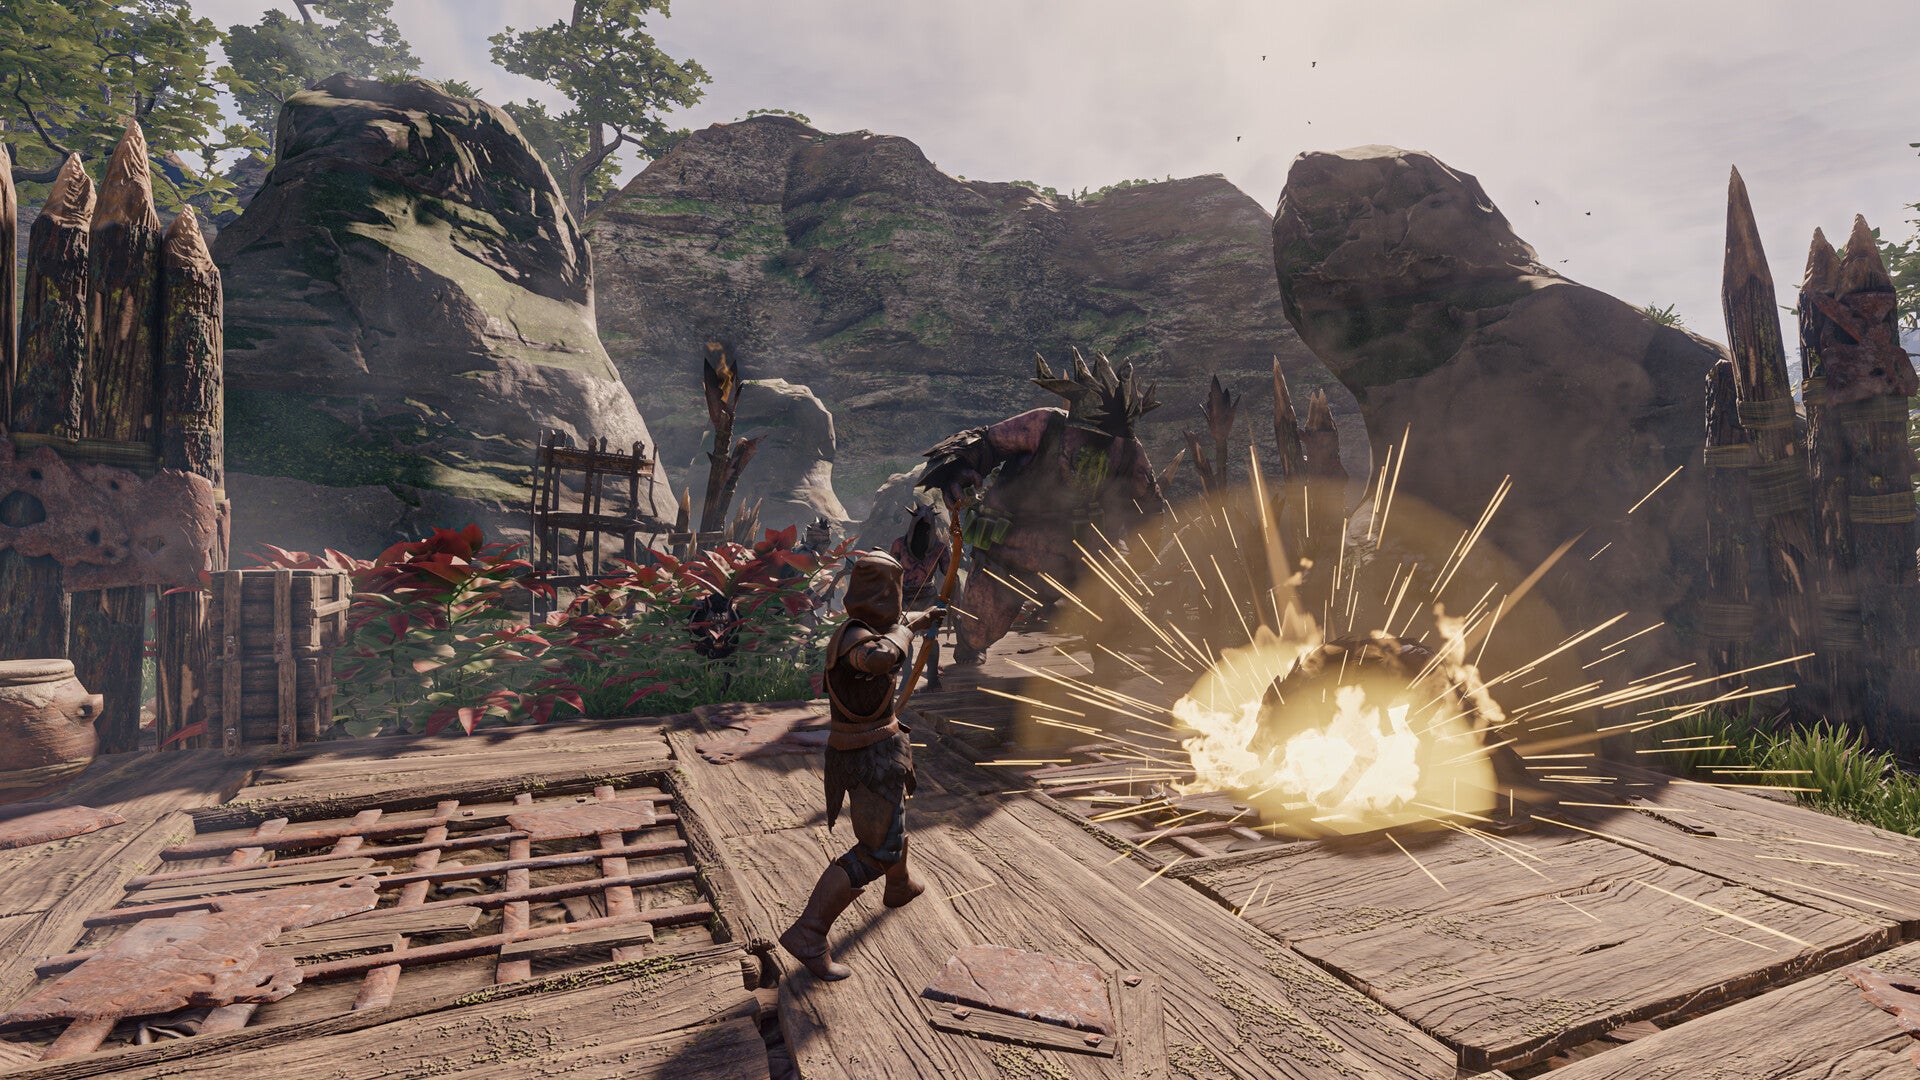
Explosive barrels can be set off with arrows, and deal frightening amounts of damage. |Image credit:Keen Games
Keen Games are quite proud of their terraformable voxel-based terrain, clearly. That’s why they’ve littered explosive barrels around the map, particularly in areas filled with enemies. Shoot one of these barrels, and it will explode, dealing massive damage to anything caught in the blast. Many enemies can be killed in a single blast with this method, but watch out - I’ve been one-shot by a barrel before, so don’t get too close.
11. Build multiples of each Workshop

Increase efficiency by building multiple Charcoal Kilns and other Workshops! |Image credit:Rock Paper Shotgun/Keen Games
There are lots of different types of Workshop in Enshrouded. Some of them, like the Workbench, are the more traditional crafting stations we’ve come to expect from the genre, useful for constructing and repairing basic items. But many others are more like miniature factories: you set a single recipe going, fill the Workshop with resources, leave it a while to slowly refine those resources into something new, and then come and collect the finished product later.
That’s why it’s a very good idea to build more than one of each type of these Workshops. My blacksmith shop at home, for example, contains 6 Charcoal Kilns and 3 Forges. That way, I can create refined materials like Metal Sheets and Tar at many times the rate that would be possible with just one of each Workshop.
12. You can’t have too many building blocks
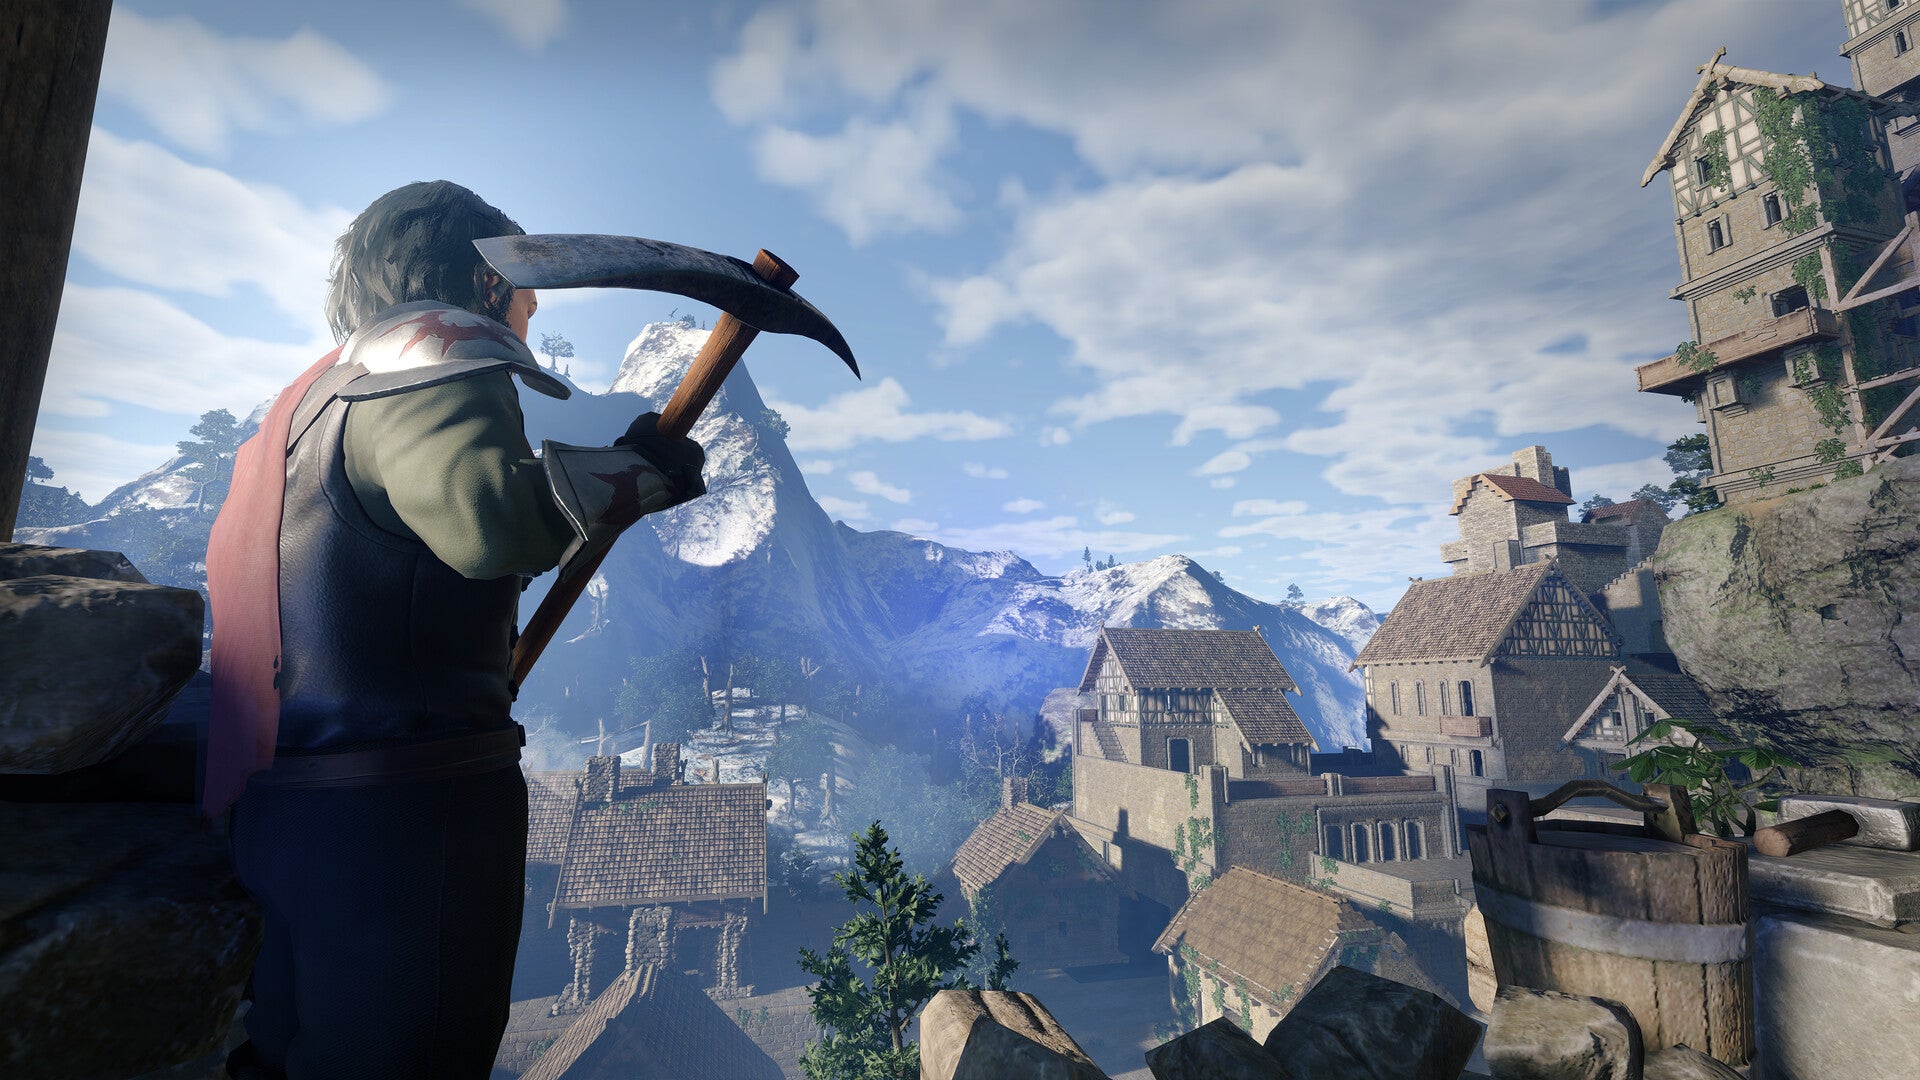
You need literally thousands of building blocks to make a regular-sized house in Enshrouded. |Image credit:Keen Games
When you start building your first home in Enshrouded, it’s very easy to drastically underestimate how many building blocks you’ll need. If you only have 100 or so blocks, then think again. You’ll need several thousand at least.
Mercifully, the recipes for basic building blocks like Rough Wood Blocks and Rough Stone Blocks are very cheap, and you can craft them at the Workbench in large quantities without much trouble. But make sure you stock up ahead of a building project, or you’ll be forced to interrupt the flow-state of your building in order to fell a forest or too.
And as an aside - definitely learn how to deconstruct properly so as not to waste resources!
13. Explore ruins carefully for secrets

Ruins are filled with fake walls like the one in this screenshot. |Image credit:Rock Paper Shotgun/Keen Games
Did you notice the hidden chest in the Longkeep directly north of where you start the game? Well, there are plenty of secret areas like that one hidden in nearly every ruined settlement across the map in Enshrouded, and they usually contain something valuable inside.
Secret areas in ruins are generally hidden by a fake wall with a button extruding from it. Interact with the button to open the wall. Keep your eyes peeled, because sometimes they’re hidden quite well, surrounded by pots and plants and various other doodads. And there’s also the fake floor variant, which when activated reveals a hidden staircase in the floor.
Even without these secret areas, it’s worth taking your time while exploring points of interest in Enshrouded, so you can walk away with the maximum number of resources like Metal Scrap , Shroud Wood , and so on.
14. Mark key mining spots on your map
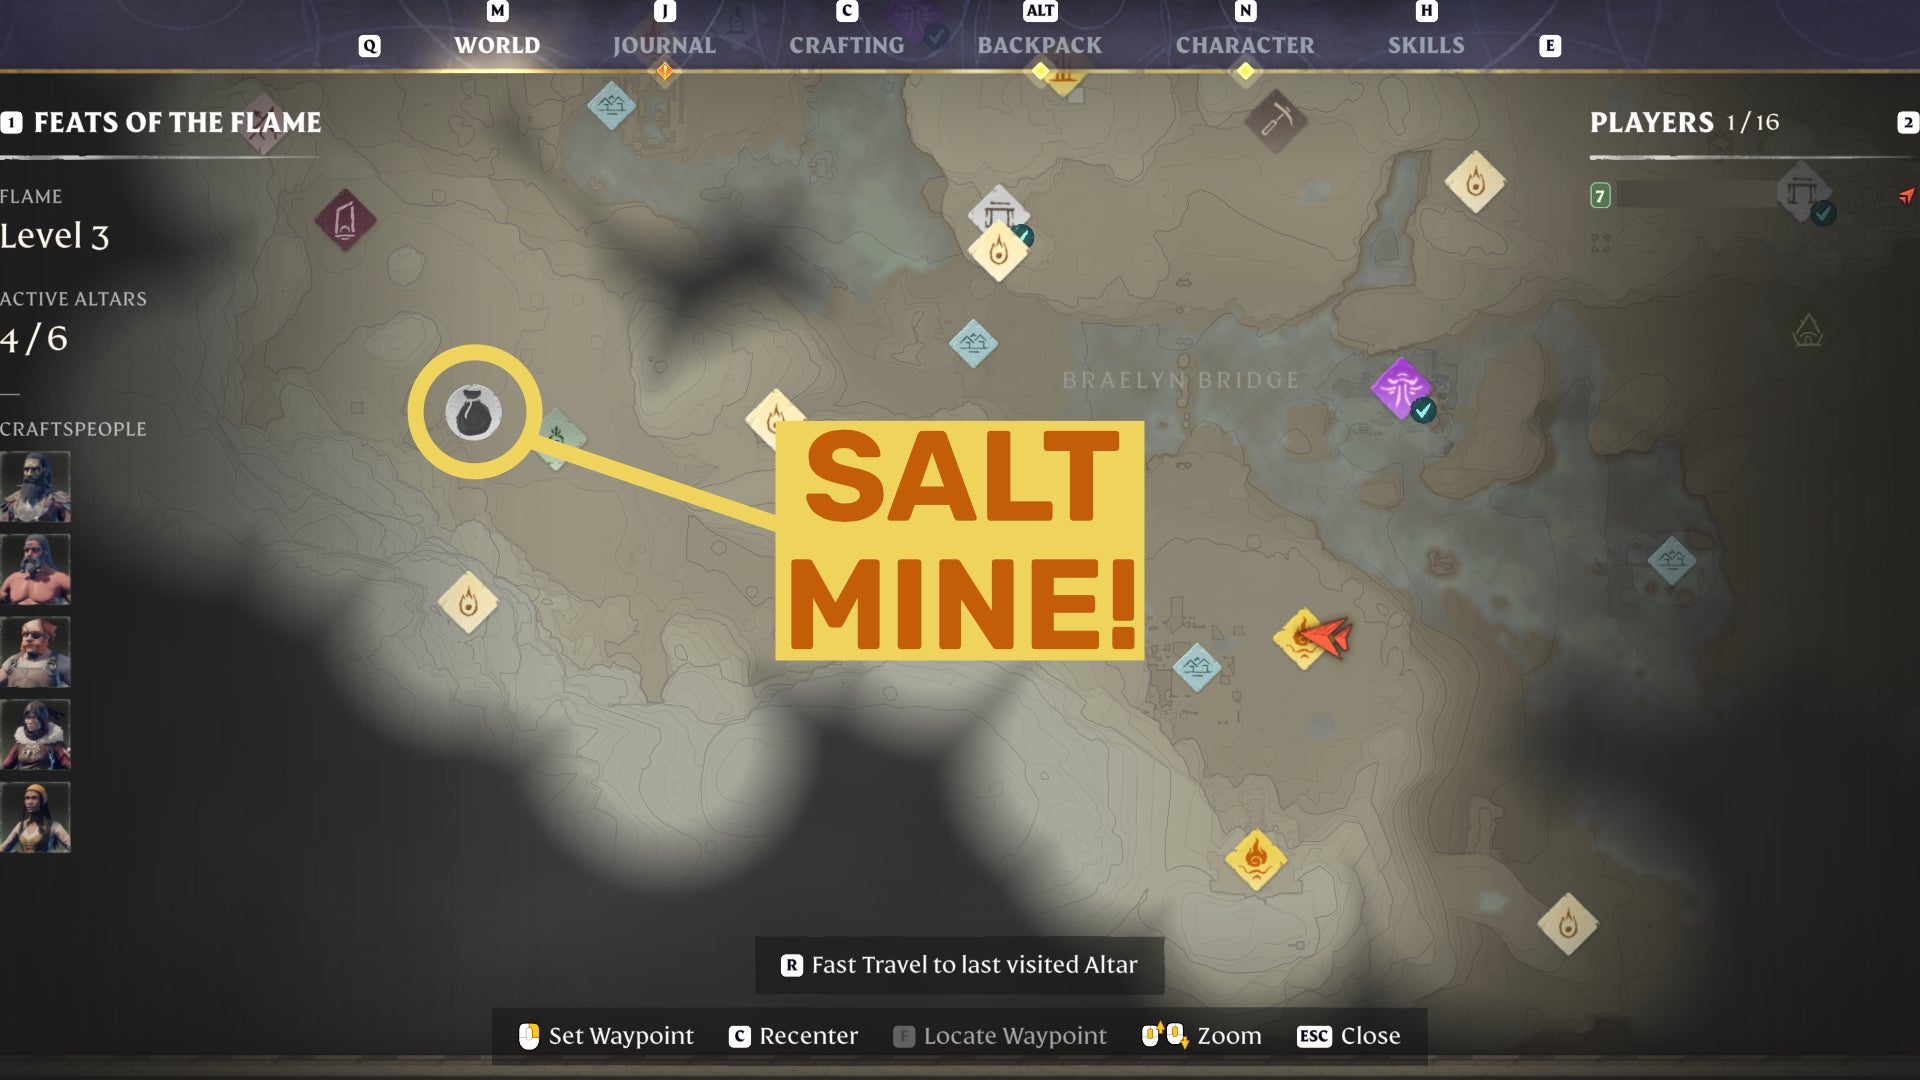
Here’s the location of an unmarked Salt Mine close to where you spawn in Enshrouded. |Image credit:Rock Paper Shotgun/Keen Games
Mining is another important part of progression in Enshrouded. Not only does it net you a lot of easy XP, but it gives you access to key resources like Salt and Copper in huge quantities.
Some mines are automatically marked as points of interest in the map, but there are plenty of other areas (some, perhaps, in more practical and useful locations) which are not marked. If you come across a good mining spot for a certain resource, open up your map and put down a marker so you can remember where it is for later!
15. Pace yourself, it’s a large map!
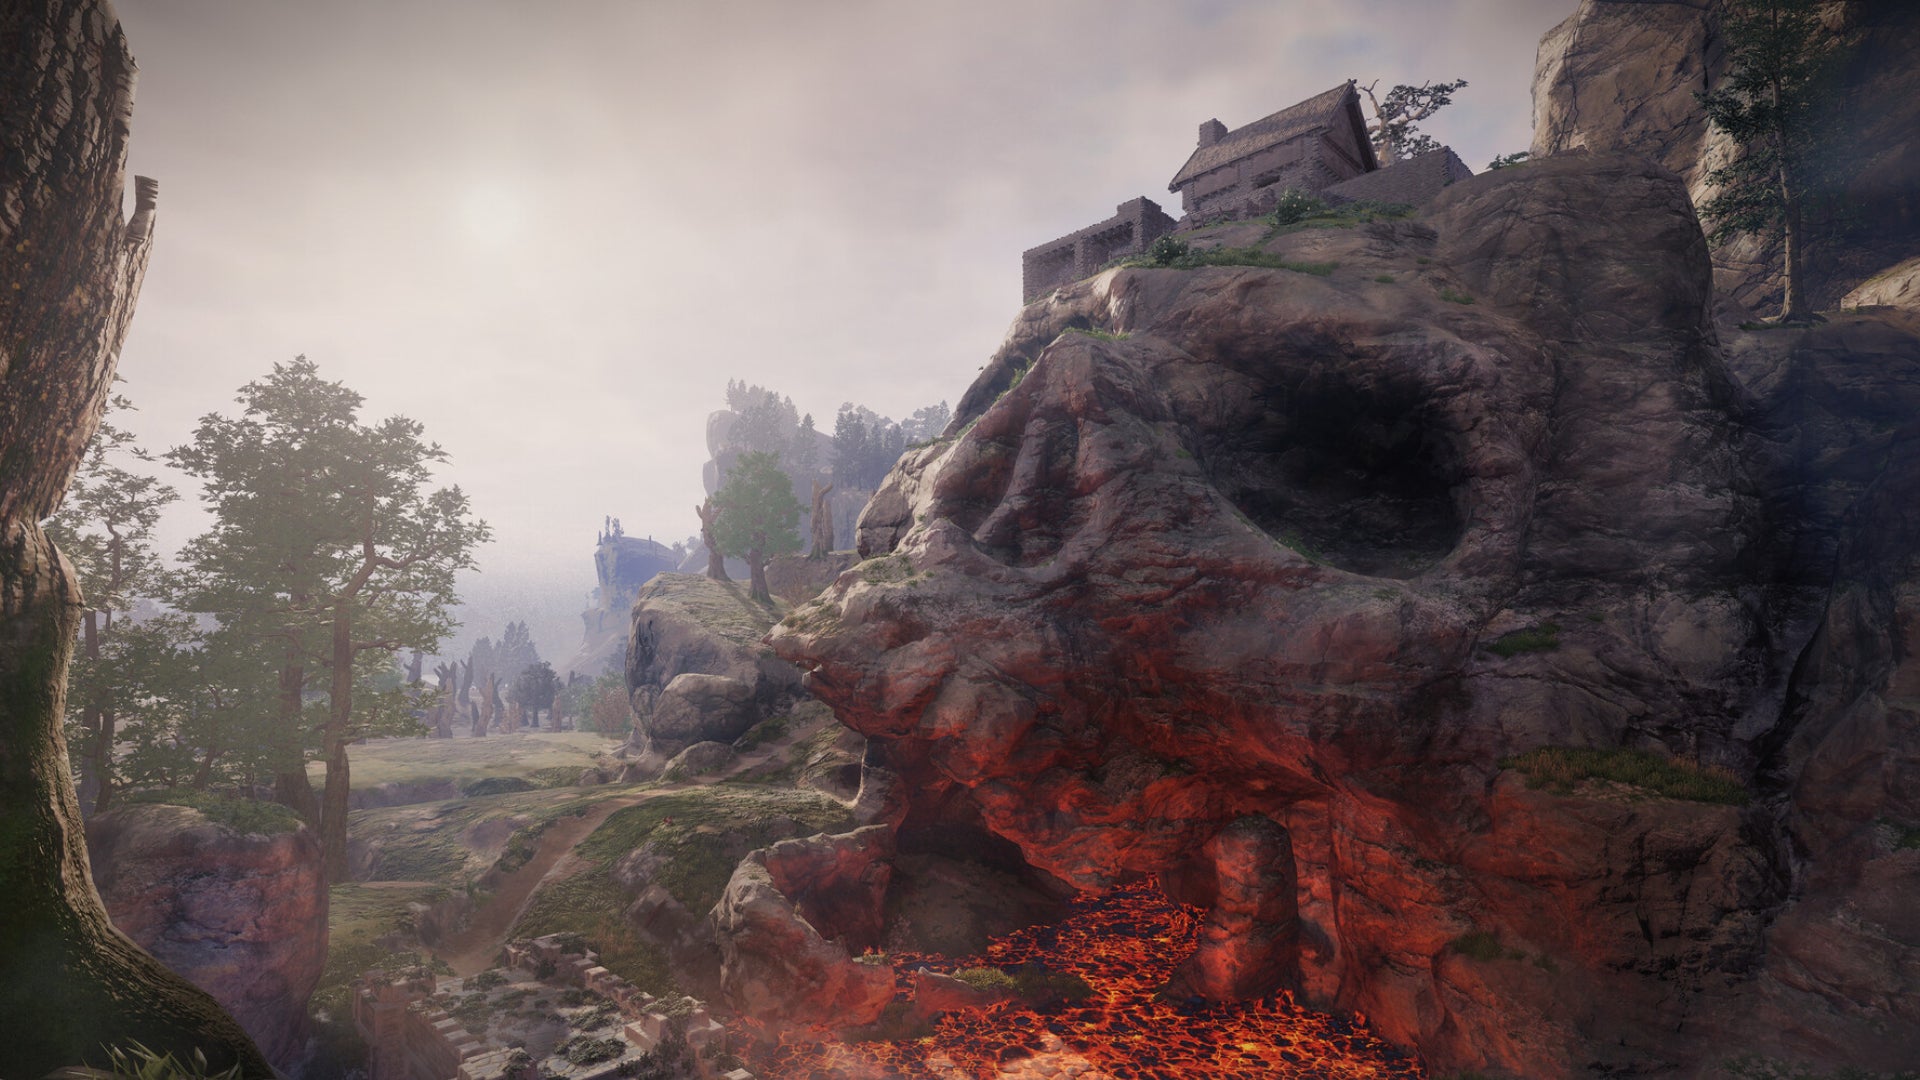
The map in Enshrouded is massive, and filled with interesting places to explore. |Image credit:Keen Games
Enshrouded is a big game. Bigger than you think. It took me about 20 hours of playtime to explore around 5% of the map. Yes, of course there are ways for players to blast their way through the game’s challenges in as short a time as possible, but I wouldn’t say that’s particularly in the spirit of the game.
Enshrouded is all about planning, patience, and exploration. It’s a good idea to use quests early on to give you some structure and unlock the key items early on, but after a certain point, I’d recommend you slow down a bit. Have a look around for what interests you, regardless of the quests in your journal. And don’t expect to plough through the entire game in a handful of sittings. Enshrouded is a great game, so pace yourself and enjoy the journey.

Enshrouded
PC
Rock Paper Shotgun is better when you sign in
Sign in and join us on our journey to discover strange and compelling PC games.

All 75 Arc Raiders Blueprints and where to get them
These areas have the highest chance of giving you Blueprints

Image credit:Rock Paper Shotgun/Embark Studios

Looking for more Arc Raiders Blueprints? It’s a special day when you find a Blueprint, as they’re among the most valuable items in Arc Raiders. If you find a Blueprint that you haven’t already found, then you must make sure you hold onto it at all costs, because Blueprints are the key to one of the most important and powerful systems of meta-progression in the game.
This guide aims to be the very best guide on Blueprints you can find, starting with a primer on what exactly they are and how they work in Arc Raiders, before delving into exactly where to get Blueprints and the very best farming spots for you to take in your search.
We’ll also go over how to get Blueprints from other unlikely activities, such as destroying Surveyors and completing specific quests. And you’ll also find the full list of all 75 Blueprints in Arc Raiders on this page (including the newest Blueprints added with the Cold Snap update , such as the Deadline Blueprint and Firework Box Blueprint), giving you all the information you need to expand your own crafting repertoire.
In this guide:
- What are Blueprints in Arc Raiders?
- Full Blueprint list: All crafting recipes
- Where to find Blueprints in Arc Raiders Blueprints obtained from quests Blueprints obtained from Trials Best Blueprint farming locations

What are Blueprints in Arc Raiders?
Blueprints in Arc Raiders are special items which, if you manage to extract with them, you can expend to permanently unlock a new crafting recipe in your Workshop. If you manage to extract from a raid with an Anvil Blueprint, for example, you can unlock the ability to craft your very own Anvil Pistol, as many times as you like (as long as you have the crafting materials).
To use a Blueprint, simply open your Inventory while in the lobby, then right-click on the Blueprint and click “Learn And Consume” . This will permanently unlock the recipe for that item in your Workshop. As of the Stella Montis update, there are allegedly 75 different Blueprints to unlock - although only 68 are confirmed to be in the game so far. You can see all the Blueprints you’ve found and unlocked by going to the Workshop menu, and hitting “R” to bring up the Blueprint screen.
It’s possible to find duplicates of past Blueprints you’ve already unlocked. If you find these, then you can either sell them, or - if you like to play with friends - you can take it into a match and gift it to your friend so they can unlock that recipe for themselves. Another option is to keep hold of them until the time comes to donate them to the Expedition.
Full Blueprint list: All crafting recipes
Below is the full list of all the Blueprints that are currently available to find in Arc Raiders, and the crafting recipe required for each item:
| Blueprint | Type | Recipe | Crafted At |
|---|---|---|---|
| Bettina | Weapon | 3x Advanced Mechanical Components 3x Heavy Gun Parts 3x Canister | Gunsmith 3 |
| Blue Light Stick | Quick Use | 3x Chemicals | Utility Station 1 |
| Aphelion | Weapon | 3x Magnetic Accelerator 3x Complex Gun Parts 1x Matriarch Reactor | Gunsmith 3 |
| Combat Mk. 3 (Flanking) | Augment | 2x Advanced Electrical Components 3x Processor | Gear Bench 3 |
| Combat Mk. 3 (Aggressive) | Augment | 2x Advanced Electrical Components 3x Processor | Gear Bench 3 |
| Complex Gun Parts | Material | 2x Light Gun Parts 2x Medium Gun Parts 2x Heavy Gun Parts | Refiner 3 |
| Fireworks Box | Quick Use | 1x Explosive Compound 3x Pop Trigger | Explosives Station 2 |
| Gas Mine | Mine | 4x Chemicals 2x Rubber Parts | Explosives Station 1 |
| Green Light Stick | Quick Use | 3x Chemicals | Utility Station 1 |
| Pulse Mine | Mine | 1x Crude Explosives 1x Wires | Explosives Station 1 |
| Seeker Grenade | Grenade | 1x Crude Explosives 2x ARC Alloy | Explosives Station 1 |
| Looting Mk. 3 (Survivor) | Augment | 2x Advanced Electrical Components 3x Processor | Gear Bench 3 |
| Angled Grip II | Mod | 2x Mechanical Components 3x Duct Tape | Gunsmith 2 |
| Angled Grip III | Mod | 2x Mod Components 5x Duct Tape | Gunsmith 3 |
| Hullcracker | Weapon | 1x Magnetic Accelerator 3x Heavy Gun Parts 1x Exodus Modules | Gunsmith 3 |
| Launcher Ammo | Ammo | 5x Metal Parts 1x Crude Explosives | Workbench 1 |
| Anvil | Weapon | 5x Mechanical Components 5x Simple Gun Parts | Gunsmith 2 |
| Anvil Splitter | Mod | 2x Mod Components 3x Processor | Gunsmith 3 |
| ??? | ??? | ??? | ??? |
| Barricade Kit | Quick Use | 1x Mechanical Components | Utility Station 2 |
| Blaze Grenade | Grenade | 1x Explosive Compound 2x Oil | Explosives Station 3 |
| Bobcat | Weapon | 3x Advanced Mechanical Components 3x Light Gun Parts | Gunsmith 3 |
| Osprey | Weapon | 2x Advanced Mechanical Components 3x Medium Gun Parts 7x Wires | Gunsmith 3 |
| Burletta | Weapon | 3x Mechanical Components 3x Simple Gun Parts | Gunsmith 1 |
| Compensator II | Mod | 2x Mechanical Components 4x Wires | Gunsmith 2 |
| Compensator III | Mod | 2x Mod Components 8x Wires | Gunsmith 3 |
| Defibrillator | Quick Use | 9x Plastic Parts 1x Moss | Medical Lab 2 |
| ??? | ??? | ??? | ??? |
| Equalizer | Weapon | 3x Magnetic Accelerator 3x Complex Gun Parts 1x Queen Reactor | Gunsmith 3 |
| Extended Barrel | Mod | 2x Mod Components 8x Wires | Gunsmith 3 |
| Extended Light Mag II | Mod | 2x Mechanical Components 3x Steel Spring | Gunsmith 2 |
| Extended Light Mag III | Mod | 2x Mod Components 5x Steel Spring | Gunsmith 3 |
| Extended Medium Mag II | Mod | 2x Mechanical Components 3x Steel Spring | Gunsmith 2 |
| Extended Medium Mag III | Mod | 2x Mod Components 5x Steel Spring | Gunsmith 3 |
| Extended Shotgun Mag II | Mod | 2x Mechanical Components 3x Steel Spring | Gunsmith 2 |
| Extended Shotgun Mag III | Mod | 2x Mod Components 5x Steel Spring | Gunsmith 3 |
| Remote Raider Flare | Quick Use | 2x Chemicals 4x Rubber Parts | Utility Station 1 |
| Heavy Gun Parts | Material | 4x Simple Gun Parts | Refiner 2 |
| Venator | Weapon | 2x Advanced Mechanical Components 3x Medium Gun Parts 5x Magnet | Gunsmith 3 |
| Il Toro | Weapon | 5x Mechanical Components 6x Simple Gun Parts | Gunsmith 1 |
| Jolt Mine | Mine | 1x Electrical Components 1x Battery | Explosives Station 2 |
| Explosive Mine | Mine | 1x Explosive Compound 1x Sensors | Explosives Station 3 |
| Jupiter | Weapon | 3x Magnetic Accelerator 3x Complex Gun Parts 1x Queen Reactor | Gunsmith 3 |
| Light Gun Parts | Material | 4x Simple Gun Parts | Refiner 2 |
| Lightweight Stock | Mod | 2x Mod Components 5x Duct Tape | Gunsmith 3 |
| Lure Grenade | Grenade | 1x Speaker Component 1x Electrical Components | Utility Station 2 |
| Medium Gun Parts | Material | 4x Simple Gun Parts | Refiner 2 |
| Torrente | Weapon | 2x Advanced Mechanical Components 3x Medium Gun Parts 6x Steel Spring | Gunsmith 3 |
| Muzzle Brake II | Mod | 2x Mechanical Components 4x Wires | Gunsmith 2 |
| Muzzle Brake III | Mod | 2x Mod Components 8x Wires | Gunsmith 3 |
| Padded Stock | Mod | 2x Mod Components 5x Duct Tape | Gunsmith 3 |
| Shotgun Choke II | Mod | 2x Mechanical Components 4x Wires | Gunsmith 2 |
| Shotgun Choke III | Mod | 2x Mod Components 8x Wires | Gunsmith 3 |
| Shotgun Silencer | Mod | 2x Mod Components 8x Wires | Gunsmith 3 |
| Showstopper | Grenade | 1x Advanced Electrical Components 1x Voltage Converter | Explosives Station 3 |
| Silencer I | Mod | 2x Mechanical Components 4x Wires | Gunsmith 2 |
| Silencer II | Mod | 2x Mod Components 8x Wires | Gunsmith 3 |
| Snap Hook | Quick Use | 2x Power Rod 3x Rope 1x Exodus Modules | Utility Station 3 |
| Stable Stock II | Mod | 2x Mechanical Components 3x Duct Tape | Gunsmith 2 |
| Stable Stock III | Mod | 2x Mod Components 5x Duct Tape | Gunsmith 3 |
| Tagging Grenade | Grenade | 1x Electrical Components 1x Sensors | Utility Station 3 |
| Tempest | Weapon | 3x Advanced Mechanical Components 3x Medium Gun Parts 3x Canister | Gunsmith 3 |
| Trigger Nade | Grenade | 2x Crude Explosives 1x Processor | Explosives Station 2 |
| Vertical Grip II | Mod | 2x Mechanical Components 3x Duct Tape | Gunsmith 2 |
| Vertical Grip III | Mod | 2x Mod Components 5x Duct Tape | Gunsmith 3 |
| Vita Shot | Quick Use | 2x Antiseptic 1x Syringe | Medical Lab 3 |
| Vita Spray | Quick Use | 3x Antiseptic 1x Canister | Medical Lab 3 |
| Vulcano | Weapon | 1x Magnetic Accelerator 3x Heavy Gun Parts 1x Exodus Modules | Gunsmith 3 |
| Wolfpack | Grenade | 2x Explosive Compound 2x Sensors | Explosives Station 3 |
| Red Light Stick | Quick Use | 3x Chemicals | Utility Station 1 |
| Smoke Grenade | Grenade | 14x Chemicals 1x Canister | Utility Station 2 |
| Deadline | Mine | 3x Explosive Compound 2x ARC Circuitry | Explosives Station 3 |
| Trailblazer | Grenade | 1x Explosive Compound 1x Synthesized Fuel | Explosives Station 3 |
| Tactical Mk. 3 (Defensive) | Augment | 2x Advanced Electrical Components 3x Processor | Gear Bench 3 |
| Tactical Mk. 3 (Healing) | Augment | 2x Advanced Electrical Components 3x Processor | Gear Bench 3 |
| Yellow Light Stick | Quick Use | 3x Chemicals | Utility Station 1 |
Note: The missing Blueprints in this list likely have not actually been added to the game at the time of writing, because none of the playerbase has managed to find any of them. As they are added to the game, I will update this page with the most relevant information so you know exactly how to get all 75 Arc Raiders Blueprints.
Where to find Blueprints in Arc Raiders
Below is a list of all containers, modifiers, and events which maximise your chances of finding Blueprints:
- Certain quests reward you with specific Blueprints .
- Completing Trials has a high chance of offering Blueprints as rewards.
- Surveyors have a decent chance of dropping Blueprints on death.
- High loot value areas tend to have a greater chance of spawning Blueprints.
- Night Raids and Storms may increase rare Blueprint spawn chances in containers.
- Containers with higher numbers of items may have a higher tendency to spawn Blueprints. As a result, Blue Gate (which has many “large” containers containing multiple items) may give you a higher chance of spawning Blueprints.
- Raider containers (Raider Caches, Weapon Boxes, Medical Bags, Grenade Tubes) have increased Blueprint drop rates. As a result, the Uncovered Caches event gives you a high chance of finding Blueprints.
- Security Lockers have a higher than average chance of containing Blueprints.
- Certain Blueprints only seem to spawn under specific circumstances: Tempest Blueprint only spawns during Night Raid events. Vulcano Blueprint only spawns during Hidden Bunker events. Jupiter and Equaliser Blueprints only spawn during Harvester events.

Raider Caches, Weapon Boxes, and other raider-oriented container types have a good chance of offering Blueprints. |Image credit:Rock Paper Shotgun/Embark Studios
Blueprints have a very low chance of spawning in any container in Arc Raiders, around 1-2% on average. However, there is a higher chance of finding Blueprints in particular container types. Specifically, you can find more Blueprints in Raider containers and security lockers.
Beyond this, if you’re looking for Blueprints you should focus on regions of the map which are marked as having particularly high-value loot. Areas such as the Control Tower in Dam Battlegrounds, the Arrival and Departure Buildings in Spaceport, and Pilgrim’s Peak in Blue Gate all have a better-than-average chance of spawning Blueprints somewhere amongst all their containers. Night Raids and Electromagnetic Storm events also increase the drop chances of certain Blueprints .
In addition to these containers, you can often loot Blueprints from destroyed Surveyors - the largest of the rolling ball ARC. Surveyors are more commonly found on the later maps - Spaceport and Blue Gate - and if one spawns in your match, you’ll likely see it by the blue laser beam that it casts into the sky while “surveying”.
Surveyors are quite well-armoured and will very speedily run away from you once it notices you, but if you can take one down then make sure you loot all its parts for a chance of obtaining certain unusual Blueprints.
Blueprints obtained from quests
One way in which you can get Blueprints is by completing certain quests for the vendors in Speranza. Some quests will reward you with a specific item Blueprint upon completion, so as long as you work through all the quests in Arc Raiders, you are guaranteed those Blueprints.
Here is the full list of all Blueprints you can get from quest rewards:
- Trigger Nade Blueprint: Rewarded after completing “Sparks Fly”.
- Lure Grenade Blueprint: Rewarded after completing “Greasing Her Palms”.
- Burletta Blueprint: Rewarded after completing “Industrial Espionage”.
- Hullcracker Blueprint (and Launcher Ammo Blueprint): Rewarded after completing “The Major’s Footlocker”.
Alas, that’s only 4 Blueprints out of a total of 75 to unlock, so for the vast majority you will need to find them yourself during a raid. If you’re intent on farming Blueprints, then it’s best to equip yourself with cheap gear in case you lose it, but don’t use a free loadout because then you won’t get a safe pocket to stash any new Blueprint you find. No pain in Arc Raiders is sharper than failing to extract with a new Blueprint you’ve been after for a dozen hours already.

One of the best ways to get Blueprints is by hitting three stars on all five Trials every week. |Image credit:Rock Paper Shotgun/Embark Studios
Blueprints obtained from Trials
One of the very best ways to get Blueprints is as rewards for completing Trials in Arc Raiders. Trials are unlocked from Level 15 onwards, and allow you to earn rewards by focusing on certain tasks over the course of several raids. For example, one Trial might task you with dealing damage to Hornets, while another might challenge you to loot Supply Drops.
Trials refresh on a weekly basis, with a new week bringing five new Trials. Each Trial can offer up to three rewards after passing certain score milestones, and it’s possible to receive very high level loot from these reward crates - including Blueprints. So if you want to unlock as many Blueprints as possible, you should make a point of completing as many Trials as possible each week.
Best Blueprint farming locations
The very best way to get Blueprints is to frequent specific areas of the maps which combine high-tier loot pools with the right types of containers to search. Here are my recommendations for where to find Blueprints on every map, so you can always keep the search going for new crafting recipes to unlock.

Image credit:Rock Paper Shotgun/Embark Studios
Dam Battlegrounds
The best places to farm Blueprints on Dam Battlegrounds are the Control Tower, Power Generation Complex, Ruby Residence, and Pale Apartments . The first two regions, despite only being marked on the map as mid-tier loot, contain a phenomenal number of containers to loot. The Control Tower can also contain a couple of high-tier Security Lockers - though of course, you’ll need to have unlocked the Security Breach skill at the end of the Survival tree.
There’s also a lot of reporting amongst the playerbase that the Residential areas in the top-left of the map - Pale Apartments and Ruby Residence - give you a comparatively strong chance of finding Blueprints. Considering their size, there’s a high density of containers to loot in both locations, and they also have the benefit of being fairly out of the way. So you’re more likely to have all the containers to yourself.
Buried City
The best Blueprint farming locations on Buried City are the Santa Maria Houses, Grandioso Apartments, Town Hall, and the various buildings of the New District . Grandioso Apartments has a lower number of containers than the rest, but a high chance of spawning weapon cases - which have good Blueprint drop rates. The others are high-tier loot areas, with plenty of lootable containers - including Security Lockers.
Spaceport
The best places to find Blueprints on Spaceport are the Arrival and Departure Buildings, as well as Control Tower A6 and the Launch Towers . All these areas are labelled as high-value loot regions, and many of them are also very handily connected to one another by the Spaceport wall, which you can use to quickly run from one area to the next. At the tops of most of these buildings you’ll find at least one Security Locker, so this is an excellent farming route for players looking to find Blueprints.
The downside to looting Blueprints on Spaceport is that all these areas are hotly contested, particularly in Duos and Squads. You’ll need to be very focused and fast in order to complete the full farming route.

Image credit:Rock Paper Shotgun/Embark Studios
Blue Gate
Blue Gate tends to have a good chance of dropping Blueprints, potentially because it generally has a high number of containers which can hold lots of items; so there’s a higher chance of a Blueprint spawning in each container. In my experience, the best Blueprint farming spots on Blue Gate are Pilgrim’s Peak, Raider’s Refuge, the Ancient Fort, and the Underground Complex beneath the Warehouse .
All of these areas contain a wealth of containers to loot. Raider’s Refuge has less to loot, but the majority of the containers in and around the Refuge are raider containers, which have a high chance of containing Blueprints - particularly during major events.
Stella Montis
On the whole, Stella Montis seems to have a very low drop rate for Blueprints (though a high chance of dropping other high-tier loot). If you do want to try farming Blueprints on this map, the best places to find Blueprints in Stella Montis are Medical Research, Assembly Workshop, and the Business Center . These areas have the highest density of containers to loot on the map.
In addition to this, the Western Tunnel has a few different Security Lockers to loot, so while there’s very little to loot elsewhere in this area of the map, it’s worth hitting those Security Lockers if you spawn there at the start of a match.
That wraps up this primer on how to get all the Blueprints in Arc Raiders as quickly as possible. With the Expedition system constantly resetting a large number of players’ Blueprints, it’s more important than ever to have the most up-to-date information on where to find all these Blueprints.
While you’re here, be sure to check out our Arc Raiders best guns tier list , as well as our primers on the best skills to unlock and all the different Field Depot locations on every map.


ARC Raiders
PS5 , Xbox Series X/S , PC
Rock Paper Shotgun is better when you sign in
Sign in and join us on our journey to discover strange and compelling PC games.
